Error Code 0xc004f034 – What is it?
Error code 0xc004f034 occurs when Windows users are unable to activate their operating system. It affects Windows 8 and Windows 10 users and features common symptoms which include the following:
- Inability to activate Windows
- Message box with error code 0xc004f034
Solution
 Error Causes
Error code 0xc004f034 often occurs due to an issue with the Windows product key. This may occur when users enter an invalid product key or use one that is appropriate for use on a different version of Windows. To correct the issue, users will need to use the correct product key for their system or contact an IT professional if their device is connected to a Key Management Service (KMS). Windows users affected by this error code may also need to check their system for viruses or missing system files since these issues can result in error codes on Windows devices.
Further Information and Manual Repair
Manual repair methods enable users to fix problems related to error codes. Though some manual repair methods require the use of Command Prompt and utility tools like the System File Checker, even non-technical Windows users can find success simply by following the instructions provided below.
However, note that some issues can be complex, thus requiring the use of an automated tool or help from a Windows repair technician. Consider these options if the manual repair methods below do not resolve error code 0xc004f034 on your Windows 8 device.
Method One: Enter Valid Windows Product Key
Microsoft currently offers several ways for customers to activate their Windows operating system, the most common of which is the product key. This 25-character code verifies that users have access to an authorized version of Windows.
You may get a valid product key from an authorized dealer, a new PC with Windows, or access a digital copy from a Windows website when you purchase your Windows operating system online. Once you have a valid product key, use it to activate Windows and resolve error code 0xc004f034 in Windows 8. Follow the steps below to access the Product Activation Wizard.
- Step one: Click or tab Start button then select Settings
- Step two: Tap or click PC Settings, then select Activate Windows
- Step three: Type invalid product key
Once a valid product key is used, the Product Activation Wizard should complete the activation process. If you are unable to complete the process, however, and error code 0xc004f034 remains unresolved, click the link or instructions the Product Activation Wizard provides regarding activation via phone or customer support.
Method Two: Run System File Checker
Another option available to Windows 8 users is System File Checker (SFC). This tool enables Windows users to scan and repair corrupted or missing system files. Follow the steps below to access SFC.
- Step one: Go to Start and type Command Prompt or CMD.
- Step two: Run as Administrator
- Step three: Type sfc /scannow ensuring a space is between “sfc” and “/scannow”.
System File Checker will repair any corruptions found on system files within your machine once you successfully follow the instructions provided. The tool will also replace missing files which will lead to better performance on your PC.
When the process is complete, restart your device then check if you are able to activate Windows. If error code 0xc004f034 is still present, you will need to find another solution via repair method three.
Method Three: Scan for Viruses and other Malware
Viruses and other forms of malware are one of the main issues resulting in poor PC performance and Windows error codes. To fix this issue on your PC, scan your machine for signs of these malicious programs. If you do not have anti-malware software and would like to download one from the Internet, ensure the software you choose is effective before attempting to download it.
Once you have powerful antimalware software on your PC, begin a scan for viruses, Trojan horses, and other forms of malware. If the Windows error code occurred due to issues related to malicious programs, you will be able to resolve the issue. If, however, this manual repair method proves ineffective in resolving error code 0xc004f034, download a powerful automated tool or contact a Windows repair technician to assist you.
Method Four: Use an Automated Tool
If you wish to always have at your disposal a utility tool to fix these Windows 8 and other related issues when they do arise,
download and install a powerful automated tool.


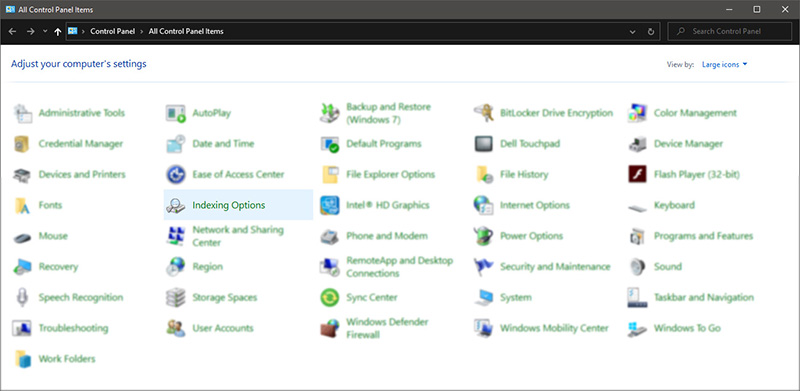
 Once you are in the control panel, switch your view to large icons and locate Indexing options.
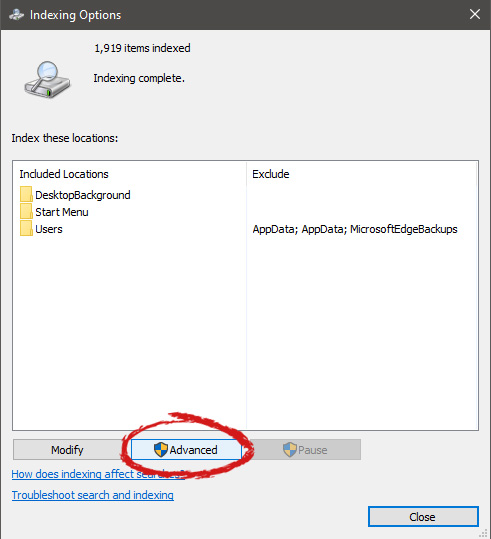
 Inside indexing options, click on advanced.
 In advanced options click on the rebuild and confirm.
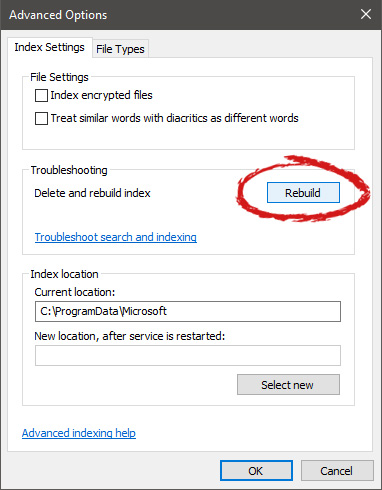 Leave your computer to finish and your searches should be working fine now.