New Windows 11 update 22000.65

The first major update for Windows 11, 22000.65 has brought some bug fixes and some new features. The previous update was just a bunch of small fixes but this time Microsoft has brought much more with this one.

Windows 11 updateBug and security fixes:
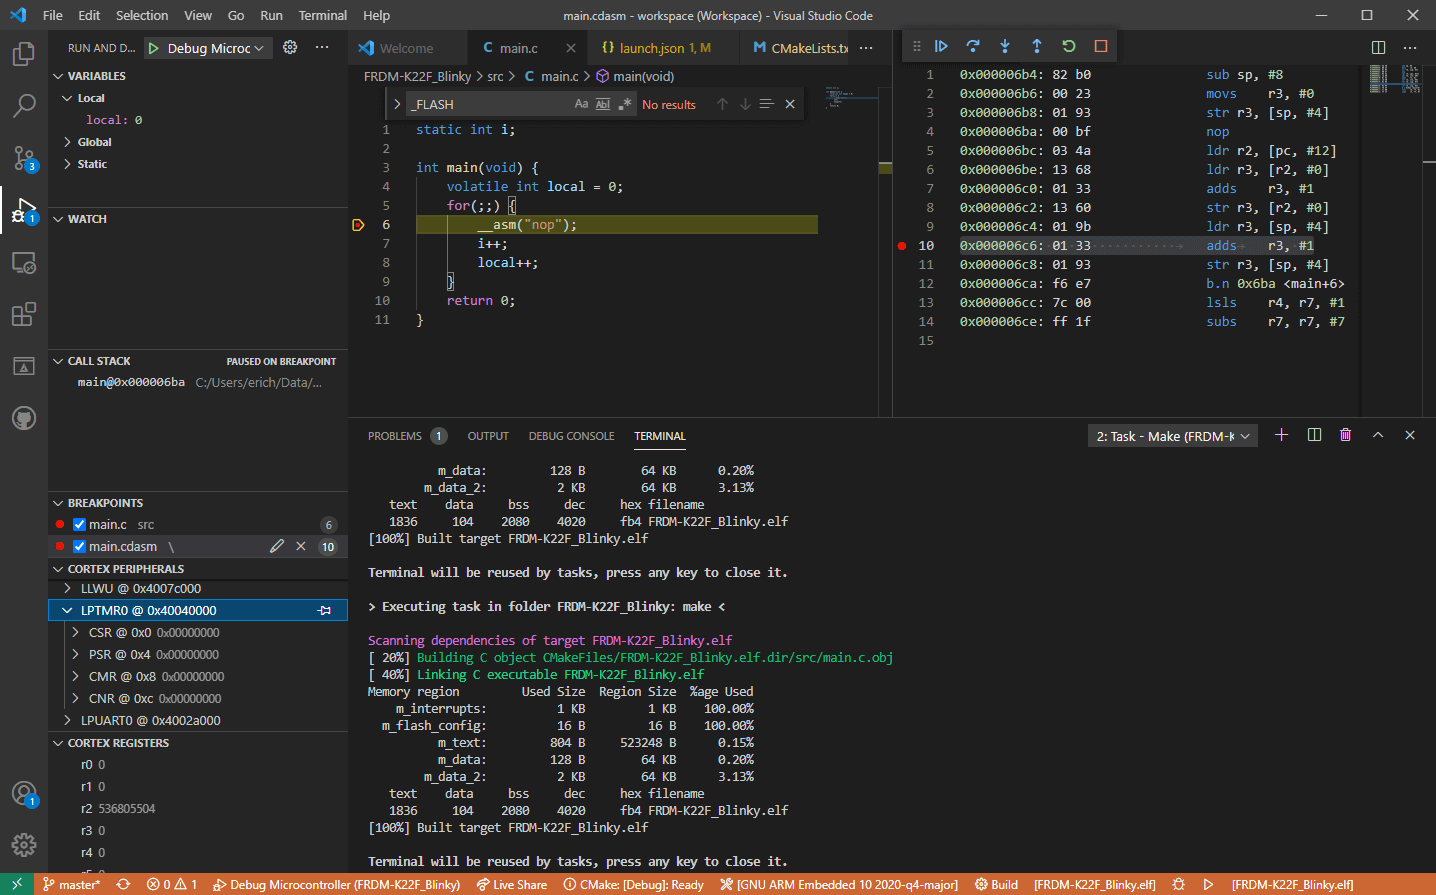
  • Patch for the PrintNightmare vulnerability.
  • Taskbar icons not displaying after you rotate the screen back and forth.
  • Date and time not following format settings.
  • Contrast issues with File Explorer title bar
  • Search dropping the first keystroke when you press the Windows key and type
  • Blurry windows in ALT + Tab

Besides bug and security fixed newest update has also brought us some functional changes:

  • The start menu can no longer be moved from center
  • A search box appears at the top of the Start menu.
  • Taskbar appears on secondary monitors.
  • The refresh option appears on the jump list when you right-click the desktop. It was on the "Show more options" list before.
  • New look for certain dialog boxes such as "battery low" or "display change"
  • New snap layouts for portrait mode screens.
  • Option to troubleshoot sound problems when you right-click the volume icon.
  • Power mode settings on Power & battery settings menu.
  • Right-clicking .ps1 files offers a "Run with PowerShell" option.
  • New GIFs in the emoji panel in China

Honestly, I really like a search box on top of the start menu but really dislike the option to move it to left, I am sure that there are a lot of users who would feel more like at home if they could still move and set Windows to function and work how they want.

It is very strange to me that Windows 10 was made to be so user-focused and been able to be user specific and Windows 1 takes most of these things away. I am not sure why Microsoft is going this way but I cannot really see how moving the taskbar on left is a programming issue or why it is wrong for example.

Do You Need Help with Your Device?

Our Team of Experts May Help
Troubleshoot.Tech Experts are There for You!
Replace damaged files
Restore performance
Free disk space
Remove Malware
Protects WEB browser
Remove Viruses
Stop PC freezing
GET HELP
Troubleshoot.Tech experts work with all versions of Microsoft Windows including Windows 11, with Android, Mac, and more.

Share this article:

You might also like

Fix user account is not authorized
If you encounter an error message saying, “The connection was denied because the user account is not authorized for remote login” when you try to establish a remote connection, read on as this post will help you resolve the problem. This kind of error occurs when the targeted host does not allow you to access that system remotely. Based on the error, you are not authorized to log in remotely which means that you need to obtain the correct permission. There are several potential fixes you can try for this error. You can try to check the Remote Desktop Users group or add users to the Security group or check the Remote Desktop Service itself. Refer to the options provided below for more detailed instructions to fix the “The connection was denied because the user account is not authorized for remote login” error.

Option 1 – Try checking the Remote Desktop Users group

You can encounter this error when the Remote Desktop Users group does not have any permission for your user account that you are using to establish a remote connection. Thus, you need to make sure that your user account is a member of the Remote Desktop Users group. How? Refer to these steps:
  • Tap the Win + R keys on your keyboard and then type “cmd” in the field and tap Enter or click OK to open Command Prompt.
  • After opening Command Prompt, type the “lusrmgr.msc” command and tap Enter to execute it.
  • Alternatively, you can also search for “lusrmgr.msc” in the Start Search and once you’ve opened it, select Users and then double click on your user name to open its Properties.
  • From there, switch from the “General” tab to the “Member Of” tab.
  • Next, if you can’t see any Remote Desktop Users group under the Administrator, you have to add it. To do that, just click on the Add button.
  • After that, on the newly opened window, click on the Advanced and Find Now buttons, respectively.
  • And in the Search results box, double click on Remote Desktop Users.
  • Now click on the OK button to save the changes made and check if you can now connect to a remote host or not.

Option 2 – Try to add a user to the Security group

You can actually block or allow a user from logging on through the Remote Desktop Services. However, if you do not have the right setting, you won’t be able to use this functionality. Thus, you need to confirm this setting. To do that, follow the steps below.
  • In the Start Search, type “secpol.msc” in the field and tap Enter to open the Local Security Policy panel.
  • From there, go to User Rights Assignment.
  • Next, look for a policy named “Allow log on through Remote Desktop Services” located on your right-hand side and then double click on it to open its Properties.
  • If you were not able to find the Remote Desktop Users under Administrator, then you have to add it by simply clicking on the Add User or Group button.
  • After that, enter “Remote Desktop Users” in the blank field and click the OK button to save the changes made.
  • Now restart your computer and try connecting again to the remote host.

Option 3 – Try checking the Remote Desktop Users group

There is a service that’s supposed to be running and needs to be set up correctly for you to connect to the remote host. And so you need to ensure that this service is up and running. To do so, follow these steps:
  • Tap the Win + R keys to launch the Run utility.
  • Then type “services.msc” in the field and hit Enter or click OK to open the Services Manager.
  • Next, look for the Remote Desktop Services and double click on it to open its Properties.
  • After that, go to the “Log On” tab and select the “This account” option and then click on the Browse button.
  • On the next screen that appears, look for the Advanced button and click on it and use the Find Now button to search.
  • You will see “NETWORK SERVICE”. Double click on it and then save the changes you’ve made to the settings.
  • Finally, restart your PC and see if the problem is now fixed.
Read More
Fix W11 Installation assistant is not working
Windows 11 is getting adopted more and more each day, and how more and more users are installing it some smaller bugs show up. One of the things that have manifested lately is that in some cases installation assistant is not working throwing error 0x8007007f at you while you try to finish the update of Windows. Win not working thumb If you are one of the users that are experiencing this kind of annoyance, we have a solution for you. Follow this guide as presented and repair this annoying error.

Run installation assistant as administrator

This is the most simple solution that can solve problems right away and it is advised to be tried first.
  1. Download standalone Installation assistant installer from Microsoft website here
  2. Go to the location where you had the file downloaded
  3. Right-click on file
  4. Click on Run as administrator
  5. On the permission box, click YES

Disable antivirus and/or firewall software

Antivirus or firewall software can sometimes interfere with Windows’s update and prevent for any reason download or installation of files they consider not safe. If the first solution has not provided success turn off your antivirus or firewall software and try again to install updates by running them as administrator. Now, how many different antivirus or firewall applications are unique pieces of software it would take too much time to cover all of them but usually and most commonly if you right-click on the taskbar icon of security app most of the time you will have either option to open it and close it or simply just to snooze it for some time.

Set the compatibility

If you are still having issues with installing updates try setting compatibility mode for the installer.
  1. Download standalone Installation assistant installer from Microsoft website here
  2. Go to the location where you had the file downloaded
  3. Right-click on file
  4. Click on properties
  5. Go to the Compatibility tab
  6. Click on Run this program in compatibility mode for:
  7. Choose Windows 7
  8. Click on APPLY
  9. Run installer

Run SFC scan

If you are still facing installation issues there is a high chance there is something wrong with Windows system files. Luckily Windows itself has a built-in tool to address these issues and fix them.
  1. Open command prompt as administrator by pressing Start and searching for the command prompt and then on right-clicking on run as administrator
  2. Once the command prompt opens type in SFC / SCANNOW and press ENTER
  3. Wait for the whole process to complete and then restart your system
Read More
Nostalgic gaming with Retroid pocket 2
We have talked about gaming on old computers and have covered new and upcoming Steam deck handheld console. Today we are combining old gaming with a handheld console and our target of talk is Retroid pocket 2. This product is packed with really high-quality plastic and with some great features in it. retroid pocket 2So let's dive into this cool handheld in more detail and find out why we like it so much.

Good manufacturing quality

Plastic and overall manufacturing quality are really, really good. The battery is great, packing 4000mAh that can hold over 3 hours of nonstop gaming, and all buttons and joysticks are great. The screen is a 640 x 480 60Hz 3.5″ IPS screen (4:3 aspect ratio) that performs really great for its purpose, retro gaming. There is a Digital D-Pad and dual analog joysticks. The right joystick is the lower profile to avoid being accidentally moved when pressing the four gaming buttons. There are three buttons at the bottom which are Home, Start, and Select. On either side are good-quality stereo speakers. On the bottom of the device are a Micro SD Card slot and a 3.5mm headphone port. On the top of the device are Left and Right shoulder and trigger buttons. There are the power button and volume adjustments. There are a USB Type-C OTG port and a Micro HDMI output for connection to a TV.

Good technical statistics

Good, not great but then again since this is retro handheld you cannot really expect some crazy stuff like alder lake inside. So the console is punching ARM Cortex A7 CPU with 2 cores and a clock of 1.5GHz paired with ARM Mali 400-MP2 500MHz GPU. The console has 1GB LPDDR3 RAM memory and 8GB eMMC Storage where 5GB is freely available, the rest is taken for OS. As mentioned before the display is 640x480 resolution with a size of 3.5″. The battery is Lithium-Ion with a power of 4000mAh and on the handheld, there is a USB Type-C connector, 3.5mm headphone jack, and Micro-HDMI. It also has Wifi/Bluetooth 4.0

Retroid Pocket 2 OS and support

Pocket 2 comes with Android 6 but you can update its firmware to the 8.1 version on the official site that I would highly recommend. New versions of the handheld will come with 8.1 on it from the box. Having Android as OS opens many possibilities like you can download Android apps such as Steam Link, allowing you to play actual PC games on your Retroid Pocket 2. Not just that, if it does get a newer version of Android it could even have the ability to use xCloud, Xbox’s cloud gaming service. Of course, hardware will not be able to handle modern games but the option is still there and for some old PC titles available on steam like Commander Keen, for example, this is a great option. The console can emulate basically everything up to Dreamcast, including N64, PSP, and Playstation 1. It can emulate Nintendo DS also, but it can only do so with one screen. The only problem with this console is you will need to install and update Apps. You’ll need to learn about RetroArch, an app that lets you download emulators or cores to play games.

Retroid price

The last thing on the list is the price of the console itself. Going just under the 100$ mark this really makes it an affordable option for plenty of people that would like to experience retro handheld gaming or for ones like me, nostalgic gamers wanting to relive some era of playing games on the road.

Conclusion

Among Chinese handheld devices for retro gaming, Retroid Pocket 2 is really on top of what the market can offer. If you are looking for a great handheld retro console and are not afraid of little dive-ins into the OS and various configurations, Pocket 2 will reward you with plenty and wide emulation support.
Read More
isapnp.sys, gv3.sys, storahci.sys, myfault.sys
One of the common causes of Blue Screen of Death or BSOD errors is system driver files due to varying reasons. So if you encounter a Stop error caused by some system driver files such as isapnp.sys, gv3.sys, storahci.sys, or myfault.sys, on your Windows 10 PC, then this post should help you fix the problem. These system driver files are associated with different error codes. The isapnp.sys file is related to the following error codes:
  • SYSTEM SERVICE EXCEPTION
  • PAGE FAULT IN A NONPAGED AREA
  • KERNEL DATA INPAGE
  • SYSTEM THREAD EXCEPTION NOT HANDLED
  • IRQL NOT LESS EQUAL
  • KMODE EXCEPTION NOT HANDLED.
While the gv3.sys file is related to the following BSOD error codes:
  • IRQL NOT LESS EQUAL
  • KMODE EXCEPTION NOT HANDLED
  • PAGE FAULT IN NONPAGED AREA.
On the other hand, the storahci.sys file is related to these error codes:
  • IRQL NOT LESS EQUAL
  • KMODE EXCEPTION NOT HANDLED
  • PAGE FAULT IN NONPAGED AREA.
And the myfault.sys file is associated with this error code: SYSTEM SERVICE EXCEPTION. Although this system driver file causes different kinds of Blue Screen errors, some of their potential fixes are quite the same so you need not carry out tons of troubleshooting steps. But before you troubleshoot the problem, you might want to check out System Restore first, especially if you create a System Restore point from time to time. To perform System Restore, follow these steps:
  • Tap the Win + R keys to open the Run dialog box.
  • After that, type in “sysdm.cpl” in the field and tap Enter.
  • Next, go to the System Protection tab then click the System Restore button. This will open a new window where you have to select your preferred System Restore point.
  • After that, follow the on-screen instructions to finish the process and then restart your computer and check if the problem is fixed or not.
If System Restore didn’t help in fixing the Blue Screen error, now’s the time for you to resort to the troubleshooting tips provided below but before you get started, make sure that you create a System Restore point first and boot your computer into Safe Mode.

Option 1 – Use the System Configuration utility

Note that this first fix is only applicable for Blue Screen errors associated with the myfault.sys file.
  • In the Cortana Search box, type “MSConfig” and click on the “System Configuration” entry to open it.
  • After opening System Configuration, go to the Processes tab.
  • Then scroll down and look for the “Digital Line Detection” process and disable it.
  • Now restart your computer and check if the Stop error is fixed or not.

Option 2 – Try to update, rollback or disable related device drivers

Incompatible and outdated drivers can also cause computer malfunctioning or crashing as well as Blue Screen errors. To fix that, you can update, roll back or disable the device drivers in your computer.
  • Tap the Win + R keys to launch the Run window and then type in the “devmgmt.msc” command and hit Enter to open the Device Manager window.
  • After opening the Device Manager, from the list of device drivers, look for the “WIN ISA Bus Driver” if you are facing a Stop error related to the isapnp.sys file. While you have to look for the Sony Recovery CDs PCG-Z1RAP Series device drivers if you face a Stop error concerning the gv3.sys file. For the storahci.sys, on the other hand, look for any outdated drivers and update them.
  • To update or roll back or disable these drivers, just right-click on each one of them, and depending on your preference, you can either select “Update driver”, “Disable device” or “Uninstall device”.
  • After that, restart your PC and see if it helped in fixing the Blue Screen error.

Option 3 – Use System File Checker

One of the built-in tools in Windows that you can use to fix Blue Screen errors is the System File Checker. This built-in command utility can help you restore corrupted or missing files as well as replace bad and corrupted system files. Chances are, any of the aforementioned system driver files might be corrupted so to fix them, use System File Checker.
  • First, right-click on the Start button and click on the “Command Prompt (Admin) option.
  • Next, type in the sfc /scannow command and hit Enter to execute it.
The command will start a system scan which will take a few whiles before it finishes. Once it’s done, you could get the following results:
  1. Windows Resource Protection did not find any integrity violations.
  2. Windows Resource Protection found corrupt files and successfully repaired them.
  3. Windows Resource Protection found corrupt files but was unable to fix some of them.
  • Now restart your computer.

Option 4 – Run the Blue Screen Troubleshooter

Troubleshooting Blue Screen of Death errors wouldn’t be complete without the Blue Screen troubleshooter. As you know, it is a built-in tool in Windows 10 that helps users in fixing BSOD errors. You can find it in Settings, under the Troubleshooters page. To use it, refer to these steps:
  • Tap the Win + I keys to open the Settings panel.
  • Then go to Update & Security > Troubleshoot.
  • From there, look for the option called “Blue Screen” on your right-hand side and then click the “Run the troubleshooter” button to run the Blue Screen Troubleshooter and then follow the next on-screen options.
  • Note that you might have to boot your PC into Safe Mode.
Read More
Free Quake upgrade comes to Steam and more
quake remasterWithout any fanfare, news, or information Bethesda has released a completely free upgrade for legendary Quake 1. Free upgrade is automatically applied to all users who possess the original game and it has already been rolled out.

What has changed for good?

New textures, effects, and resolutions are one thing that will come first into your focus when you start the game. From the moment game is started it feels and looks like a game you remember from a long time ago. Models are also upgraded with a higher polygon count. Another thing that will hit you right away is the legendary OST by Trent Reznor in its full glory. If you have the original Quake and played it you will know that OST was missing from the Steam release and having it fully back is a great feature. I would argue that placing just OST alone in the steam release is enough for people to play it again since it adds so much atmosphere. Deathmatch and other multiplayer goodies are all here as well and there is a completely free new episode in the game with several levels. Yes, you get a free Quake upgrade in HD with an extra episode completely free.

The bad side of Quake coin

So this might come as a purist or obsessive nit-picking but there were two things that I, personally am not a fan of and have noticed during my gameplay. Please know that this is personal preference and by no other chance reflects the quality of the game itself but I just had to talk about it. Quake remake is made in a new engine and as such dynamic and gunplay feel different from the original, granted they have done the best they could to replicate the authentic feeling of the original game but there are parts of the game where I have felt that simply put, it feels different. Another thing is also tied to technology and the overall game is somewhat a little brighter and in some areas little softer in dark areas. Like I said this is purely personal preference and might come as nitpicking but I preferred the darker and grittier look of the original game. Darkplaces, the free custom-made upgrade did this in my opinion better.
Read More
Communication with service process failed
The Intel Driver and Support Assistant automatically identifies, finds, and installs drivers in a computer and is pre-installed in newer Intel-supported systems. If you are using one of those newer Intel supported systems but encountered an error that says, “Communication with service process failed, Tray cannot start” when you launch a program, read on as this post will guide you in fixing this problem. This kind of issue in Intel supported system could be due to some third party application that’s meant to update drivers could be interfering. It is also possible that the Intel Driver and Support Assistant application is corrupted. Whatever the cause may be, here are some suggestions you have to check out to resolve the problem.

Option 1 – Try to uninstall all the third party driver update applications

One of the reasons why some users install third-party driver update software is that it is kind of tiresome to update each one of the drivers manually. However, as tiresome as it might be, it is still better than using a third-party driver update application as these kinds of applications could mess up the drivers, and the Intel Driver and Support Assistant is still much better. To fix the error, you have to uninstall the previously installed third-party driver update application on your computer.
  • Tap the Win + R keys to open the Run dialog box
  • Then type “appwiz.cpl” in the field and hit Enter to open the Programs and Features in Control Panel.
  • From there, look for the third-party driver update application you are using, select it and then click on Uninstall to remove it.
  • After that, restart your computer and try to install the latest version of the program again. It should work now. If not, proceed to the next available option below.

Option 2 – Try to disable the DSATray in Startup

Another thing about the “Communication with service process failed, Tray cannot start” error is that it keeps on popping up each time you boot your computer. And so to resolve this bug, you can just disable the DSATray from Startup. How? Refer to these steps:
  • Tap the Ctrl + Alt + Del to pull up the Security options window.
  • From there, select the option to open the Task Manager.
  • Once you’re in the Task Manager, go to the Startup tab and look for “DSATray” and right-click on it and then select the Disable option.
  • Now restart your computer and you should be good to go.

Option 3 – Try to reinstall the Intel Driver and Support Assistant

If the Intel Driver and Support Assistant is corrupted, you need to uninstall it from your computer. All you have to do is go to Programs and Features like what you did in the first option to uninstall the program. Once you’ve uninstalled it, download the newer or latest version of the Intel Driver and Support Assistant from the official site of Intel and then install it.
Read More
The Meta Quest Pro VR is coming

Quest 2 has been crowned as the best overall VR headset by many websites, and to be honest it is really a great piece of equipment deserving of every praise it gets. It seems that Meta feels that it can do better so the new upcoming Quest Pro is upgraded and a new line of VR sets from this company. The economic standard Quest line will not be shut down and it will still remain as an economic version of Meta's VR product line.

meta quest pro

Quest Pro will be added as a new line of the better product line with better performance and better quality. It is the first VR headset that is packing Qualcomm Snapdragon XR3+ Gen 1 chipset, 12GB of RAM, 256GB of internal storage, and 10 high-resolution sensors. Of course, this much power and improvement come with a higher price tag, this time that price tag is $1,499.99.

The new VR headset promises industry-leading visuals with a new optical stack instead of Fresnel lenses in Meta Quest 2 with thin-layer pancake optics that fold light reducing the depth of the optical module by 40% and at the same provides clear and sharp visuals.

The headset will give display more vivid colors, richer colors, and higher contrast by incorporating local dimming and quantum dot technology. It composes of specialized backlight hardware accompanied by software algorithms that can control more than individual LED blocks independently.

The Quest Pro will also come packed with new Meta Quest Touch Pro controllers. They will feature three built-in sensors to track the controller's position completely independent of the headset which means that tracking and range of motion will be improved. These new controllers will also be sold separately at the cost of $299.99 and they can be used with Quest 2.

The headset is available for preorder and it will start shipping in late October on the Meta website

Read More
Should you build a custom PC

Building your own custom PC system can be one of the greatest things you can do to your budget. Instead of going for a rebuild, we will go into detail about why building your own PC is a much better option. Also, note that if you do not possess enough technical knowledge about a topic there are plenty of stores that will offer you advice on components and after all, you can always get help from a friend.

Custom PC

So without further diversion from the topic, let us explore all the benefits of building a custom computer.

Building a custom PC is cheaper

At the first look, this statement does not feel right since when you look at the prebuilt systems you get a feeling that it is much cheaper than do it yourself variant and although CPU and GPU seem like a great deal I beg you to look under the hood on other components. Usually to lower price compromise would be made on other crucial components like SD or power supply, a PC case, or motherboard so even if you have a good CPU and GPU that will not matter much since other components would not be able to catch up with them. After all, prebuild computers will need to pay people who are building them and there is no way that will be cheaper if you just plain went and bought the same components yourself and install them.

When you are in control in choosing each component there is not only being cheaper online, it is flexibility with building itself. You choose which components you want to be stronger and which to be normal. Also, you can choose the exact model of the given component leaving you more in control and open to future upgrades.

More flexibility

Also, it may sound irrelevant but when building your own custom PC you can also choose which company you would like to purchase for each model, yes considering the CPU it is AMD or Intel but when you are buying a case, SSD, GPU, and other components choosing the right company for your needs is also the thing that should not be overlooked.

You can customize it the way you want

Not really a quality argument but with a custom PC build, you can choose would you like that RGB component or not, you choose do you like white or black fans, and many more things. You really can place a personal stamp on the computer making it indeed a personal computer.

You choose OS and applications

When you buy an already prebuilt PC, usually it comes with some sort of OS on it, sometimes it is freedos, Linux and sometimes it is Windows Home. When you get your hands dirty you can place whichever system you want on it and install applications that you use and know and some preinstalled typical apps.

Read More
Fix UNEXPECTED STORE EXCEPTION in Windows 10
Blue Screen of Death or Stop errors are definitely one of the most difficult issues to face in your Windows computer. One of them is the UNEXPECTED STORE EXCEPTION BSOD error. When you encounter this Stop error on your Windows 10 computer, this means that the store component has caught an unexpected exception. There are many potential causes for this error, but we’ve narrowed it down to a few specific causes – for one, this error could be caused by your antivirus program installed on your computer, two, it could also be caused by outdated hardware drivers on your computer, it could also be an error in the file system as well as some issue with the lock screen app, or even output to an unexpected port. Whichever the cause may be, you can use a couple of fixes laid out below. Make sure to carefully follow them.

Option 1 – Try to update your Display driver

  • First, boot your computer into Safe Mode.
  • After that, tap the Win + R keys to launch Run.
  • Type in devmgmt.msc into the box and tap Enter or click OK to open the Device Manager.
  • After that, a list of device drivers will be displayed. From there, look for the Display Adapters and click on them.
  • After that, right-click on each entry under the Display Adapters and select the “Uninstall Device” option from the menu.
  • Now restart your computer.
  • After restarting your computer, go to the Settings app and Check for Updates in the Windows Update section.
Note: You also have the option to go directly to the website of your graphics card manufacturers like NVIDIA, Intel, or AMD and go to the section called Drivers then check if there’s a new available update – if there is, download and install it.

Option 2 – Run both the System File Checker scan and DISM tool

If the problem is caused by corrupted system files, then you can use both the System File Checker and the DISM tool. To use them, follow the instructions below.
  • Tap the Win + X keys or right-click on the Start button and click the “Command Prompt (Admin)” option. Alternatively, you can also search for “cmd” in the Cortana search box and right-click on Command Prompt from the search results, and select the “Run as administrator” option.
  • After that, if a User Account Control prompt pops up, click on Yes to proceed.
  • Once the Command Prompt window is pulled up, type the following command and hit Enter:
DISM.exe /Online /Cleanup-image /Restorehealth
  • Wait for the process to be completed. Once it’s done, type the following command and hit Enter:
sfc /scannow
  • The command will start a system scan which will take a few whiles before it finishes. Once it’s done, you could get the following results:
  1. Windows Resource Protection did not find any integrity violations.
  2. Windows Resource Protection found corrupt files and successfully repaired them.
  3. Windows Resource Protection found corrupt files but was unable to fix some of them.
  • Restart your PC.
Note: You should see the “Windows Resource Protection found corrupt files and successfully repaired them. Details are included in the CBS.Log %WinDir%LogsCBSCBS.log” message on your screen. On the other hand, if you see the “Windows Resource Protection found corrupt files but was unable to fix some of them. Details are included in the CBS.Log %WinDir%LogsCBSCBS.log” message instead, then you should run the following command in Command Prompt:
findstr /c:"[SR]" %windir%LogsCBSCBS.log >"%userprofile%Desktopsfclogs.txt"
The command you entered will open up the logs on your Desktop where you can look for files that are causing the error on your computer manually.

Option 3 – Disable Fast Start-up

If you want your computer to boot faster, then you might have enabled Fast Start-up. This feature is ideal for computers that are using a hard disk drive. However, turning on this feature also means that when the computer boots, it might lag some drivers that are loaded when it initially boots up. Thus, it might be the potential cause of the UNEXPECTED STORE EXCEPTION BSOD error. Thus, you need to disable Fast Start-up. To do that, follow these steps:
  • Boot your PC into Safe Mode.
  • Then tap the Win + R keys to open the Run dialog box.
  • Next, type in “control” to open Control Panel.
  • After that, select Hardware and Sound and click on Power Options.
  • Select “Choose what the power buttons do” from the left side menu pane and click on Change settings that are currently unavailable.
  • Afterward, uncheck the “Turn on fast startup (Recommended)” entry and click on Save Changes.
  • Now restart your PC for the changes to take effect and then check if the problem’s fixed afterward.

Option 4 – Try to run the Chkdsk utility

You can also run the Chkdsk utility to resolve the UNEXPECTED STORE EXCEPTION BSOD error. If your hard drive has issues with integrity, the update will really fail as the system will think that it’s not healthy and that’s where the Chkdsk utility comes in. The Chkdsk utility repairs hard drive errors that might be causing the problem.
  • Open Command Prompt with admin privileges.
  • After opening Command Prompt, execute the following command and hit Enter:
chkdsk /f /r
  • Wait for the process to be completed and then restart your computer.
Read More
Basic IT skills everybody should know
In today’s world and age, there are some essential IT skills that basically everyone should know. No matter in what field you are working some skills are just needed in order to function properly in the work. So, without further ado let's dive into what are these essential IT skills everyone, even your grandmother should know.

Basic IT skills5 Essential IT skills everybody should know

  1. Word processing

    No matter are you creating or editing business documents or just trying to help a friend or relative, word processing skill is an essential asset and requirement in today’s age. Writing anything on a bunch of paper is time-consuming, papers can get lost, and searching for a particular item inside a bunch of papers is not a really enjoyable experience. A much easier solution is to write, format, and keep everything on the computer and almost all employers are asking for this skill.
  2. Send and using emails

    Today we live in the digital age and most communication is done in real-time via messaging apps and file sharing is done via file-sharing services. Despite mentioned technology, many files are shared and sent through emails. When a message is too long or complex when it needs to have some attachment or to be kept in archive emails are the way to go and therefore using email is a must-have essential skill.
  3. Using search engines

    When talking about using search engines we really do not think about firing up your favorite browser, going into the search engine,s and typing cat pictures. What we think is that a person should know how to use a search engine properly, tweak its search options, and phrase words and sentences to find everything he or she needs.
  4. Doing data work

    Data entry and data calculations have been made easier than ever thanks to today's technology. Microsoft excel, libre office calc, google sheets, etc. are all capable of performing a great variety of calculations and keeping track of plenty of required data. This skill is often asked by employers as an essential one.
  5. Cyber security

    Each employee or person, in general, should be quite aware of various scams and best practices to keep itself safe in this digital world. We have several articles on this topic and there are a great variety of articles on the internet as well.

Conclusion

No matter are you young or old, employed or looking for a job, these skills are a must-have in today’s world.  There are a lot of great tutorials online on these various topics and I am sure that your knowledgeable friend or cousin would be happy to help and show you how to do all of these things.
Read More
1 2 3 171
Logo
Copyright © 2023, ErrorTools. All Rights Reserved
Trademark: Microsoft Windows logos are registered trademarks of Microsoft. Disclaimer: ErrorTools.com is not affiliated with Microsoft, nor claims direct affiliation.
The information on this page is provided for information purposes only.
DMCA.com Protection Status