Magcore.dll is a type of Dynamic Link Library. This file is associated with software developed by ArcSoft, a renowned multimedia application developer.
Magcore.dll consists of small programs that help load and run software developed by ArcSoft on your system smoothly.
This file virtually comes into function when you use certain audio and video features incorporated in ArcSoft programs for example ArcSoft Media converter.
However, you may experience Magcore.dll error code on when this DLL file fails to run and load programs. The error may hamper your ability to access ArcSoft programs on your system and cause you a great deal of inconvenience.
Magcore.dll error is often displayed in any one of the following formats:
“The file magcore.dll is missing”
“MagCore.dll cannot be found”
"Cannot find [PATH]magcore.dll"
“This application has failed to start because MagCore.dll was not found. Reinstalling the application may fix the error.”
 Error Causes
This DLL file is known to be prone to errors. MagCore.dll error occurs due to several reasons such as:
If you experience MagCore.dll error on your system, it is advisable to fix it right away. Though it is not fatal, but if you don’t repair it, you may not be able to access practically all ArcSoft programs on your PC.
Here are some of the efficient and easy manual methods to resolve error MagCore.dll on your PC:
MagCore.dll error can be triggered by viral or other malware infection. Malware can easily damage DLL files and masquerade as the MagCore.dll file. To resolve, simply download a powerful antivirus on your system.
Run it to scan your entire PC for viruses and remove them right away.
As we mentioned above the error may be related to hardware failure too. In times like these, it is advisable to update the drivers for hardware devices.
For example if you try to play a 3D video game and it fails to run showing you MagCore.dll error message, then simply try updating the drivers for your video card. Drivers can be updated in Windows by using a driver update wizard from within Device Manager.
After trying method 1 and 2, if the error code still persists, then it is opt for method 3.
Use Windows System Restore utility to undo recent system changes and bring your PC to its normal previous condition before the error occurred. To restore, simply go to the start menu, type System Restore.
Now click on System Restore and just pick a point in the past called a restore point to return important Windows files and settings.
If the underlying cause of the MagCore.dll error code is related to registry issues, then simply repair the registry. You can fix it manually but it is a little complicated and time-consuming. You may find it difficult if you are not a technical whiz.
Nonetheless to resolve and repair it in seconds, download Restoro. This is a powerful and a user-friendly PC Fixer embedded with a registry cleaner and several other highly functional scanners.
Run it to scan your entire PC for registry problems. The registry cleaner utility removes all bad and invalid entries, cleans up the registry space, and repairs the damaged files.
Click here to download Restoro and repair MagCore.dll error code on your PC.

 1. File-infecting Virus
HKEY_CURRENT_USERSoftwareMicrosoftWindowsCurrentVersionExplorerAdvancedStep 4: From there, right-click on the right side of the panel and select New > DWORD (32-bit) and then name it “LastActiveClick”. Step 5: After that, double click on the newly created DWORd to modify its value. Put “1” as its value data. Step 6: Then click OK and close the Registry Editor. Step 7: Now restart your computer to successfully apply the changes made. Note: In case you want to revert back to the default configuration, all you have to do is set the value data of LastActiveClick to “0” or simply delete that DWORD and restart your computer to successfully apply the changes made.
DiscoverAncestry is a Browser Extension for Google Chrome developed by Mindspark Inc that presents itself as a web tool to discover the origins or meanings of particular family names. When installed this extension changes your default new tab page to search by MyWay, as well as your default search engine to Search.MyWay.com
While active, DiscoverAncestry logs user browsing information, recording clicked links, visited websites and viewed products. This information is later used to better target personal ads. Browsing the internet with this extension active will result in injection of additional ads, sponsored content and even pop-up ads throughout the browsing sessions.
DiscoverAncestry is usually found bundled with other potentially unwanted software, this combined alongside its aggressive ad injection is why DiscoverAncestry has been marked as a Browser Hijacker, and it is recommended to remove it from your computer.
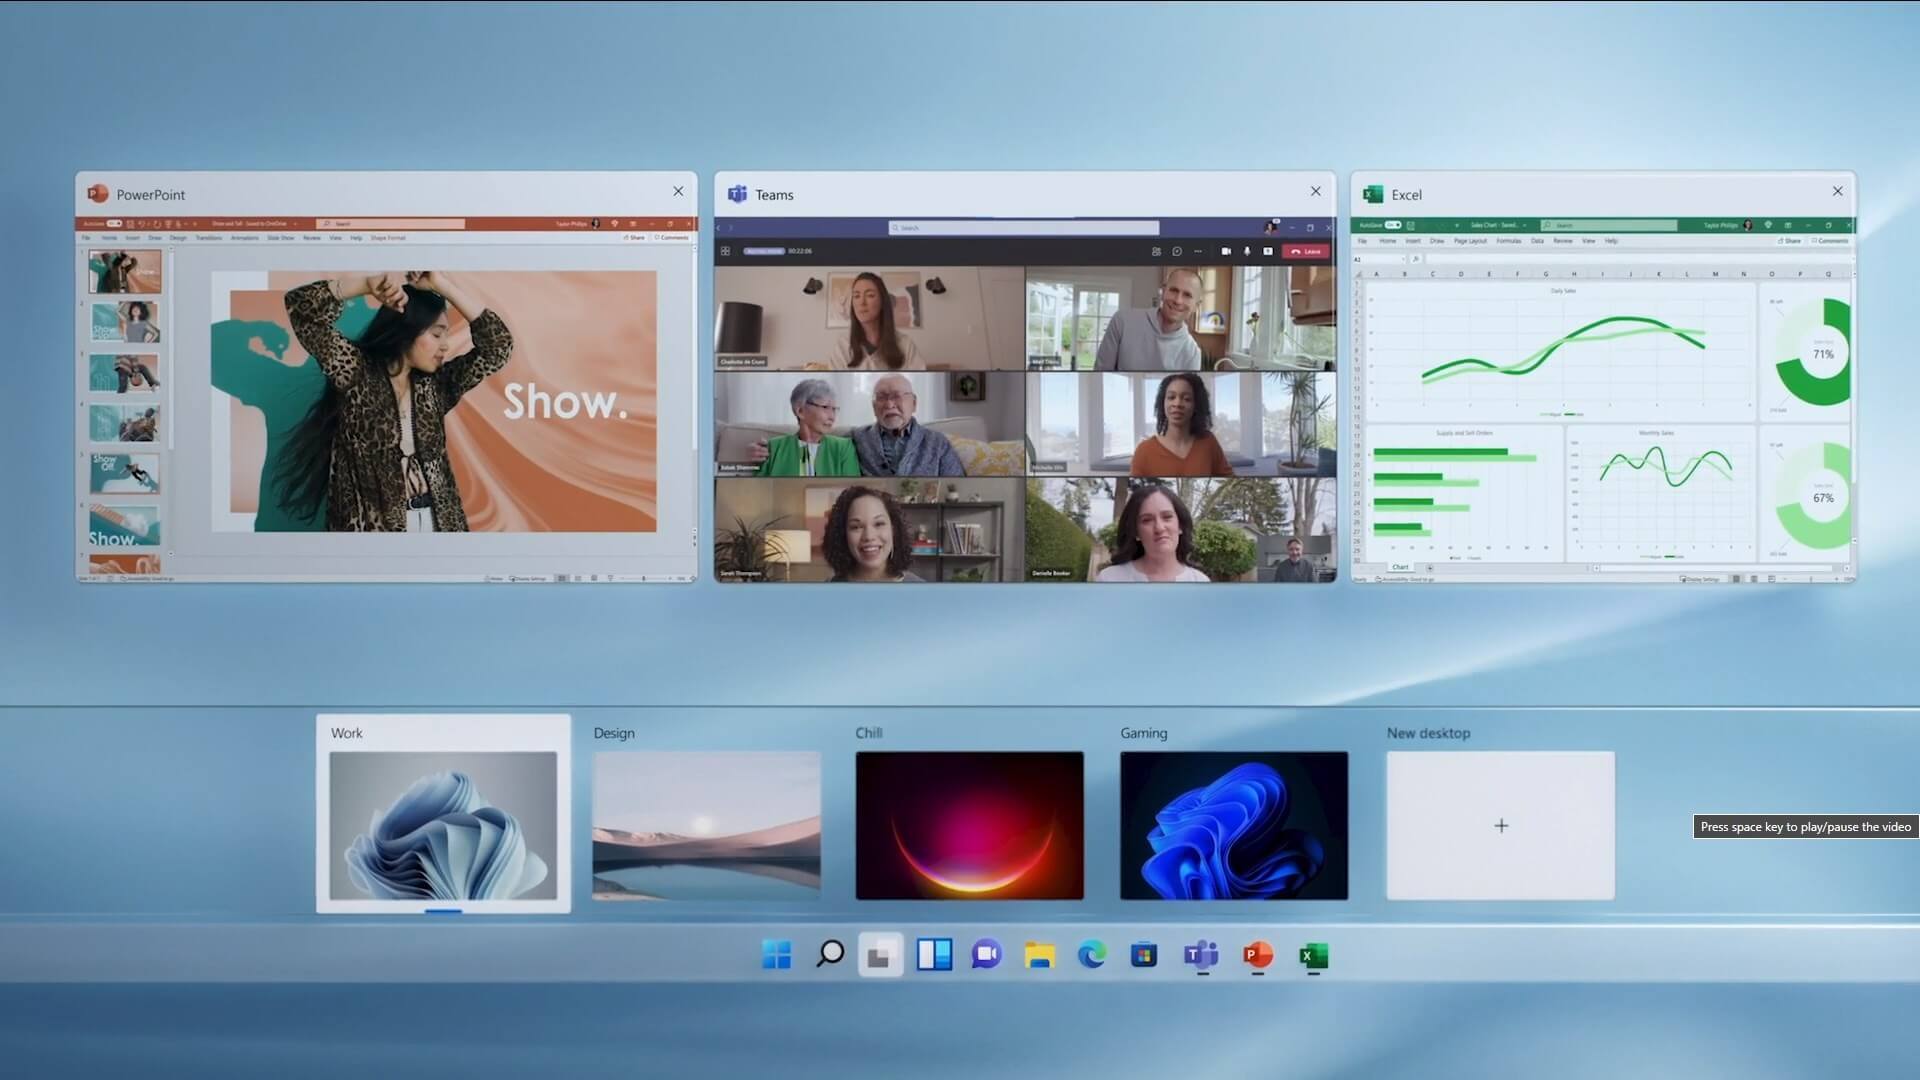 The feature that was originally planned for now scrapped Windows 10X is included in Windows 11. You will be able to customize your Virtual desktop with different wallpapers for each screen.
In order to fully customize your virtual desktops with different wallpapers follow this easy step-by-step guide.
The feature that was originally planned for now scrapped Windows 10X is included in Windows 11. You will be able to customize your Virtual desktop with different wallpapers for each screen.
In order to fully customize your virtual desktops with different wallpapers follow this easy step-by-step guide.
Error 0xc0000142 can occur in any of the Windows versions and usually occurs when an application fails to properly initialize.
This error can be critical for a computer as it signifies that the system is unstable. Error 0xc0000142 can cause slow performance in a PC, system freeze, startup and shutdown issues, blue screen and errors in installation.
Error CausesWindows/Application Error 0xc0000142 can occur because of a number of reasons.
When a computer is an overload with data, or when system files get broken or missing, this error can occur and will result in startup and shutdown issues as well as the blue screen. Another reason, and one which is quite common, is improper computer maintenance.
This will cause a PC to perform slow, system freezes, and installation errors. This error displays ‘failed to initialize’ on either a Windows error box or the blue screen of death.
Error 0xc0000142 can occur at any time, but there are many ways to resolve it. For instance:
A corrupted registry is one of the major reasons why this error occurs. The registry is used by Windows to store information and settings on the computer, which is why it has a large database.
This database contains emails, wallpapers, saved passwords and much more in ‘file path references’. These allow Windows to run the common files in your system. A registry cleaner can fix any errors in the registry database.
Viruses can cause certain applications to not function properly. Hence, download a strong antivirus and run a deep scan on your system and remove any potential infections and spyware.
Non-critical applications in a computer are those that are installed by the user. If error 0xc0000142 displays in any of your installed programs, then you should reinstall these programs. Often applications have damaged or corrupted files which can slow them down. To resolve this, follow these steps:
The third step is not recommended in case the error is caused by cmd.exe
If the error is still on display despite following the previous steps, then you can repair Windows. This process allows Windows to retain all your data and information by simply replacing the program files and settings with fresh ones. This can stop error 0xc0000142 by allowing the programs access to use necessary files smoothly and effectively.
If you cannot resolve the error in any of these steps, then there is another way to do so if you have a computer that runs the Microsoft Internet Security and Acceleration (ISA) Server 2000. Follow these steps in order to resolve it:
 So there are several problems that can cause this error like issues with accessing the Microsoft servers, corrupt system files, settings being misconfigured, malware infections, or conflicting applications. We will cover all solutions for each scenario taking approaches from most simple solutions to more complex ones. Follow the guide and let's fix this annoyance.
Error Code 0x80072efe is a fairly common error code that generally occurs in Windows 10. It is most often associated with the process of performing updates using the Windows Update tool.
Common symptoms include:
While Error Code 0x80072efe can cause a number of frustrating issues on your device, the good news is that there are several methods that can be used to fix this error. The two most common methods are actually fairly easy to perform and do not require advanced tools or knowledge. However, if you don’t feel like you will be able to perform the necessary steps on your own, be sure to get in touch with a qualified computer repair technician to help you in the resolution of this particular error.
Error CausesTwo things are generally behind the appearance of Error Code 0x80072efe on a Windows device. The first is that one or more of your registry keys are not available, have been corrupted, or are not installed properly. The second is that necessary DLL files aren’t working properly within your machine.
However, other things can mimic these causes, which is why the two methods listed below will resolve the issue in most cases.
Fortunately, there are two resolution methods that can be used quickly and easily when Error Code 0x80072efe arises on your Windows computer. Neither of these requires advanced knowledge or skill, but if you don’t feel comfortable with performing these steps on your own, it is recommended that you contact a qualified computer repair technician in order to get assistance.
Here are the best ways to resolve Error Code 0x80072efe on your computer:
If your time or date has been set incorrectly, it can make your system logs appear to have incorrect information, which can lead to the appearance of Error Code 0x80072efe. Because this is the easiest thing to fix if it is indeed the problem that is making the error code appear, this should always be the first thing that you try when this error code arises.
In order to check your time and date settings, follow these simple steps:
If method one has not successfully resolved Error Code 0x80072efe, you may need to attempt method two.
In some cases, your firewall can prevent your machine from accessing the information that it needs in order for the installation or update to go through correctly. If that is the case, you can follow a few simple steps to turn off your firewall, just while you install the update, and then turn it back on.
In order to do so, follow these steps:
Note that if this method allows you to successfully bypass the error code, you’ll need to make sure to turn the firewall back on when you are finished. Even though it can interfere with the Update process, your firewall is still very important to your computer.
If you wish to always have at your disposal a utility tool to fix these Windows 10 and other related issues when they do arise, download and install a powerful automated tool.
Note: The following process will remove all of your installed games.
