Error Code 0x80004002 - What is it?
Error Code 0x80004002 is a Windows-based error code that affects Windows 10 and previous operating systems, including Windows XP, Vista, Windows 7, and Windows 8. In most instances, the message box that shows Error Code 0x80004002 pops up as you attempt to install new software or programs on your machine.
Common symptoms include:
- Problems running programs that once worked
- Slow response time of your computer to commands entered with the keyboard or mouse
- Trouble shutting down or starting up your machine
- Error message regarding your registry, updates, or response time.
There are a number of different solutions that you can use to attempt to resolve Error Code 0x80004002. Because there are multiple causes to the issue, some of the methods used to successfully address the problems at hand are fairly simple, while others require advanced knowledge or abilities to complete. If the methods below are not successful in the resolution of the issue or if you aren’t confident in your skills to implement these methods, contact a qualified Windows repair technician to assist you. Once this error message is not rectified, you could be exposing your computer to other error messages, including error code 0x80240020.
Solution

Error Causes
There are many different issues that can contribute to the appearance of Error Code 0x80004002. The most common causes for this particular error message include:
- Errors in registry files
- Missing system files that have accidentally been associated with other programs and deleted
- Viruses or malware that cause corruption in program or system files
- Installations that have failed to complete fully
Further Information and Manual Repair
Due to the number of causes that can contribute to Error Code 0x80004002, there are a number of methods that you can use to attempt to resolve the issues behind the error. While some of these methods are fairly easy to implement, others may require you to use programs like registry cleaners and driver installation wizards, so if you are not comfortable using these kinds of software, contact a certified Windows repair technician to assist you.
Here are the top ways that you can attempt to address Error Code 0x80004002:
Method One: Run Your Windows Registry Cleaner
Many different registry cleaning tools exist on the Internet, but not all of these are provided by trustworthy sources. Rather than trusting a file from an unknown publisher, you can use the registry cleaning program included in your Windows software package.
Run this tool to complete a scan of your files, discovering which ones may need to be repaired. In most cases, the registry cleaner itself can repair the necessary files and resolve the error.
It is always a good idea to restart your computer after you have run the registry cleaning tool to ensure that your machine can accurately assess the newly repaired files.
Method Two: Update Your Drivers and Software
In some cases, Error Code 0x80004002 arises when drivers are out of date. If you believe that this is the case, you can check on the status of your various drivers by going into the settings for your operating system and selecting the “Update Drivers” option.
You can also check your system for any necessary updates to your Windows software, which may serve to address the error code.
After you have checked and installed any necessary drivers, make sure to restart your computer to fully apply any changes that the installation process has introduced.
Method Three: Reinstall Your Windows Software
In some cases, the best way to address the missing or corrupt files that can cause Error Code 0x80004002 is to simply reinstall your copy of Windows. Always make sure to back up your files before reinstalling your software.
Method Four: Run Your Virus Scan Software
Because Error Code 0x80004002 can also be caused by malware or a virus, you can run your virus scan software to detect and resolve the problem. After doing so, run the registry repair tool to fix any affected files and restart your computer.
Method Five: Use An Automated Tool
If you wish to always have at your disposal a utility tool to fix these Windows 10 and other related issues when they do arise,
download and install a powerful automated tool.

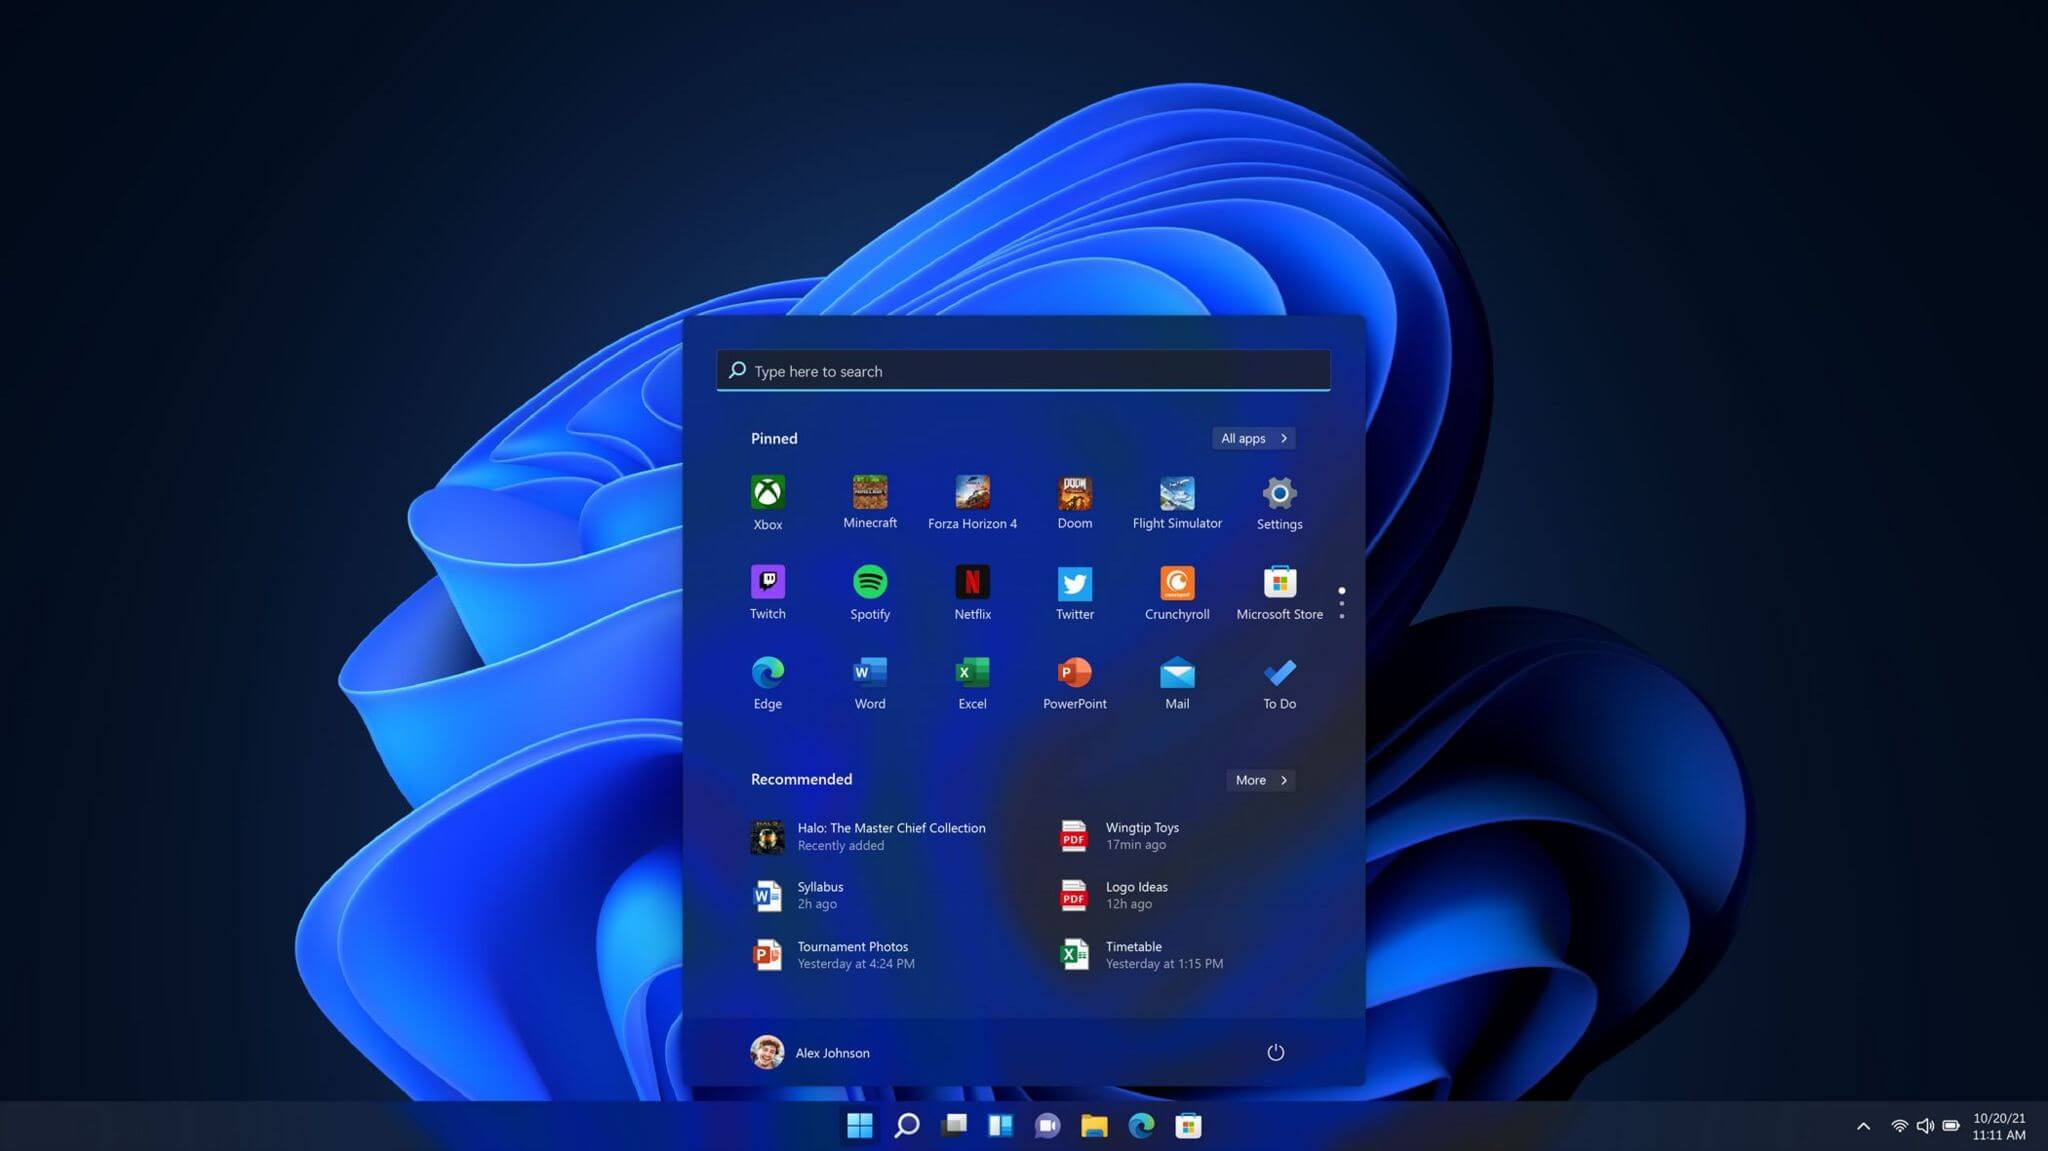 One of the first things that everyone saw when Microsoft has unveiled Windows 11 is its Start menu. Funny enough this is what has caused most of the divide among users, some find it interesting, and some do not like it. Truth is, it is different, and it is centered in the middle instead of the lower left part of the screen.
It has been confirmed however that the Start menu can be moved to any part of the screen so if you want, you could place it on the lower left as it has always been.
Live tiles do not longer exist in the Start menu, instead, we have styled simple icons.
One of the first things that everyone saw when Microsoft has unveiled Windows 11 is its Start menu. Funny enough this is what has caused most of the divide among users, some find it interesting, and some do not like it. Truth is, it is different, and it is centered in the middle instead of the lower left part of the screen.
It has been confirmed however that the Start menu can be moved to any part of the screen so if you want, you could place it on the lower left as it has always been.
Live tiles do not longer exist in the Start menu, instead, we have styled simple icons.
 If you have used the cascade option in previous Windows versions then it is most likely that you will like the new Snap controls.
You can quickly snap windows side by side, or arrange them in sections on your desktop just by hovering over maximize button on the title bar.
If you have used the cascade option in previous Windows versions then it is most likely that you will like the new Snap controls.
You can quickly snap windows side by side, or arrange them in sections on your desktop just by hovering over maximize button on the title bar.
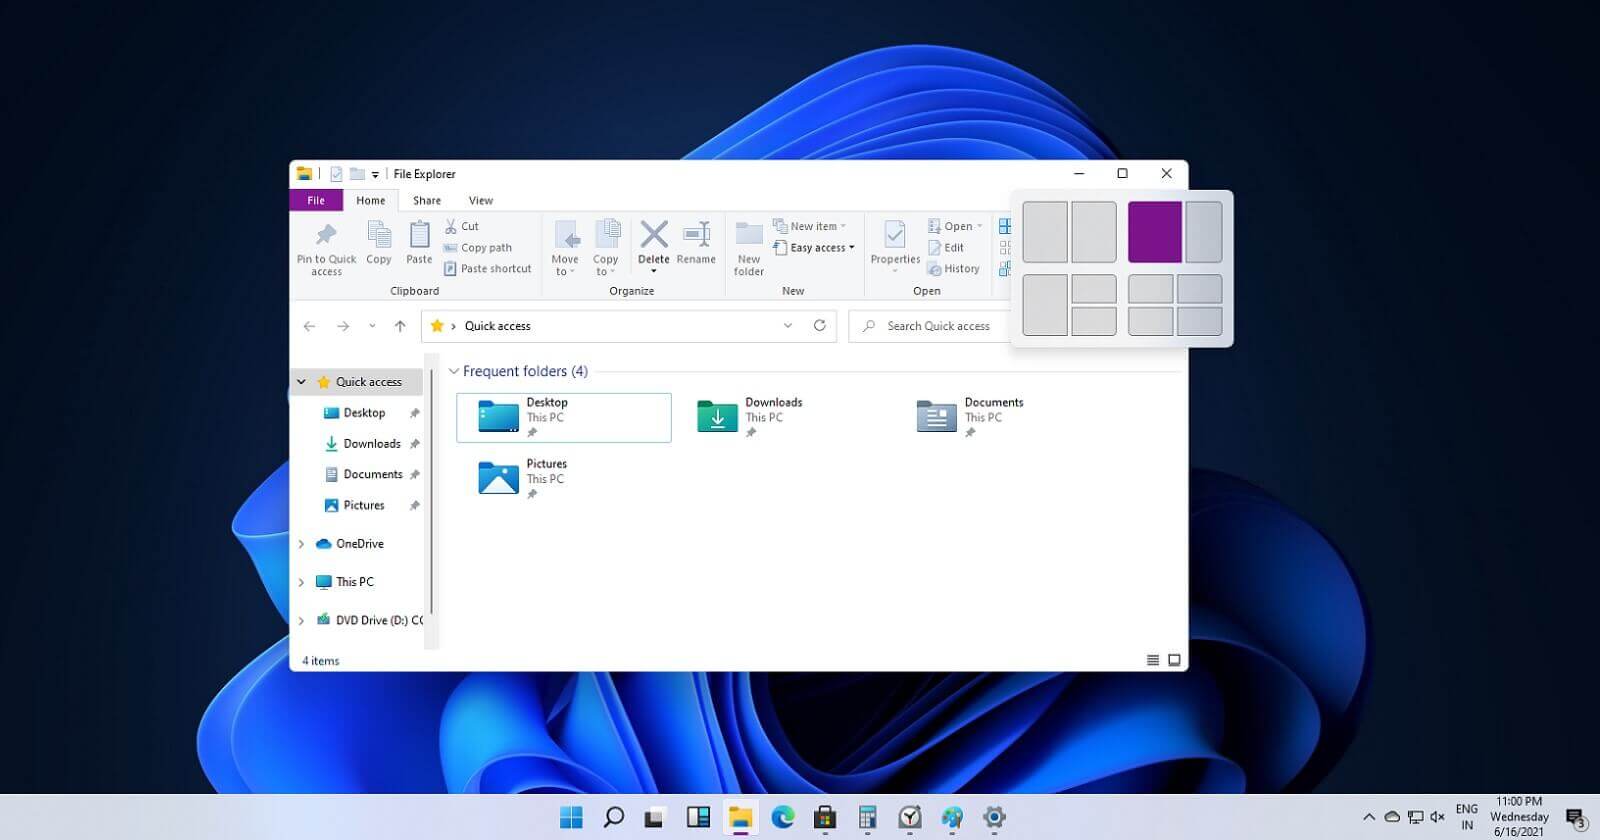
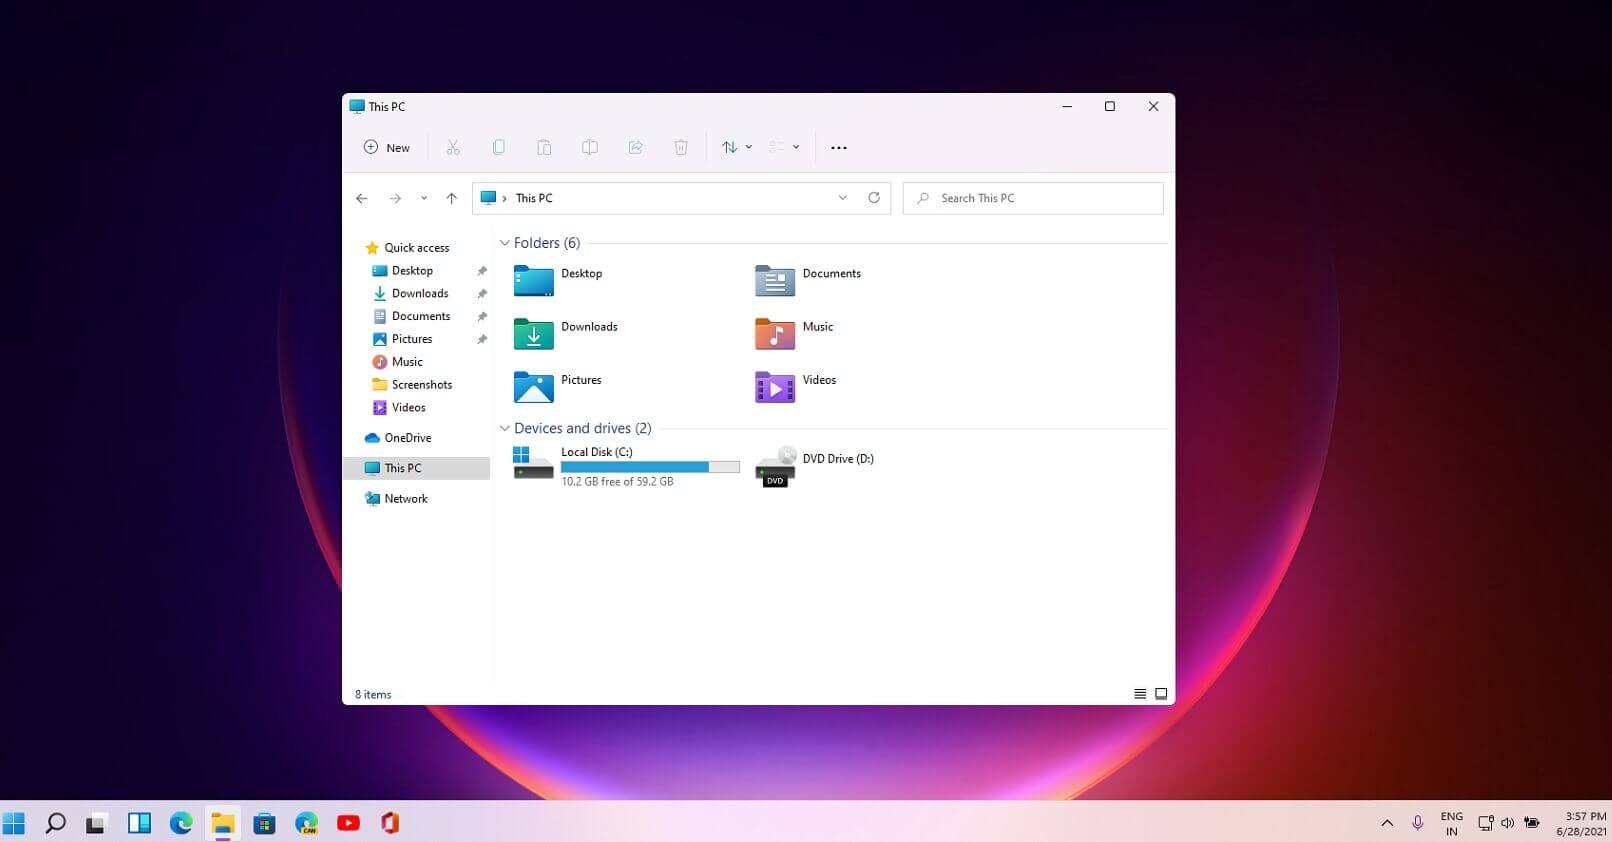 File explorer has gone through some visual and design changes, the ribbon on top has been completely removed and replaced with a header-like feature with a slick and clean design.
The header contains a nice organized and designed single row of icons like cut, paste, copy, rename, delete, and new folder icons.
File explorer has gone through some visual and design changes, the ribbon on top has been completely removed and replaced with a header-like feature with a slick and clean design.
The header contains a nice organized and designed single row of icons like cut, paste, copy, rename, delete, and new folder icons.
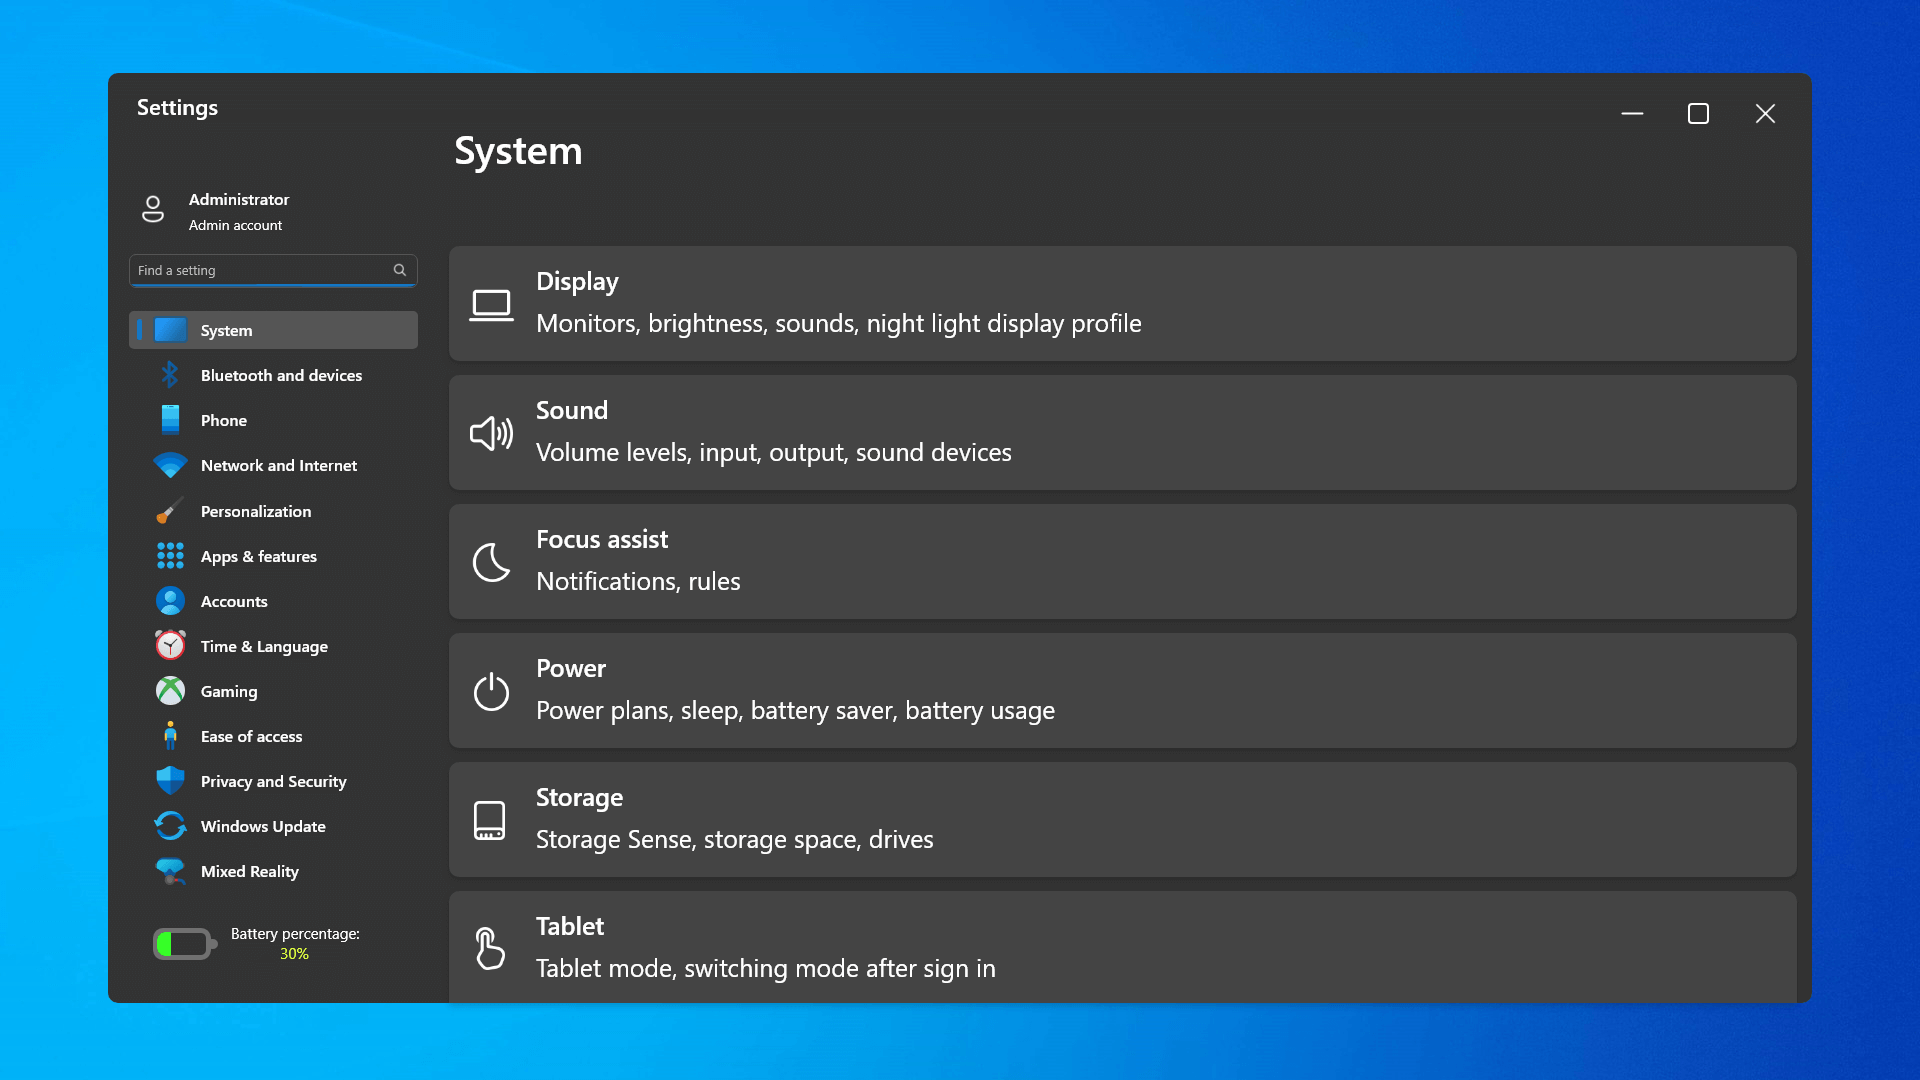 The settings app also has gone through visual and design changes. It has a new design that is very visually appealing and navigation has been simplified and more organized. Finding the right and desired setting is much faster and clearer now.
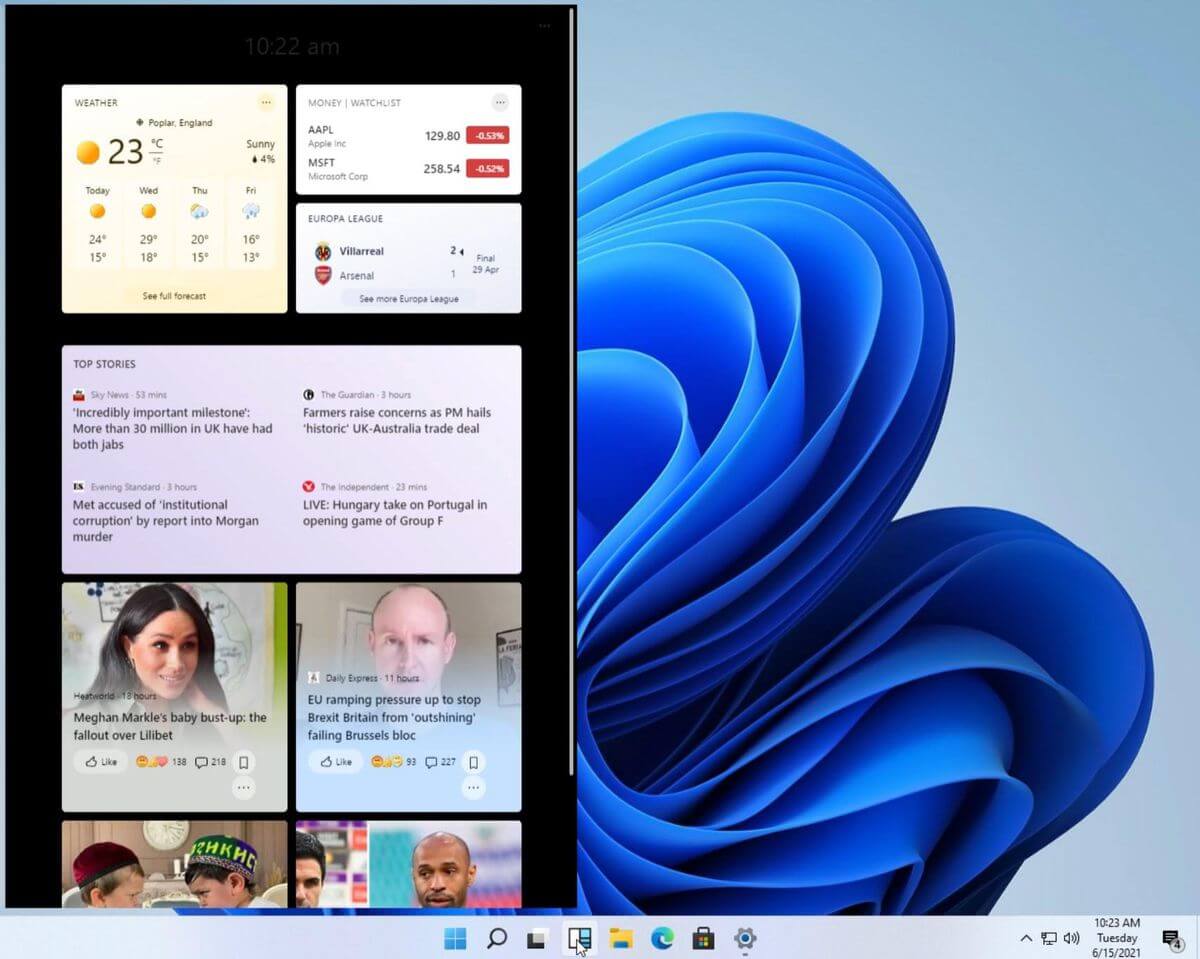 Yes, widgets are back but not like you remember them.
Instead of being all-time present at your desktop like once they used to be, now there is a button on the taskbar which brings the widget bar up that contains desired widgets. This way they are easily accessible and do not clutter desktops.
So far we have weather, news, calendar, and stocks widget but we will see how development on these goes. I expect to have community-made widgets like in old days for all of our needs.
Yes, widgets are back but not like you remember them.
Instead of being all-time present at your desktop like once they used to be, now there is a button on the taskbar which brings the widget bar up that contains desired widgets. This way they are easily accessible and do not clutter desktops.
So far we have weather, news, calendar, and stocks widget but we will see how development on these goes. I expect to have community-made widgets like in old days for all of our needs.
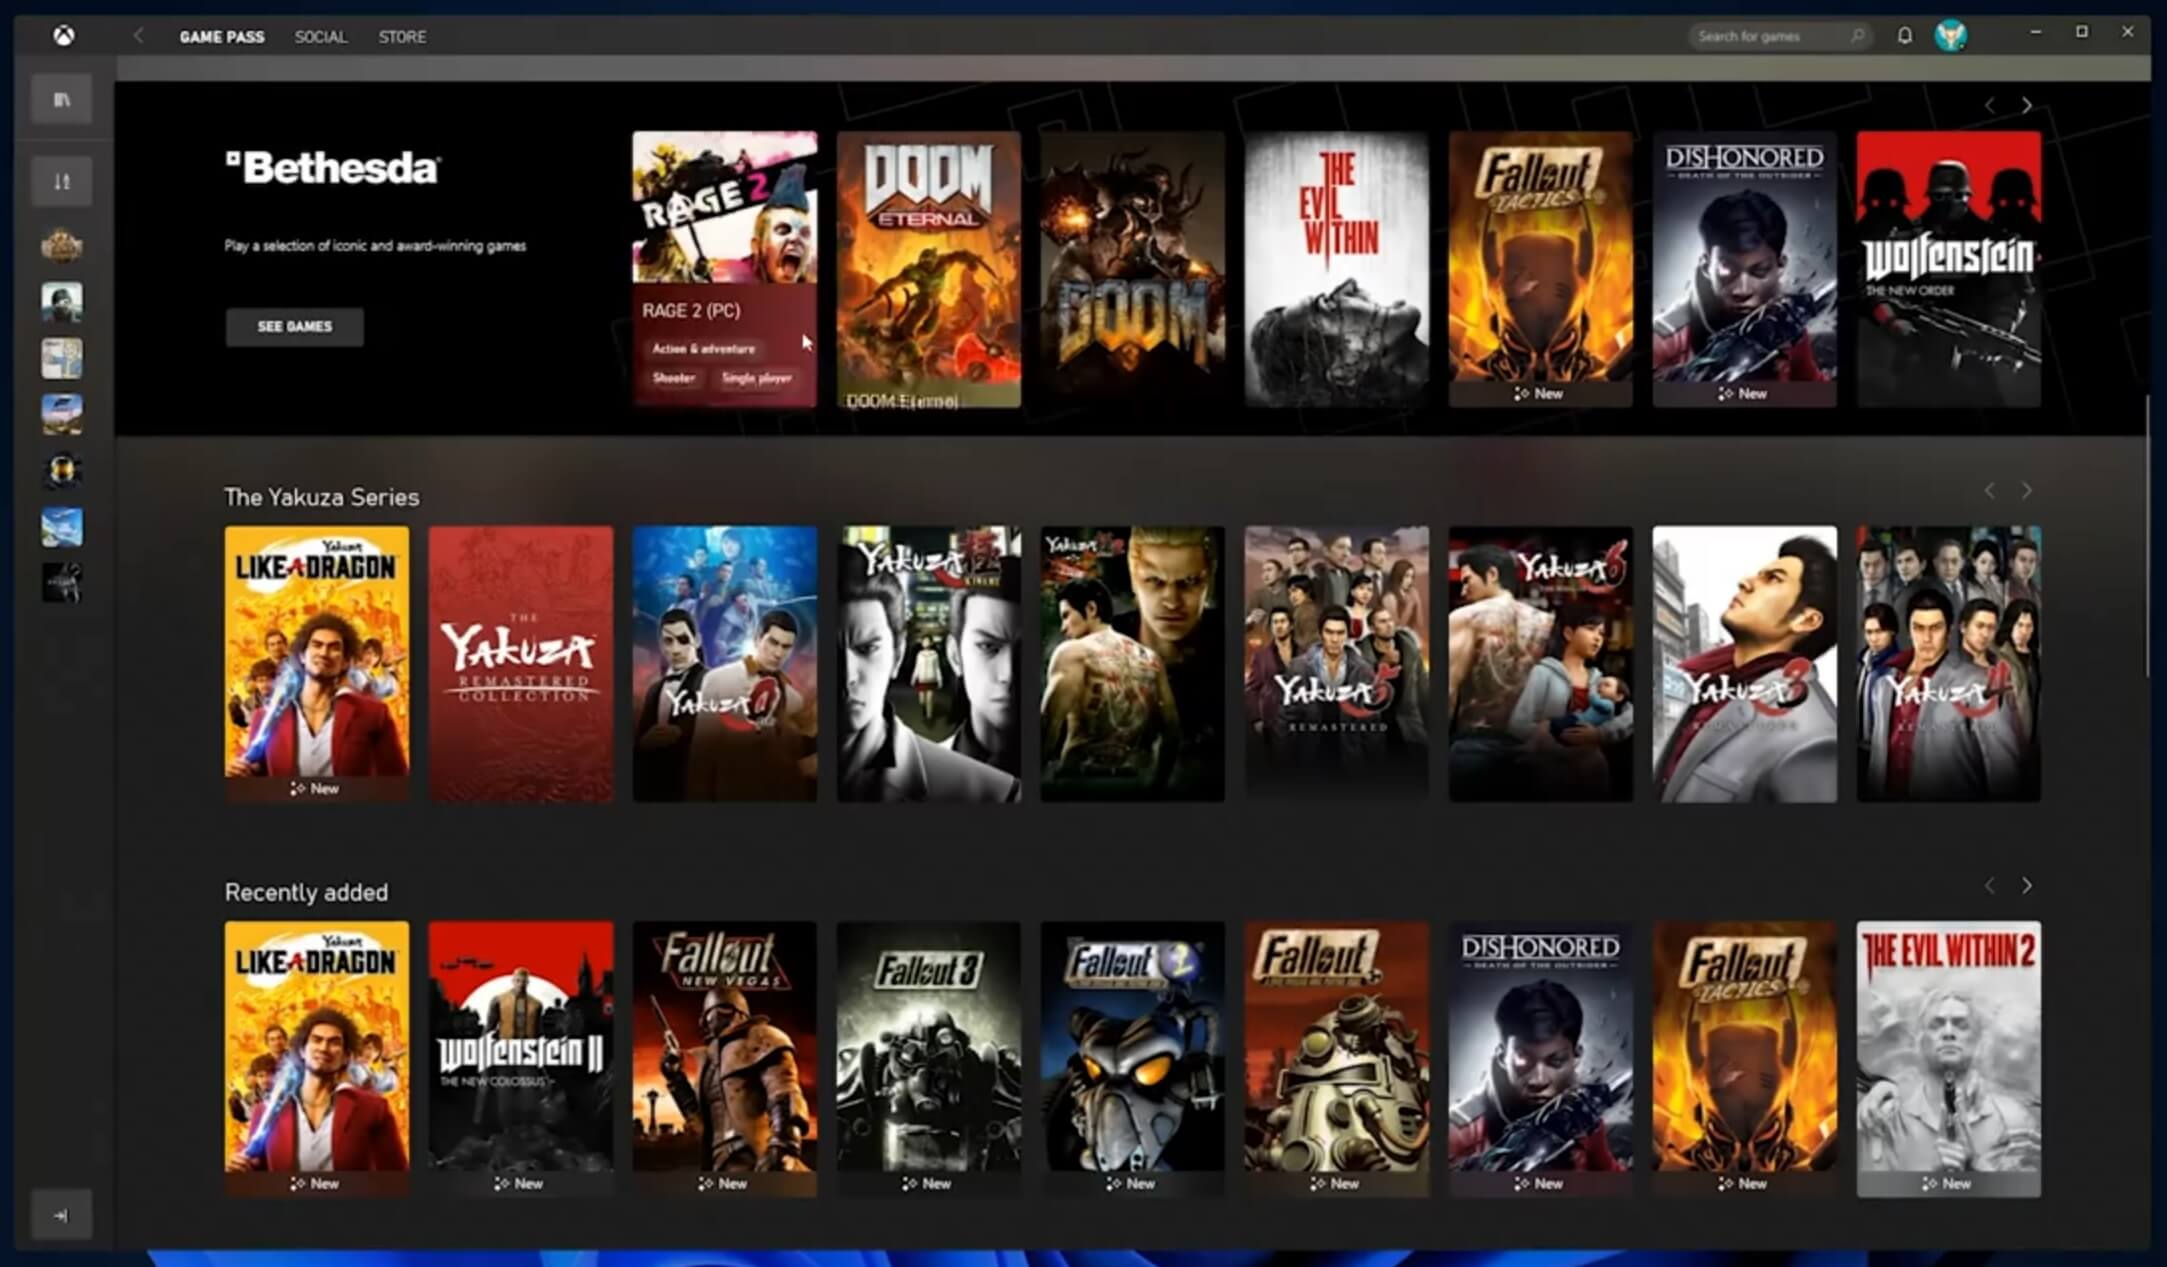 The new Xbox app is now integrated into Windows 11, offering quick access to Xbox Game Pass games, the social parts of the Xbox network, and the Xbox store.
 As widely known by now Windows 11 will require you to have a TPM 2.0 module capable CPU in order to install it.
This system requirement has caused a lot of controversies but essentially it seems that MS's goal is to protect your personal data by using this module.
The upside of course is that your data will be protected much more than in previous Windows versions, the downside, of course, will be that you will need newer hardware to run OS on it.
and that is essentially it, keep on tuned on more Windows 11 information and overall articles tied to PC and technology here at errortools.com
As widely known by now Windows 11 will require you to have a TPM 2.0 module capable CPU in order to install it.
This system requirement has caused a lot of controversies but essentially it seems that MS's goal is to protect your personal data by using this module.
The upside of course is that your data will be protected much more than in previous Windows versions, the downside, of course, will be that you will need newer hardware to run OS on it.
and that is essentially it, keep on tuned on more Windows 11 information and overall articles tied to PC and technology here at errortools.com  I do not know about you, but I prefer to set my Windows to be more to my liking and not how Microsoft thinks it should be. Let’s face it, not all users feel comfortable whit Microsoft settings and idea how things should be.
One of the things I particularly did not like even in Windows 10 is icons that come by default on my taskbar, now so far, well until the latest Windows 11 update you could remove default taskbar icons the same way as in Windows 10, just right-click on them and unpin, sadly with latest update build on Windows 11 this option has been removed.
In order to remove default icons from the taskbar, one must go now to Windows 11 settings and choose from there which one you would like to be placed on it. Of course, this is nothing game-breaking but it still feels strange why the standard option has been removed, it just makes no sense but lately not many things that come from Microsoft do.
I do not know about you, but I prefer to set my Windows to be more to my liking and not how Microsoft thinks it should be. Let’s face it, not all users feel comfortable whit Microsoft settings and idea how things should be.
One of the things I particularly did not like even in Windows 10 is icons that come by default on my taskbar, now so far, well until the latest Windows 11 update you could remove default taskbar icons the same way as in Windows 10, just right-click on them and unpin, sadly with latest update build on Windows 11 this option has been removed.
In order to remove default icons from the taskbar, one must go now to Windows 11 settings and choose from there which one you would like to be placed on it. Of course, this is nothing game-breaking but it still feels strange why the standard option has been removed, it just makes no sense but lately not many things that come from Microsoft do. 