Windows 10 has displayed one of the most efficient and user-friendly interfaces. However there have been many issues on the backend of this commonly praised operating system: For example, Windows Update is still a wonky and error-laded system application. One example of this error is Windows Update Error 0x80073712 which stands in the way of users just wanting to keep their PCs updated hassle-free.
The error code 0x80073712 signifies that a file needed by Windows Update to function is either damaged, missing, or corrupted. However, this does not mean that your Windows version will forever stay as-is with no mode to update it. Windows Update Error 0x80073712 is perfectly fixable with the set of provided steps below and some of Windows’ built-in troubleshooting steps:
Solution 1: Open Windows Update Troubleshooter
Open the Windows Update Troubleshooter by pressing the Window Key and “S” keys simultaneously.
Enter the word “Troubleshoot” in the search box and select the Troubleshoot result
On the new window, select “Windows Update” to troubleshoot.
Run the troubleshooter, then open Windows Update and try to install the update again.
Solution 2: Run the DISM tool
Open the command prompt by pressing Windows Key and “S” key simultaneously
Enter “cmd” in the search box. Right Click command prompt among the results and select “Run as administrator”
In the Command Prompt window type the following and press the Enter key after every command
DISM.exe /Online /Cleanup-image /Scanhealth
DISM.exe /Online /Cleanup-image /Restorehealth
To close the Administrator: Command prompt window, type Exit, and then press Enter.
Run Windows Update again.
Solution 3: Rename the Software Distribution folder
Open the command prompt as previously mentioned
Input the following command pressing Enter after every line net stop wuauserv net stop cryptSvc net stop bits net stop msiserver rename c:windowsSoftwareDistribution softwaredistribution.old net start wuauserv net start cryptSvc net start bits net start msiserver exit
Restart the PC and run the updater if it works again.
Solution 4: Restart Windows Update Services
Press the Windows logo key and R together to open Run -> Input services.msc -> and press Enter
Search for the Windows Update service -> Check its status
If it is not indicated, right-click on the service and select Start to force start your Windows Update
If you see an error, locate the Startup Type option and set it to Automatic
Now you should reboot your computer and see if your Windows Update is OK
Solution 5: Fix Registry Issues
If after all the aforementioned solutions, you still experience problems with Windows Update, the problem may lie in the registry that is either damaged or corrupted. You may choose to do manual editing of your Windows registry by opening your Windows registry editor. But doing so is risky as one wrong letter may do incalculable damage to your system. To do so safely for more inexperienced users., we recommend using a third-party registry cleaner/tools, many of which can be found online.
Kernel_Data_Inpage_Error is a BSOD (blue screen of death) error.
Also, know as a 0x0000007A Stop error. This bug check indicates that the requested page of kernel data from the paging file failed to be read into memory. In simple words, this means that Windows has trouble reading from the memory.
This can apply to both kinds of memory: stored memory on your hard drive and also the dynamic memory in your RAM.
The Kernel_Data_Inpage_Error turns your computer screen all blue, stops the program being executed, and sometimes even leads to abrupt system shut down.
Error Causes
Kernel_Data_Inpage_Error may occur due to numerous reasons. The exact cause of this error can easily be found by going through the code displayed in the parameter of 0x00000007A.
Let’s take a look at Kernel_Data_Inpage_Error parameter codes and the underlying causes of its occurrence:
0xC0000009A- This parameter code triggers missing nonpaged pool resources
0xC0000009C- This represents the installed hard disk drive has bad sectors.
0xC0000000E- This indicates a hardware failure or an incorrect drive configuration
Further Information and Manual Repair
No matter what the cause for Kernel_Data_Inpage_Error may be, it is advisable to fix it immediately as blue screen of death error codes are considered to be critical PC errors that can cause serious damages and even result in valuable data loss.
Here are a couple of ways to repair this issue on your system:
1. Call the ‘Chkdsk’ (check disk) command on your system.
Windows XP, Vista, and 7 users can call this command, by pressing Windows Key +F and type in ‘chkdsk’ and run.
However, you can’t run it while actively using Windows but you can always schedule it to start automatically the next time your computer turns on. Wrap up what you need and then reboot. Chkdsk disk checking process can take a long time, especially on large and slow hard drives.
To run this command on Windows 8, open Windows search by pressing Windows Key+ F and then type ‘cmd’. Then right-click on the command prompt and choose the option ‘Run as Administrator’.
To continue with the disk checking process, here you will be prompted to provide your administrator authentication.
Once you insert the administrator authentication, type the command ‘Chkdsk C:/f/r/x” where the letter ‘C’ indicates the drive you want to examine and repair. Run it to scan for Kernel_Data_Inpage_Errors on your system. Chkdsk command will detect and repair errors on the hard drive and then automatically reboot.
Limitations to this Solution:
‘Chkdsk’ is a value-adding inbuilt disk checking tool in PC new Window versions; nonetheless, this command has certain limitations.
It is time-consuming. You may have to wait for a long time for it to scan your system. Also when disk check is running, you will have to stop all other activities on your system. Furthermore, Chkdsk does not scan and fix all registry errors and other PC-related errors.
So, you can’t be 100% sure that it will resolve all the Kernel_Data_Inpage_Errors on your PC.
NVIDIA is undeniably the market leader as a Graphics Card manufacturer. Recently, NVIDIA came about a feature known as NVIDIA Share. This feature allows users to carry out a number of tasks such as streaming, recording, and sharing their gameplay with other users. NVIDIA Share allows users to take multiple snapshots of the gameplay which brings in capabilities to get the memories of the moments that happen during an awesome game. However, as of late, there were reports that NVIDIA Share is not working or responding. So if you are one of the users who are currently facing this issue, then read on as this post will guide you in resolving it. Make sure to follow the options given below carefully for a successful result.
Option 1 – Try to update the drivers from the official site of NVIDIA
The first thing you can do is to update the drivers from the official site of NVIDIA. And in case you don’t know the type of Nvidia graphics card that your computer is on, follow the steps below:
Tap the Win + R keys to open the Run dialog box.
Next type in “dxdiag” in the field and click OK or hit Enter to open the DirectX Diagnostic Tool.
From there, you can see what type of Nvidia graphics card that your system is on.
Take note of your graphics card information and then look for the best drivers for your operating system. Once you’ve downloaded and installed the file, restart your PC.
Option 2 – Try to roll back the driver to the previous version
If the first option didn’t work for you, then it’s time to roll back the device drivers. It is most likely that after you updated your Windows computer that your driver also needs a refresh.
Tap the Win + R keys to launch the Run window and then type in the “msc” command and hit Enter to open the Device Manager window.
Under the Device Manager, you will see a list of drivers. From there, look for the NVIDIA Drivers and expand them.
Next, select the driver entries that are labeled appropriately.
Then select each one of them and double click to open a new mini window.
After that, make sure that you’re on the Driver tab and if you are not, just navigate to it then click the Roll Back Driver button to switch back to the previous version of the NVIDIA Drivers.
Now restart your computer to successfully apply the changes made.
Option 3 – Try disabling NVIDIA Share
If the first two options given above didn’t work then you might want to try disabling NVIDIA Share. In case you didn’t make any modifications to the driver, chances are either your driver is out of date or there are some issues with the installation of the drivers. For you to find out, you need to first check if your NVIDIA drivers are really up to date. Once you’ve confirmed it, you can now disable the NVIDIA Share feature. Just refer to the steps below to do that.
Search for the NVIDIA GeForce Experience in the search box and then click on the appropriate result to open it.
After you open the NVIDIA GeForce Experience, go to the General tab.
Next, scroll down to the NVIDIA Share section and then select the toggle to turn off this feature.
Now restart your computer and try to check if there are any updates available for the NVIDIA Graphics card and install them again if there are any.
Disk partitioning is a concept that’s been around for so long, but is still only familiar to few. If done right, it can help get your computer in perfect order.
Today we bring you a simple definition of disk partitioning, its pros and cons, and a quick tip on how to do it properly to reap its full benefit!
Definition and purpose
The simplest way to define disk partitioning would be: it’s exactly what it sounds like. It means taking a hard disk drive and separating it into different segments. These segments are called partitions. You can visualize it as cutting a cake into smaller pieces - not necessarily of the same size, though.
So what is the purpose of these pieces?
Well, when you first get a hard drive, it’s basically just a bunch of unallocated storage space. Until there’s at least one partition, this space is unusable to your operating system. Once you create a partition, your OS will recognize it as usable storage space.
You can choose to create a single partition and use it for all your files, from program files to personal data. A lot of off-the-shelf computers come with one primary partition like this and a small secondary one reserved for recovery purposes.
Whether or not you want to split your disk into more than one segment is up to you. We would generally recommend it, though. The whole point of partitioning is for each segment to have its own purpose.
So treating all your storage space as a single unit containing different file types would be like constructing an office building with only one massive room for everything - day-to-day work, conferences, interviews, etc. And all of this for different departments of the company. You can see how this might get a little messy.
Creating multiple partitions eliminates the task of running several different types of files from the same place. This takes a heavy load off the entire process of accessing data.
Disk partitioning also brings a ton of other benefits to the table. An important disclaimer, though: there are disadvantages too. We will walk you through both sides to help you get an objective idea and make an informed decision.
Source: Kina on Unsplash
What are the benefits of disk partitioning?
1. Better file organization
This is the most obvious and perhaps the biggest advantage of partitioning your hard drive.
As we already mentioned, partitioning allows you to create separate segments for different file and data types. You wouldn’t want to use the same partition for your system files and for games, would you?
If organization and time management are important to you, then multiple partitions are the right solution. Searching for specific files will be much easier overall. Say you have one hard drive, but three partitions: C for the system files alone, D for multimedia files and documents, and E for games and apps. Your computer loads the system from C without interference from the other two, and you know exactly where to look when searching for a file.
2. Easy reinstallation
File management isn’t the only thing made faster and simpler thanks to partitioning. If you opt for creating multiple segments on your drive, reinstalling Windows will be easy peasy.
That’s because all you need to do is format the partition your system is on. Then you reinstall the OS on it, and there you go. Now you have a clean installation, with all your files saved on other partitions intact. You can even make a copy of your system partition, so you can revisit the exact same installation in the future if you want. And the whole time your pictures, music, documents stay exactly where you left them.
Source: Andrew M on Unsplash
3. Possibility of using multiple file systems
By now you’ve understood that partitions function completely separately. This means that, if for some reason you need multiple file system capabilities, partitioning will allow that.
One segment could be used for, say, an NTFS file system, while another could run ext or APFS.
4. Running different OSes
You’re an avid Windows user but need to use Linux on the side? No problem. You don’t need to buy a separate computer or anything. The possibility of running different file systems also means you can use partitioning to run multiple operating systems.
Doesn’t that sound enticing? One machine for multiple totally different uses!
5. Backup and recovery made simple
Data loss can happen on any disk, partitioned or not. However, it’s much easier to get it back on a partitioned one. You know where you stored what, and each partition can be backed up exactly as it is. It’s also a lot faster to back up single partitions than entire hard drives.
Ultimately this also means a faster path to recovery. If you lose or accidentally delete important files and data, you might want to use a recovery tool like Recuva to scan for them and get them back. Recuva is even powerful enough to recover data from damaged hard drives. But no matter how powerful, scanning a whole drive is strenuous for any recovery tool. Scanning independent partitions is a lot more convenient than that, and will get you to your goal more efficiently.
6. Optimized performance
Now, let’s keep in mind that computer performance is influenced by a number of factors. Partitioning alone isn’t what makes it better or worse. However, it can contribute to optimization. It’s easier for your computer to scan, say, a 40 GB partition to fetch the system file it needs than scanning the entire capacity of your drive.
7. Improved security (possibly*)
Separate partitions can help make your system more secure. Firstly, they minimize file corruption. If one partition gets corrupted, the others should remain unaffected. And keeping in mind the previous point about backup and recovery, ‘fixing’ the damaged partition would be much easier than fixing the entire hard drive.
Partitioning also improves security in terms of malware protection. A malicious attack on one partition is easier to deal with than malware on the whole drive. If your system partition gets infected, you can simply reinstall your OS and that should do the trick.
*Do keep in mind that partitioning can’t defend you against more advanced attacks. So make sure not to give in to a false sense of security.
What are the disadvantages of partitioning?
1. Data is still vulnerable
Yes, it’s easier to back up and recover data from independent partitions. And yes, partitioning may help protect separated files and data to a higher degree. But remember: everything is still on a single physical drive. So while digital errors and issues may be easier to deal with on partitioned drives, physical damage obviously won’t be.
If your hard drive is destroyed in some way, all data on it will be gone. That’s why, if you have crucial files on your PC, it’s important to give them the proper backup treatment before it’s too late.
2. Disbalance of space
Allocating storage space on separate partitions may be a little more tricky than you think. You may fill up one partition a lot faster than another. So on one side you’re struggling with space, and on another you have too much of it to spare. Imagine nearly filling up your system partition and then it turns out you need a lot more space for its updates than you thought.
That’s why you really have to be sure you actually have enough files of different types that you need help managing efficiently. Otherwise you’ll just create a struggle and disbalance in terms of storage.
3. Increased risk of error
If done incorrectly, partitioning can lead to more harm than good. Aside from space disbalance, there is an increased risk of incorrect partition sizes and formatting. Plus, human error is also a factor: in a moment of distraction, you may erase one partition when you meant another. Undoing such mistakes will definitely be tedious and time-consuming.
4. SSDs eliminate the need of partitioning
SSDs (solid-state drives) don’t function in the same way that HDDs do. They have faster read times and can organize files on their own. This quite literally eliminates the need for organization on your part.
Partitioning: yes or no?
The bottom line is that multiple partitions might not be necessary for the average user. But if you’re planning on storing many file types or different file and operating systems on the same PC, then you should give it a shot. It’s also an excellent solution for businesses, of course.
And if our pros and cons list isn’t enough to help you decide, you can always send us a message and we’ll help you make the right choice.
Decided to partition your hard drive?
If you’ve decided to give it a go, you definitely should make sure to do it right.
The two most effective and reliable ways to partition are using the built-in options on Windows or investing in a dedicated partitioning tool, like the EaseUS Partition Master. Which one you'll opt for depends on your specific needs.
Option 1 may be more suitable for users with at least some level of experience. In this case, you’d have to know exactly which steps to take without making errors. This is done in Disk Management on Windows 10/11. From there, you can select the partitions you’d like to split into different volumes of selected sizes.
If this is your first time partitioning, we highly suggest you either consult professionals for this or move on to option 2. The EaseUS partitioning software is specifically designed for beginners, with an intuitive interface helping you succeed in the process. All you need to do is pick the Partition Master package tailored to your needs and follow their guide.
Each package offers technical support as well, and even free upgrades (to varying degrees based on your subscription). Plus, all of this is valid for not one, but two PCs.
It’s the perfect solution for a smooth and error-free partitioning process. If you want to organize your hard drives efficiently and make the most of all your space without doing irreparable damage, it’s definitely worth the investment.
If you are trying to install or reinstall a program on your Windows 10 computer but encountered an error instead that says, “Fatal error, Installation fails, Installation ended prematurely because of an error”, then you’ve come to the right place as this post will guide you how you can fix it.
This kind of error is most likely caused by some files that may have been left behind by the previous installation of the program. Each time a program is uninstalled, it leaves behind its files and if the uninstallation process wasn’t completed properly, then it would result in errors like the
“Fatal error, Installation fails, Installation ended prematurely because of an error”.
Moreover, this kind of error is a generic one that can also occur with any software reinstallation or installation. And to fix this error, there are several suggestions you must check out. You can try to install or reinstall the program in a Clean Boot State or restart the Windows Installer Service. You could also try to re-register the Windows Installer Service or re-register the VBScript.dll file.
Option 1 – Install or reinstall the program in a Clean Boot State
It is possible that there are some third-party applications in your computer that are preventing the program from getting installed and to isolate this possibility, you need to boot your computer in a Clean Boot State and then try installing the program again. Putting your computer in this state can help you identify which program is the culprit and thus isolates the problem. In a Clean Boot state, your computer will start using only the pre-selected minimal set of drivers and startup programs. Note that you have to disable and enable one process at a time.
Log onto your PC as an administrator.
Type in MSConfig in the Start Search to open the System Configuration utility.
From there, go to the General tab and click “Selective startup”.
Clear the “Load Startup items” checkbox and make sure that the “Load System Services” and “Use Original boot configuration” options are checked.
Next, click the Services tab and select the “Hide All Microsoft Services” checkbox.
Click Disable all.
Click on Apply/OK and restart your PC. (This will put your PC into a Clean Boot State. And configure Windows to use the usual startup, just simply undo the changes.)
After you’ve set your computer into a Clean Boot State, make sure that you’re signed in as administrator and then try to install the program again.
Option 2 – Try to restart the Windows Installer Service
The next thing you can do to fix the problem is to restart the Windows Installer Service. To do this, follow these steps:
Tap the Win + R keys to launch the Run utility and type “services.msc” in the field and then hit Enter to open the Windows Services Manager.
Next, look for the Windows Installer service among the list of services shown.
Once you found it, right-click on it and open its Properties.
From there, click on the Stop button and then click on the Start button.
But if it isn’t running, then just click on the Start button.
Option 3 – Try to unregister and re-register the Windows Installer Module
Tap the Win + R keys to open the Run dialog box.
Then type the “msiexec /unregister” command and hit Enter to unregister the Windows Installer Module.
Next, type the “msiexec /regserver” command and hit Enter to re-register the Windows Installer Module.
Now restart your computer and see if unregistering and re-registering the Windows Installer Module fixed the problem or not.
Option 4 – Try to re-register the vbscript.dll file
You may have to re-register the vbscript.dll file using the regsvr32.exe before you can successfully install the program and fix the error. The Regsvr32 tool is a command-line utility that can be used to register and un-register the OLE controls like DLL and ActiveX (OCX) control in the Windows operating system. Follow the steps below to use it.
Open Command Prompt as admin from the WinX menu.
Next, type regsvr32.exe vbscript.dll in the elevated Command Prompt and hit Enter to execute the command. This will re-register the affected DLL file using the Windows operating system tool, regsvr32.exe.
You should see a message saying, “DllRegisterServer in vbscript.dll succeeded” if the Regsvr32 tool was able to run successfully. After that, try to install the program again and see if it now works.
This error 80070490 code may occur when you try to update your PC either through the Microsoft Update website or with a Windows update. The error message is displayed in the following format:
Error 80070490 (Element not found)
Solution
Error Causes
Error Code 80070490 is triggered because of a couple of reasons. It indicates the file CBS Manifest that is needed to install Windows update is corrupt or damaged.
CBS (Component Based Servicing) Manifest is the file that is used to help your computer recognize various components inside your PC.
Another reason for error occurrence is registry corruption.
If the registry that stores all the information and activities performed is not cleaned frequently, the obsolete files saved in the registry like the junk files, bad entries and cookies eventually accumulate and corrupt it thereby generating such error codes.
Further Information and Manual Repair
Here are some effective and proven methods that you can try by yourself to resolve error code 80070490 on your PC.
Method 1 - Use the System Update Readiness Tool
Download the System Update Readiness Tool from the Windows website and run it on your PC.
This tool is designed to detect and scan for abnormalities and inconsistencies that could be preventing and causing problems during the system update.
Once you have downloaded and scanned your PC, try to install the updates again. If the error still persists, try other methods illustrated below.
Method 2 - Repair Windows
Here are the steps that you need to follow to repair Windows:
First, close all programs and then reboot your PC. Insert the Windows DVD into the computer’s disk drive and wait for the setup to begin.
If for any reason, the setup doesn’t start automatically, then don’t worry simply click start, then type Drive: setup.exe in the search box. Please note, in the drive insert the letter of your computer’s DVD drive for example D:setup.exe.
Now in the programs list, click setup.exe And then click install now.
After that click ‘go online to obtain the latest updates for installation’, if you are asked for the Windows Product Key, then simply type it to proceed.
In the ‘Which kind of Installation do you want?’ option, click Upgrade.
When the Windows installation is complete, restart your PC and then run Windows update.
Method 3 - Clean the Registry
If the cause of error code 80070490 on your PC is related to registry corruption, then it is advisable to download Restoro. This is an advanced and easy-to-use PC Repair Tool embedded with a registry cleaner.
The registry cleaner scans your entire PC, removes all obsolete and unnecessary files corrupting the registry, and cleans it right away.
Click here to download Restoro to repair error code 80070490
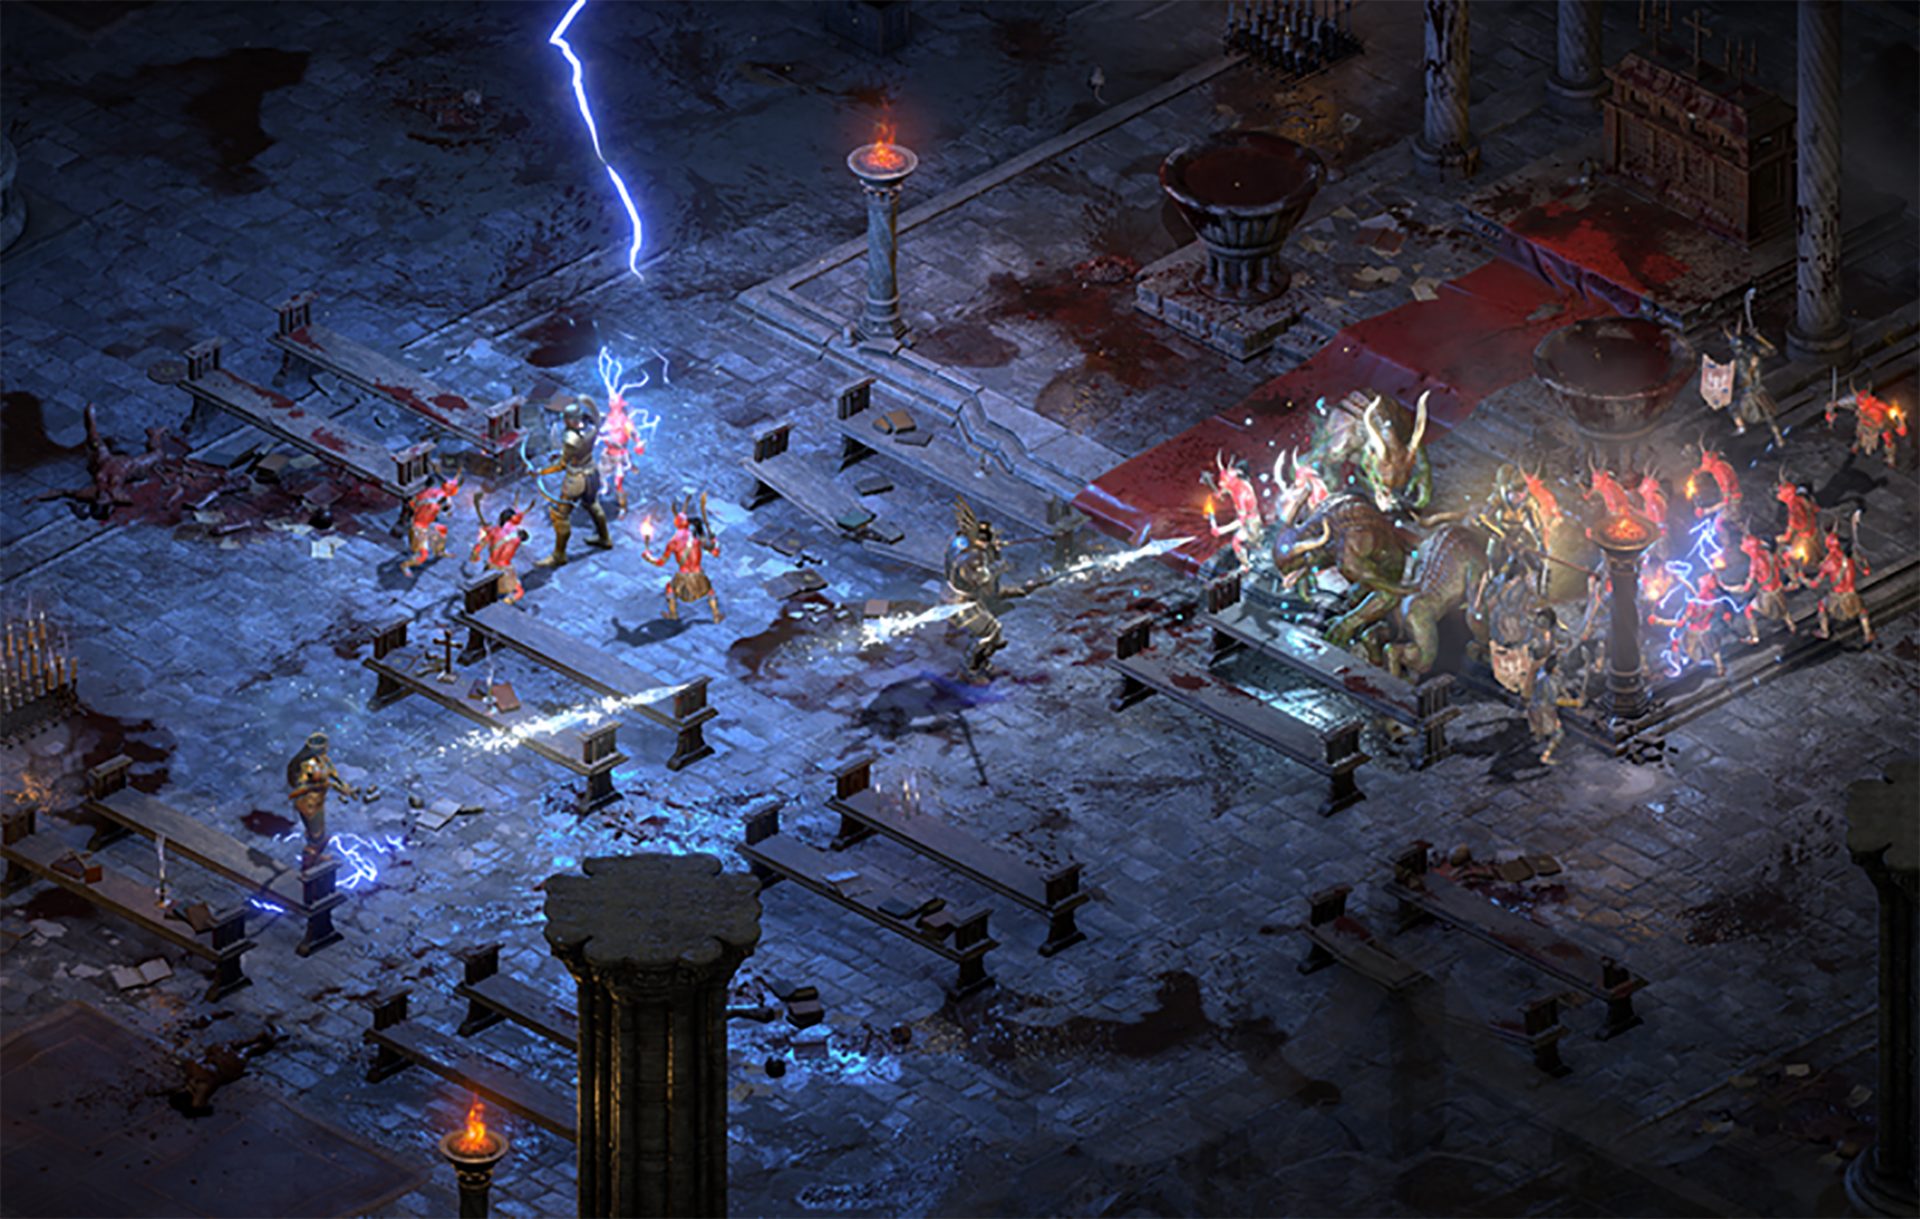
Diablo 2 resurrected has hit official release and servers seem to be finally taken care of and everything seems to be running smoothly now. The game also received great praise from gamers and attracted old players of the original Diablo 2 game.
Speaking of old players of old Diablo 2, they can transfer their old characters into remaster and continue playing them within this new great HD environment. There are some steps and requirements but we are here to help and transferred characters will bring full stash, inventory, and equipped items with them.
Requirements
There are not many requirements for this transfer to occur but they must be respected in order to be successful. The first thing is a minor requirement and somewhat annoying but it needs to be done, firstly fire up Diablo 2 resurrected and create a character, any kind of character with any kind of name, any kind of class. This strange requirement is to actually create a character folder and register it inside D2 resurrected so we can copy old ones there.
The second requirement will be that characters that you wish to be transferred must be offline characters. Old battle net online characters cannot be transferred at this moment and probably will not be in the future as well. So for all of you that wish to transfer online characters, bad luck, for the rest of us casuals playing offline single-player mode, we can enjoy our characters.
Process of diablo 2 character trasfer
The process itself of transferring characters when previously mentioned requirements are met is just a simple and copy operation. If you have somewhere backed your characters go into your backup folder and copy files in c:\users\*current user*\saved games\*diablo 2 resurrected folder*
If you do not have characters backed up and just have old Diablo 2 installed and playing it, you can go to c:\users\*current user*\saved games\*diablo 2 folder* and just copy all characters files into c:\users\*current user*\saved games\*diablo 2 resurrected folder*
Your old characters end with .d2s extension, grab all that you want to transfer, and copy them into D2R. Take note that copied characters cannot be brought back into Diablo 2, once they are copied into Diablo 2 resurrected all further progress on them will be tied to the new game.
Conclusion
That’s it about the transfer process and requirements for it. Fire up the new game version and enjoy.
Browsing the internet doesn’t always go smoothly, you might encounter ads, pop-ups, viruses, malware, and even errors. In this post, we’ll walk you through how you can fix the 502 Bad Gateway error that you might encounter in browsing the internet. This kind of error suggests the server which is the one that’s acting as a gateway to facilitate in taking your request to the server and bring some response back has received an invalid response or even no response at all. It could be that the connection is broken or that there is an issue on the server-side that returns an invalid response. Even though the 502 Bad Gateway error is a server-related error, there are still a few things you can try that might help resolve it, if tapping the Ctrl + F5 keys does not resolve the problem.
Keep in mind that it doesn’t matter what website you open as this error can appear on any website. To resolve the problem, you need to follow the options prepared below.
Option 1 – Check the network cable connections and restart your router
As with other connection problems, this is the most basic thing to do before you try other troubleshooting options because the root cause of the problem might be as simple as a cable not connected properly or a router that just needs to be restarted. Thus, checking the network cable connection to see if there is anything out of order can help as well as restarting your router.
Option 2 – Reset Winsock, TCP/IP & Flush DNS
Resetting Winsock, TCP/IP, and flushing DNS might help you resolve the issue. To do so, follow these steps:
Right-click on the Start button and click on Command Prompt (administrator) so you can pull up an elevated Command Prompt.
After that, execute each one of the commands listed below. And after you typed in one after the other, you have to hit Enter.
netsh winsock reset – type in this command to reset Winsock
netsh int ip reset resettcpip.txt – type in this command to reset TCP/IP
ipconfig /flushdns– type in this command to flush the DNS cache
Next, restart your PC and check if the problem’s fixed.
Option 3 – Change the DNS
Changing the DNS server for your network can also help you fix the 502 Bad Gateway error. You can use a public DNS like the Google Public DNS, Open DNS, Yandex DNS, Comodo Secure DNS, and many more. All you have to do is to override the default DNS settings on your PC so that you can specify which DNS server is used as well as which IP address should be used for a specific domain.
Option 4 – Try updating the Network Adapter Driver
Follow the steps below to update your Network Adapter Driver:
Tap the Win + R keys to launch the Run window and then type in the “devmgmt.msc” command and hit Enter to open the Device Manager window.
From there, expand the list of all the network drives and update each one of them.
Note: If updating the network drivers didn’t help in fixing the problem, you can also try to uninstall the very same drivers and restart your Windows 10 PC. After that, the system itself will reinstall the drivers you just uninstalled. Alternatively, you can also download and install the drivers from the manufacturer’s website directly.
Option 5 – Try a Network Reset
When all else fails, you might have to consider resetting your entire network settings. Simply follow the steps below to do so.
Click on the Start button and then click on the gear-like icon for Settings to open it.
Next, select Network and Internet.
Then scroll down and look for “Network Reset” – click on it and then click on the Reset now button.
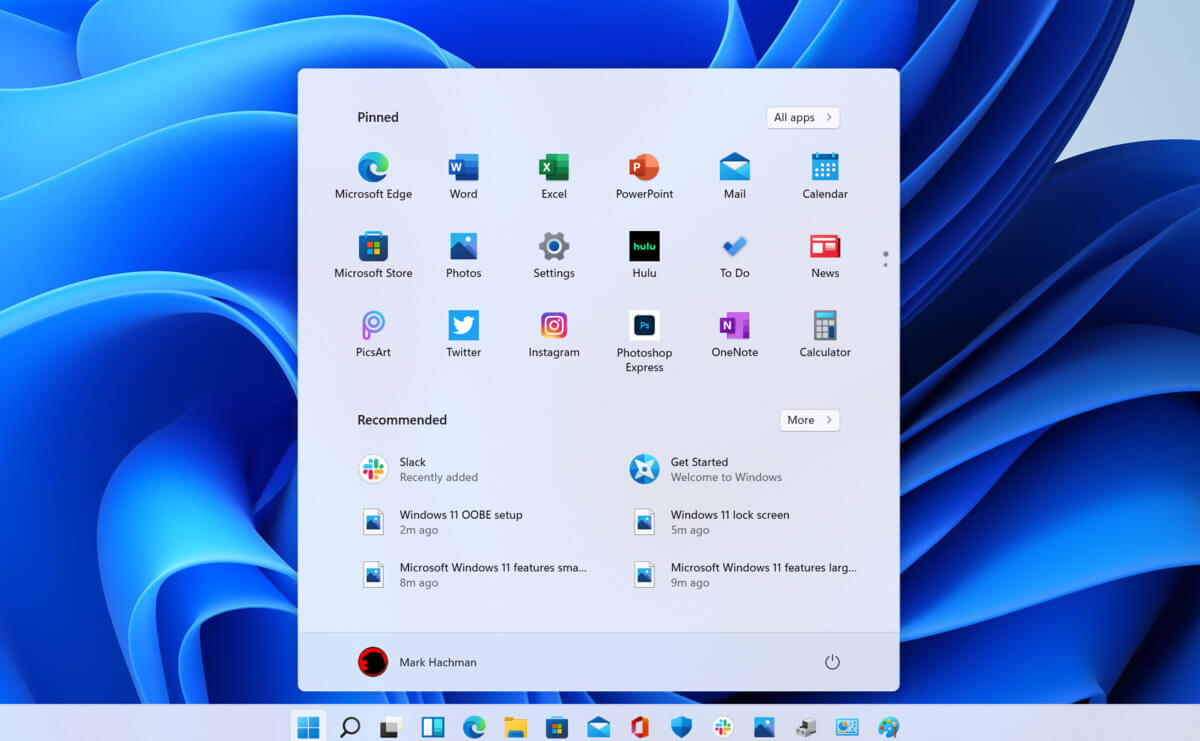
Windows 11 has brought some bad reviews for its inability to change the taskbar location to the screen. Luckily we can still hide it if needed.
In order to hide the taskbar from the screen follow these simple instructions:
Right-click the taskbar itself and select “Taskbar Settings” in the tiny menu that pops up or open Windows Settings and navigate to Personalization > Taskbar
Click on Taskbar Behaviors
Check the box next to Automatically hide the Taskbar
Close settings
As soon as you click on the box to hide the taskbar Windows 11 will apply your settings and hide the taskbar, you will get one line at the very bottom of the screen indicating that the taskbar is still present, just hidden.
When you reach the bottom of your screen with the mouse it will pop up and be visible again, just like in all Windows so far.
Intel announced that Pat Gelsinger (CEO) and Dr. Ann Kelleher (technology Department head) will discuss Intel’s process and packaging innovations on an upcoming webcast that will happen on July 26th.
The spokesman will talk and provide a deeper look at the process and packaging roadmaps for Intel. As we know Intel is planning to expand its production capabilities, outsource some of its technologies and offer foundry services to other chip design companies.
The strategy will also include a shift to a 7nm process and Intel’s effort to set itself again as leader of CPU performance by 2024.
There is also a chance that we will hear exact plans for Intel in the next three or four years.
Intel didn't reveal much else about what Gelsinger and Kelleher plan to discuss during the webcast. The event will be streamed on July 26 at 2 pm PT via the Intel Newsroom; it will also be available to watch on-demand after the stream ends.
DriverPro is a program developed by PC Utilities Pro. This program is often found bundled in other installations.
From the author: PC Utilities Pro is a leading software development company founded in 2009. As a group of young enthusiastic programmers, we constantly strive in creating powerful, yet easy-to-use solutions that would enable even the most basic computer users to keep their PCs running like new.
When installed, DriverPro will add registry entries for the current user that allow it to run each time to computer is started. It will also add a scheduled task in Windows, that allows it to run at various times. The optimizing nature of the application allows it to access any file and information on your computer without your knowledge.
Multiple anti-virus programs have marked this application as a Potentially Unwanted Program, and it is not recommended to keep it on your computer.
About Potentially Unwanted Applications
Have you ever discovered an unwanted program running on your PC and wondered exactly how the heck it got there? A PUA / PUP (potentially unwanted application / potentially unwanted program) is a software program that comes bundled with freeware/shareware and you agree to install on your computer. These are programs you certainly don’t want on your computer since it doesn’t provide any useful service.
Despite being regarded very dangerous, PUPs aren’t necessarily computer viruses or malware What makes a PUP different from malware is the fact that whenever you download one, you are doing it with your consent – though in most instances unwittingly and unwillingly. PUPs might not be malware but still, they’re harmful programs to your computer. At best, these unwanted applications provide hardly any benefit, and at worst, they could be quite damaging to your computer.
What do PUPs do on your computer, really?
Most Potentially Unwanted Programs will come in the form of adware, which typically aims to exhibit numerous irritating pop-up ads, banners, coupons, and bargains on websites you go to. PUPs that come as browser add-ons and toolbars are readily identifiable. They’ll track your online activities, redirect your search results to unsafe websites where spyware and adware can be downloaded, hijack your home page, and slow your internet browser down to a crawl.
PUPs load up a dangerous bite if kept unchecked. They will often include things like information gathering program code which could gather and send your sensitive information back to 3rd parties. These are programs that don’t really do anything good for you; in addition to occupying space on the hard drive, they also slow down your PC, often alter settings without your authorization, the list of annoying features goes on and on.
Great tips on protecting yourself from unwanted software
• When setting up anything on your computer system, always study the fine print, like the license agreement. Don’t accept terms of use that are for bundled programs.• Only Use the “custom” or “manual” install method – and never blindly click Next, Next, Next.• Use an advert blocker/pop-up blocker; Install anti-malware products such as Safebytes Anti-malware. These software programs could establish a wall between the computer and cybercriminals.• Think twice before you decide to download any type of freeware or shareware. Just before adding a plug-in or web browser extension, think about whether it is really necessary.• Only download programs from the original providers’ websites. Avoid download portals because they use their very own download manager to pack extra programs along with the initial download.
Help! Malware Blocking Anti-virus Installation And Access To The Web
All malware is bad, but certain kinds of malicious software do a lot more damage to your computer than others. Some malware is meant to hinder or block things that you wish to do on your computer. It may well not allow you to download anything from the net or it will stop you from accessing some or all websites, particularly the anti-malware sites. So what you should do if malware prevents you from downloading or installing Safebytes Anti-Malware? Do as instructed below to get rid of the malware in alternate ways.
Get rid of malware in Safe Mode
The Windows operating system has a special mode known as “Safe Mode” where just the bare minimum required programs and services are loaded. In the event, the virus is set to load automatically when the PC starts, shifting to this mode may well prevent it from doing so. To start the computer into Safe Mode, press the “F8” key on the keyboard just before the Windows boot screen appears; Or right after normal Windows boot up, run MSConfig, check the Safe Boot under the Boot tab, and click Apply. After you restart into Safe Mode with Networking, you could download, install, and update the anti-malware program from there. Now, you are able to run the anti-virus scan to eliminate computer viruses and malware without any interference from another malicious application.
Switch to some other internet browser
Web-based viruses could be environment-specific, aiming for a particular internet browser or attacking particular versions of the browser. If you appear to have malware attached to Internet Explorer, then switch over to a different internet browser with built-in safety features, such as Firefox or Chrome, to download your favorite antivirus program – Safebytes.
Run anti-virus from your USB drive
Another way is to download and transfer an anti-malware program from a clean computer to run a scan on the affected system. Adopt these measures to run the anti-malware on the infected computer system.
1) On a clean computer, download and install Safebytes Anti-Malware.2) Plug the pen drive into the uninfected computer.3) Run the setup program by double-clicking the executable file of the downloaded application, which has a .exe file format.4) Select the USB flash drive as the location when the wizard asks you where you intend to install the software. Follow the activation instructions.5) Remove the flash drive. You may now utilize this portable antivirus on the infected computer.6) Run the Safebytes Anti-malware directly from the flash drive by double-clicking the icon.7) Press the “Scan” button to run a full system scan and remove viruses automatically.
Detect And Remove Viruses With SafeBytes Anti-Malware
Want to download the very best anti-malware software for your laptop or computer? There are many applications available that come in paid and free versions for Microsoft Windows computers. A few are worth your money, but many aren’t. You need to pick a company that creates industry-best antimalware and has earned a reputation as reliable. Among few good programs, SafeBytes Anti-Malware is the strongly recommended software for the security-conscious end user.
Safebytes is one of the well-established PC solutions firms, which provide this complete anti-malware software program. This software program can easily detect, remove, and protect your computer from the most advanced malware intrusions such as adware, spyware, trojan horses, ransomware, parasites, worms, PUPs, along with other potentially harmful software applications.
SafeBytes anti-malware offers a plethora of advanced features that set it apart from all others. The following are some of the good ones:
Real-time Protection: SafeBytes provides complete and real-time security for your personal machine. It will regularly monitor your computer for hacker activity and also gives users superior firewall protection.
Best AntiMalware Protection: This deep-cleaning anti-malware program goes much deeper than most antivirus tools to clean out your computer system. Its critically acclaimed virus engine finds and disables hard to remove malware that hides deep within your PC.
Web Protection: SafeBytes gives an instant safety rating about the web pages you are about to check out, automatically blocking unsafe sites and ensuring that you are certain of your safety while browsing the world wide web.
Fast Scan: SafeBytes Anti-Malware has a multi-thread scan algorithm that works up to 5x faster than any other antivirus software.
Very Low CPU and RAM Usage: This software program is not “heavy” on your computer’s resources, so you’ll not notice any overall performance problems when SafeBytes is operating in the background.
Fantastic Tech Support Team: You will get 24/7 technical assistance to promptly resolve any issue with your security application.
Technical Details and Manual Removal (Advanced Users)
To remove Driver Pro manually, navigate to the Add/Remove programs list in the Control Panel and choose the offending program you want to get rid of. For web browser plug-ins, go to your web browser’s Addon/Extension manager and select the add-on you want to remove or disable. You may also want to reset your web browser settings, as well as clear your web browser cache and cookies.
Lastly, check your hard disk for all of the following and clean your registry manually to remove leftover application entries after uninstalls. Please note that only professional computer users should try to manually edit the system files mainly because removing any single vital registry entry leads to a major problem or even a computer crash. Also, certain malware is capable of replicating itself or preventing its removal. Carrying out this in Safe Mode is suggested.


 Speaking of old players of old Diablo 2, they can transfer their old characters into remaster and continue playing them within this new great HD environment. There are some steps and requirements but we are here to help and transferred characters will bring full stash, inventory, and equipped items with them.
 Windows 11 has brought some bad reviews for its inability to change the taskbar location to the screen. Luckily we can still hide it if needed.
In order to hide the taskbar from the screen follow these simple instructions:
Windows 11 has brought some bad reviews for its inability to change the taskbar location to the screen. Luckily we can still hide it if needed.
In order to hide the taskbar from the screen follow these simple instructions:
 Intel announced that Pat Gelsinger (CEO) and Dr. Ann Kelleher (technology Department head) will discuss Intel’s process and packaging innovations on an upcoming webcast that will happen on July 26th.
The spokesman will talk and provide a deeper look at the process and packaging roadmaps for Intel. As we know Intel is planning to expand its production capabilities, outsource some of its technologies and offer foundry services to other chip design companies.
The strategy will also include a shift to a 7nm process and Intel’s effort to set itself again as leader of CPU performance by 2024.
There is also a chance that we will hear exact plans for Intel in the next three or four years.
Intel didn't reveal much else about what Gelsinger and Kelleher plan to discuss during the webcast. The event will be streamed on July 26 at 2 pm PT via the
Intel announced that Pat Gelsinger (CEO) and Dr. Ann Kelleher (technology Department head) will discuss Intel’s process and packaging innovations on an upcoming webcast that will happen on July 26th.
The spokesman will talk and provide a deeper look at the process and packaging roadmaps for Intel. As we know Intel is planning to expand its production capabilities, outsource some of its technologies and offer foundry services to other chip design companies.
The strategy will also include a shift to a 7nm process and Intel’s effort to set itself again as leader of CPU performance by 2024.
There is also a chance that we will hear exact plans for Intel in the next three or four years.
Intel didn't reveal much else about what Gelsinger and Kelleher plan to discuss during the webcast. The event will be streamed on July 26 at 2 pm PT via the