If you are testing your headphone or your speaker but all of a sudden encountered an error that says, “Failed to play test tone” in your Windows 10 computer, worry not for this post will walk you through how you can fix this problem.
The test tone is used to check the right-left balance of the headphones and speakers in your computer, however, if you are not able to use it, there are several options you can check out. You can try to run the Playing Audio troubleshooter or restart the services that are related to Windows Audio. Aside from these, you could also disable Audio Enhancements or you could also change the default test tone rate and bit depth.
Option 1 – Try to run the Playing Audio Troubleshooter
Since the Windows 10 operating system has the Playing Audio Troubleshooter, you can use this troubleshooter to try and fix the problem with the “No Audio Output Device is installed” error. You can access this tool in the Control Panel or in the Taskbar Search and even on the Troubleshooters page of Windows 10.
Run this troubleshooter and see if it can fix the issue or not.
Option 2 – Try to restart the Windows Audio-related services
The next thing you can do to fix the problem is to restart the services related to Windows Audio. Although the audio services start automatically on every system boot, there are times when they might fail to start. Thus, you can start these services manually by following these steps:
Tap the Win + R keys to launch the Run utility and type “services.msc” in the field and hit Enter to open the Services Manager.
Then look for the services named “Windows Audio” and “Windows Audio Endpoint Builder”.
Double click on each one of these services and check if their Service Status is set to Running or not and also check if the Startup Type is set to Automatic.
If none of the services are running, just click on the Start button and select the Automatic option from the drop-down menu.
Now click on the Apply and OK buttons to save the changes made and then check if the error is fixed.
Option 3 – Try to update the Audio driver
You might also want to consider updating or the Audio driver as it could help in fixing the error.
Tap the Win + R keys to open the Run dialog box and then type in devmgmt.msc and tap Enter or click OK to open the Device Manager.
Expand the section for the outdated device drivers.
And then select the outdated driver(s) and right-click on it/them.
From the drop-down menu, select the Update Driver option and follow the on-screen instructions to install the latest version of the driver.
Then also click on the option, “Search automatically for updated driver software.
Restart your PC after the installation.
Note: If updating or reinstalling the Audio driver didn’t work, you can go to the manufacturer’s website and look for the support section where you can download the drivers for your computer. You just need to take note of your PC’s correct model and model number so you can find the appropriate driver.
Option 4 – Try changing the default test tone rate and bit depth
Windows selects a default test tone rate and bit depth depending on your headphone or speaker. This allows you to look for the best sound quality from your audio output device. So if your headphone or speaker has some problems with the default settings, then it’s no wonder why you’re getting the “Failed to play test tone” error. To fix this, you can try to change the default test tone rate and bit depth by following the steps below.
First, you need to open the Windows Settings panel and then go to System > Sound.
Next, look for the Device properties option located on your right-hand side and click on it.
After that, select the Additional device properties option and go to the Advanced tab.
From there, select a different test tone rate and bit depth and then click on the Test button.
Once done, check if it was able to fix the problem or not.
Option 5 – Try disabling the Sound or Audio enhancements
To make your operating system’s specific hardware sound nothing but perfect, both Microsoft and third-party vendors have shipped audio enhancement packages which are usually referred to as “Audio Enhancements” in Windows 10. However, there are instances when instead of improving the sound or audio quality of your computer, it can cause problems so to fix the problem you need to turn off these audio enhancements. How? Simply follow the steps below.
Type in “Sound” in the taskbar search and then from the list of results, select “Sound Control Panel”.
After clicking Sound, the Sound properties box will pop up. From there, go to the Playback tab and right-click on the default device i.e. Speakers or Headphones then select Properties.
After that, the Speakers properties box will appear. From there, go to the Enhancements tab and select the checkbox for the “Disable all enhancements” option.
Error 0x0000001e is when you start the Windows XP Setup and you see a message which says something like:
STOP: 0x0000001E (0x80000003, 0xBFC0304, 0x0000000, 0x0000001)
Solution
Error Causes
You are most likely to face this error if you restart your PC while the Windows Setup is still under process and yet to complete.
Other causes of this error include any of the following conditions:
The drive on which you are installing Windows has insufficient disk space to accommodate the installation.
An incompatible or outdated third-party driver (or more) is installed on your PC which is conflicting with the installation. For instance, this could be a problematic video driver.
The system BIOS has incompatibilities with the installation.
Further Information and Manual Repair
This error is also called the “Bug check code”.
The STOP 0x1E signifies that there was an unknown or illegal processor instruction detected by the Windows XP kernel. You will see the exception address which shows up to indicate the root of the problem which is usually a driver or faulty hardware.
You should note this address down as well as the link date of the faulty driver or image which includes it.
If at any point it becomes impossible for you to handle and you end up contacting the Windows support center to help you out with the process then this information will help you out in making things a lot easier while the support team tries to troubleshoot the problem.
The parameters included in the STOP 0x1E error message are the following:
is the exception code which couldn’t be handled.
shows the module’s address where the exception took place.
signifies the exception’s parameter 0.
represents the exception’s parameter 1.
You can use this information which usually is provided in error 0x0000001e message to pinpoint the root cause of the problem and troubleshoot it.
In order to fix this error, you need to follow either one of the following procedures as needed according to your situation.
Clean Up Your Disk
If your disk doesn’t have ample space to accommodate the installation then you should free up some of the space on your disk to make sure the Windows can be installed on it.
You can also reinstall the Windows on another disk that has sufficient space.
Get Rid of the Third Party Driver
If the error 0x0000001e message gives you the name of the driver due to which the installation process is being halted, then get rid of that driver by disabling it or removing it.
If the problem is resolved by this then you should contact the manufacturer of the third-party driver and ask them about any newer versions of the driver that wouldn’t conflict with the installation of Windows.
Upgrade System BIOS
Upgrading your system BIOS is something that you can’t do on your own. You will need to find out more about how you can upgrade. For this, you should contact either your PC’s manufacturer or your motherboard’s manufacturer.
If nothing else works, you can always make use of the Microsoft Debugging Tools which will provide you ample information about the error message.
You will find the Debugging Tools and further information about them including the downloading and installation process on Microsoft’s website.
Updating your Windows 10 computer does not always go smoothly as there are some errors you can encounter along the way. One of these Windows Update errors is the error code of 0x80246008. This kind of error can occur during different phases of an update that’s being downloaded or installed and even when an update is being initialized.
If you narrow down the cause of this Windows Update error, you’ll most likely see that it is related to the deliverability of a file to a computer from the servers of Microsoft. In other words, the error might be due to conflicts from programs like Firewall as well as third party programs like Antivirus or it could also be due to corrupted disk image or system files or it could be that any of the supporting Windows Update components and services are not working properly. Whatever the cause may be, the potential fixes provided in this post can be applicable to Windows Updates as well as the Microsoft Store.
Refer to the suggestions provided below to resolve the Windows Update Error 0x80246008 but before you proceed, make sure that you create a System Restore point first.
Option 1 – Apply some tweak in the Windows Registry from Command Prompt
Tap the Win + X keys and select Command Prompt (Admin) to open Command Prompt with admin privileges.
Next, navigate to the root location of the bootable device inside the Command Prompt command line.
Once you’re in the root location, type the following command and tap Enter to execute it:
After that, close the Command Prompt command line and then tap the Win + R keys to open Run utility.
In the field, type “services.msc” and click OK or tap Enter to open the Windows Services Manager.
From there, look for the following services:
Windows Update – Manual (Triggered)
Background Intelligent Transfer Service – Manual
Now open their Properties and make sure that their Startup type is as mentioned above and that they are running. If they are not running, just click on the Start button.
Option 2 – Run the System File Checker Scan
If the registry tweak didn’t work, you can run a System File Checker scan instead. It is a built-in command-line utility that replaces bad and corrupted system files to good system files that might be the cause why you’re getting the error when you try updating your computer. To run the SFC command, follow the steps given below.
Tap Win + R to launch Run.
Type in cmd in the field and tap Enter.
After opening Command Prompt, type in sfc /scannow
The command will start a system scan which will take a few whiles before it finishes. Once it’s done, you could get the following results:
Windows Resource Protection did not find any integrity violations.
Windows Resource Protection found corrupt files and successfully repaired them.
Windows Resource Protection found corrupt files but was unable to fix some of them.
Restart your computer.
Option 3 – Run the Windows Update Troubleshooter
If the System File Checker wasn’t able to resolve the Windows Update error, you could also try running the Windows Update Troubleshooter as it could also help in fixing any issues related to Windows Update including this one. To run it, go to Settings and then select Troubleshoot from the options. From there, click on Windows Update and then click the “Run the troubleshooter” button. After that, follow the next on-screen instructions and you should be good to go.
Option 4 – Try to disable your antivirus program
Disabling the antivirus program or any security software installed in your computer is always a good idea you can try when the Windows Update process does not go smoothly. So before you try updating your computer again, make sure to disable the antivirus or security program and once the Windows Update is done, don’t forget to enable the antivirus program back again.
Option 5 – Try deleting the files from the SoftwareDistribution folder and resetting the Catroot2 folder
The downloaded Windows Updates are placed in a folder called “SoftwareDistribution”. The files downloaded in this folder are automatically deleted once the installation is completed. However, if the files are not clean up or if the installation is still pending, you can delete all the files in this folder after you pause the Windows Update service. For complete instructions, refer to the steps below.
Open the WinX Menu.
From there, open Command Prompt as admin.
Then type in the following command – don’t forget to hit Enter right after typing each one of them.
net stop wuauservnet start cryptSvcnet start bitsnet start msiserver
After entering these commands, it will stop the Windows Update Service, Background Intelligent Transfer Service (BITS), Cryptographic, and the MSI Installer
Next, go to the C:/Windows/SoftwareDistribution folder and get rid of all the folders and files thereby tapping the Ctrl + A keys to select them all and then click on Delete. Note that if the files are in use, you won’t be able to delete them.
After resetting the SoftwareDistribution folder, you need to reset the Catroot2 folder to restart the services you just stopped. To do that, follow these steps:
Type each one of the following commands.
net start wuauservnet start cryptSvcnet start bitsnet start msiserver
After that, exit Command Prompt and restart your computer.
If you encounter an error message saying, “The ordinal xxx could not be located in the dynamic link library C:/Program Files (x86)/Microsoft VS Code Insiderscode – insiders.exe“ and you see a reference of a missing DLL file, then this indicates that the software is trying to locate the related DLL file, however, it is missing, hence the error.
The error mentioned “Ordinal” which refers to the order of a number mathematically, e.g. 1st, 2nd, etc. And in this error message, the ordinal is referring to an Xth file of an XX.DLL file which is missing which is why you’re getting this kind of error.
When you get this particular error, it means that your computer is missing the Microsoft Visual C++ Redistributable program. As per the error message, XXX is a number that in turn is the Ordinal. There is also another common error related to Ordinal which says, “The ordinal 12404 could not be located in the dynamic link library mfc90u.dl”.
The error message could be referring to any DLL in the message. And since all these DLL files are part of the package, the error changes quite a bit as the Visual Studio looks for that DLL file. To fix this error, here are some suggestions that might be of help.
Option 1 – Try installing Microsoft Visual C++ Redistributable
As pointed out earlier, the error pops up when the Microsoft Visual C++ Redistributable program is missing on your computer. Thus, you need to download it from the official website of Microsoft. Once you’ve downloaded the Microsoft Visual C++ Feature Pack Redistributable Package, install it and then check if the error is now fixed.
Option 2 – Try to install OpenSSL
If you encounter the same error message but it points out that the LIBEAY32.DLL file is missing, then you have to install OpenSSL. In such a case, you will see the following error message:
“Ordinal not found. The Ordinal [Xxxx] could not be located in the Dynamic Link Library Libeay32.dll.”
Make sure that when you install OpenSSL, you do it into the Windows system directory since the Libeay32.dll file is related to security.
Option 3 – Try to check Windows Updates
There are instances when Microsoft rolls out the framework and related updates via Windows Updates. It could be that an update related to DLL is still pending which is why you need to check Windows Updates. To do so, go to Settings > Update and Security and from there check if there is any pending update. If there is, you need to install that update and then restart your computer if needed.
Jp2klib.dll is a type of Dynamic Link Library. This file is developed by Adobe Systems Inc and associated with CS2 (Creative Suite 2 Premium).
Like all DLL files, this file also contains small programs that support programs developed by Adobe Systems on your PC. The function of Jp2klib.dll is to load and run programs. Jp2klib.dll error occurs when it fails to do so.
It occurs during program startup.
Jp2klib.dll error is displayed in several different formats depending on the cause of the error. Here are some common error messages that you may come across:
"JP2KLib.dll not found."
"Cannot find C:\WindowsSystem32\JP2KLib.dll."
"Cannot start Creative Suite 2 Premium. A required component is missing: JP2KLib.dll. Please install Creative Suite 2 Premium again."
"Cannot register JP2KLib.dll."
"The file JP2KLib.dll is missing."
"This application failed to start because JP2KLib.dll was not found. Re-installing the application may fix this problem."
JP2KLib.dll Access Violation."
Solution
Error Causes
There are several causes for the Jp2klib.dll error code pop-up. These include:
Hardware failure
Jp2klib.dll file not properly registered
Viral infection
Deleted, missing, or corrupted Jp2klib.dll file
Registry problems
Another program overwrote the Jp2klib.dll file
The good news is that this is not a fatal error code like the blue screen of death errors. However, it is still advisable to resolve it right away to avoid inconvenience. This error may limit your ability to access your desired program.
Further Information and Manual Repair
Follow these methods to resolve Jp2klib.dll error code on your PC in a few minutes without any professional assistance or technical know-how:
Method 1 - Re-register the Jp2klib.dll file
Sometimes Jp2klib.dll error may occur if the DLL file is not registered properly. In such a situation "JP2KLib.dll not registered" error message will pop on your computer screen.
To resolve, all you need to do is register this file. Follow these steps to register the Jp2klib.dll file on your PC:
Go to the start menu, type the command in the search box. Don’t press enter yet.
First, hold CTRL-SHIFT and then press it. This action will prompt a permission dialog box. Click yes to proceed.
You will be asked to enter a command, here simply type regsvr32 /u JP2KLib.dll and then press enter.
This will first unregister the previous Jp2klib.dll file. Now type regsvr32 /i JP2KLib.dll and press enter to re-register the same file.
After this, close the command window and reboot your PC to activate changes.
Method 2 - Check the Recycle Bin and Restore the Jp2klib.dll file
If you come across this error message "JP2KLib.dll not found”, this indicates a missing Jp2klib.dll file.
This usually happens if you recently uninstalled a program on your system which was also supported by the Jp2klib.dll file due to which the file was also deleted. But don’t worry!
Check your recycle bin to retrieve the accidentally deleted file on your system. If you find it restore, but if you don’t then simply download it from a reliable DLL website.
Method 3 - Scan for Viruses
Install and run an antivirus to detect viruses. Viruses are malicious programs that damage and corrupt DLL files like the Jp2klib.dll file. Scan for all viruses on your PC and remove them to fix the problem.
Method 4 - Repair the Registry
If you don’t clean the registry often it becomes accumulated with obsolete files like bad and broken entries, cookies, and junk files.
These files corrupt the registry and damage system and DLL files also stored in the same location. It then leads to such error message pop-ups.
To resolve, download Restoro. This is an advanced PC Fixer deployed with a registry cleaner. It is easy to use and in just a few clicks can repair the Jp2klib.dll error on your PC. The registry cleaner scans and removes all obsolete files. It cleans the registry and repairs the damaged system and DLL files.
Click here to download Total System Care and fix the Jp2klib.dll error.
It really sucks when you can’t fully enjoy the newest version of your favorite OS.
Windows 11 is still relatively fresh and consequently has some annoying little bugs that really ruin our experience. The good news is that you’re not alone and most of them are easy to fix.
Here are 5 commonly reported Windows 11 issues and what you can do to get rid of them.
1. Windows 11 audio problems
One of the absolute most irritating things in the world is struggling with the sound on your computer. Windows 11 users have reported facing the issue of low or no sound. If you’re currently experiencing the same frustration, you can be relieved. Chances are fixing it will only take a few minutes.
The first thing to check would be whether you accidentally muted your device by pressing the mute button on your keyboard. Yes, we know it sounds a lot like the old “have you tried turning it off and on again?” But it’s important to leave no stone unturned, and the most obvious things are usually the ones we easily overlook.
Moreover, if you have several audio output sources, check whether the right one is selected. You can do this via the Action Center or through Settings. If you want to use the same source every time, we also recommend you set it as the default one.
It’s also important to have a good, up-to-date audio driver. More often than not, this will be the true cause of your audio struggles. Make sure to update your driver, and if that doesn’t work out, you can always un- and reinstall it or install a different one.
Lastly, if all attempts remain unsuccessful, run the audio troubleshooter to figure out what’s actually going wrong.
2. Unable to find files
Such a powerful new operating system, yet it can’t seem to do the simplest thing imaginable? The File Explorer not responding on Windows 11 is one of the most frustrating and most common problems with Microsoft’s newest iteration of its awesome OS.
However, 9/10 times it can be fixed by simply restarting your PC. You could also try killing the Windows Explorer process in the Task Manager and then rerunning it.
If these don’t help, check whether there are any pending Windows 11 updates. A single missing update can compromise your PC’s functionality, so always make sure to install them all on time.
Should none of that work, then there are other ways to solve the File Explorer problem. However, then the issue is probably a bit deeper and it’s no longer in the ‘easy fix’ territory.
3. Start menu not working
Just like the File Explorer, the Start menu is a fundamental element of your OS. So, it’s only natural that its malfunction grinds your gears. It may be more customizable than on previous Windows versions, but it doesn’t always work smoothly.
If you’re facing the so-called Start menu critical error, there are a few things this could be caused by. Usually it means you turned off your system while an important update was still being installed, there is a corrupt file on your PC, or Windows forcefully stopped a program.
Whatever the reason, the solution should be pretty simple. Try the basic steps: restarting your File Explorer (like we explained above) and signing out and back into your account. If that doesn’t do anything, you may want to try uninstalling third-party start menu apps (if you have any), since they can interfere with your default programs’ functionality.
Now, those are the easy fixes. If you get nowhere with them, you might need to identify the root cause and search for more complex solutions than that.
4. Snipping tool not working
Our beloved screenshot tool was introduced with Windows 10 and Microsoft decided to keep it. However, you were probably just as disappointed as us when you tried to run it and failed.
Normally, this can be fixed by installing the latest Out-of-band (OOB) update, or even pending updates in general. Even if your system appears to be up-to-date, run the checker just in case.
Another cool thing Windows 11 lets you do is ‘Repair’ and ‘Reset’, which is the easiest way to troubleshoot your Snipping tool. If this fails, you can also try the good old un- and reinstall method. Simply uninstall the tool through the Control Panel and reinstall it from the Microsoft Store.
Furthermore, in the case of an upgrade from Windows 10 to 11, it may be that the old Snipping tool version is interfering with the launch of the new one. If you don’t care that much about the additional options available with the enhanced screenshot tool, you can use the old version instead.
Simply go to your C Drive, find the Windows.old folder, search for the tool and open it from there. Make sure to pin it to your taskbar as well, if you know you’re going to use it often.
5. Can’t install the latest update
The latest Windows 11 version, 22H2, has brought tons of enhancements to our dearest operating system. Unfortunately, a lot of users still haven’t had the opportunity to experience it. A mere update of your OS version should be the one thing that goes smoothly, but sometimes that’s not the case.
Failure to install 22H2 can be caused by a few things. Most commonly, the issue is caused by lack of storage space or corrupted files, but there could be other culprits.
There are a couple of things you could try. For example, it’s crucial that your drivers be up-to-date and some important services be enabled. These are: Windows Modules Installer, Background Intelligent Transfer Service, Cryptographic Service, Windows Update services.
To enable them, search ‘Services’, find the service you need and right-click on it. Open ‘Properties’ and select the startup type ‘Automatic’.
It may also be necessary to unplug all peripherals that aren’t crucial and disable third-party antivirus tools until after the update is finished.
Ultimately, you can run the Windows Update troubleshooter to detect and fix other possible issues.
Summary
Tiny bugs like these are nothing out of the ordinary. That said, we still all hate when they happen.
Hopefully some of our solutions have helped you to a smoother Windows 11 experience. But if you’re still struggling, feel free to reach out to us. We’d be happy to help!
Blue screen locale id 1033 error as the name suggests, is a type of BSoD error. This error may occur during Windows startup, program load, or while the program is running. The error indicates poor PC maintenance and occurs without any warning.
The error message is prompted in the following format:
Problem signature: Problem Event Name: BlueScreen OS Version: 6.0.6002.2.2.0.16.7 Locale ID: 1033
When the error occurs, the computer screen turns blue and the user is unable to view or access the program. It is advisable to fix the error right away, virtually because BSoD is a critical PC error, it can pose serious threats to your system.
Error Causes
The two most common causes of the occurrence of the Blue Screen Locale ID1033 error code are:
Registry issues
Viral infection
Further Information and Manual Repair
You don’t need to hire a technician or be a computer whiz to resolve Blue Screen Locale ID1033 error code. Here are some methods that you can try to resolve this error on your PC. These methods are easy to perform and result-driven.
Method 1: Perform a PC Scan by Downloading an Anti-Virus
Since this error is indicative of a viral infection, it is suggested you perform a PC scan by installing an antivirus on your system. Make sure you download an antivirus that is powerful and has the ability to scan all kinds of viruses.
Method 2: Clean and Repair the Registry
Another alternative method is to clean and repair the registry.
The Registry is a component of the PC that stores all information and activities performed on the PC. This includes both important and unnecessary files like junk files, cookies, internet history, temporary files, invalid entries, bad registry keys, and more.
These files not only accumulate in the registry but also damage and corrupt it thereby generating error codes like the Blue Screen Locale ID1033 error code.
Booting Windows 10 in safe mode can solve many issues with your computer since Windows will boot just in its basic core and you can safely maintain it, find a solution for issues, etc.
Before, entering safe mode was easy and pretty straightforward, during Windows evolution, entering safe mode was somewhat complicated and not being made so directly like once it was but do not worry. Starting Windows in safe mode today is even maybe easier than it was before, it is just not so obvious as it once was.
In this article, we will go through several ways how you can boot up Windows in safe mode in order to solve whatever issue is troubling you.
Start safe mode from settings
Open Settings by pressing the ⊞ WINDOWS + I or by just clicking on the Start button and clicking Settings.
Go to Update & Security, then Recovery.
In Advanced startup, click Restart now.
Once your PC reboots, click Troubleshoot, then Advanced options. Select Startup Settings then Restart.
Go to safe screen from Sign-in screen
Click the Shift on your keyboard while clicking on the Power button on the bottom right corner of the screen.
Once your PC restarts, click on Troubleshoot, then Advanced options.
Select Startup Settings then Restart.
After the reboot, select 4 or the F4 on your keyboard to run in Safe Mode. If you choose to use Safe Mode with Networking, select 5 or F5.
Start Windows recovery Environment
Go to the Windows Recovery Environment by doing the following steps:
Press on the power button to turn off your device.
Press on the button again to turn it on.
Once Windows starts, press the power button again for 10 seconds to turn it off. Then press it on again.
Upon the reboot, hold on to the power button for 10 seconds to turn it off, then turn it on again.
Because you've repeatedly turned on and off your PC, you will be redirected to Windows Recovery Environment.
On the pop-up window, click on Troubleshoot, then Advanced options. Select Startup Settings, then Restart.
After the reboot, select 4 or the F4 on your keyboard to run in Safe Mode. If you choose to use Safe Mode with Networking, select 5 or F5.
Hold SHIFT while pressing RESTART on the start menu
On the Windows 10 sign-in screen, hold on the SHIFT on your keyboard.
While pressing on the key, click on the Power button, then choose Restart on the pop-up menu.
Once your PC restarts, click on Troubleshoot, then Advanced options.
Select Startup Settings then Restart.
After the reboot, select 4 or the F4 on your keyboard to run in Safe Mode. If you choose to use Safe Mode with Networking, select 5 or F5
Boot from installation media and choose it in the command prompt
Create a Windows 10 bootable installation media on any external storage media.
Once you do this step, wait for the installation to load.
Select your preferred language and click on Next.
Click on Repair your computer at the bottom left of the menu.
Click on Troubleshoot, then Advanced options.
Select Command Prompt - Use the Command Prompt for advanced troubleshooting options.
Type in the following command on the prompt: bcdedit /set {default} safeboot minimal
Hit Enter and wait for it to tell you that "The operation completed successfully".
Exit Command Prompt and click on Continue.
Use system configuration tool
In the Search bar, type in msconfig.
Select the Boot tab and under the Boot options, put a check beside Safe boot.
Click OK.
Reboot PC
Press SHIFT + F8
Press SHIFT + F8 when turning on Windows.
This redirects you to Advanced Boot Options Window, then choose to run Windows on Safe Mode
There you have it, 7 different ways to enter safe mode in Windows 10, we hope that any of these tips proved helpful and that you managed to enter the safe mode and fix your Windows issues.
The Sysfader iexplore.exe Application Error - What is it?
To understand Sysfader iexplore.exe application error, first, it is important to learn what is Sysfade.exe file.
Sysfader.exe is basically an IE (Internet Explorer) application file that provides cool animation effects. These animation effects include fading menus in and out, animated windows and etc. It is responsible for the graphical enhancements for animated pages.
The Sysfader iexplore.exe application error occurs when this file fails to execute properly and open animated websites on Internet Explorer.
The error code is displayed in the following format:
“SysFader: iexplore.exe – Application ErrorThe instruction at “0×00000000″ referenced memory at “0×00000000″. The memory could not be “read”.”
Solution
Error Causes
The Sysfader iexplorer.exe application error may be triggered due to many causes. These include:
Sysfader.exe file corrupted by malware and spyware
Recently upgraded Internet Explorer which resulted in the Sysfader iexplorer.exe application error due to incompatibility issues with the system program.
Issues with IE configuration
Damaged registry files
Damaged DLL files
Obsolete and bad registry entries
Due to Sysfader iexplorer.exe application error, your Internet Explorer browser may crash. Furthermore if the error is not fixed timely, it may result in even more severe PC problems like system slowdown, system crash and failure.
This happens especially when Sysfader iexplorer.exe application error is related to the registry.
The registry saves all the activities performed on the computer. This also includes junk files, invalid registry entries, bad registry keys, cookies, temporary internet files, and files of the programs uninstalled.
If the registry is not cleaned frequently, these obsolete files overload the RAM causing great deal of damage to the registry. When you try to upgrade your browser, the installation fails and results in browser incompatibility issues because of the previous files of the uninstalled program saved in the registry.
Furthermore, the error code may also pop up due to the Sysfader.exe file corrupted by malicious software like spyware and adware on your system if you don’t run an antivirus on your system regularly.
Further Information and Manual Repair
To prevent IE web browser and your PC from coming crashing, here are some solutions that you can try to resolve the Sysfader iexplorer.exe application error:
Repair and restore the registry by changing the configuration settings in the Registry Editor Window. This is accessible by typing ‘Regedit’ in the Run window. However, to edit the configuration settings manually and restore the registry, you should be technically sound. If not then making the changes would be slightly complex and time-consuming for you.
However, another alternative to this is to download Restoro. Restoro is a powerful, advanced, and highly functional PC repair tool that includes multiple utilities such as a registry cleaner and a system optimizer. The registry cleaning feature scans your entire PC for registry issues triggering error codes like Sysfader iexplorer.exe.It wipes out all the unnecessary and obsolete files and fixes the damaged dll files thus simultaneously restoring the registry. The antivirus utility scans for and removes viruses and spyware from your PC which as we explained earlier could be the reason for Sysfader error code.
With Restoro, it takes only a few seconds to resolve this error and repair the registry. If you have system slowdown issues, it takes care of that too.
It has simple navigations and a user-friendly interface which makes it very easy to operate even if you are not technically sound. It is safe, efficient, and compatible on all Windows versions including Vista, XP, Windows 7, 8, 8.1, and 10.
Click here to download Restoro and resolve Sysfader iexplorer.exe application error on your PC today!
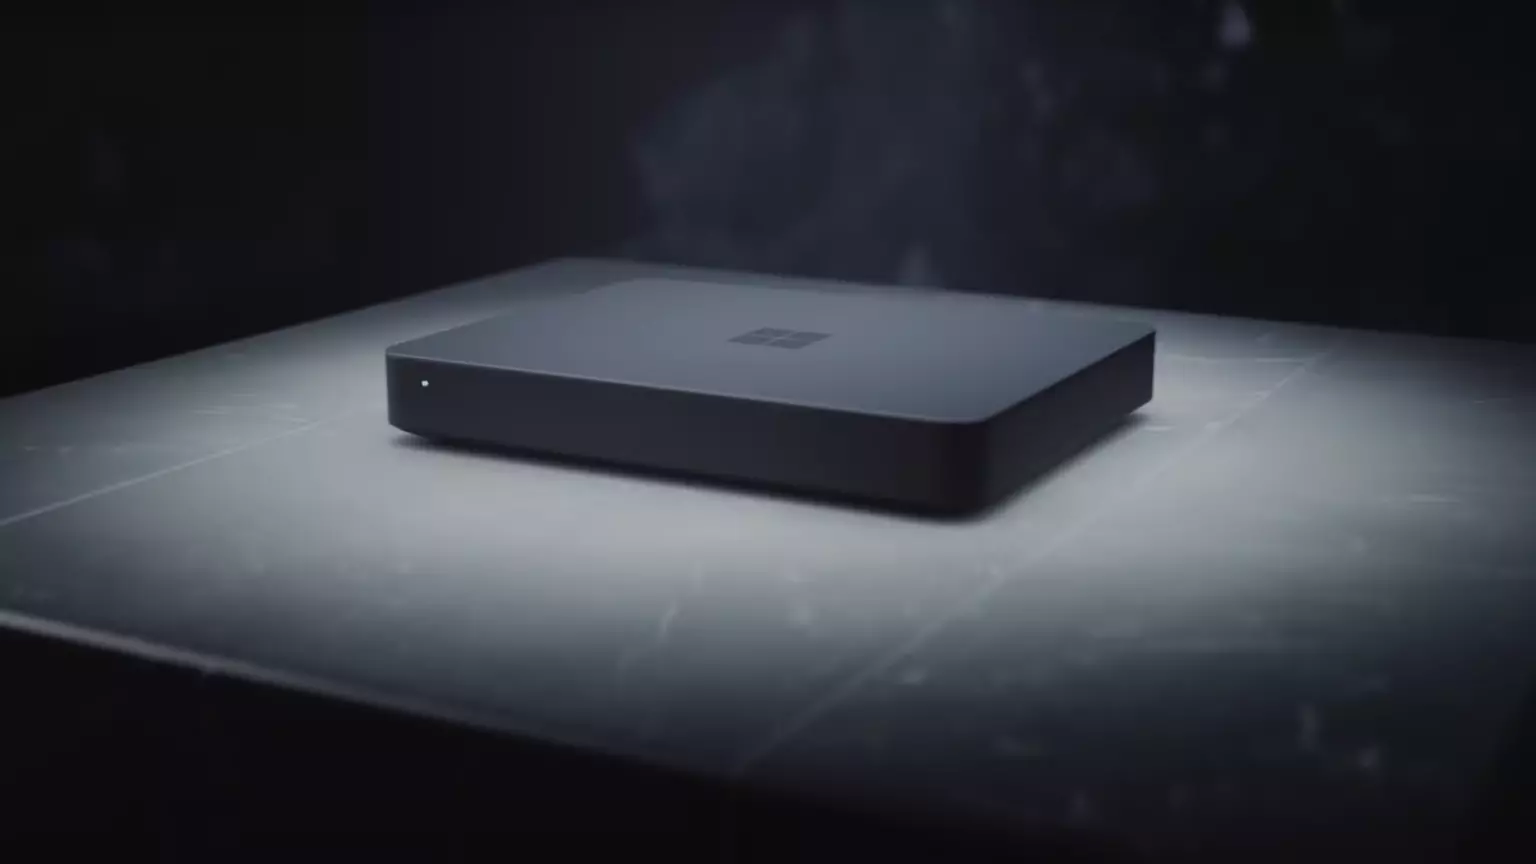
Microsoft will soon offer 4 CPU computer specifically aimed at developers and its name is Volterra. The machine as stated will come with 4 processors but the strange thing is that they will be ARM-based instead of x86.
CEO of Microsoft, mister Satya Nadella has introduced the product and Microsoft has released a youtube video promoting it.
https://youtu.be/yICVNta8jMU
The computer system will have Qualcomm's NPU or built-in neural processing unit to use AI's power to help developers write and produce better and faster code. The sad news is that besides processors used there is no other information on other components that will go into this system.
As seen in the video, the computer reminds me a lot of the apple MAC mini with its size and design, and as stated it is made from recycled plastic which in our opinion will bring the price under $1000.
Microsoft has not provided an official price tag for Volterra, but our hope is that it will be more affordable than building your own development PC. Also, there was nothing said about computer availability, we suspect that the selling model will be typical Microsoft one with first models available only in the USA and moving forward slowly opening it to other markets.
Volterra specifications
As previously said nothing except the number of CPUs and their type has been officially said but we managed to get some information about some other specific things not including its inside components.
The unit will have a fan inside of it for cooling purposes and better performance and that is what was officially stated by Microsoft. On the outside, it is known that the computer will have three USB-A ports, a mini DisplayPort, and an ethernet input. All of these will be positioned on the back of the device, on its left side there will be two USB-C ports.
The unit itself will be running on Windows 11 but it was not disclosed anything about the version, we presume since this is a model aimed for professional use that it will come with Windows 11 PRO version.
Currently available tools for ARM
Since this product is aimed at developers logically support for developing software is a must-have and at the time of this writing software that will come and that will run on Volterra is:
Visual Studio 2022
Visual Studio Code
Visual C++
Modern .NET 6 & JAVA
Classic .NET
Windows Terminal
Windows Subsystem for Android
Windows Subsystem for Linux
Conclusion
Once MAC studio has been released it showed that specific builds have their audience and can be sold for less of a price than full-fledged custom-made workstations. There is no doubt that Microsoft Volterra will find its audience but will that be enough to have more versions of this compact computer only time will tell.
The Clear Linux Project creates an operating system and software stack that offers highly optimized performance, security, versatility, and manageability.
Clearly optimized for Intel CPUs and based on GNOME it will offer you incredible speeds if you are on Intel CPU.
The big news, though, is that Clear Linux sports the shiny new Gnome 40. This is a fresher Gnome than you'll find even on Ubuntu's more experimental 21.04 release. The only big names that let you test drive Gnome 40 are Fedora and Arch Linux.
Packages only when you need them
Installation of packages is used by Swupd, a Clear Linux* package management tool. It is easy to use and pretty straightforward.
"bundle-list" for showing what's installed
"bundle-info" for details on installed bundles (such as owned files via the "‑‑files" flag)
"search" for repository searching
"bundle-add" for installation
"bundle-remove" for uninstallation
The only problem here is the packages themselves. Clean Linux* has been imagined as a developer distro focusing mostly on well-development tolls. In intel’s words: “A Linux OS built for Linux developers”, so some things will be left out. Strangely enough some things as FFmpeg which if you want to have and blast some youtube videos while you work will have to complete manually by yourself.
Clear Linux* modular philosophy
Everything in Clear Linux* is based on a modular philosophy approach. There is no /etc/fstab file, the /boot directory is totally empty. Every partition to be mounted is enabled as a systemd "mount unit."
Intel reaping the benefits of systemd's modular philosophy, where everything is a unit. If you know your way around systemd, intermediate-level configuration tasks should be straightforward. Any advanced configuration likely demands deep systemd knowledge.
Clear Linux* performance
As stated earlier this is Intel’s distro, optimized for Intel hardware meaning that Intel as the developer has every possible tool at its disposal to make use of hardware to its maximum potential and it shows.
Distro almost leaves other ones two times in speed performance. So if you are looking for a distribution that will deliver you speed and it is aimed for developer Clear Linux* is for you.
Conclusion
Clear Linux* is a really interesting distro and seeing how Intel is adding new software packages on its official website it might have a bright future.
But as always, be the judge for yourself and see if it can fit your needs. Go get it at: https://clearlinux.org/

 Error Causes
 If your disk doesn’t have ample space to accommodate the installation then you should free up some of the space on your disk to make sure the Windows can be installed on it.
You can also reinstall the Windows on another disk that has sufficient space.
If your disk doesn’t have ample space to accommodate the installation then you should free up some of the space on your disk to make sure the Windows can be installed on it.
You can also reinstall the Windows on another disk that has sufficient space.


 The Clear Linux Project creates an operating system and software stack that offers highly optimized performance, security, versatility, and manageability.
Clearly optimized for Intel CPUs and based on GNOME it will offer you incredible speeds if you are on Intel CPU.
The big news, though, is that Clear Linux sports the shiny new Gnome 40. This is a fresher Gnome than you'll find even on Ubuntu's more experimental 21.04 release. The only big names that let you test drive Gnome 40 are Fedora and Arch Linux.
The Clear Linux Project creates an operating system and software stack that offers highly optimized performance, security, versatility, and manageability.
Clearly optimized for Intel CPUs and based on GNOME it will offer you incredible speeds if you are on Intel CPU.
The big news, though, is that Clear Linux sports the shiny new Gnome 40. This is a fresher Gnome than you'll find even on Ubuntu's more experimental 21.04 release. The only big names that let you test drive Gnome 40 are Fedora and Arch Linux.