As you know, the Windows 10 operating system has support for a dedicated high-end graphics processor that brings in capabilities inside to support Graphics Cards from NVIDIA or AMD. This helps the operating system to function in a much better way by segregating the graphics-intensive operations from the CPU to a dedicated processor. However, there are times when it also experiences some issues that lead to some errors like the “Failed to create a graphics device” error.
It is possible that your computer has more than one screen or graphics card which is why you’re getting this error. To fix it, you need to try reinstalling DirectX or reinstall the Graphics Card driver. You could also try to manually check the hardware or power cycle of your computer.
To start troubleshooting the “Failed to create a graphics device” error, follow the given suggestions below.
Option 1 – Try running the DirectX Diagnostic Tool
Since the error has something to do with the DirectX Graphics APIs, you can run the DirectX Diagnostic tool to resolve the problem.
Option 2 – Try updating or re-installing DirectX
If the DirectX Diagnostic tool didn’t work, you can try to update or reinstall DirectX instead. This can help in fixing the problem because when you reinstall or update DirectX, it will replace the incompatible or corrupted components of DirectX from your computer.
Option 3 – Update or reinstall the Graphics card drivers
First, boot your computer into Safe Mode.
After that, tap the Win + R keys to launch Run.
Type in MSC into the box and tap Enter or click OK to open the Device Manager.
After that, a list of device drivers will be displayed. From there, look for the Display Adapters and click on them.
After that, right-click on each entry under the Display Adapters and select the “Uninstall Device” option from the menu.
Now restart your computer.
After restarting your computer, go to the Settings app and Check for Updates in the Windows Update section.
Note: You also have the option to go directly to the website of your graphics card manufacturers like NVIDIA, Intel, or AMD and go to the section called Drivers then check if there’s a new available update – if there is, download and install it.
Option 4 – Try to physically check the hardware of your computer
You might also want to check the physical status of the hardware in your computer. You can clean the dust off the hardware components like the Graphics Card of the computer. In doing so, you have to use a small blower or you could also use a soft cloth and run the components gently. Make sure that you don’t damage any parts with moisture or cause harm to any circuits while you carry out this task.
Option 5 – Try to power cycle your computer
You could also try to power cycle your computer to fix the error. To do that, you have to turn off your computer in a way that the power is completely cut off and all the fresh configurations of files are loaded when your computer is booted up. The first thing you have to do is to shut down your computer and if you are using a laptop with a removable battery, you must remove the battery for a couple of minutes before you plug it back in and boot your laptop. On the other hand, if you are using a desktop computer, press and hold the power button until the CPU goes off and take out the power cable for a minute or so and then plug it back in. Boot your computer and see if the error has been resolved.
In the Windows ecosystem, MS Surface laptops are among the best laptops on the market, they are regarded as equivalent to Apple MAC laptops but for Windows. Microsoft Fall 2022 Event will be held on October 12th at 10 AM. The event itself will be held right before it kicks off its annual, developer-focused Ignite event in Seattle from that same day through October 14.
This event is the first in-person event that Microsoft has held since the beginning of the pandemic. We expect the launch of the Surface Pro 9 and the Surface Laptop 5, and maybe Surface Studio 3 as well. There are also some rumors about products themselves like choices between an ARM or x86 CPU but nothing is confirmed so far, we can just wait and see.
Originally Microsoft has imagined its widgets menu as Microsoft-only widgets but it seems that they have changed their mind.
Due to the latest leak, it seems that Microsoft will open the widgets menu to 3rd party developers as well but at launch, it will be only official widgets. It was hinted that later widgets menu will be open to developers who want to bring their own stuff into it.
Distribution, date, and technology that will need to be used in order to create your widget have not been discussed nor leaked at a given time but in some way, I am very glad that at least some customization will be in Windows 11.
It is funny and amusing how some things that were in Windows Vista are getting back like glass design, round corners, and widgets. Let’s just hope Windows 11 will be a better Windows than Vista was.
Facebook has an algorithm inside it that can recognize your face in pictures and videos which is meant to help people tag friends when they upload media into Facebook. It is a neat feature meant to help all Facebook users but what if we do not want to be detected in pictures and videos? What if we do not want to be tagged?
If you are one of the Facebook users that do not wish to be detected and recognized by Facebook in media keep on reading to find out how you can disable this option.
Open the Facebook website and log into your account.
Click on the arrow visible in the top menu bar.
Select the Settings & privacy option.
Click on the Settings option.
Switch to the Face recognition tab on the left-hand side.
Click the Edit button.
Select No from the drop-down list.
And you are done, you do not need to log out or restart facebook in order for changes to have an effect. Now you are free from face recognition and detection.
Update Error 0x80070003, 0x20007 One of the most common errors encountered by users who updated to Windows 10 is the Error Code 0x80070003-0x20007. Normally, this error code is accompanied by the message saying “Windows could not search for new updates. An error occurred while checking for new updates or your computer” or “Error(s) found: Code 0x80070003 Windows update encountered an unknown error”.
This update-related error is often encountered any time while your device automatically installs updates once there’s an available system update or during manually installing updates for a specific app. Regardless if you are using a tablet, laptop, or PC, this update-related error could occur after upgrading your system to Windows 10.
Solution
Error Causes
There are several reasons why the update-related Error Code 0x80070003-0x20007 occurs. This includes the following:
Windows Firewall-related problem
A conflict in your device’s system might be present
Not enough space in your RAM
Not enough space in your installation disk
Problems in your system memory
Further Information and Manual Repair
An effective way to address problems like the Error Code 0x80070003-0x20007 is by applying certain manual repair methods. However, ensure that you strictly follow instructions since one slight slip-up might result in critical issues. If you’re not knowledgeable enough, it would be best to consult help from a professional Windows technician or you can make use of an automated tool to solve any issues you’re encountering.
When you encounter the update-related Error Code 0x80070003-0x20007, you must take action immediately to address the problem to lessen the risk of losing all your data or damaging the Windows registry host.
Uninstall your antivirus prior to upgrading your system
Ensure that you have a simple machine name with no periods, dashes, or hyphens.
Restart several times then try again.
Disable the General USB Devices in your machine like the Smart Card Reader.
If you use a SCSI hard disk, ensure that you have available drivers you can use as your storage such as a thumb drive, and ensure as well that it is connected. Once you’re on the Windows 10 setup, click on Custom Advanced Option then use the Load Driver command in order to load the right driver for the SCSI drive. If this fails, try switching to an IDE-based hard disk.
Once done, perform a clean boot then try restarting the device again.
If you are upgrading your system using the .ISO file, disconnect your device from the Internet during setup. If your device is connected to the Internet by LAN or Wi-Fi, you need to disable both first then proceed to set up again.
If you’re performing the update through Windows Update, disconnect from the Internet LAN or Wi-Fi once the download reaches 100% then proceed with the installation.
If this still does not work, you can try using the .ISO file in upgrading.
Switch to a local account if your machine is connected to a domain.
Disconnect all external devices attached to your machine including gaming controllers, external hard disk, USB keys, and printers.
If the above steps still do not work, you can try performing a repair by doing the following steps:
Put the installation disc into the disc drive. Afterward, boot the computer.
Once the message: “Press any key to boot from CD or DVD…” appears, press any key.
Choose a language, currency, time, and a keyboard or another input method. Click Next.
Click on Repair your computer
Select the operating system that you wish to repair then click Next
Open the Command Prompt by clicking it in the System Recovery Options dialog box.
Type BOOTREC /FIXMBR then hit Enter
Type BOOTREC /FIXBOOT then hit Enter
Type Drive:bootBootsect.exe /NT69 All then hit Enter
Error 550 is an SMTP (Simple Mail Transfer Protocol) outgoing server error code.
It usually occurs when you try to send emails through your Outlook account and the email message encounters a relay error. The email returns back without being delivered with a 550 error message.
The error message is prompted as either of the following:
"550 Requested action not taken: mailbox unavailable" "550 5 2 1 mail from refused spam site"
In other words, the error code 550 means that your SMTP server was not able to deliver the sent email to the user.
Solution
Error Causes
There are multiple reasons for this error message including:
The email address was typed incorrectly
Incorrect SMTP Server settings
ISP placing restrictions for outgoing mails on the email server
System infected by virus or malware
Further Information and Manual Repair
Regardless of what the reason may be for the error 550 code occurrence, it is advisable to repair and fix the issue quickly to avoid inconvenience.
You may not be able to send emails from your Outlook account if the error continues. This can cause great hassle in corresponding with others timely and may create a big communication gap.
Here are some quick and efficient ways to resolve this issue on your system:
Solution 1:
There is no need to panic when you encounter error 550. Sometimes the error message may occur because you inserted the wrong/ incorrect email address of the recipient.
In such a case, cross-check the recipient’s email address to verify if it is correct. If not, insert the correct address and try sending the email again.
Solution 2:
If the error still persists, try other methods to resolve it. Sometimes error 550 can also occur due to incorrect SMTP settings.
Fix it to resolve the error. This can be done by opening your Outlook settings Tools and Accounts option. Now go to view/change the email account for the email account you are having problems with.
After that check, the SMTP server is set to mail.yourdomain.com. Then click more settings and then click the outgoing server tab. See if the ‘My server requires authentication for the outgoing server’ is checked. If not, then check on it. Then simply save to confirm changes. Now try emailing again.
Hopefully, this will resolve the issue.
Solution 3:
Another reason for the error occurrence can be ISP blockage.
When the junk email volumes increase, network administrators (the people who are responsible for managing ISP servers) place restrictions on SMTP email servers to prevent spam on their network. If this is the reason, contact your ISP administrator to resolve the issue.
Solution 4:
Malware and viral infection can also be the cause for error 550. To remove all kinds of viruses including Trojans and spyware and fix the issue right away without compromising on the speed of your PC it is advisable to download Restoro.
This is a highly functional and advanced PC Fixer embedded with multiple utilities like a powerful antivirus and a system optimizer.
It scans your entire PC in seconds, detects and removes all kinds of viruses. Simultaneously, the system optimizer feature ensures the speed of your PC does not slow down during the scanning and virus removal process.
This feature boosts your PC speed significantly.
It is user-friendly and has easy navigations making it quite simple for even those users who are not technically sound to work around it and operate it with ease. It is compatible with all Windows versions.
Click here to download Restoro and resolve the error 550 messages today!
The MP4 MIME-type is a video type that is mainly configured in IIS or Internet Information console. It is the one that instructs a web browser to use the default video application when running MP4 files from websites. MIME which stands for Multipurpose Internet Mail Extensions which offers a way to identify files on the Internet-based on their format and nature. For example, when a content-type header value like MP4 is defined in an HTTP response, the browser can be configured to open the file with the proper plugin. However, there are some servers that don’t have an associated MIME type to support MP4 files and so they fail to play these files. In such cases, you will encounter the “Unsupported video type or invalid file path” error, especially when you use the Internet Explorer browser in Windows 10. To fix this problem, you may have to configure the MP4 MIME type in IIS but you might find that IIS is not enabled in Windows 10 which is why you need to turn it on or enable it first. For more details, refer to the following instructions below.
Step 1 – Enable IIS:
Open Control Panel and go to Programs > Programs and Features.
From there, select “Turn Windows features on or off” to mark its checkbox.
After that, select “Web Management Tools” and expand its menu and look for “IIS Management Console”.
Click the OK button and then wait for a couple of seconds to allow Windows to successfully apply the changes made.
Step 2 – Configure the MP4 MIME type in IIS:
Go to Control Panel and from there, access Administrative Tools.
Next, click “Internet Information Services Manager” from the list of given options.
Once confirmed, it will open the IIS console where you have to click the name of your IIS Server located on the left panel. This will enable several options in the central details section.
Now double click on the icon with the label “MIME Types”.
After that, you should see an “Add” link option on the right panel. Click on the link to open a configuration dialog box.
Then type “.mp4” in the File Name Extension field and enter “video/mp4” in the textbox of the MIME Type.
Click the OK button to save the changes made. This should fix the “Unsupported video type or invalid file path” error on your Windows 10 computer.
Step 3 – Reset your browsers:
Mozilla Firefox
Open Firefox and click the icon that looks like three stacked lines located at the top-right section of the browser.
Next, select the question mark icon from the drop-down menu.
Then select “Troubleshooting information” from the slide-out menu.
After that, click on the “Reset Firefox” button located at the top-right section of the newly opened web page.
Now select “Reset Firefox” in the confirmation pop-up window that appears.
Google Chrome
Open Google Chrome, then tap the Alt + F keys.
After that, click on Settings.
Next, scroll down until you see the Advanced option, once you see it, click on it.
After clicking the Advanced option, go to the “Restore and clean up option and click on the “Restore settings to their original defaults” option to reset Google Chrome.
Now restart Google Chrome.
Internet Explorer
Launch Internet Explorer.
Next, click the wrench icon for Settings.
Then click Internet Options.
After that, go to the Advanced tab.
From there, click the Reset button. This will reset Internet Explorer’s settings to their default condition.
So far I believe each person on this planet has at least heard of Marvel superhero movies, perhaps even watched a few of them, and no wonder. Movies are spawning now over 20 titles and they are not really released as events described in them.
Throw into mix TV series and you can get confused pretty fast. Now it was officially stated that all TV series that were released before Wanda vision is no canon in Marvel cinematic universe which simplify thing a little but there are still series that are.
So without further blabbering around here is a list of Marvels films and TV series in chronological order:
Captain America: The First Avenger
Captain Marvel
Iron Man
Iron Man 2
The Incredible Hulk
Thor
The Avengers
Iron Man 3
Thor: The Dark World
Captain America: The Winter Soldier
Guardians of the Galaxy
Guardians of the Galaxy Vol. 2
Avengers: Age of Ultron
Ant-Man
Captain America: Civil War
Spider-Man: Homecoming
Doctor Strange
Black Panther
Thor: Ragnarok
Ant-Man and The Wasp
Black Widow
Avengers: Infinity War
Avengers: Endgame
WandaVision
The Falcon and The Winter Soldier
Spiderman: Far From Home
Loki
And there you go, if you have someone who has not yet seen movies or you would like to view that as the story is revealed and not by the date they were released now you can easily with this list.
The runtime error R6025 can be quite annoying for PC users as it pops up randomly anytime. It is a type of runtime error but typically associated with C++ programming. The error is displayed in the following format:
‘Runtime Error! Program: C:…R6025-Pure Virtual Function Call’
Solution
Error Causes
The runtime error R6025 is triggered due to the following reasons:
Runtime components of Visual C++ libraries are missing
Microsoft.NET framework damaged
Registry corrupted with bad files and data overload
Virus and malware invasion
Further Information and Manual Repair
Try the solutions given below to repair the runtime error R6025 on your system:
Cause: Microsoft.NET framework damaged
Solution: If this is the underlying cause of the error, then it is advisable to reinstall and repair the Microsoft.NET framework on your PC.
To reinstall this framework, go to the start menu, click control panel, programs and then click ‘Turn Windows features on or off’. Here you might be promoted for an administrator password. Insert the password to proceed.
Now locate Microsoft.NET framework 3.5.1 and uncheck this box, press OK and then reboot your system. After that open ‘Turn Windows features on or off’ and check the Microsoft.NET framework 3.5.1 and then restart your PC. This will hopefully resolve the error.
Cause: Runtime components of Visual C++ libraries are missing
Solution: If runtime components of Visual C++ libraries are missing, then you will have to download and install these from different websites. This can be time-consuming and slightly complicated for you if you are not technically sound.
Cause: Malware Attack
Solution: If the runtime error R6025 is triggered due to a malware attack, then you will have to install and run a powerful antivirus on your PC. This will help detect and remove such malicious software affecting your system.
Cause: Registry Issues
Solution: If registry corruption is the underlying cause of the runtime error R6025 on your PC, then you need to clean up the registry and repair it. The best way to clean and repair the registry is to download Restoro.
Restoro is an advanced PC repair tool integrated with powerful and highly functional utilities all in one.
Utilities include a registry cleaner and a system optimizer. It has easy navigation, a user-friendly interface, and is compatible with all Windows versions. Users of all levels can operate it to resolve all kinds of PC errors including the runtime error R6025.
The registry cleaner utility wipes out all the unnecessary, malicious, obsolete files and invalid entries overloading the RAM. It frees up the disk space, repairs the damaged files and the registry.
Furthermore, Restoro also functions as a system optimizer. It detects system instability issues and resolves them while boosting the speed of your PC.
To resolve the runtime Error R6025 on your system in seconds click here to download Restoro PC repair tool now!
Have you been feeling anxious in the digital space? Feeling like you have a million eyes on you each time you visit a website? It can definitely make you uneasy. Luckily there’s an easy fix, and it’s called a VPN.
In this article we’ll take you through the basics of what a VPN does and some of the biggest benefits you can reap from buying one.
VPN: definition and how it works
VPN stands for Virtual Private Network, so its name already says a lot about what it does.
A VPN is specialized software that keeps your browsing private and secure. Essentially it hides your identity, preventing possible cyberattacks and data theft. This is especially important in cases of public network use, where you’re highly exposed to potential threats.
To be more specific, this software encrypts your Internet Protocol (IP) address by filtering it through a server hosted by the VPN provider first. That way, it prevents your Internet service provider, third parties and lurking online thieves from tracking the actual you.
Credit: FLY:D on Unsplash
Some providers, such as Surfshark VPN with its IP Rotator feature, even make it a habit to frequently change your IP address to further protect your identity. With most VPN providers, you can also appear to be in a completely different country, adding to your disguise.
There are tons of advantages you can look forward to if you decide to use a VPN. Take a look at some of the crucial ones.
Benefits of using a VPN
When choosing a VPN, you can find both free and paid options. We recommend you go with the paid ones, since they have stronger security, encryption and data protection, as well as more advanced features. Free VPNs come with limitations and risk of malicious attacks on the software itself.
You can choose to buy a singular VPN service or opt for antivirus software that has a VPN built in, for example Bitdefender’s Ultimate Security plan. That depends on what you use your computer for and how much.
When you pick one, here’s what it can do for you.
1. Access region-specific content
When we said you could change your location, we meant it. Say you’re using a streaming service and a show you desperately want to watch isn’t available in your country. You can use your VPN to make it look like you’re browsing from a country where it’s unlocked.
This option is also convenient for gamers who want to access maps, skins and other in-game items unavailable in their location.
In addition, you can use this powerful feature when you’re traveling to a region where some of your favorite content may not be accessible.
Do keep in mind that you need to read the Terms and Conditions (yeah, we know - who does that?) of your games and services before doing this, since you could end up getting a penalty. It’s also important to remember that there are entire countries that have strict regulations or even bans on VPNs, for example Belarus, Russia and China. So make sure to be very cautious with your VPN use, friends.
2. Browse like no one’s watching
VPNs shield your browsing habits from prying eyes on the web. Those can be malicious hackers or just third-party cookies tracking your every move to later bombard you with targeted ads. For example, Surfshark VPN features a Cookie blocker that blocks all cookie-related pop-ups and lets you browse in peace (and secret). It works even when the VPN is turned off, which is also pretty neat.
In addition, their CleanWeb 2.0 technology makes sure ads and especially malware don’t stand a chance at all, since they’re blocked before they can even load.
The inability of sites to track your browsing means they can’t collect and analyze any of your data. So, your personal information - or your company’s information in case that’s what you’re using your computer for - is entirely hidden and secure.
3. Save money
It’s well-known that the prices of certain items and services vary based on your location, browsing time, age and many other factors. This most commonly goes for airline tickets and hotel stays.
You can use your VPN to avoid high prices and surcharges. Clear all cookies, turn on your VPN and visit an online shopping site to check out their prices. Then compare your findings with the offers you see when your VPN is off, when you spend a long time on the site or have an active account with the company.
Sometimes this can really help you find the best deals and avoid breaking the bank. But again, check the Terms and Conditions before you purchase something using a VPN.
4. Secure your smart home
The more smart devices you have connected to your network, the more exposed you are to potential cyberattacks. Phones and computers are generally designed to be decently secure even without a VPN or antivirus, but smart home devices leave a lot to be desired in that regard.
Protecting your home network with a VPN software means all devices connected to it are secure, be it an air purifier or Alexa.
Credit: Bence Boros on Unsplash
5. Prevent connection slowdown
Your ISP can intentionally slow down your internet speed based on how much data you’ve consumed (data throttling) or your activities online (bandwidth throttling).
But with a VPN, what kind of data you send and receive and how much is entirely hidden. Therefore, if your ISP can’t see you, they can’t control you and they can’t throttle down your speed.
The bottom line
You can never be too safe online. So definitely think about getting yourself a solid VPN to pump up your privacy and security as much as you can. And if you have any questions or need help choosing the perfect software for you, feel free to reach out to us.
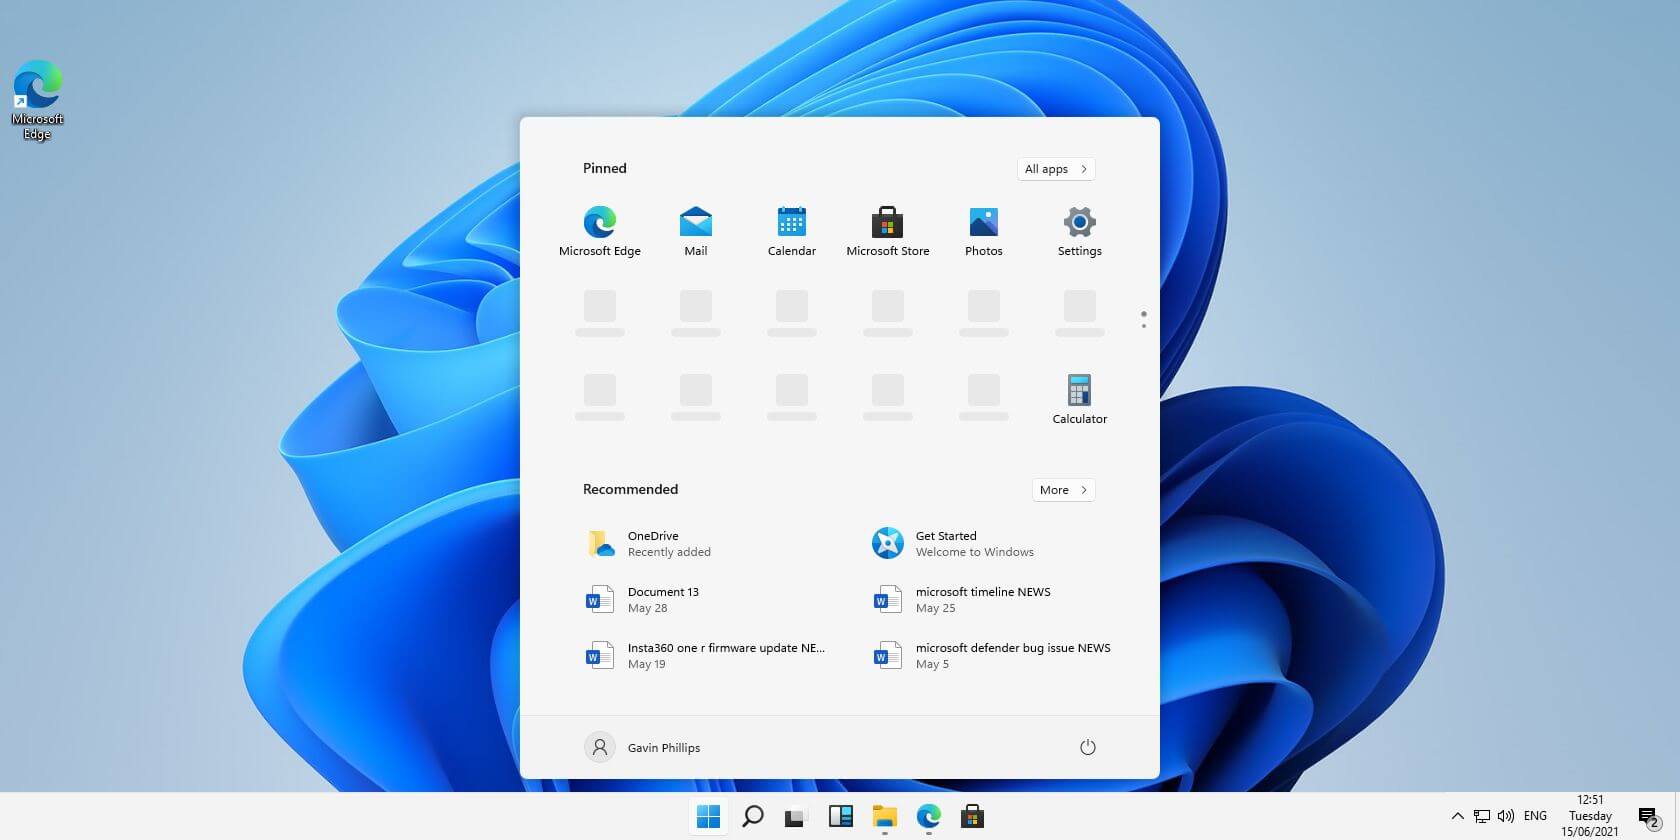
Windows 11 comes with glass and transparency effects by default once it is installed. The transparency effect looks really good but if in any case, you do not like them, you can easily turn them off very easily
Open settings inside Windows 11
Inside settings click on Accessibility in the sidebar
Click on Visual Effects on far-right
Inside Visual effects, settings click on the switch beside Transparency effects to OFF
Windows will automatically save settings and apply changes right away. Just close your settings application and continue with work. You can always turn it back ON if you change your mind.


 Originally Microsoft has imagined its widgets menu as Microsoft-only widgets but it seems that they have changed their mind.
Due to the latest leak, it seems that Microsoft will open the widgets menu to 3rd party developers as well but at launch, it will be only official widgets. It was hinted that later widgets menu will be open to developers who want to bring their own stuff into it.
Distribution, date, and technology that will need to be used in order to create your widget have not been discussed nor leaked at a given time but in some way, I am very glad that at least some customization will be in Windows 11.
It is funny and amusing how some things that were in Windows Vista are getting back like glass design, round corners, and widgets. Let’s just hope Windows 11 will be a better Windows than Vista was.
Originally Microsoft has imagined its widgets menu as Microsoft-only widgets but it seems that they have changed their mind.
Due to the latest leak, it seems that Microsoft will open the widgets menu to 3rd party developers as well but at launch, it will be only official widgets. It was hinted that later widgets menu will be open to developers who want to bring their own stuff into it.
Distribution, date, and technology that will need to be used in order to create your widget have not been discussed nor leaked at a given time but in some way, I am very glad that at least some customization will be in Windows 11.
It is funny and amusing how some things that were in Windows Vista are getting back like glass design, round corners, and widgets. Let’s just hope Windows 11 will be a better Windows than Vista was. 
 So far I believe each person on this planet has at least heard of Marvel superhero movies, perhaps even watched a few of them, and no wonder. Movies are spawning now over 20 titles and they are not really released as events described in them.
Throw into mix TV series and you can get confused pretty fast. Now it was officially stated that all TV series that were released before Wanda vision is no canon in Marvel cinematic universe which simplify thing a little but there are still series that are.
So far I believe each person on this planet has at least heard of Marvel superhero movies, perhaps even watched a few of them, and no wonder. Movies are spawning now over 20 titles and they are not really released as events described in them.
Throw into mix TV series and you can get confused pretty fast. Now it was officially stated that all TV series that were released before Wanda vision is no canon in Marvel cinematic universe which simplify thing a little but there are still series that are.


 Windows 11 comes with glass and transparency effects by default once it is installed. The transparency effect looks really good but if in any case, you do not like them, you can easily turn them off very easily