One of the most critical processes in the Windows 10 operating system is the Explorer.exe. And there are times when you might encounter an error that says, “System call failed”. You can encounter this error when you try to launch File Explorer, and in such case when the File Explorer does not work, it could cause issues in accessing folders and files on your computer.
This kind of error pops up when the explorer.exe system file has become corrupted or if there is some process that interferes with its smooth functioning. To fix this error, you can try to restart the explorer.exe process, run both the System File Checker scan and DISM tool. You could also put your computer in a Clean Boot State or uninstall any programs you’ve installed recently. For more details, follow each one of the given suggestions below.
Option 1 – Try to restart the Explorer.exe process
The first thing you can do is try to restart the Explorer.exe process. To do so, refer to these steps:
First, right-click on the Taskbar and select the Task Manager.
Next, expand the Task Manager window to see all the active processes.
From there, look for the Windows Explorer process, right-click on it and select Restart.
After that, check if the error is now fixed.
Option 2 – Run System File Checker scan
If restarting the explorer.exe process didn’t work, you can also try running the System File Checker or SFC scan to fix the error. System File Checker is a command utility built into your computer that helps restore corrupted files and missing files. Refer to the following steps to run it:
Hit the Win + R keys to launch Run.
Type in cmd in the field and tap Enter.
After opening Command Prompt, type in this command: sfc /SCANFILE=c:windowsexplorer.exe
Note: If you are using a 64-bit Windows operating system, enter the “sfc /SCANFILE=C:WindowsSysWow64explorer.exe” command instead.
Wait until the process is completed and then restart your computer.
Option 3 – Run the DISM tool
You might also want to run the DISM tool. This tool is known to repair potentially corrupted files in your system as having them could also system issues like the “System call failed” error. To repair these corrupted system files, you can run the DISM commands:
Tap the Win + X keys and click on the “Command Prompt (Admin)” option.
After that, input each one of the commands listed below sequentially to execute them:
Dism /Online /Cleanup-Image /CheckHealth
Dism /Online /Cleanup-Image /ScanHealth
Dism /Online /Cleanup-Image /RestoreHealth
Once you’ve executed the commands given above, restart your computer and check if the problem is now fixed.
Option 4 – Try running the Check Disk utility
In the Windows Search box, type “command prompt” and from the search results, right-click on Command Prompt and select “Run as administrator”.
After opening Command Prompt, type this command and tap Enter: chkdsk c: /f /r
The command you entered will start to check for errors and fix them automatically. Else, it will throw an error message saying, “Chkdsk cannot run because the volume is in use by another process. Would you like the schedule this volume to be checked the next time the system restarts? (Y/N)”.
Tap the Y key to schedule Disk Check the next time your computer restarts.
Option 5 – Put your computer in a Clean Boot State
As pointed out, there are some instances that some conflicting programs installed in your computer might be the one that triggers the “System call failed” error to appear when you try to open File Explorer. To identify which program is causing the problem, you need to put your computer in a Clean Boot State. To do so, follow the steps below.
Log onto your PC as an administrator.
Type in MSConfig in the Start Search to open the System Configuration utility.
From there, go to the General tab and click “Selective startup”.
Clear the “Load Startup items” check box and make sure that the “Load System Services” and “Use Original boot configuration” options are checked.
Next, click the Services tab and select the “Hide All Microsoft Services” check box.
Click Disable all.
Click on Apply/OK and restart your PC. (This will put your PC into a Clean Boot State. And configure Windows to use the usual startup, just simply undo the changes.)
Once your computer has restarted in a Clean Boot State, perform your scan again and see if it now works, and then start to isolate the problem by checking which one of the programs you installed recently is the root cause of the problem.
Option 6 – Try to uninstall the programs you’ve installed recently
In case you don’t know, freeware software packages aren’t always free as some of them could contain malicious software that can cause serious damage to your computer. Thus, if you have installed a program recently prior to getting the “System call failed” error, then you have to uninstall that program.
Tap the Win + R keys to open the Run dialog box.
Then type “appwiz.cpl” in the field and tap Enter to open the Programs and Features in Control Panel.
Next, arrange the list of installed programs in the order of the installation date.
After that, look for the problematic program and right-click on it, and then select Uninstall.
Once the process is done, restart your computer and see if the error is fixed.
Taking information from the internet or from other sources usually involves selecting the text, copying it into the clipboard, and then pasting it into your file. In today's modern applications pasting text will most of the time take its formating with it.
By formatting what I am talking about are parameters like font size, line breaks, hyperlinks, font styles, etc. and sometimes you do not want any of these in your file, you would like and prefer to have just plain text so you can format it as you wish.
In order to paste just plain text instead of using the CTRL + V keyboard shortcut, press CTRL + SHIFT + V instead. This shortcut will paste the only text into your file.
Shortcut and Microsoft Word
Leave it to Microsoft to make its shortcut not work in their application. In Microsoft Word, you can only use the standard CTRL + V shortcut, if you press CTRL + SHIFT + V nothing will happen. So in order to paste the only text into a word document, choose to paste special > text only
Other applications
I have tried CTRL + SHIFT + V in various applications like photoshop, illustrator, InDesign, visual studio code, slack, discord, WordPress installations, etc and only one that has not worked for me was Word and office in general so you are safe to use this trick and have desired results.
Disk partitioning is a concept that’s been around for so long, but is still only familiar to few. If done right, it can help get your computer in perfect order.
Today we bring you a simple definition of disk partitioning, its pros and cons, and a quick tip on how to do it properly to reap its full benefit!
Definition and purpose
The simplest way to define disk partitioning would be: it’s exactly what it sounds like. It means taking a hard disk drive and separating it into different segments. These segments are called partitions. You can visualize it as cutting a cake into smaller pieces - not necessarily of the same size, though.
So what is the purpose of these pieces?
Well, when you first get a hard drive, it’s basically just a bunch of unallocated storage space. Until there’s at least one partition, this space is unusable to your operating system. Once you create a partition, your OS will recognize it as usable storage space.
You can choose to create a single partition and use it for all your files, from program files to personal data. A lot of off-the-shelf computers come with one primary partition like this and a small secondary one reserved for recovery purposes.
Whether or not you want to split your disk into more than one segment is up to you. We would generally recommend it, though. The whole point of partitioning is for each segment to have its own purpose.
So treating all your storage space as a single unit containing different file types would be like constructing an office building with only one massive room for everything - day-to-day work, conferences, interviews, etc. And all of this for different departments of the company. You can see how this might get a little messy.
Creating multiple partitions eliminates the task of running several different types of files from the same place. This takes a heavy load off the entire process of accessing data.
Disk partitioning also brings a ton of other benefits to the table. An important disclaimer, though: there are disadvantages too. We will walk you through both sides to help you get an objective idea and make an informed decision.
Source: Kina on Unsplash
What are the benefits of disk partitioning?
1. Better file organization
This is the most obvious and perhaps the biggest advantage of partitioning your hard drive.
As we already mentioned, partitioning allows you to create separate segments for different file and data types. You wouldn’t want to use the same partition for your system files and for games, would you?
If organization and time management are important to you, then multiple partitions are the right solution. Searching for specific files will be much easier overall. Say you have one hard drive, but three partitions: C for the system files alone, D for multimedia files and documents, and E for games and apps. Your computer loads the system from C without interference from the other two, and you know exactly where to look when searching for a file.
2. Easy reinstallation
File management isn’t the only thing made faster and simpler thanks to partitioning. If you opt for creating multiple segments on your drive, reinstalling Windows will be easy peasy.
That’s because all you need to do is format the partition your system is on. Then you reinstall the OS on it, and there you go. Now you have a clean installation, with all your files saved on other partitions intact. You can even make a copy of your system partition, so you can revisit the exact same installation in the future if you want. And the whole time your pictures, music, documents stay exactly where you left them.
Source: Andrew M on Unsplash
3. Possibility of using multiple file systems
By now you’ve understood that partitions function completely separately. This means that, if for some reason you need multiple file system capabilities, partitioning will allow that.
One segment could be used for, say, an NTFS file system, while another could run ext or APFS.
4. Running different OSes
You’re an avid Windows user but need to use Linux on the side? No problem. You don’t need to buy a separate computer or anything. The possibility of running different file systems also means you can use partitioning to run multiple operating systems.
Doesn’t that sound enticing? One machine for multiple totally different uses!
5. Backup and recovery made simple
Data loss can happen on any disk, partitioned or not. However, it’s much easier to get it back on a partitioned one. You know where you stored what, and each partition can be backed up exactly as it is. It’s also a lot faster to back up single partitions than entire hard drives.
Ultimately this also means a faster path to recovery. If you lose or accidentally delete important files and data, you might want to use a recovery tool like Recuva to scan for them and get them back. Recuva is even powerful enough to recover data from damaged hard drives. But no matter how powerful, scanning a whole drive is strenuous for any recovery tool. Scanning independent partitions is a lot more convenient than that, and will get you to your goal more efficiently.
6. Optimized performance
Now, let’s keep in mind that computer performance is influenced by a number of factors. Partitioning alone isn’t what makes it better or worse. However, it can contribute to optimization. It’s easier for your computer to scan, say, a 40 GB partition to fetch the system file it needs than scanning the entire capacity of your drive.
7. Improved security (possibly*)
Separate partitions can help make your system more secure. Firstly, they minimize file corruption. If one partition gets corrupted, the others should remain unaffected. And keeping in mind the previous point about backup and recovery, ‘fixing’ the damaged partition would be much easier than fixing the entire hard drive.
Partitioning also improves security in terms of malware protection. A malicious attack on one partition is easier to deal with than malware on the whole drive. If your system partition gets infected, you can simply reinstall your OS and that should do the trick.
*Do keep in mind that partitioning can’t defend you against more advanced attacks. So make sure not to give in to a false sense of security.
What are the disadvantages of partitioning?
1. Data is still vulnerable
Yes, it’s easier to back up and recover data from independent partitions. And yes, partitioning may help protect separated files and data to a higher degree. But remember: everything is still on a single physical drive. So while digital errors and issues may be easier to deal with on partitioned drives, physical damage obviously won’t be.
If your hard drive is destroyed in some way, all data on it will be gone. That’s why, if you have crucial files on your PC, it’s important to give them the proper backup treatment before it’s too late.
2. Disbalance of space
Allocating storage space on separate partitions may be a little more tricky than you think. You may fill up one partition a lot faster than another. So on one side you’re struggling with space, and on another you have too much of it to spare. Imagine nearly filling up your system partition and then it turns out you need a lot more space for its updates than you thought.
That’s why you really have to be sure you actually have enough files of different types that you need help managing efficiently. Otherwise you’ll just create a struggle and disbalance in terms of storage.
3. Increased risk of error
If done incorrectly, partitioning can lead to more harm than good. Aside from space disbalance, there is an increased risk of incorrect partition sizes and formatting. Plus, human error is also a factor: in a moment of distraction, you may erase one partition when you meant another. Undoing such mistakes will definitely be tedious and time-consuming.
4. SSDs eliminate the need of partitioning
SSDs (solid-state drives) don’t function in the same way that HDDs do. They have faster read times and can organize files on their own. This quite literally eliminates the need for organization on your part.
Partitioning: yes or no?
The bottom line is that multiple partitions might not be necessary for the average user. But if you’re planning on storing many file types or different file and operating systems on the same PC, then you should give it a shot. It’s also an excellent solution for businesses, of course.
And if our pros and cons list isn’t enough to help you decide, you can always send us a message and we’ll help you make the right choice.
Decided to partition your hard drive?
If you’ve decided to give it a go, you definitely should make sure to do it right.
The two most effective and reliable ways to partition are using the built-in options on Windows or investing in a dedicated partitioning tool, like the EaseUS Partition Master. Which one you'll opt for depends on your specific needs.
Option 1 may be more suitable for users with at least some level of experience. In this case, you’d have to know exactly which steps to take without making errors. This is done in Disk Management on Windows 10/11. From there, you can select the partitions you’d like to split into different volumes of selected sizes.
If this is your first time partitioning, we highly suggest you either consult professionals for this or move on to option 2. The EaseUS partitioning software is specifically designed for beginners, with an intuitive interface helping you succeed in the process. All you need to do is pick the Partition Master package tailored to your needs and follow their guide.
Each package offers technical support as well, and even free upgrades (to varying degrees based on your subscription). Plus, all of this is valid for not one, but two PCs.
It’s the perfect solution for a smooth and error-free partitioning process. If you want to organize your hard drives efficiently and make the most of all your space without doing irreparable damage, it’s definitely worth the investment.
Not a Valid Win32 Application error code that indicates either the file or the program you are attempting to run missing or corrupt. And because of this error, Windows is unable to open your desired file or run the program successfully.
Error Causes
The ‘Not a Valid Win32 Application’ is triggered due to multiple reasons such as:
Unsuccessful program installation due to damaged disc/CD
Corrupted or incompatible file
The hard drive is loaded with bad and invalid entries
Malware invasion or viral infection
When you come across this error code on your PC, it is advisable to resolve it as it will cause you a great deal of inconvenience hampering program and file accessibility.
Furthermore, if the error code occurs due to malware or viruses, then it can lead to severe data security threats and privacy issues.
Further Information and Manual Repair
To resolve the Not a Valid Win32 Application error on your PC, you don’t need to be a technical expert or hire a professional. Though this error might be crucial it is easy to fix.
Here are some of the many methods that you can try to resolve this error code on your PC:
Check for File Compatibility
If you downloaded a file that is not compatible with your Windows version then you will come across this error. In this case, it is advisable to download the file version that is compatible and can run easily on the Windows version installed on your system.
Nonetheless, if the file is compatible but still doesn’t run on your PC, then it’s possible that the file became corrupt during the download.
Try downloading the file again.
Check if the CD is Clean
You may also come across the Not a valid Win32 application error code if the program installation from the CD is unsuccessful.
This happens when the CD is dirty or it is scratched. The program does not copy properly onto the computer from the damaged CD. So, if the CD is scratched and dirty, buy a new CD and try installing the program again.
Verify the Program You Want to Run is Still on the Computer
If you are running the program from a shortcut, then verify that the program is still installed on your PC. This error may occur if the program is no longer installed on the computer.
If you find the program is not installed on your system, then reinstall and try running the program again.
Wrong File Name Issue
Make sure the program or the file you are attempting to run on your system does not contain the same name as the long filename directory it is saved in. For example, running a file named ‘program’ in the ‘program files’ directory can cause errors in some Windows versions.
If this is the issue, then try installing the program in a different directory.
Repair Hard Drive
If the hard drive is bad or corrupted, it can also generate the not a valid Win32 application. And because of this error files and programs fail to execute successfully as not all data can be read from the hard drive.
To repair this issue first you need to run defrag and ScanDisk Microsoft built-in tools. These tools check for errors on the hard drive.
Run an Antivirus
If the error code occurs due to a viral infection or malware attack on your system, then you must download an antivirus, scan, and remove such malicious software. However, antivirus may slow down the speed of your PC.
So, to resolve speed issues and boost the performance of your system, you may have to download a system optimizer.
There are times when it is really inevitable to delete your hard drive partitions especially if you are already running low on disk space in your Windows 10 computer. Users typically delete the volume which is not being used in such cases in order to free up some space for the volume that’s running low on disk space.
To resolve the problem, users tend to use the Disk Management utility to delete hard drive partitions. However, some users reported that the “Delete volume” option is not available as it is grayed out. Thus, users aren’t able to delete hard drive partitions and aren’t able to free up disk space.
This kind of problem usually occurs when there is a Page file on the volume that you are trying to delete and so on. Oftentimes, this issue is mistaken for the problem where you are unable to delete an EFI-protected partition. However, in this case, not only you are unable to delete EFI-protected partition but also NTFS file systems. This is really hard to deal with but worries not for there are some potential fixes you can check out to resolve this problem.
Option 1 – Try to manage the Page file in the Partition
As mentioned earlier, if a Page file exists in a partition, you won’t be able to delete it. The page file is what stores your data when the system’s random access memory fills up. To resolve this, follow these steps:
Go to the Start menu and type “View advanced system settings” in the field and open it from the search results.
Next, click on Settings in the Advanced tab.
On the new window that pops up, go to the Advanced tab and select Change.
Next, uncheck the checkbox of “Automatically manage paging file size for all drives” and highlight the drive you want to delete.
Then select “No paging file” and click on Set.
Now click on the Apply and OK buttons on all the windows and restart your computer.
Option 2 – Delete storage partition via Command Prompt
Tap the Win + X keys or right-click on the Start button and select Command Prompt (Admin) or you could also type in “cmd” in the Cortana search box and right-click on the Command Prompt icon and then select the “Run as Administrator” option from the context menu.
Once you have Command Prompt pulled up as admin, type in and enter this command – diskpart
After entering this command, the Diskpart Utility will start. Diskpart Utility is a command-line-based utility just like Command Prompt but it will get a UAC Prompt after you invoke it so you have to click Yes for the UAC Prompt.
After that, type in list volume and tap Enter to see the list of all the partitions created on your PC. This includes both types of partitions that are visible to the normal users in the File Explorer as well as the ones that are created by Windows 10 by default which helps it in storing the boot files and other essential system files.
You should see a list of all the partitions made on your computer. Select the partition you want to delete by its Unique Identification number as Volume X where X denotes the Unique Identification Number.
Next, type in the select volume number command and hit Enter to select the desired volume.
Then delete the volume you’ve selected and type in the delete volume command and hit Enter to delete the volume you just selected and convert it into unallocated space.
Option 3 – Delete storage partition via Windows PowerShell
Start by tapping the Win + X keys or simply right click on the Start button and select Windows PowerShell (Admin) or you could also type in “Windows PowerShell” in the Cortana search box and right-click on the Windows PowerShell icon and select the “Run as administrator” option.
Once you’ve opened the Windows PowerShell, type in the Get-Volume command and hit Enter to get a list of all the partitions on your PC.
Next, select the drive letter you want to delete and then type in the Remove-Partition –DriveLetter command and hit Enter to delete the selected partition. Note that you need to replace the drive letter with the letter of the partition you want to get rid of.
After that, it will ask you for confirmation. Just hit the Y key for Yes or hit the A key to say Yes to All. This will delete all the partition you’ve selected and will move them in as unallocated space.
If you have suddenly run into a problem when trying to connect or pair your Bluetooth keyboard with your Windows 10 computer, read on as this post will guide you on how exactly you can resolve the problem.
This kind of problem typically occurs when you’ve disabled the Bluetooth option. However, this option is already enabled and you still encountered the same error message saying, “Check the PIN and try connecting again”, then you need to troubleshoot the problem further.
In most cases, this kind of issue can be fixed when you restart your computer and go to the Windows Settings and select the “Add Bluetooth or other devices” option and then put the keyboard into pairing mode. And when the keyboard appears in the “Add a device” dialog box, just select it. On the other hand, if your Bluetooth keyboard won’t get connected to your Windows 10 computer and you encounter an error that says, “Can’t pair Bluetooth keyboard, Check the PIN and try connecting again”, then you need to check out the options provided below but before you do so, make sure that you create a System Restore point first as some of the troubleshooting options provided involves the Windows Registry.
Option 1 – Try to use the Device Pairing Wizard
The Device Pairing Wizard is the one that allows your computer to look for any new devices and display them underneath it. All you have to do to use this wizard is to follow its instructions to connect your Bluetooth device to Windows 10. To get started, follow these steps:
First, tap the Win + R keys to launch the Run utility and type “devicepairingwizard” in the field, and then hit Enter to run the Device Pairing Wizard.
After that, wait for a couple of seconds until the devices appear. Once they do, select the Bluetooth device you wish to add.
A new screen with a passcode should appear instantly. You need to take note of the given passcode and type them on your Bluetooth keyboard.
Once done, tap Enter. This should help in pairing your computer to your Bluetooth keyboard.
Option 2 – Try to use the Registry Editor
The next thing you can do to resolve the pairing issue with your Bluetooth keyboard is to use the Registry Editor by following these steps:
Tap the Win + R keys to open the Run utility and type “Regedit” in the field and then hit Enter to open the Registry Editor.
Next, navigate to this registry path: HKEY_USERS/.DEFAULT/Software/Microsoft/Windows/CurrentVersion/Bluetooth/ExceptionDB
From there, look for the folder named “Addrs” and expand it. If you see any folders or keys under it, select them and delete them. These keys represent the MAC address of your Bluetooth devices.
Once you’re done, restart your computer and try to pair your Bluetooth keyboard once more.
Option 3 – Try running the Bluetooth Troubleshooter
As you know, Windows 10 has various troubleshooters with user-friendly interfaces where you can utilize them to fix issues in your PC. And since you’re dealing with some Bluetooth problem, you have to run the Bluetooth Troubleshooter.
Open the Windows 10 Settings.
Then go to Update & Security > Troubleshoot.
You should find the option for Bluetooth on your right-hand side – click on it then click on the “Run the troubleshooter” option.
Now follow the next screen options.
Option 4 – Try to reinstall or update the Bluetooth driver
The issue might have something to do with the Bluetooth drivers. It could be that it is outdated and needs to be updated or that you recently updated it and since you have trouble pairing your Bluetooth keyboard, you can update, rollback, or uninstall the Bluetooth drivers. How? Follow the steps below.
Tap the Win + X keys to open the Device Manager.
Next, look for the Bluetooth device and right-click on it.
Select the option “Update driver”.
After that, a new popup window will appear. In there, select the option, “Search automatically for updated driver software”.
Note: Checking the update may take a few minutes so you’ll have to wait until it finishes. If it is able to find an update, you must install it.
Hacker group recently came up with claims that they have stolen data from 100 million T-Mobile customers. T-Mobile has responded with confirmation it has been compromised and that over 40 million records were stolen, among them are not just present customers, but anyone who has applied for T-Mobile service as well as past accounts.
What has been stolen?
Report from T-Mobile states that stolen records included first and last name, date of birth, social security number, driver’s license & ID information. The company said that it has “no indication that the data contained in the stolen files included any customer financial information, credit card information, debit or other payment information.” Not really a reassuring statement meaning that they really do not know, but even if the statement is true, already stolen information is as much if even not more damaging and devastating as payment information.
What T-Mobile is planning to do now?
It is stated that the hole used for the hack has been addressed and closed so no more data can be stolen.
Considering people that had their personal information compromised, T-Mobile said it is planning to reach out to them and offer them two years of free identity protection through McAfee’s ID Theft Protection Service.
Additionally, T-Mobile recommends postpaid customers change their PIN by going online into their T-Mobile account or calling T-Mobile customer service by dialing 611 on their phone. The company also recommends a feature called Account Takeover Protection that prevents unauthorized individuals from stealing a phone number and porting it out of T-Mobile.
Finally, the company will publish a website “for one-stop information and solutions to help customers take steps to further protect themselves.”
Many times we were talking and writing here on Errortools.com about security, privacy, hacking, identity theft, etc. We tried to raise important security questions and I hope I have managed to at least shed some light and change maybe some bad behaviors for some, helping them embrace better routines about their security on their PC.
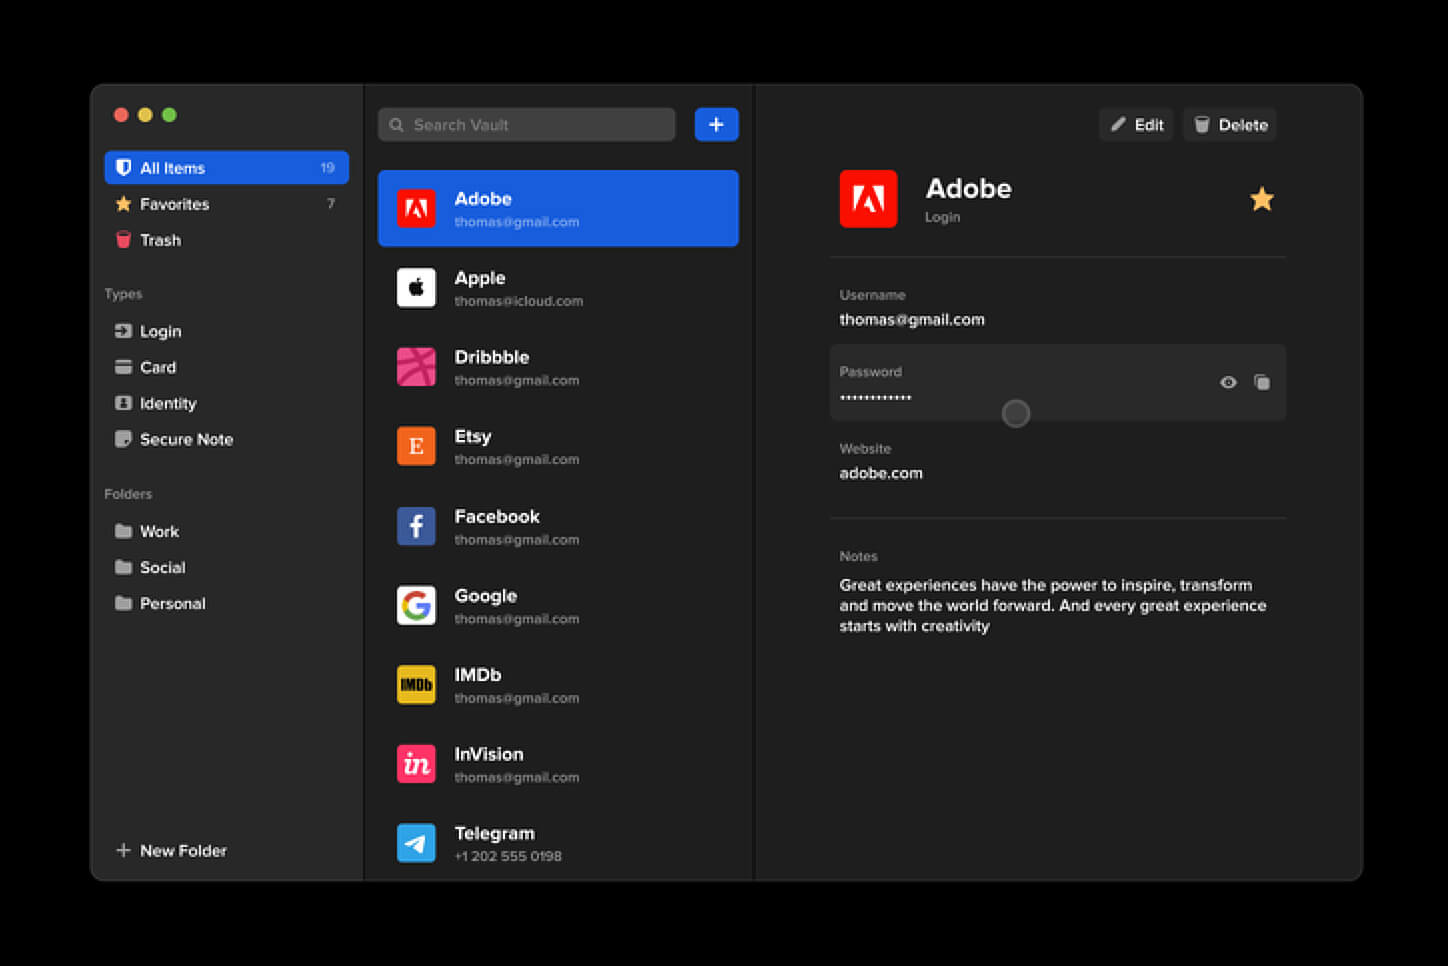
In this light, I will today present you with one neat and awesome piece of software, a password manager worth your time and money (if you want premium features): BitWarden.
What BitWarden offers?
The first thing that it offers is the completely free basic plan, granted BitWarden is not an open-source project nor completely free but it has an unlimited free basic plan that will cover 90% of user needs. There is also a free basic unlimited plan for Organizations letting you and one more user share files and other stuff via BitWarden making it a cool option if you need it.
Premium features offer you encrypted sharing of files, two-step login, 1GB file attachments (encrypted), Bitwarden Authenticator (TOTP), Vault Health Reports, Emergency Access, and Priority Support. The cost for all of these additional features is 10 USD per year for an individual plan or 40 USD per year for organizations where you will get an increase of maximum users from 2 to 6. Yes, you read that correctly, only 10 USD per YEAR for the whole set of features. Granted if you do not need any of them, enjoy the free version forever.
Besides very low premium cost BitWarden will offer you compatibility with all major browsers and devices including both Android and iOS platforms making it a great cross-platform solution to login and maintain your passwords anywhere with just one click.
Once installed all you need to do is set one master password and be very careful not to lose or forget this one, if you do all of your other generated passwords will be lost forever.
Features
Secure Password Sharing
Share your encrypted data quickly and easily, and only with the users or teams who need access
Cross-Platform Accessibility
Access critical data in your Bitwarden vault from any location, browser, and device
Cloud-Based or Self-Host
Get up and running in minutes in the cloud or you can self-host Bitwarden for complete data control
Security Audit & Compliance
Open source and third-party audited, Bitwarden complies with Privacy Shield, GDPR, CCPA regulations
Vault Health Reports
Access insightful reports to reveal weak, reused passwords, and other helpful data security metrics
Directory Sync
Our powerful Directory Connector streamlines user and group onboarding and keeps them in sync
Always-On Support
Our Customer Success agents are available to support you around the clock
Detailed Event Logs
Bitwarden creates audit trails to help you keep track of user and group access to sensitive data
Flexible Integrations
Unite your existing systems with Bitwarden using SSO authentication, Directory services, or powerful APIs
Conclusion
There are many password managers out there but via recommendation I have tried BitWarden and truth to be told, I really never felt the need to try anything else, it is great at what it does and it is moving forward with features and it is constantly updated and maintained.
If you are running a System File Checker scan but got an error message instead that says, “There is a system repair pending which requires reboot to complete, Restart Windows and run SFC again”, worry not for this post will walk you through how you can fix the problem.
This kind of error can be addressed and fixed with several potential fixes which will be provided in this post. You can try to restart your computer and run a System File Checker scan again or delete the pending .xml file or use the “revertpendingactions” parameter for the DISM tool. For more information, refer to each one of the options given below.
Option 1 – Try restarting your computer and run the SFC again
The first thing you can do to fix the problem is to restart your computer and let the pending process be completed. After your computer restarted, try to run System File Checker again and see if the error is now fixed or not. If not, refer to the other options below.
Option 2 – Try deleting the pending .xml file
The next thing you can do to fix the problem is to delete the pending .xml file. How? All you have to do is navigate to this location at CWindowsWinSxS and from there, look for a pending .xml file and rename it or delete it. This will get rid of any pending tasks and will build a fresh new check.
Option 3 – Try to use the “revertpendingactions” parameter for the DISM tool
If the two options given above didn’t work, you can try using the revertpendingactions parameter for the DISM tool. If you’re not able to boot into Windows, then run Command Prompt from the Recovery Console and execute the given command below.
Error 0xA00F4244 or 0x200F4244 is when Windows can not detect the WEB camera in your system and it is usually accompanied by the message: We can’t find or start your camera.
There could be several reasons for this error and in this guide, we will cover all of them in order to help you to get back on track and start using your WEB camera which is perhaps now more required than ever in this world we live in.
Check privacy settings
With the latest Microsoft Windows updates come the latest issues and it is not strange that privacy settings can become reset or changed when an update is applied. This is a quick fix to this issue and can be the sole reason why you get this error, go to Windows settings, then to privacy and check to see if the WEB camera is turned OFF, if this is the case turn it back ON and make sure that option Allow apps to access your camera is also set to ON.
Check if the camera is enabled
Sometimes it is by mistake, sometimes by an update but the web camera could be disabled in the device manager of Windows. Right-click on the Windows Start button and click on device manager to open it up, find and expand the cameras category. Right-click on your camera, if it is disabled, you will have the option to enable the camera, if it is enabled and Windows is detecting that it is working fine you will have the option to disable it.
Check antivirus settings
Antivirus and firewall applications are in today's world and life-essential piece of software but they can sometimes create more harm than good, from stopping windows updates to killing important services of applications and preventing internet access being just some examples of their paranoid behavior. Try disabling or turning your protection software OFF and see if your WEB camera will miraculously come back to life. If this is the case, somewhere in the settings of software there is an option that controls this aspect, try to locate it and set it in that way so you are able to use your camera.
Reinstall camera driver
If the previous three solutions failed to produce a satisfactory solution then reinstalling the camera driver might fix the problem. Go to your manufacturer's camera website and download the latest driver for your camera. Go to the device manager and uninstall the driver for the camera, then apply the latest driver and reboot the system.
Check connections and cable
Sometimes an issue is not due to software nature, sometimes it is hardware. Try checking connections and plug the camera in another USB port, twist and turn the cable a little to see is issue cable-related.
Check to see if the application supports your camera
If Windows has detected the camera and is not reporting any issues with it check your application to see if it can detect your camera and that it supports it fully. Sometimes newer applications tend to support only newer camera models. Try to use the camera in other software as well to see if the problem is with the application you are using.
Try camera on another computer
If everything else fails, try the camera on another computer to see if it will work there. If the camera is not working there as well it is probably malfunctioned and broken for good. If it does work there, try to find out what is different in that computer in comparison to yours, maybe it is some service running in the background, certain application configuration, Windows version itself, USB port version, or something else.
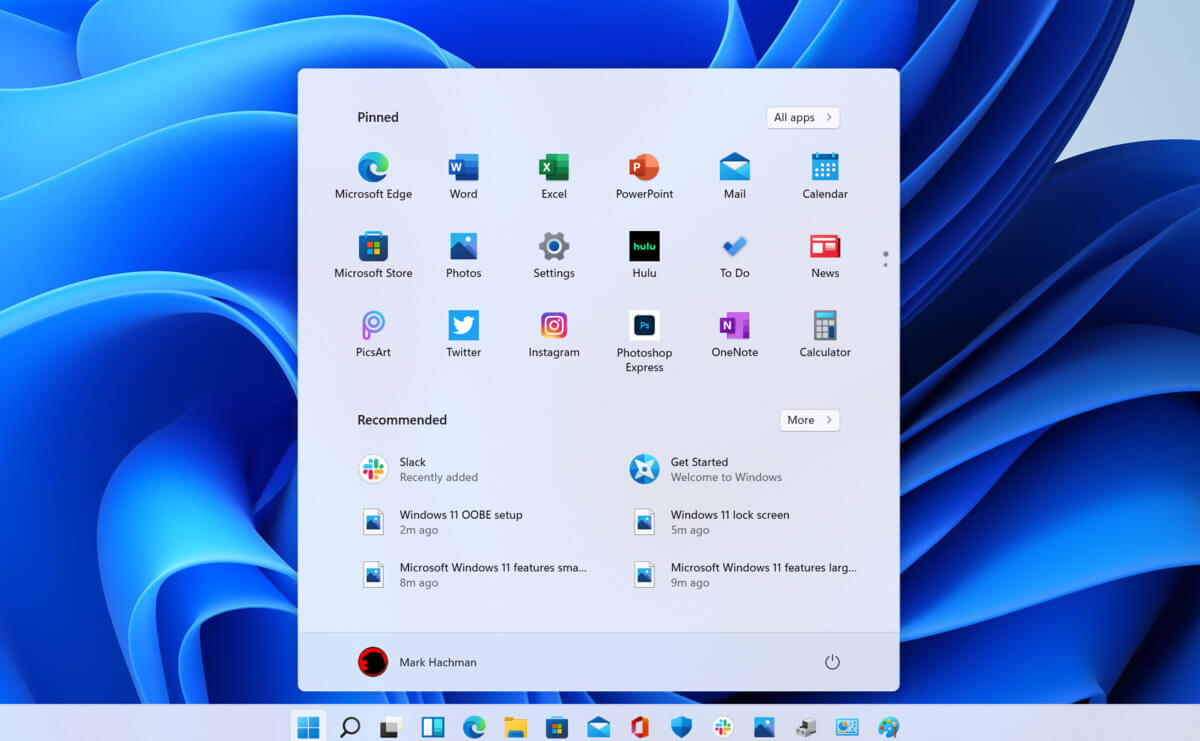
Windows 11 has brought some bad reviews for its inability to change the taskbar location to the screen. Luckily we can still hide it if needed.
In order to hide the taskbar from the screen follow these simple instructions:
Right-click the taskbar itself and select “Taskbar Settings” in the tiny menu that pops up or open Windows Settings and navigate to Personalization > Taskbar
Click on Taskbar Behaviors
Check the box next to Automatically hide the Taskbar
Close settings
As soon as you click on the box to hide the taskbar Windows 11 will apply your settings and hide the taskbar, you will get one line at the very bottom of the screen indicating that the taskbar is still present, just hidden.
When you reach the bottom of your screen with the mouse it will pop up and be visible again, just like in all Windows so far.


 Hacker group recently came up with claims that they have stolen data from 100 million T-Mobile customers. T-Mobile has responded with confirmation it has been compromised and that over 40 million records were stolen, among them are not just present customers, but anyone who has applied for T-Mobile service as well as past accounts.
 Many times we were talking and writing here on Errortools.com about security, privacy, hacking, identity theft, etc. We tried to raise important security questions and I hope I have managed to at least shed some light and change maybe some bad behaviors for some, helping them embrace better routines about their security on their PC.
In this light, I will today present you with one neat and awesome piece of software, a password manager worth your time and money (if you want premium features): BitWarden.
Many times we were talking and writing here on Errortools.com about security, privacy, hacking, identity theft, etc. We tried to raise important security questions and I hope I have managed to at least shed some light and change maybe some bad behaviors for some, helping them embrace better routines about their security on their PC.
In this light, I will today present you with one neat and awesome piece of software, a password manager worth your time and money (if you want premium features): BitWarden.
 Windows 11 has brought some bad reviews for its inability to change the taskbar location to the screen. Luckily we can still hide it if needed.
In order to hide the taskbar from the screen follow these simple instructions:
Windows 11 has brought some bad reviews for its inability to change the taskbar location to the screen. Luckily we can still hide it if needed.
In order to hide the taskbar from the screen follow these simple instructions: