Logo

A Guide to Fixing Error Code 80070490

Error Code 80070490 - What is it?

This error 80070490 code may occur when you try to update your PC either through the Microsoft Update website or with a Windows update. The error message is displayed in the following format:

Error 80070490 (Element not found)

Solution

Restoro box imageError Causes

Error Code 80070490 is triggered because of a couple of reasons. It indicates the file CBS Manifest that is needed to install Windows update is corrupt or damaged.

CBS (Component Based Servicing) Manifest is the file that is used to help your computer recognize various components inside your PC.

Another reason for error occurrence is registry corruption.

If the registry that stores all the information and activities performed is not cleaned frequently, the obsolete files saved in the registry like the junk files, bad entries and cookies eventually accumulate and corrupt it thereby generating such error codes.

Further Information and Manual Repair

Here are some effective and proven methods that you can try by yourself to resolve error code 80070490 on your PC.

Method 1 - Use the System Update Readiness Tool

Download the System Update Readiness Tool from the Windows website and run it on your PC.

This tool is designed to detect and scan for abnormalities and inconsistencies that could be preventing and causing problems during the system update.

Once you have downloaded and scanned your PC, try to install the updates again. If the error still persists, try other methods illustrated below.

Method 2 - Repair Windows

Here are the steps that you need to follow to repair Windows:

  • First, close all programs and then reboot your PC. Insert the Windows DVD into the computer’s disk drive and wait for the setup to begin.
  • If for any reason, the setup doesn’t start automatically, then don’t worry simply click start, then type Drive: setup.exe in the search box. Please note, in the drive insert the letter of your computer’s DVD drive for example D:setup.exe.
  • Now in the programs list, click setup.exe  And then click install now.
  • After that click ‘go online to obtain the latest updates for installation’, if you are asked for the Windows Product Key, then simply type it to proceed.
  • In the ‘Which kind of Installation do you want?’ option, click Upgrade.

When the Windows installation is complete, restart your PC and then run Windows update.

Method 3 - Clean the Registry

If the cause of error code 80070490 on your PC is related to registry corruption, then it is advisable to download Restoro. This is an advanced and easy-to-use PC Repair Tool embedded with a registry cleaner.

The registry cleaner scans your entire PC, removes all obsolete and unnecessary files corrupting the registry, and cleans it right away.

Click here to download Restoro to repair error code 80070490

Do You Need Help with Your Device?

Our Team of Experts May Help
Troubleshoot.Tech Experts are There for You!
Replace damaged files
Restore performance
Free disk space
Remove Malware
Protects WEB browser
Remove Viruses
Stop PC freezing
GET HELP
Troubleshoot.Tech experts work with all versions of Microsoft Windows including Windows 11, with Android, Mac, and more.

Share this article:

You might also like

Fixing Folder Size Issue in Windows 10
Recently, several Windows 10 users have reported an issue with the Windows folder sizes in their PCs. If you are one of these affected users, read on as this post will walk you through fixing this issue. For instance, if you have a folder with 100 GB worth of data and when checking its size using its properties, you see the wrong size instead of 100GB. The size displayed will most likely be a random number which can either be bigger or smaller than the real size of the folder. This incorrect folder size issue does not happen to any specific drive or certain kinds of folders as any folder can be affected by this incorrect folder size issue. When you try to rename the affected folder, the size will change but its size still remains to be incorrect. The root cause of this particular issue is in Windows 10 itself. It is a known bug that came along with one of the latest Windows Updates which prevents the File Explorer to accurately read the metadata of a certain folder or file and leads to displaying incorrect and unexpected file sizes and the reason why you might also notice that your drive is also not correct. Since this is brought upon by one of the recent or latest Windows Updates the good thing is that Microsoft will most likely release a fix on its next upcoming updates but until then, you will be left with no choice but to deal with an incorrect folder or file size. To remedy that, here are some suggestions you can try that might fix the problem.

Option 1 – Try using the System File Checker

The System File Checker or SFC is a built-in command utility that helps in restoring corrupted files as well as missing files. It replaces bad and corrupted system files to good system files that might be causing the incorrect folder or file size in Windows 10. To run the SFC command, follow the steps given below.
  • Tap Win + R to launch Run.
  • Type in cmd in the field and tap Enter.
  • After opening Command Prompt, type in sfc /scannow
The command will start a system scan which will take a few whiles before it finishes. Once it’s done, you could get the following results:
  1. Windows Resource Protection did not find any integrity violations.
  2. Windows Resource Protection found corrupt files and successfully repaired them.
  3. Windows Resource Protection found corrupt files but was unable to fix some of them.

Option 2 – Try resetting Windows 10

To fix the folder and file size issue, you can try resetting Windows 10. Doing so won’t get rid of any file in your system – instead of erasing all your media files and documents, this reset option resets all the system settings and files. That way, you won’t have to deal with inaccurate folders or file sizes as you browse and use your files.

Option 3 – Wait for the Windows Update

As mentioned, this is already a known issue and a lot of Windows 10 users have already complained about it to Microsoft so a bug fix will be soon released in the latest Windows Updates.
Read More
Change system font in Windows 10
In previous versions of Windows changing the system, the font was a pretty straightforward process, but it seems Microsoft did not want this feature to keep for whatever reason and there is no option as of the time of the writing of this article to do it in standard options in Windows 10. But do not worry, you are still able to customize your Windows and choose which font would you like to see inside it in all of its dialogs. You can choose whichever font you desire, the only prerequisite is it to be installed on your system. This guide will require you to change values in the registry of Windows itself so please follow step-by-step instructions and always make a backup of the registry before changing it in order to prevent some permanent Windows issues. All of that being said, let's start.

Setting new font

First thing is to open notepad, in the notepad paste the next block of code:
Windows Registry Editor Version 5.00 [HKEY_LOCAL_MACHINE\SOFTWARE\Microsoft\Windows NT\CurrentVersion\Fonts] "Segoe UI (TrueType)"="" "Segoe UI Bold (TrueType)"="" "Segoe UI Bold Italic (TrueType)"="" "Segoe UI Italic (TrueType)"="" "Segoe UI Light (TrueType)"="" "Segoe UI Semibold (TrueType)"="" "Segoe UI Symbol (TrueType)"="" [HKEY_LOCAL_MACHINE\SOFTWARE\Microsoft\Windows NT\CurrentVersion\FontSubstitutes] "Segoe UI"="NEW_FONT"
Where in "Segoe UI"="NEW_FONT" instead of NEW_FONT you need to write the exact name of the font that you wish to use as a system font. Once you have replaced the default system font with your desired one, go to File and save as, from file type drop-down menu, choose all files and save this file as .REG type giving it whatever name you wish. When the file is saved, close notepad, right-click on the saved file and choose the merge option. Confirm with YES and click on OK. Reboot your system and your Windows will now use the font of your choice as its default system font.

Restoring default font

If you wish to return the old default system font as it was, follow the same steps but in your notepad paste this code:
Windows Registry Editor Version 5.00 [HKEY_LOCAL_MACHINE\SOFTWARE\Microsoft\Windows NT\CurrentVersion\Fonts] "Segoe UI (TrueType)"="segoeui.ttf" "Segoe UI Black (TrueType)"="seguibl.ttf" "Segoe UI Black Italic (TrueType)"="seguibli.ttf" "Segoe UI Bold (TrueType)"="segoeuib.ttf" "Segoe UI Bold Italic (TrueType)"="segoeuiz.ttf" "Segoe UI Emoji (TrueType)"="seguiemj.ttf" "Segoe UI Historic (TrueType)"="seguihis.ttf" "Segoe UI Italic (TrueType)"="segoeuii.ttf" "Segoe UI Light (TrueType)"="segoeuil.ttf" "Segoe UI Light Italic (TrueType)"="seguili.ttf" "Segoe UI Semibold (TrueType)"="seguisb.ttf" "Segoe UI Semibold Italic (TrueType)"="seguisbi.ttf" "Segoe UI Semilight (TrueType)"="segoeuisl.ttf" "Segoe UI Semilight Italic (TrueType)"="seguisli.ttf" "Segoe UI Symbol (TrueType)"="seguisym.ttf" "Segoe MDL2 Assets (TrueType)"="segmdl2.ttf" "Segoe Print (TrueType)"="segoepr.ttf" "Segoe Print Bold (TrueType)"="segoeprb.ttf" "Segoe Script (TrueType)"="segoesc.ttf" "Segoe Script Bold (TrueType)"="segoescb.ttf" [HKEY_LOCAL_MACHINE\SOFTWARE\Microsoft\Windows NT\CurrentVersion\FontSubstitutes] "Segoe UI"=-
Reboot your system and your Windows will now revert the font of your choice as its default system font.
Read More
A command is not recognized Error in Windows
A command is not recognized Error, what it is? If you are constantly using programs like CMD or DISM directly from the Run prompt, you might have wondered how they launched instantly and how is it that the Windows operating system is able to find them right away. For instance, when you create a shortcut of a program, the shortcut knows where exactly the program is located and launches it quickly. The Windows operating system keeps a list of paths where the most common system programs are located so when you use the Run prompt, it opens easily. The list kept by Windows is called the Windows Environment Variables. If something goes wrong with this list, the programs won’t work. So in this guide, you will be guided on how you can troubleshoot the problem where any command you use is not recognized as an internal or external command, operable program, or batch file. Before you start troubleshooting the problem, you need to make sure that the program you are trying to run really exists. In fact, this can also happen to the Run program which is pulled up using the Win + R shortcut. To check, go to C:\Windows\System32 and there, check if the program exists or not or you can also try searching for the EXE in the System 32 folder. After making sure that the program exists, refer to the instructions given below.

Modify the Windows Environment Variables:

  • Step 1: Tap the Win + X keys and then select System. After that, it will open the section where you can see all the properties on your computer.
  • Step 2: Next, select the Advanced system setting located on the left pane and click on the Environment Variables.
  • Step 3: After that, locate Path under the System Variables and select EDIT.
  • Step 4: Before you edit, you need to copy the entire string and paste it into the Notepad app so that in case something went wrong, you can paste it back.
  • Step 5: Next, look for the directory path, “C:\Windows\System32”. If you can’t find it, try adding a semi-colon at the end.
  • Step 6: Afterwards, click OK to save the changes made and then exit.
  • Step 7: Now restart your computer as all the paths are picked up when your computer restarts.
Note: Now all you have to do is to try executing the programs once again – the ones where you got the error, “ is not recognized as an internal or external command, operable program or batch file” every time you open them and then see if you can now open these programs or not.
Read More
Quick Guide to Fixing Error Code 29

What is Error Code 29?

Code 29 is a Device Manager error commonly seen whenever a hardware device driver reports a problem. This error code indicates that the resources needed for operation are not available.

The computer hardware basically requires drivers to interface with the operating system. Drivers comprise multiple components and are supplemented with other resources provided by the BIOS (a physical chip on the motherboard).

The BIOS contains a set of basic input and output instructions for the computer system to boot, load drivers, and more.

Its firmware provides resources that drivers require to interface with other essential components. However, when the firmware fails to provide the requested resources, the device drivers stop functioning; this results in error codes like code 29.

Error code 29 is usually displayed in the following format:

“This device is disabled because the firmware of the device did not give it the required resources” Code 29

Solution

driverfix boxError Causes

Error code 29 may be triggered due to several reasons. These include:

  • Outdated drivers
  • Corrupted drivers
  • BIOS misconfiguration
  • The device firmware is corrupt
  • Previous attempt to update the driver failed

To avoid inconvenience and to ensure your computer keeps working at its optimal pace, it is recommended that you repair error code 29 on your PC immediately. Delay may limit you from using certain hardware attached to your system properly.

Further Information and Manual Repair

To repair error code 29, you don’t have to hire a professional and spend hundreds of dollars. Here are some quick and effective DIY methods that you can try to resolve this issue in minutes even if you don’t have any technical background.

Method 1 - Reboot Your PC

Sometimes, error codes like code 29 may pop up on your computer screen due to some temporary glitch with the hardware. Rebooting can resolve the issue easily.

Therefore, before you do anything, try restarting your PC. It could be all you need to repair code 29. However, if the error code continues to persist, try the other methods given below.

Method 2 - Clear the CMOS

This may sound technical but it isn’t. To begin, with CMOS is an acronym for Complimentary Metal Oxide Semiconductor.

It is a term that is used to describe motherboard memory that contains the BIOS settings. Clearing CMOS helps reset the BIOS settings to their default manufacturer levels. It’s easy to do and is an effective troubleshooting step to resolve error code 29.

To do this, simply:

  1. Enter the BIOS setup utility  by restarting your PC
  2. Watch for an entering setup message
  3. Enter the BIOS access key. Usually, the key is F2 or F12. However, the key may differ from manufacturer to manufacturer. You may want to check the manufacturer’s website first to find out the BIOS access key before you restart your PC.
  4. ‘Reset BIOS settings’ to their default factory levels.

Method 3 - Enable the Device in the BIOS

Error code 29 may appear if a device is disabled. In such a scenario, simply follow the same steps as discussed in method 2, and in the advanced BIOS settings, look for disabled devices.

Enable the devices in the BIOS so that you use them easily.

This will hopefully resolve the issue. If it doesn’t, then this means the error code 29 is caused by either corrupted or outdated drivers. Try method 4 to resolve this issue successfully.

Method 4 - Identify the Problematic Device Drivers and Update them

Whether the error code 29 is caused by a misconfigured, corrupted, or outdated driver, simply update the new driver version to resolve. When doing it manually, you will first have to find and identify the problematic device drivers in the Device Manager.

You can access the Device Manager by going to the start menu and then simply typing Device Manager in the search bar.

Access the Device Manager and the properties to identify problematic drivers. Problematic drivers are normally displayed with a yellow exclamation mark.

Once you have spotted problematic drivers, simply update new drivers to resolve them. Though there is nothing technical about it but it may be time-consuming.

Method 5 - Install Driver Assist to Update Drivers Automatically and Regularly

A good alternative to manual driver update is DriverFIX. Simply download and install DriverFIX on your PC to update all problematic drivers in seconds. This is a cutting-edge program designed to resolve all kinds of device driver problems.

It is user-friendly and compatible with all Windows versions.

The intelligent programming system deployed inside this software program enables it to identify and detect all problem drivers automatically thereby sparing you from the hassle.

Furthermore, it also matches the drivers with the latest and compatible versions and updates them on a regular basis.

It takes the guesswork out of finding misconfigured and corrupted drivers and fixes driver-related problems and error codes like code 29 right away.

Click here to download DriverFIX to repair Device Manager error code 29 on your system without any hassle.

Read More
Cannot start new hardware device, Error 49
In case you don’t know, the Windows Registry contains a System Hive which is a core part of Windows. The Windows operating system store various settings, options, and configurations. And if you encounter a Device Manager Error 49 for a device then it means that the system hive has exceeded its size limit. Worry not for this post will provide you with possible solutions that can help you in fixing error code 49. You will see the following error message when you encounter error code 49:
“Windows cannot start new hardware devices because the system hive is too large (exceeds the Registry Size Limit), (Code 49)”
There are instances when it may so happen that the device or devices are no longer attached to the computer but they are still listed in the system hive of the registry. For instance, if you were removing hardware and application for years but they weren’t removed from the registry then the size of the system hive keeps on growing until it hits the maximum limit. As you know, making changes in the registry manually, no matter how knowledgeable you are on such things is not sage since the registry is not only important but also complex. In addition, the System Hive is also a permanent part of the Registry associated with a set of files that contain information related to the configuration of the computer on which the OS is installed. To resolve this error, you must remove or uninstall any hardware devices that are no longer in the system. In fact, the Device Manager hides them by default so you need to enable hidden or non-present devices. Follow the instructions given below to set the Devices Manager to display devices that are no longer connected to the computer. Step 1: Tap the Win + R keys to open the Run dialog box. Step 2: After that type in “cmd” and hit Enter to open the Command Prompt. Step 3: Type “set devmgr_show_nonpresent_devices=1” in the Command Prompt and hit Enter to enable the hidden devices option. Step 4: After that, exit Command Prompt and tap Win + X + M to open the Devices Manager. Step 5: After opening the Devices Manager, click on View and then select the “Show hidden devices” option. This will show you all the devices that are not connected to the computer but are still mentioned. Step 6: Next, select a non-present device and click Uninstall from the Driver tab. Step 7: After that, repeat what you’ve done on step 5 for any other device that you no longer use. Step 8: Restart your computer. You can check the device Properties dialog box in the Device Manager after you’re done removing all the useless devices, to check if the error is now fixed or not. Moreover, you can also try running the Hardware and Devices Troubleshooter as it can also help resolve hardware-related problems. To use it, refer to the steps below.
  • The first thing you need to do is click on Start and then on the gear-like icon to pull up the window for Settings.
  • After opening Settings, look for the Update and Security option and select it.
  • From there, go to the Troubleshoot option located on the left-hand side of the list.
  • Next, select Hardware and Devices from the list and open the Troubleshooter and run it. Once it is doing its job, wait for it to complete the process and then restart the system.
  • After the system restarts, check if the problem’s now fixed. If not, refer to the next option given below.
Read More
Fix One Drive Error: This is not a valid file name
As you know, Microsoft’s consumer cloud storage platform is none other than OneDrive. It is where users can save any of their files albeit it’s mostly used to store common files like documents and photos. However, there are times when you might encounter some problems when saving these files. Recently, some users reported that they had problems saving Word documents to OneDrive and if you experience the same issue, then you’ve come to the right place as this post will guide you on how to resolve it. According to users who encountered the problem, when they try to save Word documents on OneDrive, an error message appears instead stating, “This is not a valid file name”. This kind of error only occurs when the file is opened from within OneDrive for saving in a different folder. In other words, if the file is saved in the same folder, the error won’t pop up but if it is saved in a separate folder, that’s when the error appears. Worry not though for fixing this error is not complicated and won’t take too long. It seems that this error is due to the 259-character limitation when creating and saving files as far as the Office products are concerned. To resolve it, there are several workarounds you can check out. Before you proceed with these workarounds, make sure that you have a stable internet connection.

Option 1 – Try renaming the file with a shorter name

The first thing you can do to fix the problem is to rename the file with a shorter name. Just right-click on the file and select the Rename option from the menu and then type in the new name and click OK or tap Enter to rename the file.

Option 2 – Try renaming the folders where the file is located

Like what you did in the first given option, all it takes is a right-click but this time on a folder. Rename the folder with a different name and save the changes made and then check if you can now save the Word document on OneDrive.

Option 3 – Try moving the file to a folder with a shorter path

If the first two options didn’t work, you can try moving the file to a folder with a shorter path. Note that it is not the same as doing it locally on a Windows 10 computer so you have to right-click on the file and select the “Move to” option. After that, locate the folder where you want to move the file and select it and then click on the Move button to complete the task.

Option 4 – Try making some changes in the document

You could also try to make some modifications to the document. Once you’ve done that, click the File tab and select the Save As option and then go to the folder where you want to save the file and tap enter.
Read More
WebShield Malware Removal Tutorial

Web Shield is a free application that allows you to view insightful analyses about the websites that you visit and specifically how they’re tracking you online. Web Shield cannot determine exactly who is tracking your computer usage. Instead, Web Shield allows a user to see which websites have placed tracking code onto their computer.

This software is ad-supported and displays advertisements in the form of injected banner ads, popups, and context hyperlinks in the user’s web browser. It adds Windows Background services, displays unwanted advertisements, and can modify the browser’s home page.

About Browser Hijackers

Browser hijackers (also called hijackware) are a type of malicious software that modifies web browser settings without the user’s knowledge or permission. These hijacks appear to be increasing at a worrying rate across the world, and it could be really nefarious and sometimes dangerous too. There are lots of reasons why you may experience a browser hijack; but commercial, marketing, and advertising are the main reasons for their creation. The idea is to force users to visit specific sites that are looking to increase their site visitor traffic and generate higher ad income. Nevertheless, it is not that harmless. Your web safety is jeopardized and it is also very irritating. Furthermore, hijackers will make the entire infected system fragile – other destructive malware and viruses would seize these opportunities to intrude into your system very easily.

Browser hijacking signs

Here are some symptoms that indicate you have been hijacked: home-page is modified; you see new unwanted favorites or bookmarks added, typically directed to ad-filled or pornography sites; the default search engine has been changed and the web browser security settings have been cut down without your knowledge; you notice many toolbars on the internet browser; you see lots of pop-up ads on your computer screen; your internet browser has become unstable or starts running slowly; you can’t visit certain websites like home pages of anti-malware software.

How does a PC get infected with a browser hijacker?

Browser hijackers might use drive-by downloads or file-sharing networks or even an email attachment to reach a targeted computer system. They may also originate from any BHO, browser extension, add-on, toolbar, or plug-in with the malicious objectives. Some browser hijackers spread in user’s PC by using a deceptive software distribution strategy called “bundling” (usually through shareware and freeware). A good example of a popular browser hijacker is the most recent Chinese malware named “Fireball”, which has attacked 250 million computers across the world. It acts as a hijacker but could be changed into a fully functioning malware downloader later on. Browser hijackers will affect the user’s web surfing experience severely, record the websites frequented by users and steal personal information, cause problems in connecting to the net, and eventually create stability issues, causing applications and systems to crash.

Browser hijacker removal

Some browser hijacking could be quite easily reversed by finding and removing the corresponding malware software from your control panel. But, most browser hijackers are difficult to get rid of manually. No matter how much you try to remove it, it can come back over and over. Moreover, manual removal requires you to carry out several time-consuming and intricate actions that are hard to do for novice computer users.

Malware Blocking Access To Safebytes Website And Anti-Malware Downloads - What To Do?

Every malware is bad and the effects of the damage can vary based on the specific type of malicious software. Some malware types alter browser settings by including a proxy server or change the computer’s DNS settings. In these cases, you’ll be unable to visit some or all internet sites, and therefore unable to download or install the required security software to get rid of the malware. If you’re reading this, chances are you’re stuck with a malware infection that is preventing you to download and/or install Safebytes Anti-Malware software on your PC. Even though this type of problem can be tougher to circumvent, there are some steps you can take.

Start your system in Safe Mode

If the malware is set to load at Windows start-up, then booting in Safe Mode should avoid it. Since just the bare minimum programs and services start-up in Safe Mode, there are rarely any reasons for issues to occur. The following are the steps you need to follow to start your computer into the Safe Mode of your Windows XP, Vista, or 7 computers (go to Microsoft website for directions on Windows 8 and 10 computers). 1) Tap the F8 key continuously as soon as your computer boots, but before the large Windows logo or black screen with white texts appears. This would conjure up the “Advanced Boot Options” menu. 2) Make use of the arrow keys to choose Safe Mode with Networking and press ENTER. 3) Once this mode loads, you should have internet access. Now, get the malware removal program you need by using the browser. To install the program, follow the guidelines within the setup wizard. 4) Right after installation, run a complete scan and allow the program to delete the threats it detects.

Switch over to an alternate browser

Some malware only targets particular browsers. If this is your situation, make use of another internet browser as it might circumvent the malware. If you appear to have a trojan attached to Internet Explorer, then switch to a different web browser with built-in safety features, such as Firefox or Chrome, to download your favorite antivirus program – Safebytes.

Install and run anti-virus from your Thumb drive

Here’s yet another solution which is utilizing a portable USB antivirus software that can scan your system for malware without the need for installation. Follow these steps to use a thumb drive to clean your infected computer system. 1) Make use of another virus-free PC to download Safebytes Anti-Malware. 2) Plug in the USB flash drive to a USB port on the uninfected computer. 3) Run the setup program by double-clicking the executable file of the downloaded software, which has a .exe file extension. 4) When asked, choose the location of the pen drive as the place where you want to put the software files. Follow the directions to complete the installation process. 5) Now, transfer the pen drive to the infected PC. 6) Double-click the anti-malware software EXE file on the USB flash drive. 7) Click on “Scan Now” to run a scan on the affected computer for malware.

Review of SafeBytes Anti-Malware

Do you want to download the very best anti-malware software program for your desktop? You can find many applications available that come in free and paid versions for Windows systems. A few of them are great, some are ok types, and some will harm your computer themselves! You need to pick one that is reliable, practical, and has a good reputation for its malware protection. When considering the reliable software programs, Safebytes Anti-Malware is undoubtedly the highly recommended one. SafeBytes anti-malware is a trusted software that not only secures your PC completely but is also quite user-friendly for people of all ability levels. Through its cutting-edge technology, this software protects your computer against infections caused by different types of malware and other threats, including spyware, adware, trojans horses, worms, computer viruses, keyloggers, ransomware, and potentially unwanted program (PUPs). SafeBytes anti-malware comes with a plethora of enhanced features that sets it apart from all others. Here are a few popular features present in this program: World-class AntiMalware Protection: This deep-cleaning anti-malware software program goes much deeper than most antivirus tools to clean out your personal computer. Its critically acclaimed virus engine locates and disables hard to remove malware that hides deep within your PC. Real-time Active Protection: SafeBytes offers complete and real-time security for your computer system. It’ll regularly monitor your laptop or computer for hacker activity and also provides users with advanced firewall protection. Web protection: SafeBytes checks and provides a unique safety rating to every website you visit and block access to web pages considered to be phishing sites, thus protecting you from identity theft, or known to contain malware. Low CPU Usage: SafeBytes is a lightweight and simple-to-use anti-virus and anti-malware solution. Since it uses very little computer resources, this software leaves the computer power exactly where it belongs to: with you actually. 24/7 Guidance: You could get high levels of support 24/7 if you’re using their paid version.

Technical Details and Manual Removal (Advanced Users)

If you’d like to manually get rid of WebShield without the use of an automated tool, it may be actually possible to do so by deleting the program from the Microsoft Windows Add/Remove Programs menu, or in cases of web browser extensions, going to the browsers AddOn/Extension manager and removing it. You’ll probably also want to totally reset your browser to its default settings. If you choose to manually delete the system files and registry entries, make use of the following list to make sure you know precisely what files to remove before undertaking any actions. Please keep in mind that this is for advanced users only and might be challenging, with incorrect file removal leading to additional system errors. In addition to that, certain malware is capable of replicating or preventing deletion. It is recommended that you do the removal procedure in Safe Mode.
Files: %ProgramData%webshield %ALLUSERSPROFILE%Application DataWebShield %ALLUSERSPROFILE%WebShield Registry: [HKEY_LOCAL_MACHINESOFTWAREMicrosoftWindowsCurrentVersionUninstallmweshield] [HKEY_LOCAL_MACHINESOFTWAREmweshield] [HKEY_LOCAL_MACHINESYSTEMCurrentControlSetservicesmwescontroller]
Read More
MyScrapNook Complete Removal Tutorial

MyScrapNook is a browser extension for Google Chrome that allows users to easily find scrapbook templates, layouts, and graphics. This extension requires the use of Adobe Flash Player and does not work with Chrome’s built-in flash player.

When installed MyScrapNook will change your home page and default search engine to MyWebSearch.com. It will also inject unwanted ads and sponsored links into your search queries. This extension has been marked as a Browser Hijacker by several anti-virus applications and is recommended to remove it from your PC.

From the Author:

FREE scrapbooking templates, layouts, and graphics! Get creative with tons of FREE scrapbooking features. With MyScrapNook, you can make beautiful, custom scrapbooks — with just a few clicks. Let us help you capture the memories with FREE scrapbook templates. The MyScrapNook extension offers convenient web search and features from the Chrome New Tab page.

About Browser Hijackers

Browser hijack is a common type of internet fraud where your web browser configurations are altered to make it do things you don’t intend. Basically, nearly all browser hijackers are created for marketing or advertising purposes. These are generally used to force visitors to predetermined sites, manipulating web traffic to generate ad revenue. Many people assume that such websites are legitimate and harmless but that is not the case. Nearly all browser hijacker pose an existent threat to your on-line safety and it is important to classify them under privacy dangers. Browser hijackers can even allow other vicious programs without your knowledge to further damage your computer.

How to know whether the web browser is hijacked?

There are numerous signs of browser hijacking. Below are some of them: the browser’s home page is changed; bookmark and the new tab are likewise modified; the default online search engine has been changed and your browser security settings have been cut down without your knowledge; you notice many toolbars on the web browser; numerous pop-up ads show up and/or your browser popup blocker is disabled; your web browser gets slow, buggy, crashes often; You cannot access particular websites, especially anti-virus sites.

Exactly how browser hijacker infects PCs

There are several ways your computer can become infected by a browser hijacker. They typically arrive through spam e-mail, via file-sharing websites, or by a drive-by-download. They also come from add-on application, also known as browser helper objects (BHO), web browser extensions or toolbars. Also, certain freeware and shareware can put the hijacker within your PC through the “bundling” technique. An example of some notorious browser hijacker includes Anyprotect, Conduit, Babylon, SweetPage, DefaultTab, Delta Search, and RocketTab, however, the names are constantly changing. Browser hijackers can interrupt the user’s web browsing experience greatly, track the websites visited by users and steal sensitive information, cause problems in connecting to the net, and then finally create stability problems, causing applications and system to freeze.

Removing browser hijackers

Some hijackers can be removed by deleting the free software they came with or by eliminating any extension you have recently added to your browser. Sometimes, it could be a difficult job to discover and remove the malicious component because the associated file could be running as part of the operating system process. And there is no denying the very fact that the manual fixes and removal methods can certainly be a difficult job for an amateur computer user. On top of that, there are plenty of risks associated with fiddling around with the system registry files. Experts always recommend users get rid of any malicious software including browser hijacker by using an automatic malware removal tool, which is easier, safer, and faster than the manual removal process. If you’d like to eliminate persistent hijackers effectively, install the top-rated, award-winning anti-malware software Safebytes Anti-Malware. Together with the anti-virus tool, a system optimizer, like SafeBytes’s Total System Care, will help you in deleting all linked files and modifications in the computer registry automatically.

Learn How To Install Safebytes Anti-Malware On An Infected PC

All malware is bad and the degree of the damage can vary greatly with regards to the type of infection. Some malware sits in between your computer and the internet connection and blocks a few or all internet sites that you want to visit. It might also block you from installing anything on your computer, especially the antivirus program. If you’re reading this, you may have infected by malware that prevents you from installing security software such as Safebytes Anti-Malware. There are some steps you can take to get around this issue.

Download the software in Safe Mode with Networking

In the event the malware is set to run at Windows start-up, then booting in safe mode should prevent it. Since only the bare minimum programs and services start-up in “Safe Mode”, there are rarely any reasons for issues to take place. Here are the steps you have to follow to boot into the Safe Mode of your Windows XP, Vista or 7 computers (go to Microsoft site for instructions on Windows 8 and 10 computers). 1) Press the F8 key repeatedly as soon as your computer boots, however, before the big Windows logo or black screen with white texts shows up. This will invoke the “Advanced Boot Options” menu. 2) Select Safe Mode with Networking using arrow keys and press ENTER. 3) As soon as this mode loads, you should have the internet. Now, utilize your browser to download and install Safebytes Anti-malware. 4) Immediately after installation, run a complete scan and allow the software program to delete the threats it finds.

Switch to some other internet browser

Malicious code could exploit vulnerabilities in a specific browser and block access to all anti-virus software sites. If you seem to have a virus attached to Internet Explorer, then switch over to an alternate browser with built-in safety features, such as Firefox or Chrome, to download your favorite antivirus program – Safebytes.

Install and run anti-malware from your flash drive

Another solution is to store and run an antivirus program completely from a USB drive. Abide by these steps to run the anti-malware on the affected computer. 1) Make use of another virus-free computer to download Safebytes Anti-Malware. 2) Connect the USB flash drive to a USB port on the uninfected computer. 3) Double click on the downloaded file to open the installation wizard. 4) Pick a thumb drive as the place when the wizard asks you where you want to install the software. Follow activation instructions. 5) Transfer the USB drive from the uninfected computer to the infected PC. 6) Double-click the EXE file to run the Safebytes program from the thumb drive. 7) Click on the “Scan” button to run a full system scan and remove viruses automatically.

Detect And Destroy Viruses With SafeBytes Anti-Malware

Want to download the very best anti-malware software program for your desktop? You can find many applications on the market that comes in free and paid versions for Windows computers. A few are really worth your money, but most aren’t. You have to be very careful not to select the wrong product, particularly if you purchase a paid software. One of the highly recommended software by industry experts is SafeBytes Anti-Malware, a popular security application for Windows computers. SafeBytes anti-malware is a trustworthy tool that not only protects your computer system completely but is also very user friendly for people of all ability levels. Once you’ve got installed this software program, SafeBytes superior protection system will ensure that absolutely no viruses or malware can seep through your personal computer.

There are many great features you will get with this particular security product. Here are a few popular features found in this computer software:

Anti-Malware Protection: With a critically acclaimed malware engine, SafeBytes offers multilayered protection that is intended to catch and get rid of threats that are concealed deep inside your computer’s operating system. Live Protection: SafeBytes gives you round-the-clock protection for your PC limiting malware intrusions in real-time. This software will always keep track of your PC for any suspicious activity and updates itself continuously to keep abreast of the constantly changing threat situation. “Fast Scan” Features: This software program has got one of the fastest and most efficient virus scanning engines in the industry. The scans are extremely accurate and take a short amount of time to complete. Safe Web Browsing: SafeBytes inspects the links present on a web page for possible threats and tells you whether the site is safe to view or not, through its unique safety ranking system. Light-weight: This software program is not “heavy” on the computer’s resources, so you’ll not see any performance troubles when SafeBytes is operating in the background. 24/7 Premium Support: You can obtain high levels of support 24/7 if you’re using their paid version. SafeBytes has created a wonderful anti-malware solution to help you conquer the latest malware threats and virus attacks. Malware trouble will become a thing of the past once you put this tool to use. If you’re seeking the very best malware removal tool out there, and if you don’t mind paying out some dollars for it, go for SafeBytes Anti-Malware.

Technical Details and Manual Removal (Advanced Users)

If you’d like to manually remove MyScrapNook without the use of an automated tool, it might be actually possible to do so by deleting the application from the Microsoft Windows Add/Remove Programs menu, or in cases of browser plug-ins, going to the browser’s AddOn/Extension manager and removing it. It’s also advised to reset your browser settings to their default state. If you opt to manually delete the system files and Windows registry entries, use the following list to ensure that you know precisely what files to remove before executing any actions. Please be aware that this is for professional users only and may be challenging, with incorrect file removal causing additional PC errors. In addition, some malware keeps replicating which makes it difficult to get rid of. Doing this in Safe Mode is recommended.
Folders: %LOCALAPPDATTA%\Google\Chrome\User Data\Default\Extensions\lbapdklahcjljfincdglncfpdgfhckcf %LOCALAPPDATTA%\Google\Chrome\User Data\Default\Local Extension Settings\lbapdklahcjljfincdglncfpdgfhckcf %LOCALAPPDATTA%\Google\Chrome\User Data\Default\Sync Extension Settings\lbapdklahcjljfincdglncfpdgfhckcf %LOCALAPPDATTA%\My Scrap NookTooltab Registry: key My Scrap Nook at HKEY_CURRENT_USER\Software\ key My Scrap NookTooltab Uninstall Internet Explorer at HKEY_CURRENT_USER\Software\Microsoft\Windows\CurrentVersion\Uninstall\
Read More
How to Fix Windows 10 Error 0x80070426

Error Code0x80070426 - What is it?

When Windows evolved into Windows 10, the program known as Windows Security Essentials is no longer. It is now the program known as Windows Defender. When a computer is upgraded from a previous version of Windows up to Windows 10, the Windows Defender takes over and will replace the Security Essentials. In a small percentage of Windows 10 upgrades, something will go wrong and the new program will fail to replace Security Essentials. The result will be that the operating system has both of the programs installed. In this case, Windows Defender will not offer any protection and Security Essentials will not be able to defend either. This error code will also present itself when the Windows Mail App in Windows 10 fail to retrieve and sync email from the user's account.

Common symptoms include:

  • There will be an error message that says: “An error has occurred in the program initialization. If this problem does continue, contact your System Admin. Error code 0x80070426.”
  • The computer will be left completely vulnerable to spyware and viruses.
  • The Windows Mail App will not be able to retrieve mail and will not sync with the PC user's mail.
  • The user can be doing anything on their computer and the error code will show up unprompted.
  • The computer will lock up, become slow, crash, or even freeze when dealing with error code 0x80070426.
  • The programs from an older version of Windows do not replace the newer version from Windows 10.

Solution

Restoro box imageError Causes

Error code 0x80070426 will present itself when a PC user has upgraded their OS from a previous version of Windows to the new Windows 10 version. When this happens, a small portion of users will experience the disconnect between older versions of specific programs, namely the virus protection. When the previous version of the program under a different name is not completely removed and the new virus protection program is installed, the programs will cancel each other out and collectively offer no protection.

This error code may also be found when Windows 10 tries to sync the user's email with the Windows Mail App.

Further Information and Manual Repair

There are a few methods to repair this problem. It should be noted that should anyone feel that the instructions are too complicated, they should contact a Windows repair technician to ensure that the error is fixed properly.

Method One: Uninstall Microsoft Essentials

Hold down the Windows Key and press R. Type in taskmgr into the run dialogue. You should locate the Windows Defender Service (this may show up as Windefend). Right-click on it and then choose Stop.

This will stop the program, but the program will start back up automatically when the computer restarts. While this program is stopped, uninstall Essentials.

To do this: go to Control Panel, Programs, and Features, Uninstall a Program. Alternately, you may hold down the Windows Key and press R, type in appwiz.cpl, click OK, and then locate Microsoft Essentials. Uninstall it, and then restart your computer.

After this is done, go to Settings, Update, and Security. Choose Windows Defender and ensure that Real-time protection is on. Refer back to the Task Manager, Services. Make sure that Defender service is on and running.

Method Two: If the problem occurs in the Windows Mail App

When error code 0x80070426 presents itself in the form of an error with the Mail app, it may be necessary to run an SFC scan.

Right-click on the Start menu or Windows icon, and select Command prompt. The command prompt may be navigated by using shortcut keys Win and X and then select it.

Run the command prompt and then type in sfc /scannow and then press enter. The SFC scan will be run, and be careful not to abort the process before it has finished. This will scan for any files that are lost or corrupt on the PC.

If the scan has found any corrupt files, type in this code and then hit Enter: findstr /c:”[SR]” %windir%LogsCBSCBS.log >”%userprofile%Desktopsfcdetails.txt.

To skip the repair of corrupt or missing files, type in: Dism /Online /Cleanup-Image /RestoreHealth. The details of the scan can be found on the sfcdetails.txt file that will be on the desktop.

Method Three: Use An Automated Tool

If you wish to always have at your disposal a utility tool to fix these Windows 10 and other related issues when they do arise, download and install a powerful automated tool.
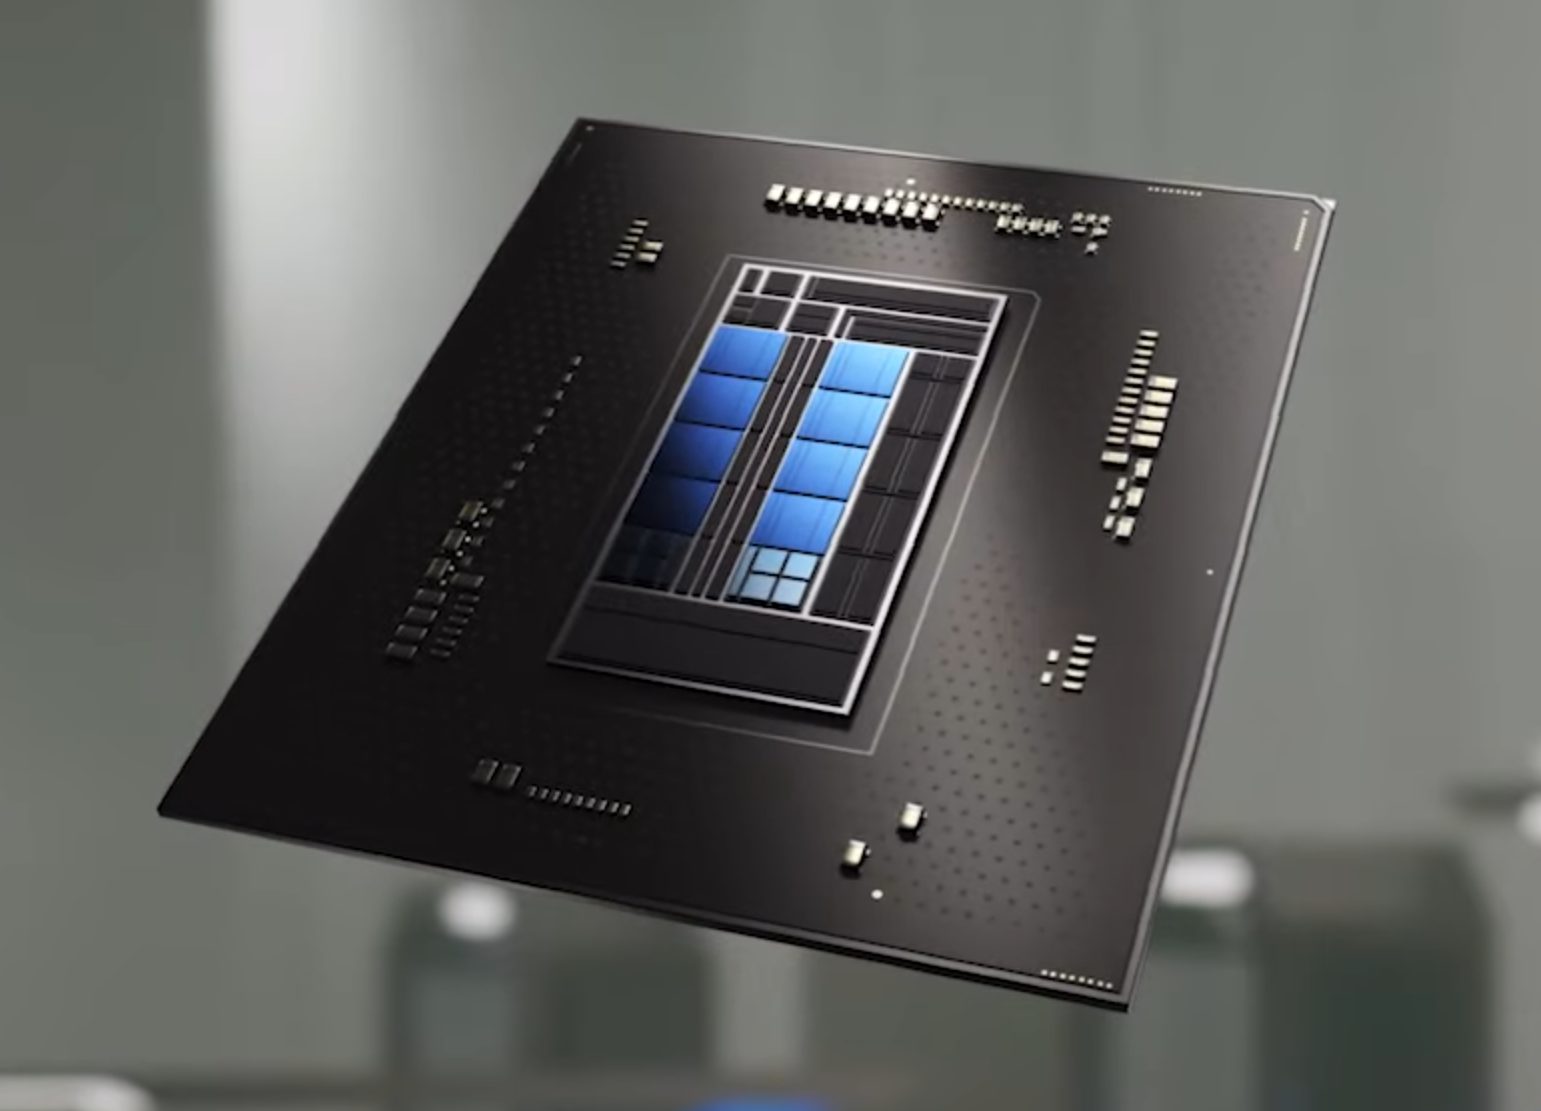
Read More
Fix PDC WATCHDOG TIMEOUT BSOD
If you suddenly encountered the PDC WATCHDOG TIMEOUT BSOD Blue Screen stop error with a bug check value of 0x0000014F, then it’s probably due to a system component that has failed to respond with the allocated period which prevents the system from exiting connected standby. This kind of Blue Screen error could be caused by both hardware and software components. To fix this Stop error, here are some possible fixes you can try that might help but before you proceed, make sure that you create a System Restore point first and boot your computer into Safe Mode with Networking.

Option 1 – Try to rollback, update or disable drivers

The next thing you can do to fix the PDC_WATCHDOG_TIMEOUT Stop error is to roll back, or update, or disable device drivers. It is most likely that after you updated your Windows computer that your driver also needs a refresh. On the other hand, if you have just updated your device drivers then you need to roll back the drivers to their previous versions. Whichever applies to you, refer to the steps below.
  • Open the Devices Manager from the Win X Menu.
  • After opening the Device Manager, look for the device driver named “IDE ATA/ATAPI controllers” and expand it.
  • Then look for the SATA AHCI Controller entry and right-click on it. If you haven’t updated this driver in a while, select the “Update Driver” option. On the other hand, if you’ve just updated this driver, then select the Uninstall Device option.
  • Next, follow the screen option to update or uninstall it.
  • Finally, restart your computer. It will just reinstall the device drivers automatically if you have chosen to uninstall them.
Note: You can install a dedicated driver on your computer in case you have it or you could also look for it directly from the website of the manufacturer.

Option 2 – Try to disconnect or disable newly installed hardware

In this option, you will have to disable or remove the hardware you’ve just installed recently since external devices could be the one that’s causing the Blue Screen of Death error to appear. To do that, just disconnect any external device that’s connected to your computer physically and then check if it fixes the PDC_WATCHDOG_TIMEOUT Blue Screen error.

Option 3 – Try running the Memory Diagnostic Tool

The Memory Diagnostic tool in windows can help resolve the PDC_WATCHDOG_TIMEOUT Blue Screen error by checking and automatically fixing any memory-based issues. To run it, refer to these steps:
  • Tap the Win + R keys to open Run and type mdsched.exe and hit Enter to open the Windows Memory Diagnostic Tool.
  • After that, it will give two options such as:
    • Restart now and check for problems (Recommended)
    • Check for problems the next time I start my computer
  • Once your computer has restarted, perform a basic scan or you could also go for the “Advanced” options such as “Test mix” or “Pass count”. Simply tap the F10 key to start the test.

Option 4 – Try to update the BIOS

Updating the BIOS can help you fix the PDC_WATCHDOG_TIMEOUT BSOD error but as you know, BIOS is a sensitive part of a computer. Even though it is a software component, the functioning of the hardware depends on it largely. Thus, you must be careful when modifying something in the BIOS. So if you don’t know much about it, it’s best if you skip on this option and try the other ones instead. However, if you are well-versed in navigating the BIOS, then follow the steps below.
  • Tap the Win + R keys to open the Run dialog box.
  • Next, type “msinfo32” in the field and press Enter to open System Information.
  • From there, you should find a search field on the bottom where you have to search for the BIOS version and then press Enter.
  • After that, you should see the developer and version of the BIOS installed on your PC.
  • Go to your manufacturer’s website and then download the latest version of BIOS on your computer.
  • If you are using a laptop, make sure that you keep it plugged in until you have updated the BIOS.
  • Now double click on the downloaded file and install the new BIOS version on your computer.
  • Now restart your computer to apply the changes made.

Option 5 – Try running the Blue Screen Troubleshooter

The Blue Screen troubleshooter is a built-in tool in Windows 10 that helps users in fixing BSOD errors like PDC_WATCHDOG_TIMEOUT. It can be found in the Settings Troubleshooters page. To use it, refer to these steps:
  • Tap the Win + I keys to open the Settings panel.
  • Then go to Update & Security > Troubleshoot.
  • From there, look for the option called “Blue Screen” on your right-hand side and then click the “Run the troubleshooter” button to run the Blue Screen Troubleshooter and then follow the next on-screen options. Note that you might have to boot your PC into Safe Mode.
Read More
1 2 3 171
Logo
Copyright © 2023, ErrorTools. All Rights Reserved
Trademark: Microsoft Windows logos are registered trademarks of Microsoft. Disclaimer: ErrorTools.com is not affiliated with Microsoft, nor claims direct affiliation.
The information on this page is provided for information purposes only.
DMCA.com Protection Status