If you encounter the ERR_SSL_VERSION_INTERFERENCE error on your Google Chrome browser then this means that the browser is trying to load a website with SSL protocol but is not able to do so. This error can occur for many reasons and in this post, you will be given potential fixes that could help you in resolving the problem. But bear in mind that these potential fixes are not that straightforward forward so if you encounter an option you don’t understand much, just skip to the options you have the knowledge of.
There is no direct fault in the browser for the ERR_SSL_VERSION_INTERFERENCE error as there are issues with caching the website data locally on your computer. Moreover, this kind of error can also appear when a website is coded incorrectly or if there are conflicting browser extensions installed in the browser that prevents the website to function properly.
Refer to the suggestions given below to fix the ERR_SSL_VERSION_INTERFERENCE error in Chrome on Windows 10.
Option 1 – Try clearing browser data
There are times when some data in the browser is conflicting with the loading of the website and triggers errors like ERR_CACHE_MISS. And so you can try to clear your browser’s data. This might be a very basic solution but oftentimes it works in fixing this kind of error in Google Chrome. Follow the steps below to clear the data in your browser.
Open your Google Chrome browser.
After that, tap the Ctrl + H keys. Doing so will open a new panel that allows you to delete the browsing history and other data in your browser.
Now select every checkbox that you see and click on the Clear browsing data button.
Then restart your Chrome browser and check if you can now open any website or not.
Option 2 – Try disabling TSL 1.3
If clearing the browser data didn’t fix the problem, you can also try to disable TSL 1.3 in Chrome. To do so, refer to these steps:
Open Google Chrome.
Next, type in “chrome://flags/#tls13-variant” in the address bar and tap Enter.
After that, you should see the experimental features page for Google Chrome where you can set TSL 1.3 to disabled.
After disabling TSL 1.3, restart your computer and check if the problem is fixed or not.
Option 3 – Reset Winsock, TCP/IP & Flush DNS cache
Resetting Winsock, TCP/IP, and flushing DNS might help in resolving the ERR_SSL_VERSION_INTERFERENCE error just follow these steps:
Right-click on the Start button and click on Command Prompt (administrator) so you can pull up an elevated Command Prompt.
After that, execute each one of the commands listed below. And after you typed in one after the other, you have to hit Enter.
netsh winsock reset – type in this command to reset Winsock
netsh int ip reset resettcpip.txt – type in this command to reset TCP/IP
ipconfig /flushdns – type in this command to flush the DNS cache
Next, restart your PC and check if the problem’s fixed.
Option 4 – Get rid of any conflicting browser extensions
Open Chrome and press Alt + F keys.
Go to More tools and click Extensions to look for any suspicious browser extensions or toolbars.
Click the Recycle bin and select Remove.
Restart Chrome and press Alt + F keys again.
Proceed to On Startup and mark Open a specific page or set of pages.
To check if the browser hijacker is still active, click Set pages, if it is active, overwrite the URL.
Option 5 – Reset Google Chrome
Resetting Chrome can also help you get rid of the error. Resetting Chrome will restore its default settings, disabling all the extensions, add-ons, and themes. Aside from that, the content settings will be reset as well and the cookies, cache, and site data will also be deleted. To reset Chrome, here’s what you have to do:
Open Google Chrome, then tap the Alt + F keys.
After that, click on Settings.
Next, scroll down until you see the Advanced option, once you see it, click on it.
After clicking the Advanced option, go to the “Restore and clean up option and click on the “Restore settings to their original defaults” option to reset Google Chrome.
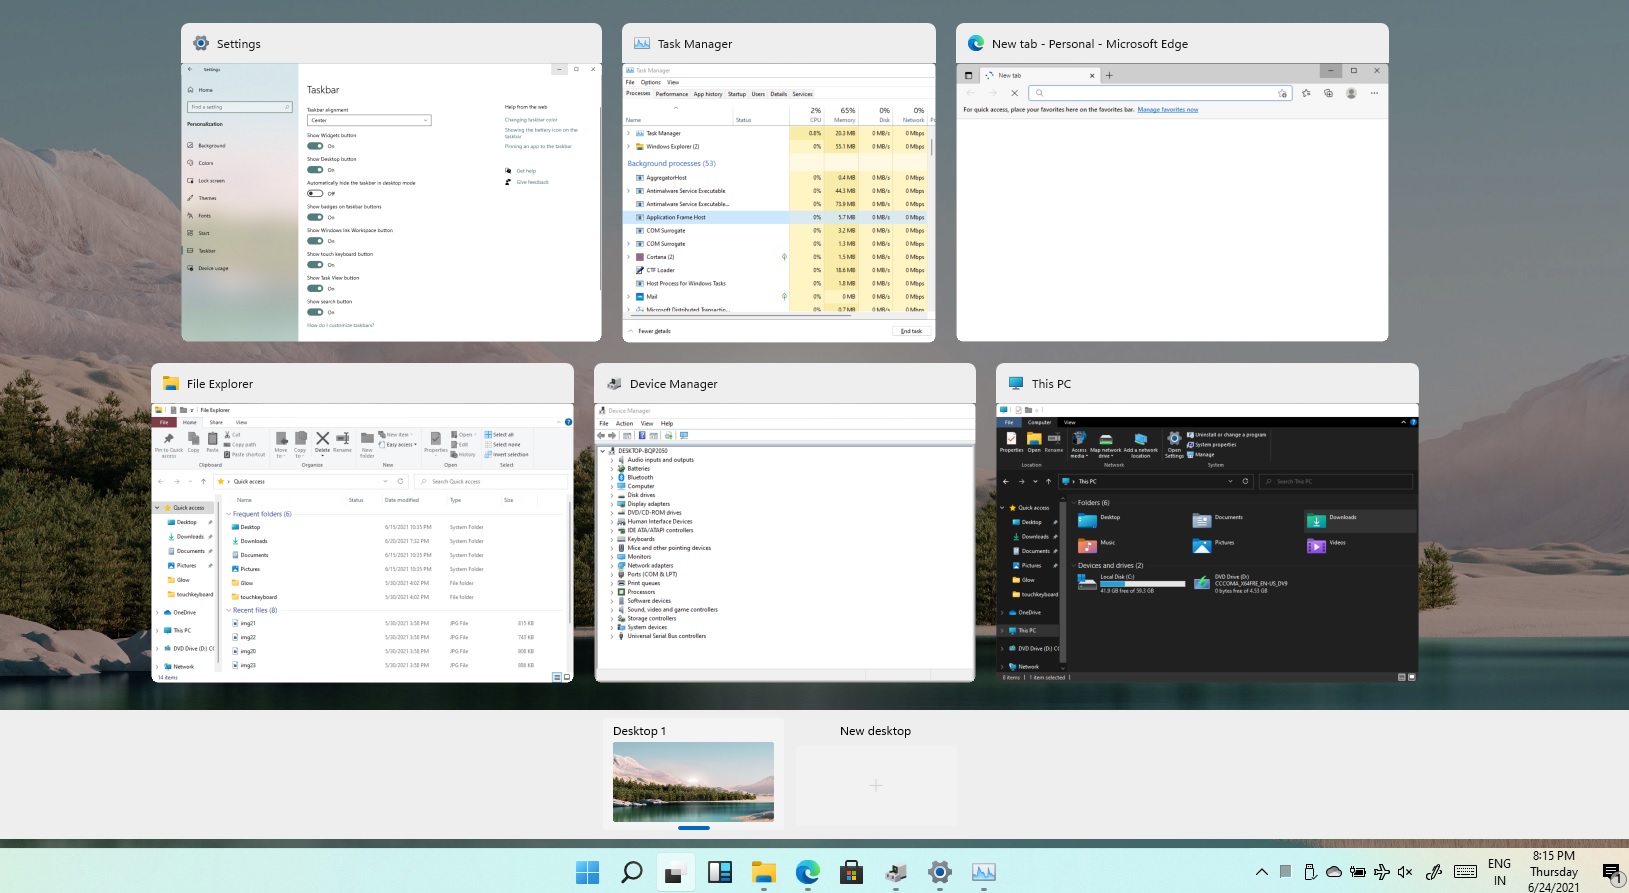
Task View feature inside Windows 11 is actually a great feature, letting you quickly view open windows and virtual desktops. How Task view itself could be reached with keyboard shortcut combination of ⊞ WINDOWS + TAB some users will prefer this way of using it and thus button on the taskbar is something you do not want or need.
There is a very easy way to remove mentioned button and I will show you how to do it.
Right-click the taskbar button itself and click on Hide From Taskbar.
That’s it, you have done it.
Now in order for you to bring it back if you change your mind, you will have to do some extra steps but it is nothing difficult.
Right-click on the taskbar and click on Taskbar settings, you will be lead to Personalization > Taskbar.
Inside locate Taskbar Items and switch Task View to ON, you will see the Task View button right away showing itself again.
Error Code 0x8000222 is an error that occurs during the installation process for Windows 10. It is also present in past versions of the software, going all the way back to Windows 7 and even affecting Windows software products, including Microsoft Word, PowerPoint, and other items in the Microsoft Office Suite.
Common symptoms include:
Inability to complete the installation process for new versions of the operating system, Microsoft Office programs, or other Windows-based software
While there are several factors that can contribute to the appearance of Error Code 0x8000222 during the installation process, most of these factors can be addressed using a few high-level methods. These methods do require some advanced knowledge and computing skills, so if you are unable to complete the steps below successfully or do not have confidence in your ability to undertake these methods on your own, contact a qualified computer repair service that is familiar with the Windows 10 installation process.
Solution
Error Causes
There are a few different issues that can cause Error Code 0x8000222 to arise during the installation process on your Windows operating system. The first is a corrupted file in your system library or dynamic link library, also called the DLL. The second is interference by your proxy, firewall, or antivirus software that inhibits the machine from being able to access the files that it needs to successfully complete the installation of your Windows operating system or software.
Further Information and Manual Repair
To address and resolve Error Code 0x8000222 on your Windows operating system, regardless of the version of the software that you are using, there are a few steps that you can take. Keep in mind that these steps do require some advanced skills and knowledge about your computer, so if you don’t believe that you can undertake these steps on your own or if the following methods do not fully resolve the issue on your device, talk to a qualified computer repair technician for assistance.
Here are the best ways to address Error Code 0x8000222 on your Windows machine:
Method One: Fix Your DLL Dependencies Registry
Before implementing this method, make sure that a proxy is not active on your computer. To check to see if there is an active proxy, simply press the Windows key together with the “R” key and type in the command “cmd”, then when the prompt opens up, type in the following command: “netsh winhttp import proxy source=ie”. From the box that follows, if you see a message saying that there has been an error writing in the proxy settings and that access has been denied, it means that you can turn off the proxy setting in your Internet Explorer and the error will go away on its own.
If you do not have an active proxy, it is time to check and see whether your DLL dependencies are properly set up. To do so, open up the command prompt again by pressing the Windows key and “R” key at the same time and typing in “cmd”. Once the command prompt is active, simply typing in “regsvr32 Officevalidator.dll”, then attempt to resume your installation once it has been complete.
In some cases, you may need to restart your computer before attempting the Windows installation process.
Method Two: Turn Off Firewalls and Antivirus Software Before Installing
If the above method did not successfully resolve the problem, you can go into your control panel and turn off any firewalls or antivirus programs that may be interfering with your ability to complete the Windows installation process. Depending on the programs that you use for your antivirus needs, you may need to restart your computer before you reattempt to do the installation process.
You should be able to turn your firewall and antivirus programs back on once the installation process has run through to completion.
In most cases, taking the steps above will fully resolve the appearance of Error Code 0x8000222 on your Windows 10 machine.
Method Three: Use An Automated Tool
If you wish to always have at your disposal a utility tool to fix these Windows 10 and other related issues when they do arise, download and install a powerful automated tool.
New malware with extensive spyware capabilities steals data from infected Android devices and is designed to automatically trigger whenever new info is read to be exfiltrated. The spyware can only be installed as a 'System Update' app available via third-party Android app stores as it was never available on Google's Play Store. This drastically limits the number of devices it can infect, given that most experienced users will most likely avoid installing it in the first place. The malware also lacks a method to infect other Android devices on its own, adding to its limited spreading capabilities.
However, when it comes to stealing your data, this remote access trojan (RAT) can collect and exfiltrate an extensive array of information to its command-and-control server. Zimperium researchers who spotted it observed it while "stealing data, messages, images and taking control of Android phones."
What happens when malicious software is installed
"Once in control, hackers can record audio and phone calls, take photos, review browser history, access WhatsApp messages, and more," they added. Zimperium said its extensive range of data theft capabilities includes:
Stealing instant messenger messages;
Stealing instant messenger database files (if the root is available);
Inspecting the default browser's bookmarks and searches;
Inspecting the bookmark and search history from Google Chrome, Mozilla Firefox, and Samsung Internet Browser;
Searching for files with specific extensions (including .pdf, .doc, .docx, and .xls, .xlsx);
Inspecting the clipboard data;
Inspecting the content of the notifications;
Recording audio;
Recording phone calls;
Periodically take pictures (either through the front or back cameras);
Listing of the installed applications;
Stealing images and videos;
Monitoring the GPS location;
Stealing SMS messages;
Stealing phone contacts;
Stealing call logs;
Exfiltrating device information (e.g., installed applications, device name, storage stats).
How does it work?
Once installed on an Android device, the malware will send several pieces of info to its Firebase command-and-control (C2) server, including storage stats, the internet connection type, and the presence of various apps such as WhatsApp. The spyware harvests data directly if it has root access or will use Accessibility Services after tricking the victims into enabling the feature on the compromised device. It will also scan the external storage for any stored or cached data, harvest it, and deliver it to the C2 servers when the user connects to a Wi-Fi network. Unlike other malware designed to steal data, this one will get triggered using Android's contentObserver and Broadcast receivers only when some conditions are met, like the addition of a new contact, new text messages, or new apps being installed.
"Commands received through the Firebase messaging service initiate actions such as recording of audio from the microphone and exfiltration of data such as SMS messages," Zimperium said.
"The Firebase communication is only used to issue the commands, and a dedicated C&C server is used to collect the stolen data by using a POST request."
Camouflage
The malware will also display fake "Searching for the update.." system update notifications when it receives new commands from its masters to camouflage its malicious activity. The spyware also conceals its presence on infected Android devices by hiding the icon from the drawer/menu. To further evade detection, it will only steal thumbnails of videos and images it finds, thus reducing the victims' bandwidth consumption to avoid drawing their attention to the background data exfiltration activity. Unlike other malware that harvests data in bulk, this one will also make sure that it exfiltrates only the most recent data, collecting location data created and photos taken within the last few minutes.
If you would like to read more helpful articles and tips about various software and hardware visit errortools.com daily.
The Error Code 0x802400d most often occurs when users attempt to use the Windows Update tool on their computers to move from one version of the software to another. In some cases, this error is more likely to appear on your computer during the process if you have not performed regular updates to the software as they have been available.
Common symptoms include:
Inability to finish the download of the necessary update to Windows 10
Incomplete installation of the desired Windows 10 update
While it can take additional time to deal with the issues that cause Error Code 0x802400d to appear on your computer, there are several steps that you can take to address the problem. These are fairly simple to perform and do not require advanced knowledge of the system to employ.
Solution
Error Causes
The most basic cause for Error Code 0x802400d is that there is a file or a process that is causing the update process to hiccup. In many cases, this error appears when a user attempts to begin the process of updating their computer if they have several stacked updates to perform. Computers that are several updates behind where they should be will display this error more often than computers that are kept on a schedule of recommended updates.
Further Information and Manual Repair
While there are multiple reasons why the Error Code 0x802400d may appear on your computer during the Windows Update process, there are several methods that can be used to attempt to resolve the problem on your own. These are generally easy to do and do not require advanced techniques. However, if you do not feel comfortable addressing the issue on your own, contact a qualified Windows repair technician.
Here are some of the best methods that users can employ to resolve Error Code 0x802400d:
Method 1: Run the System Update Readiness Tool
There are a number of different processes, files, and settings that could cause Error Code 0x802400d to appear on your computer during the Windows 10 Update process. For this reason, the most efficient way to determine what the culprit is for your specific issue is to download and use the System Update Readiness function.
This tool is available directly from Windows. Although there are other tools available on the Internet that claim to be able to fix the problem, these can contain viruses and malware, so be cautious if you decide to employ these instead. There are also several versions of the tool on the Windows website, so be sure to download the version that matches the operating system and version of your computer.
Once you have downloaded the Readiness tool from the Windows website, allow it to run a scan on your system. At a minimum, this process will take about fifteen minutes to complete. Although you will see a progress bar at the bottom of the window, it does not always update effectively. Some users have reported that the update appears to stop when it is two-thirds complete. Continue to let the scan run if this happens, rather than canceling it out. Even if the progress bar doesn’t update, the scan is still running.
Method 2: Remove New Software and Re-Attempt the Update Process
If you have recently installed new software on your machine, it can sometimes cause problems with the update process. The best way to resolve this issue is to remove or uninstall the software, run the update process again, and then reinstall the software once the Windows system has been successfully updated.
If the above methods are not successful in resolving Error Code 0x802400d from your machine and you are still unable to complete the Windows 10 Update process or if you are not confident in your ability to complete these steps successfully on your own, get in touch with a qualified computer repair technician who is familiar with the issues surrounding Windows 10 in particular. Microsoft offers certifications for Windows repair technicians, so look for a professional who has the experience, skills, and knowledge necessary to adequately address Error Code 0x802400d on your machine.
If you wish to always have at your disposal a utility tool to fix these Windows 10 and other related issues when they do arise, download and install a powerful automated tool.
We have all experienced Windows errors over time and that can range from simple ones that will do very little to no harm and can be even system breaking making us lose our work or completely making the PC unusable. No one likes them but they happen, and usually, they happen once we least expect them.
No matter how frequent and unpleasant they might be there are ways to keep them at the minimum and even avoid them.
We will discuss steps that you can take in order to do this, simple tips and guides on how to keep your computer in top form and eliminate not just Windows, but any kind of errors altogether.
Keep your hardware clean
Believe it or not, some serious Windows errors like the dreaded blue screen of death can come from hardware issues not from the software at all. It is very important to keep your computer clean and with enough air flow so it can function properly.
Keeping applications on the drive might seem harmless but sadly that is not the case. Some applications have a certain impact on the system itself after all most of them are tweaking registry entries in Windows and sometimes having too many applications means an increased possibility of conflict over certain resources even when they are not running.
Some applications like adobe creative suite, for example, will have certain services always running in the background, and more of these kinds of applications you have, more services, more places for unexpected errors when they collide. Some of them will also install certain dependencies that could be problematic.
The general idea is: if you are not using it, uninstall it and you will be safer and more resilient to errors inside OS.
Do not use pirated or cracked software
Besides moral and law implications that using pirated or cracked software might bring you there are also certain other things that might be problematic. Certain "free" software might come packet with some problematic malware, for example, it is not uncommon for attackers to use some popular software to pack their malicious application with it.
Other things might be wrong and incomplete tweaking with application in order to bypass security and thus bringing some instability due to scripts needed to run in order to achieve this goal.
Keep your drivers updated
Errors can also come from old drivers or bad drivers, device manufacturers are not all-knowing and perfect, and sometimes drivers can wreak havoc on the system. Having updated drivers can minimize any kind of unexpected behaviors inside the operating system making it more stable and reliable.
You can check your driver version in the control panel inside the Windows OS and then compare it to the ones found on the manufacturer's site, if there are newer available it is recommended to download and install them,
Keep software updated
Applications can have bugs, and bugs can lead to certain errors both in the system and when using the app as well. It is in your best interest to get the latest patch or newer version of the software in order to avoid these unpleasant experiences.
Also, certain codecs and extensions that are installed directly in Windows can also have some unpredictable behavior, updating is the best solution to keep them in line.
Keep Windows updated
Same as with drivers and applications, Windows itself is not immune from bugs and some unpredictable issues. Luckily Microsoft is always working on fixes and features of Windows but in order to actually have benefited from that work, you will need to keep Windows updated. Sometimes a bad update can introduce some errors but you can always roll back to the previous and wait for them to fix everything and then download them all.
Check the health of your hardware regularly
Hardware components have their life cycle, more quality ones tend to last longer but eventually, they will reach the end of their lifecycle. There are a lot of testers for various components in your computer that can check different things and provide you with information about the state of your components.
If you are on Windows 11, Microsoft has included a basic health app inside OS, just type PC health check in search and start the app. For some more detailed information and advanced checks, you will have to use a custom application. There are plenty of them specialized for single components like RAM, SSD, etc. A simple google search with providing you with top results and most of them are free for personal use.
Remember, a faulty component or component that is reaching its life cycle can produce many errors inside the operating system.
The Sysfader iexplore.exe Application Error - What is it?
To understand Sysfader iexplore.exe application error, first, it is important to learn what is Sysfade.exe file.
Sysfader.exe is basically an IE (Internet Explorer) application file that provides cool animation effects. These animation effects include fading menus in and out, animated windows and etc. It is responsible for the graphical enhancements for animated pages.
The Sysfader iexplore.exe application error occurs when this file fails to execute properly and open animated websites on Internet Explorer.
The error code is displayed in the following format:
“SysFader: iexplore.exe – Application ErrorThe instruction at “0×00000000″ referenced memory at “0×00000000″. The memory could not be “read”.”
Solution
Error Causes
The Sysfader iexplorer.exe application error may be triggered due to many causes. These include:
Sysfader.exe file corrupted by malware and spyware
Recently upgraded Internet Explorer which resulted in the Sysfader iexplorer.exe application error due to incompatibility issues with the system program.
Issues with IE configuration
Damaged registry files
Damaged DLL files
Obsolete and bad registry entries
Due to Sysfader iexplorer.exe application error, your Internet Explorer browser may crash. Furthermore if the error is not fixed timely, it may result in even more severe PC problems like system slowdown, system crash and failure.
This happens especially when Sysfader iexplorer.exe application error is related to the registry.
The registry saves all the activities performed on the computer. This also includes junk files, invalid registry entries, bad registry keys, cookies, temporary internet files, and files of the programs uninstalled.
If the registry is not cleaned frequently, these obsolete files overload the RAM causing great deal of damage to the registry. When you try to upgrade your browser, the installation fails and results in browser incompatibility issues because of the previous files of the uninstalled program saved in the registry.
Furthermore, the error code may also pop up due to the Sysfader.exe file corrupted by malicious software like spyware and adware on your system if you don’t run an antivirus on your system regularly.
Further Information and Manual Repair
To prevent IE web browser and your PC from coming crashing, here are some solutions that you can try to resolve the Sysfader iexplorer.exe application error:
Repair and restore the registry by changing the configuration settings in the Registry Editor Window. This is accessible by typing ‘Regedit’ in the Run window. However, to edit the configuration settings manually and restore the registry, you should be technically sound. If not then making the changes would be slightly complex and time-consuming for you.
However, another alternative to this is to download Restoro. Restoro is a powerful, advanced, and highly functional PC repair tool that includes multiple utilities such as a registry cleaner and a system optimizer. The registry cleaning feature scans your entire PC for registry issues triggering error codes like Sysfader iexplorer.exe.It wipes out all the unnecessary and obsolete files and fixes the damaged dll files thus simultaneously restoring the registry. The antivirus utility scans for and removes viruses and spyware from your PC which as we explained earlier could be the reason for Sysfader error code.
With Restoro, it takes only a few seconds to resolve this error and repair the registry. If you have system slowdown issues, it takes care of that too.
It has simple navigations and a user-friendly interface which makes it very easy to operate even if you are not technically sound. It is safe, efficient, and compatible on all Windows versions including Vista, XP, Windows 7, 8, 8.1, and 10.
Click here to download Restoro and resolve Sysfader iexplorer.exe application error on your PC today!
Universal Windows Platform (UWP) applications are the modern application in the windows store that can be used in all the Window devices like Xbox, Hololens, Tablet, PC or Phone. Basically, UWP provides a common platform for every device that runs Windows 10. When attempting to login into these applications and receive this error:
Can’t sign in with a Microsoft accountThis program is blocked by group policy. For more information, contact your system administrator.0x8000704ec
Then this post is for you. We will guide you on how to easily resolve issues, please follow the steps provided.
Local group policy editor solution
Press ⊞ WINDOWS + R to open the Run dialog.
In the Run dialog box type gpedit.msc and press ENTER to open Group Policy Editor.
Inside the Local Group Policy Editor, navigate to the path below:
Computer Configuration > Windows Settings > Security Settings > Local Polices > Security Options
On the right pane, double-click on Accounts: Block Microsoft accounts to edit its properties.
Under Local Security Setting tab, click on the drop-down and select This policy is disabled.
Click Apply > OK to save the changes.
Exit Group Policy Editor.
Registry editor solution
As always, it is highly recommended to make a backup of the registry editor just in case that something goes wrong.
Press ⊞ WINDOWS + R to open the Run dialog.
In the Run dialog box, type regedit and hit ENTER to open Registry Editor.
Error 1512 is a type of runtime error code. This error may hamper your ability to run and load your desired programs on Windows PC. There are increased chances of runtime error 1512 occurring when system files go missing or get corrupt.
Symptoms of this error code include:
Slow PC speed
Window System freeze
Solution
Error Causes
There are several for the occurrence of runtime error 1512. These include:
Faulty or outdated drivers
Poor Program installation
Damaged Windows Registry
Viruses tampering the system settings/memory
Broken or incorrect Registry entries
Damaged Windows registry
Further Information and Manual Repair
To resolve this issue you don’t have to hire a professional and spend hundreds of dollars to get it fixed. Here are some of the best and easy do-it-yourself methods to repair error 1512 on your system in a few minutes.
These methods are very easy to work around and do not require any kind of technical expertise.
Method 1 - Uninstall and then reinstall the Same Program
Sometimes this runtime error may pop up due to poor program installation. In such an event, it is advisable to uninstall the program and then reinstall it again properly. To do so, go to the start menu, and click on control panel.
Now select the program & features option. Here you will find the option Add/Remove Program. Remove the program causing error 1512. Once the program is removed, reinstall it again.
Method 2 - Run an Antivirus Program
Computer viruses are capable of tampering with system settings. Due to this reason you might experience runtime errors like 1512 on your PC. These malicious programs usually enter the system through phishing emails or website downloads.
To resolve the issue, you need to run a powerful antivirus program. An antivirus removes all sorts of malicious programs hiding in your PC like malware, spyware, and malware that are responsible for generating runtime errors.
Method 3 - Update the Outdated Drivers on your PC
If the error still persists, then it is suggested to update outdated drivers. Faulty and outdated drivers can also trigger runtime error 1512. To do this, go to the Device Manager. Here use the Driver update wizard to make updates.
Method 4 - Remove the Invalid Registry Entries and Repair the Damaged Registry
The best way to perform both tasks is to download Restoro. It is embedded with a registry cleaner that is quite easy to use.
The registry cleaner removes all invalid entries in seconds, cleans the cluttered registry by wiping out all the redundant and unnecessary files. The damaged registry is then repaired and resumes its normal function.
Click here to download Restoro and resolve runtime error 1512.
0x0000007B is the most common Windows stop error.
The error is displayed on the blue-colored screen which is also called the blue screen of death. You may receive a 0x0000007B error message during Windows XP setup or while running the setup program.
The message is often displayed as ‘a problem has been detected and Windows has been shut down to prevent damages’ or ‘inaccessible boot device error’.
Solution
Error Causes
The 0x0000007B error code is usually triggered by:
Poor Window XP installation
Registry corruption
Device Drivers Issues
Boot sector viruses
Further Information and Manual Repair
The 0x0000007B error makes your system vulnerable and reduces its speed significantly. And besides, you can’t run the programs smoothly on your PC either. Therefore, it’s advisable to fix the error right away.
To fix and repair the 0x0000007B error successfully, you must first understand the cause of the error. Let’s take a look at all the solutions available to fix the 0x0000007B error.
Cause: Boot Sector Viruses
Solution: If your computer is infected with boot sector viruses, then you will first have to download a powerful antivirus. After downloading the antivirus program, run it on your PC to check your computer for viruses. Delete the viruses found and click the repair option.
Sometimes even an antivirus program may fail to remove the virus and repair the system. In such cases, you must repartition and format your hard disk and also reinstall Windows XP.
Cause: Device Driver Issues
Solution: Device driver issues may occur if the boot controller is not properly configured or the driver is not up to date. If device driver configuration is the cause of the 0x0000007B error on your PC, then all you need to do is restart your PC, and while restarting press F8 to go to the advanced boot options.
Now choose the ‘Last Known Good Configuration’ option. After selecting it, boot into windows and then perform a system restore. Now go to Device Manager and perform a driver rollback to reinstall the drivers. This will resolve the configuration issues.
However, if you need an updated driver, all you need to do go on the web and download software to update the driver. It is advisable to download software from the manufacturer’s website in order to successfully update the device driver.
Cause: Poor Windows Installation
Solution: In this case, you will have to perform a Windows start-up repair. To do this: boot Windows XP from CD. Press ‘enter’ at setup Windows Screen when prompted. Then press R to repair Windows Installation.
This procedure will not delete any user data and files. In fact, it will copy only the original Windows files over the bad or existing ones.
Some of the best ways to avoid Ox0000007B blue screen errors are
To scan for viruses every time you use your PC
Never open web pages, emails, or download content that you think looks suspicious because that’s probably a virus.
PST file is the acronym for Private Storage Table. It is a proprietary file structure utilized in the ms-outlook program shop and to preserve attachments as well as e-mails, notifications, scheduled calendar events, and even more.
This structure can also be called a Personal Folder File. The storage limit or the size varies today with respect to the Outlook version you've got installed.
The PST file size limit depends on the edition you have installed. Outlook 2002 and earlier versions have a memory limitation of 2GB while later versions such as Outlook 2013 have up to 50GB memory limit.
Error Causes
You will be amazed to discover there is not a single cause behind this problem. The File can be damaged due to a number of reasons including:
Virus infection
Incorrect file system recovery
Data storage device failure
Storage size limit exceeds
Sometimes due to power failure when accessing the PST files
Once this File becomes corrupted and broken, it places you in danger of losing your important e-mails and attachments.
Moreover, this stops you from getting or sending e-mails to and from your own associates. And in case you would like to add new contacts, you are greatly hindered. It reduces your productivity.
For individuals relying completely on the Outlook program for communicating via e-mails and maintaining a track of important dates that they have set reminders for and scheduled in their calendars, the PST file problem is a nightmare.
It decreases productiveness and performance.
Further Information and Manual Repair
To regain the damaged File without removing old e-mails Install a PST File Repair Tool. The latter one is probably the best way to resolve this issue without compromising on your old important emails and contacts.
There are a number of repair resources out there. Each device provides a distinct degree of characteristics and performance. We urge you to use Stellar Phoenix Outlook PST Repair Tool.
Not only does this repair tool aid work out PST file error that is damaged, but it also helps with data recovery. With this particular tool, it is possible to recover even the erased files you've removed from your Outlook Installation before the PST file got corrupted.
Wait there is more! It is also possible to raise the memory limit by installing this repair tool on your computer.
What this means is in the event the PST file corruption's cause was associated with the storage size limit, it is easily worked out. With an increase in memory, you can keep your older emails and continue storing new mail from associates.
To begin, Click here to Download Install Stellar Phoenix Outlook PST Repair on your personal computer and run it to restore the PST files.

 Task View feature inside Windows 11 is actually a great feature, letting you quickly view open windows and virtual desktops. How Task view itself could be reached with keyboard shortcut combination of ⊞ WINDOWS + TAB some users will prefer this way of using it and thus button on the taskbar is something you do not want or need.
There is a very easy way to remove mentioned button and I will show you how to do it.
Right-click the taskbar button itself and click on Hide From Taskbar.
That’s it, you have done it.
Now in order for you to bring it back if you change your mind, you will have to do some extra steps but it is nothing difficult.
Right-click on the taskbar and click on Taskbar settings, you will be lead to Personalization > Taskbar.
Inside locate Taskbar Items and switch Task View to ON, you will see the Task View button right away showing itself again.
Task View feature inside Windows 11 is actually a great feature, letting you quickly view open windows and virtual desktops. How Task view itself could be reached with keyboard shortcut combination of ⊞ WINDOWS + TAB some users will prefer this way of using it and thus button on the taskbar is something you do not want or need.
There is a very easy way to remove mentioned button and I will show you how to do it.
Right-click the taskbar button itself and click on Hide From Taskbar.
That’s it, you have done it.
Now in order for you to bring it back if you change your mind, you will have to do some extra steps but it is nothing difficult.
Right-click on the taskbar and click on Taskbar settings, you will be lead to Personalization > Taskbar.
Inside locate Taskbar Items and switch Task View to ON, you will see the Task View button right away showing itself again. 
