In case you don’t know, when you visit a website that uses HTTPS, it also offers an SSL certificate to the browser in order to verify the website’s identity. Although it may contain lots of things inside it, one of them is the URL of the website. So if the certificate does not match the URL to what you entered, you will most likely get the “Server’s certificate does not match, ERR CERT COMMON NAME INVALID” error which indicates that the connection is not private and the site may try to steal your data but worry not, as this post will guide you in resolving this issue.
To fix the ERR_CERT_COMMON_NAME_INVALID error, here are some suggestions that might help.
Option 1 – Check the website’s certificate
If you own the website where you’re getting the error, then you might have to check if the website’s certificate is installed properly and configured on the server as it could be the reason why you’re suddenly getting the error.
Option 2 – Check the Windows Host file
You can also try to cross-check the Windows Hosts file to find out if the website you are trying to open has been blocked, because if it is, then it’s no wonder why you’re getting the ERR_CERT_COMMON_NAME_INVALID error. There are instances when some third-party application modifies the file and adds some websites to the blocklists. So if the website is indeed blocked, you need to remove it from the list.
Option 3 – Use the Google Public DNS
You might want to change your DNS to Google Public DNS as it could also help you in fixing the ERR_CERT_COMMON_NAME_INVALID error in Chrome. To do so, follow the steps below.
The first thing you have to do is right-click on the network icon in the Taskbar and select Network and Sharing Center.
Next, click on the “Change Adapter Settings” option.
After that, search for the network connection that you are using to connect to the internet. Note that the option might be “Wireless Connection” or “Local Area Connection”.
Right-click on your network connection and click on Properties.
Then select the new window to choose the “Internet Protocol 4 (TCP/IPv4)” option.
After that, click on the Properties button and click the checkbox in the new window for the option “Use the following DNS server addresses”.
Type in “8.8.8.8” and “8.8.4.4” and click OK and exit.
Option 4 – Run the built-in Malware Scanner and Cleanup Tool in Chrome
In case you don’t know, there is actually a built-in malware scanner and cleanup tool in Chrome that helps you get rid of any unwanted ads, pop-ups, and even malware, as well as unusual startup pages, toolbars, and other things that could affect the performance of the browser. In addition, this built-in tool in Chrome might also help in fixing the ERR_CERT_COMMON_NAME_INVALID error.
Option 5 – Reset Chrome
Resetting Chrome can also help you get rid of the error. Resetting Chrome means restoring its default settings, disabling all the extensions, add-ons, and themes. Aside from that, the content settings will be reset as well and the cookies, cache, and site data will also be deleted. To reset Chrome, here’s what you have to do:
Open Google Chrome, then tap the Alt + F keys.
After that, click on Settings.
Next, scroll down until you see the Advanced option, once you see it, click on it.
After clicking the Advanced option, go to the “Restore and clean up option and click on the “Restore settings to their original defaults” option to reset Google Chrome.
Error code 0xC1900101, 0x20017 in Windows 10 occurs when Windows users attempt to upgrade to Windows 10 but fail to complete the installation process. This Windows error code may occur due to issues with a third-party antivirus program or problems related to a driver or hardware. When this occurs users will receive an error message and their machine will automatically revert to the original operating system on the device. Common symptoms of the error code include the following:
Error code 0xC1900101-0x20017 message box
Inability to complete Windows 10 upgrade
Solution
Error Causes
Like many other error codes affecting Windows 10 users, 0xC1900101-0x20017 may result due to several different reasons. Oftentimes, error code 0xC1900101 -0x20017 affects users who attempt to upgrade their operating system but have incompatible drivers or hardware as well as antivirus or other security systems which prevent the upgrade from occurring. If this error message is not resolved, it could give birth to other error messages such as error code 0x80070652.
Further Information and Manual Repair
To fix this particular error code affecting Windows 10 devices, you will need to employ at least one manual repair method mentioned within this article. Manual repair methods offer effective solutions as they seek to address the root causes related to Windows error codes. When the manual repair methods are implemented correctly, users are usually able to quickly overcome issues that cause Windows error codes and can thereafter access all the benefits Windows has to offer to its users.
Note, however, that in a few cases where technical skills are required, the need for a Windows repair technician may present itself. In such a case, resort to Windows forums and other resources to access help from a certified Windows professional. Also, consider using an automated tool where necessary.
Method One: Temporarily Disable or Uninstall Third-party Security Software
Some third-party security programs or antivirus software may interfere with the installation process when Windows users attempt to upgrade to Windows 10. To verify if this is the issue causing error code 0xC1900101-0x20017 on your device, temporarily uninstall or disable these applications. You may easily do so by checking the settings of these programs or visiting Settings within the Windows Start Menu.
Once you have disabled these programs on your device, reboot your machine and attempt to update to Windows 10. If the issue was caused by a third-party app, error code 0xC1900101-0x20017 will no longer occur and your machine will successfully upgrade to the version of Windows 10 you attempt to download.
However, in the case where error code 0xC1900101-0x20017 in Windows 10 reoccurs during the installation process, you will need to resort to another manual repair method listed below.
Method Two: Disable Firewall Software
Like method one, this manual repair method can be effective in combating issues related to 0xC1900101-0x20017. This is of course, dependent on whether or not the error code is due to an incompatible security program.
Temporarily disable your firewall by adjusting its settings. Once this step is complete, reboot your machine and attempt to install the latest version of Windows 10. If you are able to complete the process, this means the problem was due to an issue with your firewall. You can then enable the firewall you previously disabled or download another program as its replacement.
If the error code reoccurs, however, consider implementing the next manual repair method on this list.
Method Three: Use Command Prompt to Check for Damaged System Files
Command Prompt can be very effective in helping regular as well as technically skilled users repair issues with their PC. In the case of error code 0xC1900101-0x20017 in Windows 10, access Command Prompt using the following instructions.
Step one: Right-click Start Menu
Step two: Select Command Prompt (Admin)
Step three: Type sfc /scannow
Be sure to enter the command as it is written above, with a space between “sfc” and “/scannow”. Wait until the scan is complete. If there are any errors related to system files, i.e. if any system files are damaged, corrupted, or missing, your machine will begin to fix it. Once the process is complete, reboot your PC then reattempt the Windows 10 upgrade process via Windows Update. If you are successful, it means that you have rectified error code 0xC1900101-0x20017. Otherwise, you may need to contact a Windows repair technician.
Method Four: Download an Automated Tool
If you wish to always have at your disposal a utility tool to fix these Windows 10 and other related issues when they do arise, download and install a powerful automated tool.
Some Windows 7 and Windows 8.1 users reported experiencing a Compare Exchange128 error when trying to upgrade to Windows 10. The error reads, “You can’t install Windows 10 because your processor doesn’t support CompareExchange128”. In order to upgrade to Windows 10 (64-bit), the CMPXCHG16B instruction must be present. If you receive this error, this mostly means that your CPU doesn’t have the CMPXCHG16B instruction.
Solution
Error Causes
The CompareExchange128 error normally occurs due to two possible reasons:
CPU lacks CMPXCHG16b Instruction
Old & Outdated BIOS – Even if your CPU has the CMPXCHG16b instruction, the CompareExchange128 issue can still occur if you have an older BIOS.
Further Information and Manual Repair
One main requirement to upgrade to Windows 10 is for your CPU to have the CMPXCHG16b instruction. You also need the right BIOS version to guarantee a smooth installation. See below on how to manually fix this issue.
NOTE: If you don’t feel confident using the manual methods listed below, it’s highly advisable to get help from an expert technician. If you don’t know someone, you can also use an automated tool to fix this.
Before performing any fixes, try to determine first if the cause of the error is due to your CPU lacking the CMPXCHG16b instruction. You can use a CPU Info tool that provides complete details about your processor, memory, and motherboard. If you’re looking for more in-depth information, you might also try command-line utilities. But, the safest and easiest way to check this is by simply searching online. Try using the search query: <CPU Model> CMPXCHG16b
Method 1 – Update your BIOS
This method will download the latest BIOS from your motherboard’s manufacturer. This makes sure your CPU has the CMPXCHG16b instruction needed to complete the Windows 10 64-bit installation. To update your computer’s BIOS, complete the following steps:
Determine first the current BIOS you have on your computer. Open System Information Windows app and type msinfo32 in the search bar. The BIOS version will appear under the processor speed. Record it somewhere.
Go to the support page of your motherboard’s manufacturer. Find if there’s any update on the BIOS that you’re currently using. If you find one, download the BIOS update file available. Make sure that you’re looking into the right model and you download all the necessary documentation. Otherwise, the BIOS update might not work.
Update your BIOS. Most BIOS update steps are straightforward. Just make sure to follow the steps provided.
Method 2 – Install Windows 10 32-bit version
If updating the BIOS doesn’t work, what you can do is install a 32-bit version of Windows 10 instead of the 64-bit version. Here’s how to do this:
Download and install the 32-bit version of Windows you currently have. If you have a Windows 7 64-bit version, get the 32-bit version of Windows 7. The same goes for Windows 8.1. When you do this, you might want to back up your files first. Remember that installing the 32-bit version works like other installations, and could delete some of your files.
After installing the 32-bit version, go to Updates and install all the necessary updates. This includes upgrading to Windows 10 if you’re asked to.
When you installed the Windows 10 upgrade, you’ll now have the Windows 10, 32-bit version installed. This will be the version activated on Microsoft servers. Despite this, the activated version stored is only applicable to your computer’s hardware, not the version of Windows 10.
Download Windows 10, 64-bit version.
Prepare an empty DVD or USB flash drive. Use Creation Media software then click the Create Installation Media for Another PC option.
Install the 64-bit Windows 10 version you downloaded from Step 4. Make sure not to put anything when you’re asked to input the serial number.
Once the installation is complete, you’ll have the 64-bit version of Windows 10.
Method 3 – Buy a new processor/motherboard
If the above two methods don’t work, there’s a great chance that this error occurs because of an outdated processor/motherboard. Your next possible solution is to buy an updated model that’s fully compatible with 64-bit Windows 10.
Method 4 – Download an automated tool
If all else fails, you might want to consider using this powerful automated tool to quickly fix the problem and any other computer-related issues.
If you got encounter an error message saying, “Error opening file for writing” while running a setup file to install some program on your computer, read on as this post will give you some suggestions on how you can fix it. You can encounter this error when running a setup file for installing a program like GlassWire, Notepad++, VLC, Steam, OBS, Mod Organizer, WinpCap, NSIS, FileZilla, BSPlayer, Kodi, Wireshark, rtcore64, qt5core.dll, MSI Afterburner, GWCtlSrv.exe, npf.sys, vcredist_86 and many more. And so when this error pops up while you run a setup file, refer to the steps given below which might help resolve the problem.
Step 1: First, you have to make sure that there is no other installation in progress as multiple installations can most likely cause this error to show up. You can restart your computer and try to run the setup file again.
Step 2: If you still got the error even after your restart your computer, click on Retry to try again and if it does nothing, click Abort to terminate the installation. After that, go to the folder where you’ve placed the setup file and then delete it.
Step 3: Make sure that you have enough disk space on your computer. You can use the Windows 10 Storage Sense feature which can clean all the temporary files from your computer and help you save storage space. To use Storage Sense, follow the steps below.
Open Setting > System > Storage from the WinX Menu.
From there, you will see a list of all the local and connected storage devices along with the details on the free space.
Now make sure that the Storage Sense feature is turned On then go find a link that says “Free Up Space” and click it to open.
After that, a screen which is the built-in program in Windows 10 will appear and will scan your computer for the following junk files so you can free up disk space:
Windows Upgrade Log Files
The system created Windows Error Reporting Files
Thumbnails
Temporary Internet Files
Previous Windows Installation Files
Delivery Optimisation Files
DirectX Shader Cache
Note: Once you’re done freeing up space on your drive, try to run the setup file again.
Step 4: If freeing up space didn’t help, you can just delete the setup file and download another one from the official homepage of the program. From there download the setup file and place it in a different location. After that, run the setup file once again.
Step 5: Make sure that you have downloaded the correct setup file according to your operating system, i.e. x64 or x86.
Step 6: Restart your computer once more and make sure that you sign in as administrator. After that, right-click on the setup file and click “Run as administrator”.
If it still didn’t help, you might want to take ownership of the folder where you saved the setup file. How? Follow the steps below but before you do that, you have to create a System Restore Point first, once that’s done, proceed.
First, locate the concerned folder and right-click on it then select Properties.
Next, click on the Edit button in the Properties window and click OK to confirm if you got a User Account Control elevation request.
After that, select user/group from the permission windows or click on the Add button to add another user or group. It would be best if you add “Everyone” to give permission.
Then check “Full Control” under the “Allow” column to assign full access rights control permissions.
Now edit the permission to Full Control for “Everyone”.
Disk partitioning is a concept that’s been around for so long, but is still only familiar to few. If done right, it can help get your computer in perfect order.
Today we bring you a simple definition of disk partitioning, its pros and cons, and a quick tip on how to do it properly to reap its full benefit!
Definition and purpose
The simplest way to define disk partitioning would be: it’s exactly what it sounds like. It means taking a hard disk drive and separating it into different segments. These segments are called partitions. You can visualize it as cutting a cake into smaller pieces - not necessarily of the same size, though.
So what is the purpose of these pieces?
Well, when you first get a hard drive, it’s basically just a bunch of unallocated storage space. Until there’s at least one partition, this space is unusable to your operating system. Once you create a partition, your OS will recognize it as usable storage space.
You can choose to create a single partition and use it for all your files, from program files to personal data. A lot of off-the-shelf computers come with one primary partition like this and a small secondary one reserved for recovery purposes.
Whether or not you want to split your disk into more than one segment is up to you. We would generally recommend it, though. The whole point of partitioning is for each segment to have its own purpose.
So treating all your storage space as a single unit containing different file types would be like constructing an office building with only one massive room for everything - day-to-day work, conferences, interviews, etc. And all of this for different departments of the company. You can see how this might get a little messy.
Creating multiple partitions eliminates the task of running several different types of files from the same place. This takes a heavy load off the entire process of accessing data.
Disk partitioning also brings a ton of other benefits to the table. An important disclaimer, though: there are disadvantages too. We will walk you through both sides to help you get an objective idea and make an informed decision.
Source: Kina on Unsplash
What are the benefits of disk partitioning?
1. Better file organization
This is the most obvious and perhaps the biggest advantage of partitioning your hard drive.
As we already mentioned, partitioning allows you to create separate segments for different file and data types. You wouldn’t want to use the same partition for your system files and for games, would you?
If organization and time management are important to you, then multiple partitions are the right solution. Searching for specific files will be much easier overall. Say you have one hard drive, but three partitions: C for the system files alone, D for multimedia files and documents, and E for games and apps. Your computer loads the system from C without interference from the other two, and you know exactly where to look when searching for a file.
2. Easy reinstallation
File management isn’t the only thing made faster and simpler thanks to partitioning. If you opt for creating multiple segments on your drive, reinstalling Windows will be easy peasy.
That’s because all you need to do is format the partition your system is on. Then you reinstall the OS on it, and there you go. Now you have a clean installation, with all your files saved on other partitions intact. You can even make a copy of your system partition, so you can revisit the exact same installation in the future if you want. And the whole time your pictures, music, documents stay exactly where you left them.
Source: Andrew M on Unsplash
3. Possibility of using multiple file systems
By now you’ve understood that partitions function completely separately. This means that, if for some reason you need multiple file system capabilities, partitioning will allow that.
One segment could be used for, say, an NTFS file system, while another could run ext or APFS.
4. Running different OSes
You’re an avid Windows user but need to use Linux on the side? No problem. You don’t need to buy a separate computer or anything. The possibility of running different file systems also means you can use partitioning to run multiple operating systems.
Doesn’t that sound enticing? One machine for multiple totally different uses!
5. Backup and recovery made simple
Data loss can happen on any disk, partitioned or not. However, it’s much easier to get it back on a partitioned one. You know where you stored what, and each partition can be backed up exactly as it is. It’s also a lot faster to back up single partitions than entire hard drives.
Ultimately this also means a faster path to recovery. If you lose or accidentally delete important files and data, you might want to use a recovery tool like Recuva to scan for them and get them back. Recuva is even powerful enough to recover data from damaged hard drives. But no matter how powerful, scanning a whole drive is strenuous for any recovery tool. Scanning independent partitions is a lot more convenient than that, and will get you to your goal more efficiently.
6. Optimized performance
Now, let’s keep in mind that computer performance is influenced by a number of factors. Partitioning alone isn’t what makes it better or worse. However, it can contribute to optimization. It’s easier for your computer to scan, say, a 40 GB partition to fetch the system file it needs than scanning the entire capacity of your drive.
7. Improved security (possibly*)
Separate partitions can help make your system more secure. Firstly, they minimize file corruption. If one partition gets corrupted, the others should remain unaffected. And keeping in mind the previous point about backup and recovery, ‘fixing’ the damaged partition would be much easier than fixing the entire hard drive.
Partitioning also improves security in terms of malware protection. A malicious attack on one partition is easier to deal with than malware on the whole drive. If your system partition gets infected, you can simply reinstall your OS and that should do the trick.
*Do keep in mind that partitioning can’t defend you against more advanced attacks. So make sure not to give in to a false sense of security.
What are the disadvantages of partitioning?
1. Data is still vulnerable
Yes, it’s easier to back up and recover data from independent partitions. And yes, partitioning may help protect separated files and data to a higher degree. But remember: everything is still on a single physical drive. So while digital errors and issues may be easier to deal with on partitioned drives, physical damage obviously won’t be.
If your hard drive is destroyed in some way, all data on it will be gone. That’s why, if you have crucial files on your PC, it’s important to give them the proper backup treatment before it’s too late.
2. Disbalance of space
Allocating storage space on separate partitions may be a little more tricky than you think. You may fill up one partition a lot faster than another. So on one side you’re struggling with space, and on another you have too much of it to spare. Imagine nearly filling up your system partition and then it turns out you need a lot more space for its updates than you thought.
That’s why you really have to be sure you actually have enough files of different types that you need help managing efficiently. Otherwise you’ll just create a struggle and disbalance in terms of storage.
3. Increased risk of error
If done incorrectly, partitioning can lead to more harm than good. Aside from space disbalance, there is an increased risk of incorrect partition sizes and formatting. Plus, human error is also a factor: in a moment of distraction, you may erase one partition when you meant another. Undoing such mistakes will definitely be tedious and time-consuming.
4. SSDs eliminate the need of partitioning
SSDs (solid-state drives) don’t function in the same way that HDDs do. They have faster read times and can organize files on their own. This quite literally eliminates the need for organization on your part.
Partitioning: yes or no?
The bottom line is that multiple partitions might not be necessary for the average user. But if you’re planning on storing many file types or different file and operating systems on the same PC, then you should give it a shot. It’s also an excellent solution for businesses, of course.
And if our pros and cons list isn’t enough to help you decide, you can always send us a message and we’ll help you make the right choice.
Decided to partition your hard drive?
If you’ve decided to give it a go, you definitely should make sure to do it right.
The two most effective and reliable ways to partition are using the built-in options on Windows or investing in a dedicated partitioning tool, like the EaseUS Partition Master. Which one you'll opt for depends on your specific needs.
Option 1 may be more suitable for users with at least some level of experience. In this case, you’d have to know exactly which steps to take without making errors. This is done in Disk Management on Windows 10/11. From there, you can select the partitions you’d like to split into different volumes of selected sizes.
If this is your first time partitioning, we highly suggest you either consult professionals for this or move on to option 2. The EaseUS partitioning software is specifically designed for beginners, with an intuitive interface helping you succeed in the process. All you need to do is pick the Partition Master package tailored to your needs and follow their guide.
Each package offers technical support as well, and even free upgrades (to varying degrees based on your subscription). Plus, all of this is valid for not one, but two PCs.
It’s the perfect solution for a smooth and error-free partitioning process. If you want to organize your hard drives efficiently and make the most of all your space without doing irreparable damage, it’s definitely worth the investment.
HWiNFO (Hardware Information) is a professional hardware information and diagnostic tool supporting the latest components, industry technologies, and standards. It's targeted to recognize and extract the most possible amount of information about computer hardware which makes it suitable for users searching for driver updates, computer manufactures, system integrators, and technical experts too. Retrieved information is presented in a logical and easily understandable form and can be exported into various types of reports. System health monitoring and basic benchmarking available too.
If you would like to read more helpful articles and tips about various software and hardware visit errortools.com daily.
If your Windows 10 computer slows down, the first thing you can do is to check the status of the resource usage in the Task Manager. In such cases, it shoots up to even 1000% which causes the system to either hang or freeze since some programs are using a major chunk of system resources. And this is the case with msrtn32.exe.
Msrtn32.exe is a malicious file that may try to steal your digital currency. It can get installed on your computer when you install a browser plugin or extension that can modify the default settings of browsers, the content of web pages, search results, as well as display tons of intrusive ads. So if you see msrtn32.exe under the Processes tab of the Task Manager
If you see msrtn32.exe under the Processes tab of your Task Manager, refer to the suggestions given below to get rid of it and restore your computer’s normal function.
Before you proceed, take note that this executable file is found in the following location:
C:/Program Files(x86)msrtn32
Option 1 – Delete the folder where msrtn32.exe is located
The first thing you can do is to go to C:/Program Files(x86)/msrtn32. From there, look for the malicious executable file and delete its folder. If you are not able to delete the folder, make sure that you’re logged in as administrator and then try again.
Option 2 – Try scanning your computer using Windows Defender
Since you are dealing with a malicious file, if you weren’t able to delete the folder where the file is located, you can scan your computer using the built-in Windows Defender program and then eliminate the malicious file. Follow the steps below to do so:
Tap the Win + I keys to open Update & Security.
Then click on the Windows Security option and open Windows Defender Security Center.
Next, click on Virus & threat protection > Run a new advanced scan.
Now make sure that Full Scan is selected from the menu and then click the Scan Now button to get started.
Steam Autumn sale is still raging and other storefronts like EPIC and GOG have also had their go, and as the year slowly closes we reflect on the best games released this year.
The games presented are not in any particular order and as sales are still raging pick one for you for a good time.
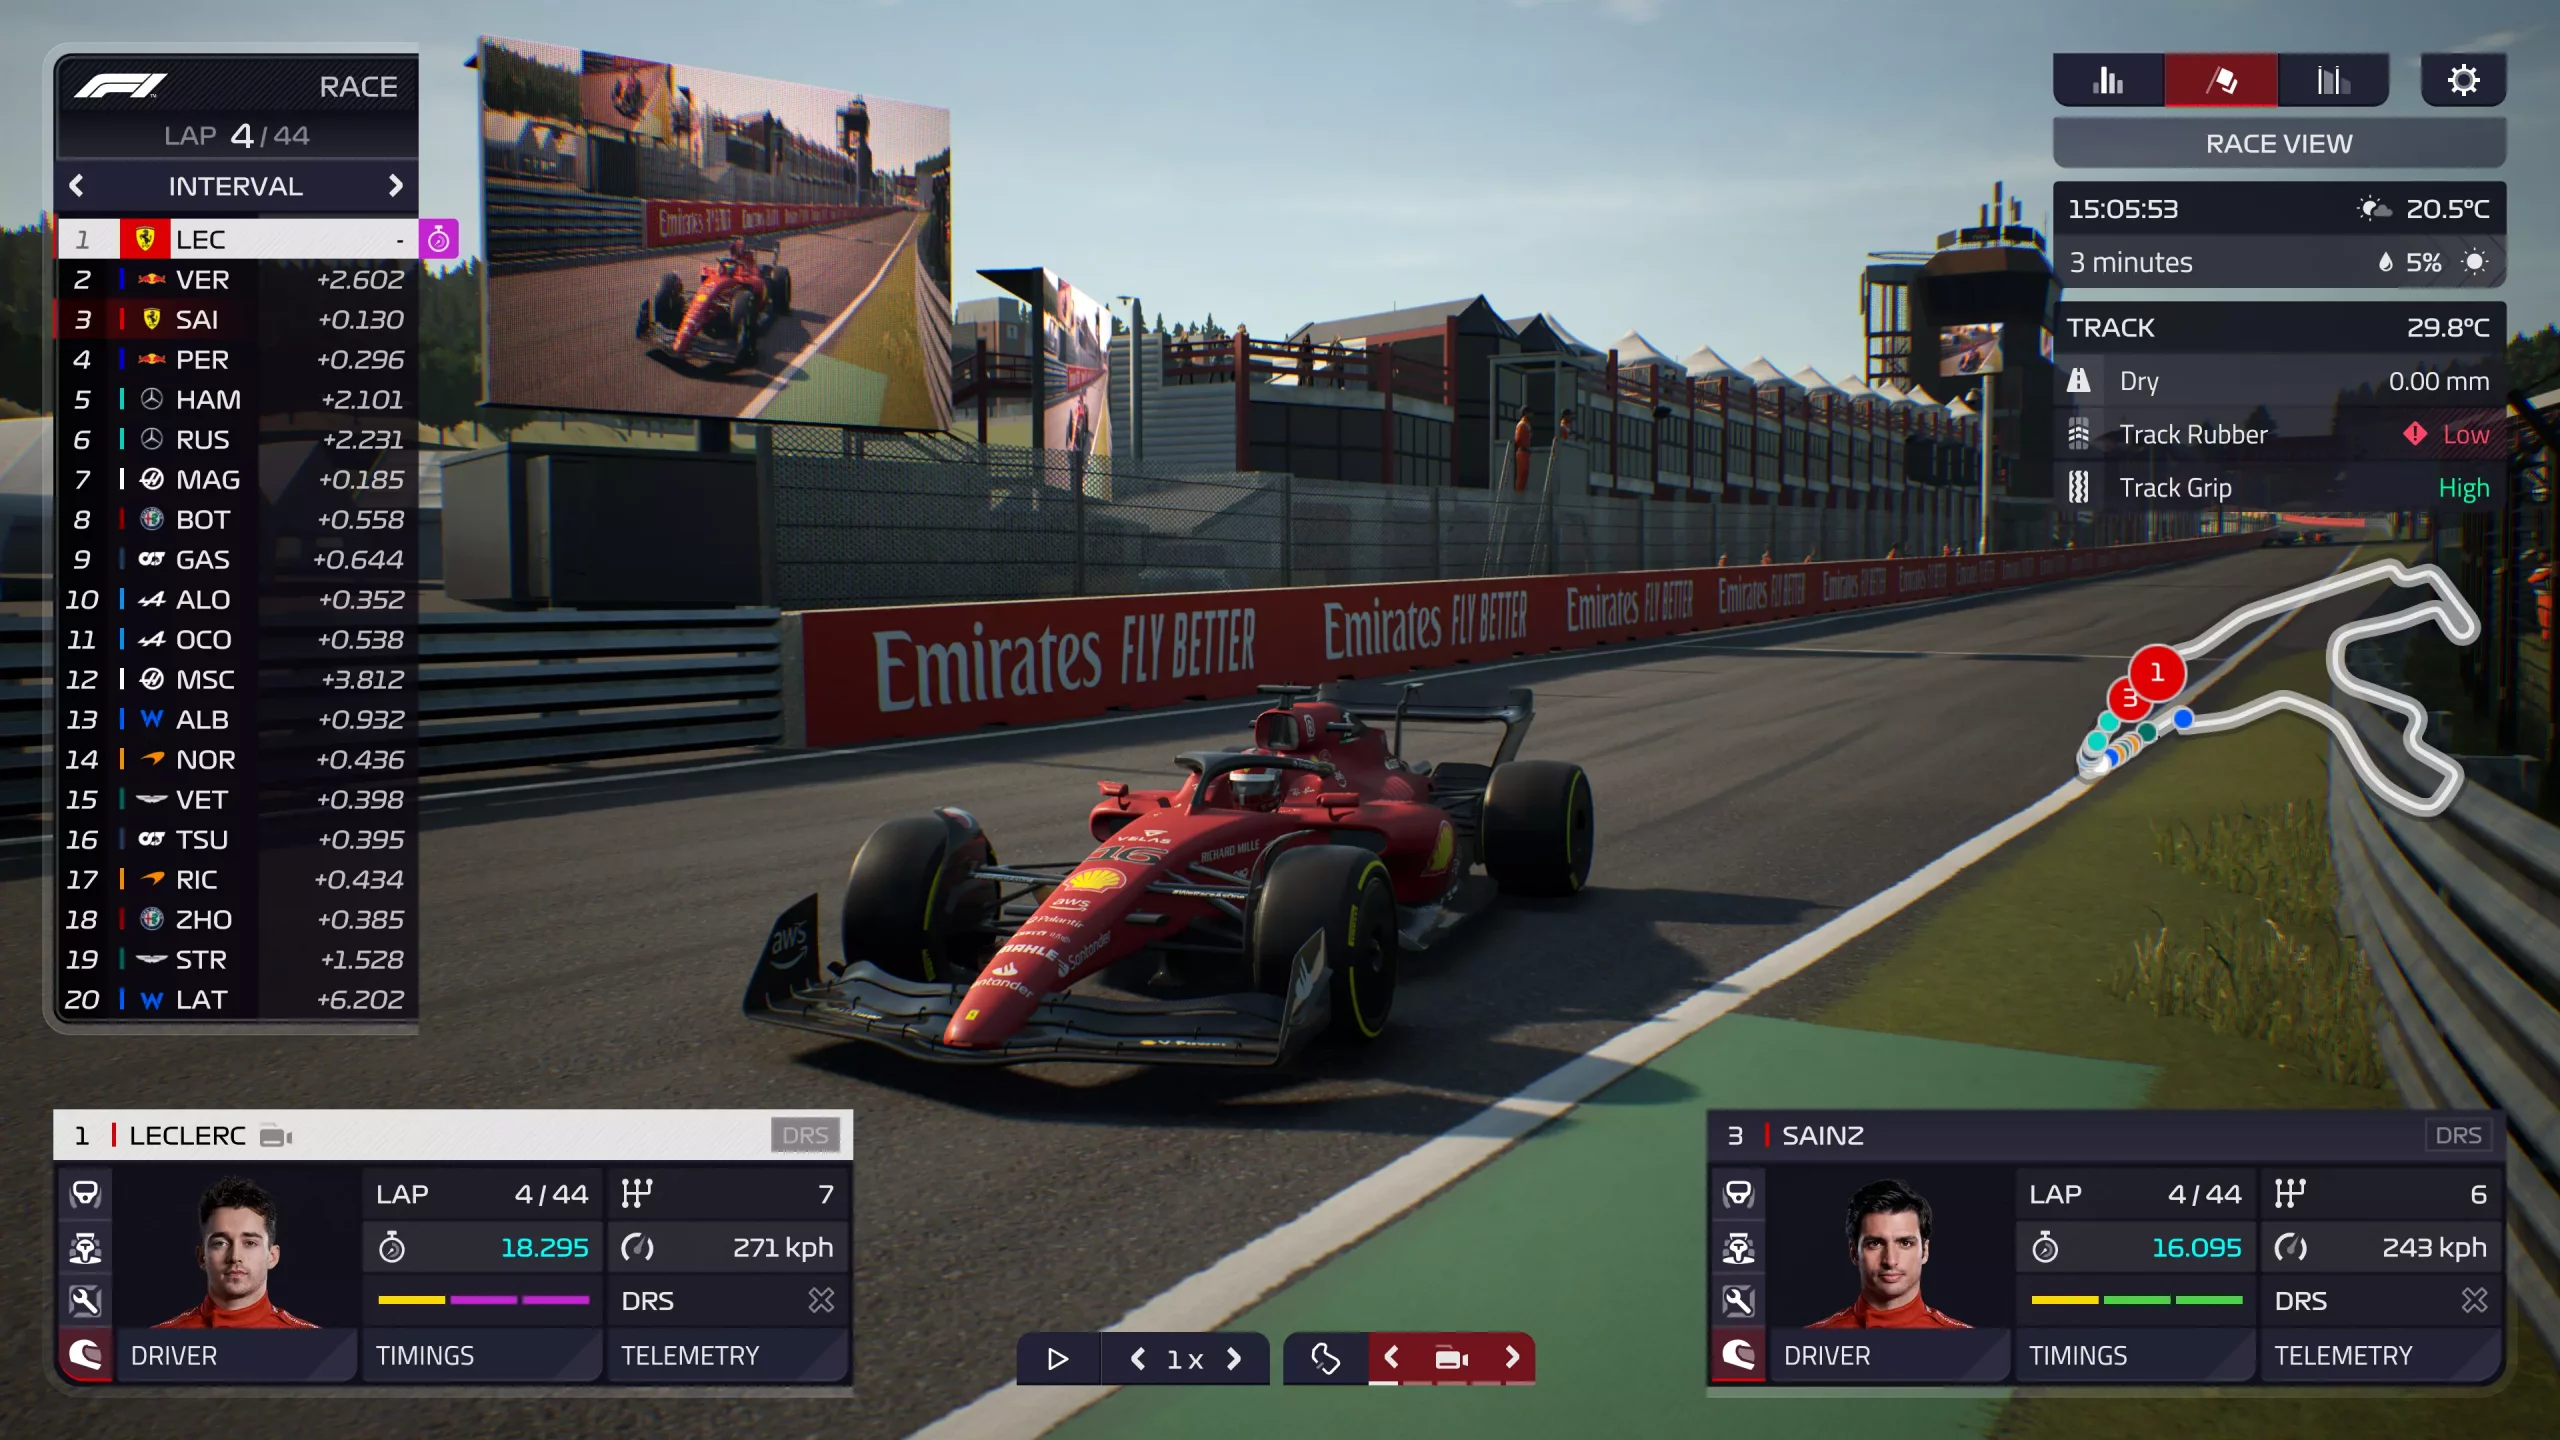
F1 Manager 22
If you are into formula racing this new manager is something we will wholeheartedly recommend. How it has been a very long time since a good F1 manager has been released this one is breath of fresh air. Masterfully done and fun to play, also licensed with real teams and cars get it here: https://store.steampowered.com/app/1708520/F1_Manager_2022/
Stray
I like cats, but this game is on another level from its competitors. Unique approach, great storyline, and of course orange cat as the main character! Set in a cyberpunk environment following the story of some unfortunate androids you can do most cat things like playing in boxes, etc but essentially the game is a puzzle platformer which in my opinion is a great thing. Meow your things and get the game while it is discounted: https://store.steampowered.com/app/1332010/Stray/
Neon White
Mirror's Edge was the very unique game when it was released introducing parkour into the gaming world, and Neon white brings it one level up. With competitive parkour FPS gameplay this game is great for killing some time and competing with your friends but most of all it is fun to play experience. Get it here: https://store.steampowered.com/app/1533420/Neon_White/
This game needs to be experienced in order to fully grasp its magnitude and quirkiness. From the creators of borderlands comes a new IP fusion of fantasy, guns, and crazy ideas all wrapped into an action RPG looter shooter with a recognizable borderlands style of graphics. https://store.steampowered.com/app/1286680/Tiny_Tinas_Wonderlands/
Norco
Winner of multiple awards, Norco is a classic point-and-click adventure game with a great sci-fi story with a lot of environmental focus. Story and atmosphere are the main selling points for the game and if you enjoy good stories with interesting characters give this one a go: https://store.steampowered.com/app/1221250/NORCO/
Final Fantasy 14: Endwalker
Expansion for Massive multiplayer online roleplaying game brings so much to the table that we just could not oversee it and place it aside. Technically not full standing game since it is the expansion it still delivers on many fronts and since it is supposedly the last expansion now is the best time to pick it up and give a final fantasy 14 a go: https://store.steampowered.com/app/1592500/FINAL_FANTASY_XIV_Endwalker/
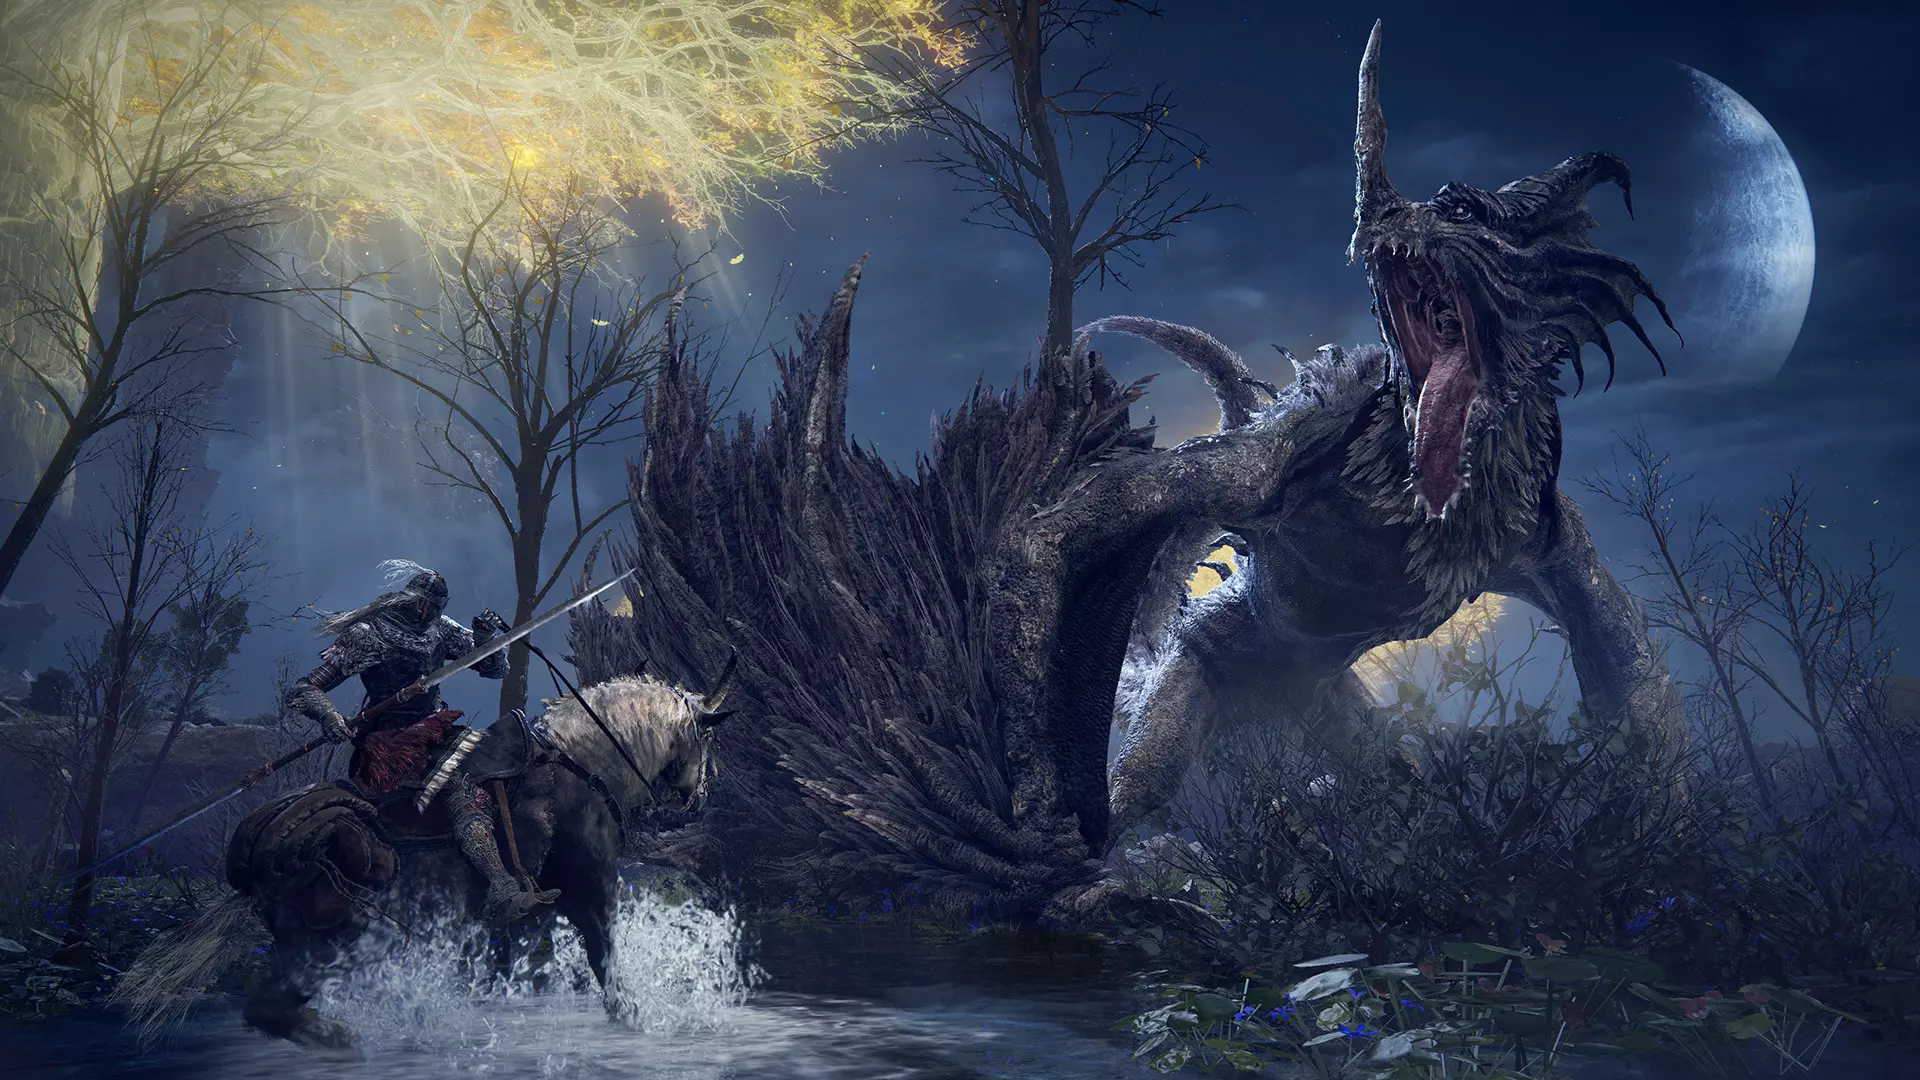
Elden Ring
Of course, the list would not be complete if we did not include Elden ring, a great example of how a difficult but well-executed game can go over and beyond. With a story on par with great epics and compact as in dark souls, this title will provide you with many hours of gameplay and content. https://store.steampowered.com/app/1245620/ELDEN_RING/
Error 550 is an SMTP (Simple Mail Transfer Protocol) outgoing server error code.
It usually occurs when you try to send emails through your Outlook account and the email message encounters a relay error. The email returns back without being delivered with a 550 error message.
The error message is prompted as either of the following:
"550 Requested action not taken: mailbox unavailable" "550 5 2 1 mail from refused spam site"
In other words, the error code 550 means that your SMTP server was not able to deliver the sent email to the user.
Solution
Error Causes
There are multiple reasons for this error message including:
The email address was typed incorrectly
Incorrect SMTP Server settings
ISP placing restrictions for outgoing mails on the email server
System infected by virus or malware
Further Information and Manual Repair
Regardless of what the reason may be for the error 550 code occurrence, it is advisable to repair and fix the issue quickly to avoid inconvenience.
You may not be able to send emails from your Outlook account if the error continues. This can cause great hassle in corresponding with others timely and may create a big communication gap.
Here are some quick and efficient ways to resolve this issue on your system:
Solution 1:
There is no need to panic when you encounter error 550. Sometimes the error message may occur because you inserted the wrong/ incorrect email address of the recipient.
In such a case, cross-check the recipient’s email address to verify if it is correct. If not, insert the correct address and try sending the email again.
Solution 2:
If the error still persists, try other methods to resolve it. Sometimes error 550 can also occur due to incorrect SMTP settings.
Fix it to resolve the error. This can be done by opening your Outlook settings Tools and Accounts option. Now go to view/change the email account for the email account you are having problems with.
After that check, the SMTP server is set to mail.yourdomain.com. Then click more settings and then click the outgoing server tab. See if the ‘My server requires authentication for the outgoing server’ is checked. If not, then check on it. Then simply save to confirm changes. Now try emailing again.
Hopefully, this will resolve the issue.
Solution 3:
Another reason for the error occurrence can be ISP blockage.
When the junk email volumes increase, network administrators (the people who are responsible for managing ISP servers) place restrictions on SMTP email servers to prevent spam on their network. If this is the reason, contact your ISP administrator to resolve the issue.
Solution 4:
Malware and viral infection can also be the cause for error 550. To remove all kinds of viruses including Trojans and spyware and fix the issue right away without compromising on the speed of your PC it is advisable to download Restoro.
This is a highly functional and advanced PC Fixer embedded with multiple utilities like a powerful antivirus and a system optimizer.
It scans your entire PC in seconds, detects and removes all kinds of viruses. Simultaneously, the system optimizer feature ensures the speed of your PC does not slow down during the scanning and virus removal process.
This feature boosts your PC speed significantly.
It is user-friendly and has easy navigations making it quite simple for even those users who are not technically sound to work around it and operate it with ease. It is compatible with all Windows versions.
Click here to download Restoro and resolve the error 550 messages today!
Users are reporting that randomly their screen will just go black for a second and come back. When this happens, it usually distorts any video currently on the screen; sometimes, they can resume working on the PC normally. However, when they view the event logs, they see the error message Display driver nvlddmkm stopped responding and has successfully recovered.
In this article, we will address solutions to this issue and how to not have it again.
Remove Aura iCUE plugin (applies to only ASUS motherboards)
Some PC users discovered that iCue adds an Aura plugin for ASUS MOBOs. That, combined with EVGA Precision X1, was causing the error it seems – this was determined when the screen would turn off and on when opening EVGA x1 software. In this case, the issue was resolved by removing the Aura iCUE plugins.
Change Power Management mode
Right-click the battery icon on the notification area on the right of the Taskbar.
Select Power Options.
In the Power Options window, locate your current Power Plan.
Select High performance, if that’s not your current power plan.
Now, click on Change plan settings next to it.
Now click on Change advanced power settings.
Expand PCI Express section.
Expand Link State Power Management.
Now set power saving to Off for both On battery and Plugged in state. This would fix any issues caused by the low power of the video card.
Click Apply > OK to save changes.
Update graphics driver
Go into device manager
Expand display adapter section
Right-click on adapter
Click on update driverReboot
Rollback graphics driver
Go into device manager
Expand display adapter section
Right-click on adapter
Click on Roll back driverReboot
Uninstall and reinstall graphics card driver
Go into device manager
Expand display adapter section
Right-click on adapter
Click on Uninstall deviceReboot
Replace the graphics card
If everything else failed, replace the graphic card
A lot of Windows 10 users have reported recently that their computers are frequently crashing with a Blue Screen error with an error code “VIDEO_DXGKRNL_FATAL_ERROR”. This kind of Stop error appears not so often and its bug check value of 0x00000113 is an indication that there is some violation in the Microsoft DirectX graphics kernel subsystem. This error also occurs when there is a corrupted driver that interferes with the GPU’s normal functionality.
According to some security experts, this kind of error is reported to only occur in Windows 10 PCs. Users started getting this error right after a large Windows Update. The cause of this error might have something to do with a violation in the DirectX graphics kernel subsystem where there could be a bad DirectX install or some corrupted Dynamic Link Library or DLL. Aside from that, the error might also be caused by the Nvidia driver which might have crashed or it could also be that there is an intermittent power supply. Moreover, an outdated BIOS as well as a third-party security program might be the ones behind this Blue Screen error. Whichever the case may be, you need to fix the VIDEO_DXGKRNL_FATAL_ERROR BSOD error by following the instructions given below carefully.
Option 1 – Try checking if the NVIDIA graphics card is enabled and update it as well
Although the problem is quite massive, the fix could be as simple as enabling the NVIDIA graphics card if it turns out to be disabled. There might be some strange reason why your graphics card disables itself. Thus, the best and first option you can try is to check if the NVIDIA graphics card is enabled or not. To do so, follow these steps:
Tap the Win + R keys to open the Run dialog box.
Then type “devmgmt.msc” in the field and hit Enter to open the Device Manager.
After opening the Device Manager, look for the Nvidia graphics card option among the list of device drivers. Once you found it, check if it is enabled or not. If it’s not enabled, you should see a gray arrow pointing downwards. Right-click on the card and select Enabled.
Next, right-click on the graphics card once more and click on the Update Driver Software option and then click on the “Search automatically for updated driver software” option.
Option 2 – Update or uninstall third-party security program
As mentioned, the VIDEO_DXGKRNL_FATAL_ERROR Blue Screen error might be caused by a third-party security program that’s installed on your computer. So you have to either update it or uninstall it to resolve the issue.
Option 3 – Check the power supply for any inconsistency
The Blue Screen error might also be caused by an intermittent power supply. If there is any intermittent changes between the main supply and the battery power, it might lead to bad contact on your supply to the charger and thus, causes the VIDEO_DXGKRNL_FATAL_ERROR Stop error to appear. So to check if this scenario is applicable to you, you have to monitor your computer for any frequent changes between the power supply and the battery power. If you see that the supply is displaying power On and Off, see if the same goes when the power supply is disconnected. However, if it does not occur, you might have to purchase a new power adapter cable and replace the one that you have right now.
Option 4 – Reinstall the Graphics card drivers
Tap Win + R to open Run then type “devmgmt.msc” in the field and hit Enter to open the Device Manager.
From there, look for the Display adapters and uninstall each one of the graphics card drivers by right-clicking on them and selecting the Uninstall device option.
After uninstalling the graphics card drivers, close the Device Manager and tap Win + R to open Run once again.
After that, type “appwiz.cpl” in the field and hit Enter to open Programs & Features in the Control Panel.
Next, look for any program that’s related to your GPU manufacturers like Nvidia, AMD, or Intel. Right-click on any GPU-related entry and click on Uninstall to uninstall them and then follow the next on-screen instructions that appear afterward.
Now restart your computer.
Once your computer has restarted, go to the GPU manufacturer’s website and download the latest driver version for your graphics card model and then install it.
Restart your computer once again. That should fix the problem.
Option 5 – Try checking if there are any BIOS updates available for your PC
Updating the BIOS may help you resolve the BSOD error. You can just go to the OEM’s website as they offer utility software that can download BIOS firmware and update it without any problem. BIOS updates usually offer enhancements and fixes to some issues like this one.
Option 6 – Perform a System Restore
Performing a System Restore on your computer can also help you fix the VIDEO_DXGKRNL_FATAL_ERROR Blue Screen of Death error. You can do this option either by booting into Safe Mode or in System Restore. If you are already in the Advanced Startup Options, just directly select System Restore and proceed with the next steps. And if you have just booted your PC into Safe Mode, refer to the steps below.
Tap the Win + R keys to open the Run dialog box.
After that, type in “sysdm.cpl” in the field and tap Enter.
Next, go to the System Protection tab then click the System Restore button. This will open a new window where you have to select your preferred System Restore point.
After that, follow the on-screen instructions to finish the process and then restart your computer and check if the problem is fixed or not.

 Error Causes