Many Minecraft players are experiencing Realms internal server error 500, luckily for all of that players, we are offering you solutions.
Preliminary Fixes
Before heading towards the fixes here it is suggested to try some quick tweaks that might work in your case to fix
Minecraft Internal Server Error 500.
Restart your PC – Very first it is suggested to shut down your computer and after that restart the system. This worked for many players to get rid of the server outages issue.
Update your Windows version – Check if you are running an outdated Windows version then make sure to install the latest Windows update and then run the game.
Update Your Game Version – Also make sure you are running an updated version of
Minecraft Realms. Installing the latest updates not only makes the game more stable but also helps you to solve common glitches and issues with the game. So, check if any recent updates are available to make sure to download and install them
Modify the Game Settings – Check if you have tweaked some of the game settings then this might be the reason for the problem. So try to reconfigure the settings to default. This may work for you.
Now after following the preliminary solutions check if the
Minecraft Realms Internal Server Error 500 is resolved or else head to the next solution.
Check your Internet Connection
As said above if the internet connection is not working properly or it is preventing you from accessing the servers, then this can also cause the
Internal Server Error 500 in the Minecraft server.
So, very first make sure your
internet connection is stable and working properly. Also if you are using Wi-Fi then use a wired connection to get a stable network.
Moreover, if your internet connection is working fine then there is a possibility that
your internet connection is causing interruption and preventing you from accessing the
Minecraft Realms server.
So, if this is the case then here it is suggested to use a VPN connection to get exceptionally fast & reliable speeds without getting detected.
Check for the Minecraft Server Outage
Well, there is a possibility the
Minecraft servers are down and if this is the case then you don’t have any other option than just waiting for the servers to get restarted and the service becomes available again.
Also, the
service outages can affect the
ability of the game and as a result, you are unable to play the game. Additionally, you can also inquire about
Minecraft’s server status by visiting the
Downdetector website.
But if you find the services are running fine then the issue is from your side.
Disable Background Applications
If you are still getting the
Minecraft Realms Internal Server Error 500, then there are chances that other applications running in the background are causing a limit to your internet bandwidth.
It is suggested to disable the internet-connected apps and after that try connecting to Microsoft Realms again.
- Hit CTRL + SHIFT + ESC keys > to open the Task Manager.
- Then under the Process tab,> right-click on unwanted background process, > click on the End Task
After disabling the applications running in the background, relaunch Minecraft and check if the internal server error 500 still appears or not.
Delete UUID Files in Minecraft
If you are still getting the
Minecraft Realms Internal Server Error 500 then here it is suggested to
delete the UUID files in Minecraft.
- First, visit the website by clicking the https://mcuuid.net/ and enter all the credentials to get the player’s UUID
- Then login to the server > proceed to server files > head to the world
- Here locate the PlayerData folder > click to open it.
- And from here choose the file containing the same name like the player’s Username or UUID > after that hit the Delete
- Lastly, restart your server to save the changes
Remove Resource Packs & Mods
If you are getting the
Minecraft realms internal server error 500 after the installation of a particular mod or the resource pack then this is what causing the issue while playing the realm.
So, here it is suggested to delete it immediately, also
uninstall the mod as well as the resource pack you installed recently.
It is estimated this works for you but if you have a doubt related to any specific mod or the resource pack causing an error you should uninstall then also and check if the
Minecraft internal error 500 is fixed.
Disable the Plugins
If you are still encountering the error then
check for the plugins installed on your PC. Many times the installed plugin starts causing issues with the game as they are not compatible with the game version.
So here it is recommended to try
disabling the plugins on the PC and check if this works for you.
- On your system > open the plugin window > rename the plugins files from “[plugin name].jar to [plugin name].jar.disabled”.
- Next restart the server and check if the Minecraft Realms Internal Server Error 500 problem is resolved or not.
Uninstall & Reinstall Minecraft
If none of the above-given solutions works for you then here it is suggested to uninstall and reinstall Minecraft.
Well, it is suggested to uninstall the game using the third-party uninstaller. Manually uninstalling the program won’t remove it completely, some of its registry entries, junk files are left behind and causes interruption when the next time you install it.
If you are looking to uninstall it manually then follow the steps given:
- Hit Window + R key > to open the Run box
- And in the run box type appwiz.cpl command > hit Enter
- Now the application manager window pops up on your screen > locate the Minecraft application > right-click to Uninstall
And as the uninstalling process is completed > head to the
Minecraft official website and tries downloading and installing the game.
Check if the
Minecraft Realms Internal Server Error 500 is resolved or not.
Contact Support Center
If after trying all the solutions given you are still unable to fix the error then the only option left is to contact the
Customer Support Center and fill the form in the link and describe the problem in a detailed way.
And within few days you will get feedback from them to
fix Minecraft Realms internal error 500. 
 Following a two-year investigation by the California Department of Fair Employment and Housing, the state has filed a lawsuit against Activision Blizzard for fostering a "frat boy" culture in which female employees are allegedly subjected to unequal pay and sexual harassment.
As reported by Bloomberg, Activision Blizzard is being accused by the state of California of discriminating against female employees at nearly all levels of employment, including in regards to compensation, promotion, assignments, and termination. The state alleges Activision Blizzard’s leadership has failed to address any of these outstanding issues or prevent them from occurring within the workplace. You can read the full details of the lawsuit here.
The suit, filed Tuesday in the Los Angeles Superior Court, says Activision Blizzard, which is made up of about 20 percent women, assigns women, and women of color, to "lower paid and lower opportunity levels" with lower starting pay for similar work as their male counterparts.
The documents also accuse Activision Blizzard of fostering a "pervasive 'frat boy' workplace culture in the office. Male employees are said to drink "copious amounts of alcohol" as they make their way through cubicles and "often engage in inappropriate behavior toward female employees."
Male employees are said to come to work hungover, play video games during work "while delegating their responsibilities to female employees, engage in banter about their sexual encounters, talk openly about female bodies, and joke about rape."
The lawsuit also cites one particular incident where a female employee, who was already subjected to intense sexual harassment at the company, committed suicide during a work trip with a male supervisor who allegedly brought inappropriate, sexual items with him on the trip.
The lawsuit is asking for an injunction that will force Activision Blizzard to comply with workplace protections, as well as deliver unpaid wages, pay adjustments, back pay, and lost wages and benefits for female employees.
Following a two-year investigation by the California Department of Fair Employment and Housing, the state has filed a lawsuit against Activision Blizzard for fostering a "frat boy" culture in which female employees are allegedly subjected to unequal pay and sexual harassment.
As reported by Bloomberg, Activision Blizzard is being accused by the state of California of discriminating against female employees at nearly all levels of employment, including in regards to compensation, promotion, assignments, and termination. The state alleges Activision Blizzard’s leadership has failed to address any of these outstanding issues or prevent them from occurring within the workplace. You can read the full details of the lawsuit here.
The suit, filed Tuesday in the Los Angeles Superior Court, says Activision Blizzard, which is made up of about 20 percent women, assigns women, and women of color, to "lower paid and lower opportunity levels" with lower starting pay for similar work as their male counterparts.
The documents also accuse Activision Blizzard of fostering a "pervasive 'frat boy' workplace culture in the office. Male employees are said to drink "copious amounts of alcohol" as they make their way through cubicles and "often engage in inappropriate behavior toward female employees."
Male employees are said to come to work hungover, play video games during work "while delegating their responsibilities to female employees, engage in banter about their sexual encounters, talk openly about female bodies, and joke about rape."
The lawsuit also cites one particular incident where a female employee, who was already subjected to intense sexual harassment at the company, committed suicide during a work trip with a male supervisor who allegedly brought inappropriate, sexual items with him on the trip.
The lawsuit is asking for an injunction that will force Activision Blizzard to comply with workplace protections, as well as deliver unpaid wages, pay adjustments, back pay, and lost wages and benefits for female employees.
 In order to make a keyboard shortcut for the desired folder know that it is available only when you have a shortcut of the desired folder, it cannot be done on the folder itself, only on its shortcut. Now folder shortcut does not need to reside on desktop, you can place it anywhere you like, but it must be a shortcut.
So the first step is of course to make a shortcut of the folder that you wish to have access via keyboard key combination and place it where you wish.
Once you have done this step, right-click on it and choose properties. Inside properties at the top click on the Shortcut tab and then inside Shortcut Key, press the key combination that you wish to associate with this folder. Confirm with OK and start using fast folder access with your desired key combination.
In order to make a keyboard shortcut for the desired folder know that it is available only when you have a shortcut of the desired folder, it cannot be done on the folder itself, only on its shortcut. Now folder shortcut does not need to reside on desktop, you can place it anywhere you like, but it must be a shortcut.
So the first step is of course to make a shortcut of the folder that you wish to have access via keyboard key combination and place it where you wish.
Once you have done this step, right-click on it and choose properties. Inside properties at the top click on the Shortcut tab and then inside Shortcut Key, press the key combination that you wish to associate with this folder. Confirm with OK and start using fast folder access with your desired key combination. 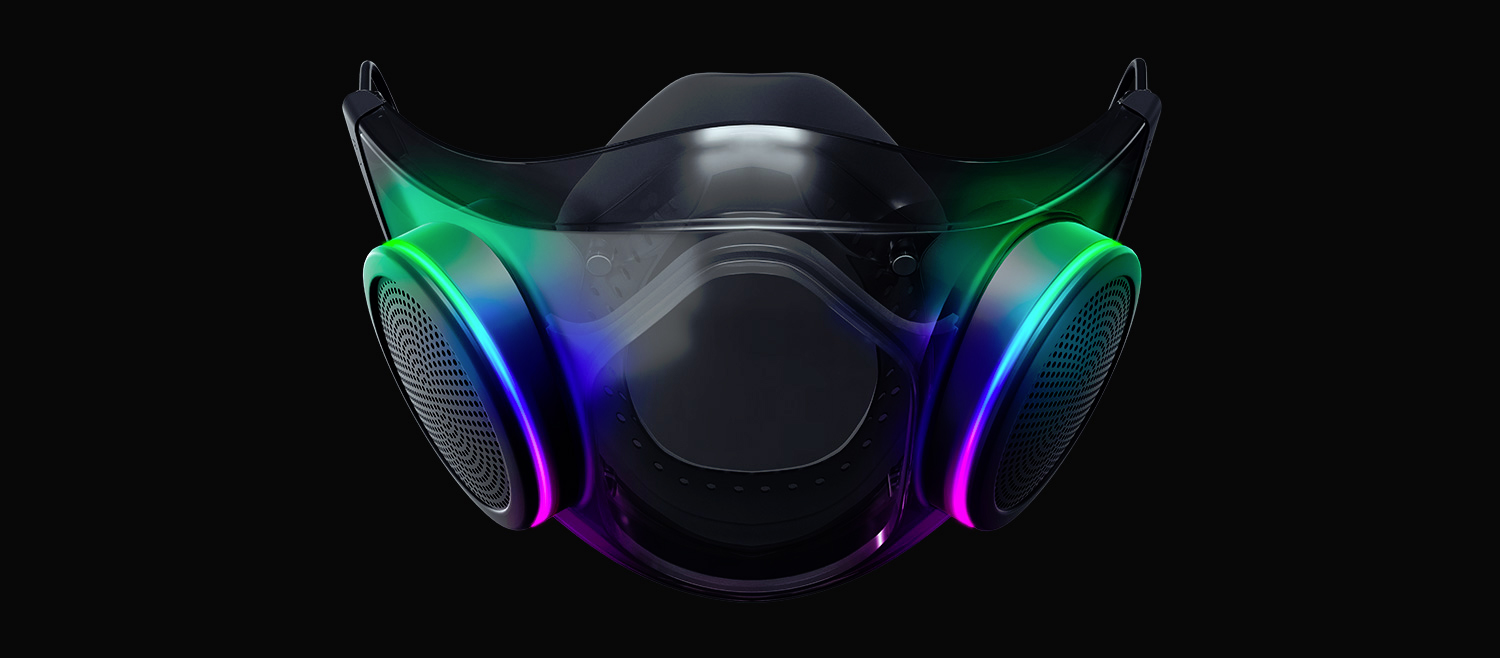 The world today is still sadly under pandemic and by the looks of it, COVID-19 is here to stay, well at least for some time in the near future. Razer seems to think so as well since their upcoming gear is not really what you would expect.
Enter Hazel, a new and upcoming Razer smart mask.
The world today is still sadly under pandemic and by the looks of it, COVID-19 is here to stay, well at least for some time in the near future. Razer seems to think so as well since their upcoming gear is not really what you would expect.
Enter Hazel, a new and upcoming Razer smart mask.