If you are trying to install or upgrade your Windows 10 computer but suddenly encountered an error message saying, “Windows could not configure one or more system components”, read on as this post will show you how you can fix the problem.
You are not alone in experiencing this problem as other users also reported having the same scenario. Some of them reported getting the following error message:
“Windows could not configure one or more system components. To install Windows restart the computer with error code 0xc1900101-0x30018.”
When you check on the Windows 10 rollback log, you will see a part with the “iisetup.exe” that’s related to the abort. Usually, the upgrade process completes over 50% and gets stuck and then rolls back later on and generates the error logs. This kind of error, in most cases, appears during the upgrade of Windows 10 and is related with the Internet Information Services or IIS in Windows 10. For some unknown reason, it restricts the installation or the upgrade which causes the error to appear. To fix the “Windows could not configure one or more system components” error, you can try to remove the IIS from the Windows Features or rename the “inetsrv” folder. You could also move all the folders related to IIS to another drive. For more details, refer to the options provided below.
Option 1 – Try to remove the IIS from Windows Features
The IIS is installed from the Windows Features and you can find it at Control Panel > Programs. From there, uncheck the checkbox for the Internet Information Services. Once done, click on the OK button to save the changes. Note that this process will get rid of all the related programs, services, and folders from Windows 10. So if you want to, you can just install them later on or use an offline installer from the official site of Microsoft.
Option 2 – Try renaming the inetsrv folder
The next option you can check out to resolve the problem is to rename the “inetsrv” folder. If you have uninstalled IIS from the Windows Features, this should remove the folders as well, however, it didn’t remove the folder then you have to delete the folders that are related to the IIS by following these steps:
First, you have to boot into the Advanced Recovery Mode and from there, open Command Prompt.
Next, execute this command to rename the folder from this location, C:Windowssystem32inetsrv: rename C:/Windows/system32/inetsrv/inetsrv.old
Once done, boot into your computer normally and try to upgrade Windows 10 again, and check if the problem is fixed or not.
Option 3 – Try to move the folders related to IIS to a different drive
Tap the Win + R keys to launch the Run utility and type “services.msc” in the field and hit Enter to open the Windows Services Manager.
Next, look for the Application Host Helper Service from the list of services and stop it.
Once done, take ownership of the “WinSxS” folder and then move the *windows-iis*.*” folders to another drive. You can just search using the “*windows-iis*.*” keyword in the Start Search.
Next, tap the Ctrl + X keys and paste the folders to another drive.
After that, start the update process for Windows 10 again.
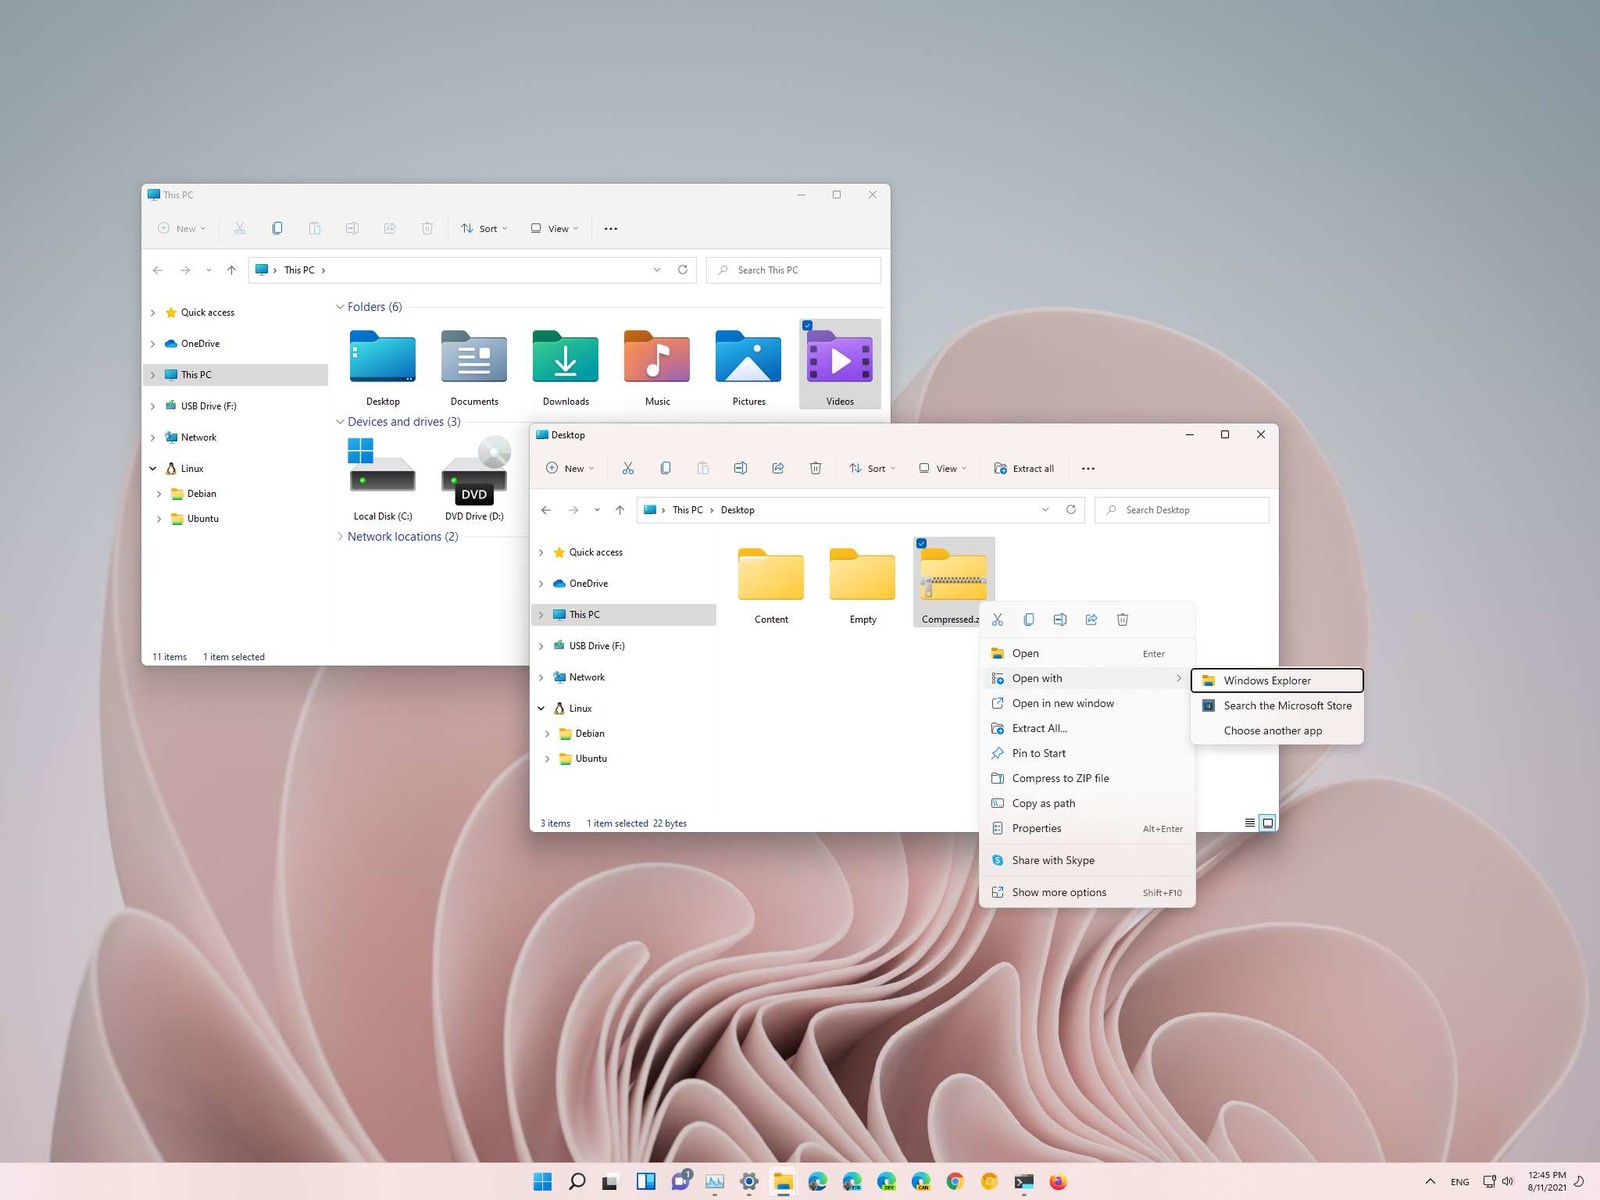
Typical use of file explorer will probably not need any kind of elevated privileges, but from time to time you might encounter some tasks that will require administrator rights in order to perform them. If this is the case you will need to run file explorer with these rights but inside Windows 11 that is somewhat hidden and not 1 click away.
How this is the case we have decided to put a little tutorial on how to accomplish this very task and run file explorer with administrator privileges.
Open File Explorer via EXE file
Open File Explorer typically
Navigate to This PC > Windows (C:) > Windows
Locate file explorer application
Right-click on it and select Run as Administrator
Run File Explorer
A new instance of file explorer will pop with elevated administrator privileges.
Run it as an administrator using the Task Manager
Open the Task Manager ( CTRL + SHIFT + ESC )
Click on More details (at the bottom)
After the task manager expands click on the File tab
Click on Run New Task
Type in explorer.exe and check the box next to it that says Create this task with administrative privileges
Can graphic cards wear out over a longer period of time? Recent studies and experience from crypto miners say no but they can die due to different reasons like improper use, low cleaning habits, factory mistakes, etc.
Many gamers and people who use GPU intense applications tend to think that some glitches and hiccups in the software are a sign that graphic card is dying out and that it is time to be replaced. Altho this could be true in many cases these kinds of behavior are mostly due to old drivers and software issues.
Older cards can produce these kinds of results due to their old age and new software is often more demanding than these cards can handle.
So in order to diagnose and be sure that your GPU is indeed dying out lookout for these signs.
The Main Signs of a Dying GPU:
The Computer Crashes and Won’t Reboot
If your computer shutdown while working in the graphic application or while playing the game and the monitor loses signal there is a high chance the graphic card is soon going to be gone. Some motherboards have hardware detection failure and can signal immediate fail. If when turning your computer ON you are greeted with a blue screen with the message that the signal can not be found or you do not have picture at all it is most likely that GPU has failed.
Graphic Glitches While Playing Games
If you are playing the game and all of sudden you get off-color pixels, screen flickering, strange graphic behaviors, random artifacts, or similar and that keeps repeating in multiple games it is likely that GPU days are coming to an end.
Abnormal Fan Noise or Performance
Fans are an essential part of cooling the GPU and over time if they are intensively used they could wear out and need replacing. If however you have not noticed and have not replaced the fans card can sustain overheating damage.
Many cards have cooling fans that are designed to spin at a higher RPM only when the GPU is under load. It prevents bearings in the fans from dying prematurely, so don’t worry if one of your fans is inactive while you are browsing the web.
However, when you play games that utilize software that your card isn’t built to support, the bearings in the fans wear out faster. Once the fans stop working under load, the graphics card can quickly die.
How to Diagnose a Dying Graphics Card
Presented next are essential steps in order to recognize a dying graphic card.
Check Motherboard Error Codes
Many motherboards today completely shut down a component that is no longer working. If your graphics card has died completely, this may be one of the easiest ways to tell. If your motherboard doesn’t have display codes, you can try testing the card in a new system.
Open the computer case: Use your screwdriver to remove screws on the side panel and gently slide it back.
Locate the error code display on your motherboard: If you have a motherboard with error codes, they should appear near an outer corner.
Try to reboot your computer: Record each error number you see after you boot your computer.
Consult the motherboard manufacturer manual for error codes: Open the manual and locate the list for your error codes. If the code matches a graphics processing unit error, your video card could have died.
Check Hardware for Damage or Debris
A graphics card that has damage or debris on the physical parts might quickly overheat and kill the card.
Remove the screws holding the GPU in place: There are typically one or two screws holding the card to a bracket on the case.
Unhook the power cords from the GPU and pull the release tab: Remove the power cords from your GPU by pushing in their tabs and gently rocking them out. Once you remove each cord, gently push or pull up on the release tab near the motherboard.
Inspect the GPU for damage/debris: Check the card for any dirt or debris buildup and clean it out with a Q-tip. You can replace broken fan pieces from the manufacturer.
Test Your GPU Under Load
Download GPU stress-testing and heat-monitoring software.
With the card installed, run a stress test.
As you are running the stress test, run heat-monitoring software: With the stress test running, check your heat-monitoring software for GPU overheating. Any reading over 80 degrees Celsius is too hot.
Check device manager for outdated drivers: If your GPU is clean, but still running too hot, your software drivers are not installed correctly. To check, type in “device manager” at the bottom of your desktop and click on Device Manager. Find your display adapter and right-click on it to see if it’s working. If your drivers are not working correctly, it is indicated here usually. However, the driver may appear to be functioning even if it says otherwise in the properties.
Keep your graphic card drivers updated
When you don’t have the right driver installed, graphics cards can quickly burn up, and their cooling components may fail faster. That’s why you should always keep drivers updated for each new game you install or play. Older games may also release new software patches, so your GPU drivers should be updated accordingly.
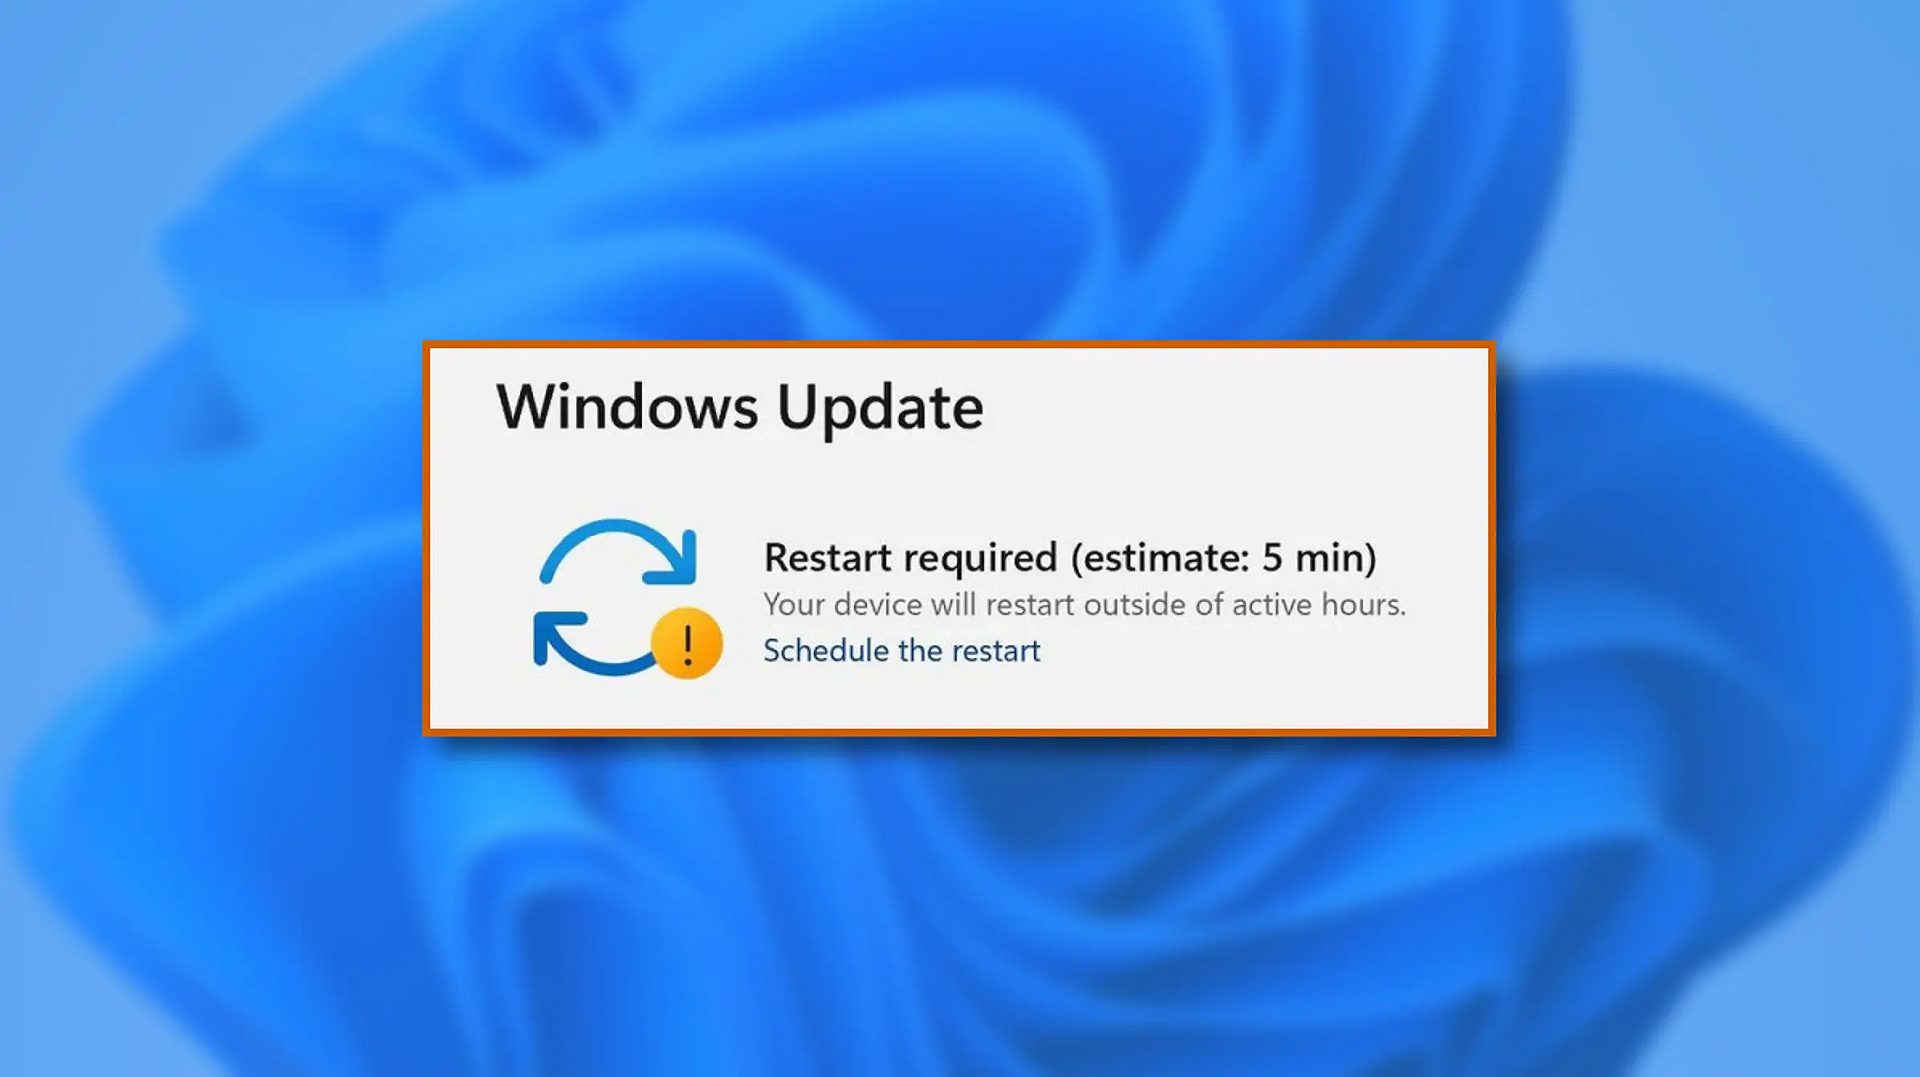
When Windows 11 update is available but you do not wish to restart right away because you are in the middle of using a computer, you can schedule a restart for up to 7 days. It is very easy and we will show you how to do it.
Press ⊞ WINDOWS + I to open settings
Click on Windows Update
At the top, under the Restart required to click on Schedule the Restart
Click the switch under Schedule a Time to turn it ON
Use the Pick a Time and Pick a Day menu to set time and day when you want to update
Go back to one screen and visually confirm that the date is set
Close the settings
The scheduled restart will be confirmed in a message on the Windows Update page.
If you suddenly find the Windows Recovery Environment not working and you see an error message saying, “Could not find the recovery environment”, then you’ve come to the right place as this post will guide you on how you can fix it. In times when you can’t boot into the Windows Recovery Environment, there could be several reasons behind it. However, have you ever wondered where exactly the Windows Recovery Environment is in your computer?
Windows initially places the Windows RE Image file in the installation partition during Windows Setup so if you have installed Windows in the C drive, you can find the Windows RE at the C:/Windows/System32/Recovery or C:/Recovery folder. Keep in mind that this folder is hidden and later on, the system copies the image file into the recovery tools partition to make sure that one can boot into recovery if there are any issues with the drive partition.
The “Could not find the recovery environment” error mostly occurs if the Windows Recovery Environment is disabled or if the “Winre.wim” file is corrupted. Thus, to fix this error, you need to refer to the given suggestions below.
Option 1 – Try to enable Windows Recovery Environment
In the Windows Start Search, type “PowerShell” and from the search results that appear, right-click on Windows PowerShell and then select the “Run as administrator” option to open it with admin privileges.
Next, type the “reagentc /info” command and tap Enter to execute it.
After that, if the output states that Status is enabled, then you’re all set.
Now type the “reagentc /enable” command and tap Enter to enable the Windows Recovery Environment. You will see a success message at the end signifying that Windows RE is available.
Option 2 – Try to fix the corrupted or missing “Winre.wim” file
If the Winre.wim file is either corrupted or missing, you need to get a new copy of this file from another computer where the Windows RE is working. Once you’re able to get a new copy of the Winre.wim file, you have to set the image path to a new location. For more details, refer to these steps:
First, type “Powershell” in Windows Start Search and right-click on Windows PowerShell from the results, and select Run as administrator.
Next, execute the given command below to change the path of the WIM file to the new location. Note that the steps should be used when the file path of the Windows Recovery Environment is different from the usual spot.
Reagentc /setreimage /path C:RecoveryWindowsRE
As mentioned, if the file is corrupted, you just have to get a new copy from another PC but before you do that, make sure that the WINRE on that computer is disabled (just enable it later on) and then place it in the C:/Recovery path and then set its path again using the command given above and then verify its path by executing the following command.
reagentc /info command
Note: Since the Recovery folder is hidden as well as the WINRE folder in it and you won’t be able to access them using the Windows File Explorer, you need to use the Windows PowerShell or Command Prompt so that you can access them.
Option 3 – Try checking and fixing the WinRE Reference in the Windows Boot Loader
The Windows Boot Loader is the one that determines if it has to load the Windows Recovery Environment. It could be that the boot loader is pointing to an incorrect location which is why you’re getting the error. To resolve it, you have to check and fix the WinRE Reference in the boot loader. How? Follow these steps:
In the Windows Start Search, type “PowerShell” and from the search results that appear, right-click on Windows PowerShell and then select the “Run as administrator” option to open it with admin privileges.
After that, execute the “bcdedit /enum all” command.
Next, look for an entry in the Windows Boot Loader identifier set as Current and look for “recoverysequence” in that section and take note of the GUID.
Ensure that the device and the osdevice items show the path for the Winre.wim file and that they are the same. If not, you need to point the current identifier to the one which has the same.
Once you’ve found the new GUID, execute this command: bcdedit /set {current} recoverysequence {GUID_which_has_same_path_of_device_and_device}
Now check if the error in the Recovery Environment is fixed or not.
Option 4 – Try creating a Recovery Media
You could also try creating a Recovery Media to resolve the error in the Windows RE. All you have to do is download the Windows 10 ISO file using the Media Creation tool and then create a recovery drive. Once you’re done, check if it fixes the problem or not.
Minecraft has taken the world by the storm, it was an indie project game and it went mainstream. Dream of every game developer I guess. The dream of every gamer on the other hand is to double click on the game and to play it and not to deal with various issues, especially if they are launch issues.
Luckily for all of you gamers, here at errortools we game as well and we are happy to bring you a solution on how to fix Minecraft won't launch issue. So sit back, relax and keep on reading, and hopefully enough you will be gaming again in no time.
Follow the guide presented step by step, point by point how it is presented for the quickest way to get back in Minecraft. This guide also presumes that your hardware configurations meet at least the minimum system requirements for running Minecraft.
Disable antivirus and firewall
90% of the time this is the issue why Minecraft is not working, your antivirus or firewall has detected it as a false positive, and access to system internet, etc has been cut. Try disabling it and if everything is working fine add it to the antivirus or the firewall exception list.
Run Minecraft as admin
Minecraft will sometimes refuse to run if it does not has administrator privileges. To make sure this is the case locate the Minecraft executable, right-click on it and choose properties. Go to the compatibility tab and check Run as Administrator box.
End Minecraft process
It came to knowledge that even if Minecraft is not running it can have its processes active in the background.
Press CTRL + SHIFT + ESC to open task manager
Locate if Minecraft has a process running
If you find the Minecraft process right-click on it and choose End Task
Run Minecraft in compatibility mode
If Minecraft still refuses to start try running it in compatibility mode in the previous Windows version
Locate Minecraft executable file in its install location
Right-click on it and choose properties
In the properties, windows go to the compatibility tab
Check run this program in compatibility mode for:
Select previous version of the operating system, try Windows 8 or Windows 7
Update graphic card driver
The best bet is to go to your GPU manufacturer's website and download the latest version of the driver of your GPU.
Remove mods, plugins, texture packs
Mods, plugins, texture packs are all great but sometimes they can cause GPU overloads and other issues to see if this is the case try running Minecraft in Vannila mode without anything installed, just pure and clean Minecraft as it was just downloaded and installed.
Reinstall Minecraft
If everything else failed, reinstall Minecraft. There might be a chance that some DLL file was deleted or corrupted by mistake or that some crucial files are missing. Clean reinstallation will fix all of these issues.
Email Access Online is a browser extension published by Polarity Technologies Ltd. That offers users quick and easy access to emails and weather reports. While this might sound interesting and useful, there is nothing this extension offers that cannot be solved with a few simple bookmarks.
While installed Email Access Online monitors the user's browser activity and records visited websites, clicked links, and bought products, this data is later used to serve partner ads if the user looks for the covered categories, additionally, it will hijack your new tab page, changing your search engine to Yahoo to allow easier ad placement.
Browsing the internet with this extension enabled will result in additional ad placement, pop-up ads, and sponsored links throughout your browsing sessions.
Upon further investigation, it was discovered that this extension is a repack of MyEmailXP, which was a repack of Fast Email Checker. Due to its suspicious delivery methods and information gathering, several anti-virus scanners have marked this extension as a browser hijacker and it is recommended to remove it from your computer.
About Browser Hijackers
Browser hijacking means that a malicious code has taken control over and modified the settings of your web browser, without your consent. Browser hijacker malware is designed for many different reasons. The idea is to force users to visit specific websites which are aiming to increase their visitor traffic and generate higher advertisement income. It may appear naive, but the majority of such websites are not legitimate and can present a significant risk to your online safety. In a worst-case scenario, your internet browser could be hi-jacked to download malicious software that can do a lot of damage to your PC.
Major signs that your internet browser has been highjacked
There are many signs that could indicate a browser hijacking:
1. the home page of the web browser is changed suddenly2. you observe new unwanted bookmarks or favorites added, usually directed to ad-filled or porn websites3. the default search engine is changed and the web browser security settings have been brought down without your knowledge4. you see unwanted new toolbars added5. your internet browser will display constant pop-up windows6. your web browser starts running sluggishly or presents frequent errors7. Inability to navigate to particular sites, especially anti-malware and other computer security software websites.
So how does a computer get infected with a browser hijacker
There are a number of ways your computer can get infected by a browser hijacker. They usually arrive through spam e-mail, via file sharing websites, or by a drive-by-download. They could also come from add-on software, also referred to as browser helper objects (BHO), web browser extensions, or toolbars. Browser hijackers sneak to your computer in addition to free software application downloads that you unintentionally install along with the original.
The presence of any browser hijacker on your system could substantially diminish the web browsing experience, monitor your internet activities that lead to critical privacy concerns, create system stability problems and finally cause your PC to slow down or to a practically unusable condition.
How to repair a browser hijack
Certain kinds of browser hijackers can be effortlessly removed from your PC by deleting malicious software programs or any other recently installed shareware. However, most hijacking codes are certainly not very easy to remove manually, as they go deeper into your operating system. And there’s no denying the very fact that manual repairs and removal methods can certainly be a difficult job for an inexperienced PC user. Besides, there are several risks connected with fiddling around with the system registry files.
Anti-malware program is incredibly effective when it comes to discovering and removing browser hijackers that regular anti-virus application has missed. To get rid of any kind of browser hijacker from your computer, you can download the following certified malware removal application – SafeBytes Anti-Malware.
What you can do if Virus Stops You From Downloading Antivirus?
Practically all malware is bad, but certain kinds of malicious software do much more damage to your PC than others. Some malware goes to great lengths to stop you from downloading or installing anything on your personal computer, especially anti-malware software. If you are reading this right now, you’ve probably realized that virus infection is the reason behind your blocked net traffic. So what to do when you want to install an anti-malware application such as Safebytes? There are a few actions you can take to circumvent this issue.
Make use of Safe Mode to fix the issue
If the malware is set to run automatically when Windows starts, getting into safe mode may block this attempt. Since only the bare minimum programs and services start-up in “Safe Mode”, there are rarely any reasons for conflicts to happen. You will need to do the following to remove malware in Safe mode.
1) At power on/start-up, tap the F8 key in one-second intervals. This will bring up the Advanced Boot Options menu.2) Use the arrow keys to choose Safe Mode with Networking and press ENTER.3) When you are into this mode, you will have access to the internet again. Now, use your internet browser normally and navigate to https://safebytes.com/products/anti-malware/ to download Safebytes Anti-Malware.4) Once the software is installed, let the diagnostic scan run to remove viruses and other threats automatically.
Obtain the antivirus software in an alternate browser
Certain viruses may target vulnerabilities of a particular web browser that obstruct the downloading process. If you seem to have a virus attached to Internet Explorer, then switch to an alternate browser with built-in safety features, such as Firefox or Chrome, to download your favorite antivirus program – Safebytes.
Run anti-virus from a pen drive
Here’s yet another solution which is using a portable USB anti-malware software package that can scan your computer for viruses without needing installation. Follow these steps to run the anti-malware on the infected PC.
1) Make use of another virus-free computer to download Safebytes Anti-Malware.2) Plug the Flash drive into the uninfected computer.3) Double-click on the downloaded file to run the installation wizard.4) Choose the drive letter of the USB drive as the location when the wizard asks you exactly where you want to install the anti-virus. Follow activation instructions.5) Now, insert the USB drive into the infected system.6) Double click the Safebytes Anti-malware icon on the thumb drive to run the software.7) Click on “Scan Now” to run a complete scan on the infected computer for malware.
Let's Talk About SafeBytes Anti-Malware!
Nowadays, anti-malware software can protect your PC from different forms of internet threats. But wait, how to select the right one among plenty of malware protection application that is available on the market? As you may be aware, there are numerous anti-malware companies and tools for you to consider. Some of them are good, some are ok types, while some will affect your computer themselves! When looking for an antivirus program, select one which gives solid, efficient, and full protection against all known computer viruses and malware. On the list of the recommended tool by industry experts is SafeBytes Anti-Malware, well-known security software for Microsoft Windows.
SafeBytes anti-malware is really a powerful, highly effective protection software intended to help end-users of all levels of IT literacy in identifying and removing malicious threats from their computers. Once you have installed this tool, SafeBytes advanced protection system will ensure that absolutely no viruses or malware can seep through your personal computer.
SafeBytes possesses a plethora of amazing features that can help you protect your computer from malware attacks and damage. The following are some of the great features included in the application.
Real-time Active Protection: SafeBytes offers a totally hands-free active protection and is set to observe, prevent and wipe out all threats at its first encounter. It’ll constantly monitor your pc for hacker activity and also gives users superior firewall protection.
Anti-Malware Protection: Using its advanced and sophisticated algorithm, this malware removal tool can detect and remove the malware threats hiding in your PC effectively.
High-Speed Malware Scanning Engine: This computer software has got one of the fastest and most efficient virus scanning engines in the industry. The scans are extremely accurate and take a short amount of time to complete.
Web Security: SafeBytes gives an instant safety rating on the pages you are about to check out, automatically blocking risky sites and making sure that you’re certain of your online safety while browsing the web.
Lowest Memory/CPU Usage: SafeBytes gives you complete protection from online threats at a fraction of the CPU load due to its enhanced detection engine and algorithms.
Fantastic Tech Support Team: For any technical inquiries or product guidance, you could get 24/7 expert assistance through chat and email.
SafeBytes will keep your personal computer protected from most advanced malware threats automatically, thus keeping your online experience safe and secure. You now may know that this particular software does more than just scan and delete threats on your computer. If you want advanced forms of protection features and threat detections, buying SafeBytes Anti-Malware could be well worth the dollars!
Technical Details and Manual Removal (Advanced Users)
To remove Email Access Online manually, navigate to the Add/Remove programs list in the Windows Control Panel and choose the program you want to remove. For browser plug-ins, go to your browser’s Addon/Extension manager and choose the plug-in you want to remove or disable. You will probably also want to reset your internet browser.
To make sure of complete removal, find the following Windows registry entries on your system and eliminate it or reset the values accordingly. However, this is a difficult task and only computer professionals can perform it safely. Additionally, certain malware is capable of replicating itself or preventing deletion. You’re suggested to do this process in Windows Safe Mode.
Registry:
HKEY LOCAL MACHINE\SOFTWARE\Microsoft\Internet Explorer\SearchScopes\675942D5-E956-4670-9ADE-6982CF23558F
If you are using File Explorer but suddenly encountered an error saying, “No such interface supported”, read on as this post will guide you on how to fix the problem. This kind of error occurs due to the corruption in the system files which supports several tasks in the system that works with the Windows File Explorer process or File Explorer. This kind of error can give you a hard time in browsing the files on your computer, or when you open important utilities like the Control Panel, or when you copy files and other inconveniences. Needless to say, it won’t bring you any productivity at all and can only leave you frustrated.
To fix this problem, there are several options you can try. You can try to run the System File Checker scan or the DISM tool. You could also try to re-register the potentially corrupted DLL files or fix the User Profile. For more details, refer to each one of the given options below.
Option 1 – Try to run System File Checker
System File Checker or SFC is a built-in command utility that helps in restoring corrupted files as well as missing files. It replaces bad and corrupted system files to good system files that might be the cause why you’re getting the errors 0x8024a11a and 0x8024a112. To run the SFC command, follow the steps given below.
Type “cmd” in the Start search and then right-click on the appropriate search result.
Next, select “Run as administrator” to open Command Prompt with admin privileges.
After opening Command Prompt, type in sfc /scannow
The command will start a system scan which will take a few whiles before it finishes. Once it’s done, you could get the following results:
Windows Resource Protection did not find any integrity violations.
Windows Resource Protection found corrupt files and successfully repaired them.
Windows Resource Protection found corrupt files but was unable to fix some of them.
Now restart your computer and see if the problem is fixed or not.
Option 2 – Try to fix the User Profile
The next thing you can do to fix the problem is to fix the User Profile. All you have to do is migrate to a new User Profile in Windows 10 by creating a new User Account and migrating all your personal files from the current user profile folder in the C:/Users location to the new user profile folder which is also located in the same folder.
Option 3 – Run the DISM tool
You can try running the Deployment Imaging and Servicing Management or DISM tool to fix the “No such interface supported” error. Using this built-in tool, you have various options such as the “/ScanHealth”, “/CheckHealth”, and “/RestoreHealth”.
Open the Command Prompt with admin privileges.
Then type in the following commands and make sure to hit Enter right after you type each one of them:
Dism /Online /Cleanup-Image /CheckHealth
Dism /Online /Cleanup-Image /ScanHealth
exe /Online /Cleanup-image /Restorehealth
Do not close the window if the process takes a while as it will probably take a few minutes to finish. Once it’s done, restart your computer.
Option 4 – Try to re-register the problematic DLL file
You may have to re-register the ntdll.dll file using the regsvr32.exe before you can successfully install the program and fix the error. The Regsvr32 tool is a command-line utility that can be used to register and unregister OLE controls like DLL and ActiveX (OCX) controls in the Windows operating system. Follow the steps below to use it.
Open Command Prompt as admin from the WinX menu.
Next, type the following command in the elevated Command Prompt and hit Enter to execute it. This will re-register the affected DLL file using the Windows operating system tool, regsvr32.exe.
regsvr32 c:windowssystem32actxprxy.dll
After you execute the given command, you should see a message saying, “DllRegisterServer in vbscript.dll succeeded” if the Regsvr32 tool was able to run successfully. If it didn’t work, you can try to execute this command instead: FOR /R C: %G IN (*.dll) DO "%systemroot%system32regsvr32.exe" /s "%G"
For PC users that are blind or have low vision, the Narrator accessibility feature in Windows 10, lets you use your PC without a display or mouse to complete common tasks – it reads and interacts with things on the screen, like text and buttons. The narrator can be used to read and write an email, browse the internet, and work with documents.
In Windows 10, there are a lot of options for Narrator that you can customize. You can change its keyboard shortcuts, personalize Narrator’s voice, enable Caps Lock warnings, and more. You can choose the voice for the Narrator, adjust the speaking rate, pitch, and volume.
To change the default audio output device used to play the voice of the Narrator in Windows 10:
Press the ⊞ WINDOWS + I
From the Settings menu, click Ease of Access.
Click Narrator on the left pane.
In the Narrator window, on the right pane, toggle the button to On to enable Narrator if required.
Scroll down to the Personalize Narrator’s voice section.
For the Select where you hear Narrator’s voice option, click the drop-down and select the audio output device you want from the list. Please know that you will not be able to choose if you do not have multiple audio output devices connected to your Windows 10 computer.
Exit Settings when done.
If you would like to read more helpful articles and tips about various software and hardware visit errortools.com daily.
Anxiety from all these digital threats lurking everywhere? An antivirus program can help put your mind at ease.
What can a virus do to your device?
A virus is malicious software that can affect pretty much any device and does so in a variety of ways. Be it your computer, your phone or your smart lightbulb - as long as there’s access to the internet, malware can get to it.
How exactly does this kind of attack manifest itself? Well, there’s a wide variety of effects ranging from mild to severe. Among other things, they depend on which type of malware attacks your device - a virus, spyware, ransomware, adware or something else.
These are some of the things you can expect to happen:
Slow performance
System crashes
Theft of data and sensitive information
Connectivity issues
Constant browser redirects
Strange messages sent to your contacts
Interference with files
It really can be the stuff of nightmares. So, if you want to sleep peacefully knowing that your devices are completely safe, you should definitely consider getting an antivirus.
P.S. don’t let its name fool you - an antivirus does indeed protect your devices against more than just viruses.
What is antivirus software exactly?
Antivirus software is designed to help you battle and ward off malware. Basically, it scans your device to detect any suspicious activity and offers tools to get rid of the culprit.
At first, antiviruses were developed to fight against viruses only, but nowadays they cover a lot more ground. Here are some of the biggest benefits of getting yourself a powerful defender.
Advantages of antivirus software
1. It fights those pesky ads
Look, constant ads that pop up everywhere aren’t the absolute worst thing that can happen on your computer. If anything, they are annoying, like when you’re trying to sleep but that one fly in your room just won’t stop buzzing.
Now, there’s a free, well-established solution for that - installing an ad blocker. And we’re about a hundred and ten percent sure you’ve already done that on each and every browser you use.
However, “if I can’t see it, it doesn’t exist” isn’t the most ideal approach for your online safety. Ad blockers can’t block everything and they won’t protect you from potential adware. An antivirus on the other hand offers that layer of protection against malware snuck into pop-ups and spammy websites.
2. It protects you from hackers
Hackers don’t target government institutions only. They’ll target regular people too if they have something to gain.
Credit: Clint Patteron (Unsplash)
There are different types of hacking, such as phishing e-mails, transmission of malicious programs, credential reuse, denial of service and more. In any case, they take control of your device and hijack your data.
The good thing is that, as threats evolve, antiviruses evolve too and there are tons of quality programs on the market that can keep you secure for an affordable price.
3. It keeps your files and data safe
When malware enters your device, it can target pretty much any file and get access to any and all data.
Installing an antivirus program will make sure that every single file, new or old, is monitored at all times, warning you against threats immediately. That way, you can make sure to react before your other files become infected and data is lost or stolen.
Another great thing for data protection is that the best antivirus software normally comes with a password manager, so no one can use malware to steal your passwords.
4. It blocks all kinds of malware
As we already stated, malicious attacks can be performed in many ways and malware comes in in different shapes an sizes, such as:
Trojan horse
Spyware
Ransomware
Adware
Rootkit
RAT (remote access Trojan)
Keyloggers
Worms
Botnets
Credit: Growtika (Unsplash)
Nowadays, antivirus software is designed to fight against all of these types. That’s why more often than not we hear the term 'antivirus' used interchangeably with 'anti-malware,' like in this article.
5. It keeps your children protected
You can’t keep your eyes on your kid every second of the day and you can’t protect them from everything. But at least you can limit their exposure to the threats they can encounter at every corner of the digital world.
An antivirus program will block harmful or suspicious websites and ads, which is great both for you and your children. To take it a step further, though, many such programs come with special parental controls and offer monitoring as well. It’s a great solution for keeping your kids safe online without sounding like the irritating, overbearing, controlling parent who “just doesn’t get it!”
How to pick one
There are definitely lots of different antivirus programs out there, both free and paid. We recommend you look for a paid option, since free ones are unfortunately a lot more susceptible to being compromised through malicious attacks.
Now, there are a few factors to consider when choosing the right software. If you use your PC for basic things then a basic antivirus will suffice. However, the more complex your use and the more sensitive the data you deal with, the stronger it needs to be.
It’s also crucial that you take into account the features it includes. As we already mentioned, some programs have additional security options. For example, depending on the package you select, Bitdefender provides:
Some are included in plans and some are separate products, so make sure to check out all the offers.
And don’t worry if you have multiple PCs or you’re looking for protection for your smartphone or tablet as well; Bitdefender has suitable solutions for your needs. Of course, you can also just pick their classic antivirus software if you’re not in need of advanced protection.
Another important point is how regularly the software is updated and enhanced. The more frequent the updates the better, as bugs can make the program more vulnerable. Other things we advise you consider are user-friendliness, impact on performance, reputation (user reviews especially) and, of course, price.
The bottom line
Fact is: anyone can be a malware victim. Don’t let it be you.
You can’t put a price on peace and security, so don’t be reluctant to pay for yours - especially since a lot of options out there are extremely affordable. Is $159.00 a year really too much to pay for cross-platform protection for up to 10 devices? We don’t think so.
Explore your options and protect your files and data before it’s too late.
Windows 10 and Windows 11 have automatic dynamic screen brightness depending on the surrounding light inside the room. Please take note that this option is available only on devices with build-in screens like laptops, tablets, and all in one desktop PC. If you are connected with your PC via an external monitor you will not have these settings available and probably feature is not even working.
Some computers will also allow automatic brightness changes also on what is displayed on the screen. This option is meant to save battery life on devices. Microsoft calls this automatic brightness feature Content adaptive brightness control. In order to change this setting, we will go to settings inside Windows.
Disabling automatic brightness inside Windows
Open Settings inside Windows, in Windows 11 press WINDOWS + I to open settings, then click on the system in the sidebar and then go to Display. Click on the small arrow beside the Brightness slider in order to expand a small menu and then uncheck Help improve battery by optimizing the content show and brightness. If you see Change brightness automatically when lighting changes, uncheck that as well. Close the settings and you are good to go, now brightness will always be as set in settings.
Inside Windows 10, go to Settings and then go to System and then in Display under the Brightness and Color section look below and locate the box that says Automatically adjust contrast based on the displayed content to help improve battery and uncheck it, if the box below with text Change brightness automatically when lighting changes exists, uncheck it as well. Close settings and you are done.

 How this is the case we have decided to put a little tutorial on how to accomplish this very task and run file explorer with administrator privileges.
 When Windows 11 update is available but you do not wish to restart right away because you are in the middle of using a computer, you can schedule a restart for up to 7 days. It is very easy and we will show you how to do it.


