Logo

Fix update error 0x8024ce0e in Windows 10

The Windows update error 0x8024ce0e can happen as a result of improper installation, a virus, or due to file corruption. Follow this guide to easily fix errors and continue with your work.

  1. Restart Windows

    As awkward as it seems this method actually works most of the time. Click on the start button and restart your system.

  2. Check hard disk space

    Of course, when installing updates there should be enough disk space for updates to be downloaded and installed. Check your disk space to see if there is sufficient available space.

  3. Disconnect external components

    External components can interfere sometimes with the update process, disconnect external hard drives, USB, and other devices, leaving only the keyboard, mouse, and core ones.

  4. Check devices in the device manager

    Open device manager and visually check to see if there is a device with a yellow exclamation sign next to it. If there is such a device, right-click on it and choose update driver.

Do You Need Help with Your Device?

Our Team of Experts May Help
Troubleshoot.Tech Experts are There for You!
Replace damaged files
Restore performance
Free disk space
Remove Malware
Protects WEB browser
Remove Viruses
Stop PC freezing
GET HELP
Troubleshoot.Tech experts work with all versions of Microsoft Windows including Windows 11, with Android, Mac, and more.

Share this article:

You might also like

Quick Fix Guide for Error 0xe06d7363

What is Error 0xe06d7363?

Error 0xe06d7363 is displayed when a process or an operation is not launched, or completed by an application.

This error can prevent the user from performing some operations. It might close the application unconditionally. Sometimes a ‘GetLastError()’, a ‘GetExceptionCode()’, or a ‘GetExceptionInformation()’ is displayed with this error.

Error Causes

Error 0xe06d7363 can occur for a number of reasons. Damaged, corrupted, or missing files in the registry database are the main reasons why the error might occur. Another reason is when the system files are not configured correctly, thus they corrupt system files in applications. They can also affect the hardware devices.

All code-generated exceptions in the Microsoft Visual C + + compiler will contain this error. As this error is compiler-generated, the code will not be listed in Win32 API header files. This code is a cryptic device, with ‘e’ for exception while the final 3 bytes represent ‘msc’ ASCII values.

Further Information and Manual Repair

To resolve this error, you will have to debug an application. While using Microsoft Visual Studio, you can stop the program when the error 0xe06d7363 occurs. To start debugging, follow these steps:

  • Start debugging application
  • From Debug menu, click on Exceptions
  • In the Exceptions window, select error 0xe06d7363
  • In Action, Change to Stop always from Stop if not handled

Another fix for this issue is reverting back to an earlier copy or the last update of the same Windows. Error 0xe06d7363 can occur is when you try running a client application using Microsoft.SqlServer.Types.dll component on your computer that has Microsoft SQL Server 2008 Server Pack 2 installed. With the error, the following text can be seen:

“unable to load DLL ‘SqlServerSpatial.dll’ Exception from HRESULT 0xe06d7363".

A Cumulative Update 7 was initially released for SQL Server 2008 Service Pack 2 in order to fix this issue. Since the builds are cumulative, every new fix released contains hotfixes and all security fixes which were also included in the previous SQL Server 2008 fix release. This error can be found in all Microsoft products that are listed in the Applies to Category.

Microsoft SQL Server 2008 hotfixes are created to resolve errors like 0xe06d7363 on specific SQL Server service packs. This error is by design and has commonly occurred in the previous versions of Windows before Windows 7.

Congratulations, you have just fixed Error 0xe06d7363 in Windows 10 all by yourself. If you would like to read more helpful articles and tips about various software and hardware visit errortools.com daily. Now that’s how you fix Error 0xe06d7363 in Windows 10 on a computer. On the other hand, if your computer is going through some system-related issues that have to get fixed, there is a one-click solution known as Restoro you could check out to resolve them. This program is a useful tool that could repair corrupted registries and optimize your PC’s overall performance. Aside from that, it also cleans out your computer for any junk or corrupted files that help you eliminate any unwanted files from your system. This is basically a solution that’s within your grasp with just a click. It’s easy to use as it is user-friendly. For a complete set of instructions in downloading and using it, refer to the steps below Perform a full system scan using Restoro. To do so, follow the instructions below.
      1. Download and install Restoro from the official site.
      2. Once the installation process is completed, run Restoro to perform a full system scan. restoro application screen
      3. After the scan is completed click the “Start Repair” button. restoro application screen
Read More
Fix Chrome ERR QUIC PROTOCOL ERROR in Windows
If you aren’t able to pull up any website and instead got the ERR QUIC PROTOCOL ERROR error message in Google Chrome then read on as this post will help you resolve the problem. When you encounter such an error in Chrome, you will see the following error message:
“This site can’t be reached, The webpage at [website URL] might be temporarily down or it may have moved permanently to a new web address, ERR_QUIC_PROTOCOL_ERROR”
This kind of error message pops up when the URL is down. However, if you are certain that the site is not down and you’re still seeing this error message, then troubleshoot further using the suggestions given below.

Option 1 – Try to disable the QUIC Protocol

QUIC is an experimental transport layer network protocol that is present in Google Chrome in order to establish a connection between two endpoints over UDP. So if there is any problem on the development side, you will most likely encounter ERR_QUIC_PROTOCOL_ERROR on your Google Chrome browser when you try to open any website. Thus, you have to disable the QUIC protocol in order to resolve the error. How? Simply follow the steps below.
  • Open your Google Chrome browser.
  • Now type in “chrome://flags/” in the address bar and hit Enter.
  • After that, look for the Experimental QUIC protocol which should be set by default.
  • Then expand the drop-down menu and select Disable.
  • Restart Google Chrome and see if the error is fixed or not.

Option 2 – Disable VPN

As mentioned, if you are using VPN, this could be the reason why you’re getting the Windows Update error 0x800F0922 so the most obvious thing to do is for you to turn off the VPN and try to run the Windows Update once more. And if you use a VPN software that works using their software, you can just completely exit or log-off from its account. On the other hand, if you are using a built-in Windows 10 VPN, you can simply turn it off or delete all the settings you have created there. Although it’s understandable that you might have to use a VPN connection to connect to the work network, you really have to disable it at least until the Windows Update is no longer stuck in the error 0x800F0922. It would be best if you do this when you are not working.

Option 3 – Disable the Proxy server

You can also try to disable the Proxy server to fix the ERR_QUIC_PROTOCOL_ERROR in Chrome. Refer to these steps to do so:
  • Tap the Win + R keys to open the Run dialog box.
  • Then type “inetcpl.cpl” in the field and hit Enter to pull up the Internet Properties.
  • After that, go to the Connections tab and select the LAN settings.
  • From there. Uncheck the “Use a Proxy Server” option for your LAN and then make sure that the “Automatically detect settings” option is checked.
  • Now click the OK and the Apply buttons.
  • Restart your PC.
Note: If you are using a third-party proxy service, you have to disable it.
Read More
How to Fix Windows 10 Error 0xC1900200, 0x20008

Error Code 0xC1900200, 0x20008 (Code 0xC1900202 – 0x20008)   – What is it?

Error Code 0xC1900200, 0x20008 (Code 0xC1900202 – 0x20008)  is an error that occurs when you attempt to upgrade to Microsoft Windows 10, but the minimum requirements have not been met by your computer. You will therefore be unable to upgrade to Microsoft Windows 10 until your computer is updated or upgraded to meet those requirements. Common symptoms include:
  • When attempting to upgrade a dialog box with Code 0xC1900200 – 0x20008 (Code 0xC1900202 – 0x20008) is displayed.
  • Your computer is unable to begin the Microsoft Windows 10 upgrade process.

Solution

Restoro box imageError Causes

Error Code 0xC1900200 – 0x20008 (Code 0xC1900202 – 0x20008)  occurs when you are unable to begin the Microsoft Windows 10 upgrade because your computer does not meet the minimum requirements to run Microsoft Windows 10.
  • You are unable to begin the upgrade because your computer does not meet the required system or hardware specifications.
  • You are not running the correct version of Microsoft Windows to be able to begin the upgrade.
  • You are not running the latest updated version of Microsoft Windows 7 SP1 or Microsoft Windows 8.1.
Error Code 0xC1900200 – 0x20008 (Code 0xC1900202 – 0x20008) as stated, simply means your computer does not meet the requirements to update and does not indicate a permanent problem or inability to continue to use your computer. This error only means that you will not be able to upgrade to Microsoft Windows 10 until your computer is made to meet these requirements.

Further Information and Manual Repair

There are several solutions that the user can complete at home that should fix the problem resulting in a manifestation of Error Code 0xC1900200 – 0x20008 (Code 0xC1900202 – 0x20008). Below are several options that should resolve this error.

Method 1:

Verify what version of Microsoft Windows you are currently running, older, outdated, or no longer supported versions of Microsoft Windows are not able to upgrade to Microsoft Windows 10. If you are not running one of the following versions you will have to update before being able to upgrade.
  • The most current version of Microsoft Windows 7 SP1
  • The most current version of Microsoft Windows 8.1

Method 2:

Your computer's system specifications do not meet the requirements to be able to upgrade to and run Microsoft Windows 10. To check your system specifications do the following.
  1. Click on the start button in the bottom left corner, then locate the control panel on the menu, click on it to open.
  2. Once it opens, locate system and security on the menu and click to open, click on system and this will show you your amount of RAM and processor speed.
  3. Find device manager on the left-hand side click this then select display adapter, and it will show you your current video card.
  4. Click on the start button again, then click on the computer in the menu, this will show you your hard drive size, and available space.
If you have the option available you can simply run the get Microsoft Windows 10 app to check compatibility. Once you have your system specs make sure they meet or exceed the following.
  • 1 GHz or higher processor or SoC
  • 1 gig of RAM for 32 bit and 2 gigs of RAM for 64 bit
  • 16 GB available hard drive space for 32 bit, 20 GB for 64 bit
  • Minimum of DirectX9 that has 1.0 WDDM
  • At least an 800x600display
If your computer does not meet these minimum requirements, upgrade the components necessary to meet them. If you do not possess the technical expertise required to accomplish this yourself or do not feel comfortable doing so, download and install a powerful automated tool to get the job done.

Method 3:

Your computer might not meet the aforementioned requirements to make an upgrade because of insufficient hard drive space or resources. Learn how to create or make space on your computer here.

Method 4:

Many people hold on to and use the same computer for a very long time. It is possible that your computer cannot be upgraded to meet the requirements, or that the cost to do so would be so high that a new computer would be cheaper. If that is the case, your only option may be to replace your computer.
Read More
Setup Voice control in Windows11

Computer voice control has moved a long way from its beginning routes and in today's age controlling your PC with voice is truly a reality and fully possible. Voice control is taking up the steam in everyday life, from simple commands in cars, Alexa, smartphones, TVs, etc. to modern computers.

voice control

Windows 10 has introduced voice control into PC with Cortana even during the installation process but a lot has changed from having a virtual assistant in begging days and in today's modern Windows 11 OS. You can now freely open apps, move, copy delete files, and even dictate in order to create a word document.

However, in order to take this advantage, you will need to turn it off first since it is disabled by default. Of course, you will need a microphone and some spare time to train Windows in understanding you properly.

Setting up Voice Control

Just like in Windows 10, in Windows 11 voice control is also in accessibility options and the first step is to turn ON Windows Speech Recognition.

Click on the Start button and type Settings into the search bar, click on Open, or press ENTER. On the left side of the settings, window locate and click on Accessibility. On the right part once Accessibility is selected scroll down and find a section titled Interaction and click on Speech. Turn on the switch next to Windows Speech Recognition.

A pop-up will appear that will lead you through the rest of the setup and that's it.

Improving Voice Control

In order to make your voice control better, if you are not satisfied with the results, you can sample more of your voice into the algorithm to tune it more to your liking. Sadly this option is still deep in Control Panel.

Click the Start button and type in Speech recognition into the search bar, look for the search result with Control Panel displayed under it, and click on Open. Click on Train Your Computer to Better Understand You and follow the instructions.

The process will probably take a few minutes. The more data you provide to the speech recognition model, the more accurate it will be when interpreting your instructions. You can train the model multiple times, and each time you do, it should improve the accuracy.

Read More
Microsoft vs Google & Facebook
microsoft hqMicrosoft wants to escalate the situation from Australia to the EU, what a surprise. Hello all and welcome to another news article, this time we are focusing on Microsoft pushing the EU to accept law proposition from Australia. For all of you who are not familiar with the given situation let me quickly explain. The feud began when the Australian government proposed a new law that targeted Facebook and Google specifically. The government said that it believed that both of the tech giants were using content from news outlets without paying. Have you ever seen the little news snippets that Google or Facebook sometimes show its users to keep them up to date? These are lifted directly from news websites, and the Australian government claimed that this practice meant that people didn't bother visiting the news website. This then staved news websites of revenue. As such, the government put forward a new law that would mean Google and Facebook would have to pay the source website for every time they displayed a news snippet. Facebook responded by removing its Australian news coverage in light of the law. Google, however, put up a fight. It argued that its snippets encouraged people to click on it to read more, thus driving more traffic to the news website. It also said that such a law would be too expensive to maintain in the long run. As such, Google threatened to remove itself from Australia if the law passed. This was likely a scare tactic, as 95 percent of Australian web users use Google; however, it actually opened the door for its rival, Microsoft. Microsoft saw how it could push its own search engine BING to replace google. It of course went and reached the Australian government to assure them that BING is more than capable to fulfill its needs and fully abide by the proposed law. Now Microsoft knows that if this law passes it could see a similar situation happening in Europe and it is pushing it. US News reported on how Microsoft plans to encourage EU countries to adopt this new law too. The company has teamed up with the European Publishers Council and News Media Europe to make the following statement: Publishers might not have the economic strength to negotiate fair and balanced agreements with these gatekeeper tech companies, who might otherwise threaten to walk away from negotiations or exit markets entirely
Read More
How to Turn Bluetooth ON in Windows 11
Windows 11 Bluetooth
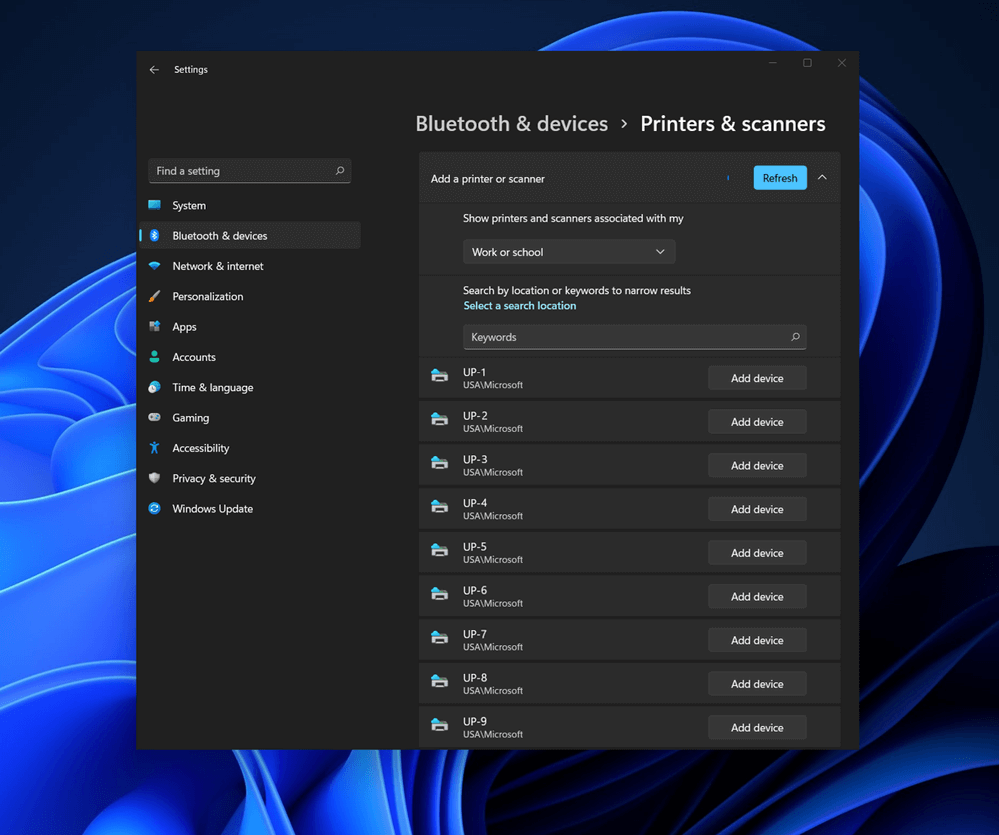
Bluetooth perhaps is slowly becoming an outdated feature but sometimes you can really used it and need it. By default, in Windows 11 Bluetooth is turned OFF so if you need it, you will need to turn it ON first. Luckily turning it ON is easy and we will guide you through the process

Turning Bluetooth using the Quick Settings menu

The easiest and fastest way to turn the Bluetooth ON is using the quick setting menu:
  1. Click on indicator icons located left of date and time in Taskbar
  2. Click on the Bluetooth icon (if the icon is not displayed, click on the pencil icon, then click on Add and add Bluetooth icon from the list)
  3. Right-click on the Bluetooth icon and select go to Settings
  4. Go to Adding a Bluetooth Device to Windows 11 section

Switch it ON via Windows Settings

  1. Open Windows settings by using ⊞ WINDOWS + I combination
  2. Click on Bluetooth & Devices
  3. Inside settings turn Switch to ON beside Bluetooth
  4. Click + Add Device large button on top
  5. Click Bluetooth
  6. Select device in the list of found devices (make sure device is turned ON, it has Bluetooth sharing ON, and that it is in pairing mode)
  7. If the device needs the password, type it in
  8. When the message Your device is ready to go is showed on the screen click on the Done

Advice on Bluetooth devices

Note that the Bluetooth devices you connect to Windows 11 stay linked to your PC unless you pair them with a different PC, smartphone, or tablet later. After a time, most Bluetooth devices power down automatically to save battery life. To continue where you left off, either power the Bluetooth device up (if it has a power button) or press a button on a keyboard or mouse, and it should automatically turn on and reconnect with your PC. If you’re having trouble connecting your Bluetooth device, make sure that Windows 11 is fully updated and that you’ve installed any drivers that came with your device. Make sure that the device is fully charged or that it has a fresh set of batteries. while Windows is searching. You’ll need to remove the device from Windows 11 first and then attempt to pair it with your PC again.

Removing devices

If you need to remove (un-pair) a Bluetooth device, just open Windows Settings and navigate to Bluetooth & Devices. Locate the name of the device that you want to remove, click the three dots button in the corner of its square and select Remove Device.
Read More
MS releases ISO for Windows 10 build 21354
On April 7th Microsoft has released Windows build 21354 for their flagship OS and updates are rolling. Alongside the new update builds Microsoft has decided to create and release Windows 21354 build as an installable ISO image for anyone who wishes to do a clean installation of Windows without the need to update it after the installation. We have not seen this move by Microsoft in a long time and honestly, we are welcoming it, it is always great to have updated ISO Windows build than to install the old version and sit through an hour or more of updates. If you are interested in getting this ISO image and you are part of the insider program you can download it from here. If you would like to read more helpful articles and tips about various software and hardware visit errortools.com daily.
Read More
Change Legacy to UEFI without reinstalling
There are some new generation motherboards for laptops and PCs that bring in support for both the Unified Extensible Firmware Interface or UEFI as well as the Basic Input Output System or BIOS. The main advantage of UEFI over the traditional BIOS is the fact that UEFI supports a hard drive that has a capacity of more than 2 terabytes. However, the disadvantage of UEFI is that it only supports the x64 Windows operating system versions and that the hard drive is supposed to use the GPT structure. So if your PC is compatible with and supports UEFI and you want to change from Legacy to UEFI, then you’ve come to the right place as this post will guide you on how you can exactly do that without having to reinstall it. There are two ways to change Legacy to UEFI. You can convert MBR to GPT using either the built-in utilities in Windows or using the Recovery Environment. Before you proceed, make sure that your computer fulfills the following prerequisites:
  • Your PC’s motherboard should support both Legacy and UEFI.
  • Your PC should be running at least the 1703 Windows 10 version or newer on an MBR partition.
Once you’ve made sure that your computer covers the aforementioned prerequisites, refer to the given options below.

Option 1 – Convert MBR to GPT via Windows built-in utilities

  • In the Windows Search box, type “command prompt” and from the search results that appear, right-click on Command Prompt and select the “Run as administrator” option.
  • After that, execute this command: exe /convert /allowfullOS
  • Now, wait until the process is completed since you can track its process on your screen.
  • Once it’s done, go to Settings > Update & Security > Advanced Startup options and from there, click on Restart Now. This will restart your computer and give you advanced options.
  • Next, select Troubleshoot > Advanced Options where you will see further options including System Restore, Startup Repair, Go back to the previous version, Command Prompt, System Image Recovery, and UEFI Firmware Settings.
  • Now select the UEFI Firmware Settings. This will take you to the BIOS. Boot Mode is typically available under Boot > Boot Configuration. Once you’re there, set it to UEFI and then save the changes you’ve made. After that, your computer will restart.

Option 2 – Convert MBR to GPT via the Recovery Environment

  • When the message appears on your screen while running Windows Setup, you need to tap the Shift + F10 keys to open Command Prompt.
  • Make sure to run Command Prompt as admin and then execute this command: exe /convert
  • After that, wait until the process is completed. When it’s done, you have to go to the BIOS just like in the first given option above.
  • As mentioned, you can usually find the Boot Mode under Boot > Boot Configuration. Once you’re there, set it to UEFI.
  • Now save the changes made and exit as your computer will restart.
Read More
How to Fix Error Code 0xc004f210 in Windows 10

Error Code 0xc004f210 – What is it?

Error code 0xc004f210 is one of the many activation errors that affect Windows 10 users. Users will be able to identify error code 0xc004f210 because of the following common symptoms which occur:

  • Inability to activate Windows 10 operating system
  • Message box with error code 0xc004f210

Solution

Restoro box imageError Causes

Error code 0xc004f210 usually occurs due to issues related to one’s product key or digital entitlement. Both the product key and digital entitlement are used by Microsoft to enable customers to activate the version of Microsoft that they have legitimate access to. If you enter the wrong product key or if you upgrade to Windows 10 but the current version of Windows to which you are attempting an activation does not match the edition of your digital entitlement, error code 0xc004f210 may occur. To correct this issue, you will need to implement one or more manual repair procedures. This will depend on the problem that caused the error to occur in the first place.

Further Information and Manual Repair

The methods below are simple procedures that Windows users lacking technical knowledge will be able to successfully complete. However, do contact a Windows repair technician if you have difficulty completing the manual repair methods listed below, or if the problem persists after completing these steps.

Method One: Enter Valid Product Key

In order to successfully activate your Windows 10 operating system and resolve error code 0xc004f210, you will need to enter a valid product key. Ensure you enter the 25-character code in the order it is given as making a simple mistake while typing the product key can lead to the reoccurrence of the error code. Follow the instructions below to enter the product key.

  • Step one: Click the Start button then select Settings
  • Step two: Select Update & security then Activation
  • Step three: Click the Change product key
  • Step four: Type in your valid product key with its 25 characters in the correct order

You should be able to successfully activate Windows 10 once you complete the process. However, move to the next manual method suggested below if the problem persists as error code 0xc004f210 could be due to an issue with your digital entitlement.

Method Two: Reinstall Windows 10 Edition that Matches Your Digital Entitlement

Digital entitlement, a new form of activation that doesn’t require the use of a product key, could be the real reason you are experiencing error code 0xc004f210 on your device. To combat any issues related to your digital entitlement, ensure the version of Windows 10 installed on your system matches your digital entitlement. This will require that you reinstall your operating system as well. After reinstalling Windows 10, follow the steps below to complete the process.

  • Step one: Click the Start button then select Settings
  • Step two: After selecting Settings, click Update & Security
  • Step three: Select Windows Update then the Check for updates tab
  • Step four: Activate Windows 10 update

If this method is successful, you will no longer see the error code 0xc004f210 pop up on your screen. However, contact a Windows repair technician to evaluate your system if the issue persists.

Method Three: Use an Automated Tool

This method involves the use of a powerful automated tool. But why is this important you might ask? A third-party tool is often the best solution when all manual repair efforts fail. Automated tools come equipped to tackle the most serious PC problems including error codes which can cause frustration and result in reduces PC performance.

Read More
How to Fix Windows 10 Error Code 0x803f7001

Error Code 0x803f7001 – What is it?

Error code 0x803f7001 occurs when there is a failure to update your Windows operating system to Windows 10. Usually, a message box pops up with the following statement, “Windows is not activated as your previous version of Windows on this device was not activated prior to upgrade to Windows 10.” When this occurs, common symptoms of the error code will manifest themselves:

  • Inability to upgrade your Windows operating system to Windows 10
  • Message box with error code 0x803f7001

Solution

Restoro box imageError Causes

The cause for error code 0x803f7001 varies. Usually, it occurs for two reasons: 1) when during the process of upgrading to Windows 10, no valid Windows license or product key is found for your device or 2) when a user performs a clean installation of Windows 10. During a clean installation, a new license is usually required to allow you to activate your copy of Windows.

Further Information and Manual Repair

There are two main options available to fix error code 0x803f7001. Usually, the use of a valid product key can help users rectify error code 0x803f7001. You may also try an automated tool to access the best solutions.

Method One: Use a Valid Product Key

A product key is a code containing 25 characters that enable users to activate Windows. You will need to enter the product key in the exact order it appears in order to install your Windows operating system. All users will be able to access this code in an email or on a card within the Windows DVD package they receive upon purchasing a version of the Windows operating system.

To solve error code 0x803f7001, complete the following steps.

  • Step one: Click the Start button then select Settings
  • Step two: Select Update and Security then Activation
  • Step three: Click the Change product key
  • Step four: Type in your valid product key. (To do this ensure the 25 characters are accounted for and in the correct order.)

If the issue causing error code 0x803f7001 relates to your product key, then the instructions within method one will rectify the issue. You will be able to install and activate Windows 10. However, if while attempting to update your Windows operating system, the error occurs once more, you will need to follow the instructions in the manual repair below.

You may also consider contacting a Windows repair technician if you are uncertain of your ability to perform the tasks required to fix error code 0x803f7001. This IT professional will be able to use his or her technical knowledge to perform complex manual repair tasks if the need arises.

Method Two: Install an Automated Tool

Automated tools help PC users eliminate common issues such as Windows error codes. To address or rectify error codes like error code 0x8007007b download a powerful automated tool on your machine. This tool enables users to access quick solutions. It also scans for and corrects issues that may result in error codes or poor PC performance.

Read More
1 2 3 171
Logo
Copyright © 2023, ErrorTools. All Rights Reserved
Trademark: Microsoft Windows logos are registered trademarks of Microsoft. Disclaimer: ErrorTools.com is not affiliated with Microsoft, nor claims direct affiliation.
The information on this page is provided for information purposes only.
DMCA.com Protection Status