Quick Fix Guide for Stop Code 0x0000008e

What Is STOP Code 0x0000008e

The STOP Code 0x0000008E is essentially an error code that is displayed on the STOP message. This STOP message is also commonly known as Blue Screen of Death or BSOD for short. When this error occurs, usually messages like,

“STOP: 0x0000008E” or “KERNEL_MODE_EXCEPTION_NOT_HANDLED”

are displayed to the user.

Solution

Download Available to Completely Repair Error 0x0000008e

Restoro box imageError Causes

These errors are commonly caused by failures of memory hardware. However, viruses, hardware failures or issues with the device drivers may also trigger them.

If this error code appears but Windows is successfully able to recover from it, then the message ‘Windows has recovered from an unexpected shutdown’ is displayed to the users.

Regardless of what causes these errors, it is of paramount importance that counteractive measures are taken as soon as the error appears.

Further Information and Manual Repair

While this error can be removed in many ways, the most effective ones are listed below as follows.

  • The screen might be a fluke. Restart your system; the blue screen that appears to you may not be what it seems.
  • Have you just modified or installed new hardware or driver? If yes, it is highly likely that the change you have made has triggered the error. If this is the case, it is strongly recommended that you revert back to the original settings and check whether the blue screen appears again or not. If it does, you can fix it by reconfiguring or removing the hardware you have recently installed. You can perform System Restore or you can go back to the previous versions if you have installed a new driver.
  • To keep this error from occurring in the future, it is strongly advised that you test your RAM. Damaged memory or one that’s unable to perform in the usual manner is often the reason this error occurs.
  • Ensure appropriate installation of your system memory. If you have installed memory in a way other than advised by your memory manufacturer that it may lead to STOP 0x0000008E error or other problems.
  • Misconfigured or over-clocked memory settings can cause STOP 0x0000008E errors as well. To remedy this situation, it is best advised to return the BIOS settings to their default level.
  • If you haven’t updated your Windows, apply all the updates you come across. Patches and service packs specifically address such issues.

Do You Need Help with Your Device?

Our Team of Experts May Help
Troubleshoot.Tech Experts are There for You!
Replace damaged files
Restore performance
Free disk space
Remove Malware
Protects WEB browser
Remove Viruses
Stop PC freezing
GET HELP
Troubleshoot.Tech experts work with all versions of Microsoft Windows including Windows 11, with Android, Mac, and more.

Share this article:

You might also like

How to Fix Unknown Hard Error in Windows 10
The “Unknown Hard” error that keeps on appearing in Windows 10 can put users in an unpleasant situation. This kind of error leads to the freezing of the taskbar, blackening of the screen, and sudden disappearance of the icons on the Desktop. And each time you try to open Windows, the system will only give you an error message saying that it’s a critical error and some applications like Start and Cortana won’t work. Upon analysis, it seems that the “sihost.exe” is not responding and that it is the one that’s causing the c000021a Unknown Hard error to pop up. Sihost.exe files represent the Shell Infrastructure Host which is an essential component in the Windows operating system. The Windows Shell Infrastructure Host is primarily responsible for handling some graphical elements of the operating system interface such as the Start menu and the taskbar transparency. And so if the Shell Infrastructure or Sihost.exe has stopped, has been removed, or corrupted, you will most likely have issues with the overall functionality of the Windows operating system and you’ll get the Unknown Hard error In addition, the ctfmom.exe Unknown Hard error may also occur due to incompatible drivers installed on your PC. Ctfmom is a process that identifies inputs such as handwriting, languages, and many more. It’s the one that controls the functions of background behavior. To resolve this issue, you need to first try to identify which application is the one that’s running the sihost.exe file. And if needed, you need to either update or reinstall or completely uninstall the problematic application.

Option 1 – Try to run the System File Checker

The SFC Scan or System File Checker, us a built-in utility in Microsoft Windows that can be found in the C:\Windows\System32 folder. This tool allows users to scan and restore any corrupted system files in Windows that might be causing the Unknown Hard error to appear. Before you use this tool, make sure to find out whether the sihost.exe on your computer is a Trojan that you have to remove or if it’s a file that belongs to a trusted Windows application. Once you have that sorted out, follow the steps below.
  • Tap Win + R to launch Run.
  • Type in cmd in the field and tap Enter.
  • After opening Command Prompt, type in sfc /scannow
The command will start a system scan which will take a few whiles before it finishes. Once it’s done, you could get the following results:
  1. Windows Resource Protection did not find any integrity violations.
  2. Windows Resource Protection found corrupt files and successfully repaired them.
  3. Windows Resource Protection found corrupt files but was unable to fix some of them.

Option 2 – Try to use System Restore

You can also try using System Restore. This is one of the ways you can use it to back up your PC. Since restore points are created automatically each week by System Restore, you can use System Restore to restore your computer back to an earlier good point in time.

Option 3 – Try to troubleshoot the error in a Clean Boot State

Putting your PC in a Clean Boot state can help you diagnose and troubleshoot the issues in your system. During this state, you can start the system with a minimum number of drivers and startup programs that will surely help you in isolating the root cause of the Unknown Hard Error.
  • Log onto your PC as an administrator.
  • Type in MSConfig in the Start Search to open the System Configuration utility.
  • From there, go to the General tab and click “Selective startup”.
  • Clear the “Load Startup items” checkbox and make sure that the “Load System Services” and “Use Original boot configuration” options are checked.
  • Next, click the Services tab and select the “Hide All Microsoft Services” checkbox.
  • Click Disable all.
  • Click on Apply/OK and restart your PC. (This will put your PC into a Clean Boot State. And configure Windows to use the usual startup, just simply undo the changes.)
After putting your PC in a Clean Boot State, try creating a system restore point and see if the problem still occurs. Clean Boot troubleshooting is designed to help you isolate the problem. For you to execute a clean boot troubleshooting, you must do a couple of actions (the steps are given above) and then restart your PC after every action. You might have to disable one third-party app after the other to really isolate the issue. And once you’ve narrowed down the problem, you can either disable the third-party app that’s causing the problem or remove it. Note that you must switch your PC back into the Normal Startup mode after you’re done troubleshooting the problem. Here’s how you can do it:
  • From the “Start” menu, go to System Configuration.
  • After that, switch to the General tab and click the option for “Normal Startup”.
  • Next, go to the Services tab and clear the checkbox for “Hide all Microsoft services”.
  • Then find and click “Enable all” and if prompted, you have to confirm.
  • Afterward, go to the Task Manager and enable all the Startup programs and confirm the action.
  • Restart your PC when prompted.
Read More
How to Fix dxgmms2.sys BSOD in Windows
The dxgmms2.sys file is a system driver file in Windows that is associated with the Graphics Rendering capabilities of a computer. However, this file is known to cause various Blue Screen of Death errors. Some of the culprits for these errors include issues with RAM, hard disk issues, corrupted drivers, and incompatible firmware. Despite its many causes, fixing this issue is quite straightforward so it should be easier for you to fix it. Here are some of the Blue Screen errors related to the dxgmms2.sys file:
  • SYSTEM_THREAD_EXCEPTION_NOT_HANDLED
  • SYSTEM_SERVICE_EXCEPTION
  • KMODE EXCEPTION NOT HANDLED
  • PAGE FAULT IN A NONPAGED AREA
  • IRQL NOT LESS OR EQUAL
If you have recently created a System Restore point prior to getting the dxgmms2.sys Blue Screen error, then you need to perform System Restore first before you further troubleshoot the problem as it might help in resolving the Blue Screen error. Refer to the steps below to perform System Restore.
  • First, press the Win + R keys to open the Run dialog box.
  • After that, type in “sysdm.cpl” in the field and tap Enter.
  • Next, go to the System Protection tab then click the System Restore button. This will open a new window where you have to select your preferred System Restore point.
  • After that, follow the on-screen instructions to finish the process and then restart your computer and check if the problem is fixed or not.
If System Restore didn’t help in fixing the Blue Screen error, now’s the time for you to resort to the troubleshooting tips provided below but before you get started, make sure that you create a System Restore point first.

Option 1 – Reinstall the Graphics Card drivers

  • Tap the Win + R keys to launch Run.
  • Type in devmgmt.msc into the box and tap Enter or click OK to open the Device Manager.
  • After that, a list of device drivers will be displayed. From there, look for the Graphics Card drivers listed under Display Adapters.
  • Right-click on each one of the Graphics Card drivers and select Uninstall device and then follow the next on-screen instructions given to uninstall the driver.
  • Now reboot your computer. During this time, your system will automatically reinstall the Graphics card drivers.
Note: You also have the option to go directly to the website of your graphics card manufacturer and check if there’s a new update – if there is, download it. After that, you could also check if there’s a new update of the game you’re getting the issue of the black bar.

Option 2 – Try running the DirectX Diagnostic Tool

Since the dxgmms2.sys Stop error has something to do with the DirectX Graphics APIs, you can run the DirectX Diagnostic tool to resolve the problem.

Option 3 – Try updating or re-installing DirectX

If the DirectX Diagnostic tool didn’t work, you can try to update or reinstall DirectX instead. This can help in fixing the problem because when you reinstall or update DirectX, it will replace the incompatible or corrupted components of DirectX from your computer.

Option 4 – Try to update the BIOS

Updating the BIOS can help you fix the Blue Screen error related to the dxgmms2.sys file but as you know, BIOS is a sensitive part of a computer. Even though it is a software component, the functioning of the hardware depends on it largely. Thus, you must be careful when modifying something in the BIOS. So if you don’t know much about it, it’s best if you skip on this option and try the other ones instead. However, if you are well-versed in navigating the BIOS, then follow the steps below.
  • Tap the Win + R keys to open the Run dialog box.
  • Next, type “msinfo32” in the field and press Enter to open System Information.
  • From there, you should find a search field on the bottom where you have to search for the BIOS version and then press Enter.
  • After that, you should see the developer and version of the BIOS installed on your PC.
  • Go to your manufacturer’s website and then download the latest version of BIOS on your computer.
  • If you are using a laptop, make sure that you keep it plugged in until you have updated the BIOS.
  • Now double click on the downloaded file and install the new BIOS version on your computer.
  • Now restart your computer to apply the changes made.

Option 5 – Use some registry tweaks

  • Tap the Win + R keys to launch the Run utility.
  • Then type “Regedit” in the field and hit Enter to open the Registry Editor.
  • Next, navigate to this registry key: HKEY_LOCAL_MACHINESYSTEMCurrentControlSetControlGraphicsDrivers
  • From there, right-click on the right-side panel and click on New > DWORD (32-bit) Value.
  • Then set the name of the new DWORD to “TdrDelay”.
  • After that, use the next set of instructions and select the one for the Windows version you are using.

32-bit Windows:

  • Choose the DWORD (32-bit) value.
  • Then type in “TdrDelay” as the name and hit Enter.
  • After that, double click on TdrDelay and add “10” as its value and click OK. This will set the response time for your GPU to be 10 seconds.

64-bit Windows:

  • Select the QWORD (64-bit) value.
  • Next, type in “TdrDelay” as the name and hit Enter.
  • Double click on TdrDelay and type in “10” as its value data and click OK.
  • Restart your computer to apply the changes made.

Option 6 – Disable the Sleep Functionality

You might also want to disable the Sleep Functionality as it could be the reason why you’re getting the Blue Screen error. There are times when the graphics card’s drivers are being used in the background and if the display goes to sleep and is awakened, it may cause a Blue Screen error. To fix it, you can prevent your computer from going into Sleep mode.

Option 7 – Try to run the Blue Screen Troubleshooter

The Blue Screen troubleshooter is a built-in tool in Windows 10 that might help you fix any Blue Screen errors related to the dxgmms2.sys file. It can be found on the Settings Troubleshooters page. To use it, refer to these steps:
  • Tap the Win + I keys to open the Settings panel.
  • Then go to Update & Security > Troubleshoot.
  • From there, look for the option called “Blue Screen” on your right-hand side and then click the “Run the troubleshooter” button to run the Blue Screen Troubleshooter and then follow the next on-screen options. Note that you might have to boot your PC into Safe Mode.
Read More
Fix oobesettings error inside Windows 11
oobesettingsOobesttings error is the blue screen of death error caused by some faulty settings inside the Windows registry. The good news is that this is not a hard error to fix and if by any chance you are one of the unfortunate people getting this dreaded annoying error, please do keep reading because we have several things that you can do in order to eliminate this issue from your computer.

Reboot your system

This is the easiest and straightforward solution and can work sometimes since if the system has not been properly rebooted in a while memory could be filled with various processes and it can trigger oobesettings error. A simple restart of the system can solve the issue by decluttering files and emptying memory.

Scan and repair with SFC

If rebooting the system was not helpful and sadly you still receive an error then let's scan and repair system files by using Windows built-in tool SFC. In order to use this, we will have to run the command prompt in elevated administrator mode. Follow instructions closely. First click on the search icon on the taskbar and type in CMD The command prompt will show as a search result, on the right side click on Run as administrator. Once it opens type in following command: sfc /scannow and press ENTER Wait for the process to finish completely and restart your device after.

Repair the system registry

If the SFC scan has not repaired the issue then we will move to the next solution that involves repairing the system registry itself. Please note that you need to follow step-by-step for provided instructions since playing with the system registry can cause some serious issues if not done properly and can even render the system unstable. That being said, let's begin: Press ⊞ WINDOWS + R to open Windows run dialog Type inside regedit and press ENTER Inside registry editor locate the following key: HKEY_LOCAL_MACHINE/SYSTEM/CurrentControlSet/Control/Session Manager/ Memory Management. and click on it to see properties Inside the properties right-click on CommitLimit value and choose delete. Confirm with yes. Close registry editor and reboot your computer.

Reset Windows 11

If even clearing key inside the registry editor has not helped next step would be to reset the system itself. Press ⊞ WINDOWS + I to open Windows settings and click on System on the left. Inside on the right part click on Recovery In recovery click on the button next to Reset this PC that says Reset PC Choose between keep my files and remove everything (a better option is remove everything, but be sure that you have all your files on a separate drive backed up) Choose between Cloud Download or Local reinstall. Click on next to confirm choices and after that on Reset to start the reset process. Follow onscreen instructions until it is fully done.
Read More
How to Fix Windows 10 Update Error Code 80004002

Error Code 80004002 - What is it?

Error code 80004002 will be encountered when there are absent registry keys. These missing registry keys will hinder an update process when initiated. However, this error code can be averted once the user makes a reinstall of the Windows Update Client. The steps will be highlighted throughout the article.

Solution

Restoro box imageError Causes

Error code 80004002 might occur for various valid reasons. In cases of installing programs, a user might mistakenly install a new program over another, that was not properly (completely) uninstalled. This could cause a stack-up of registry keys and error messages. Additionally, error code 80004002 might be a consequence of malware, viruses, and adware.

Further Information and Manual Repair

If left unchecked, error code 80004002 could amount to system freezes and crashes, slow computer performance, error codes upon installation, and even blue screen errors. To fix this error code, you might want to attempt one or all the methods below. This is due to the fact that the problem might stem from various reasons.

Method 1: Safe Mode

Ensure to boot your computer in safe mode. This is to ensure that you are properly able to troubleshoot Windows update error code 80004002. To load your computer in safe mode, turn on the computer, press F8 before it fully loads to the ‘sign in’ screen.

Method 2: Update Outdated Drivers

One of the many reasons why you’ll encounter error code 80004002 is in light of the fact that your drivers might have been outdated. To check if your driver is outdated, Right click on the Start menu, select the Device Manager option. From there, you’ll be able to tell which device(s) is corrupted and needs updating.

Method 3: Reinstall Windows Update Client

To perform this process, follow the steps below:
  1. Locate “My Computer” or “This PC” on your device.
  2. Select the “Properties” option.
  3. Under the System option, determine whether your System type is 64-bit or 32-bit version of Windows.
  4. Use the links below to install the Windows Update client:

Click for 32-bit Operating System

Click for 64-bit Operating System

  1. After installation, search for Windows Update from the Search option.
  2. Select the Check for Updates option.
  3. Once any updates are found, hit Install Updates.

Method 4: Use An Automated Tool

If you wish to always have at your disposal a utility tool to fix these Windows 10 and other related issues when they do arise, download and install a powerful automated tool.
Read More
How to Fix Low FPS in Apex Legends
  • In your Graphics Settings, select r5apex.exe and change the Graphics performance preference to Classic App, set it to High Performance, and then launch the game as an administrator when you want to play.
  • Inside the Nvidia Control Panel, click “Manage 3D Settings”, and select Apex Legends and change it to “Prefer Maximum Power”
  • You can also change “pre-rendered frames” to 1, but it will make you lag just a tiny, tiny bit.
  • Turning the shader cache on can help improve FPS, but on some systems, it may cause additional negative performance changes.
  • If you have the ability to use G-Sync, use that as well (Only available on some monitors and graphics cards)
  • From the task manager, change the priority of r5apex.exe to “High” and close out of other applications.
  • Update your graphics drivers.
  • Ensure your PC complies with the games minimum system requirements:
    • OS: 64-bit Windows 10
    • CPU: Intel Core i3-6300 3.8GHz / AMD FX-4350 4.2 GHz Quad-Core Processor
    • RAM: 6GB
    • GPU: NVIDIA GeForce GT 640 / Radeon HD 7700
    • GPU RAM: 1 GB
    • HARD DRIVE: Minimum 30 GB of free space
  • Check to see if your system has the game’s recommended hardware requirements:
    • OS: 64-bit Windows 10
    • CPU: Intel i5 3570K or equivalent
    • RAM: 8GB
    • GPU: Nvidia GeForce GTX 970 / AMD Radeon R9 290
    • GPU RAM: 8GB
    • HARD DRIVE: Minimum 30 GB of free space
  • Within the game, try to set the settings to:
    • Full Screen
    • Disable V-Sync
    • Anti-Aliasing to Disabled/TSAA (slight performance difference)
    • Use Native Resolution
    • Keep Field of View at around 80-100
    • Texture Streaming Budget to High
    • Texture filtering as low as possible while still being playable
    • Ambient occlusion as low as possible
    • Shadow all to Low / Lowest
    • Model detail low
    • Effects detail low
    • Volumetric lighting / Dynamic spot shadows Disabled
    • Ragdolls low
    • Impact marks the lowest
  • Make sure other applications are not placing overlays (Discord, GeForce, Xbox Gaming)
  • Clean your temporary files and uninstall other games to give your PC room to have the game run.
  • Don’t use products like CCleaner as they may remove necessary files from your computer.
  • Closeout of Chrome when you’re playing the game or follow our guide on Optimizing Chrome Performance
Read More
Fix microphone not working in Windows 10
The microphone has become from exclusive niche hardware to everyday requirements. In today's world when we live in a pandemic most of the work has shifted from office to home where people need working computers with microphones, working microphones. So what do we do when the microphone stops working? Keep reading on to find out and hopefully, we will fix this as fast as possible.

Check Microphone Privacy Settings

In 2019, Microsoft introduced new privacy features to Windows that give you more granular control over which apps are accessing your microphone. The side effect of this is that certain apps may be blocked from using your microphone without you even knowing. To find out if this is the issue, go to Settings > Privacy > Microphone. Click Change and make sure the slider is set to On. This will broadly mean that the mic is now enabled on your PC.
Next, make sure the slider under Allow apps to access your microphone is set to On, then look through the list of Microsoft Store apps to make sure the apps you want to use are selected.
You’re likely to be using many apps, not from the Microsoft Store, so to make sure these are enabled, scroll down even further and set the Allow desktop apps … slider to On.

Check Microphone Driver

The outdated or corrupted driver could be the issue for the microphone not working in Windows 10. To check the driver status, follow these steps:
  1. In your Start menu search for Device Manager
  2. In the device manager window search for sound and expand it.
  3. Once expanded, you should see your audio drivers. Note that the names of these will vary depending on the manufacturer.
  4. On Audio, right-click, and select properties. On the General tab, check to see if the device is working properly.
  5. If it is not working properly, click on the driver tab and select the update option.
  6. Repeat for the other audio drivers.
  7. Restart the computer.

Check the Sounds setting

  1. In the taskbar, right-click on the speaker icon at the far-right corner and select the sound option.
  2. On the Recording tab, click on the microphone and select the Properties option.
  3. Select the levels tabs and increase the volume for both microphone and microphone boost.
  4. Go to the Enhancement tab of the same pop-up and make sure that the immediate mode checkbox is checked.
  5. Click Ok and restart the computer.

The sound troubleshooter

  1. Right-click on the sound icon at the far-right corner of the taskbar and select troubleshoot sound problems.
  2. The computer will detect any fault that exists with your audio and recommend fixes for you. You just need to read through the prompts and click the options that you think will work for you.

Try microphone on another computer

If previous steps have not produced results, try the microphone on another computer, if it is not working there then it is a hardware malfunction
Read More
Fix Realtek HD audio driver issue
Realtek sound device not playing sound is a common Windows issue.  It happens occasionally and luckily it can be solved with a little effort and in a short time period. Today in this article we will explore the most common reasons and solutions for driver malfunction for Realtek inside Windows 10. If you have this particular problem, go from step 1 to the last step since all steps are meant to go from simplest to the most complex. All of that being said let us fix your Realtek driver issue.
  1. Check Speakers or/and Headphones first

    The first thing would in any troubleshooting be to check are your speakers turned on or are your headphones connected and the volume or switch on them is set properly. Nothing more embarrassing than spending an hour or so troubleshooting only to find out that issue was in a malfunction of speakers or them not being turned on.
  2. Check the Volume control in Windows

    Same as the previous step where you have checked hardware, now it is time to check to see if the volume control is set properly and not by any chance muted or volume is brought all the way down.
  3. Check if the Device Manager is reporting an error and update the driver

    If both hardware is functioning properly and volume control in Windows is set correctly then the issue might be in Windows not detecting device or driver malfunction. In any case, the Device Manager will be the one who will report this problem. In order to check to see if the driver is properly working press ⊞ WINDOWS + X to open the hidden start menu. keyboard with windows and x marked Once it opens, click on Device Manager to open it, realtek audio driver in device menager If you have a driver device error inside Windows, you should see it immediately when entering the Device Manager, it will have a yellow exclamation mark beside it. Right-click on it and choose update driver.
  4. Reinstall driver

    If driver update failed or you already have the latest drivers, reinstalling them could fix the issue since drivers might have corrupted during installation of some update or application. Follow steps from point 3 to get to the driver in Device Manager, then right-click on it but instead of update choose to uninstall. Reboot Windows once the driver is uninstalled and Windows will install a new one.
  5. Check Windows update

    Check to see if the latest Windows update is installed, update your Windows if needed
  6. Fix driver issue with DRIVERFIX

    If everything else fails, get DRIVERFIX, a premium solution for your PC issues, and fix driver errors.
Read More
Disable widgets menu inside Windows 11
windows 11 widgets menu
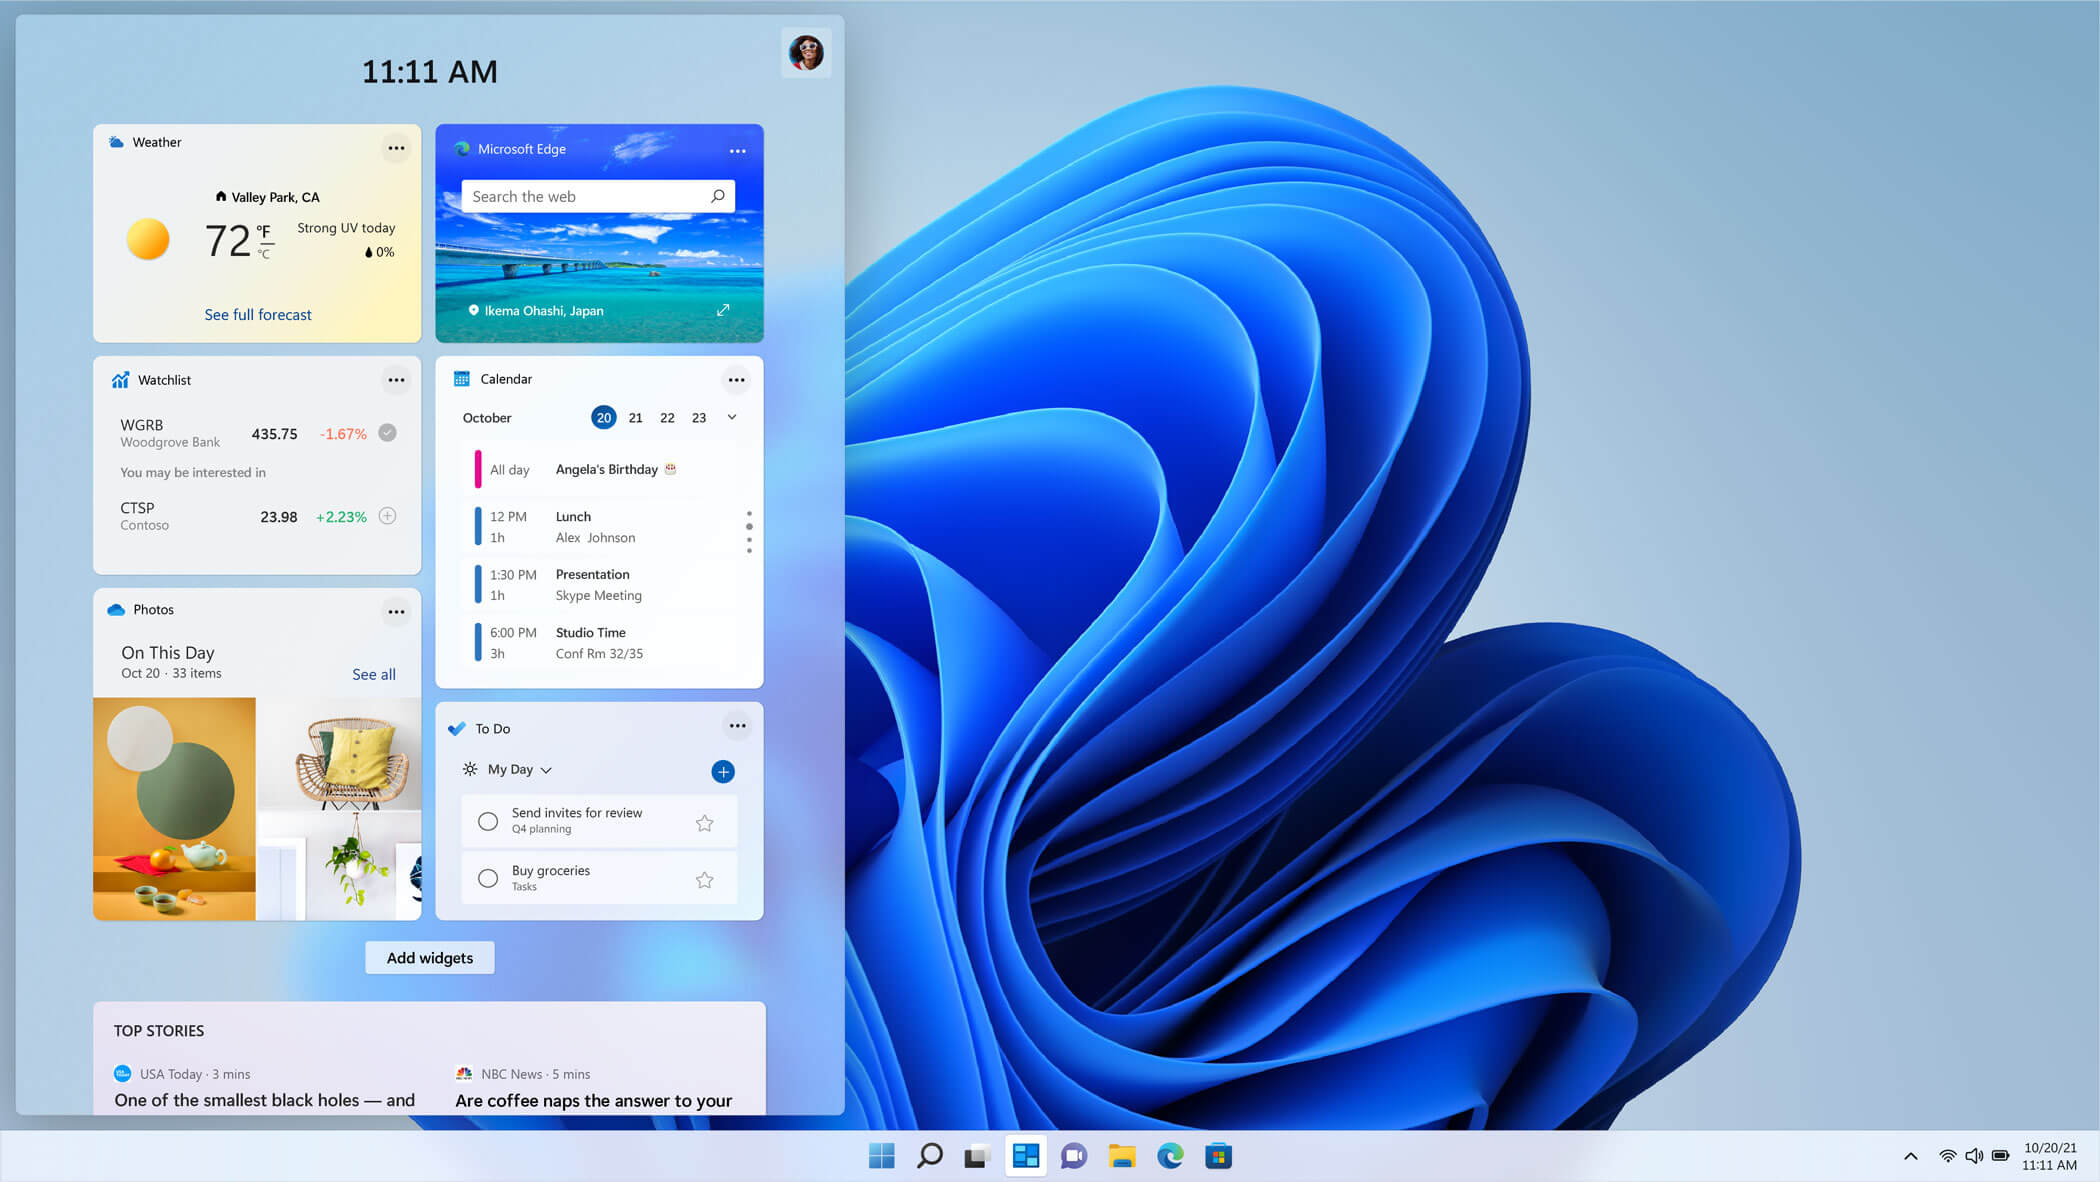
The new widget's menu inside Windows 11 is generally met with a positive attitude but there are still users which prefer not to have it. Luckily for them, Microsoft included a very easy way to turn the widgets menu on or off. Follow this easy guide to see how. Right-click on the widget button in the taskbar and click on Hide from Taskbar and that’s it Alternatively, you can also turn it off via the setting app. Go to the settings app and navigate to Personalization > Taskbar > Taskbar Items and flipping the switch beside Widgets to Off. Please note that both methods will only hide the button to toggle widgets menu, at the current state there is no really a way to actually turn it off, only hide it and make it not available to bring it up.
Read More
An Easy Guide to Fixing Mingwm10.dll Error Code

Mingwm10.dll Error Code - What is it?

Mingwm10.dll is a dynamic link library file. This file is associated with the gaming program called the Adventures of Tintin developed for Windows OS by Ubisoft. Like all other DLL files, Mingwm10.dll file also contains small programs that are used to load and run this gaming program on your PC and several other programs developed by Ubisoft. Mingwm10.dll error code may occur when this file fails to run and load the Adventures of Tintin, the game on your PC. This error may appear on your PC in different formats such as:
  • "Mingwm10.dll not found."
  • "The file mingwm10.dll is missing."
  • "Cannot register mingwm10.dll."
  • "Cannot find C:\Windows\System32\mingwm10.dll."
  • "Mingwm10.dll Access Violation."
  • "Cannot start The Adventures of Tintin The Game. A required component is missing: mingwm10.dll.Please install The Adventures of Tintin The Game again."
  • "This application failed to start because mingwm10.dll was not found. Re-installing the application may fix this problem."

Solution

Restoro box imageError Causes

Mingwm10.dll error code is triggered due to a plethora of reasons. These include causes like:
  • Registry damage or corruption
  • Viral infection
  • Hardware failure
  • Corrupt or missing Mingwm10.dll file
Though this error is not fatal nonetheless it is advisable to fix it promptly to ensure you are able to access your desired program successfully without any restriction. Please note, this error can become a major PC threat as the underlying causes are registry corruption or viral infection.

Further Information and Manual Repair

Listed below are some of the best, proven, and easy DIY methods to help you resolve the Mingwm10.dll error code on your system. These are simple methods and require no technical expertise or know-how.

Method 1 - Restore the Missing File

As mentioned above DLL are shared files, there is a possibility that you accidentally deleted the Mingwm10.dll file on your system while uninstalling a program developed by Ubisoft. In such an event, the best and the easiest way to fix the error is to check your recycle bin and restore the deleted Mingwm10.dll file on your system.

Method 2 - Download Mingwm10.dll File from a Reliable Website

If you are unable to locate the missing Mingwm10.dll file in the recycle bin, then another method to fix the issue can be to download the Mingwm10.dll file from a trusted website. The reason why we say trusted is that viruses often enter computer systems when users download files from unreliable websites. So, to avoid bigger problems first make sure the site you select to download the Mingwm10.dll file is authorized and trusted.

Method 3 - Update Outdated Drivers

Hardware failure is related to outdated drivers. If the cause of the Mingwm10.dll error code is hardware failure, simply update the outdated drivers to resolve. Since the Mingwm10.dll file is used to run and load Adventures of Tintin, a gaming software program, then most probably the error is caused because of the outdated video card driver. Therefore update it to fix the issue. For this, go to the start menu, type Device Manager in the search bar. Once it opens use the driver update wizard to make updates. The wizard will walk you through the entire process, making the driver update task easy.

Method 4 - Repair the Corrupt Registry

The registry is the part that stores all the information and activities performed on your system. From important files to obsolete files it saves everything. If the obsolete files like the junk files, bad entries, invalid registry keys, and cookies are not removed from the registry frequently, these files accumulate in the registry and corrupt important system files like DLL files, popping error codes like Mingwm10.dll error. To resolve, download Restoro. It is a PC Fixer embedded with a  registry cleaner. The registry cleaner scans and removes all the obsolete files. It cleans the registry and the corrupted system files in just a few clicks, thereby fixing the problem. Click here to download Restoro to resolve the Mingwm10.dll error code on your PC
Read More
Fix 0x800F0825 update error in Windows 10
Windows updates have become a regular occurrence in our digital lives. They are frequent and have become quite necessary. Most of the time they bring us quality content like fixed security, resolved bugs, and even new features but from time to time update itself can be not downloaded properly or it can have some issues when installing. Windows Update Error 0x800F0825 is one of these update errors that will be reported seemingly after applying the update. Altho annoying error it is nothing system breaking and can be easily resolved. Hello and welcome everyone, today we will provide you with solutions on how to resolve error 0x800F0825 when trying to complete a Windows update.

Run Windows troubleshooter

Built-in Windows troubleshooter can help a lot in resolving these issues and we will try it as a first solution because of its simplicity and ease of use.
  • Click on START
  • Click on settings Windows 10 Start menu with marked settings icon
  • Navigate to Update & Security > Troubleshoot > Additional Troubleshooter > Windows Update
  • Click on Run the troubleshooter
  • Follow onscreen instructions and let the troubleshooter try to solve the issue

Clear contents of SoftwareDistribution & Catroot2 folders

Altho SoftwareDistribution and Catroot2 folders are essential for the update process it can happen that badly downloaded updates or similar corruption can be stored there and thus producing this error.
  • Open file explorer and locate these two folders, go inside and delete content inside them
  • Try updating again to see if corruption inside folders was the issue.

Update manually

If the previous two solutions have not produced a result and the error is still present then go to the official Microsoft Update Catalog and download the update manually The catalog is here. Search for updates from the Windows Update Catalog In the Search box, type your search terms. You can carry out a full-text search, using a keyword, KB article, MSRC bulletin, driver manufacturer, driver model, driver version, product, and a classification. Select the appropriate version of Windows. Search or click on Advanced Search if you want to refine your search. A list will be displayed. Select the updates that you want to download. Click Add for each selection to add it to the download basket.
  • Download the updates. You may be asked to install an Active-X download control to be able to download files from this site
  • Double-click on the downloaded updates to install them
Administrators can download updates from the Microsoft Download Center or the Windows Update Catalog to deploy to multiple computers If you are running Windows Server Update Services (WSUS) 3.0, System Center Essentials (SCE), or System Center Configuration Manager (SCCM) you can import updates directly into these applications. Security updates, critical updates, service packs, update rollups, definition updates, and critical drivers can be configured to synchronize with your server automatically. You can still import these updates into your application by using Microsoft Update Catalog; however, depending on how you configure WSUS, SCE, and SCCM, you may not need to import the updates.

Disable system protection

In some rare cases, antivirus or firewall could interfere with both downloads and execution of certain files. If each previous solution failed disable temporarily your security software and try executing the update again.
Read More
1 2 3 171
Logo
Copyright © 2023, ErrorTools. All Rights Reserved
Trademark: Microsoft Windows logos are registered trademarks of Microsoft. Disclaimer: ErrorTools.com is not affiliated with Microsoft, nor claims direct affiliation.
The information on this page is provided for information purposes only.
DMCA.com Protection Status