Windows update issue may come up when the configuration for windows update service is not properly configured or this error can also come up when there is corrupt windows installation. Before trying any of the given solutions to this error try first to clean boot your Windows and turn off any 3rd party utility application. If this method fails move to the provided solutions.
Change startup type of UOS service to automatic
UOS or The Update Orchestrator Service is essential for proper Windows updates. If this service is by any means turned on manual it could be the reason for error since it can create incompatibility between OS modules, if this is the case, setting it to automatic will solve the issue.
Press CTRL + SHIFT + ESC on your keyboard to bring the task manager up and click on the services tab.
In the services find orchestrator service, right-click on it, and from the list of startup types choose automatic.
Click on APPLY and reboot your computer.
Try to fix it in the command prompt
If the above method failed, try fixing the issue via command prompt.
Press ⊞ WINDOWS + X to bring up the secret menu and start command prompt (administrator)
In the command prompt write these lines one after another as they are finished: net stop bits net stop wuauserv net stop appidsvc net stop cryptsvc Ren %systemroot%SoftwareDistribution SoftwareDistribution.bak Ren %systemroot%system32catroot2 catroot2.bak Net Start bits Net Start wuauserv Net Start appidsvc Net Start cryptsvc
After all this, reboot your system and check if updates are working properly.
Try to fix it via registry editor
Press ⊞ WINDOWS + R to bring run and type in it RegEdit, press ENTER
find Computer\HKEY_LOCAL_MACHINE\SYSTEM\CurrentControlSet\Services\UsoSvc
in the right part, find key START and change its value to 2 Reboot your system
Try with a new user account
If by any chance user account data is corrupted this may be the reason why we have this error.
Create a new administrator user account Shut down your computer
Turn in back ON and log in with the new account
Perform SFC scan
Press ⊞ WINDOWS + X and choose command prompt (administrator)
type in: sfc /scannow
This may take a while, sit back, let it finish, and try again windows update
That is all considering this particular error, we certainly hope that you have managed to fix it using any of provided solutions!
Users who constantly use graphic-intensive applications like games or any video-rendering software need to control how their graphics card is used. There are some who always toggle their Graphic Quality settings to get the Frames Per Second or FPS up. While some tend to adjust the size, orientation, scaling, and other display settings in order to use their PCs in a more efficient way or to simply work better. And in all of that, that’s where the NVIDIA Graphics Card comes into the picture. Take note that this software only works on PCs which has NVIDIA Graphics Card attached to them. Thus, if you use another Graphics Card then this post is not for you, otherwise, proceed reading to know what you can do if the NVIDIA Control Panel is not opening on your Windows 10 PC.
Here are a couple of things you can try if the NVIDIA Control Panel is not opening, not responding, or not working:
Restart the process of the NVIDIA Control Panel
Restart the NVIDIA Display Driver Service
Update your NVIDIA Display Drivers
For more details, refer to the instructions provided below.
Option 1: Restart the process of the NVIDIA Control Panel.
Tap the Ctrl + Shift + Esc keys to open the Task Manager.
After opening the Task Manager, look for the process named NVIDIA Control Panel Application.
Once you found it, expand it and right-click on the NVIDIA Control Panel sub-process, and click on End Task.
Now try opening the NVIDIA Control Panel from the Start Menu and see if it now works fine or not.
Option 2: Restart the NVIDIA Display Driver Service
Tap the Win + R keys to open the Run dialog box.
Then type “services.msc” in the field and hit Enter to open the Windows Services Manager.
After opening the Services window, you will see a list of services. From there, look for services named “NVIDIA Display Container LS” and double click on it to open its Properties.
Now make sure that the service is Started. If it isn’t, you need to start it, otherwise, you need to Stop it and Start It again. You also have to make sure that the Startup Type is set to Automatic.
Do the same for the NVIDIA LocalSystem Container service.
Restart your computer and check if the problem’s fixed.
Option 3: Try updating the drivers from the official site of NVIDIA
If both the first and second given options didn’t work, you can also try updating the drivers from the official NVIDIA website. And in case you don’t know the type of Nvidia graphics card that your computer is on, follow the steps below:
Tap the Win + R keys to open the Run dialog box.
Next type in “dxdiag” in the field and click OK or hit Enter to open the DirectX Diagnostic Tool.
From there, you can see what type of Nvidia graphics card that your system is on.
Take note of your graphics card information and then look for the best drivers for your operating system. Once you’ve downloaded and installed the file, restart your PC.
The new Windows 10 update has brought some fixes, improvements, and little things to personalize our computer more. One of these personalization updates we have received is that we can now finally change the color of our START menu and taskbar and it is easy as 1,2,3.
In order to change and personalize your START menu and/or title bars all you have to do is click on your windows icon to bring the start menu up and then click on settings.
Once you are in setting windows go to personalization settings.
When the personalization setting opens go-to color tab on left and scroll down until you find 2 checkboxes under "show accent color on the following surfaces:"
check ones you wish to apply the effect to and you are done. Now your START menu and/or title bars are using the color scheme of your choice.
Although the UWP platform is still new, it is working efficiently and significantly and it’s apparent that Microsoft is betting big on it. It helps developers in building applications for Windows 10 that are more modern and beautiful as well as responsive with the help of the .NET Core and XAML. However, all things considered, it still isn’t perfect and it could still encounter some errors. One of these errors is the Windows.UI.Xaml.Markup.XamlParseException UWP app error.
This particular error can occur to any Universal Windows Platform or UWP application and according to security experts, it is due to some XAML parsing error. To fix this error, you can try to reinstall the faulty program or check its privacy settings. You can also run both the Program Compatibility and Windows Store Apps troubleshooters as well as run System Restore. For more information, check out the given options below.
Option 1 – Try to reinstall the faulty application
If you encounter this error in an application that is not a system-related one, then you can just uninstall it from the Windows 10 Settings app and then reinstall it again from the Microsoft Store. On the other hand, if it is a system application like the Camera or Calculator app, you can just uninstall and reinstall it using a PowerShell script.
Option 2 – Try to check the Privacy Settings of the concerned app
You might also want to check if all the Privacy Settings required for a certain application are configured properly as it could also cause issues like the Windows.UI.Xaml.Markup.XamlParseException UWP app error.
Option 3 – Try to run the Program Compatibility Troubleshooter
You might also want to run the Program Compatibility Troubleshooter. This built-in troubleshooter is available in the Windows Update & Security section. From there, select Troubleshoot. This will find a list of programs for you and since you have already downloaded the driver files, just click on Not Listed located at the top of the program list. After that, browse and select the driver files and then let the program do its job. In addition, you can try to run the Windows Store apps troubleshooter as it can also help you resolve the problem.
Option 4 – Run System Restore
If you have recently made changes in your computer’s settings, you could also run System Restore to fix the Windows.UI.Xaml.Markup.XamlParseException UWP app error. How? Refer to these steps:
Tap the Win + R keys to open the Run dialog box.
After that, type in “sysdm.cpl” in the field and tap Enter.
Next, go to the System Protection tab then click the System Restore button. This will open a new window where you have to select your preferred System Restore point.
After that, follow the on-screen instructions to finish the process and then restart your computer and check if the problem is fixed or not.
Error 0x0000007E is a Windows Stop error message that is displayed on a blue screen.
This may appear when browsing the internet, listening to music on some media player application or while working on an important document on MS Word or Excel. This message strikes terror as the screen goes blue without any warning.
Solution
Error Causes
The error code 0x0000007E is triggered because of:
Faulty hard drive
When the hard drive is full and there is no storage space
If you experience this error on your PC, you don’t have to panic and call a professional. This error is rated as an easy fix. And you can easily resolve the issue even if you don’t have a piece of strong technical knowledge about computers.
Here are some quick fixes to repair the error 0x0000007E on your PC in the shortest time and without any hassle:
Cause: Faulty Hard Drive
Solution: In the event of a faulty hard drive, it is best to create a backup of all your data and get a new hard drive. However, first, it is advisable to use the Windows tool called Chkdsk (Check Disk) to identify and determine if the hard drive is faulty or not.
To do so, click on the start menu and type CMD into the search box. Click on it to run. Now a black box will be displayed on the screen, simply type the command Chkdsk and run it to find out if your hard drive is faulty and damaged. If so, then get a new hard drive.
Cause: Hard Drive is full
Solution: Error 0x0000007E may also occur if the hard drive is full. To check the storage space on your hard drive, go to My Computer. If the space is full, then it is advisable to delete some files or uninstall heavy and recently installed programs to free up some space.
Cause: BIOS not updated
Solution: You may come across this blue screen error if your BIOS is not updated. To update your BIOS, restart your computer and press F2 to enter setup. Now go to SATA Operation and change RAID AHCI to RAID ATA. Save changes and then exit. By doing so, you can update your BIOS and fix the error 0x0000007E immediately. It’s that easy!
Hello and welcome to our software series review. Weel this time we could say this is more of a service review since the application we are going through today is online and you can use it freely without ever needing to install it.
When we choose software that we are going to review and recommend we really try to recommend something that is worth your time and money, Cartoonize fits in both categories in my opinion.
First of all basic plan of this graphic software is completely free and as mentioned it is working online, also as one more feature basic plan does not even require you to have an account of any kind, all you need to do is go to the website of the application and you can start using it right away. There is also paid plan for extra features if you need them billed monthly or annually.
Features
First things first, this is not Photoshop or GIMP and it does not aim nor want to be. This is something else, directed and pointed at the different types of users. This application is aimed at people that want to make some quick graphics and post them on social media and it does that very well. Even without knowledge to use graphic software this one is so well designed and straightforward that even a complete newcomer can do something right away.
So as the application that wants to be used by people that want to place some cool pictures or ads on their social media what it offers. For starters simplicity and ease of use, every option that you can use is on the left side of the screen nicely packed into the vertical toolbox. Inside the toolbox, you have access to various tools, effects, and filters that you can apply to your image.
Tools explained
Image manager
The first section on the tool panel is the image manager, here you can upload your images, delete them, search stock images, and so forth. nothing more to say about this one as it is only a basic file manager.
Edit
In this tool panel, there are a lot of basic settings for your image manipulations divided into 3 sections: Basics, Enhance, and Creative. In the basic section, you can crop, resize and rotate your image. Enhance panel will let you set exposure, color, vibrance, tint, and details (sharpen). Finally, the Creative part will let you remove the background with AI in a single click, replace colors in the image, and add a vignette and round image.
Effects
In the effects panel, you will be given 4 options to choose from Cartoonizer, Digital art, Sketcher, and painting. Each option once clicked will open another set of options tied to chosen preset where you will be able to choose a different style from chosen template. Once you click on the desired template it will be applied to your image and in the upright corner, you will have edit options to tweak it to your liking. You can play around as much as you want because only once you click on the apply button, the effect will be applied to your image.
Filters
Same as in the effects tool panel here you will also get a series of different filters that you can apply to your image. As in the previous tool once clicked on the chosen filter, you will be given options for its variations and details edits. How there is really plenty of filters options and combined with its own presets I will not focus on explaining what each one is doing since picture thumbnails are pretty accurate and just one look at them will explain to you everything you need to know.
Overlays
In the overlays panel, you can as the name says overlay different kinds of effects on your image. You can add snow, fog, sun flares rain, and many more. Presets work identically to previous effects and filters.
Masks
If you want to place your image in a certain shape or in-text this is the section for you. You will be presented with sections as custom text, shapes, brushes, floral, animals, and patterns. Each section will once again lead to plenty of variations on the chosen subject where you can pick one that you like the most and tweak its options.
Text
As the name suggests, this section is to add text to your picture or design. If you are making some cool ad for Facebook, Instagram, or other social media I believe that you will spend most of your time in this section adding text and tweaking it so it looks best. You have all the tools that you will need to make a catchy title or smaller block of text and you can add multiple texts to your picture tweaking their own visual appearance, the font used, color, and some effects like a drop shadow.
Draw
In the draw section, you will be able to freely draw whatever you like with your mouse or pen if you have one. you have basic options for a brush and eraser so you can erase stuff. Pretty basic tool but it gives a nice touch to underline something, circle it, etc.
Graphics
This panel will let you place various already made graphic assets into a picture. You have hearts, hats, glasses, etc. There really are tons of premade graphics along with thematic ones like new year, st. Patric day and more.
Frames
As the name suggests this section will place a frame of your choice around your picture. You can choose the style of frame, position, color, and many more. There are various styles and each style has its own options.
Conclusion
Cartoonize is a great online application that will let you quickly and easily do cool and nice image edits. As mentioned you can also add various effects, text, and graphics and use this app to make some quick and nice ads for social media. You have the option to publish to your social media right from the app in the save dialog but you can also of course download your image or design to your local computer.
Please note that for this review we used the pro, paid version so all of the features were unlocked. We wanted to give you a full overview of the full potential of the app. In my opinion, the small monthly fee that they charge is well worth it when you see all things that you can do with it.
Go to the cartoonize website and check it out, basic option is completely free and it does not even require making an account. Have fun, be creative and take care, I hope to see you again tomorrow.
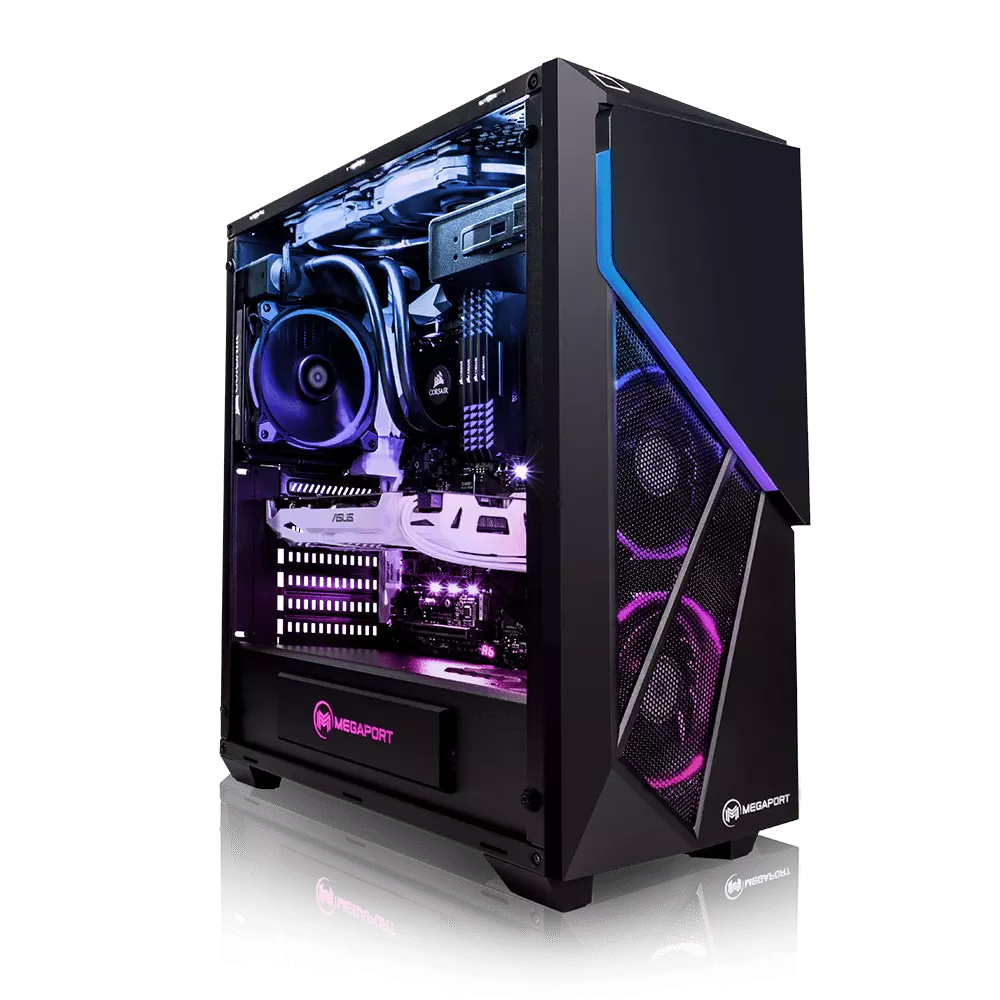
Building your own custom PC system can be one of the greatest things you can do to your budget. Instead of going for a rebuild, we will go into detail about why building your own PC is a much better option. Also, note that if you do not possess enough technical knowledge about a topic there are plenty of stores that will offer you advice on components and after all, you can always get help from a friend.
So without further diversion from the topic, let us explore all the benefits of building a custom computer.
Building a custom PC is cheaper
At the first look, this statement does not feel right since when you look at the prebuilt systems you get a feeling that it is much cheaper than do it yourself variant and although CPU and GPU seem like a great deal I beg you to look under the hood on other components. Usually to lower price compromise would be made on other crucial components like SD or power supply, a PC case, or motherboard so even if you have a good CPU and GPU that will not matter much since other components would not be able to catch up with them. After all, prebuild computers will need to pay people who are building them and there is no way that will be cheaper if you just plain went and bought the same components yourself and install them.
When you are in control in choosing each component there is not only being cheaper online, it is flexibility with building itself. You choose which components you want to be stronger and which to be normal. Also, you can choose the exact model of the given component leaving you more in control and open to future upgrades.
More flexibility
Also, it may sound irrelevant but when building your own custom PC you can also choose which company you would like to purchase for each model, yes considering the CPU it is AMD or Intel but when you are buying a case, SSD, GPU, and other components choosing the right company for your needs is also the thing that should not be overlooked.
You can customize it the way you want
Not really a quality argument but with a custom PC build, you can choose would you like that RGB component or not, you choose do you like white or black fans, and many more things. You really can place a personal stamp on the computer making it indeed a personal computer.
You choose OS and applications
When you buy an already prebuilt PC, usually it comes with some sort of OS on it, sometimes it is freedos, Linux and sometimes it is Windows Home. When you get your hands dirty you can place whichever system you want on it and install applications that you use and know and some preinstalled typical apps.
Call of Duty is a fun and good game, a great time killer with a squad of friends, however sometimes the game crashes, and fun is interrupted.
In this guide, we will address and solve this unpleasant issue.
Scan game files
inside launcher choose options and under them, choose scan and repair game files
This process can take 5-30 minutes, as the game is 60GB large. This will look through all your game files and make sure they’re all valid and that none are corrupted, which may cause crashes. When it’s complete, you’ll get a notification that the game is now playable. Try again and see if your crashes continue.
Update drivers
Keeping drivers updated is crucial for the game to run smoothly, GPU drivers are possibly important. Go to your GPU manufacturer's website and get the latest drivers.
Lower graphic settings
Intensive graphic requirements can overload GPU and cause crashes, try lowering details in-game and see if this will fix the issue.
Disable overlays
If you’re using a program like Discordthat has an overlay, you’ll want to disable it as it may be causing the graphic error
As you probably know, uTorrent is one of the best software you can use to download torrents over the web. It has been around for many years now and is trusted by lots of users despite having competition here and there.
Over the years, uTorrent has changed as it is now packed with tons of features. What’s more, is that this program is no longer the smallest client when it comes to file size. However, just like other software, it is not always working smoothly as there are instances when it’s not responding even when it’s already running. The first thing you can do is to close all the processes of uTorrent and then try opening it again.
There are various reasons why your uTorrent program fails to respond. However, it is most likely caused by some virus that was brought on by the file you’ve just downloaded. On the other hand, it could also be caused by other factors as well but whichever the case is, here are some fixes you can check out to resolve the uTorrent issue.
Option 1 – Delete the file you’ve downloaded
As pointed out earlier, uTorrent might have failed to respond due to some file you’ve just downloaded which is why you have to delete it since there really is no point in keeping a file that’s causing this kind of issue. After deleting the file, try opening uTorrent again and see if it now works or not.
Option 2 – Allow uTorrent to run via Windows Defender Firewall
Click on the Cortana or the Start button and type “firewall” in the field.
From the search results that appear, click on the “Allow an app through Windows firewall”.
After that, a new window will pop up and from there, you will see a list of apps that can be allowed or disallowed using a Windows firewall. From this list, you have to search for uTorrent and once you find it, set it to Publick if you are on a public network or Private if you’re in a private network.
Option 3 – Uninstall or reinstall uTorrent software
You can also try to completely uninstall uTorrent from your computer and then reinstall it right back. to do so, follow the steps below.
In the search box, type in “control” and then click on Control Panel (desktop app) among the search results.
After that, select Programs and Features from the list which will give you a list of all the programs installed on your computer.
From there, look for uTorrent and select it and then uninstall it.
Once uTorrent is uninstalled, go to uTorrent’s official website and download its latest version.
Option 4 – Try scanning your computer using Windows Defender
Tap the Win + I keys to open Update & Security.
Then click on the Windows Security option and open Windows Defender Security Center.
Next, click on Virus & threat protection > Run a new advanced scan.
Now make sure that Full Scan is selected from the menu and then click the Scan Now button to get started.
If you have suddenly run into a problem when trying to connect or pair your Bluetooth keyboard with your Windows 10 computer, read on as this post will guide you on how exactly you can resolve the problem.
This kind of problem typically occurs when you’ve disabled the Bluetooth option. However, this option is already enabled and you still encountered the same error message saying, “Check the PIN and try connecting again”, then you need to troubleshoot the problem further.
In most cases, this kind of issue can be fixed when you restart your computer and go to the Windows Settings and select the “Add Bluetooth or other devices” option and then put the keyboard into pairing mode. And when the keyboard appears in the “Add a device” dialog box, just select it. On the other hand, if your Bluetooth keyboard won’t get connected to your Windows 10 computer and you encounter an error that says, “Can’t pair Bluetooth keyboard, Check the PIN and try connecting again”, then you need to check out the options provided below but before you do so, make sure that you create a System Restore point first as some of the troubleshooting options provided involves the Windows Registry.
Option 1 – Try to use the Device Pairing Wizard
The Device Pairing Wizard is the one that allows your computer to look for any new devices and display them underneath it. All you have to do to use this wizard is to follow its instructions to connect your Bluetooth device to Windows 10. To get started, follow these steps:
First, tap the Win + R keys to launch the Run utility and type “devicepairingwizard” in the field, and then hit Enter to run the Device Pairing Wizard.
After that, wait for a couple of seconds until the devices appear. Once they do, select the Bluetooth device you wish to add.
A new screen with a passcode should appear instantly. You need to take note of the given passcode and type them on your Bluetooth keyboard.
Once done, tap Enter. This should help in pairing your computer to your Bluetooth keyboard.
Option 2 – Try to use the Registry Editor
The next thing you can do to resolve the pairing issue with your Bluetooth keyboard is to use the Registry Editor by following these steps:
Tap the Win + R keys to open the Run utility and type “Regedit” in the field and then hit Enter to open the Registry Editor.
Next, navigate to this registry path: HKEY_USERS/.DEFAULT/Software/Microsoft/Windows/CurrentVersion/Bluetooth/ExceptionDB
From there, look for the folder named “Addrs” and expand it. If you see any folders or keys under it, select them and delete them. These keys represent the MAC address of your Bluetooth devices.
Once you’re done, restart your computer and try to pair your Bluetooth keyboard once more.
Option 3 – Try running the Bluetooth Troubleshooter
As you know, Windows 10 has various troubleshooters with user-friendly interfaces where you can utilize them to fix issues in your PC. And since you’re dealing with some Bluetooth problem, you have to run the Bluetooth Troubleshooter.
Open the Windows 10 Settings.
Then go to Update & Security > Troubleshoot.
You should find the option for Bluetooth on your right-hand side – click on it then click on the “Run the troubleshooter” option.
Now follow the next screen options.
Option 4 – Try to reinstall or update the Bluetooth driver
The issue might have something to do with the Bluetooth drivers. It could be that it is outdated and needs to be updated or that you recently updated it and since you have trouble pairing your Bluetooth keyboard, you can update, rollback, or uninstall the Bluetooth drivers. How? Follow the steps below.
Tap the Win + X keys to open the Device Manager.
Next, look for the Bluetooth device and right-click on it.
Select the option “Update driver”.
After that, a new popup window will appear. In there, select the option, “Search automatically for updated driver software”.
Note: Checking the update may take a few minutes so you’ll have to wait until it finishes. If it is able to find an update, you must install it.
REevil is one of the most active and successful hacking groups connected to Russia and operating all over the world. The group recently demanded a huge bitcoin ransom for an attack targeting IT firm Kaseya in the USA.
Since Tuesday blog and payment site run by REvil group cannot be longer reached without any kind of explanation or why.
The reason behind the disappearance is unknown but has sparked speculation that the group may have been targeted deliberately by authorities.
US President Joe Biden said he raised the issue with Vladimir Putin during a phone call on Friday, after discussing the subject during a summit with the Russian president in Geneva last month.
Mr. Biden told reporters that he had "made it very clear to him...we expect them to act" on information and also hinted the US could take direct digital retaliation on servers used for intrusions.
The timing of Tuesday's outage has sparked speculation that either the US or Russian officials may have taken action against REvil - though officials have so far declined to comment and cyber experts say sudden disappearances of groups are not necessarily uncommon.
The development comes after a series of high-profile ransomware attacks which have hit major US businesses this year.
The FBI accused REvil - also known as Sodinokibi - of being behind a ransomware attack on the world's largest meat processing company JBS last month.

 When the personalization setting opens go-to color tab on left and scroll down until you find 2 checkboxes under "show accent color on the following surfaces:"
 check ones you wish to apply the effect to and you are done. Now your START menu and/or title bars are using the color scheme of your choice.

 REevil is one of the most active and successful hacking groups connected to Russia and operating all over the world. The group recently demanded a huge bitcoin ransom for an attack targeting IT firm Kaseya in the USA.
Since Tuesday blog and payment site run by REvil group cannot be longer reached without any kind of explanation or why.
The reason behind the disappearance is unknown but has sparked speculation that the group may have been targeted deliberately by authorities.
US President Joe Biden said he raised the issue with Vladimir Putin during a phone call on Friday, after discussing the subject during a summit with the Russian president in Geneva last month.
Mr. Biden told reporters that he had "made it very clear to him...we expect them to act" on information and also hinted the US could take direct digital retaliation on servers used for intrusions.
The timing of Tuesday's outage has sparked speculation that either the US or Russian officials may have taken action against REvil - though officials have so far declined to comment and cyber experts say sudden disappearances of groups are not necessarily uncommon.
The development comes after a series of high-profile ransomware attacks which have hit major US businesses this year.
The FBI accused REvil - also known as Sodinokibi - of being behind a ransomware attack on the world's largest meat processing company JBS last month.
REevil is one of the most active and successful hacking groups connected to Russia and operating all over the world. The group recently demanded a huge bitcoin ransom for an attack targeting IT firm Kaseya in the USA.
Since Tuesday blog and payment site run by REvil group cannot be longer reached without any kind of explanation or why.
The reason behind the disappearance is unknown but has sparked speculation that the group may have been targeted deliberately by authorities.
US President Joe Biden said he raised the issue with Vladimir Putin during a phone call on Friday, after discussing the subject during a summit with the Russian president in Geneva last month.
Mr. Biden told reporters that he had "made it very clear to him...we expect them to act" on information and also hinted the US could take direct digital retaliation on servers used for intrusions.
The timing of Tuesday's outage has sparked speculation that either the US or Russian officials may have taken action against REvil - though officials have so far declined to comment and cyber experts say sudden disappearances of groups are not necessarily uncommon.
The development comes after a series of high-profile ransomware attacks which have hit major US businesses this year.
The FBI accused REvil - also known as Sodinokibi - of being behind a ransomware attack on the world's largest meat processing company JBS last month.