Error code 707 is a typical Gmail error. Gmail is an email service provided by the largest internet giant Google Inc. It is an email service that is most widely used by web-based email providers with more than 425 million active users worldwide.
The error code 707 is usually displayed in any one of the following formats:
“Oops... the system encountered a problem (#707)”
“Server error occurred and your email was not sent (error 707)”
Solution
Error Causes
The error code 707 may be triggered due to many reasons. These include:
Enabled Lab ‘Background Send’ feature on Gmail
Web browser history and cache is full of junk content
Outdated browser
Though this error code is not fatal it is advisable to fix it right away to avoid inconvenience and to ensure your email is sent right away without any delays.
Further Information and Manual Repair
Here are some of the easy DIY methods to repair and fix the error code 707 on your PC. These methods are simple and do not require any kind of technical expertise. So, even if you are not technically sound, you can repair the error code 707 on your system in no time.
Method 1
Sometimes you may experience error code 707 while sending email via Gmail because of the enabled Background send labs feature. To fix this error here’s what you must do: Log in to your Gmail account, click on the Gear Box, and select settings.
Now simply switch to the lab tab under the settings. Here search for Background Send. If you can’t locate it, then scroll down and insert background Send in the find box. Once you find this lab feature, disable it. After disabling this feature, try resending the email.
Hopefully, this will resolve the issue. Nonetheless, if the error 707 still persists, then try method 2 given below.
Method 2
The error 707 may also be triggered if your web browser becomes outdated. If so, then it is advisable to update the browser to resolve the issue. Simply download the latest browser version from a reliable website.
After the installation is complete, log on to your Gmail account and then try to send an email. If the email is sent successfully, then the issue is fixed.
Method 3
Try clearing cache and web browser history. When the web browser history and cache are full of junk files, then you might experience this error on your system. Sometimes this can also lead to registry issues. To remove the error and repair the registry immediately, download Restoro.
This is a multi-functional and user-friendly PC Fixer compatible with all Windows versions and embedded with multiple powerful scanners including a registry cleaner.
It scans your entire PC for such errors. It clears the registry, removes all obsolete and unnecessary files including cookies, web browser history, junk files, and invalid entries, and cleans it right away thereby fixing the error immediately.
Click here to download Restoro and resolve error code 707.
Mscomctl.ocx is a Microsoft library Windows Common Controls file. The Mscomctl.ocx error occurs when this file is either lost or gets corrupt.
The error is displayed on the screen when the user tries to run a program that is dependent on this file. It appears as:
“Component 'MSCOMCTL.OCX' or one of its dependencies not correctly registered: a file is missing or invalid”
Solution
Download Available to Completely Repair the Error Mscomctl.ocx
Error Causes
Installing and then uninstalling a large number of applications on the Windows operating system often corrupts or unregisters the Mscomctl.ocx library.
This message will continue to appear on the screen until you re-register the library file again on your system.
Further Information and Manual Repair
You don’t need to have the sound technical knowledge or call a professional to resolve Mscomctl.ocx error on your PC. The Mscomctl.ocx error is easy to repair and can be fixed in a couple of minutes.
Here are 2 solutions to repair the Mscomctl ocx error code on your system:
Cause: Error occurs because the Mscomctl ocx file is unregistered
Solution:
Go to the start menu and type ‘Mscomctl.oxc and press enter
Copy the ‘Mscomctl.ocx’ file and paste it in "C:WindowsSystem32" folder
Now click the start menu again and type ‘CMD’ in the search box. This will open your computer's command prompt.
Once this opens, type either of the following commands and then press enter. If you have a 64-bit operating system, then type: Regsvr32 "C:WindowsSysWOW64MSCOMCTL.OCX” and if you have 32-bit operating system, then you should type ‘Regsvr32 "C:WindowsSystem32MSCOMCTL.OCX"
By doing this, you will be able to register the Mscomctl.ocx file on your PC and then you will no longer receive Mscomctl.ocx error code.
Cause: Error code occurs because the Mscomctl.ocx file is missing
Solution:
First search for MScomctl ocx on your local drive to see if it is missing.
If the file is missing, then download the MScomctl.exe file from a reliable website.
Now extract the file to your C:WINDOWSsystem32 directory
Then click start and run.
Now type ‘REGSVR32 MSCOMCTL.OCX’ and press enter
Please note to implement any of the two solutions stated above, you will need administrator rights. If you have the administrator rights then only can you make the above registry changes.
Therefore to make the following changes you will have to access the PC using the Administrator account.
Simply follow the instructions given above to repair this error code problem right away!
In today's modern world many households have internet access, most of the connection nowadays is done via Wi-Fi or wireless but there is a high probability that you have also a few devices connected via cable. There are of course many disadvantages and advantages between cable connection and wireless connection.
The main advantages of a hard cable connection are of course faster speed and stability compared to Wi-Fi. But if we look into the cables themselves there is also a big difference between them. Not all cables are the same and quality as well as speed vary a lot between them. Choosing the right cable is essential in order to make a maximum of your internet and we have some great tips and explanations of what cables do so you can make the right choice and enjoy your full internet potential.
Not all cables are the same
Cheap cables and expensive ones are not the same no matter what everyone tells you. The old proverb you get what you pay is true and more expensive cables will be made from better materials and will have a higher transfer rate.
Quality network cables are separated into different categories with proper markings and when buying one you should always look for these markings on the cables themselves, do not buy cables that do not have markings since they will often provide lower transfer rates or will not be shielded from outside influences resulting in packet drops and instability in a network.
Categories and what they mean are:
Cat-5 with a maximum speed of 100Mbps, typically unshielded.
Cat-5e with a maximum speed of 1Gbps, available in both shielded and unshielded varieties.
Cat-6 with a maximum speed of 10Gbps for runs under 55 meters (around 180ft), available in both shielded and unshielded varieties.
Cat-6a with a maximum speed of 10Gbps, shielded.
Cat-7 uses a proprietary GG45 connector rather than the standard RJ-45 connector seen on other cables for speeds of 10Gbps, shielded.
Cat-8 with a maximum speed of 25Gbps (Cat-8.1) or 40Gbps (Cat-8.2) at a distance of around 30 meters (around 100ft), shielded.
Unless stated, these standards are typically rated at their quoted speeds for a run of around 100 meters (around 330 ft) and use a standard RJ-45 Ethernet connector. Each generation of cable is designed to be compatible with the generations that came before it, so it’s possible (for example) to use a Cat-6a cable with a router that only supports speeds of 1Gbps.
Shielded cables
When purchasing higher quality cable you might not be able to choose if you have shielding or not since some standards like Cat-6a, Cat-7, and Cat-8 are always shielded. But if you do not have the need for these and you are satisfied with Cat-5e for example you can choose.
Shielded cables are a little more expensive but they will provide you with a coating that will eliminate interference from outside waves making cables more reliable. Of course, if the cable will go through a room that does not have many radio waves or some other interferences then buying a shielded cable is a waste of money.
Cable platings
Usually, there are two types of connector platings on connectors, silver, and gold, and people usually think that gold is much better but there are major differences between silver and gold platings and truth to be told there is no better one, both are different and should be considered depending on your need.
Silver plating will provide you with faster speed since its conductivity is larger than gold, but gold is slower on the oxidation front so its life span is longer. On the other hand, if your cables are always connecting and disconnecting gold will be first to be scrubbed off from the surface since the gold coating is much thinner.
Overall if you would only connect cable once and have slower internet than cable capacity gold is the way to go, in another case if you would use the cable as always connecting and switching and your internet plan is the same as cable transfer capacity you might want to go with silver one.
Cable material quality
Network cables are made from copper, your standard conduction material but even here there are differences in quality and therefore the chance of pocket losses over it. More quality less loss and more stable connection and this will depend on the purity of copper that is used in the cable itself. More purity in copper, more stability, simple as that.
Conclusion
So as you can see, there are a lot of different things that will influence your pick of proper network cable but the overall best advice is to get one that will fit well into your needs and setup. pair it up with your router and your internet plan since just simply buying something that you can not use is really a waste of money.
You have probably heard a lot of good things about gaming mice, how they are better feeling, better in any way possible and it is all true, everything you heard is actually true, they are superior in any way to a regular mouse but with one big disadvantage, and that would be the price. While you can find a regular mouse for pocket change, a gaming mouse is in comparison very expensive even for entry-level ones.
In this article we will explore all advantages and compare it with the regular one so you can come up with your own conclusion about do you really need one for yourself or if you are fine with regular.
Price
As stated price is one factor that does not favor gaming mice. Regular mouse for a personal computer goes around 10 or 20 USD, while entry-level in gaming one will be 40 USD and can go up to 250 USD, this large gap in price is usually determining factor why people pick up regular one. If you are on a really tight budget go for the regular one, but if you can afford a gaming one get it without second thoughts.
Software
This is where you will see the big difference between mice. Regular ones when connected are recognized and the driver is automatically installed and you can use it, same goes with gaming ones but with one big difference, you have an option to install additional manufacturers' software specially tailored for your mouse. In the application, you will be able to access some features that are specific to the mouse model that you could not set in typical Windows mouse properties. Beside more options software can also have features like setting your profiles and saving them to be recalled when you need them on the fly.
Sensitivity of mouse
The sensitivity of the mouse is measured in dots per one inch or short DPI, this is directly shown on your screen by how fast your mouse can move, higher sensitivity means your mouse will move faster across the screen and lower means it will move slower. All gaming mice come with buttons and settings that will allow you to change DPI on the fly and you can choose precise DPI settings in the software.
The regular mouse comes with DPI around 800 and goes to 1200 typically and does not have usually the option to change this while gaming mice start at 400 and can go as high as 26000 with the option to change it. Some regular mice can have only 1 option of DPI, usually very cheap ones.
Polling rates in mice
Pooling rate is the measurement of how often your mouse reports where it is positioned on the computer. The higher the pooling rate, the more responsive your mouse will be and vice versa. It is measured in hertz (Hz) and regular mice have them around 125Hz that is enough if you are using a computer for office, internet, and mail work.
If you are working in design or gaming you will need more than 125Hz polling rate, luckily gaming mice come with a minimum of 500Hz as an entry point and some hi-end models are going as far as 8000Hz. This very high pooling rate will get some extra load on your CPU but the mouse itself will be maximally responsive and will respond even to the smallest moves.
Ergonomics
Regular mice are well just mice, they are typical shape and size, gaming mice are made with ergonomics in mind. How they are made for extensive daily use of several hours per day they are constructed in a way to offer a pleasant and pain-free experience.
If you work on a computer for long periods of time consider gaming an ergonomic mouse since it will take the strain from hands and place them in a more natural position.
Macro keys
Gaming mice most of the time come with more keys compared with regular ones and good thing is that via its software you can tie certain actions to these extra keys making work or gaming more pleasant and quicker.
Components and material quality
In order to make regular mice more affordable and cheaper materials and quality of components had to suffer. Gaming mice have millions of guaranteed clicks by companies that make them before they break and regular ones usually do not guarantee a single one. This is due of course quality of materials that have been used in constructing these devices.
In the long term, if you use a gaming mouse for typical daily tasks it will outlive your regular one and on the side offer you more pleasant and responsive use along the way.
A lot of users prefer to use Microsoft OneDrive when it comes down to cloud storage as it does not only come with the seal of approval from Microsoft but it’s also primarily good and better compared to other cloud storage services. However, that doesn’t mean that OneDrive isn’t without any issues. For one, you might encounter an issue where the OneDrive thumbnails do not show in File Explorer in Windows 10. If you are currently experiencing this problem, read on as this post will help you fix it.
As you know, you can add OneDrive to your Windows 10 computer and have all the files locally synchronize to the cloud and so on. This means that whatever is available in the cloud will be seen on your computer. It is smooth and definitely saves you a lot of time which is why a lot of users prefer to use it. So if you suddenly not see any thumbnails in OneDrive, then that would be a problem.
You are actually not the only one having this problem as there are other users who reported getting the same issue recently about the picture thumbnails that no longer show up in the OneDrive folders in the File Explorer. At the time of writing, it isn’t clear yet what the cause of the issue really is. Even so, there are still potential fixes you can check out to resolve it, and the sooner you do it, the better as this can be a major problem. To get started, refer to the instructions given below.
Option 1 – Try to disable Files on Demand
The first thing you can do to fix the problem is to disable the Files on Demand. This is what you have to do to get things under control.
First, right-click on the OneDrive icon located in the taskbar and go-to of OneDrive.
After that, click on More and Settings. This will open a new window where you have to click on the Settings tab and uncheck the “Files on Demand” service.
Once done, restart your computer and check if you can now see the thumbnails in the OneDrive folder. However, if it didn’t work, then proceed to the next given option below.
Option 2 – Try to change the icon view
The next thing you can do to fix the problem is to change the icon view. It is possible that the problem might have something to do with the size of the icons than anything else. So you have to change the icon view and to do that, follow these steps:
First, open Control Panel in Windows 10.
Next, in the search box, type “folder” and then click on the File Explorer Options.
From there, click on the View tab and uncheck the “Always show icons” option, and make sure that showing thumbnails is active.
Now go back to Control Panel and type “system” in the search box. This will open a new window where you have to select the “View advanced system settings” option.
Then under the Performance section, click on Settings and click on the option that allows you to show the thumbnails instead of icons.
If you encounter an error saying, “Boot Device Not Found” when you turn on your Windows 10 computer, then you’ve come to the right place as this post will guide you on how you can fix this problem. Apart from the error message, you will also see a message that states, “Please install an operating system on your hard disk, Hard Disk<xxx>”. You will then be asked to tap the F2 key to initiate the System Diagnostics.
If you install the Windows operating system, it becomes the boot device, and when your computer boots, the UEFI or the BIOS looks for the operating installed on your drive and continues the process. So when you encounter the “Boot Device Not Found” error, this means that the UEFI or the BIOS wasn’t able to locate the drive where it can boot.
There are several suggestions you can check out to resolve this error. You can try checking the connection with your boot drive or change the boot order. You can also fix the Boot Record from Recovery and see if the primary partition is active or not. But before you troubleshoot the problem, make sure that you have a bootable Windows USB drive ready since two of the options provided below will require you to boot into the Advanced Recovery mode. Once you have this covered, proceed to each one of the following options.
Option 1 – Try checking the connection with the boot drive
If you have a custom computer that comes with a cabinet, you might want to open it and remove any connected power supply, and then check the wires. As you know, drives are connected with the motherboard using a cable. So all you have to do is check if both ends are connected properly and make sure that the connection is not loose. You could also try to unplug the cable and plug it back in.
Option 2 – Try changing the boot order
You might also want to try changing the boot order of your computer. Each time a computer boots, the BIOS or the UEFI follows a boot order. It is the one that tells where to first look for the boot drive and if for some reason, a USB is connected to your computer and the first boot device found in the USB, then you have resolved the problem. All you have to do is to remove the USB device and boot or go into the BIOS and change the boot order yourself.
Option 3 – Try to rebuild the BCD files
The next thing you can do to resolve the issue is to Rebuild Boot Configuration Data or BCD files.
You can start by booting into the installation environment for Windows 10 from an installation media.
After that, click on Repair your computer and on the blue screen, select Troubleshoot and then select the Advanced options menu.
From there, select Command Prompt and once you open it, enter each one of the commands given below by sequence.
bootrec /FixMbr
bootrec /FixBoot
bootrec /ScanOS
bootrec /RebuildBcd
Once you’re done executing the commands given above, type “exit” to close the Command Prompt window and then restart your computer and see if it fixed the “Boot Device Not Found” error.
Option 4 – Try setting the System Partition to Active
Like the first given option, you also have to make sure that you have a bootable Windows 10 USB drive before you proceed to set the System Partition to Active. Once you have it covered, refer to these steps:
Boot your computer using the bootable Windows 10 USB drive.
Next, click Next when you get to the Welcome Screen.
Then click on Repair your computer located at the bottom left part of the window and select Troubleshoot > Advanced Options > Command Prompt.
After opening Command Prompt, type the following command and hit Enter to start the Diskpart utility. It is a command line-based utility just like Command Prompt but has a UAC prompt once you provoke it. So if you encounter a UAC prompt, just click on Yes to proceed.
diskpart
Now type the following command:
list disk
From there, select your primary disk by typing the following command:
select disk number
After that, list all the partitions on the selected disk by entering the following command:
list partition
The command you just entered will list all the partitions created on your PC including both types of partitions that are visible to a normal user in the File Explorer as well as the ones created by Windows 10 by default which helps it in storing the boot files and other important system files.
Now type the following command to select the partition that is usually around 100 MB in size:
select partition number
Finally, type the following command to mark the partition active:
active
Then type the “exit” command to exit the disk part utility.
Once it’s done, the primary drive should now be active and you should now be able to boot into your computer without the “Boot Device Not Found” error.
The Control Panel is one of the most important tools in Windows which allows users to control and change various settings. However, there are cases when it experiences some problems like when users aren’t able to open it. Recently, a lot of users complained about not being able to open the Control Panel. To be more specific, users were able to open it but only lasted for a second, and then it’s gone. This is not just some issue you can ignore as this will prevent you from accessing some major settings in your computer and you won’t be able to perform some important task without it.
According to security experts, this issue is most likely caused by a bug in the Windows Update. If you have installed an update recently, then it’s most likely the culprit. Aside from the Windows Update, there are also other things that can cause this issue. Some of them are the IDT audio panel and a control panel file that causes conflicting issues with the control panel that leads to this problem. Aside from these aforementioned cases, the Windows Error reporting services could also be one of the causes of this issue. As you can see, since there are a lot of possible causes for this problem, this post prepared a lot of options as well which you have to check out. Follow each one of them and see which one worked best for you.
Option 1 – Try updating your Windows 10 PC
If you haven’t updated your PC to the latest version of Windows 10, then you should. A lot of users found that the issue with the Control Panel was fixed right after they updated their Windows 10 PCs. This is probably because Microsoft has probably released a fix on one of the latest updates.
Option 2 – Try uninstalling the IDT Audio Panel
For some users, uninstalling the IDT Audio Panel from their PCs did the trick. You can also try doing the same thing to fix the vanishing Control Panel. According to these users. The IDT audio panel was the one that’s causing the issue. To uninstall the IDT audio panel, here’s what you have to do:
Tap the Win + R keys at the same time to open the Run dialog box.
Then type in “appwiz.cpl” in the field and tap Enter to open the “Uninstall or change a program” screen of the Control Panel.
From there, look for the IDT audio panel, select it and then select the Uninstall option and follow the next on-screen instructions that appear.
Note: If you are unable to locate the IDT audio panel or you simply can’t access the Uninstall or change program screen or you can’t keep Control Panel open for a long time, here’s what you can do:
Tap the Win + R keys at the same time once again to open the Run dialog box.
And in the field, type in “devmgmt.msc” and hit Enter to open the Device Manager.
After opening the Device Manager, look for the “Sound, video and game controllers” option and double-click on it.
From there, locate the IDT audio panel or “IDT High Definition CODEC” and select Uninstall and follow the next instructions that appear.
Option 3 – Try deleting or renaming IDTNC64.cpl
IDTNC64.cpl is a control file in the control panel. However, it might be the one that’s causing the problem as it could be conflicting with the control panel. As a result, the control panel crashes after a second or more. Many users have fixed the problem by either renaming or deleting this file – the safer option would be is renaming it.
Tap the Win + E keys to open File Explorer.
In the address bar located at the top, type in “C:\Windows\System32” and tap Enter to open this folder.
From there, look for the IDTNC64.cpl file, right-click on it and select the Rename option.
You can name the file anything you want but it’s better if you rename it to “oldcpl”.
After you rename the file, try opening the Control Panel again. It should work fine now.
Option 4 – Try to disable the Windows Error Reporting Service
As mentioned earlier, the Windows Error Reporting Service is also known to cause the issue so some users disable it and got the issue fixed.
Tap the Win + R keys.
In the field, type in “MSConfig” and hit Enter to open System Configuration.
After opening System Configuration, go to the Services tab and look for the Windows Error Reporting Service and uncheck its checkbox.
Click the Apply button and click OK. You should now see a date in the Disable Date column. Then check if the Control Panel is now working properly if not, restart your computer and check once more. That should fix the problem.
Option 5 – Try opening Control Panel via Run
This option is more of a workaround than a solution as it does not really fix the issue with the Control Panel but rather helps you in accessing the controls at the very least.
Tap the Win + R keys to open Run.
Type in “appwiz.cpl” in the field and tap Enter to open the Uninstall or change program screen of the Control Panel.
Next, copy and paste “Control panel all control panel items” on the address bar located at the top-mid part of your screen. You must not type the given address and simply copy and paste it. After that, you will see a list of control panel controls you can use.
The docking station was promised upon release of the Deck but it was pushed back and now the official statement is that it is delayed again.
Valve said in an announcement on June 1:
“Due to parts shortages and COVID closures at our manufacturing facilities, the official Steam Deck Docking Station is delayed. We’re working on improving the situation and will share more info when we have it.”
Valve
The docking station was presented at the same time as Deck itself and the whole idea was to make Steam Deck work like a laptop docking station. It has ports for USB devices, displays, and network connections that became functional the moment Deck is placed on it. Docking supports a mouse, keyboard, and external display making it an almost full PC station if needed.
Valve confirmed that its official dock station will not improve performance so while you wait for its release you can use another docking station with a USB Type-C connector.
When experiencing internet connection problems, most users run the built-in troubleshooter to fix the problem. However, you might come across another problem when instead of fixing the problem, the troubleshooter throws up an error message saying, “The Windows Wireless Service is not running on this computer”. After displaying this error message, the troubleshooter would exit.
Usually, this kind of error indicates that Windows has failed to initialize the wireless service so it can start searching for broadcast signals and try to connect to them. So in this post, we have prepared some workarounds that might help you resolve the issue.
Option 1 – Try to check the WLAN Status
You have to make sure that the wireless service is enabled in your computer before you proceed to the other troubleshooting options below as this error could occur for a simple reason as the wireless capability is turned off from your PC either on some built-in settings or physically. This is why you need to make sure that Wireless is enabled. And if it turns out that it is disabled, you need to turn it back on and then reconnect to the wireless network again. You should now be able to connect to the internet without any issue.
Option 2 – Try to check the WLAN AutoConfig Service
The WLAN AutoConfig service is the one that provides the logic and functionality required to discover, connect and configure wireless networks with your PC. Aside from that, it also contains the module that allows your PC to be discoverable to other systems on a network. Thus, you need to verify if the WLAN AutoConfig service is on or not.
Tap the Win + R keys to open the Run dialog box.
And in the field, type in “services.msc” and hit Enter to open Services.
After opening the Services window, look for the entry named “WLAN AutoConfig” and then right-click on it and select Properties from the context menu.
Next, click on the Start button to turn on the service and then set the startup type as “Automatic”.
Then try to connect to your Wireless network again and check if the issue has been resolved.
Option 3 – Try to reset the Network Configurations
Resetting the Network Configurations can also help you in fixing the Windows Wireless service as the network settings often get disrupted or corrupted in a variety of different cases every now and then. Note that this module will reset all the network settings stored on your computer.
Tap the Win + S keys to open Search and then type in “command prompt” in the field.
From the search results that appear, right-click on Command Prompt and select the “Run as administrator” option.
After opening Command Prompt, copy and paste the following command and hit Enter to execute it:
netsh winsock reset
The command given will reset the Winsock data. Once it is executed, restart your PC for the changes to take effect and then check if the internet connection is now fine.
Note: Do make sure that the WiFi drivers are up to date. To do that, follow these steps:
Tap the Win + R keys to launch Run.
Type in devmgmt.msc into the box and tap Enter or click OK to open the Device Manager.
After that, a list of device drivers will be displayed. If you see a red or yellow sign that shows up against the driver, right-click on the driver’s name and select “Update Driver Software” or “Uninstall”. And if you find any “Unknown device”, you need to update it as well.
Select the “Search automatically for updated driver software” option and then follow the instructions to complete the process.
Restart your PC.
Note: You also have the option to go directly to the website of your graphics card manufacturer and check if there’s a new update – if there is, download it.
Option 4 – Perform System Restore
Recently, a lot of issues have resurfaced after users installed the latest Windows update. So the wireless service issue might also be related to it. To fix the problem, you can perform System Restore to roll back your Windows to the last time when it was working just fine. It automatically creates backups in time whenever you install a new update or periodically. Follow the steps below to perform System Restore.
Tap the Win + S keys to open Search and then type in “restore” in the field and select the topmost result.
Once you’ve opened the restore settings, click on System Restore located at the beginning of the window under the System Protection tab.
After that, a wizard will appear that will guide you through all the steps needed to restore the system. You can choose either the recommended restore point or a different one.
After you select the restore point, click Next to proceed to the next on-screen instructions.
Then select the restore point where the Windows Update was installed on your computer. If you have more than one restore point, you can just select the latest restore point and check the functionality from there. If it doesn’t work, you can just try another restore point.
Another prompt will appear and will ask you to confirm your actions. Click OK and wait for the system to be restored. Once it’s done, check if the problem’s now fixed.
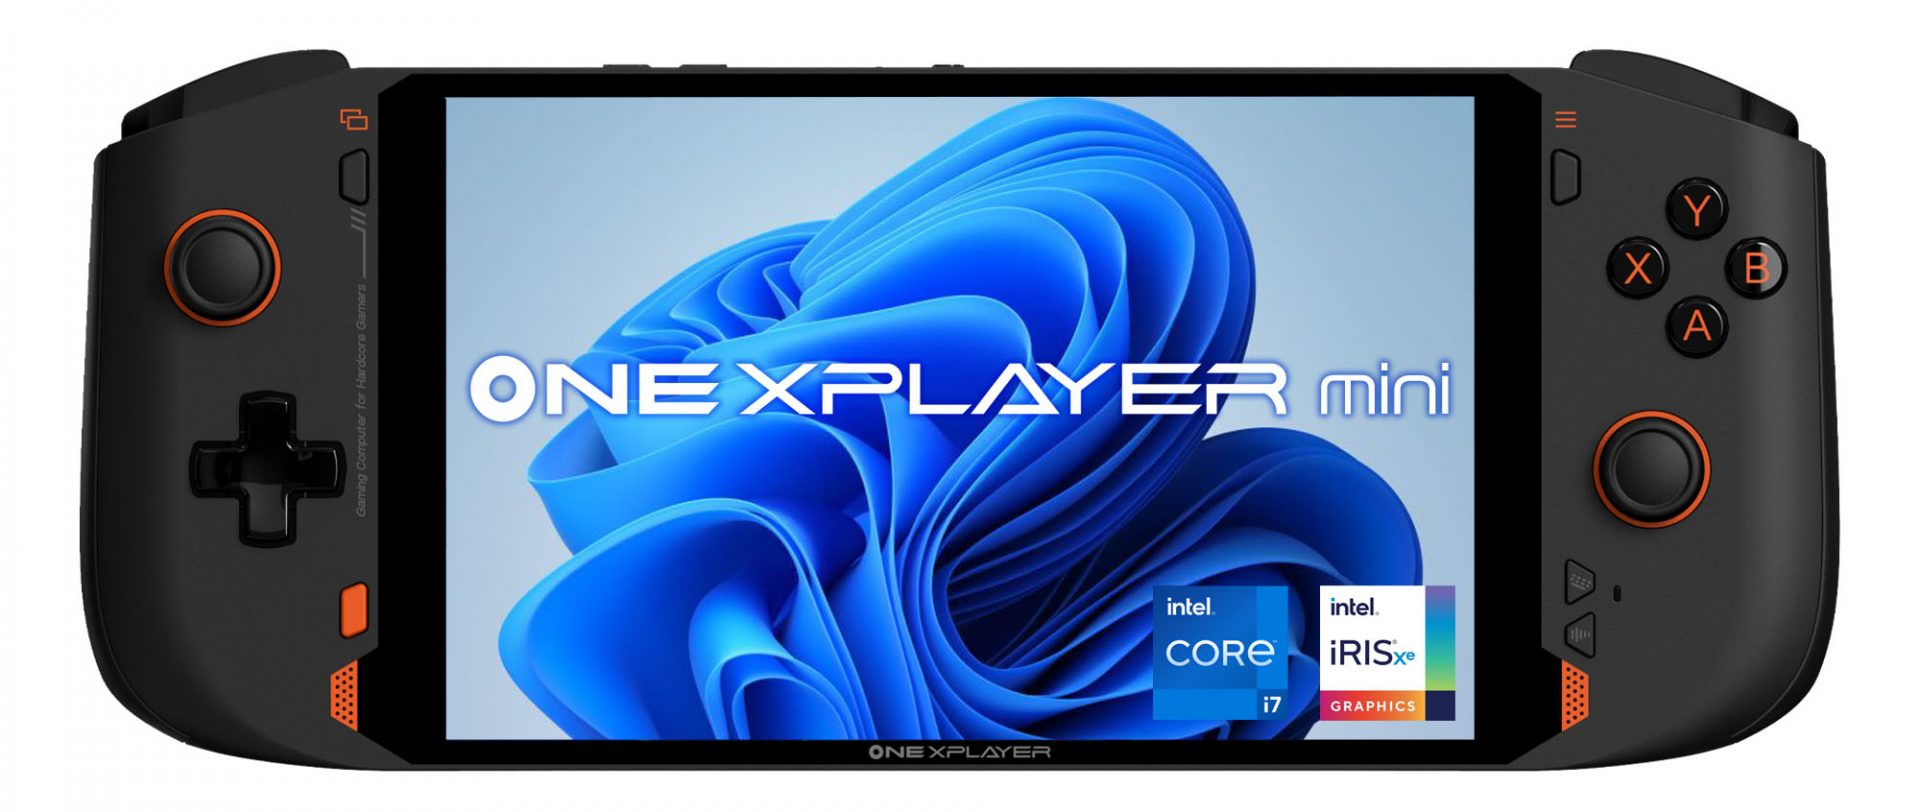
OneXPlayer is a direct competitor to Valve’s upcoming steam deck. This device is clearly inspired by Valve’s offering and it shows all over the place, from its looks to its purpose and aims to PC gamers as a handheld device.
Hardware under the hood
This device is packing a 7-inch 1080p display, 11th generation Intel Core i7-1195G7 CPU, stunning 16GB of RAM, 512GB SSD drive with the option to purchase 1TB or 2TB model. GPU of choice is Intel iris Xe Graphics that is in our opinion a bottleneck in the whole system and for more demanding games, we believe switching them to 720p would be a better option. Everything here is powered with a 10455 mAh lithium-ion battery.
OneXPlayer inputs and other stuff
Handheld is equipped with dual bumpers and dual linear triggers. The console comes with dual speakers on both sides of it. Inside the console, there is an aluminum heat sink with copper heat pipes and a fan in order to cool internal hardware. On the outside, we have two USB-C ports and one USB-A port for connections, and of course, a headphone jack for headphones. The console comes with Wi-Fi 6 and Bluetooth 5.0 for wireless connectivity.
Price
The base entry model will cost you a whopping $1.259, 1TB model $1.399 and 2TB one will go as far as $1,599. With this kind of price, I am not sure it can come up as a winner against Valve. Sure it is packing fully licensed Windows 11 that will for sure offer more options than Stem’s OS based on Linux but even with that advantage I do not think it justifies such a big price difference.
Conclusion
Of course, this kind of console or handheld PC will still find its customer base, many users will probably like it since it comes Windows ready out of the box. Sure, you can place Windows on Steam deck as well but you will need to know how, where everything is ready and you can run beside steam other launchers without issues like origin, uplay, gog, etc.
How this will be accepted by community time will tell but it is good to see that there is variety and competition in handheld PC space.
This post will guide you in fixing the (1058) ERROR_SERVICE_DISABLED error you can encounter when trying to launch various games. Usually, this error pops up during startup and prevents you from running the game. In fact, this error has become quite a headache for many users. Some of the games it affects are Smite, Paladins, Far Cry, and many more.
In most cases, this error is caused by missing or corrupted game files. It could also be caused by the anti-cheat utility you might have installed along with your games. Whichever the cause is, you can try to check out the possible fixes given below to resolve the (1058) ERROR_SERVICE_DISABLED error.
Option 1 – Verify the Integrity of the Game files
This is the first option you can try no matter what kind of issues you are having with Steam games.
Double click on the game’s icon located on your Desktop and then go to the Library tab in the Steam window.
From there, look for GTA V from the list of games installed in your library.
Next, right-click on its entry and select Properties.
After that, navigate to the Local Files tab and click the “Verify Integrity of Game Files” button.
Now, wait for the tool to complete checking the game’s integrity. You should see that some of the files may have been downloaded.
Reopen the game and see if it now runs properly without crashing.
Option 2 – Apply some tweaks in the Service’s startup settings
As pointed out earlier, the error can also occur due to the anti-cheat tools that were installed alongside the game. These tools are usually used by games to check if you are running something which might give you an unfair advantage over other players. These anti-cheat tools include but are not limited to BattlEye, EasyAntiCheat, and PunkBuster. The error might occur if the service’s startup settings are not correctly configured which is why you can apply some tweaks in order to resolve the problem.
Tap the Win + R keys to open the Run dialog box.
Next, type “services.msc” in the field and hit Enter or click OK to open Services.
From the list of Services, look for any of the services mentioned above such as BattlEye, EasyAntiCheat Service, or PunkBuster Service. Then right-click on the service and select Properties from the context menu.
After that, check if the service is started by checking the Service status. If it is started, click on the Stop button to stop the service and if it is already stopped, leave it as it is, at least for now.
Next, make sure that the Startup type menu in the Service’s properties is set to Automatic before you go on.
Now confirm any dialog boxes that may appear as you set the Startup type and then click on the Start button located in the middle before you exit Properties.
Note: You might get the following error message when you click on the Start button:
“Windows could not start the service on Local Computer. Error 1079: The account specified for this service differs from the account specified for other services running in the same process.”
If you got the error message above, then here’s how you can fix it:
Tap the Win + R keys to open the Run dialog box.
Next, type “services.msc” in the field and hit Enter or click OK to open Services.
From the list of Services, look for any of the services mentioned above such as BattlEye, EasyAntiCheat Service, or PunkBuster Service. Then right-click on the service and select Properties from the context menu.
Now go to the Log On tab and click on the “Browse…” button.
After that, type in your account’s name under the “Enter the object name to select” box and click on Check Names then wait for the name to be recognized.
Then click OK once you’re done and type in the password in the Password field when you are prompted to do so. This should resolve the issue.
Option 3 – Try reinstalling the Anti-cheat program
If the first two options did not work out, you can try reinstalling the anti-cheat program.
Open Steam from your Desktop or by searching for it in the Start menu.
After opening the Steam client, go to the Library tab in the Steam window and then look for the Rust entry from the list.
Next, right-click on the game’s icon in the library and select Properties.
Now go to the Local Files tab under Properties and click the Browse Local Files button.
From there, look for BattlEye, EasyAntiCheat, or PunkBuster folder depending on the game, and then double click on it to open the folder.
Then right-click on EasyAntiCheat_setup.exe or the BattlEye installed file in the folder or PunkBuster and select the Run as administrator option.
Exit the Steam client by clicking Steam > Exit from the menu located at the top.

 Error Causes


 Hardware under the hood