Error Code 0x8000222 - What is it?
Error Code 0x8000222 is an error that occurs during the installation process for Windows 10. It is also present in past versions of the software, going all the way back to Windows 7 and even affecting Windows software products, including Microsoft Word, PowerPoint, and other items in the Microsoft Office Suite.
Common symptoms include:
- Inability to complete the installation process for new versions of the operating system, Microsoft Office programs, or other Windows-based software
While there are several factors that can contribute to the appearance of Error Code 0x8000222 during the installation process, most of these factors can be addressed using a few high-level methods. These methods do require some advanced knowledge and computing skills, so if you are unable to complete the steps below successfully or do not have confidence in your ability to undertake these methods on your own, contact a qualified computer repair service that is familiar with the Windows 10 installation process.
Solution
 Error Causes
There are a few different issues that can cause Error Code 0x8000222 to arise during the installation process on your Windows operating system. The first is a corrupted file in your system library or dynamic link library, also called the DLL. The second is interference by your proxy, firewall, or antivirus software that inhibits the machine from being able to access the files that it needs to successfully complete the installation of your Windows operating system or software.
Further Information and Manual Repair
To address and resolve Error Code 0x8000222 on your Windows operating system, regardless of the version of the software that you are using, there are a few steps that you can take. Keep in mind that these steps do require some advanced skills and knowledge about your computer, so if you don’t believe that you can undertake these steps on your own or if the following methods do not fully resolve the issue on your device, talk to a qualified computer repair technician for assistance.
Here are the best ways to address Error Code 0x8000222 on your Windows machine:
Method One: Fix Your DLL Dependencies Registry
Before implementing this method, make sure that a proxy is not active on your computer. To check to see if there is an active proxy, simply press the Windows key together with the “R” key and type in the command “cmd”, then when the prompt opens up, type in the following command: “netsh winhttp import proxy source=ie”. From the box that follows, if you see a message saying that there has been an error writing in the proxy settings and that access has been denied, it means that you can turn off the proxy setting in your Internet Explorer and the error will go away on its own.
If you do not have an active proxy, it is time to check and see whether your DLL dependencies are properly set up. To do so, open up the command prompt again by pressing the Windows key and “R” key at the same time and typing in “cmd”. Once the command prompt is active, simply typing in “regsvr32 Officevalidator.dll”, then attempt to resume your installation once it has been complete.
In some cases, you may need to restart your computer before attempting the Windows installation process.
Method Two: Turn Off Firewalls and Antivirus Software Before Installing
If the above method did not successfully resolve the problem, you can go into your control panel and turn off any firewalls or antivirus programs that may be interfering with your ability to complete the Windows installation process. Depending on the programs that you use for your antivirus needs, you may need to restart your computer before you reattempt to do the installation process.
You should be able to turn your firewall and antivirus programs back on once the installation process has run through to completion.
In most cases, taking the steps above will fully resolve the appearance of Error Code 0x8000222 on your Windows 10 machine.
Method Three: Use An Automated Tool
If you wish to always have at your disposal a utility tool to fix these Windows 10 and other related issues when they do arise, download and install a powerful automated tool.


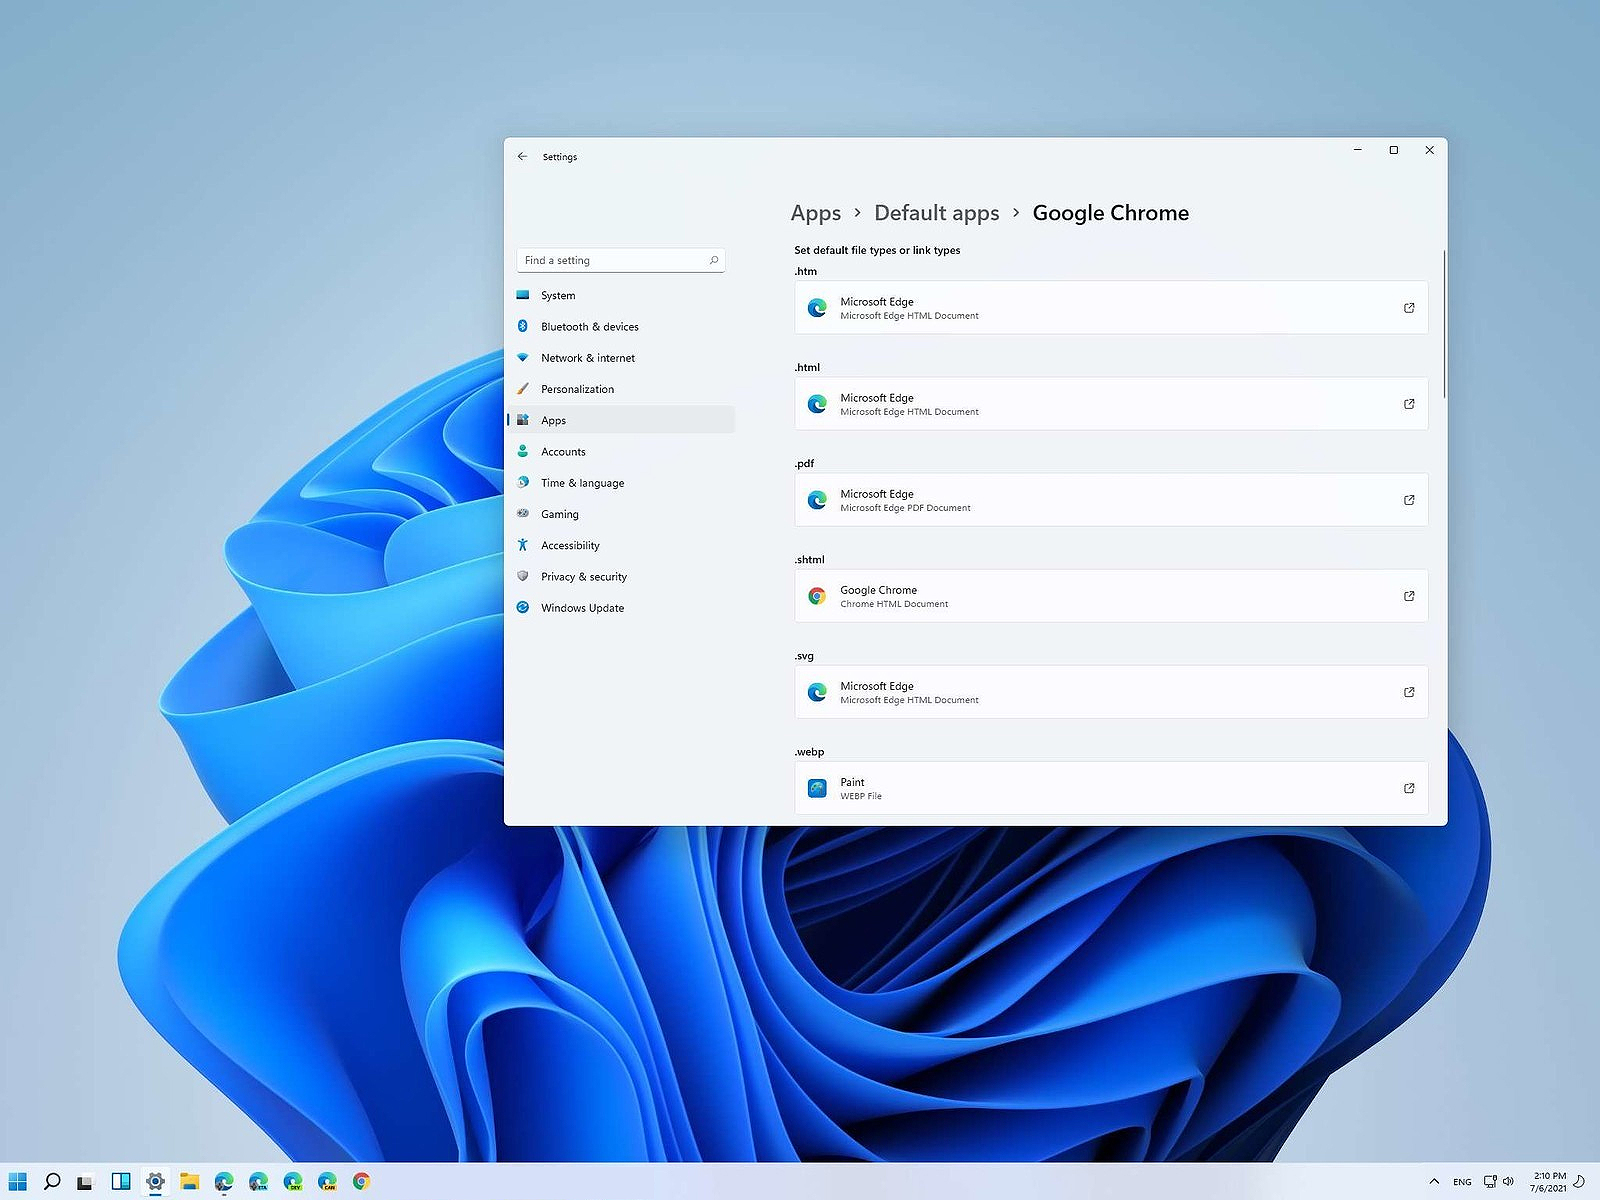 Same as in previous Windows versions, Windows 11 will also use certain applications as default ones for opening certain file types and file extensions. And yes, same as in previous versions it will come preconfigured for certain file types and associated applications like for example photos for pictures.
Of course, users usually have their own favorite applications for certain file types and much more prefer to open them inside the application of their choice instead of the default one.
We can change the default application like in previous Windows versions but this time there are two ways and overall more control of this process. Windows 11 has settings for choosing default file type applications and default file extension applications giving you more control of this process.
Same as in previous Windows versions, Windows 11 will also use certain applications as default ones for opening certain file types and file extensions. And yes, same as in previous versions it will come preconfigured for certain file types and associated applications like for example photos for pictures.
Of course, users usually have their own favorite applications for certain file types and much more prefer to open them inside the application of their choice instead of the default one.
We can change the default application like in previous Windows versions but this time there are two ways and overall more control of this process. Windows 11 has settings for choosing default file type applications and default file extension applications giving you more control of this process.
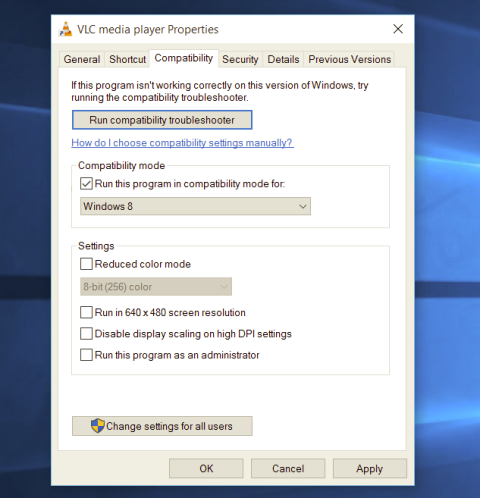 Most of the time running applications with typical settings is fine but from time to time we might have some applications that will require running with administrator privilege in order to work properly. In this case, it is very easy to do it, you just right-click and choose run as administrator.
Although a very easy solution, it can be quite annoying if running the app is on a daily basis or even more times per day. If this is the case then right-clicking and choosing to run as administrator can be a daunting task, sometimes you can even forget to run it like this in heat of work and some unforeseen consequences might occur.
Luckily there is an easy hack so you can open the chosen application each time as an administrator with a simple double click each time.
Most of the time running applications with typical settings is fine but from time to time we might have some applications that will require running with administrator privilege in order to work properly. In this case, it is very easy to do it, you just right-click and choose run as administrator.
Although a very easy solution, it can be quite annoying if running the app is on a daily basis or even more times per day. If this is the case then right-clicking and choosing to run as administrator can be a daunting task, sometimes you can even forget to run it like this in heat of work and some unforeseen consequences might occur.
Luckily there is an easy hack so you can open the chosen application each time as an administrator with a simple double click each time.