This post will provide you a couple of fixes you can try to resolve the Windows Update Error 0x8007001E in Windows 10. So if you are one of the users who encountered this particular Windows Update error then you’ve come to the right place. The error code in this error message also happens to be linked to some random BSOD crashes. The error code 0x8007001E is related to a storage space error or out-of-memory-type error. On the other hand, there are also instances when this error has nothing to do with your computer’s space or shortage of memory – it could be that there are broken software components or corrupted system files that are causing this error. Whichever your case is, refer to the options given below to fix the Windows Update Error 0x8007001E.
Option 1 – Run the Windows Update Troubleshooter
Running the built-in Windows Update troubleshooter is one of the things you can first check out as it is known to automatically resolve any Windows Update errors like Error 0x8007001E. To run it, go to Settings and then select Troubleshoot from the options. From there, click on Windows Update and then click the “Run the troubleshooter” button. After that, follow the next on-screen instructions and you should be good to go.
Option 2 – Free up some space on your drive
As mentioned, storage space error or out-of-memory-type error might have something to do with this problem so you need to free up some space on your drive. Make sure that you have enough space on your drive (15GB or so should do) and then restart your computer. After your computer reboots, ensure that all the major RAM hoggers are closed before you try to install the update or upgrade again.
Option 3 – Run the SFC scan
The SFC or System File Checker scan could detect and automatically repair damaged system files that could be causing the Windows Update Error 0x8007001E to appear. SFC is a built-in command utility that helps in restoring corrupted files as well as missing files. It replaces bad and corrupted system files with good system files. To run the SFC command, follow the steps given below.
- Tap Win + R to launch Run.
- Type in cmd in the field and tap Enter.
- After opening Command Prompt, type in sfc /scannow and hit Enter.
The command will start a system scan which will take a few whiles before it finishes. Once it’s done, you could get the following results:
- Windows Resource Protection did not find any integrity violations.
- Windows Resource Protection found corrupt files and successfully repaired them.
- Windows Resource Protection found corrupt files but was unable to fix some of them.
Option 4 – Run the DISM tool
Running the DISM Tool helps in repairing the Windows System Image as well as the Windows Component Store in Windows 10 which might be the reason behind the Windows Update error 0x8007001E. Using this built-in tool, you have various options such as the “/ScanHealth”, “/CheckHealth”, and “/RestoreHealth”.
- Open the Command Prompt as admin.
- Then type in this command: exe /Online /Cleanup-image /Restorehealth
- Do not close the window if the process takes a while as it will probably take a few minutes to finish.
- Once it’s done, restart your computer and then check if the issue is resolved or not on the next startup.
Option 5 – Perform a System Restore
You can also try to perform a System Restore as it can also help you fix the Windows Update error 0x8007001E. You can do this option either by booting into Safe Mode or in System Restore. If you are already in the Advanced Startup Options, just directly select System Restore and proceed with the next steps. And if you have just booted your PC into Safe Mode, refer to the steps below.
- Tap the Win + R keys to open the Run dialog box.
- After that, type in “sysdm.cpl” in the field and tap Enter.
- Next, go to the System Protection tab then click the System Restore button. This will open a new window where you have to select your preferred System Restore point.
- After that, follow the on-screen instructions to finish the process and then restart your computer and check if the problem is fixed or not.
Option 6 – Try running Microsoft’s online troubleshooter
You also have the option to run Microsoft’s online troubleshooter which could help you fix Windows Update errors including the Windows Update error 0x8007001E.

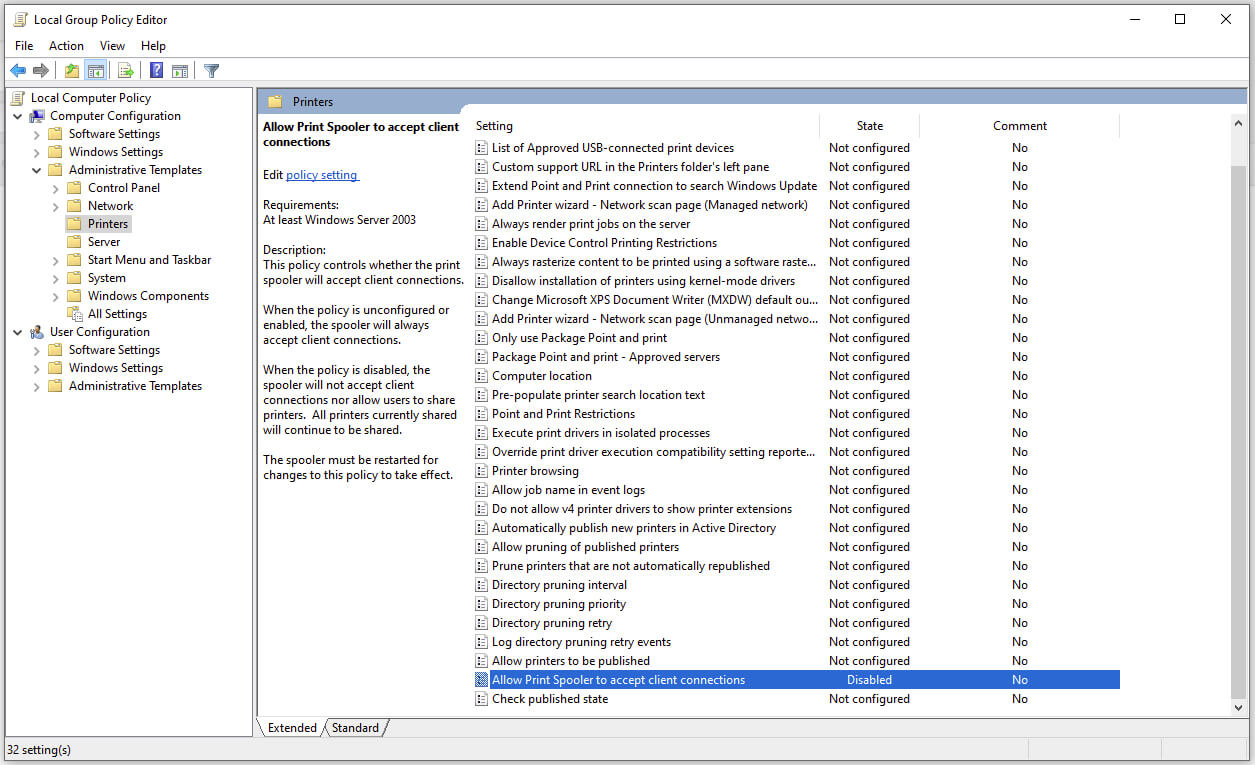 Microsoft is once again advising its customers to disable Windows print spooler after a new vulnerability that allows hackers to execute malicious code on machines has emerged. While a patch fixing the flaw will be released in due course, the most effective workaround currently on the table is to stop and disable the print spooler service entirely.

 Researchers have discovered 16 vulnerabilities in Bluetooth connections that could be exploited and make from minor to some serious damage to your device. The flaw can be used on chips manufactured by Intel, Qualcomm, and Texas Instruments while connecting to external devices like speakers, headphones, keyboards, mice, etc.