Logo

Enable or Disable the Reserved Storage

A lot of users complain about low storage space each time a Windows Feature update is released as well as to complain about not being able to download the updates, slow update experience, and many other complaints. The main issue is that many users do not have enough storage space available on their PCs. And now to make sure that none of the updates gets stuck because of low storage space, Microsoft presented the Reserved Storage feature which comes preinstalled with v1903 or those where v1903 was clean installed. This guide will be showing you how you can enable or disable the Reserved Storage in your Windows 10 computer.

As you know, the Windows Update process should have enough space so that it can download, extract and apply the update on the computer. Usually, the size of the Reserved Storage is around 7GB which gives enough space for the update, temporary files, system caches, apps, and many more. And according to Microsoft, the size of the Reserved Storage space will vary from time to time and will depend on how you use your computer.

Explanation

The Reserved Storage space feature is enabled by default on devices that come preinstalled with the May 2019 update or after performing a clean installation of the Windows 10 OS. To check if your computer has this feature, you need to go to Settings > System > Storage and from there click on the “Show more categories” link and then click on the “System & reserved” option. However, if you can’t find the Reserved Storage from the list, then it’s probably because your computer has limited space on the hard disk or it is not a fresh or new install. On the other hand, if you have this feature but have no use for it and want to disable it instead, then read on as this post will also show you how it’s done.

Solution

Keep in mind that when you disable the Reserved Storage feature, chances are, you might be unable to enable it back so you need to make sure that it’s really what you want to do before you disable it permanently. So if you really want to disable Reserved Storage, you can do so using the Registry Editor. Before you proceed, you have to create a System Restore point first and then carry out the following steps.

  • Tap the Win + R keys to launch the Run utility and type “Regedit” in the field and then tap Enter to open the Registry Editor.
  • Next, navigate to this registry path: ComputerHKEY_LOCAL_MACHINESOFTWAREMicrosoftWindowsCurrentVersionReserveManager
  • From there, double click on the DWORD named “ShippedWithReserves” and set its value to “1”.
  • Once you’re done, restart your computer and see if the Reserved Storage feature is now gone.

On the other hand, if you want to reduce the Reserved Storage space, there are two ways you can do that. First, you can go to Settings > Apps > Apps & features > Manage optional features and from there, uninstall the optional features that you do not use. The second one is you have to go to Settings > Time & Language > Language and then uninstall the languages and their add-on which you don’t use.

Note: The Reserved Storage feature is also used by system processes and apps to create temporary files and once the Reserved Storage space fills up, Windows 10 will delete them automatically. It is undeniable a useful feature so disabling it is not recommended but if you are running on low storage space and don’t have much choice, then you may disable it at your own risk.

Do You Need Help with Your Device?

Our Team of Experts May Help
Troubleshoot.Tech Experts are There for You!
Replace damaged files
Restore performance
Free disk space
Remove Malware
Protects WEB browser
Remove Viruses
Stop PC freezing
GET HELP
Troubleshoot.Tech experts work with all versions of Microsoft Windows including Windows 11, with Android, Mac, and more.

Share this article:

You might also like

Create BlueTooth shortcut on desktop
If you have a BlueTooth device on your computer, you know that each time you need to receive or transfer the file you need to find the icon in the system tray, right-click on it and choose the desired option. But there is a simpler solution, create a Bluetooth icon on the desktop so it is always easy to access. Open File Explorer by pressing ⊞ WINDOWS + E Go to C:\Windows\System32 Find fsquirt.exe Right-click on it and choose copy Go to the desktop and right-click, choose paste Rename the file to Bluetooth And, you are done!
Read More
Should you use the Faraday bag

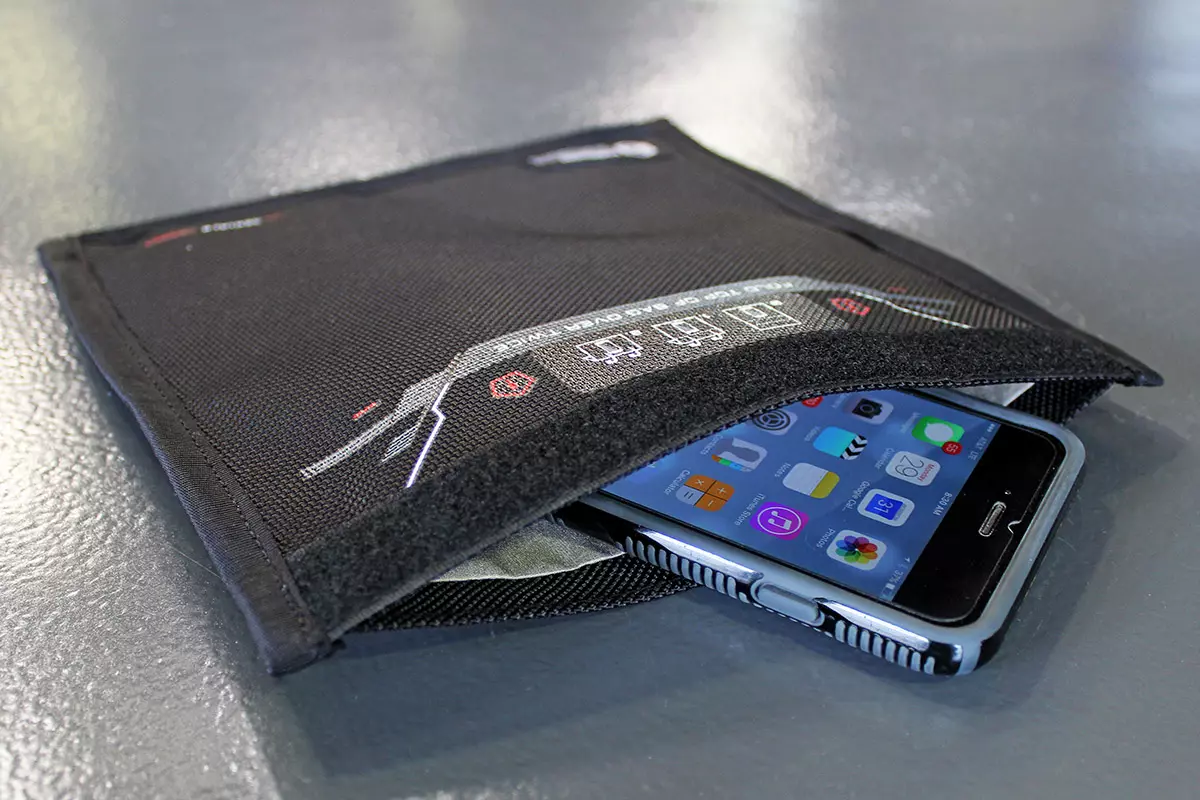
Faraday bag is a new take on security and privacy for people using a lot of electronic devices and credit cards. So what is exactly a Faraday bag?

faraday bag

Faraday bag explained

Faraday bag is designed in the same manner as the Faraday cage which was invented by Michael Faraday, who was an English scientist who contributed to the study of electromagnetism and electrochemistry. His main discoveries include the principles underlying electromagnetic induction, diamagnetism, and electrolysis.

The idea of the Faraday cage is that anything inside a cage that is made of specific grid size is completely isolated from outside current and magnetic fields since the cage itself will pick up everything upon itself. This means that for example, a human could be inside a cage that is struck by lightning and be perfectly safe and fine.

This idea led to the Faraday bag design, which takes this concept and places a wiring pattern inside clothing in order to isolate all magnetic fields from the outside so your devices and cards are completely cut off from any kind of influence and electromagnetic waves. If the pattern and quality of material for the bag are good, you have a fully safe placeholder for your stuff.

Advantages of Faraday bag

The main advantages, of course, are the privacy and safety of mobile phones and credit cards from outside influences and this is why this bag has been designed in the first place. If the bag is designed properly your phone would not be able to be hacked nor accessed from any outside source, GPS tracking will also be disabled and your phone location will not be visible. Credit cards will also be completely safe from any malicious attack via wi-fi signals.

Disadvantages of bag

Well, the disadvantage of using this bag is a very simple one, since your phone is isolated from outside influence that will also mean that you will not be able to take messages or calls on it while it is in the bag. Notifications from the internet would also be disabled so it is security vs usability deal.

Read More
Recent Items aren't visible under Taskbar
In this post, you will be guided on what to do if the Recent Items are no longer visible in the Taskbar icons in Windows 10. This can be quite inconvenient especially if you work simultaneously on many files and documents together and would require you to visit them regularly to incorporate changes. Thus, if you find that the Recent items are not visible in the Windows Taskbar, read on. In order for the Recent Items to appear on the taskbar icons in Windows 10 again, there are four potential fixes you can check out. You can try to show the recently opened items via Settings or clear the cache of the recent items. You could also make some changes in the Windows Registry or use the Group Policy Editor. But before you proceed with these potential fixes, it’s best if you create a System Restore Point first just in case something goes wrong after you made changes in the system. The System Restore Point allows you to undo these changes and bring back the previous state of your computer. Thus, you need to create one and then carefully follow the given options below.

Option 1 – Show the recently opened items via Settings

The first thing you can do to fix the problem is to show the recently opened items through the Settings app.
  • Open the Settings app and select Personalization.
  • From there, select the Start option and scroll down until you see the “Show recently opened items in Jump Lists on Start or the taskbar” option.
  • Make sure that its toggle button is turned on.

Option 2 – Try to clear the Recent Items cache

  • Tap the Win + E keys to open File Explorer.
  • Next, copy and paste this link on the address bar: %AppData%Microsoftwindowsrecentautomaticdestinations
  • Once you’re in the given location, you should see multiple files. Now select all these files and completely delete them.
Note: These files are automatically recreated when you interact with the system like performing tasks such as opening apps or accessing files.
  • After that, go to this next location: %AppData%Microsoftwindowsrecentcustomdestinations
  • Once there, delete all of its files and restart your computer. This should resolve the problem.

Option 3 – Try making changes via Registry Editor

The next thing you can do to fix the problem is to apply some tweaks in the Registry by following these steps:
  • Tap the Win + R keys to open the Run dialog box and type “Regedit” in the field and hit Enter to open the Registry Editor.
  • Next, navigate to this registry sub-path: HKEY_CURRENT_USERSoftwareMicrosoftWindowsCurrentVersion
  • From there, select the Policies Explorer folder located in the left pane.
  • Then move to the right pane and look for the “NoRecentDocsHistory” entry and right-click on it.
  • Now delete this entry.
Note: This entry is the one that stores the Group Policy setting for “Do not keep the history of recently opened documents. The Group Policy adds this entry to the registry with a value of 1 if you enable the “Do not keep the history of recently opened documents” policy. On the other hand, if you disable the policy by setting it to “Not configured” or deleting it, the Group Policy will delete the entry from the registry, and the system will act as though the value is 0 – for instance, it keeps the history of the recently opened files in your computer.

Option 4 – Try to use the Group Policy Editor

  • Tap the Win + R keys to open the Run utility and type “gpedit.msc” in the field and tap Enter to launch the Group Policy Editor.
  • Next, navigate to User Configuration > Administrative Templates > Start Menu and Taskbar.
  • Afterward, double click on the “Do not keep a history of recently opened documents” policy located on the right panel. This is the policy that lets you enable or disable recent items and frequent places.
  • Now to enable the recent items, as well as the frequent places, feature, click on the “Disabled” or the “Not Configured” option.
  • Once you’re done, close the Group Policy Editor and restart your PC.
Note: If you choose to enable this setting, the system and Windows programs will not create shortcuts to documents opened while the setting is in effect. Aside from that, they also stay but won’t display the existing document shortcuts and the system will empty the Recent Items menu on the Start menu and the Windows programs won’t also display shortcuts in the Start Menu. In addition, the Taskbar won’t also show the recently opened or frequently used folders, files, or websites.
Read More
Fix Error Code 0x80072EE7 in Windows
Installing or updating Google Chrome does not always go smoothly as there are times when it also encounters some errors like the error code 0x80072EE7. This kind of error in Chrome is most likely caused by the Windows Firewall or third-party Firewall (if you’re using one) that blocks the installation or update process. Aside from this known culprit, there are also other factors to consider such as corrupted or incompatible installation files or it could also be caused by some issue with your internet connection. If you face this kind of problem when installing or updating Chrome, you will see the following error message on your screen:
“An error occurred while checking for updates: Unable to connect to the Internet. If you use a firewall, please whitelist GoogleUpdate.exe. (error code 7: 0x80072EE7 — system level).”
Whatever the cause of this error is, you need to use the options prepared below to fix it.

Option 1 – Whitelist the “googleupdate.exe” in Firewall

If the issue is really caused by the Firewall, you need to whitelist the googleupdate.exe program to fix the error. To do that, follow these steps:
  • Tap the Win + E keys to open the File Explorer.
  • Next, copy and paste the following location in the address bar and tap Enter to go there.
Control Panel/All Control Panel Items/Windows Defender Firewall/Allowed apps
  • After that, click on the Change Settings button, and from the given list, look for Google Chrome.
  • Now check both Private and Public connections for it and then click on OK and see if it fixes the error or not.

Option 2 – Disable the proxy server for LAN

If the problem has something to do with your internet connection, then you can try disabling the proxy server for LAN and see if that helps.
  • Tap the Win + R keys to open the Run dialog box.
  • Then type “inetcpl.cpl” in the field and hit Enter to pull up the Internet Properties.
  • After that, go to the Connections tab and select the LAN settings.
  • From there. Uncheck the “Use a Proxy Server” option for your LAN and then make sure that the “Automatically detect settings” option is checked.
  • Now click the OK and the Apply buttons.
  • Restart your PC.
Note: If you are using a third-party proxy service, you have to disable it.

Option 3 – Check your VPN

If you are using a VPN application, then this option should apply to you, if not, skip this option and proceed to the next one. There are times when VPN software causes some issues like this error. If that’s the case, you can try to disable your VPN temporarily and see if the error is resolved or not and if turns out that your VPN is the culprit, you have to uninstall it and install a new one or its latest version. To uninstall it, follow the steps below.
  • Tap the Win + R keys to open the Run dialog box
  • Then type “appwiz.cpl” in the field and hit Enter to open the Programs and Features in Control Panel.
  • From there, look for the VPN service you are using, select it and then click on Uninstall to remove it.
  • After that, restart your computer and try to install the latest version of the program again. It should work now. If not, proceed to the next available option below.

Option 4 – Try to run the Chrome Cleanup tool

You might want to run Google Chrome’s built-in Malware Scanner & Cleanup tool as it could also help in getting rid of any unwanted ads, pop-ups, and even malware, as well as unusual startup pages, toolbars, and anything else that might overtake the network and could affect the performance of the browser.

Option 5 – Reset Google Chrome

Before you proceed, make sure that the Chrome browser is not running anywhere in the background via Task Manager. Once you’ve made sure that it’s no longer running, refer to these steps:
  • Tap the Win + R keys to open the Run dialog box.
  • Then type “%USERPROFILE%AppDataLocalGoogleChromeUser Data” in the field and tap Enter to open this location.
  • From there, look for the Default folder and then tap the Shift + Delete button and if a confirmation prompt appears, click on Yes.
  • After deleting the Default folder, open Google Chrome and click on the three vertical dots icon located in the top-right corner to open the menu.
  • Next, click on Settings and scroll down and then click on Advanced to open the Advanced Settings.
  • Then scroll down until you see the “Reset and clean up” section and click the “Restore Settings to their original defaults” option.
  • After that, you will see a confirmation box and from there, click on the Reset settings button to reset your Google Chrome browser.
Read More
How to remove weather widget from W11
The latest Windows 11 update has brought with it not so popular widget from Windows 10, the weather widget that will reside into the taskbar and constantly show stuff like temperature, weather conditions, etc. The weather widget is not a bad thing but most users found it a little annoying and turned it off in Windows 10. If you wonder how can you do the same but this time inside Windows 11 please keep reading. weather widgetThe first step is to right-click  anywhere on the taskbar (in empty space) and choose Taskbar settings Once the taskbar settings are opened, find Widgets and click on the switch on the far right to turn it off, immediately no more information will be shown on the taskbar and it will be free again. And that is all there is to it.
Read More
How to remove PC Fix Speed from your Windows PC

PC Fix Speed is a Potentially Unwanted Program designed to improve the speed of your computer. This program usually comes bundled with other software, and when installs automatically scan your PC and displays exaggerated messages on the status of the PC’s performance, to get users to pay for the PRO version of the software. It also adds registry entities that allow it to run each time the computer is started, and the application itself will constantly keep reminding users that they have errors by putting the application windows on top.

From the Author: The Service is provided by PCRx through Crawler, LLC. Clean and repair your PC’s registry, optimize PC performance and free up disk and memory space. With everything you do on your PC, including adding on devices, a new entry is created in your Windows® registry, and seldom are any removed after they’re no longer needed. As a result, your PC gets bogged down with unnecessary entries, slowing your PC speed, the start-up, and your Internet browser. PC Fix Speed cleans up registry entries and puts your PC back on track for optimal performance. PC Fix Speed is an essential application that should be a part of every computer. PC Fix Speed especially helps computers that are unusually slow, freeze up often or show error messages, by cleaning the system registry and improving overall performance.

About Potentially Unwanted Applications

If you have ever downloaded software from the internet (shareware, freeware, etc,), it’s quite possible you’ve unconsciously installed unwanted programs on your computer system. A Potentially Unwanted Program, often known as PUP, in short, is software that contains adware, installs toolbars, or has other hidden goals. These kinds of programs are usually bundled up with free applications that you download from the internet or will also be bundled inside the custom installers on many download sites. It’s clear by its name – unwanted programs – but did not actually constitute “malware” in the traditional sense. An important difference between malware and PUP is distribution. Malware is normally dropped through vulnerability exploitation while PUP gets installed with the consent of the user, who intentionally or unwittingly approves the PUP installation on their computer. PUP developers can argue their programs aren’t malicious software however, it can nevertheless be unsafe software and put your PC at risk much the same way malware does.

Exactly how do PUPs look like?

Unwanted programs come in various forms. More often, they can be found in adware bundlers which are known to utilize aggressive and misleading advertising. Most bundlers install many adware programs from a number of vendors, each of which possesses its own EULA policy. Safebytes Anti-malware entirely eliminates this threat and safeguards your computer against unwanted programs or adware infection. Several PUPs also show up as toolbars or add-ons, mounted on your preferred web browser. These toolbars change your homepage and your search engine in the installed browser, track your web activities, control your search results with redirects and sponsored links, and eventually slow down your browser and diminish your web browsing experience. Potentially Unwanted Programs occasionally act very much like viruses or spyware. Some PUPs carry keyloggers, dialers, and other software to collect your personal details that can cause identity theft. Because of this unwanted program, your application may freeze, your security protections can get disabled which could leave your computer susceptible, your system may get ruined, and the list goes on and on.

Some tips on protecting yourself from PUPs

• Read meticulously before you install anything. Don’t click accept until you have read the fine print. There could be a clause about PUPs. • Use ONLY custom or manual install method – and don’t blindly click Next, Next, Next. • Use good anti-malware software. Try Safebytes Anti-malware which can spot PUPs and handle them as malware by flagging them for removal. • Be alert if you install freeware, open-source programs, or shareware. Disable or eliminate toolbars and browser extensions you don’t really need. • Only download applications from the original providers’ websites. Avoid download portals since they use their very own download manager to pack additional programs together with the initial download. Remember the fact that although PUPs could cause damage and hinder the proper function of the computer, they can’t get into your system without your consent, so be watchful not to provide them with it.

What To Do If You Cannot Install Any Antivirus?

Malware could cause a great deal of damage to your PC. Some malware sits in between your PC and your net connection and blocks some or all internet sites that you would like to check out. It could also prevent you from adding anything to your PC, especially the antivirus program. So what should you do when malware prevents you from downloading or installing Anti-Malware? Although this kind of issue will be tougher to get around, there are some steps you can take.

Start your computer in Safe Mode

If the malware is set to load at Windows start-up, then booting in Safe Mode should prevent it. Only the bare minimum required applications and services are loaded whenever you start your laptop or computer into Safe Mode. Listed below are the steps you should follow to boot into the Safe Mode of your Windows XP, Vista, or 7 computers (check out the Microsoft website for instructions on Windows 8 and 10 PCs). 1) At power-on/startup, tap the F8 key in 1-second intervals. This will bring up the Advanced Boot Options menu. 2) Make use of the arrow keys to select Safe Mode with Networking and press ENTER. 3) When you are into this mode, you will have an internet connection again. Now, use your web browser to download and install an anti-malware program. 4) After the application is installed, allow the diagnostic scan run to eliminate trojans and other threats automatically.

Switch to an alternate web browser

Web-based viruses could be environment-specific, aiming for a particular internet browser or attacking specific versions of the web browser. The ideal way to avoid this problem is to select an internet browser that is well known for its security features. Firefox contains built-in Malware and Phishing Protection to keep you safe online.

Make a bootable USB anti-virus drive

Here’s yet another solution which is using a portable USB anti-malware software package that can check your computer for malware without needing installation. To run anti-virus from a USB drive, follow these simple steps: 1) Make use of another virus-free PC to download Safebytes Anti-Malware. 2) Plug in the pen drive to a USB port on the uninfected computer. 3) Double-click the executable file to run the installation wizard. 4) Choose a USB drive as the location when the wizard asks you where you want to install the application. Follow the instructions on the computer screen to finish off the installation process. 5) Now, insert the USB drive into the corrupted PC. 6) Double-click the EXE file to run the Safebytes tool right from the thumb drive. 7) Click the “Scan” button to run a full system scan and remove viruses automatically.

SafeBytes AntiMalware Overview

Want to download the best anti-malware software program for your system? There are various applications available that come in free and paid versions for Microsoft Windows systems. A few are good ones, some are decent, while some are merely bogus anti-malware programs that can damage your personal computer themselves! When searching for an anti-malware tool, select one which gives dependable, efficient, and complete protection against all known viruses and malware. On the list of highly recommended software is SafeBytes Anti-Malware. SafeBytes carries a superb track record of excellent service, and customers appear to be happy with it. SafeBytes can be described as a powerful, real-time antivirus application that is created to assist the typical computer end user in protecting their PC from malicious threats. This tool can easily detect, remove, and protect your computer from the most advanced malware intrusions including adware, spyware, trojan horses, ransomware, worms, PUPs, parasites, and other potentially harmful software programs.

There are plenty of amazing features you will get with this particular security product. Here are some of the features you will like in SafeBytes.

Active Protection: SafeBytes provides a totally hands-free active protection that is set to observe, block, and remove all computer threats at its first encounter. This utility will always keep track of your PC for suspicious activity and updates itself continuously to keep abreast of the constantly changing threat landscape. Anti-Malware Protection: This deep-cleaning anti-malware software goes much deeper than most antivirus tools to clean your computer system. Its critically acclaimed virus engine finds and disables hard-to-remove malware that hides deep inside your PC. Web protection: Through its unique safety rating, SafeBytes informs you whether a site is safe or not to access it. This will make sure that you’re always certain of your online safety when browsing the web. Low Memory/CPU Usage: SafeBytes is a lightweight and easy-of-use anti-virus and antimalware solution. As it uses very little computer resources, this application leaves the computer’s power exactly where it belongs: with you. 24/7 Premium Support: SafeBytes provides 24/7 technical support, automatic maintenance, and updates for the best user experience. SafeBytes has developed a wonderful anti-malware solution that can help you conquer the latest malware threats and virus attacks. You can rest assured that your computer system will be protected in real-time as soon as you put this software to use. So if you need sophisticated forms of protection features and threat detections, purchasing SafeBytes Anti-Malware will be well worth the dollars!

Technical Details and Manual Removal (Advanced Users)

If you do not want to use malware removal software and prefer to get rid of PC Fix Speed manually, you might do so by going to the Add/Remove Programs menu in the control panel and removing the offending software; in cases of web browser plug-ins, you could un-install it by going to the browser’s Add-on/Extension manager. You will definitely also want to reset your browser. Finally, examine your hard drive for all of the following and clean your computer registry manually to remove leftover application entries after uninstalls. However, this is a tough task and only computer professionals can perform it safely. Moreover, some malware keeps replicating which makes it tough to get rid of. It is advised that you carry out the removal procedure in Windows Safe Mode.
Folders: C:\Program files\PC Fix Speed\ C:\Documents and Settings\All Users\Start menu\Programs\PC Fix Speed\ C:\Program filesx7Help\ Registry: HKLM\SOFTWARE\PCFixSpeed HKCU\Software\PCFixSpeed HKLM\SOFTWARE\Microsoft\Windows\CurrentVersion\Run\PCFixSpeed
Read More
Fix fatal error C0000034 applying update
Fatal error C0000034 happens during the installation of the Windows update and if you are one of the unlucky users who sadly run into this, keep reading as we will provide solutions to this error and how to get around it. Start from point 1 to the bottom and hopefully you will have your PC back into working order in no time.
  1. Run Windows Update troubleshooter

    Usually, a built-in Windows troubleshooter can solve issues painlessly and fast, my advice is to try this as the first option, it is a simple and clean solution worth trying and in 90% it solves the issue all by itself.
  2. Do a clean boot

    Using task manager, remove all nonessential applications and services from starting up, reboot your computer, and once it is cleanly booted try re-running the update process again, if the issue was running the application this time everything will work since the problematic application is not running.
  3. Reset Windows update components to the default

    This solution requires you to use the Reset Windows Update Agent Tool to reset Windows Update components to default or use this PowerShell script to reset Windows Update Client. You can also manually reset each Windows Update component to default and then re-run the update.
  4. Disable firewall and antivirus

    Altho not likely it is still a possibility that some firewalls and antivirus can detect windows updates as malicious software and cut them off. If everything else failed, disable the firewall and your PC protection and when it is fully disabled try updating.
  5. Do automatic startup repair

    This should be the last thing to do but if everything else failed, do it. Perform Windows 10 Startup Repair. Once the startup repair completes successfully, you can re-run the update. The update should install without errors.
Read More
Fix 0xA00F4244 or 0x200F4244 error in Windows
Error 0xA00F4244 or 0x200F4244 is when Windows can not detect the WEB camera in your system and it is usually accompanied by the message: We can’t find or start your camera. There could be several reasons for this error and in this guide, we will cover all of them in order to help you to get back on track and start using your WEB camera which is perhaps now more required than ever in this world we live in.
  1. Check privacy settings

    With the latest Microsoft Windows updates come the latest issues and it is not strange that privacy settings can become reset or changed when an update is applied. This is a quick fix to this issue and can be the sole reason why you get this error, go to Windows settings, then to privacy and check to see if the WEB camera is turned OFF, if this is the case turn it back ON and make sure that option Allow apps to access your camera is also set to ON.
  2. Check if the camera is enabled

    Sometimes it is by mistake, sometimes by an update but the web camera could be disabled in the device manager of Windows. Right-click on the Windows Start button and click on device manager to open it up, find and expand the cameras category. Right-click on your camera, if it is disabled, you will have the option to enable the camera, if it is enabled and Windows is detecting that it is working fine you will have the option to disable it.
  3. Check antivirus settings

    Antivirus and firewall applications are in today's world and life-essential piece of software but they can sometimes create more harm than good, from stopping windows updates to killing important services of applications and preventing internet access being just some examples of their paranoid behavior. Try disabling or turning your protection software OFF and see if your WEB camera will miraculously come back to life. If this is the case, somewhere in the settings of software there is an option that controls this aspect, try to locate it and set it in that way so you are able to use your camera.
  4. Reinstall camera driver

    If the previous three solutions failed to produce a satisfactory solution then reinstalling the camera driver might fix the problem. Go to your manufacturer's camera website and download the latest driver for your camera. Go to the device manager and uninstall the driver for the camera, then apply the latest driver and reboot the system.
  5. Check connections and cable

    Sometimes an issue is not due to software nature, sometimes it is hardware. Try checking connections and plug the camera in another USB port, twist and turn the cable a little to see is issue cable-related.
  6. Check to see if the application supports your camera

    If Windows has detected the camera and is not reporting any issues with it check your application to see if it can detect your camera and that it supports it fully. Sometimes newer applications tend to support only newer camera models. Try to use the camera in other software as well to see if the problem is with the application you are using.
  7. Try camera on another computer

    If everything else fails, try the camera on another computer to see if it will work there. If the camera is not working there as well it is probably malfunctioned and broken for good. If it does work there, try to find out what is different in that computer in comparison to yours, maybe it is some service running in the background, certain application configuration, Windows version itself, USB port version, or something else.
Read More
BubbleDock Complete Removal Tutorial

BubbleDock is a software developed by Nosibay. It installs a customizable dock at the top of your screen.

It adds registry entities to allow it to start automatically each time your system is rebooted, as well as installing an update checker that will automatically update the software when an update is available. The software also adds various scheduled tasks to start the application at different times, this ensures that once the application is closed, it is re-launched at a later time, making it very hard to keep the software closed permanently.

While the software is running, it will generate ad links in your browser, display sponsored ads, and collect personal information and deliver it back to it’s ad network. While using this software you may see additional ads, banners, links, pop-up ads, and various other sponsored content while browsing the internet.

About Potentially Unwanted Applications

Have you ever found out an unwanted program running on your computer system and wondered exactly how the heck it got there? A PUA / PUP (potentially unwanted application / potentially unwanted program) is actually a piece of software that comes bundled with freeware and you consent to install it on your computer. These are programs you certainly don’t want on your computer since it does not provide any beneficial service. From a technical standpoint, a PUP isn’t “true” malware. An interesting difference between PUP and malware is distribution. Malware is commonly dropped via vulnerability exploitation whereas PUP gets installed with the consent of the user, who purposefully or unwittingly authorizes the PUP installation on their PC. Although a PUP is not malware by definition, it can still be harmful software and put your computer at risk exactly the same way a computer virus does.

Exactly how do PUPs look like?

PUPs come in many forms; however, most of them are adware, which usually displays irritating adverts and advertising banners on internet pages that you’re surfing. PUPs which come as browser add-ons and toolbars are widely recognizable. These toolbars alter your homepage and your default search engine in the installed web browser, track your internet activities, modify your search results with re-directs and sponsored hyperlinks, and eventually slow down your internet browser and diminish your web browsing experience. Potentially Unwanted Programs occasionally act quite much like viruses or spyware. They will carry dialers, keyloggers, as well as other software built right into them that may monitor you or deliver your sensitive details to 3rd parties. Even if the PUPs are not basically malicious, these applications still do practically nothing good on your personal computer – they’ll take precious system resources, slow your PC, weaken your device’s security, and make your PC more susceptible to viruses.

Preventing PUPs

• Study the fine print to be sure the end-user license agreement (EULA) you are accepting is only for the program you actually intend to download. • Never accept standard, express, default, or other installation settings which are recommended. Always opt for custom installation. • Use a good anti-malware program. Try Safebytes Anti-Malware which will spot PUPs and handle them as malware by flagging them for deletion. • Avoid shareware or freeware wherever possible. Disable or get rid of toolbars and browser extensions you don’t actually need. • Don’t download software from popups, online advertising, file sharing sites, as well as other unreliable sources; look out for any pre-set, unwanted features when downloading the program. Avoid heading to blogs and websites that promote pirated programs.

How To Install Safebytes Anti-Malware On An Infected Computer

Practically all malware is inherently unsafe, but certain kinds of malicious software do a lot more damage to your computer than others. Certain malware goes to great lengths to prevent you from downloading or installing anything on your personal computer, particularly antivirus applications. So what should you do if malicious software keeps you from downloading or installing Anti-Malware? There are some solutions you could try to get around with this particular obstacle.

Install in Safe Mode with Networking

Safe Mode is a unique, simplified version of Microsoft Windows where only the bare minimum services are loaded to stop malware and other troublesome applications from loading. In the event, the malicious software is set to load immediately when the PC starts, switching to this mode can prevent it from doing so. In order to enter into Safe Mode or Safe Mode with Networking, press the F8 key while the PC is starting up or run MSCONFIG and look for the “Safe Boot” options under the “Boot” tab. After you restart the PC into Safe Mode with Networking, you may download, install, as well as update the anti-malware program from there. Now, you can run the anti-virus scan to remove computer viruses and malware without interference from another application.

Switch to some other internet browser

Web-based malware could be environment-specific, aiming for a particular internet browser or attacking specific versions of the web browser. If you’re not able to download the security software program using Internet Explorer, this means the virus may be targeting IE’s vulnerabilities. Here, you must switch over to a different browser like Firefox or Chrome to download Safebytes Anti-malware software.

Create a portable USB antivirus for removing viruses

Here’s yet another solution which is creating a portable USB antivirus software that can scan your computer for malware without needing installation. Abide by these steps to run the anti-virus on the affected computer. 1) Use another virus-free computer to download Safebytes Anti-Malware. 2) Plug the Flash drive into the clean computer. 3) Double-click the Setup icon of the antivirus software to run the Installation Wizard. 4) When asked, select the location of the USB drive as the place where you would like to put the software files. Follow the activation instructions. 5) Now, transfer the USB drive to the infected PC. 6) Double-click the antivirus program EXE file on the flash drive. 7) Hit the “Scan Now” button to start the virus scan.

Benefits and Features of SafeBytes Security Suite

To protect your computer from many different internet-based threats, it’s very important to install an anti-malware application on your laptop. However, with so many antimalware companies in the marketplace, these days it’s tough to decide which one you should obtain for your PC. A few of them are excellent, some are ok types, and some will destroy your computer themselves! You should pick one that is efficient, practical, and has a strong reputation for its malware source protection. While considering the highly regarded software programs, Safebytes Anti-Malware is undoubtedly the highly recommended one. SafeBytes anti-malware is a powerful, highly effective protection application intended to help end-users of all levels of computer literacy in identifying and eliminating harmful threats out of their personal computer. After you have installed this software program, SafeBytes' superior protection system will ensure that no viruses or malicious software can seep through your personal computer. There are numerous great features you’ll get with this security product. Let’s check out a few of them below: Live Protection: Malware programs attempting to get into the computer are identified and stopped as and when detected by the SafeBytes real-time protection shields. They’re very efficient in screening and getting rid of different threats since they’re constantly improved with the latest updates and safety measures. Robust Anti-malware Protection: Built upon a greatly acclaimed anti-virus engine, this malware removal tool is able to identify and get rid of many stubborn malware threats like browser hijackers, potentially unwanted programs, and ransomware that other common antivirus applications will miss. Internet Security: SafeBytes gives an instant safety rating about the web pages you’re about to visit, automatically blocking dangerous sites and ensuring that you are certain of your safety while browsing the net. “Fast Scan” Abilities: Safebytes AntiMalware, with its enhanced scanning engine, provides ultra-fast scanning that will promptly target any active online threat. Lightweight: This program is not “heavy” on the computer’s resources, so you will not find any performance problems when SafeBytes is operating in the background. 24/7 Guidance: Expert technicians are at your disposal 24/7! They will quickly fix any technical issues you may be experiencing with your security software.

Technical Details and Manual Removal (Advanced Users)

If you wish to manually remove BubbleDock without the use of an automated tool, it may be possible to do so by removing the program from the Windows Add/Remove Programs menu, or in cases of browser extensions, going to the browsers AddOn/Extension manager and removing it. You will likely also want to reset your browser. To ensure the complete removal, manually check your hard drive and registry for all of the following and remove or reset the values accordingly. Please note that this is for advanced users only and may be difficult, with incorrect file removal causing additional PC errors. In addition, some malware is capable of replicating or preventing deletion. Doing this in Safe Mode is advised.

The following files, folders, and registry entries are created or modified by BubbleDock

Files: %APPDATA%Nosibay %PROGRAMS%Bubble Dock %PROGRAMFILES%Nosibay Registry: Key: HKCUSoftwareNosibay Key: HKCUSoftwareClassesbubbledock Key: HKCUSoftwareClasses.bubbledock Key: HKCUSoftwareMicrosoftWindowsCurrentVersionUninstallBubble Dock Key: HKLMSOFTWAREGoogleChromeExtensionskbjlipmgfoamgjaogmbihaffnpkpjajp Key: HKLMSOFTWAREMicrosoftWindowsCurrentVersionExplorerBrowser Helper Objects23AF19F7-1D5B-442c-B14C-3D1081953C94 Key: HKLMSOFTWAREClassesNosibay.SurfMatch Key: HKLMSOFTWAREClassesAppIDIESurfMatch.DLL
Read More
Fix ERR_SSL_VERSION_INTERFERENCE on Chrome
If you encounter the ERR_SSL_VERSION_INTERFERENCE error on your Google Chrome browser then this means that the browser is trying to load a website with SSL protocol but is not able to do so. This error can occur for many reasons and in this post, you will be given potential fixes that could help you in resolving the problem. But bear in mind that these potential fixes are not that straightforward forward so if you encounter an option you don’t understand much, just skip to the options you have the knowledge of. There is no direct fault in the browser for the ERR_SSL_VERSION_INTERFERENCE error as there are issues with caching the website data locally on your computer. Moreover, this kind of error can also appear when a website is coded incorrectly or if there are conflicting browser extensions installed in the browser that prevents the website to function properly. Refer to the suggestions given below to fix the ERR_SSL_VERSION_INTERFERENCE error in Chrome on Windows 10.

Option 1 – Try clearing browser data

There are times when some data in the browser is conflicting with the loading of the website and triggers errors like ERR_CACHE_MISS. And so you can try to clear your browser’s data. This might be a very basic solution but oftentimes it works in fixing this kind of error in Google Chrome. Follow the steps below to clear the data in your browser.
  • Open your Google Chrome browser.
  • After that, tap the Ctrl + H keys. Doing so will open a new panel that allows you to delete the browsing history and other data in your browser.
  • Now select every checkbox that you see and click on the Clear browsing data button.
  • Then restart your Chrome browser and check if you can now open any website or not.

Option 2 – Try disabling TSL 1.3

If clearing the browser data didn’t fix the problem, you can also try to disable TSL 1.3 in Chrome. To do so, refer to these steps:
  • Open Google Chrome.
  • Next, type in “chrome://flags/#tls13-variant” in the address bar and tap Enter.
  • After that, you should see the experimental features page for Google Chrome where you can set TSL 1.3 to disabled.
  • After disabling TSL 1.3, restart your computer and check if the problem is fixed or not.

Option 3 – Reset Winsock, TCP/IP & Flush DNS cache

Resetting Winsock, TCP/IP, and flushing DNS might help in resolving the ERR_SSL_VERSION_INTERFERENCE error just follow these steps:
  • Right-click on the Start button and click on Command Prompt (administrator) so you can pull up an elevated Command Prompt.
  • After that, execute each one of the commands listed below. And after you typed in one after the other, you have to hit Enter.
  1. netsh winsock reset – type in this command to reset Winsock
  2. netsh int ip reset resettcpip.txt – type in this command to reset TCP/IP
  3. ipconfig /flushdns – type in this command to flush the DNS cache
  • Next, restart your PC and check if the problem’s fixed.

Option 4 – Get rid of any conflicting browser extensions

  • Open Chrome and press Alt + F keys.
  • Go to More tools and click Extensions to look for any suspicious browser extensions or toolbars.
  • Click the Recycle bin and select Remove.
  • Restart Chrome and press Alt + F keys again.
  • Proceed to On Startup and mark Open a specific page or set of pages.
  • To check if the browser hijacker is still active, click Set pages, if it is active, overwrite the URL.

Option 5 – Reset Google Chrome

Resetting Chrome can also help you get rid of the error. Resetting Chrome will restore its default settings, disabling all the extensions, add-ons, and themes. Aside from that, the content settings will be reset as well and the cookies, cache, and site data will also be deleted. To reset Chrome, here’s what you have to do:
  • Open Google Chrome, then tap the Alt + F keys.
  • After that, click on Settings.
  • Next, scroll down until you see the Advanced option, once you see it, click on it.
  • After clicking the Advanced option, go to the “Restore and clean up option and click on the “Restore settings to their original defaults” option to reset Google Chrome.
  • Now restart Google Chrome.
Read More
1 2 3 171
Logo
Copyright © 2023, ErrorTools. All Rights Reserved
Trademark: Microsoft Windows logos are registered trademarks of Microsoft. Disclaimer: ErrorTools.com is not affiliated with Microsoft, nor claims direct affiliation.
The information on this page is provided for information purposes only.
DMCA.com Protection Status