The touchscreen feature inside Windows 11 is a pretty good thing but sometimes can be very impractical. The screen can easily and constantly get dirty due to fingers touching it all the time and there are users that do not wish or want to have this feature at all.
 If you are one of the mentioned users and for any reason, you do not wish to have a touchscreen-enabled then sit back and relax, we have you covered in this tutorial on how to fully disable touchscreen inside Windows 11.
No matter which method you prefer, both of them will disable the touch screen inside Windows 11. Thank you for reading trough article and I hope to see you again. Take care.

"Error Code 0x80070057: The parameter is wrong"When this problem happens, you will end up struggling to move private documents from one person to another.
 Error Causes
"An Internal Error has occurred. Incorrect parameters".If this happens to you, realize that you are dealing with malfunction code 0x80070057. This error occurs mostly when you are trying to build a full backup of your Windows 7 OS.
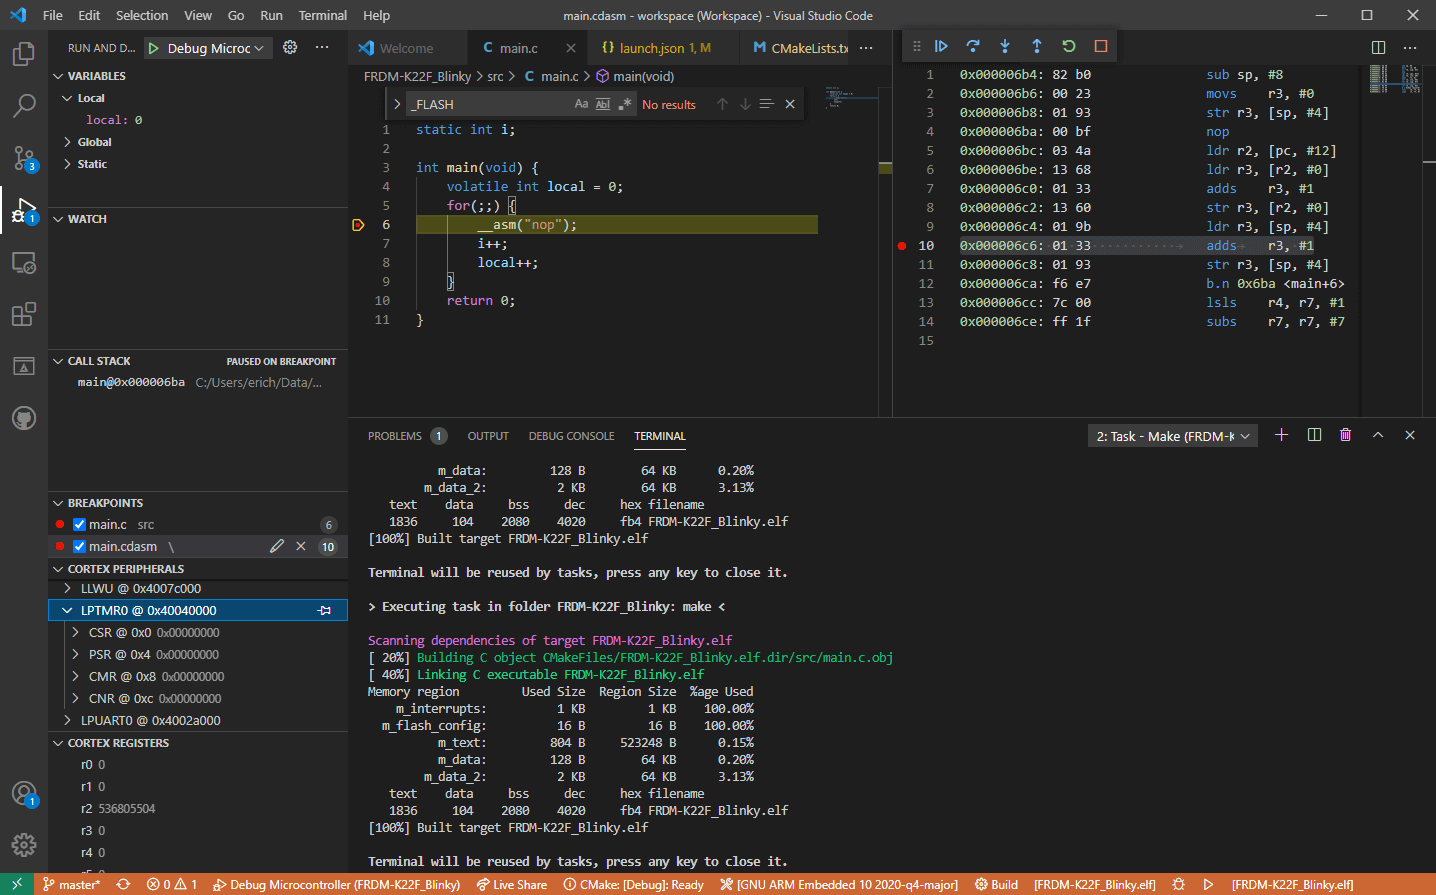 Visual studio code is a code editor available for Windows, Linux, and macOS. It is a completely free tool offering you to code in any language without the need to switch to another editor.
Visual Studio Code is part of Microsoft Visual Studio which is a complete integrated development environment (IDE). Take notice that Visual studio itself has more advanced tools for developing and testing, it has 24/7 support, training, and Azure for WEB apps.
Visual Studio Code is an editor lacking in some advanced features Visual Studio offers.
Visual studio code is a code editor available for Windows, Linux, and macOS. It is a completely free tool offering you to code in any language without the need to switch to another editor.
Visual Studio Code is part of Microsoft Visual Studio which is a complete integrated development environment (IDE). Take notice that Visual studio itself has more advanced tools for developing and testing, it has 24/7 support, training, and Azure for WEB apps.
Visual Studio Code is an editor lacking in some advanced features Visual Studio offers.
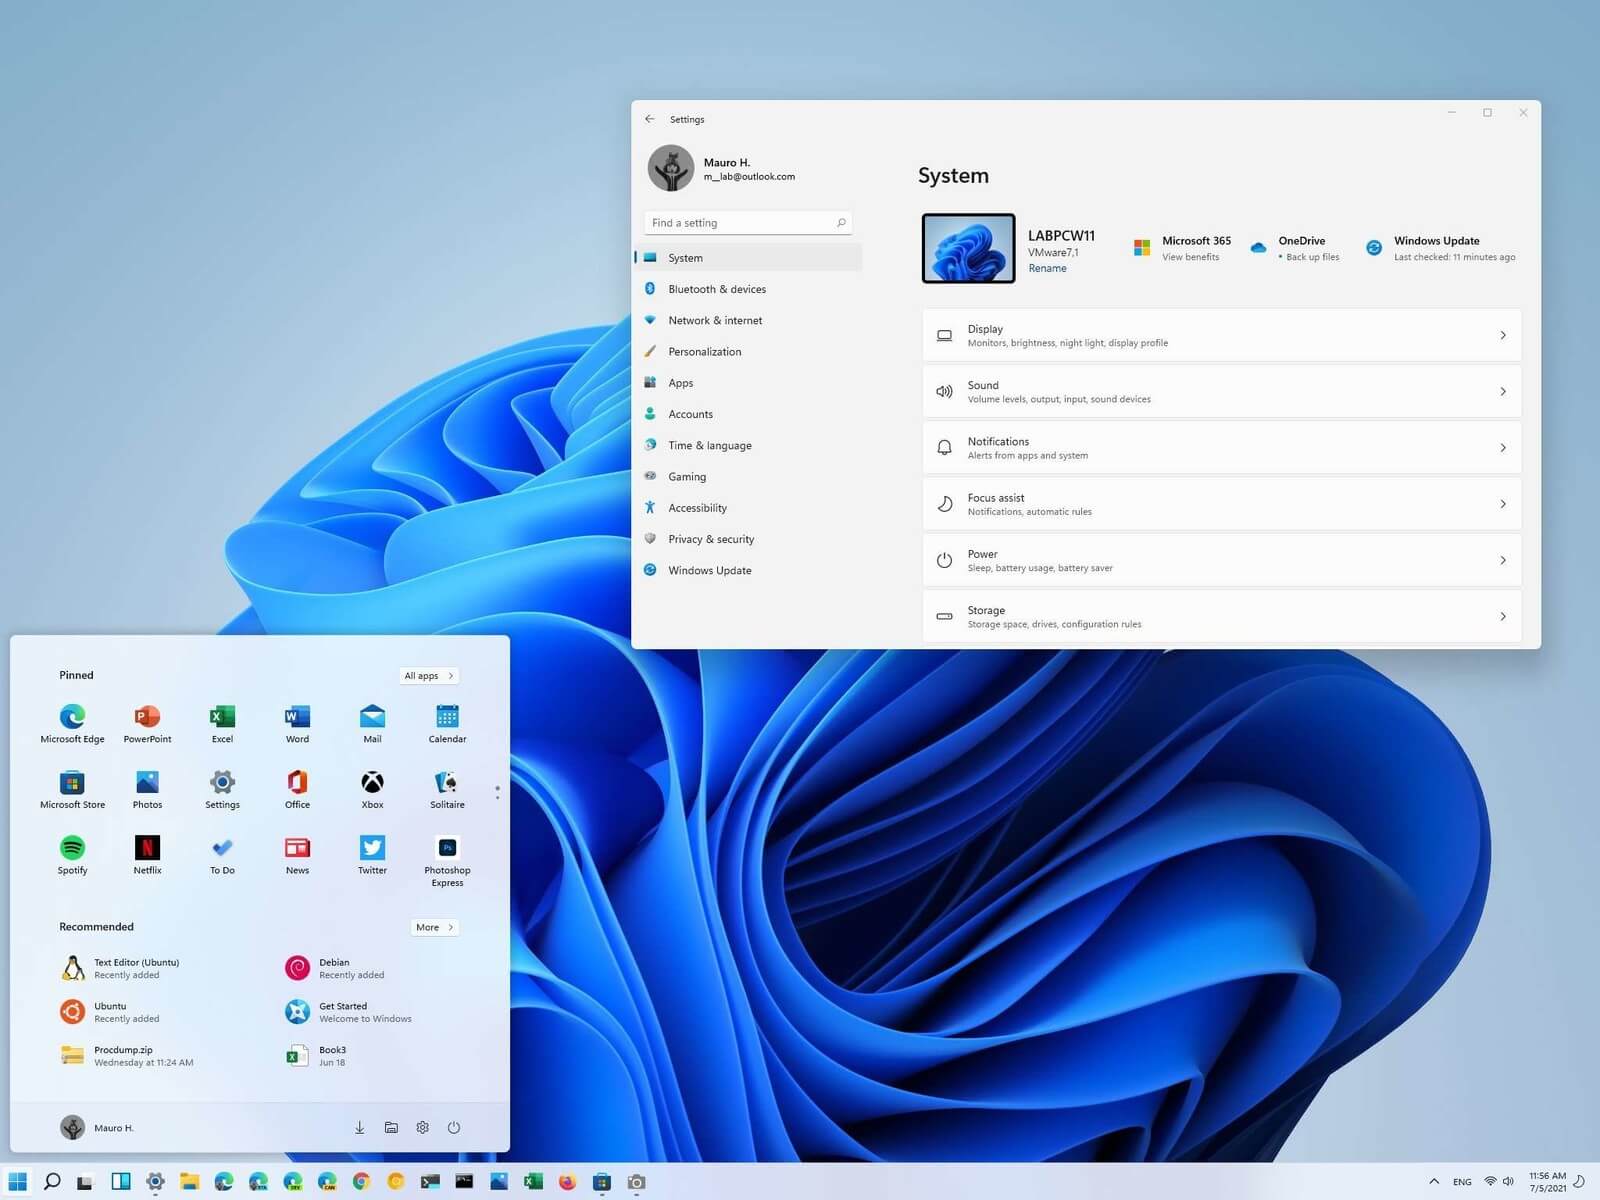 Most scrollbars are hidden by default if they are not used in Windows 11. If you are not ok with this feature and want scrollbars to be always visible and available do not worry, turning them ON is very easy.
Windows 11 will save settings automatically and apply setting right away. Close settings and continue with work.
Digital Signature: POPELER SYSTEM, S.L. Entry Point: 0x0000C1DC
Solimba employed aggressive advertising techniquesIt’s important to note that hijacked results resulting from the installation of Solimba. This affected the results of the website on the Internet browser to boost its ranking, even without the use of a search engine. The advertisement displayed on the Internet Explorer search page routes the user to a software installation website. The utility tool in question was a “Windows 8.1 PC Repair” tool used to identify threats present on the Windows 8.1 OS. The advertisement displayed on the Chrome Browser search page routes the user to a health and beauty magazine website. This site advocates health and beauty, especially issues concerning weight loss. Several ads were visible on-site, displaying products to assist people in losing weight. During my installation of Solimba, the installation wizard underscored that four programs would be downloaded. These programs included N8Fanclub.com_KinoniRemoteDesktop, Lolliscan, PaceItUp, and SearchProtect. Interestingly, only two programs from the list were apparent or obvious. An N8Fanclub.com_KinoniRemoteDesktop file was made on the Desktop and SearchProtect was seen in “All Programs”, along with files stored on the computer’s Local Drive. The other programs that were “supposedly” installed remained concealed. A test was done to determine whether these were counted as extensions or add-ons to the varying web browsers but nothing was found on any of the tested browsers – Google Chrome, Internet Explorer, and Mozilla Firefox.
“Installing, this may take a few minutes… WslRegisterDistribution failed with error: 0x8007019e/0x8000000d Error: 0x8007019e/0x8000000d The parameter is incorrect. Press any key to continue.”Error code 0x8007019e or 0x8000000d could be due to the absence of supporting Windows 10 features since the error does not even let one use the WSL-based command line. If you are one of the users facing this problem, then you’ve come to the right place as this post will provide you with a couple of suggestions to fix it. There are two options you can check out to fix the problem, but before you do that, you need to make sure that the Windows Subsystem for Linux feature is enabled. The two options include enabling WSL using the “Turn Windows features on or off” option and using the Windows PowerShell.
 A not long time ago we had an article about the deep WEB and dark WEB here on errortools.com explaining its origins and its purpose. The article can be found here if you are interested: https://errortools.com/windows/what-is-deep-and-dark-web/
Now at this point in time, we want to present you with 15 great Deep WEB sites that could offer you some information not found anywhere else, that could offer you some privacy, or simply to have some fun and safely explore how it is like to be part of deep WEB.
Take notice that for successful visiting of given sites you will need to have installed TOR browser. More about Tor browser itself can be found here: https://errortools.com/blog/software-review-series-tor-browser/ and its official website for download here: https://www.torproject.org/download/
Make sure that you copy the onion link and paste it into your TOR browser in order to access the site. That being said, let’s begin.
Error Causes
A not long time ago we had an article about the deep WEB and dark WEB here on errortools.com explaining its origins and its purpose. The article can be found here if you are interested: https://errortools.com/windows/what-is-deep-and-dark-web/
Now at this point in time, we want to present you with 15 great Deep WEB sites that could offer you some information not found anywhere else, that could offer you some privacy, or simply to have some fun and safely explore how it is like to be part of deep WEB.
Take notice that for successful visiting of given sites you will need to have installed TOR browser. More about Tor browser itself can be found here: https://errortools.com/blog/software-review-series-tor-browser/ and its official website for download here: https://www.torproject.org/download/
Make sure that you copy the onion link and paste it into your TOR browser in order to access the site. That being said, let’s begin.
Error Causesshutdown /r /o /f /t 00
