Hello everyone, last time we were talking about disk cleanup and its benefits, but as you need to keep your System clean you should also clean and keep your hardware clean as well. Many system issues could be traced and could happen due to dirty PC. In this article, we will give you tips on how to perform safely cleaning on your computer and hopefully point good sides to it so you can develop a healthy habit of regularly cleaning it and keeping it tidy.
Keeping your PC clean is not rocket science and you can do it with things you already and probably have in your house. One thing that I would recommend tho to purchase is antistatic gloves since they could prevent any kind of electrostatic discharges thus protecting your electric components.
If you have the option to disconnect your PC and get it outdoors, I would highly recommend this approach since all the dust will be dusted outside and not in the room where your computer is. If you can not it is still ok, but since some portion of dust will be set in the room, you might need to dust your room after cleaning your computer.
Cleaning outside case & redusting inside
The first thing after disconnecting your computer is to dust it from outside, here you will need a vacuum cleaner and a brush, gently brush outside dust from your casing and vacuum it with your vacuum cleaner. You can use dustcloth for larger parts but use the brush for fans and connectors.
After you have done cleaning the outside part, open the side of your computer casing, put on your antistatic gloves, and get a fine and soft brush, repeat dusting and vacuuming of the inner parts of your computer. If your computer is not regularly been cleaned this part will take a little longer since there would be excess dust inside and it will take a longer time to vacuum it all but keep going until you are left with no dirt.
Cleaning it inside
Fans are troublesome to clean since they will rotate when brushed and that could make you miss certain sports, in order to battle this get a tape and stick the fan into one position, brush areas that you can reach, then unstick it, rotate the head, stick it again in another position and dust off remaining areas which you could not reach before.
If your computer is very dirty and some hard dirt is at bottom of the connectors, disconnect desired component and clean the connection properly. plug it back in immediately after cleaning to avoid connecting it somewhere else.
Harder stains that could not be dusted could be cleaned with little alcohol. Get your dustcloth just a little wet with alcohol, just a corner, and gently wipe out sticky dust or spills if they are present. Leave it 10 minutes for alcohol to evaporate before plugging it back into an electric socket.
Thermal paste and cable management
If you have money and expertise, every 2 years would be a good idea to change the thermal paste on your processor, all you need to do is buy it from your local computer store online, remove the CPU fan clean the CPU and bottom of the fan and apply new thermal paste, place fan back and lock it. If you do not have expertise in this area, call someone who has to show you how it is done.
When cleaning it would be a good idea if you do not have any cable management to do it now, nice and tidy cables not only look good, they also improve your air circulation inside your casing making your computer cooling better.
once you are done with it, close back the casing side and plug it back in the wall.
Peripherals
When you are cleaning your computer, do yourself a favor and clean your keyboard, mouse, and screen as well. the keyboard can be quickly cleaned with compressed air in the can and screen and mouse with dustcloth.
That's it, remember, keep your PC clean and tidy and enjoy the benefits of non-hardware malfunctions caused by dirt and dust.
As you know, one of the most useful web browsers all over the globe is Google Chrome. However, it is not without flaws as you could encounter errors while using it. One of these errors is the ERR_UNSAFE_PORT error. This kind of error is caused by the data being accessed using a port that isn’t recommended. When you encounter this kind of error in Chrome, you will see the following error message on your screen:
“The webpage is not available, The webpage at <Address> might be temporarily down or it may have moved permanently to a new address. Error code: ERR_UNSAFE_PORT”
In this post, you will be guided on how you can fix the ERR_UNSAFE_PORT error in Google Chrome on your Windows 10 computer. You can try to set allowed ports or reset or reinstall Google Chrome. For more details, refer to the given options below.
Option 1 – Try to set allowed ports
To get started, open Google Chrome.
After that, go to the Shortcut tab and type the following after the whole address in the field named Target: --explicitly-allowed-ports=xxx
It should look like this “C:/Documents and Settings/User/Local Settings/Application Data/Google/Chrome/Applicationchrome.exe --explicitly-allowed-ports=6666”.
Now click on Apply and click OK to save the changes made.
Option 2 – Reset Chrome
Resetting Chrome can also help you fix the error. This means that you will be restoring its default settings, disabling all the extensions, add-ons, and themes. Aside from that, the content settings will be reset as well and the cookies, cache, and site data will also be deleted. To reset Chrome, here’s what you have to do:
Open Google Chrome, then tap the Alt + F keys.
After that, click on Settings.
Next, scroll down until you see the Advanced option, once you see it, click on it.
After clicking the Advanced option, go to the “Restore and clean up option and click on the “Restore settings to their original defaults” option to reset Google Chrome.
Now restart Google Chrome
Option 3 – Try to clean reinstall Chrome
There are instances when programs leave files behind after you’ve uninstalled them and the same thing can happen to Chrome so before you reinstall Chrome, you have to make sure that you have deleted the User Data folder. To do so, refer to the following steps:
Hit the Win + R keys to open the Run dialog box.
Next, type “%USERPROFILE%AppDataLocalGoogleChromeUser Data” in the field and hit Enter to open the User Data folder.
From there, rename the default folder and name it something else, e.g. “Default.old”.
After that, install Google Chrome again and check if the issue is now fixed.
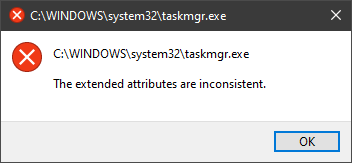
One of the most critical errors inside your Windows operating system is The Extended Attributes Are Inconsistent error. This error means that your operating system has been corrupted and it may produce many annoying issues like for example time lags, random crashes, and even freezing of the system when running multiple applications.
There are a lot of reasons for this error, from the registry to faulty application installations to sometimes even hardware issues like bad RAM memory or bad hard drive. Mostly issue is due to corrupted files inside Windows and most often people only think that resetting the PC or complete reinstallation is the only way to fix this problem.
Although reinstalling the system or resetting the PC will solve this error for sure there are other less time-consuming ways to fix this error.
In this guide, we will show you common ways in fixing Extended Attributes are inconsistent errors inside your Windows that are easy to do and less time-consuming than complete reinstallation of the system.
Fixing Extended Attributes Are Inconsistent error
Run SFC scan
Press ⊞ WINDOWS + X to open the hidden menu
Click on command prompt (admin)
In command prompt type in SFC /scannow and press ENTER
Wait for the operation to complete
Reboot your PC
Use System Image Repair Tool
Press ⊞ WINDOWS + X to open the hidden menu
Click on command prompt (admin)
In command prompt type in Dism /Online /Cleanup-Image /RestoreHealth and press ENTER
Wait for the operation to complete
Reboot your PC
Change all user accounts to the administrator
Press ⊞ WINDOWS + R to open the run dialog
Type in netplwiz and press ENTER
Select a first user account and click on Properties
Click on the Group Membership tab
Choose Others from the options
Select administrator (if all accounts are already administrators change all to users)
Repeat process for all other accounts
Click OK to save settings
Change Windows Sound scheme to default
Right-click on the sound icon in the taskbar
Click on Sound options
Go to the Sounds tab
In Sound Scheme click and choose Windows Default
Under Program Events choose Windows User Account Control
Click on the drop-down menu and choose None
Click on Apply
Click on OK
Downgrade the Sound driver
Press ⊞ WINDOWS + X to open the hidden menu
Click on Device Manager
Find your Audio driver and right-click on it
Click on uninstall and then on OK
Reboot your system
Do System Restore
If none of the provided solutions have worked, perform a system restore to the last point where everything was working fine.
Reset PC
If even system restore has not solved the issue or you do not have valid point in system restore time, perform Reset this PC and hopefully, the error will be finally fixed.
Conclusion
If all of the provided methods have not managed to repair this error that checks your hardware, your computer might have some faulty components if after complete PC reset error persists.
Anxiety from all these digital threats lurking everywhere? An antivirus program can help put your mind at ease.
What can a virus do to your device?
A virus is malicious software that can affect pretty much any device and does so in a variety of ways. Be it your computer, your phone or your smart lightbulb - as long as there’s access to the internet, malware can get to it.
How exactly does this kind of attack manifest itself? Well, there’s a wide variety of effects ranging from mild to severe. Among other things, they depend on which type of malware attacks your device - a virus, spyware, ransomware, adware or something else.
These are some of the things you can expect to happen:
Slow performance
System crashes
Theft of data and sensitive information
Connectivity issues
Constant browser redirects
Strange messages sent to your contacts
Interference with files
It really can be the stuff of nightmares. So, if you want to sleep peacefully knowing that your devices are completely safe, you should definitely consider getting an antivirus.
P.S. don’t let its name fool you - an antivirus does indeed protect your devices against more than just viruses.
What is antivirus software exactly?
Antivirus software is designed to help you battle and ward off malware. Basically, it scans your device to detect any suspicious activity and offers tools to get rid of the culprit.
At first, antiviruses were developed to fight against viruses only, but nowadays they cover a lot more ground. Here are some of the biggest benefits of getting yourself a powerful defender.
Advantages of antivirus software
1. It fights those pesky ads
Look, constant ads that pop up everywhere aren’t the absolute worst thing that can happen on your computer. If anything, they are annoying, like when you’re trying to sleep but that one fly in your room just won’t stop buzzing.
Now, there’s a free, well-established solution for that - installing an ad blocker. And we’re about a hundred and ten percent sure you’ve already done that on each and every browser you use.
However, “if I can’t see it, it doesn’t exist” isn’t the most ideal approach for your online safety. Ad blockers can’t block everything and they won’t protect you from potential adware. An antivirus on the other hand offers that layer of protection against malware snuck into pop-ups and spammy websites.
2. It protects you from hackers
Hackers don’t target government institutions only. They’ll target regular people too if they have something to gain.
Credit: Clint Patteron (Unsplash)
There are different types of hacking, such as phishing e-mails, transmission of malicious programs, credential reuse, denial of service and more. In any case, they take control of your device and hijack your data.
The good thing is that, as threats evolve, antiviruses evolve too and there are tons of quality programs on the market that can keep you secure for an affordable price.
3. It keeps your files and data safe
When malware enters your device, it can target pretty much any file and get access to any and all data.
Installing an antivirus program will make sure that every single file, new or old, is monitored at all times, warning you against threats immediately. That way, you can make sure to react before your other files become infected and data is lost or stolen.
Another great thing for data protection is that the best antivirus software normally comes with a password manager, so no one can use malware to steal your passwords.
4. It blocks all kinds of malware
As we already stated, malicious attacks can be performed in many ways and malware comes in in different shapes an sizes, such as:
Trojan horse
Spyware
Ransomware
Adware
Rootkit
RAT (remote access Trojan)
Keyloggers
Worms
Botnets
Credit: Growtika (Unsplash)
Nowadays, antivirus software is designed to fight against all of these types. That’s why more often than not we hear the term 'antivirus' used interchangeably with 'anti-malware,' like in this article.
5. It keeps your children protected
You can’t keep your eyes on your kid every second of the day and you can’t protect them from everything. But at least you can limit their exposure to the threats they can encounter at every corner of the digital world.
An antivirus program will block harmful or suspicious websites and ads, which is great both for you and your children. To take it a step further, though, many such programs come with special parental controls and offer monitoring as well. It’s a great solution for keeping your kids safe online without sounding like the irritating, overbearing, controlling parent who “just doesn’t get it!”
How to pick one
There are definitely lots of different antivirus programs out there, both free and paid. We recommend you look for a paid option, since free ones are unfortunately a lot more susceptible to being compromised through malicious attacks.
Now, there are a few factors to consider when choosing the right software. If you use your PC for basic things then a basic antivirus will suffice. However, the more complex your use and the more sensitive the data you deal with, the stronger it needs to be.
It’s also crucial that you take into account the features it includes. As we already mentioned, some programs have additional security options. For example, depending on the package you select, Bitdefender provides:
Some are included in plans and some are separate products, so make sure to check out all the offers.
And don’t worry if you have multiple PCs or you’re looking for protection for your smartphone or tablet as well; Bitdefender has suitable solutions for your needs. Of course, you can also just pick their classic antivirus software if you’re not in need of advanced protection.
Another important point is how regularly the software is updated and enhanced. The more frequent the updates the better, as bugs can make the program more vulnerable. Other things we advise you consider are user-friendliness, impact on performance, reputation (user reviews especially) and, of course, price.
The bottom line
Fact is: anyone can be a malware victim. Don’t let it be you.
You can’t put a price on peace and security, so don’t be reluctant to pay for yours - especially since a lot of options out there are extremely affordable. Is $159.00 a year really too much to pay for cross-platform protection for up to 10 devices? We don’t think so.
Explore your options and protect your files and data before it’s too late.
So, you have finished with work, game, movie, music, email, or whatever on your PC, you look at the clock, it is late, you decide to go to sleep or outside, you click on the power button and choose shutdown. Now when a PC is shut down you feel good and go with your business but the next time you power it up you get the same error like the computer never really shut down in the first place. You wonder why and reboot it, just in case and all of the sudden error is gone.
If something similar has happened to you or you had the feeling that after shutting down your computer has not really felt like shutting it down, do not seek professional help, everything is OK with you because when you click on shut down, your computer does not really shut down!
Truth is that Microsoft has changed how to shut down works and how rebooting works in Windows with an update but has not publicly said anything about it so some users may experience this feeling of not shutdown phenomenon and might even think there is something wrong with their PC.
Why this change?
A few years ago shutdown button and option in Windows were really shutting down OS, but things changed when Microsoft wanted to increase boot-up speed. Now when that decision was made shutdown option was changed. So, what was changed? Well in order to increase Windows booting time, the shutdown will now turn off power to PC components and it will look like everything is indeed shutdown but the Windows kernel will actually be saved to a hard drive with all settings and just awaken once the PC is turned back ON. This will result in all errors and other stuff being just still present same as they were once the system was instructed to be turned off.
Rebooting your PC will now clear kernel and file from the hard drive and you will get a clean system startup without any issues tied with the kernel itself.
Workaround
Now that we know why and what change has been made to Windows logical question is can we shut down our PC at all properly? Luckily for us, the answer is yes and we will not need any external application to do it, we can still do it inside Windows itself and it is quite quick and easy.
Bringing back the old shutdown
In order to bring the old shutdown functionality of your PC please follow the instructions but be aware that by doing this your PC will boot a little bit slower since it will have to load the kernel from scratch each time computer is turned ON.
First thing is to go to settings and go to System
Then once you are inside the system, navigate to the power and sleep and click on it to select it. Once you have it selected to all the way to the right and click on additional power settings.
When you click on advanced power settings you should be led to the control panel's power options. Inside this panel click on top left link where it says Choose what the power button does.
Inside options, you will need to untick the box next to Turn on fast startup (recommended), this option has been ticked ON by the Windows update and probably without notifying you. Option means exactly what was described, it will save kernel state on the hard drive for faster boot time but sadly it can cause some issues since it will never be reloaded from 0.
If you are unable to uncheck the box click on the text beside the shield icon that says: Change settings that are currently unavailable (you will have to be logged in as administrator).
Conclusion
Altho turning off fast startup and shutting down the PC completely will for sure extend your bootup time I still believe that it is the right choice since sometimes a lot of clutter and bad things accumulate over time inside the OS and can cause a vast variety of problems in a long run. So stay safe and shut down that PC as it used to be in the past.
0x800ccc79 error is an error message that you may come across when sending emails through Outlook Express from Microsoft. This error message is accompanied by a notification that is displayed as ‘email was not delivered’ or ‘the server doesn’t support SSL connection’.
Solution
Download Available to Recover all Lost Outlook data
Error Causes
This error code 0x900ccc79 is triggered due to the following causes:
Problems related to email servers
Changes in the configuration settings
Corrupted Windows Registry
Further Information and Manual Repair
When you receive the error 0x800ccc79 it may hamper your ability to send emails. Therefore it is advisable to fix it to ensure your emails are sent and received without any difficulty.
This Outlook error 0x800ccc79 is quite easy to repair. By following the quick fix 0x800ccc79 error code solutions given below you can resolve this error in just a couple of minutes.
Here’s what you need to do to fix this error right away:
Cause: Configuration issues
Solution: If the error occurs due to Outlook Express being configured to use the SSL protocol while sending and receiving emails via the web, then to resolve it, you need to allow Outlook Express to bypass the Secure Socket Layer settings.
To do so, click on ‘tools’ and then on ‘Accounts’. Now select the email account that you want to modify.
Now select the ‘Properties’ tab and then click on ‘Advanced Settings’.
Here search for the following text message ‘This server requires a secure connection’. Once you locate it, uncheck all the checkboxes given next to this option. After that save the changes and restart Outlook Express to see bring the changes into effect.
Cause: Missing or Corrupt Registry Entries
Solution: If the error 0x800ccc79 occurs due to missing or corrupt registry entries, then the best way to fix this error is to download and install a good registry cleaner on your PC.
The registry cleaner will help you clean your corrupt and damaged Windows registry entries and get rid of this error right away. It is suggested you download the registry cleaner tool from a reliable website to avoid any malware or virus downloads simultaneously.
Once you download the registry cleaner on your system, click on scan. The cleaner will scan your computer completely for registry errors and show you the results in a list form.
After the scanning is complete, click on repair to fix the errors.
So, next time, if you or anyone at your office comes across the Outlook Express error 0x800ccc79, you can try these solutions and fix the error immediately without waiting for the network personnel to come and resolve it.
The Microsoft Photos app is a useful tool that allows users to view, edit, as well as create videos on their Windows 10 computers. Although it works just fine most of the time, there are some instances when you might encounter some issues when using it. One of these issues is when you cannot save media from the Photos app after you’ve edited an image. This is most likely related to a permission issue. However, according to some users, they got the error where the edited media file can’t be saved. When you encounter this kind of error, you will see the following error in your Photos app:
“It looks like you don’t have permission to save changes to this file.Try saving a copy instead.”
There are several options you can explore to resolve this error. You can try updating the Microsoft Photos app or verify the ownership of the destination folder. You can also re-register and reinstall the app. For more detailed instructions, make use of the options provided below.
Option 1 – Try to update the Microsoft Photos app
The first thing you can do to fix the problem is to update the Microsoft Photos app.
Open the Microsoft Store and click on the three horizontal dots for the menu located on the top right portion of the window to see the options.
Next, select Downloads and updates and then click the Get updates button in the top right. This will install any pending updates for all the apps including the Microsoft Photos app using the Microsoft Store.
Option 2 – Try to verify the ownership of the destination folder
The next thing you can do to fix the error is to verify the ownership of the folder because chances are, the location where you’re trying to save the file might not have enough permissions to read and write the file to the disk. Thus, you need to take ownership of the folder by following these steps:
Type “command prompt” in the Windows Search bar and then right-click on the relevant search result and select “Run as administrator”.
After that, if a User Account Control or UAC prompt appears, just click on Yes to proceed.
Next, type and enter this command: TAKEOWN /F <path>
Note that the <path> is the location of the folder or file in File Explorer.
Now type and enter this second command: ICACLS <path> /grant administrators:F
Finally, once the command has been executed, restart your computer and then see if you can now access the folder or file.
Option 3 – Try resetting the Photos app
If the first option of restarting the background process of the Photos app didn’t work for you, you can try to reset the Photos app so that it will use the default factory settings. Note that this option works when you are experiencing this issue after making a couple of changes in the Photos app.
To get started in resetting the Photos app, open the Windows 10 Settings.
Then go to Apps > Apps & features.
After that, scroll down until you see the Photos app option – click on it and open its Advanced options.
From there, you will see the Reset button, click on it and click and then click on it once more to confirm.
Note: The process may take a couple of minutes to complete. Once it’s done, open the pictures again using the Photos app.
Option 4 – Try reinstalling the Photos app
If none of the first two options given above worked, then you might want to consider reinstalling the Photos app. Unlike what most users think, it isn’t really that hard reinstalling preinstalled apps as you have the Windows PowerShell for that. To use this program in reinstalling the Photos app, follow these steps:
Open the Windows PowerShell program with admin privileges and key in the following command:
Set-ExecutionPolicy Unrestricted
After that, execute this second command to re-register and reinstall the Microsoft Photos app.
Note: In the command given, do not forget to replace the “PackageFullName” with the actual package name for the Photos app. After executing the command, it will uninstall the Photos app from your computer so you need to install it again from the Windows Store by simply looking for it. Once you found it, just click on install to start the installation process.
ShopAtHome Toolbar is a browser extension. This extension tracks information when you visit a website, whether typing in the URL or clicking a link, the Browser App recognizes whether the URL is that of an Affiliate Store, and, if so, may redirect you through the affiliate network site to the Affiliate Store’s website, at which time, a tracking cookie will be placed in your browser. This cookie is the tracking mechanism that will follow your transaction with the Affiliate Store.
During installation, the Browser App may automatically change the default search engine used by your Web browser, whether via a built-in search box or otherwise, to our search engine. Upon installation and setup, it defines an auto-start registry entry which makes this program run on each Windows boot for all user logins. A scheduled task is added to Windows Task Scheduler in order to launch the program at various scheduled times.
Multiple anti-virus scanners have detected possible malware in ShopAtHome.com Helper and are therefore classified as potentially unwanted and flagged for optional removal.
About Browser Hijackers
Browser hijacking is actually a form of an unwanted program, often a web browser add-on or extension, which then causes modifications in the browser’s settings. Browser hijackers can do a variety of things on your PC. The idea would be to force users to visit certain sites that are looking to increase their visitor traffic and generate higher ad income. A lot of people assume that these kinds of sites are legitimate and harmless but that is incorrect. Almost every browser hijacker poses an actual threat to your online safety and it is important to classify them under privacy risks. They do not just screw up your web browsers, but browser hijackers could also modify the system registry, leaving your computer or laptop susceptible to other forms of hacking.
Browser hijacking signs and symptoms
Signs that your web browser is hi-jacked include:
1. the home page of your web browser is changed suddenly2. you find yourself regularly directed to some other web page than the one you actually meant3. The default search page of the browser is changed4. you find many toolbars in your web browser5. you see a lot of pop-ups on your computer screen6. your internet browser starts running sluggishly or displays frequent glitches7. Inability to navigate to particular sites, particularly anti-malware as well as other security software sites.
How browser hijacker infects PCs
Browser hijackers infect computers through malicious email attachments, downloaded infected documents, or by checking out infected internet sites. They also come from add-on programs, also called browser helper objects (BHO), web browser extensions, or toolbars. Other times you may have unintentionally accepted a browser hijacker as part of a software program package (generally freeware or shareware). Popular examples of browser hijackers include Conduit, CoolWebSearch, Coupon Server, OneWebSearch, RocketTab, Delta Search, Searchult.com, and Snap.do.
The best ways to get rid of browser hijackers
Some hijackers could be removed simply by uninstalling the related freeware or add-ons from the Add or Remove Programs in the Microsoft Windows Control Panel. Sadly, the majority of the software packages utilized to hijack a web browser are deliberately designed to be hard to detect or remove. Besides, browser hijackers can modify the Windows registry so it can be very difficult to fix manually, particularly if you are not a very tech-savvy person.
Help! Malware Preventing Anti-virus Installation And Access To The Web
All malware is inherently dangerous, but certain kinds of malware do a lot more damage to your computer or laptop than others. Some malware sits in between the computer and the net connection and blocks some or all websites that you would like to visit. It might also block you from adding anything on your PC, especially anti-malware applications. If you’re reading this, odds are you’re stuck with a virus infection that is preventing you to download and/or install Safebytes Anti-Malware software on your PC. Do as instructed below to get rid of the malware by alternate methods.
Boot your PC in Safe Mode
In the event the malware is set to load at Windows startup, then booting in Safe Mode should avoid it. Just the minimum required applications and services are loaded when you boot your personal computer in Safe Mode. To launch your Windows XP, Vista, or 7 PCs in Safe Mode with Networking, please do as instructed below.
1) Press the F8 key repeatedly as soon as your PC boots, but before the big Windows logo shows up. This will conjure up the “Advanced Boot Options” menu.2) Make use of the arrow keys to choose Safe Mode with Networking and press ENTER.3) Once you get into this mode, you should have online access again. Now, obtain the virus removal application you need by utilizing the browser. To install the application, follow the guidelines in the installation wizard.4) Right after installation, do a full scan and let the software delete the threats it detects.
Use an alternate web browser to download a security program
Malicious program code can exploit vulnerabilities in a particular browser and block access to all antivirus software websites. The best solution to avoid this problem is to choose a browser that is well known for its security features. Firefox contains built-in Phishing and Malware Protection to keep you secure online.
Install and run anti-virus from a USB drive
Here’s another solution which is using a portable USB anti-virus software package that can check your system for viruses without the need for installation. Try these simple actions to clean up your affected computer by using portable anti-malware.
1) Make use of another virus-free computer system to download Safebytes Anti-Malware.2) Put the USB drive into the clean PC.3) Double click on the downloaded file to run the installation wizard.4) When asked, choose the location of the USB drive as the place where you would like to store the software files. Follow the on-screen instructions to finish the installation.5) Now, plug the thumb drive into the corrupted system.6) Run the Safebytes Anti-malware directly from the pen drive by double-clicking the icon.7) Run Full System Scan to identify and clean-up up all types of malware.
SafeBytes Anti-Malware Features
If you’re planning to purchase anti-malware for your computer system, there are many brands and utilities for you to consider. Some are very good ones, some are ok types, while some are simply just fake anti-malware software that could harm your PC themselves! While looking for an antimalware tool, pick one that provides reliable, efficient, and total protection against all known computer viruses and malware. While considering the dependable software programs, Safebytes AntiMalware is undoubtedly the highly recommended one.
Safebytes is among the well-established computer solutions firms, which provide this complete anti-malware tool. With its cutting-edge technology, this application can help you remove multiples types of malware including computer viruses, worms, PUPs, trojans, adware, ransomware, and browser hijackers.
SafeBytes anti-malware takes computer protection to a totally new level with its enhanced features. Here are a few popular features found in this program:
Antimalware Protection: With a critically acclaimed anti-malware engine, SafeBytes offers multilayered protection that is intended to find and get rid of viruses and malware that are hidden deep inside your computer’s operating system.
Live Protection: SafeBytes provides complete and real-time security for your PC. It’ll continuously monitor your pc for hacker activity and also gives users sophisticated firewall protection.
Extremely Speed Scanning: SafeBytes Anti-Malware has got a multi-thread scan algorithm that works up to 5x faster than any other anti-malware software.
Web Filtering: SafeBytes provides an instant safety rating on the pages you are about to check out, automatically blocking harmful sites and make sure that you’re certain of your online safety while browsing the net.
Lightweight Application: This software program is not “heavy” on the computer’s resources, so you will not find any overall performance troubles when SafeBytes is operating in the background.
24/7 Customer Service: Skilled technicians are at your disposal 24/7! They will quickly fix any technical issues you might be encountering with your security software.
Technical Details and Manual Removal (Advanced Users)
If you wish to manually remove ShopAtHome without the use of an automated tool, it may be possible to do so by removing the program from the Windows Add/Remove Programs menu, or in cases of browser extensions, going to the browsers AddOn/Extension manager and removing it. You will likely also want to reset your browser.
To ensure the complete removal, manually check your hard drive and registry for all of the following and remove or reset the values accordingly. Please note that this is for advanced users only and may be difficult, with incorrect file removal causing additional PC errors. In addition, some malware is capable of replicating or preventing deletion. Doing this in Safe Mode is advised.
The following files, folders, and registry entries are created or modified by ShopAtHome
Files:
File %PROGRAMFILESSelectRebatsToolbarShopAtHomeToolbar.dll.
File %WINDIRDownloaded Program Filesinstall.inf.
File %WINDIRDownloaded Program Filessahagent-cdt1004.exe.
File %LOCALSETTINGSTempsahagent-cdt1004.exe.
File %LOCALSETTINGSTempcdt1004.sah.
File %LOCALSETTINGSTempsetup4002b.cab.
File %LOCALSETTINGSTempsetup4002b.ini.
File %SYSDIRap9h4qmo.ini.
Search and Delete: ap9h4qmo.ini.
File %SYSDIRap9h4qmo.exe.
File %SYSDIRBundleLite_westfrontier1001.exe.
File %SYSDIRap9h4qmo.ini.
File %WINDIRa95kfrhe.exe.
File %SYSDIRa95kfrhe.ini.
File %SYSDIRa95kfrhe.ini.
File %SYSDIRq17i9a4j.ini.
Search and Delete: ap9h4qmo.ini.
Directory %LOCALSETTINGSTempSahUpdate.
Registry:
Key 759C257C-F750-4F52-AB58-FB8A7B8770FE at HKEY_CLASSES_ROOTTypeLib.
Key HKEY_CLASSES_ROOT named GRInstall7.Installer
Key HKEY_CLASSES_ROOT named GRInstall7.Installer.1
Problems occur when your PST file becomes corrupted or hits the size limit. Outlook will start to display error messages. These errors include like 0x80040119, 0x80040600, and 0x8004060c.
Error Causes
You might think Outlook problems are just a minor inconvenience. You can’t access your emails and contact information, but that doesn’t actually affect computer security, right? Wrong! Outlook problems can indicate serious corruption issues within your system.
In many cases, your PST file can even be targeted specifically by a virus.
Today, many viruses are specially designed to steal personal information and then sell that information on the online black market. Since so much personal data is stored within Outlook’s PST file, this is often the first place that viruses look.
If you don’t want some hacker in a foreign country to read your emails, steal your contact information, or do all sorts of other dangerous tasks, then we advise you to fix your PST problem as soon as possible.
Other causes include hitting the 2GB memory limit on older versions of Outlook, erroneous SMTP settings, etc,.
Further Information and Manual Repair
PST errors are an incredibly annoying problem. However, thanks to powerful software like Stellar Phoenix Outlook PST Repair, it has never been easier to fix Outlook and recover all of the data inside your PST file. That means that you won’t lose contact information, calendar entries, emails, or any other information stored in Outlook.
ScanPST.exe rarely fixes problems with the PST file. Since the application is only a few megabytes in size, its effectiveness is very limited. Although Microsoft designed ScanPST.exe to be an effective solution to any PST files, it fails miserably.
Better Alternatives to Microsoft's ScanPST.Exe
Ultimately, after downloading ScanPST.exe and running it, your Microsoft Outlook will still be unable to send or receive emails. And, to make matters worse, you might also be unable to access contact data or read your old emails.
Unlike other PST repair solutions, ScanPST.exe will not recover deleted emails or other lost Outlook data. In fact, using ScanPST.exe can sometimes cause your personal data to become even more difficult to recover.
If you do want to try out ScanPST.exe, then go ahead. While it probably won’t make your PST errors worse, it won’t even come close to fixing them. If you’re ready for a more serious solution to PST problems, then keep reading.
Why are Outlook problems dangerous?
You might think Outlook problems are just a minor inconvenience. You can’t access your emails and contact information, but that doesn’t actually affect computer security, right? Wrong!
Outlook problems can indicate serious corruption issues within your system. In many cases, your PST file can even be targeted specifically by a virus.
Today, many viruses are specially designed to steal personal information and then sell that information on the online black market. Since so much personal data is stored within Outlook’s PST file, this is often the first place that viruses look.
If you don’t want some hacker in a foreign country to read your emails, steal your contact information, or do all sorts of other dangerous tasks, then we advise you to fix your PST problem as soon as possible.
How do I actually fix Microsoft Outlook PST errors?
Microsoft’s ScanPST.exe application clearly doesn’t work. So what’s the next best option? Well, a program called Stellar Phoenix Outlook PST Repair has been helping PC users solve Outlook problems for several years. As the world’s leading Outlook solution, Stellar Phoenix Outlook PST Repair will quickly and effectively repair any PST problems you encounter.
So how does Stellar Phoenix Outlook Repair work? Well, it starts by finding your PST file. Once the PST file has been found, Stellar Phoenix Outlook PST Repair determines if the file is corrupt or full. It will then repair your PST file either by removing the size limit or by fixing the corrupt files.
How Does Stellar Phoenix Outlook Repair Work?
Once Stellar Phoenix Outlook PST Repair determines that your calendar appointments, contact data, and emails have all been successfully recovered, it permanently restores access to your PST file.
In fact, Stellar Phoenix Outlook PST Repair can even restore Outlook data that you deleted a long time ago. So, instead of just being a PST error recovery tool, Stellar Phoenix Outlook PST Repair is also a powerful data recovery program.
After letting Stellar Phoenix Outlook PST Repair go to work, open up Outlook and try it out. You’ll have full access to all of your Outlook files and folders, and all of those ScanPST.exe problems will be a thing of the past.
Advantages of Stellar Phoenix Outlook PST Repair Software
Stellar Phoenix Outlook PST Repair comes with many advantages. Here are just a few reasons why it’s such a popular program:
Easy-to-use: Don’t worry if you’re not a computer genius. Stellar Phoenix Outlook Repair is incredibly easy to use. Even if you barely know how to send an email over your computer, the program has a straightforward interface that anybody can understand. If you can click the left mouse button, then Stellar Phoenix will be easy to use.
Goes to work instantly: It takes only seconds to download and install Stellar Phoenix Outlook PST Repair. Once you’re ready to perform a scan, the program goes to work instantly. It identifies your PST file in an incredibly short amount of time, and before long, you’ll be able to access Outlook once more.
Effective: Unlike the infamously useless ScanPST.exe application, Stellar Phoenix Outlook PST Repair actually works like it’s supposed to. It allows users to safely recover all of their most important data. While ScanPST.exe can actually damage your PST file, Stellar Phoenix Outlook PST Repair simply goes to work quickly and effectively.
Multiple support packages: Stellar Phoenix Outlook Repair comes with three different pricing plans. One is designed for people who only need to install the program on a single computer. Another is designed for businesses or households that want to install the program on multiple PCs.And with the third option, the technician package, users can install Stellar Phoenix Outlook PST Repair on an unlimited number of computers. One of the biggest advantages of these packages is that you can spread out the cost of the program among multiple users. If several different people at your workplace are having PST error problems, for example, then you can buy a multiple-license package and share the cost.
Data recovery: Along with fixing corrupt PST files and removing the size limits from the PST file, Stellar Phoenix Outlook PST Repair can actually recover any Outlook data on your computer. This is useful if you uninstalled Outlook a few months ago but still need to recover that data. In fact, Stellar Phoenix can recover Outlook data even if Outlook is not currently installed on your computer. In that sense, Stellar Phoenix Repair is more than just an Outlook repair program; it’s also a full-service data recovery solution.
Stellar Phoenix PST Repair is superior to ScanPST.exe in every way. But Stellar Phoenix’s most important advantage is that it actually works. If you’re ready to quickly fix your Outlook PST errors, then Stellar Phoenix Outlook PST Repair can help. Download it here today to experience the magic of PST repair for yourself.
In 2014 Proton mail started as an end-to-end encrypted email service offering secure and private email services. Proton mail is still live and going with the same dedication to privacy and security but the company has expanded its offering into cloud storage drive services.
Starting as a public beta at the end of 2020, Proton Drive is keeping its privacy and security policy philosophy with the new service. Proton Drive is the newest service besides Proton Calendar, Proton VPN, and Proton Mail.
Drive has end-to-end encryption for everything on it including files themselves, filenames, folder structure, folder names, extensions, and file sizes. This means that you and only you can access your files. Servers are located in Geneva, Switzerland and they are under Swiss privacy laws making sure that your files are protected. Proton services in general are all open source so anyone can take a look at them to be sure that nothing is lurking under the hood. For now, sync is done either via the android app or web interface but the desktop client will come soon since currently, it is under development.
Sadly free plan of Proton Drive will give you only 1GB of storage which is much less than other services and sadly payments plans are also not so jaw-dropping going for $4 USD per month for a 200GB plan or with Proton ultimate subscription that will set you $10 behind but you will get 500GB of drive storage. Of course, if you value privacy for your files these options are good but if you do not mind that part other services have much better options.
All in all Proton Drive is a great cloud storage solution if you need privacy and well worth the investment. With the ultimate subscription, you will get enough space for most people and company needs with other services and guaranteed privacy and security, on the other hand, if you just need a large amount of cloud storage not caring too much about privacy other options are better.
Instagram posting has been reserved for mobile phones for a very long time but in October 2021 that privilege has come to an end. Instagram added the long-awaited ability to post to Instagram from the website. You get nearly all of the same filters and editing tools that you can find in the iPhone and Android app, too.
In order to post via computer on your Instagram account all you need is a browser. The first step, of course, is to go to instagram.com and login into your account, if you do not have an account, you can make one for free. Next, click on the + icon in the upper right corner.
Create a new post screen will open, in this screen click on the Select from computer blue button on the bottom. The file manager will open, choose your desired photo and confirm. After that, you will be presented will an adjustment screen for a photo, here you can crop the photo, zoom in, adjust the aspect ratio, or if you wish add more photos to create a slide show.
Once you are done will all of these adjustments, click on Next in the upper right. From there you will be taken into a filter screen where you can apply one of many filters or if you want, you can adjust brightness, contrast, saturation, temperature, etc. just like in the application on your phone. Once you have the desired result, again click on Next in the upper right part of the screen.
Lastly, you will be given an option to write a caption for the photo if you wish and add a location. Once this step is finished you can post the feed by clicking on share in the upper right part.
That is all to it, just like in a mobile application you can now use your computer for Instagram posting.
 Keeping your PC clean is not rocket science and you can do it with things you already and probably have in your house. One thing that I would recommend tho to purchase is antistatic gloves since they could prevent any kind of electrostatic discharges thus protecting your electric components.

 In this guide, we will show you common ways in fixing Extended Attributes are inconsistent errors inside your Windows that are easy to do and less time-consuming than complete reinstallation of the system.