The Gardening Enthusiast toolbar is another product that is advertised as a helpful addition to your browsing experience when it is really nothing more than the software you should remove as soon as possible. It is touted as a toolbar that will provide you with a lot of useful gardening tips. That is the hook to get you to install it. But, in truth, the only thing that it does is provide you with links to popular gardening websites that you can easily find on any search engine.
When installed the extension will change your default search engine and home page to MyWay.com
While browsing the internet with this extension you will see additional sponsored ads and links throughout your browsing session.
Anti-virus applications have marked this extension as a Browser Hijacker and are therefore marked for removal. While not considered malware, the fact that many users find it to hinder browser performance has led to its detection and flag for optional removal.
About Browser Hijackers
Browser hijacking means a malicious program code has control over and modified the settings of your browser, without your permission. Practically all browser hijackers are made for marketing or advertising purposes. Usually, hijackers will force hits to internet sites of their preference either to increase web traffic producing higher ad earnings, or to obtain a commission for every user visiting there. Nevertheless, it isn’t that harmless. Your internet safety is jeopardized and it is extremely annoying. Once the malware attacks your laptop or computer, it starts to mess things up a whole that slows your PC down to a crawl. In the worse case, you will be forced to tackle serious malware threats too.
Browser hijacking symptoms
The typical symptoms that suggest having this malware on your PC are: your home page has been reset to some unfamiliar website; you see new unwanted favorites or bookmarks added, usually directed to ad-filled or pornography sites; the default online search engine has been changed and the web browser security settings have been lowered without your knowledge; find new toolbars that you didn’t add; you notice lots of pop-up ads on your screen; your web browser gets sluggish, buggy, crashes quite often; Inability to navigate to certain sites, especially anti-malware and also other security software webpages.
Exactly how browser hijacker finds its way to your PC
A browser hijacker can be installed on your computer when you go to an infected site, click an e-mail attachment, or download something from a file-sharing website. They could be included with toolbars, BHO, add-ons, plug-ins, or browser extensions. Other times you might have accidentally accepted a browser hijacker as part of a software program package (generally freeware or shareware). Examples of popular browser hijackers are Fireball, Ask Toolbar, GoSave, CoolWebSearch, Babylon Toolbar, and RocketTab.
Browser hijackers can record user keystrokes to gather potentially invaluable information that leads to privacy issues, cause instability on computers, significantly disrupt user’s browsing experience, and ultimately slow down the PC to a point where it will become unusable.
Removing browser hijackers
Certain browser hijacking could be easily reversed by identifying and eliminating the corresponding malware application from your control panel. Unfortunately, many of the software products used to hijack an internet browser are deliberately designed to be hard to detect or get rid of. You should think of undertaking manual fixes only if you are a tech-savvy person, as risks are associated with tinkering with the computer registry and HOSTS file.
Browser hijackers can be effectively removed by installing anti-malware software on the affected PC. If you need to remove persistent hijackers effectively, install the award-winning anti-malware tool Safebytes Anti-Malware. And employ a system optimizer, like Total System Care, to eliminate all related files in the registry and fix browser issues.
How To Get Eliminate Malware That Is Preventing Anti-Malware Installation?
All malware is inherently harmful, but certain kinds of malicious software do more damage to your computer or laptop than others. Certain malware types alter internet browser settings by including a proxy server or change the computer’s DNS configuration settings. When this happens, you’ll be unable to visit certain or all of the sites, and thus unable to download or install the necessary security software to get rid of the computer virus. If you are reading this, chances are you’re stuck with a virus infection that is preventing you to download and/or install Safebytes Anti-Malware software on your computer. Even though this sort of problem can be harder to get around, there are some steps you can take.
Remove viruses in Safe Mode
Safe Mode is a special, basic version of Microsoft Windows where only the bare minimum services are loaded to prevent viruses as well as other problematic applications from loading. In the event, the malware is set to load immediately when PC boots, shifting to this particular mode can prevent it from doing so. To enter into Safe Mode or Safe Mode with Networking, press F8 while the PC is starting up or run MSCONFIG and locate the “Safe Boot” options under the “Boot” tab. Once you reboot into Safe Mode with Networking, you could download, install, as well as update anti-malware software from there. At this point, you can run the antivirus scan to eliminate viruses and malware without any interference from another application.
Switch over to an alternate internet browser
Malicious code might exploit vulnerabilities on a specific browser and block access to all antivirus software websites. In the event you suspect that your Internet Explorer happens to be hijacked by a virus or otherwise compromised by cybercriminals, the most effective thing to do would be to switch over to a different browser like Firefox, Chrome, or Safari to download your chosen computer security software – Safebytes Anti-Malware.
Install security software on a flash drive
To successfully get rid of the malware, you need to approach the problem of installing the anti-malware program on the affected computer system from a different perspective. To run antivirus from a USB drive, follow these simple measures:
1) Make use of another virus-free computer to download Safebytes Anti-Malware.
2) Plug the USB drive into the clean computer.
3) Double click on the downloaded file to open the installation wizard.
4) When asked, select the location of the pen drive as the place in which you want to store the software files. Follow the activation instructions.
5) Unplug the pen drive. You may now use this portable antivirus on the infected computer.
6) Double-click the anti-malware program EXE file on the pen drive.
7) Click on “Scan Now” to run a complete scan on the affected computer for viruses.
Benefits and Features of SafeBytes Security Suite
If you’re planning to purchase anti-malware for your desktop, there are numerous brands and utilities for you to consider. Some are well worth your money, but most aren’t. You must select a company that creates industry-best anti-malware and has earned a reputation as trustworthy. Among few good applications, SafeBytes Anti-Malware is the highly recommended software program for security-conscious people.
SafeBytes anti-malware is a very effective and easy-to-use protection tool that is designed for end-users of all levels of IT literacy. Using its cutting-edge technology, this application will help you get rid of several types of malware like viruses, worms, PUPs, trojans, adware, ransomware, and browser hijackers.
SafeBytes anti-malware takes PC protection to a totally new level with its enhanced features. Here are some of the features you will like in SafeBytes.
Anti-Malware Protection: Built upon a highly acclaimed anti-virus engine, this malware removal tool can detect and remove several stubborn malware threats such as browser hijackers, potentially unwanted programs, and ransomware that other typical antivirus programs will miss.
Real-time Threat Response: SafeBytes offers real-time active supervision and protection from all known viruses and malware. It will constantly monitor your computer for hacker activity and also gives end-users sophisticated firewall protection.
Safe Browsing: Safebytes allots all sites a unique safety ranking that helps you to have an idea of whether the website you’re about to visit is safe to browse or known to be a phishing site.
Lightweight: SafeBytes is renowned for its low impact on processing power and great detection rate of countless threats. It works silently and efficiently in the background so you are free to make use of your personal computer at full power all the time.
24/7 Premium Support: You will get 24/7 technical support to quickly resolve any issue with your security software.
SafeBytes will keep your personal computer safe from the latest malware threats automatically with hardly any input needed from you again. Malware problems will become a thing of the past once you put this software to use. You’ll get the best all-around protection for the money you spend on SafeBytes Anti-Malware subscription, there is no doubt about it.
Technical Details and Manual Removal (Advanced Users)
If you do not wish to use malware removal software and like to remove Gardening Enthusiast manually, you could do so by going to the Add/Remove Programs menu in the Control Panel and deleting the offending program; in cases of browser add-ons, you may uninstall it by visiting the browsers Add-on/Extension manager. You might also want to reset your home page and search engine providers, and also delete browsing history, temporary files, and internet cookies.
To make sure of complete removal, find the following Windows registry entries on your computer and remove them or reset the values appropriately. However, editing the Windows registry is really a difficult job that only experienced computer users and professionals should attempt to fix the problem. In addition, certain malware keeps replicating which makes it difficult to eliminate. Completing this task in Safe Mode is advised.
Folders:
C:\Program Files\GardeningEnthusiast_7j
Files:
Search and Delete:
7jbar.dll
7jhighin.exe
7jmedint.exe
7jregfft.dll
7jregiet.dll
7jhkstub.dll
7jreghk.dll
7jSrcAs.dll
7jSrchMn.exe
NP7jStub.dll
7jPlugin.dll
7jauxstb.dll
7jbprtct.dll
7jdlghk.dll
7jradio.dll
7jieovr.dll
INSTALL.RDF
 So far we probably all know what are good new and exciting features that W11 is bringing to the table, let’s talk now about features that will be removed and are not there but we had them in W10
 Error Causes
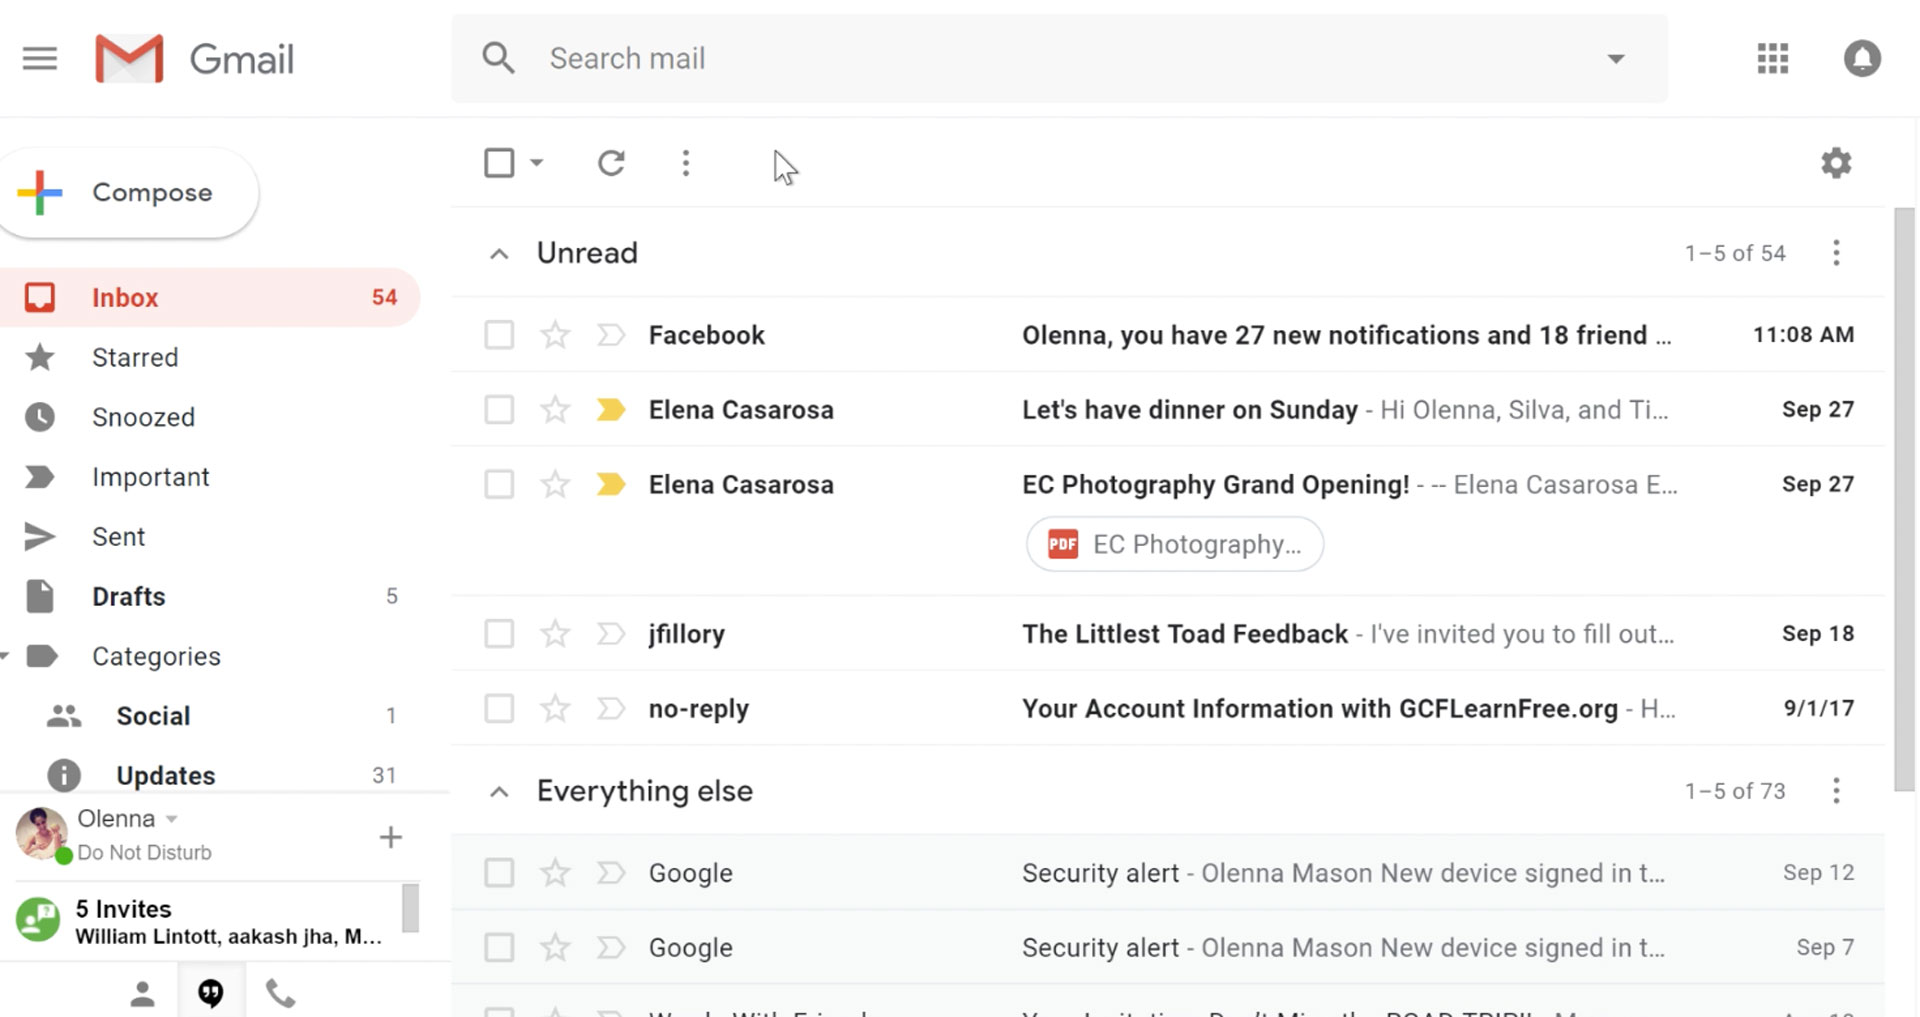 It would be very difficult to even start a free eMail list without mentioning Google's Gmail. Introduced all the way back in 2004 as an invite-only service it became over time the most popular email platform largely due to the fact Google is offering free eMail accounts.
There are a lot of good things to be said about Gmail itself, most of the area is clutter-free and the largest space is reserved for eMail itself letting users focus on what is important. WEB client itself means that you do not need to have any application installed on your device, altho via Google chrome, you can use Gmail offline offering you flexibility if needed.
The ability to connect and manage other accounts like Outlook, Yahoo, etc is just making Gmail even more attractive, and the snooze feature is a really neat little detail that will pause eMail notifications if you need to focus on other things.
Lack of organizing messages into folders is a little confusing since Gmail offers its own unique label system but sometimes I need to have old reliable save eMail to folder.
All in all, Gmail is a great service and it offers a great eMail on the go experience.
It would be very difficult to even start a free eMail list without mentioning Google's Gmail. Introduced all the way back in 2004 as an invite-only service it became over time the most popular email platform largely due to the fact Google is offering free eMail accounts.
There are a lot of good things to be said about Gmail itself, most of the area is clutter-free and the largest space is reserved for eMail itself letting users focus on what is important. WEB client itself means that you do not need to have any application installed on your device, altho via Google chrome, you can use Gmail offline offering you flexibility if needed.
The ability to connect and manage other accounts like Outlook, Yahoo, etc is just making Gmail even more attractive, and the snooze feature is a really neat little detail that will pause eMail notifications if you need to focus on other things.
Lack of organizing messages into folders is a little confusing since Gmail offers its own unique label system but sometimes I need to have old reliable save eMail to folder.
All in all, Gmail is a great service and it offers a great eMail on the go experience.
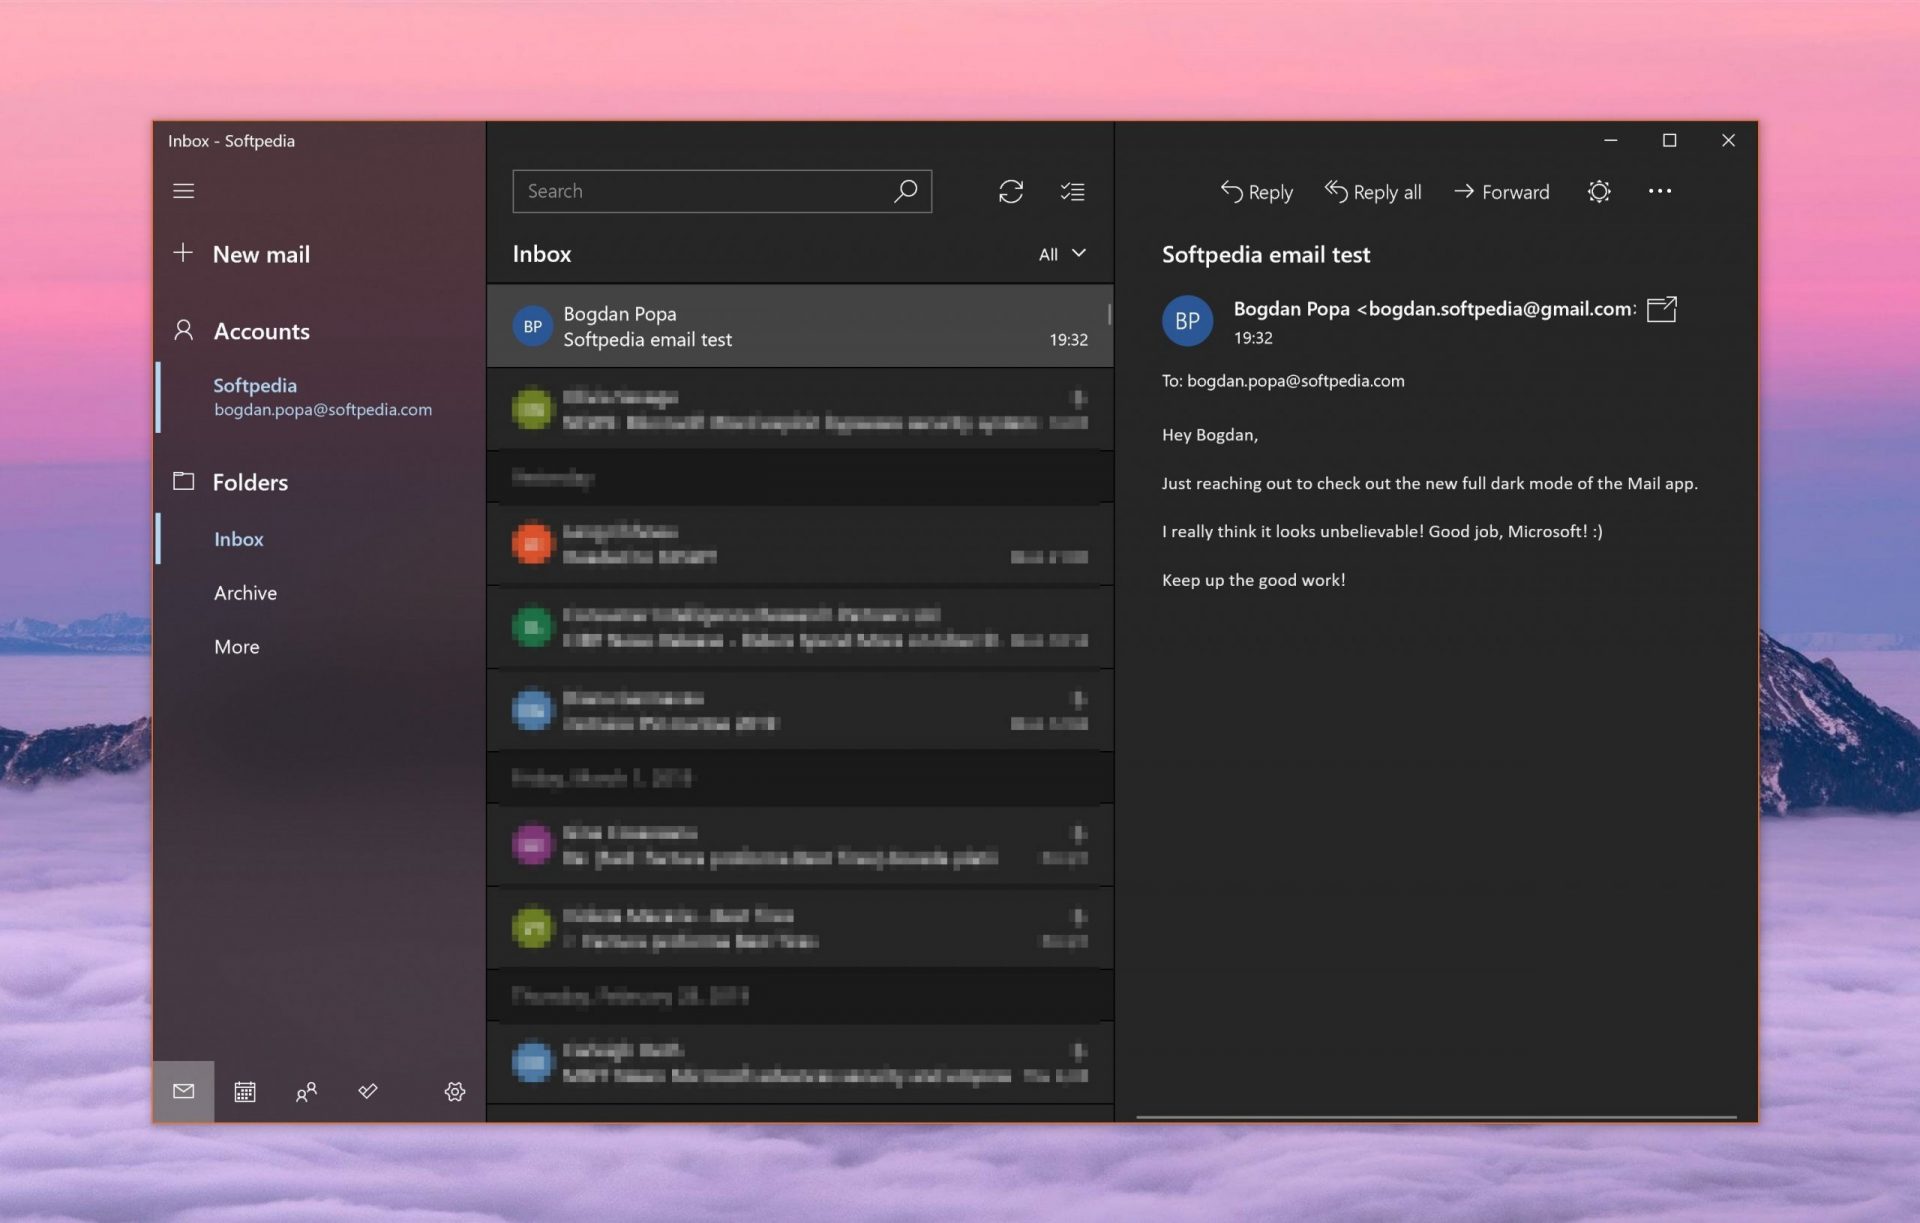 Free Windows eMail client simply called Mail is what was once outlook express. Mail itself has the ability to work with other popular accounts like Google Gmail account, Yahoo, iCloud etc. How it comes with Windows OS and it integrates very well with Microsoft Calendar, this eMail client is for many the first choice.
On the negative side, I might say this is a strip-down version of Outlook which is paid solution so some features are missing if we would compare the two.
Overall, a simple and nice eMail client worth your time, especially if you are on the Windows platform.
Free Windows eMail client simply called Mail is what was once outlook express. Mail itself has the ability to work with other popular accounts like Google Gmail account, Yahoo, iCloud etc. How it comes with Windows OS and it integrates very well with Microsoft Calendar, this eMail client is for many the first choice.
On the negative side, I might say this is a strip-down version of Outlook which is paid solution so some features are missing if we would compare the two.
Overall, a simple and nice eMail client worth your time, especially if you are on the Windows platform.
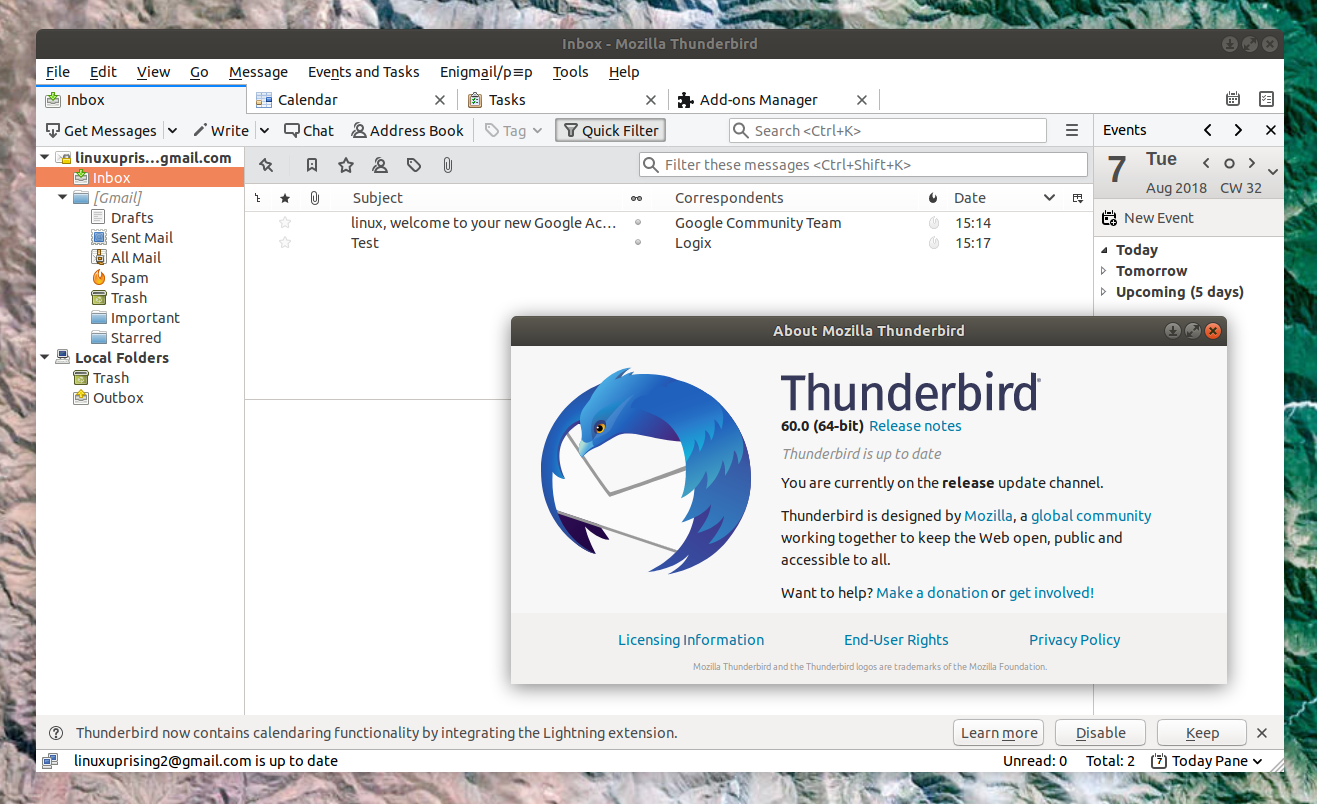 Great eMail client matching in functions against paid and premium solutions of big tech companies. Fueled with plenty of customization options and reskinning ones this eMail client offers a lot for its free price tag.
It is also fueled by Mozilla community focusing on privacy and security. It can work with any mail service and it is lightweight with a clean look, altho the look itself can be heavily customized.
The bad side is that client itself relies on email services to provide cloud-based emails, so if you are receiving your email via a service that does not have a cloud-based service in itself all of your received emails will be locked to the computer where you have received them. Also customizing it can be sometimes a little too technical for the average computer user.
All in all, Thunderbird is one great eMail client and it would be a shame not to use it because of its technical side, if you need a reliable and secure eMail client on a single machine, look no further than Thunderbird.
Great eMail client matching in functions against paid and premium solutions of big tech companies. Fueled with plenty of customization options and reskinning ones this eMail client offers a lot for its free price tag.
It is also fueled by Mozilla community focusing on privacy and security. It can work with any mail service and it is lightweight with a clean look, altho the look itself can be heavily customized.
The bad side is that client itself relies on email services to provide cloud-based emails, so if you are receiving your email via a service that does not have a cloud-based service in itself all of your received emails will be locked to the computer where you have received them. Also customizing it can be sometimes a little too technical for the average computer user.
All in all, Thunderbird is one great eMail client and it would be a shame not to use it because of its technical side, if you need a reliable and secure eMail client on a single machine, look no further than Thunderbird.
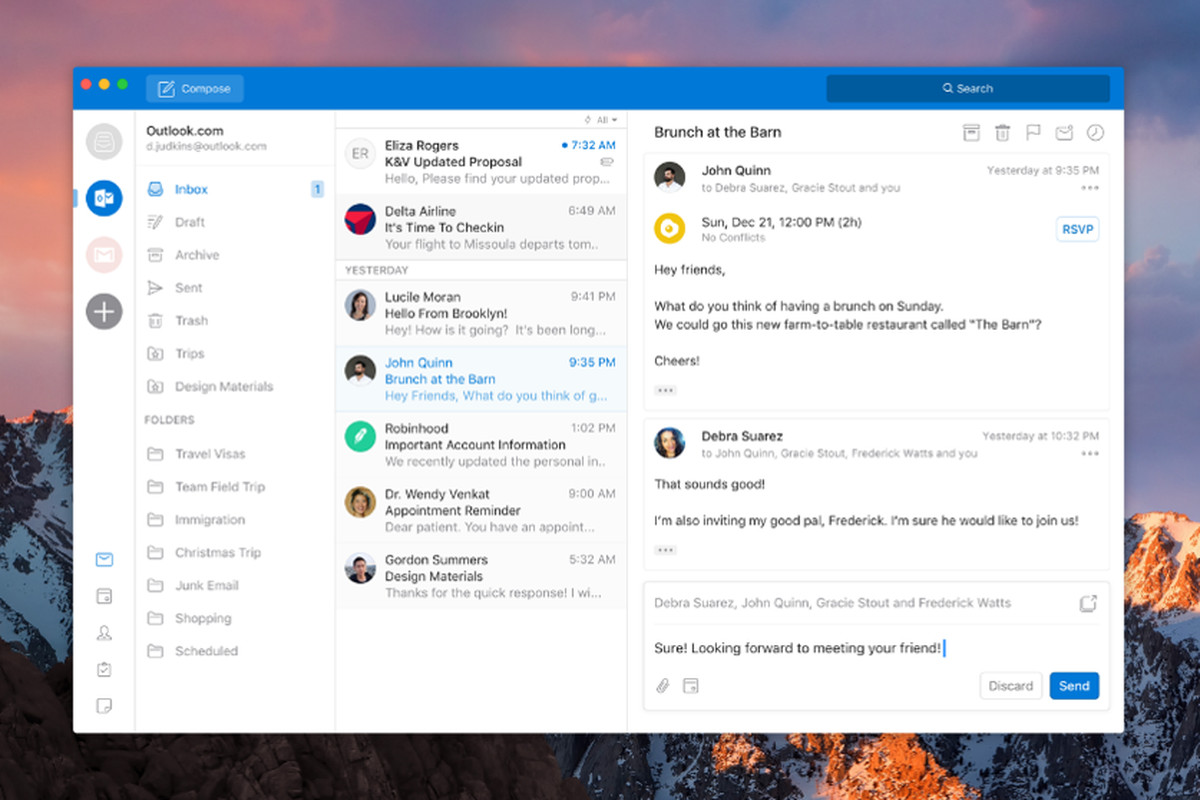 Outlook comes as a part of the Microsoft Office suite and as one of the oldest eMail clients, it is still widely popular and adopted through many users and businesses. It has tight integration with all Microsoft services and full integration with Calendar making it one of the if not the best eMail client out there.
Outlook also has a free online service completely free for personal use as well.
The downside is that you can not get it as a separate product if you want a business version other than as a part of the Office suite.
The final verdict would be that this is perhaps the best eMail client out but the big downside is that there is no desktop version outside the Office suite.
Outlook comes as a part of the Microsoft Office suite and as one of the oldest eMail clients, it is still widely popular and adopted through many users and businesses. It has tight integration with all Microsoft services and full integration with Calendar making it one of the if not the best eMail client out there.
Outlook also has a free online service completely free for personal use as well.
The downside is that you can not get it as a separate product if you want a business version other than as a part of the Office suite.
The final verdict would be that this is perhaps the best eMail client out but the big downside is that there is no desktop version outside the Office suite.
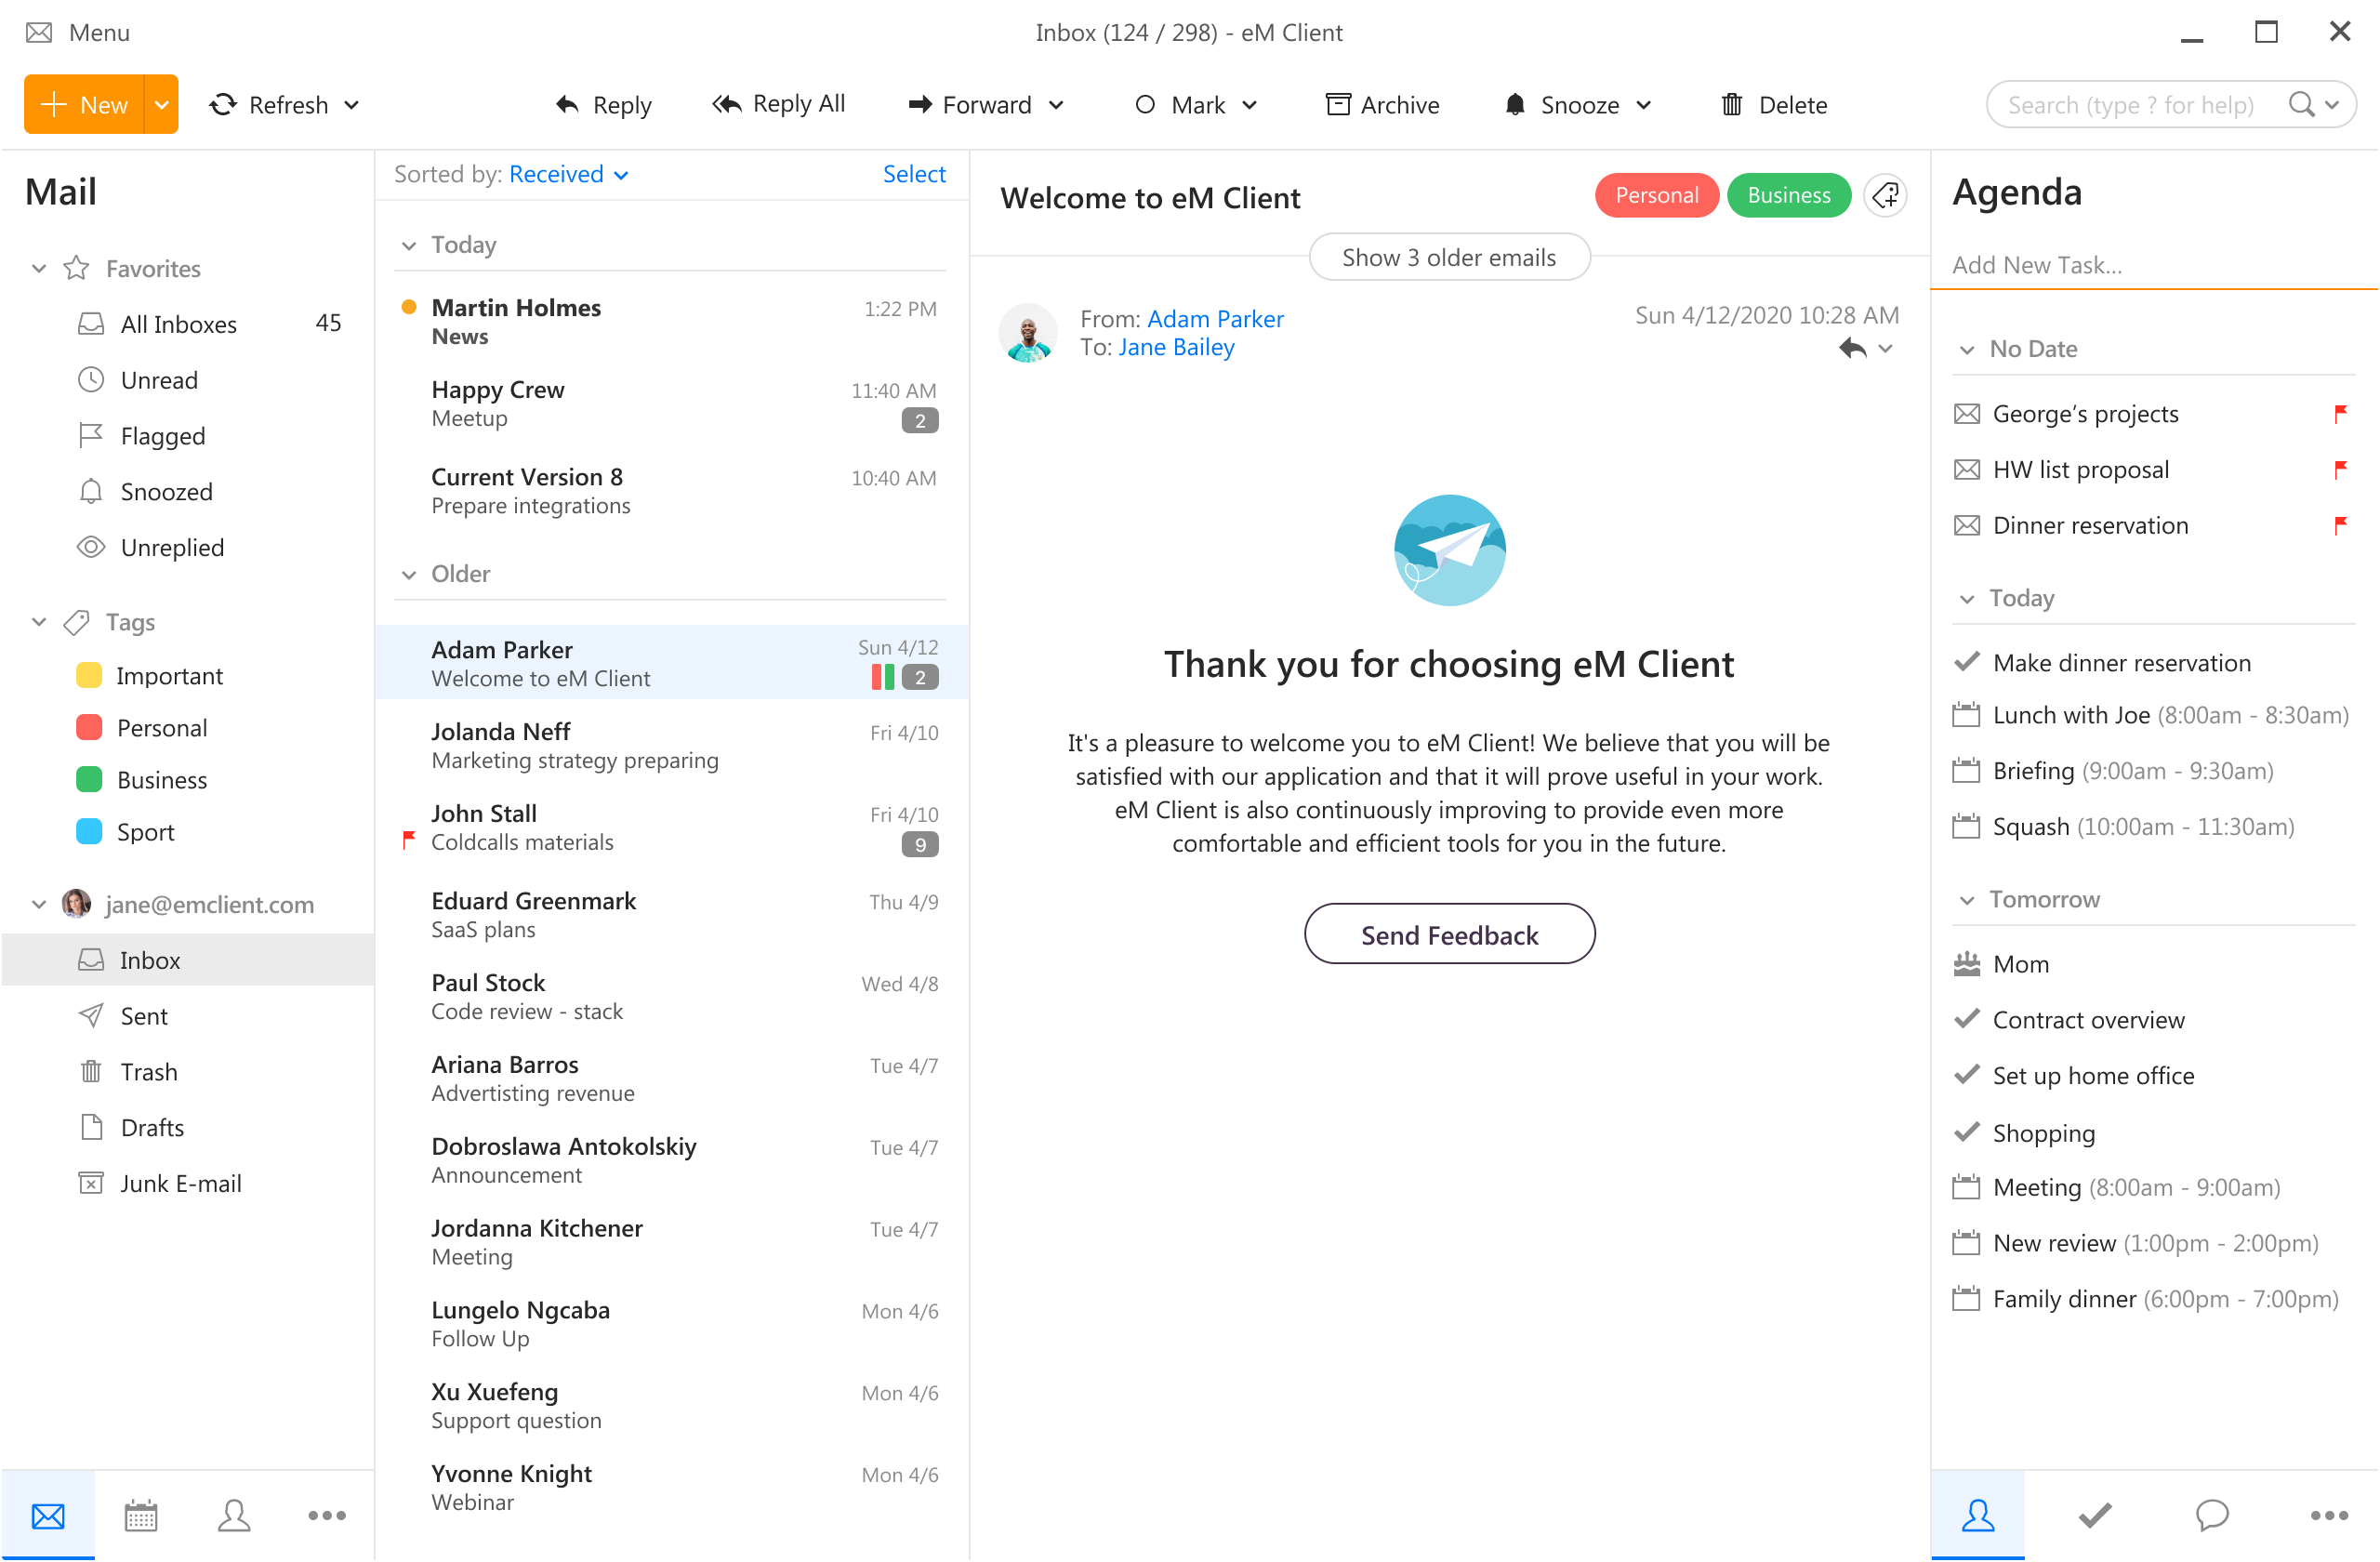 eM Client offers a wide array of features, including a calendar, contacts, and chat. Support is provided for all the major email services including Gmail, Yahoo, iCloud, and Outlook.com. The latest version also offers PGP encryption, live backup, basic image editing capabilities, and auto-replies for Gmail.
Its automatic system makes it very easy to get emails from other services since there is no manual setting, all that is needed is to type in your email and eM Client will do everything else automatically.
A one-time purchase is not pricy and it could offer some features that some free clients are missing. Go check it out with a free trial and see if it is for you.
eM Client offers a wide array of features, including a calendar, contacts, and chat. Support is provided for all the major email services including Gmail, Yahoo, iCloud, and Outlook.com. The latest version also offers PGP encryption, live backup, basic image editing capabilities, and auto-replies for Gmail.
Its automatic system makes it very easy to get emails from other services since there is no manual setting, all that is needed is to type in your email and eM Client will do everything else automatically.
A one-time purchase is not pricy and it could offer some features that some free clients are missing. Go check it out with a free trial and see if it is for you.
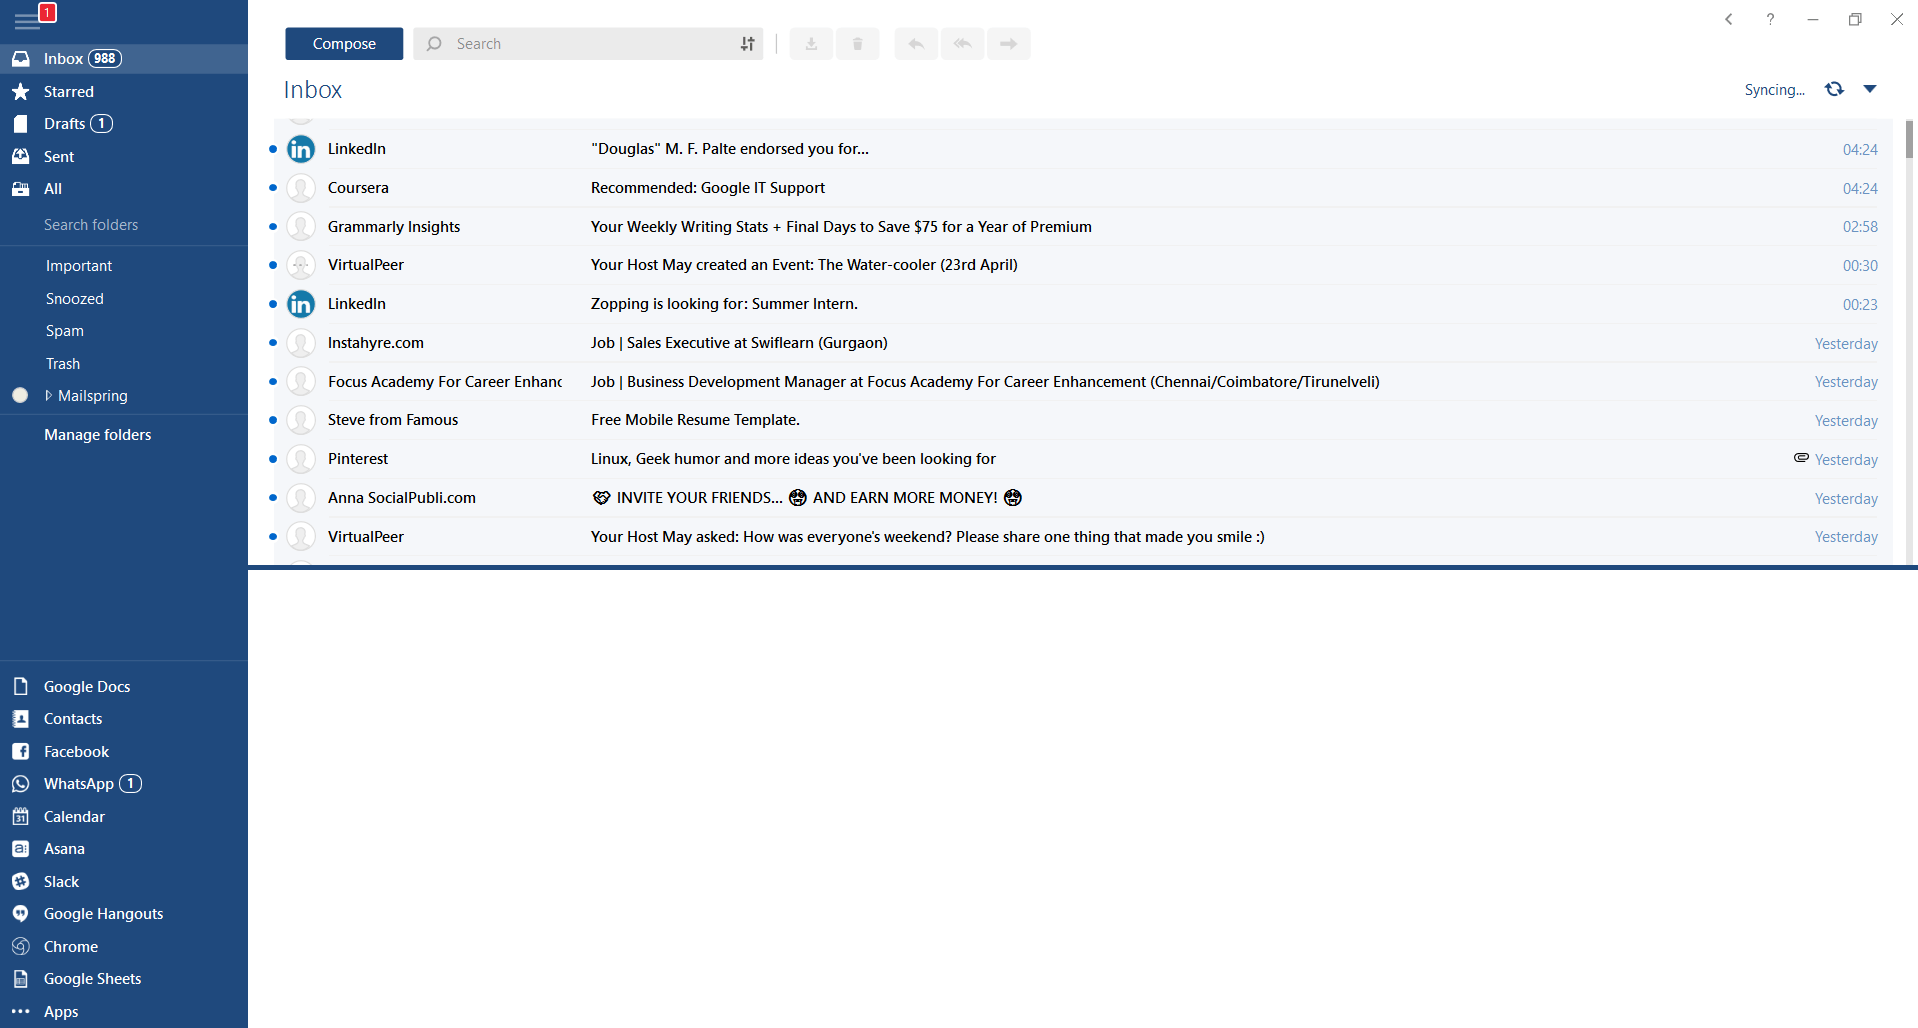 This eMail client's main focus is the simplicity of use with visual appeal while tackling multiple eMail accounts. It has many built-in apps along with a customizable interface. Unlike some more Microsoft-centric email clients, Mailbird Business supports a diverse range of integrated apps, including WhatsApp, Google Docs, Google Calendar, Facebook, Twitter, Dropbox, and Slack, all making for a better-streamlined workflow.
The downside of this client is the yearly subscription plan. I think people, in general, want to get away from software subscription plans so I will include this as a downside but bear in mind it is downside just in terms of a business plan not in the client itself.
This eMail client's main focus is the simplicity of use with visual appeal while tackling multiple eMail accounts. It has many built-in apps along with a customizable interface. Unlike some more Microsoft-centric email clients, Mailbird Business supports a diverse range of integrated apps, including WhatsApp, Google Docs, Google Calendar, Facebook, Twitter, Dropbox, and Slack, all making for a better-streamlined workflow.
The downside of this client is the yearly subscription plan. I think people, in general, want to get away from software subscription plans so I will include this as a downside but bear in mind it is downside just in terms of a business plan not in the client itself.
 Inky is eMail client if you are looking for security. It uses AI along with machine learning in order to block all types of phishing attacks that can get through to other clients. The proprietary machine learning technology can literally read an email to determine if it has phishing content, and then is able to quarantine the email or deliver it with the malicious links disabled. It also takes things a step further and offers an analytics dashboard, which allows an administrator to see patterns of attacks based on dates, or targeted users.
The downside is that client itself is so much focused on security that sometimes some nonsecurity features get overlooked and provide a poor experience but if you need a good and greatly secured eMail client Inky is one to check out.
Inky is eMail client if you are looking for security. It uses AI along with machine learning in order to block all types of phishing attacks that can get through to other clients. The proprietary machine learning technology can literally read an email to determine if it has phishing content, and then is able to quarantine the email or deliver it with the malicious links disabled. It also takes things a step further and offers an analytics dashboard, which allows an administrator to see patterns of attacks based on dates, or targeted users.
The downside is that client itself is so much focused on security that sometimes some nonsecurity features get overlooked and provide a poor experience but if you need a good and greatly secured eMail client Inky is one to check out.  The first new feature that was slid in is Always on top utility. With this cool utility, you can keep the window as the name suggests, always on top of other windows. To enable this cool feature all you have to do is press the key combination of ⊞ WINDOWS + CTRL + T and an active window will be now always on top of all other windows. To reverse and unlock this window from being always on top just press key combination again.
A second new feature is a really great one and my favorite thing to happen in power toys. Often we are making the search in our browsers to find stuff, things, maybe some explanations, information, etc. The newest update in power toys brings this to a whole new dimension. While you are on PC you just simply need to type ?? followed by questions like: ?? When doctor strange 2 is coming out and that will launch your default browser with your chosen search engine and provide you with the answer.
Third and final thing is G-code support in the file explorer preview pane and thumbnails, meaning that if you work with CNC equipment you can now have a thumbnail preview of the code itself inside File Explorer.
And that’s it for now, thank you for coming and reading, Take care and I hope to see you next time.
The first new feature that was slid in is Always on top utility. With this cool utility, you can keep the window as the name suggests, always on top of other windows. To enable this cool feature all you have to do is press the key combination of ⊞ WINDOWS + CTRL + T and an active window will be now always on top of all other windows. To reverse and unlock this window from being always on top just press key combination again.
A second new feature is a really great one and my favorite thing to happen in power toys. Often we are making the search in our browsers to find stuff, things, maybe some explanations, information, etc. The newest update in power toys brings this to a whole new dimension. While you are on PC you just simply need to type ?? followed by questions like: ?? When doctor strange 2 is coming out and that will launch your default browser with your chosen search engine and provide you with the answer.
Third and final thing is G-code support in the file explorer preview pane and thumbnails, meaning that if you work with CNC equipment you can now have a thumbnail preview of the code itself inside File Explorer.
And that’s it for now, thank you for coming and reading, Take care and I hope to see you next time.