Afraid of the growing threats online? As you should be. But we’re here to show you what kinds of malware are out there and what you can do to keep them at bay.
Malware definition
Malware comes from the term malicious software. It’s software designed to attack and exploit devices and networks to the advantage of the hacker who made it.
Malware can be transmitted in different ways. Most commonly this happens via infected USB drives, downloadable files or malicious websites. Depending on the type and ultimate goal, the consequences of a malware attack can range from negligible to catastrophic.
Credit Ed Hardie on Unsplash
What kinds of malware are there?
1. Virus
A virus is typically spread via infected files, websites or links. It’s one of the oldest malware types and one of the most difficult to get rid of. That’s because, once activated, it replicates itself - hence the name.
It can perform different kinds of attacks, depending on what the creator wants to achieve. The main characteristic of a virus is that it really doesn’t show itself until you activate the host. So that’s a scary thought for sure.
2. Adware
Sometimes an ad blocker isn’t enough to fight off unwanted ads. And some of them can, unfortunately, be malicious. They may redirect you to infected sites or prompt downloads of risky files. Even just opening a malicious site can lead to data theft.
So, definitely be careful when clicking around. Even if an ad seems completely legitimate, you can never be too sure.
3. Ransomware
Through ransomware, cybercriminals gain access to a user’s data and use it to extort them for money. Basically, the user is threatened with data deletion or even exposure if a ransom isn’t paid by a specific deadline.
This is a particularly nerve-wracking type of malware. If it targets an individual, it preys upon their sense of anxiety, fear, guilt and even shame. If it targets a business (which is a lot more common), it preys upon not only that business’s profit but also every single one of their customers and their data.
4. Trojans
This type of malware disguises itself very well as a legitimate-looking program. Once you download it, hackers can get full access and control of your device, data and network. They can even be hidden in games, apps and attachments. They cannot self-replicate, though, so we guess that’s… good news?
5. Worms
Worms can replicate, just like viruses, but you don’t need to actually activate the infected program for them to get going. They can be used for various purposes, ranging from data deletion to file encryption to support a ransomware attack.
Credit Growtika on Unsplash
6. Spyware
Spyware refers to malicious software that stays hidden on your computer and monitors your activity. The best-known type is keyloggers. This can be used to steal sensitive data like passwords and banking information.
7. Rootkits
Rootkits are among the most dangerous types of malware. They allow administrative access and full control of a device, which lets hackers continue hijacking all your data and monitoring your activity without your knowledge.
8. Botnets
Botnets are networks made up of bots - computers that cybercriminals have infected with malicious software. Bots and botnets give hackers remote access to users’ devices and allow them to spy on your camera, take screenshots, memorize passwords and launch Distributed Denial of Service attacks. This one truly makes your hair stand on end.
What can you do about it?
You know the old adage - better safe than sorry. And trust us, malware attacks are such a pain in the you-know-what that you really don’t want to be sorry.
Luckily, there are simple solutions that can shield you from most digital threats these days. What you want to be looking at is a solid antivirus program. Well, technically, you need an antimalware program, but since the latter evolved from the former, we still mostly refer to them as antivirus software. The majority of antimalware programs these days don’t just shield you from potential risks online, but include additional features as well. For example, some Bitdefender antivirus packages also include parental control and a VPN. And Bitdefender is not just for PCs either - it offers protection for your beloved iPhone or Android as well. You can throw in a password manager in there too, for an additional layer of security.
Credit Dan Nelson on Unsplash
If you aren’t too concerned about all these various threats or feel like you don’t need extra security, you can at least take a step to protect your information from being exposed to lurking cybercriminals as you’re browsing. This can be done through a good VPN like Surfshark, which hides your identity in the digital space and prevents your data from being tracked.
Choosing the right protective software is especially important if you have children with access to the Internet, since they’re unfortunately even more vulnerable to malicious attacks. If you aren’t sure what the right kind of antimalware program is right for you, you can reach out to us and we’ll be happy to help keep your entire household or office digitally secure.
The bottom line
The truth is that there’s no way to be 100% protected in the online world. Hackers are constantly coming up with new ways to infiltrate our devices. But malware-battling software evolves along with them and there’s still plenty you can do to keep risks away. Stay safe!
Universal PnP or plug-and-play monitors use a generic PnP Windows driver.
Whenever a user plugs a USB device or monitor into a PC the system will automatically identify the device and it will install the proper driver for smooth running.
Generic PnP Monitor in Windows 10 means that Windows 10 installed a monitor driver as the PNP did not recognize the device. This generic PnP monitor driver may not work perfectly like the manufacturer’s one.
It can lead to issues like unable to set the best monitor resolution and the screen refresh rate. Therefore, it is important to fix this issue.
All of that being said let us fix your PnP display driver issue.
Reconnect monitor
Always try this first, just by unplugging the monitor and then plugging it back may resolve the issue, if the monitor was not detected properly the first time, there are very high chances that this method will resolve the issue.
Check if the Device Manager is reporting an error and update the driver
If the hardware is functioning properly then the issue might be in Windows not detecting device or driver malfunction. In any case, the Device Manager will be the one who will report this problem. In order to check to see if the driver is properly working press ⊞ WINDOWS + X to open the hidden start menu.
Once it opens, click on Device Manager to open it,
If you have a driver device error inside Windows, you should see it immediately when entering the Device Manager, it will have a yellow exclamation mark beside it. Right-click on it and choose update driver.
Reinstall driver
If driver update failed or you already have the latest drivers, reinstalling them could fix the issue since drivers might have corrupted during installation of some update or application. Follow steps from point 3 to get to the driver in Device Manager, then right-click on it but instead of update choose to uninstall. Reboot Windows once the driver is uninstalled and Windows will install a new one automatically. If you do not want to update drivers automatically install the latest driver for your device, then reboot.
Check Windows update
Check to see if the latest Windows update is installed, update your Windows if needed
Fix driver issue with DRIVERFIX
If everything else fails, get DRIVERFIX, a premium solution for your PC issues, and fix driver errors.
A general rule of thumb, which is followed by most users, is to download the specific missing DLL file and place it within the software’s installation directory. However, this can be harmful to your system as hackers often upload popular malicious DLL files to target systems. Thus, you should avoid downloading DLLs from the internet. And follow these steps to fix the DLL error:
Restart your computer
System restore to an earlier state
Run a malware/virus scan
Update all the hardware drivers
Running SFC /scannow command in command prompt
Then do as the error suggests, reinstall the program if it’s feasible. Game files can take several hours to install and therefore, reinstallation can be a cumbersome job. Also, frustrating if the error appears after reinstallation.
Update device drivers manually, such as graphics drivers, DirectX software if you see DLL missing error while running game
Microsoft’s initial Windows 11 hardware requirements were not really well received by users and they were not really clearly represented from the start making a lot of potential customers slowly drift away from the hype.
It seems that Microsoft has acknowledged this since they have changed their tune about system hardware requirements for the upcoming Windows 11.
It seems that Windows 11 will be able to be officially installed on unsupported computers but with a little inconvenience.
What is a catch?
Windows 11 will still have the same hardware requirements and if the PC meets them, that computer will be officially supported, other ones (any that can run Windows 10) that do not meet system requirements can still run Windows 11 but the system will have to be clean installed. So no upgrade option for old computer users, just a clean install.
This means of course that you will need to download the ISO image and make a bootable USB in order to install it. Also since you will be doing a clean install do a backup of the hard drive since it will need to be formatted.
Also, Microsoft has stated that with unofficially supported PC some driver updates might not be delivered leaving you with either older driver versions or relying on your hardware manufacturer on them. This is still not confirmed by Microsoft, just stated as an option. We will see how it goes.
Conclusion
It is very good that Microsoft has reconsidered its system requirements and will not stubbornly push its initiatives over the top requirements allowing even older computers to install new OS.
I am sure over time lot of users will upgrade their hardware and drive into officially supported waters, but it is good that they will be able to use new OS on their current hardware.
Code 17 is a typical Spotify error code. Spotify is a music streaming service. Through this software, PC users can browse songs and search by artist, album, and playlist.
Simply put, it is an audio player available for BlackBerry, iOS, and Microsoft Windows desktop.
You may experience error code 17 if the process fails when downloading Spotify from the internet. The error message is displayed in any one of the following formats:
Error 17: Spotify has encountered a problem and needs to close. We are sorry for the inconvenience. Spotify could not be started (Error code 17)
Some of the symptoms of this error code are program crash, slow Windows performance, and periodic system freeze.
Solution
Error Causes
Error 17 may be triggered by several reasons such as:
Viral infection
Incomplete installation of Spotify software
Corrupt download
Registry corruption
Windows Installer service terminated
To use the audio player Spotify successfully on your PC, it is advisable to fix error 17 right away on your system. Delay may cause inconvenience and limit your access to your desired program.
Further Information and Manual Repair
To repair this error code on your PC, you don’t have to hire a professional or be a technical whiz yourself. The good news is that this error is quite easy to fix.
You don’t need to be technically sound to resolve it. Here are some proven methods for you to fix error code 17 on your system.
So let’s get started:
Method 1 - Make sure that the Windows Installer is running
Sometimes Spotify error 17 may occur if the Windows Installer service is terminated. Therefore before you download, make sure the Windows Installer is running. This is a good way to ensure the error code 17 messages don’t pop up on your PC again.
For this here’s what you need to do, first quit all programs. Now go to the start menu and in the search box type RUN, and press enter. In the Open Box, type msiexec /unregister and then press OK to confirm.
After that, perform the same steps again, and now in the Open Box type msiexec /regserver and press OK to save.
Reboot your PC and try downloading Spotify again. If the program successfully downloads on your system, then this means error 17 is resolved. However, if the error code still persists, then try other methods given below.
Method 2 - Use System Restore to Undo Recent Changes
Another reason for the cause of error 17 is the improper or incomplete installation of Spotify. Improper installations can configure settings and also leave bad entries in the registries.
To resolve, use System Restore utility built-in Windows. By using this system tool, you can undo recent changes and resume your computer to its previous condition as it was before the proper installation was attempted.
To do this, go to the start menu, then in the search box type System Restore and press enter. Go to System Restore and choose a restore point. Once you’ve selected the point, reboot your PC to activate changes.
Method 3 - Remove Viruses
Viruses can enter and damage your PC if you download software programs from unknown websites. These not only damage your PC but also hinder your ability to install desired programs successfully in this case audio player Spotify.
In such an event, simply use an antivirus to remove all viruses infecting your system. After they are removed, make sure you download and install Spotify software from a trusted website.
Method 4 - Repair the Registry
Another cause of error 17 is registry corruption. This occurs due to bad entries, invalid and junk files saved in the registry. To fix the corrupt registry simply download Restoro.
This is a user-friendly PC Fixer embedded with a powerful registry cleaner. This software is compatible with all Windows versions. The registry cleaner detects all registry issues, removes all file corrupting the registry, and cleans it immediately in just a few clicks.
Click here to download Restoro on your PC and resolve Error 17.
Some users wanting to upgrade to Windows 10 from Windows 7 or Windows 8.1 experienced errors with installation. One of these errors is CPU Not Compatible. When you click and run the “Get Windows 10” from your system tray bar, you’ll receive the “CPU is not compatible with Windows 10” error. When this happens, it might be good to check if there’s a bug or if your NX feature (a requirement for the Windows 10 installation) is enabled.
Solution
Error Causes
The “CPU is not compatible with Windows 10” error normally occurs when:
NX feature is not enabled
You experienced the Windows 10 bug
Further Information and Manual Repair
To successfully upgrade to Windows 10, your CPU must support Physical Address Extension (PAE), SSE2, and NX features. If any of these features are not activated on your system, it’ll cause the CPU not compatible error. However, some users still reported experiencing this error even though their CPU has these features activated. Normally, this is due to the bug that Windows acknowledged.
If any of these two scenarios apply to your computer, the following methods will help you fix the problem:
Method 1 – Check for bugs
The bug applies to some Windows 7 and Windows 8.1 systems. The bug occurs when the “Get Windows 10” app fails to recognize CPUs as being compatible. This produces a false negative result with a message, “Here’s why Windows 10 cannot be installed on this PC: The CPU isn’t supported”. To fix this bug, Microsoft released an update.
Unfortunately, the patch update (KB2976978 for Windows 8/8.1 and KB2952664 for Windows 7 SP1) to fix the bug may not be automatically downloaded to your computer. If this is the case, you need to verify first if the patch was installed correctly. To do this, follow the steps below:
Click ‘Start’ and type in View Installed Updates. The “View installed updates” icon should appear. Click the icon.
Go to the Search bar (Top right portion) then type the patch name for your system. Make sure that you type the correct patch name for your system since Windows 7 and Windows 8/8.1 have different names. If you find the patch, it means it’s already installed. You can now upgrade to Windows 10 without the CPU not-compatible error.
But, if you can’t find it you need to install the patch manually.
Go to Windows Update then click the “Check for Updates” button.
Browse through the available updates and look for KB2976978 for Windows 8/8.1 or KB2952664 for Windows 7 SP1
Download the right patch. You may need to reboot your system once it’s done.
The downloaded patch should be applied after a day or two with the Windows Task Scheduler. Once the patch is applied, you can now upgrade to Windows 10.
Method 2 – Check CPU features and activate them if needed
A major requirement for Windows 10 upgrade is for the CPU to have Physical Address Extension (PAE), SSE2, and NX features enabled on your system. If you receive the CPU not compatible error, one possible cause is that any of the mentioned features are not available OR not enabled on your system. Here’s how you can fix this:
Verify if your CPU supports the three instruction sets. You can use software that provides information like this. If all three are available, proceed to the next step.
Go to your computer’s BIOS. To do this, reboot your computer. You will need to press a key specific to your computer’s manufacturer (usually it’s F12, F8, F2, or DEL).
Look for the NX (No Execute Bit) settings. This is normally found in the “Advanced Configuration” menu, or something similar to this. Just take note that the NX setting can be named differently in BIOS. Some other names include EDB (Execute Disabled Bit), EVP (Enhanced Virus Protection), Execute Disabled Memory Protection or No Excuse Memory Protect.
Once you’re in the NX settings, make sure that it’s enabled.
Exit the BIOS and SAVE your changes.
Boot your computer normally, then try upgrading to Windows 10 again through the “Get Windows 10” app found in the system tray.
Method 3 – Force enabling NX Bit
If changing the settings in your BIOS doesn’t do the trick, your final option is to force enable the NX bit in your Windows system. However, this is only applicable IF and ONLY IF your CPU does support it. To force enable NX bit, do the following:
Click Start and go to command prompt (Type “cmd” – no quotes) and press enter.
Copy and paste the text below to the command prompt.bcdedit.exe /set {current} nx AlwaysOn
Execute the command. You will need to reboot your computer once this is done.
Download and install Windows 10
Method 4 – Use a trusted automated tool
If you still experience the error after doing the methods above, you might want to try a powerful and trusted automated tool to fix the job.
In case you don’t know, the Windows Script Host provides capabilities such as batch files but it also includes many other features like it can be used by a user manual as well as created by the operating system to automate the flow of operations in the system. However, there are a lot of errors that could take place in such a process. One of them is the following error:
“Script: <PATH of the VBS Script>Line: xChar: xError: The description of the error.Code: xxxxxxxxSource: (Source of the error)”
At the time of writing, it isn’t clear yet what the root cause of the error really is but there are several potential fixes you can check out to fix it. You can try to run the System File Checker or set the default value for the .vbs key, or troubleshoot the problem in a Clean Boot State. You could also try to repair Install Windows 10 or scan your computer for malware. For more detailed instructions refer to the following options.
Option 1 – Try to run a System File Checker scan
In the Windows Start Search, type “command prompt” and right-click on Command Prompt from the search results, and then select the “Run as administrator” option.
After opening Command Prompt with admin privileges, type the “sfc /scannow” and tap Enter to execute it.
Once the scan is finished, restart your computer and see if the Windows Script Host error.
Option 2 – Try setting the default value for the .vbs key
Tap the Win + R keys to open the Run dialog box and type “Regedit” in the field and tap Enter to open the Registry Editor.
Next, navigate to this registry path: ComputerHKEY_CLASSES_ROOT.vbs
From there, double click on the default string and change its Value data to “VBSFile”.
Exit the Registry Editor and restart your computer for the changes to take effect.
Option 3 – Try troubleshooting the problem in a Clean Boot State
Setting your computer in a Clean Boot State can help you diagnose and later troubleshoot the problems in your computer. During this state, the system will start with a minimal number of drivers and startup programs that help in isolating the problem with the interfering software. To put your computer in a Clean Boot State, follow the given steps below.
Log onto your computer as an administrator.
Type in MSConfig in the Start Search to open the System Configuration utility.
From there, go to the General tab and click “Selective startup”.
Clear the “Load Startup items” check box and make sure that the “Load System Services” and “Use Original boot configuration” options are checked.
Next, click the Services tab and select the “Hide All Microsoft Services” check box.
Click Disable all.
Click on Apply/OK and restart your PC. (This will put your PC into a Clean Boot State. And configure Windows to use the usual startup, just simply undo the changes.)
From there, start to isolate the problem by checking which one of the programs you installed recently is the root cause of the problem.
Option 4 – Try to repair install Windows 10
First, you have to click this link and then click the Download Tool Now button.
Next, click the “Use the tool to create installation media (USB flash drive, DVD, or ISO file)…” option and follow the next given instructions on the screen.
Now select the ISO file option in step 5.
After that, you should now have an ISO file.
Next, go to the location where you’ve downloaded the ISO file.
Then right-click on the Windows 10 ISO file and select the Open with option and then select File Explorer.
Now click on “setup.exe” and follow the next instructions that appear on the screen. When asked, you have to select either Nothing (clean install) or Keep personal files only option. Take note that you must not select the “Keep personal files, apps, and Windows settings”.
Option 5 – Try scanning your computer using Windows Defender
It is possible that your computer is infected with malware which could be why you’re getting the Windows Host Script error. Thus, you need to scan your computer using Windows Defender.
Tap the Win + I keys to open Update & Security.
Then click on the Windows Security option and open Windows Defender Security Center.
Next, click on Virus & threat protection > Run a new advanced scan.
Now make sure that Full Scan is selected from the menu and then click the Scan Now button to get started.
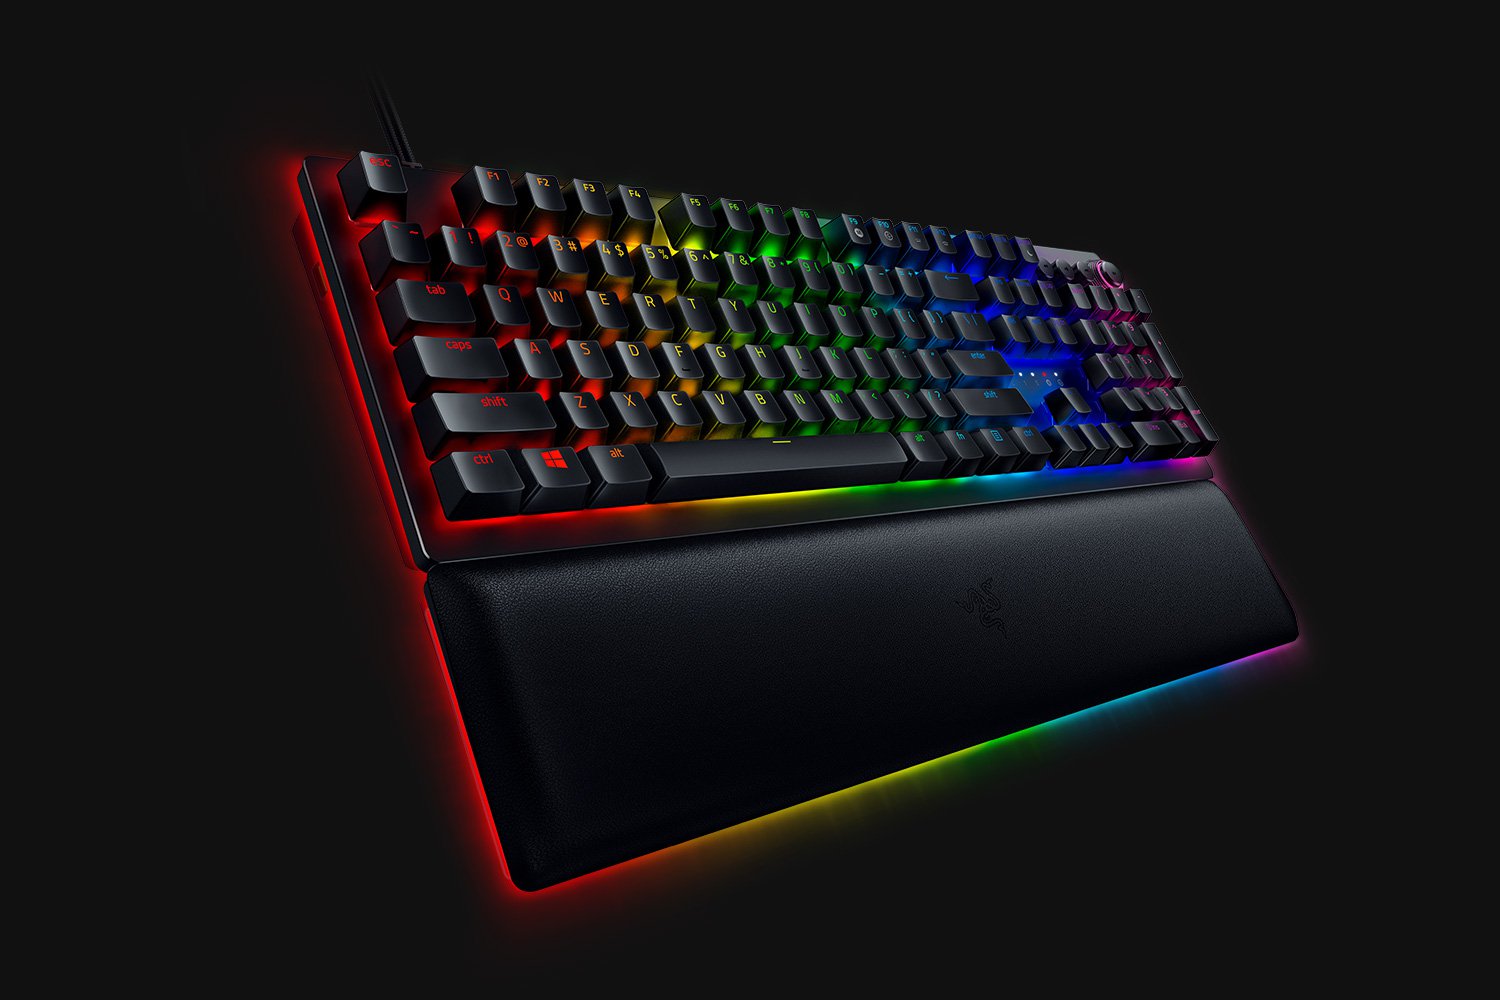
When it comes to computer peripherals first thing that comes to people's minds is probably Mouse and Keyboard. Also when discussing peripherals brands, Razer is not a stranger and over the years it has built its name and cult following.
Razer’s mechanical keyboards have been always in the upper field of quality and trust from users and Huntsman is no different.
Tech specifics of Huntsman keyboard
Mechanical optical switches
Razer has introduced their new optical technology switch with this keyboard. These switches are faster and more accurate than typical mechanical switches and if tests are to be believed this is the fastest keyboard currently on the market.
Multi-functional digital dial
A multi-function digital dial with three tactile media keys gives you instant access to everything from brightness to volume in seconds. All programmable and customizable through Synapse 3, so you can set your preferred configurations right at your fingertips.
10-key rollover
Anti-ghosting technology that enables 10-key simultaneous presses at the same time
4-side underglow with Razer chroma
Go crazy and personalize lighting effects any way you want with a full 4-side underglow and 38 customization zones. Powered by Razer Chroma
Feel and noise
In the department of noise, well it is the mechanical keyboard so naturally, it will be louder than membrane ones but in terms of comparing it to other mechanical keyboards it is within the same noise range, maybe just a tiny bit silenced.
The keyboard comes with 2 different types of switches, purple clicky ones that are louder and have that *click* sound for sound feedback, and red ones, that are not equipped with clicky sound but are linear providing slightly faster performance.
If you choose the Huntsman elite model of the keyboard it will come with a nice hand resting mat that is very comfortable and feels right. Using a keyboard feels like using a Razer keyboard, it is responsive and gives that superior mechanical feeling.
Conclusion
Razer Huntsman mechanical keyboard is not the cheapest nor the best on the market but it is the fastest one out. It is in the top tier of keyboards and worth the investment.
As you know, the Google Drive service is a Backup and Synchronization service provided by Google. It was launched way back in April 2012 which provides users with the options to synchronize, store and share files by uploading them to Google’s servers where they stay until they are deleted personally by the users and can be accessed anywhere using the Google Account that’s used to upload them.
Recently, a lot of users reported that they were unable to connect to Google Drive from their Windows 10 computers. This kind of problem has been noticed in the middle of the upload process and can be seen at times after the app launches. If you also experience the same issue, then you’ve come to the right place as this post will guide you in fixing it.
There are a lot of possible reasons why this kind of problem occurs. It could be that the app was not able to launch properly or the internet got disconnected when the app was about to launch. It is also possible that the Firewall has blocked the app from connecting to the internet or that the antivirus program is preventing the app from making contact with its database. Aside from that, it is possible that the account you are using on your computer is preventing Google Drive from connecting to the internet due to some configuration errors.
Follow the suggestions provided below to fix the connection issue with Google Drive.
Option 1 – Configure the Firewall
As mentioned, the Windows Firewall might be blocking the app from contacting its database so, in this option, you have to allow Google Drive through the Firewall. To do so, follow these steps:
In the Windows Start Search, type “firewall” and click on the “Allow an app or feature through Windows Firewall” option from the search results.
After that, you will see a list of apps, and here, click on the “Change Settings” button.
Next, scroll down and make sure to check both the “Public” and “Private” options for Google Drive.
Now click on Ok to save the changes made and then try to launch Google Drive again.
Option 2 – Try to launch Google Drive again
Google Drive might have not launched properly that’s why it can’t connect to its servers so you can try to launch it again and see if it helps.
Tap the Ctrl + Shift + Esc keys to open the Task Manager.
Next, go to the Processes tab and click on the “View” option located at the top.
After that, uncheck the “Group by Type” option and click on the “Google Drive Sync” from the list of processes.
Then click on the “End Task” option and close the Task Manager.
Launch Google Drive again and see if the issue is now resolved.
Aside from Firewall, antivirus programs, especially the third party ones, are also known to block files applications the instant it detects a threat to the system. Thus, your antivirus program might be the reason why you can’t download anything on your Windows 10 computer. To fix this, you can try to disable the antivirus program on your computer in the meantime and then try to launch Google Drive again. Do not forget to enable them again as disabling them can leave your computer vulnerable to cyber threats.
Option 4 – Try to create a new account
There are times when a certain configuration for a user account might be blocking some elements of the Google Drive app. In such cases, you can try to create a new account to fix the problem.
Click on the Windows key and then click on the icon for Settings.
From there, click on the Accounts button and select the “Family & Other People” option from the left pane.
Next, click the “Add someone else to this PC” option.
After that, click on the “I don’t have this person’s sign-in information” option and select the “Add a user without a Microsoft Account” setting.
Type in the credentials for the new account you are creating and click on Next.
After the account is created, click on the account and then select the “Change account type” option.
Click on the drop-down menu and select the “Administrator” option and then click on OK.
Now sign out of the current account and sign in to the new one and then open Google Drive again.
Isn’t it annoying when you get an error message pop up stating ‘Cannot find propsys.dll” or “propsys.dll not found” when you start your computer or open a particular program?
The propsys.dll file is crucial to the Windows operating system. This file is located in one of the following locations: "C:\Windows", C:\Program Files, C:\WINDOWS\system32, or C:\Program Files\Common Files". And the propsys.dll error indicates that the propsys digital library file is damaged and corrupt.
The propsys.dll error may lead to a very unstable operating system.
It may also hamper your ability to access many programs on your computer, lead to program and system crash and slow down the system’s performance. Therefore, to avoid these system threats, it is advisable to fix the error immediately.
Solution
Error Causes
The common causes of propsys.dll file error are:
Registry problem
The propsys.dll file is damaged due to a virus or spyware
Improper software removal
Hardware Failure
The propsys.dll error message is displayed in either of the following forms:
Propsys.dll not found
Cannot find [Path]propsys.dll
This application failed to start because propsys.dll was not found. Reinstalling the application may fix this problem
The propsys.dll file is missing
Further Information and Manual Repair
There are many ways to fix the propsys.dll error. However, for optimum results from the fix, you must first identify the cause of the error and then choose the solution accordingly.
Recommended Solution for Registry Issue
If you use your system daily the resulting wasted/invalid/junk entries may dilate the registries.
This can result in registry malfunctioning which may result in a propsys.dll error on your screen. When this happens, it is advisable to use a registry cleaner to fix the problem.
Registry cleaner helps clean up the junk entries and repairing the corrupted registries.
For this, you will first have to download a registry cleaner repair tool. Download and install the software on your computer. After downloading it, click the start scan button to run. This helps scan and diagnose system errors on your computer in seconds.
Once the scanning is complete, click on the fix button to repair the registry problem.
Recommended Solution for File Damage and Corruption
Use the ‘System Restore’ option to restore corrupt and damaged files. The ‘System Restore’ function will help you get a fresh copy back and simultaneously help fix the error. Here’s how to use and access the ‘System Restore’ function on your computer:
Simply go to the start menu and in the search box type restore. Once you type, it will show you the system restore option. Now select ‘choose a different restore point’. After this, you will be presented with a list of restore points.
Choose a point that you believe happened before the propsys.dll error. Confirm your selection and restart.
Another alternative solution for file damage is to run a virus scan of your entire system; the damage could be related to a virus or malware infection.
Recommended Solution for Hardware Failure
If a propsys.dll error occurs due to hardware failure, then it is advisable to update the drivers for hardware devices that you think are related to propsys.dll. For example, if you receive the propsys.dll error when you play a 3D video game, then try updating the driver for your video card.
Long working hours on a laptop can have some issues with laptop heating and thus slowing down. Today we will take a look at how can you prevent it from heating and keep it in a normal temperature range so it lasts longer and works better.
Close unnecessary programs or browser tabs
Usually, the main reason for high laptop temperature is the heavy and constant workload. Of course, the solution is very simple, turn off unnecessary browser tabs or applications running in the background, and less power will be needed for operation thus directly reducing workload and temperature.
Place it on a hard flat surface
Laptops generally have vents on the side and even under them, these vents, of course, are made so hot air is disposed of through them but if they are covered that will create issues. Placing computers on textiles, pillows, and legs can obstruct their venting holes and increase heat also since they are materials that are not taking heat away.
Your best practice should be placing the laptop onto a hard flat surface so air can flow freely and if you need to keep it in your lap there are lap desks made for this purpose.
Clean the laptop
With some good cleaning, the laptop can stop overheating, and generally, it will be cooler. Vents that has for ventilation can get clogged over large periods of time due to dust which is always present. Compressed air can be a quick easy solution to open the vents and redust it. Other methods include a compressor, vacuum, or brush in order to quickly remove any dust clogs. Taking it into service for complete redusting and paste change is also a great option.
Place it on the dedicated pad
There is some disagreement about using dedicated cooling pads for laptops, some say they are not effective at all, and some swear by them but from my experience good paired laptop and pad can indeed help with cooling it down. Usually, cooling pads will come with fans that will take away heat from the laptop itself reducing its overall heat.
Change your Windows power plan
If your laptop is constantly hot but you are not doing much with him check Windows power settings. There is a good chance it is set to run on a high-performance plan and if this is the case switch it back to a balanced power setting. Power plan like high performance will drain more power and more power will mean more heating. Of course, this will affect performance as well but for regular work that excludes some power gaming, video, and picture manipulations and other demanding tasks this power plan will work just fine.
Take control of the fans inside your laptop
Internal cooling is important and sometimes fans are not running to their full capacity so increasing their speed or changing their plan of work can cool down the computer nicely. Some laptops have fans controlling application already on them, especially gaming laptops but most of them do not. If your laptop does not have it, go to your laptop brand website and see if such an application exists for your model, if it does, download and install it but if there is no such application try general free ones like SpeedFan or Argus Monitor.
Reduce voltage of CPU and GPU
How more power means more heat, reducing the power that CPU and/or GPU take can be reduced inside BIOS by lowering voltage of these 2 components. First, go to BIOS and write down the voltage that is currently assigned to your CPU and/or GPU so you can bring it back if ever needed, also take note that reducing voltage and thus power will not affect negatively your components but increasing it thus overclocking can and will so be careful when bringing voltage back not to overdo it. You can always also reset your BIOS settings to bring them back to factory settings.
Do not use the laptop when charging it
When the laptop is placed on the charger in order to be charged and used at the same time, more power is drawn to it, and since the battery is taking electric charge instead of providing it more heat will be generated now since two different sources will be generating it, the battery itself and computer. When you really can not wait for the laptop to be charged, use it, but turn it off and wait to be fully charged if you can.


 Once it opens, click on Device Manager to open it,
If you have a driver device error inside Windows, you should see it immediately when entering the Device Manager, it will have a yellow exclamation mark beside it. Right-click on it and choose update driver.
Once it opens, click on Device Manager to open it,
If you have a driver device error inside Windows, you should see it immediately when entering the Device Manager, it will have a yellow exclamation mark beside it. Right-click on it and choose update driver. Microsoft’s initial Windows 11 hardware requirements were not really well received by users and they were not really clearly represented from the start making a lot of potential customers slowly drift away from the hype.
It seems that Microsoft has acknowledged this since they have changed their tune about system hardware requirements for the upcoming Windows 11.
It seems that Windows 11 will be able to be officially installed on unsupported computers but with a little inconvenience.
Microsoft’s initial Windows 11 hardware requirements were not really well received by users and they were not really clearly represented from the start making a lot of potential customers slowly drift away from the hype.
It seems that Microsoft has acknowledged this since they have changed their tune about system hardware requirements for the upcoming Windows 11.
It seems that Windows 11 will be able to be officially installed on unsupported computers but with a little inconvenience.

 When it comes to computer peripherals first thing that comes to people's minds is probably Mouse and Keyboard. Also when discussing peripherals brands, Razer is not a stranger and over the years it has built its name and cult following.
Razer’s mechanical keyboards have been always in the upper field of quality and trust from users and Huntsman is no different.
When it comes to computer peripherals first thing that comes to people's minds is probably Mouse and Keyboard. Also when discussing peripherals brands, Razer is not a stranger and over the years it has built its name and cult following.
Razer’s mechanical keyboards have been always in the upper field of quality and trust from users and Huntsman is no different.
