Logo

Fix error 0x00000709 when connecting a Printer

One of the most common and bothersome issues with a printer is when it refuses to get configured or set up on your computer. Thus when your printer has some configuration issues, you will most likely encounter the error 0x00000709.

This occurs if there is already a default printer set and configured or Windows does not want to configure the new printer at all.

The operation could not be completed (error 0x00000709), Double check the printer name and make sure that the printer is connected to the network.

Today, we will try two fixes that may help you get rid of this error.

Option 1 – Run the Printer Troubleshooter

One of the first basic troubleshooting you can perform to resolve the printer issue is running the Printer Troubleshooter. This built-in troubleshooter can detect and automatically fix the problem for you. To use it, follow these steps:

  • Tap the Win + R keys to open the Run dialog box.
  • Next, type “exe /id PrinterDiagnostic” in the field and click OK or hit Enter to open the Printer Troubleshooter.
  • Then click the Next button and follow the next on-screen instructions to fix the issue with the printer.

Option 2 – Try to use some Registry tweaks to add the Printer

You might want to use some tweaks to add the Printer but before you proceed, make sure to create a System Restore Point so that if anything goes out of hand, you can always undo the changes you’ve made.

  • Tap the Win + R keys to open the Run dialog box.
  • Next, type “Regedit” in the field and hit Enter to open the Registry Editor.
  • When a UAC or User Account Control prompt appears, click Yes.
  • Once you’ve opened the Registry Editor, go to the following key location:

HKEY_CURRENT_USERSoftwareMicrosoftWindows NTCurrentVersionWindows

  • From there, double click on the file named “Device on the right side pane under the Windows folder.
  • Now add the name of your printer in the Value Data field as you can see below and then click the OK button.

Note: As you can see on the image above, you must not change the “.winspool.Ne02:” part and only the first one which is the name of your printer.

  • After that, you will get a message that says, “Cannot edit Device: Error writing the value’s new contents, simply click on OK again. You have to take note of the existing permissions before you proceed to the next step. Once you’ve added the Printer, make sure to reverse the changes you’ve made to the Permissions.
  • Now right click on the Windows folder located on the left pane and click on Permission.
  • Select Restricted under the Group or user names section.
  • Then check the checkboxes for “Full Control”, “Read” and “Special Permissions” under the Permissions for RESTRICTED section.
  • After that click the Apply button and then OK to save the changes made.
  • Next, right-click on the file named “UserSelectdDefault” and select Rename to rename it to your printer’s name.
  • Now restart your computer to successfully apply the changes made.
  • After the printer is added, don’t forget to reverse the Permission changes you’ve made early on.

Option 3 – Try updating the Printer drivers

You might also want to try updating your printer drivers. All you have to do is locate the USB Composite Device. For complete details, follow the steps below.

  • First, click the Start button and type “device manager”.
  • Then click on the “Device Manager” from the search results to open it.
  • From there, look for the USB Composite Device option and right-click on it, and select the Update Driver from the options.
  • Restart your PC and then click the “Search automatically for updated driver software” option.

Note: You also have the option to download the latest version of your Printer from the manufacturer’s website.

Do You Need Help with Your Device?

Our Team of Experts May Help
Troubleshoot.Tech Experts are There for You!
Replace damaged files
Restore performance
Free disk space
Remove Malware
Protects WEB browser
Remove Viruses
Stop PC freezing
GET HELP
Troubleshoot.Tech experts work with all versions of Microsoft Windows including Windows 11, with Android, Mac, and more.

Share this article:

You might also like

Close non responsive application in Windows
We have all been there, unfortunately, the application freezes, and sometimes it can even freeze whole windows. Well if the whole Windows freezes because of the application there is not much we can do except hard reset but if only the application freezes we can still kill it and return the PC in working condition. The first thing you can try is to press ALT + F4, this shortcut is for closing the program, if the application is frozen Windows will try to close it when using this shortcut, and if it succeeds you will find yourself on the desktop environment in Windows with non-responsive application taken care of. If however, this fails and the application is not closed, try ending it in the task manager. To open task manager press CTRL + SHIFT + ESC, locate unresponsive application select it, and click on the end task button on the bottom right.
Read More
Windows 10 isn’t activated after upgrading for free

Error Code “Windows 10 isn’t activated after upgrading for free” – What is it?

Windows 10 isn’t activated error occurs when Windows users attempt to upgrade to Windows 10 for free and end up in a non-activated state. It is a Windows 10 activation error affecting PC owners who attempt to upgrade their Windows 7 or Windows 8.1 operating systems. A message box will appear with the following message: “Windows 10 isn’t activated after upgrading for free from Windows 7 SPI or Windows 8.1 update.”

Common symptoms of this error code include the following:

  • Inability to upgrade for free to Windows 10
  • The appearance of activation error code in the message box

Solution

Restoro box imageError Causes

To understand the cause of this activation error, users will need to understand activation within Windows. Activation is a process that allows Windows to verify that you are upgrading your operating system based on the Microsoft Software Licensing Terms. These terms specify, for instance, the number of devices upon which you can use Windows.

Once you have a genuine copy of Windows and you are following the terms mentioned earlier, you should be able to activate and complete the upgrade to Windows 10. However, the activation fails when these conditions are not met. Note also that the error may occur if users fail to upgrade to Windows 10 before reinstalling, requiring them to repeat the installation process by first going back to the previous version of Windows present on their system. Once the upgrade process is not done as should, you might encounter other Windows 10 errors such as error code 0xc0000142

If you see this error code, “Windows 10 isn’t activated after upgrading for free” proceed to rectify it using manual repair methods below.

Further Information and Manual Repair

To fix this activation error code in Windows 10, users will need to employ at least one manual repair procedure. This process can successfully be completed by non-technical Windows users. However, you may also consider getting assistance from a Windows repair technician if you are not certain you have the requisite skills needed to complete the manual repair tasks below.

The main methods to resolve the error code “Windows 10 isn’t activated after upgrading for free from Windows 7 SPI or Windows 8.1 update” is as follows:

Method One: Manually Activate Windows

If you attempted upgrading for free to Windows 10 and ended up with the activation error you will need to first perform a manual activation. Follow the steps below to complete the process.

  • Step one: Tap or click the Start button
  • Step two: Select Settings then Update & security
  • Step three: Select Activation
  • Step four: Once activation status is Connect to the Internet to activate Windows, click or tap Activate

The steps above enable users to successfully activate Windows 10 if the issue involves a connection problem. However, if Windows is not activated, it may mean your copy of Windows is not genuine. This may require you purchase a copy of Windows to rectify the issue. However, if you have a genuine copy of Windows proceed by applying the steps found in method two.

Method Two: Use Product Key to Verify Copy of Windows

A valid product key is one way you can verify your copy of Windows is genuine. This will enable you to complete activation and allow you to access the free upgrade to Windows 10. Follow the steps below.

  • Step one: Click or tap the Start button
  • Step two: Select Settings then Update & security
  • Step three: Click Activation
  • Step four: Select Change Product Key then type in the product key. (Ensure you type the 25 characters in the correct order.)

Method Three: Use an Automated Tool

Error codes in Windows often occur due to poor maintenance of one’s PC. To improve your system and reduce your machine’s risk of experiencing error codes, download a powerful automated tool. This tool is both powerful and user-friendly, making its benefits accessible to even the most non-technical Windows users.

Read More
How to Fix Windows 10 Error Code 0x80070008

Error Code 0x80070008 - What is it

Error Code 0x80070008 generally appears on machines running Windows 10, although it may sometimes also appear on earlier versions of the software, going all the way back to Windows 7, when the error was first introduced.

Common symptoms include:

  • Inability to complete the Windows 10 Update process fully
  • Machine running slowly
  • Messages about a lack of memory on the device in question

If Error Code 0x80070008 has appeared on your computer, there are several things that you can do in order to fix the error and be able to install updates as necessary. Most of these methods are simple enough to use, even for the most inexperienced users, but at least one of the methods may require advanced knowledge or comfort in changing your settings on a deeper level.

If you don’t feel comfortable in your ability to use the steps below to resolve Error Code 0x80070008, get in touch with a qualified technician who is experienced in memory issues and Windows 10 error code resolution to assist you.

Solution

Restoro box imageError Causes

There are three basic causes for Error Code 0x80070008. The first is that your machine may not have enough memory to finish the installation of an update. The second possible cause is that another program may be interfering with your machine’s ability to finish the update installation. Lastly, Error Code 0x80070008 can occur when a user has a lot of language packs, which may interfere with the ability to complete updates.

Further Information and Manual Repair

Because there are three different causes for Error Code 0x80070008, there are also three different methods to attempt to resolve the error. If you believe that the error may be caused by the number of language packs installed on your device, you should attempt method three first. Otherwise, use methods one and two first.

If you are not confident that you can do the steps below on your own to resolve Error Code 0x80070008, get in touch with a certified computer repair technician that is familiar with Windows 10 issues in order to fix the issue.

Here are the top three methods to resolve Error Code 0x80070008 on a machine running Windows 10:

Method One:  Run the Windows Update Troubleshooter

When Error Code 0x80070008 first appears on your computer, one of the first steps that you can take to resolve the issue is to open up the Windows Update module and click on the “Troubleshoot” tool. This will run a scan on the Windows Update tool to attempt to identify the root cause of the problem and to resolve it automatically for you.

If the troubleshooter finds a problem, simply follow the steps on the screen to resolve the error. In some cases, you may want to restart your computer after this process is complete before you attempt to run the Windows Update tool again.

Method Two:  Close All Programs Until Updates are Done

In some cases, a lack of memory on the machine can mean that running other programs while you are attempting to run Windows Update will cause the update process to fail. Closeout all of the programs that are running on the device, including any antivirus software or firewalls, before you run the update process. If this allows the Update process to run through to completion, you can then reactivate all of the programs that were running prior to the update.

Method Three:  Remove Unwanted Language Packs

This method generally applies to users who have an abundance of language packs installed on their machine, usually more than 20 in total, which may interfere with the update process. To remove unwanted language packs, follow these steps:

  • Step One: Open the Start Panel and select “Control Panel.”
  • Step Two: Find the setting for “Clock, Language, and Region” and choose “Region and Language.”
  • Step Three: Select the option for “Keyboards and Languages,” then under the settings for “Display language,” choose “install/uninstall languages” and select “uninstall display languages.”
  • Step Four: For any languages that you do not wish to keep, deselect them and choose “Next.” It may require several minutes for the process to complete.
  • Step Five: After the unwanted language packs have been removed from your computer, you can attempt to run Windows Update again. You may want to restart your computer first for maximum efficiency.

Method Four: Use An Automated Tool

If you wish to always have at your disposal a utility tool to fix these Windows 10 and other related issues when they do arise, download and install a powerful automated tool.

Read More
How to Fix Error Code 0x80240001 on Your PC

Error Code 0x80240001- What is it?

Error Code 0x80240001 usually occurs in Windows 10 and is specific to the process of updating your system. It is similar to an error code found in previous versions of the software during the update process. There are a number of steps that can be taken to solve this error code, most of which are fairly easy for the average user to undertake.

Common symptoms for this particular error code include:

  • Inability to complete the updating process of your Windows 10 system
  • A notice that the Windows Update Agent is not able to provide appropriate services through the update module.

While it can be frustrating to have this message appear during the update process, users can resolve the error in a number of ways. However, if you are not confident in your ability to follow the steps below or if the methods listed fail to resolve the problem, contact a certified Windows 10 repair technician to assist you in the process.

Solution

Restoro box imageError Causes

Error Code 0x80240001 occurs when the Windows Update tool is unable to complete its service successfully. This error occurs most often when users attempt to update to Windows 10 from older versions of the software, including Windows 7, 8, or 8.1.

This particular error code can also occur when your system has not been updated in a regular fashion. Stacked updates make it more likely for Error Code 0x80240001 to occur.

In most cases, when Error Code 0x80240001 appears on your screen, the update process will be halted. Sometimes, the screen may display a single color background, removing the appearance of all other windows and applications.

Fortunately, there are several methods that you can use to attempt to circumvent the problem and see the update process through to completion.

Further Information and Manual Repair

While it can be frustrating to deal with an error when you attempt to update your Windows software, there are several ways that you can seek to resolve the issue that causes Error Code 0x80240001. These steps are relatively simple to complete and do not require advanced techniques to be used. However, if you are not confident in your ability to complete the steps listed below, enlist the aid of a qualified Windows technician to help you.

Here are the most common ways that Error Code 0x80240001 can be resolved for Windows 10:

Method One:  Download and Use the Windows Repair Tool

From the Windows website, you can download the Windows Repair tool, if it is not already installed on your computer. While there are other tools available through outside sites that claim that they can resolve this error, in many cases, they can be a carrier for viruses and other kinds of malware, so it is inadvisable to use non-Windows tools to fix this particular error code.

Once you have successfully added the Windows Repair tool to your computer, open it up and look for the option to run “Repair Windows Update.” Using this process, your system can search for and resolve the error, allowing you to successfully run the update tool through to completion.

Method Two:  Uninstall Recently Added Software

In some cases, software that has been recently added to a non-updated computer can cause the update process to experience issues. If you believe that this may have occurred in your case, simply uninstall the software in question, then attempt to run the Windows 10 Update process again.

The best way to prevent this error from reoccurring when you seek to update your Windows 10 system is to apply updates within a short period of time from their release date. It is recommended that users update regularly, which can allow them to avoid a number of issues that are common to the update process.

If you have any difficulty in resolving Error Code 0x80240001 after you have attempted these steps, you may need to enlist the help of a qualified technician who is familiar with the specific errors related to the Windows 10 Update process. This can especially be helpful if you have recently installed a number of new kinds of software and are unsure of whether or not any specific one may be causing your issues. If you wish to always have at your disposal a utility tool to fix these Windows 10 and other related issues when they do arise, download and install a powerful automated tool.

Read More
Fix The backup application could not start
Windows comes with a built-in backup solution. However, if it failed because of an internal error, you will encounter an error message saying, “The backup application could not start due to an internal error, Server execution failed (0x80080005)”. When you get this kind of error, it means that it did not start and the process failed with a Server execution error. If you got this kind of error worries not for this post will guide you in fixing the problem in your Windows 10 computer. The Windows Backup service is an excellent feature in Windows that only works on the NTFS file system and if you want to use this make sure that you have formatted your files system to NTFS. It is performed by the Volume Shadow Copy, all you have to do is right-click on any folder and if you see the “Previous versions” option, this means that a backup process runs from time to time and can bring back old files when needed. To resolve the “The backup application could not start due to an internal error”, here are two suggestions you can check out.

Option 1 – Check if the Volume Shadow Copy service is running and restart it

The first thing you need to do is check if the Volume Shadow Copy service. To do that, refer to the following steps:
  • Click on Start and type “cmd” and right-click on Command Prompt from the search results.
  • Then select the “Run as administrator” option to open Command Prompt with admin privileges.
  • After that, type “net stop sdrsvc” and hit Enter to execute the command in stopping the Volume Shadow Copy service.
  • Next, type the “net start sdrsvc” command and hit Enter to start the service again.
Note: You can also restart the service using the Windows Services Manager.
  • In the Cortana search box, type “services” and click on the Services icon to open the Services Manager. Alternatively, you can also tap the Win + R keys to launch the Run prompt and then type “services.msc” in the field and hit Enter to open the Services Manager.
  • From there, look for the Volume Shadow Service (sdrsv) from the list of services. Its Startup type should be set to Manual by default.
  • Restart the service and if you don’t encounter any error while you turn it on, re-run the backup service and see if the backup process runs successfully.

Option 2 – Try to run the Volume Shadow Copy Service in a Clean Boot State

If the first option didn’t work and the service still keeps on failing even though the service is running, you can try putting your computer in a Clean Boot State and then try to run Windows Backup again.
  • Log onto your PC as an administrator.
  • Type in MSConfig in the Start Search to open the System Configuration utility.
  • From there, go to the General tab and click “Selective startup”.
  • Clear the “Load Startup items” check box and make sure that the “Load System Services” and “Use Original boot configuration” options are checked.
  • Next, click the Services tab and select the “Hide All Microsoft Services” check box.
  • Click Disable all.
  • Click on Apply/OK and restart your PC. (This will put your PC into a Clean Boot State. And configure Windows to use the usual startup, just simply undo the changes.)
  • Now try to run the Volume Shadow Copy service again and see if the process goes smoothly.
Note: You might also want to delete all the files in the backup solution if you want to start fresh with the backup solution. Just go to C:/System/Volume/Information/Windows Backup and take ownership of the folder. After that, make sure to stop the Volume Shadow Copy service and then delete all the files inside it.
Read More
Installation failed in the SAFE_OS phase
If you are trying to install a Windows 10 upgrade but was interrupted with an error saying, “0x80070003 – 0x2000D, The installation failed in the SAFE_OS phase with an error during MIGRATE_DATA operation”, then you’ve come to the right place as this post will help you sort this problem out. When you get this kind of error while trying to upgrade your computer, although there could be various reasons for this, the primary one is that when you upgrade from one update to another, something stopped the upgrade process to migrate the user data. To fix this error, you can try to run both the DISM tool and the System File Checker to automatically repair any corrupted system files. You could also try checking the free storage space of your primary drive and if you have any file lock apps like BitLocker, consider disabling them for they could also be the reason why you’re getting the error.

Option 1 – Run the DISM tool

Running the DISM Tool helps in repairing the Windows System Image as well as the Windows Component Store in Windows 10 which might be the reason behind the Windows Upgrade error 0x80070003 – 0x2000D. Using this built-in tool, you have various options such as the “/ScanHealth”, “/CheckHealth”, and “/RestoreHealth”.
  • Open the Command Prompt as admin.
  • Then type in this command: exe /Online /Cleanup-image /Restorehealth
  • Do not close the window if the process takes a while as it will probably take a few minutes to finish.
  • Once it’s done, restart your computer and then check if the issue is resolved or not on the next startup.

Option 2 – Run the SFC scan

The SFC or System File Checker scan could detect and automatically repair damaged system files that could be causing the Windows Upgrade error to appear. SFC is a built-in command utility that helps in restoring corrupted files as well as missing files. It replaces bad and corrupted system files to good system files. To run the SFC command, follow the steps given below.
  • Tap Win + R to launch Run.
  • Type in cmd in the field and tap Enter.
  • After opening Command Prompt, type in sfc /scannow and hit Enter.
The command will start a system scan which will take a few whiles before it finishes. Once it’s done, you could get the following results:
  1. Windows Resource Protection did not find any integrity violations.
  2. Windows Resource Protection found corrupt files and successfully repaired them.
  3. Windows Resource Protection found corrupt files but was unable to fix some of them.
  • Reboot your PC.

Option 3 – Try checking the free storage space on your primary drive

The next option you can try to resolve the error is to see if you have enough free storage space on the primary drive because if you don’t then it’s probably the reason why you’re getting this error. To fix it, you need to free up some storage space by following these steps:
  • Open Setting > System > Storage from the WinX Menu.
  • From there, you will see a list of all the local and connected storage devices along with the details on the free space.
  • Now make sure that the Storage Sense feature is turned On then go find a link that says “Free Up Space” and click it to open.
  • After that, a screen which is the built-in program in Windows 10 will appear and will scan your computer for the following junk files so you can free up disk space:
  • Windows Upgrade Log Files
  • System created Windows Error Reporting Files
  • Thumbnails
  • Temporary Internet Files
  • Previous Windows Installation Files
  • Delivery Optimisation Files
  • DirectX Shader Cache
Note: Once you’re done freeing up space on your drive, try to run the setup file again.

Option 4 – Try disabling BitLocker and other file lock apps

If you are using BitLocker or other file lock apps, then it could be the reason why you’re getting the error. Usually, file lock apps don’t cause any kind of issue, however, if you have something that works on file level like BitLocker, you can try to disable it. Once you’ve disabled it, try to install the Windows 10 Upgrade again and after you do, enable BitLocker again. This should fix the problem.
Read More
Fixing TV screen resolution on PC
When you connect your TV via HDMI cable Windows will recognize it as another monitor and will control the display settings for your HDMI connection. In most cases using it as the extended desktop will work fine, issues will arise when you play video on it. Video playing applications can override Windows settings which can lead to strange results on the screen. Here in this guide, we will tackle with reasons and solutions to this particular issue. Solutions provided are not meant to be followed in the way they are presented but as a silent rule, they go from most common one to most rare so it is advisable to try them in the order presented.

FIXING RESOLUTION ISSUES

The first thing when experiencing resolution issues on your TV connected to a PC is to check TV settings. There is very likely a chance that you will need to manually adjust picture settings on the TV itself using TV controls. On older models of TV, there is an overscan option which can lead to different resolutions and screen sizes. Overscan is a technology that was used in order to help content creators to deliver consistent pictures on different screen sizes and aspect ratios but how technology has advanced and everything including aspect ratio was standardized overscan itself has become a relic of the past. If you are unable to access or see edges of your desktop on the TV screen it is very likely that overscan is the issue. In order to fix this be sure to select HDTV's aspect ratio to fit the screen setting in the picture setting. Sadly finding this option on your TV will be different from manufacturer to manufacturer and even from model to model of the same manufacturer so we can not cover all models but in most cases option is located under picture settings or advanced options. Sometimes you will face even different overscan settings instead of classic ft to screen options, in this case, experiment with the setting until you find one which will work. If you have it, find settings in the user manual of your TV. Luckily you have managed to find the proper option on your TV set and have chosen the right aspect ratio for display. If everything works ok there is no need for the next step but if you experience a different resolution than desired on your TV follow this next guide on how to change the resolution of the TV on your PC.
  1. Press the ⊞ Windows and type Change Display Settings. Click on the top result.
  2. Once the Display Settings App opens, you’ll see two screens (or more if you’ve got multiple HDMI outputs connected). Make sure you select the right display for the HDMI TV before making any changes. You can do this by clicking on Identify.
  3. You’ll see the number from the screenshot above displayed on the monitors for a brief period. Depending on which screen is set to your primary display, make sure you change the settings for the HDMI monitor.
  4. Select the HDMI monitor from the available displays.
  5. Scroll down until you see the current resolution settings for your HDMI monitor.
  6. You can change the resolution settings and test different values that match your HDMI TV’s configuration.
  7. Once you change the setting, Windows will apply the new resolution for a limited time and revert if you don’t accept the new setting.
  8. Once you’ve found the best resolution for your TV, select Keep Changes to keep the new resolution.
You are all set now, make sure that you have the latest drivers on your system and enjoy using your TV as a second monitor.
Read More
Create Custom Views in Event Viewer
The Event Viewer in the Windows operating system is used to troubleshoot any computer issues. It is one of the most useful tools that keep logs of both security and system events. It also monitors for both software and hardware problems in the computer. This tool is the only one with amazing features that maintain logs about everything that’s going on in the computer system. It keeps track of all the information to the point where going over them will take a lot of time. Luckily, the Event Viewer tool now allows users to create custom views where you can set the filters and sort the data recorded to limit the information details to only what you’re interested in seeing. For instance, if you want to troubleshoot with one hard drive, you can just create a special custom view to display only the hard drive warnings in the security logs. This will save you hassle and time. Take note that the logs in the Event Viewer are divided into two main categories namely the Window logs and the Application and Services logs. You can just set the filter to the logs by their event id, specific date, and many other events when you have to troubleshoot some problem in your computer. So if you are trying to troubleshoot a problem in your Windows 10 computer and you’re checking the Event Viewer, read on as this post will guide you in creating custom event views in the Event Viewer. To get started, refer to the instructions given below. Step 1: Go to the Start menu and in the search box, type “event viewer” and then click on Event Viewer from the search results to open it. Step 2: After opening Event Viewer, click on Custom Views located in the left pane of the window. Step 3: Next, click on the Administrative events under the Custom View to create special log views. Step 4: Then on the right side of the window, click on Create Custom View to open the Create Custom View window. Step 5: There is a logged drop-down list under Filter. From there, you have the option to choose an appropriate predefined time or use a custom time range for your Custom log views. Step 6: After that, select an appropriate event level for your custom view. You have fine entry-level options to choose from such as critical event level, error, warning, information and verbose.
  • Critical – select this if you want to see the events that require your immediate attention in the custom view.
  • Error – select this if you want your Event Viewer to display the events that are less critical but hints at the problems.
  • Warning – select this event-level if you want to see the event with the potential problem but may not bound to happen.
  • Verbose – select this if you want to see detailed information about all the events.
Step 7: After you’ve selected the event level, you now have to select how you want the events to be filtered. They can either be filtered By the log or By the source.
  • By the log – you can select two options called Windows log and, Application and Service logs. The Windows logs allow you to filter the logs created during events like setup, security, applications, and system events. While the Application and Service logs filter the log created by the installed applications in your system.
  • By the source – select this if you want your Custom View to search for information in event sources. It allows you to view events in detail for various applications and devices.
Note: You have the option to further customize the event logs with more filters like Event IDs, task category, keywords, User, and Computer. Using these additional filters, you can choose to filter the events in the special views by specifying event id numbers in the Event IDs, entering predefined Windows words in the Keyword, specify the user accounts in the User field, as well as choose the system from the server to maintain logs in the Computer field. Step 8: Once you’re done customizing the log filter, click on OK to apply the changes made. Step 9: After that, a Save Filter should be displayed in the Custom View window. Just enter the Custom View name and select the Event Viewer folder where you want to save the Custom view. The folder name should be Custom View by default. And if you want, you can also create your own folder if you want your custom views to be visible to all the system users. Step 10: Next, check all the Users box located in the lower corner of the window and then click the OK button after you’re done. You should now see the customized filter you just created on the left side of the window. Just click on it to check your filtered events in the center of the Event Viewer window. And for you to save the custom view logs, simply right-click on the Custom views you created and then click on Save All Events in the Custom View As from the drop-down menu. Then put a name on the file and select the appropriate location where you want to save the logs and click on the Save button. Note that the log file is saved with the “.EVTX” file extension and when you double click on it, it will open the file in the Event Viewer.
Read More
How to Fix Stop Error 7B

What is Stop Error 7B?

Stop error 7B is a blue screen of death error code that occurs during Windows XP setup or after installation. The error message is displayed in either of the following formats:
  • STOP: 0x0000007B (parameter1, parameter2, parameter3, parameter4)
  • INACCESSIBLE_BOOT_DEVICE
  • ‘A problem has been detected and Windows has been shut down to prevent damages’
  • Setup has encountered a fatal error that prevents it from continuing.
  • Setup cannot continue. Power down or reboot your computer now.

Solution

Restoro box imageError Causes

There is no one particular cause for this error. The Stop error 7B may be triggered due to multiple reasons. These include:
  • Boot Sector Viruses
  • Device Driver Issues
  • Poor Windows XP installation
  • Registry Corruption
If you come across this error code on your PC, it is advisable to fix it right away particularly because it is a blue screen of death error that can cause severe damages to your system. It can lead to system failure, crash, and valuable data loss.

Further Information and Manual Repair

Here we’ve listed for you the best PC repair solutions to resolve and fix stop error 7B.

Cause: Boot Sector Viruses

Solution: Stop error 7B can occur when infected with a boot sector virus. If this is the cause, then first download a powerful antivirus on your system. After downloading it, run it to scan your PC for viral infection. Immediately delete the viruses if found. However, if the virus is too powerful, the antivirus may fail to remove it. In such an event, you will have to repartition and format your hard disk and then later reinstall Windows XP.

Cause: Device Driver Issues

Solution: If the boot controller is not properly configured or the driver is not updated, Stop error 7B can occur.  When this happens, simply restart your system and press F8 to go to the advanced boot options. Here choose the Last Known Good Configuration option. After that boot into Windows and then perform a system restore. Now go to the start menu and type Device Manager in the search box. To access the Device Manager window it may prompt you to enter an administrator password, insert it to proceed. Now go to Device Manager and perform a driver rollback to reinstall the drivers generating this stop error. By following these simple steps you can easily resolve device driver and configuration issues.

Cause: Poor Windows XP Installation

Solution:  In this case, you will have to perform a Windows start-up repair. This can be done by booting Windows XP from CD. Simply press enter at setup Windows Screen when prompted. Then press R to repair Windows XP installation. This procedure copies the original Windows files over the bad ones.

Cause: Registry Corruption

Solution: Sometimes the stop error 7B is also triggered by the registry corruption. When this happens, it is advisable to download and run Restoro software for PC scan and repair. Restoro is a powerful, advanced, and highly functional registry cleaner. It is deployed with intuitive algorithms that detect registry issues and errors like Stop error 7B on your system in seconds.  It wipes out clutter from your hard disk, repairs damaged files and the corrupted registry. It is safe, efficient, and bug-free. It is also compatible with all Windows versions. In addition to this, it is also embedded with other utilities like an antivirus, a system optimizer, and Active X controls, and a class ID scanner. Click here to download Restoro and resolve to stop error 7B on your PC immediately!
Read More
Switch audio devices in Windows 11 taskbar
windows 11 audio settings
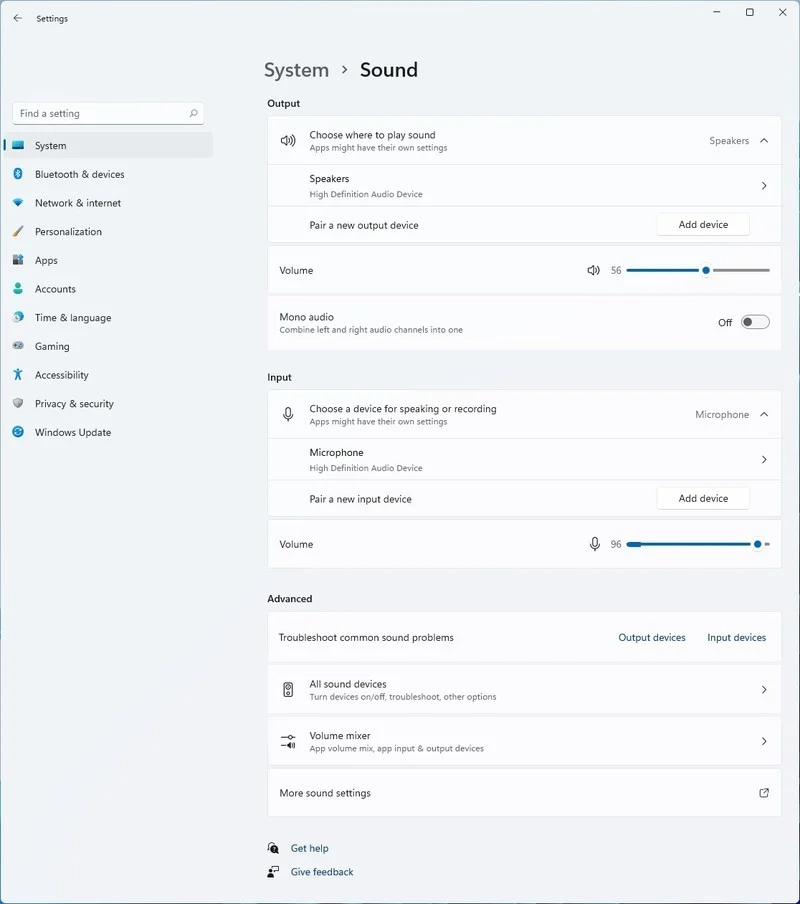
Windows 11 has brought some new features and changed some of the existing ones. One of these changes includes quick switching of audio devices which will play audio. Audio switching can still be done under the taskbar, it is just a little different and one could say even hidden. Follow this quick guide and you will be switching from your headphones to speakers as an example in a matter of seconds.
  1. Click on the speaker icon located in the far-right part of the taskbar.
  2. After the quick settings menu appears click on the right arrow located right of the volume slider. If the arrow is not present, instead of click on the pencil icon, then on add, and finally select Volume from the list.
  3. After clicking on the arrow icon, a list of all enabled audio devices on the system will replace the volume slider. Click on the desired audio device in order to make it active.
  4. Click anywhere outside the quick setting menu to save changes and close it.
Note: in the Quick settings menu if you choose More Volume Settings it will bring you to System > Sound where you can access more sound input and output options.
Read More
1 2 3 171
Logo
Copyright © 2023, ErrorTools. All Rights Reserved
Trademark: Microsoft Windows logos are registered trademarks of Microsoft. Disclaimer: ErrorTools.com is not affiliated with Microsoft, nor claims direct affiliation.
The information on this page is provided for information purposes only.
DMCA.com Protection Status