Code 39 is a device driver error code that pops up when the Windows operating system cannot load the driver for the hardware you want to use.
This hampers your ability to use the hardware properly. The error code is almost always presented in the following format:
“Windows cannot load the device driver for this hardware. The driver may be corrupted or missing.” Code 39
Error Causes
A device driver is a software program that tells the operating system how to control a particular hardware device. Each hardware device has a different driver.
There are separate device drivers for printers, CD-ROM readers, and keyboards, to name a few.
Many device drivers are already built into the operating system. But sometimes you will need to install a new device driver when you want to use a new piece of hardware device that the operating system is not familiar with, or does not anticipate.
Regardless of whether or not the drivers are already integrated into the operating system, you may still experience code 39, typically because of the corrupted or outdated drivers.
Outdated and corrupted drivers cause hardware malfunction and failure, which trigger device driver error codes like code 39. Other causes include incorrect registry values.
Further Information and Manual Repair
Below are some of the easiest and most effective methods to resolve Device Manager error code 39 on your PC.
To follow and implement these methods, you don’t require any technical knowledge or expertise. Simply follow these instructions to fix the error right away.
Method 1 - Fix with a Simple Reboot
There is a possibility that the error code 39 is caused by some fluke within the Device Manager or your BIOS.
If that’s the reason, then a simple PC reboot can resolve the issue immediately. Therefore, before you try anything, it is advisable to restart your system.
If it works, then that is great, but if it doesn’t, then don’t worry, try other methods given below to fix this problem successfully.
Method 2 - Uninstall and Reinstall Drivers
If the error code 39 is generated due to faulty or outdated drivers, then simply uninstall and remove them and then reinstall new driver versions. There are two ways to remove faulty drivers.
Method One
One is, to go to the start menu, click on Control Panel, and then Add/Remove Programs.
Remove the program and the driver you think is causing problems. This will thoroughly remove all traces of the faulty driver.
To reinstall, follow the same steps but this time install the new device driver version.
Method Two
The other way is to go to the start menu, type Device Manager in the search bar, and then press enter to continue.
In the Device Manager, find and locate the problematic device.
After that, double-click the category of device that you wish to uninstall. Let’s say, Windows is unable to load the graphics card driver.
This means you will have to click on the Display Adapter category in the Device Manager to uninstall the graphics card.
After you have successfully uninstalled, Windows will prompt you to confirm device removal.
Simply click OK to confirm and proceed. To activate the changes, restart your PC.
To reinstall, go to the Device Manager, click on the Action tab and then select the option ‘Scan for Hardware Changes.’
This method, although effective in resolving error code 39, can be time-consuming. To avoid the hassle and save time, try method 3.
Method 3 - Update Drivers Automatically with DRIVERFIX
If you would like to read more helpful articles and tips about various software and hardware visit errortools.com daily.
If you encounter error 0x8024500C after a Windows Update or when you were trying to update Windows Store apps, read on as this post will guide you in fixing the problem. This kind of Windows Update error indicates that the Windows Update service has been blocked.
Here are some suggestions you could check out to resolve the Windows Update error 0x8024500C on your Windows 10 computer.
Option 1 – Try checking the status of all the Windows Update Services
You need to check if all the Windows Update Services are up and running or not. To do so, follow the steps below.
Tap the Win + R keys to open the Run dialog box.
Next, type “services.msc” in the field and hit Enter to open Windows Services.
From the list of Services, look for the following services that support Windows Update:
Background Intelligent Transfer Service (BITS)
Delivery Optimization
Windows Update
Windows Update Medic Service
Once you’ve found them, check if they are running just fine or not. if not, you can right-click on each entry and click on Start.
Option 2 – Run the Windows Update Troubleshooter
You might also want to run the Windows Update Troubleshooter as it could also help in fixing Windows Update Error 0x8024500C. To run it, go to Settings and then select Troubleshoot from the options. From there, click on Windows Update and then click the “Run the troubleshooter” button. After that, follow the next on-screen instructions and you should be good to go.
Option 3 – Try downloading and installing the Windows Updates manually
Error 0x8024500C might be due to a Windows Update that has failed. So if it is not a feature update and only a cumulative update, you can download the Windows Update and install it manually. But first, you need to find out which update has failed, and to do so, refer to the following steps:
Go to Settings and from there go to Update and Security > View Update History.
Next, check which particular update has failed. Note that Updates that have failed to install will be displayed under the Status column which has a label of “Failed”.
After that, go to the Microsoft Download Center and look for that update using its KB number and once you find it, download and then install it manually.
Note: You can also use the Microsoft Update Catalog, a service from Microsoft that provides a list of software updates that can be distributed over a corporate network. With the help of this service, it can be easier for you to find Microsoft software updates, drivers as well as fixes.
Option 4 – Try checking the Registry settings
Tap the Win + R keys to open the Run dialog box.
Then type “Regedit” in the field and hit Enter to open the Registry Editor.
After that, navigate to this registry path: HKEY_LOCAL_MACHINESoftwarePoliciesMicrosoftWindowsWindowsUpdate
Then double click on “DisableWindowsUpdateAccess” located at the right side of the panel and make sure that its value is set to “0”. If not, you have to change it to “0”.
Now restart your computer and check if error 0x8024500C is now fixed or not
Option 5 – Disable the Proxy server
Tap the Win + R keys to open the Run dialog box.
Then type “inetcpl.cpl” in the field and hit Enter to pull up the Internet Properties.
After that, go to the Connections tab and select the LAN settings.
From there. Uncheck the “Use a Proxy Server” option for your LAN and then make sure that the “Automatically detect settings” option is checked.
Now click the OK and the Apply buttons.
Restart your PC.
Note: If you are using a third-party proxy service, you have to disable it.
Option 6 – Try to reset the Microsoft Store cache
Just like browsers, Microsoft Store also caches as you view apps and games so it is most likely that the cache is no longer valid and must be removed. To do so, follow the steps below.
Right-click on the start button and click on Command Prompt (administrator).
Next, type in the command, “exe” and tap Enter. Once you do, the command will clear the cache for the Windows Store app.
Now restart your PC and afterward, try opening Microsoft Store again.
Option 7 – Perform a System Restore
Performing System Restore might help you in fixing the Windows Update error 0x8024500C. You can do this option either by booting into Safe Mode or in System Restore. If you are already in the Advanced Startup Options, just directly select System Restore and proceed with the next steps. And if you have just booted your PC into Safe Mode, refer to the steps below.
Tap the Win + R keys to open the Run dialog box.
After that, type in “sysdm.cpl” in the field and tap Enter.
Next, go to the System Protection tab then click the System Restore button. This will open a new window where you have to select your preferred System Restore point.
After that, follow the on-screen instructions to finish the process and then restart your computer and check if the problem is fixed or not.
If you are using Windows PowerShell and it suddenly throws an error message saying, “File cannot be loaded because running scripts is disabled on this system”, then read on as this post will guide you on how you can fix this issue your Windows 10 computer. This kind of error in PowerShell is most likely due to the fact that your user account does not have the required permissions to execute the script. Although this does not mean that you need to have administrator-level permissions as it could also indicate that you have to be unrestricted to run these types of PowerShell scripts or cmdlets. Thus, to fix the error and carry out the task, you have to set the execution policy to be unrestricted. And to do that, you need to use the steps provided below as a reference.
Step 1: To get started, you have to check what policies are set for the individual user groups on your computer by tapping the Win + X key combination or by right-clicking on the Start button and clicking on Windows PowerShell (Admin). You can also search for PowerShell in the Start Search and then right-click on Windows PowerShell and select Run as administrator.
Step 2: If a User Account Control or UAC prompt appears, just click Yes to proceed. Once you’ve pulled up Windows PowerShell, type the following command to get the List of Execution Policy for all the scopes on your computer.
Get-ExecutionPolicy –List
Step 3: After you execute the command, it will give you a list of the User Groups as well as their Execution Policy status, and under the Scope column, look for “LocalMachine”. Once you find its Execution Policy you will notice that it’s either set to Undefined or Restricted.
Step 4: Now that you’ve determined the Execution Policy, you need to set it to Unrestricted if it is set to Restricted. To do that, you have to enter the following command in the very same PowerShell window.
Set-ExecutionPolicy Unrestricted
Step 5: After you execute the command, you will see a message that asks for various permissions for which you either have to tap Y to say Yes to each one of the messages individually or tap the A key to say Yes to all the messages to once. However, if the command throws another error, you can just force the Execution Policy to change by executing the following command.
Set-ExecutionPolicy Unrestricted -Force
Step 6: Once you’re done, it will finally set the Execution Policy for the Windows PowerShell scripts as well as cmdlets to be Unrestricted and fix the “File cannot be loaded because running scripts is disabled on this system” error.
As you know, installing Windows 10 is quite a complicated process in the background even though it may look like an easy task in the foreground. There are times when the setup is stuck on the “Hi there” screen where you won’t be able to input any information in the fields given and you wouldn’t be able to do anything else since the screen does not move ahead.
There are a lot of possible reasons why this issue occurs. It could be due to a damaged setup image, invalid boot configuration, and many more. To resolve this problem, there are several options you can check out. You can try to get a new setup image or run the Automatic Repair or you could also try to recreate the Boot Configuration files or BCD. To get started in checking out these solutions, make sure to follow the instructions provided below.
Option 1 – Try to run the Automatic Repair Utility
You might also want to use Automatic Repair in fixing the error. To do so, follow the steps below.
You can start by creating and booting from a bootable Windows 10 USB Stick.
After that, click on Repair your computer located on the bottom left corner when you are on the initial Windows Startup screen.
Next, click on Troubleshoot, and then on the other screen, click the Startup Repair option.
Now select the operating system you want to repair. Once you do that, it will start to repair your operating system. Wait until the process is completed and then check if the problem’s now fixed.
Option 2 – Try to rebuild the BCD files
You can also try rebuilding the BCD files to resolve stuck screen issue in your Windows 10 computer.
You can start by booting into the installation environment for Windows 10 from an installation media.
After that, click on Repair your computer and on the blue screen, select Troubleshoot and then select the Advanced options menu.
From there, select Command Prompt and once you open it, enter each one of the commands given below by sequence.
bootrec /FixMbr
bootrec /FixBoot
bootrec /ScanOS
bootrec /RebuildBcd
Once you’re done executing the commands given above, type “exit” to close the Command Prompt window and then restart your computer and see if it fixed error code 0xc000014c.
Option 3 – Try recreating the Windows 10 installation USB
Recreating the Windows 10 installation USB might help in fixing the problem. You can use a USB drive to do so but make sure that it has a great read-write speed. Follow the steps below to recreate Windows 10 installation USB”
Click this link and then click the Download Tool Now button.
Next, click the “Use the tool to create installation media (USB flash drive, DVD, or ISO file)…” option and follow the next given instructions on the screen.
Now select the ISO file option in step 5.
After that, you should now have an ISO file.
Next, go to the location where you’ve downloaded the ISO file.
Then right-click on the Windows 10 ISO file and select the Open with option and then select File Explorer.
Now click on “setup.exe” and follow the next instructions that appear on the screen. When asked, you have to select either Nothing (clean install) or Keep personal files only option. Take note that you must not select the “Keep personal files, apps, and Windows settings since it doesn’t really work.
Option 4 – Try getting a new Windows image file
If none of the four given options above worked, you might want to get a newer installation image using the Windows Media Creation tool. After that, create the bootable USB drive and once completed and then try to run the Windows 10 setup again.
So, you have finished with work, game, movie, music, email, or whatever on your PC, you look at the clock, it is late, you decide to go to sleep or outside, you click on the power button and choose shutdown. Now when a PC is shut down you feel good and go with your business but the next time you power it up you get the same error like the computer never really shut down in the first place. You wonder why and reboot it, just in case and all of the sudden error is gone.
If something similar has happened to you or you had the feeling that after shutting down your computer has not really felt like shutting it down, do not seek professional help, everything is OK with you because when you click on shut down, your computer does not really shut down!
Truth is that Microsoft has changed how to shut down works and how rebooting works in Windows with an update but has not publicly said anything about it so some users may experience this feeling of not shutdown phenomenon and might even think there is something wrong with their PC.
Why this change?
A few years ago shutdown button and option in Windows were really shutting down OS, but things changed when Microsoft wanted to increase boot-up speed. Now when that decision was made shutdown option was changed. So, what was changed? Well in order to increase Windows booting time, the shutdown will now turn off power to PC components and it will look like everything is indeed shutdown but the Windows kernel will actually be saved to a hard drive with all settings and just awaken once the PC is turned back ON. This will result in all errors and other stuff being just still present same as they were once the system was instructed to be turned off.
Rebooting your PC will now clear kernel and file from the hard drive and you will get a clean system startup without any issues tied with the kernel itself.
Workaround
Now that we know why and what change has been made to Windows logical question is can we shut down our PC at all properly? Luckily for us, the answer is yes and we will not need any external application to do it, we can still do it inside Windows itself and it is quite quick and easy.
Bringing back the old shutdown
In order to bring the old shutdown functionality of your PC please follow the instructions but be aware that by doing this your PC will boot a little bit slower since it will have to load the kernel from scratch each time computer is turned ON.
First thing is to go to settings and go to System
Then once you are inside the system, navigate to the power and sleep and click on it to select it. Once you have it selected to all the way to the right and click on additional power settings.
When you click on advanced power settings you should be led to the control panel's power options. Inside this panel click on top left link where it says Choose what the power button does.
Inside options, you will need to untick the box next to Turn on fast startup (recommended), this option has been ticked ON by the Windows update and probably without notifying you. Option means exactly what was described, it will save kernel state on the hard drive for faster boot time but sadly it can cause some issues since it will never be reloaded from 0.
If you are unable to uncheck the box click on the text beside the shield icon that says: Change settings that are currently unavailable (you will have to be logged in as administrator).
Conclusion
Altho turning off fast startup and shutting down the PC completely will for sure extend your bootup time I still believe that it is the right choice since sometimes a lot of clutter and bad things accumulate over time inside the OS and can cause a vast variety of problems in a long run. So stay safe and shut down that PC as it used to be in the past.
One of the most useful and efficient command-line disk management tools is the DISKPART utility. It can be used to manage, delete or create new hard drive partitions. However, despite its efficiency, there are still times it could face some errors like the “No usable free extent could be found”. You can encounter this error when you create a partition. This error could be due to insufficient disk space which is why it is not able to carry out the operation. It is also possible that the disk is not recognized by the system. And since there are only four recognized primary partitions, when you try creating a fifth one, you will get this error. In addition, this error could also occur if the disk has been partitioned using the MBR disk partitioning format.
To fix the “No usable free extent could be found” error, here are some suggestions you can follow.
Option 1 – Free up disk space using Storage Sense
The error could be caused by insufficient disk space in your computer and so you need to free up disk space using Storage Sense to fix the problem.
Open Setting > System > Storage from the WinX Menu.
From there, you will see a list of all the local and connected storage devices along with the details on the free space. Make sure that Storage Sense is on.
Next, find a link that says “Free Up Space” and click it to open.
After that, a screen which is the built-in program in Windows 10 will appear and will scan your computer for the following junk files so you can free up disk space:
Windows Upgrade Log Files
The system created Windows Error Reporting Files
Thumbnails
Temporary Internet Files
Previous Windows Installation Files
Delivery Optimisation Files
DirectX Shader Cache
Choose the files you want to get rid of and then click on the remove files option. Note that you’ll have an idea of the total size as you select any of the junk files listed above.
Now go to the “Free Up Space Now” section and click the Clear Now button. This will get rid of all the temporary or junk files in your computer and should hopefully fix Error 1310.
Note: You can also run the Disk Cleanup tool to free up disk space.
Option 2 – Try to run DISKPART in Command Prompt with administrator permissions
The next thing you can do to resolve the error is to run the DISKPART utility with admin privileges.
In the Start Search, type “command prompt” and from the search results that appear, look for Command Prompt.
Once you found it, right-click on it and select the “Run as administrator” option.
After that, try to execute the Diskpart operation once again. Note that you also have to specify different size & offset values for the partitioning and then see if you still encounter the same error.
Option 3 – Try to execute the DISKPART clean command
The next thing you can try is to execute the clean command in DISKPART to fix any issues in the disk.
Open Command Prompt with admin privileges.
Then execute this command: diskpart
The command you entered will initiate the DISKPART utility. Now execute this second command to view all the disk connects or all the partitions on those disks formed: list disk
After that, you need to select one command depending on the list command you executed and then execute this third command: select disk #
The third command you just executed will select the disk or partition you want to select. Now execute this fourth command: clean
The command you entered will remove all the volumes or partitions formatting the disk in focus.
Once it’s done, try to carry out the DISKPART operation you were trying to execute.
Option 4 – Try to update the USB drivers
Outdated USB drivers can also be the reason why you’re getting the error. Thus, you must update them from time to time. You can install the latest version of the USB driver for your system. But you need to check the manufacturer’s website or guidelines to update the driver according to your system. If it happens that the drivers might not be compatible with the version of the system your laptop is using which is unlikely, you can run the driver software in Compatibility Mode in that kind of situation. To update your USB drivers, follow these steps:
Tap the Win + R keys to launch Run.
Type in devmgmt.msc into the box and tap Enter or click OK to open the Device Manager.
After that, look for the USB Serial Bus controllers from the list of device drivers displayed. If you see a red or yellow sign that shows up against the driver, right-click on the driver’s name and select “Update Driver Software”. And if you find any “Unknown device”, you need to update it as well.
Select the “Search automatically for updated driver software” option and then follow the instructions to complete the process.
Option 5 – Run the Hardware and Devices troubleshooter or the USB troubleshooter
You can find the Hardware and Devices troubleshooter under the Troubleshooters section of the Windows Settings panel on your Windows 10 PC. You can use this troubleshooter to fix common hardware and external device-related issues without exerting too much effort. If you don’t know where to find it, follow these steps:
Tap the Win + I keys to open the Windows Settings.
Next, navigate to Update & Security > Troubleshoot.
You should see the option for Hardware and Devices on your right-hand side where you can also find the “Rub the troubleshooter” button – click on it to get started.
Follow the next on-screen instructions to fix the basic issues of common hardware and external device.
Note: If you want to, you can also use the USB Troubleshooter to fix the problem just go back to the Troubleshoot page where you can find it.
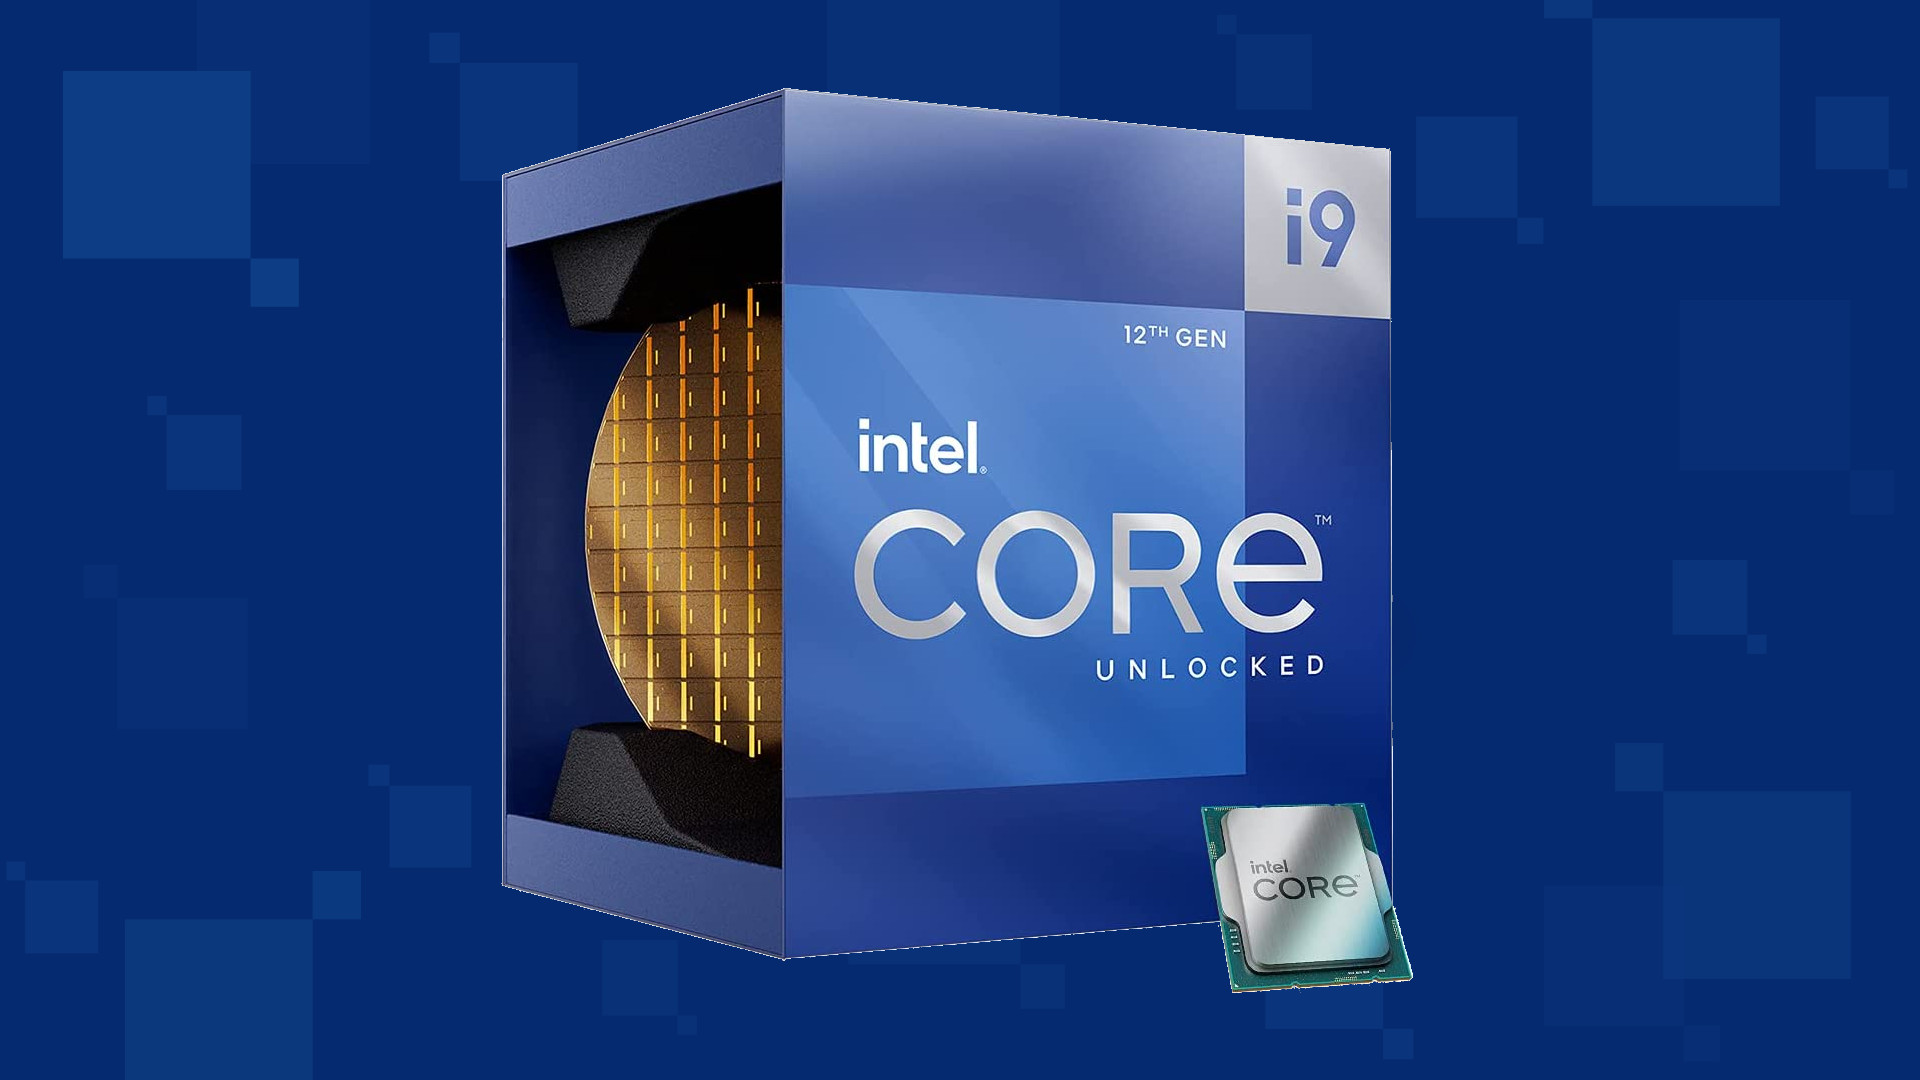
Due to its hybrid core technology, the Alder Lake line of processors had some DRM issues with some game titles where DRM protection software detected hybrid core design switching via manager as a hack attempt and prevented the game from working properly. Over 50 titles were affected by this issue, now only 3 remain still affected but it is being worked on them so that can be also resolved.
Intel says that the remedy to the issue for these games is the scroll lock fix which can be done so by enabling Legacy Game Compatibility mode from the BIOS of your motherboard. When running the said games, you can press scroll lock to park the E-cores on Intel's Alder Lake Desktop CPUs to get rid of DRM issues.
Certain motherboard manufacturers such as MSI and Gigabyte have made this even easier through software tools with which you don't have to access the BIOS. All you need to do is select a button in the tool which works on both Windows 11 and Windows 10 operating systems and you will enable compatibility mode.
Recently, a lot of users reported having an issue with Windows Update. According to these users, they got an error message saying, “Windows Update components must be repaired” after they run the Windows Update troubleshooter. So if you are also facing this issue then you’ve come to the right place as this post will guide you in fixing this problem.
There are various suggestions you can check out to fix this problem – you can try running the Windows Update troubleshooter again but this time, in a Clean Boot State or you could also run System File Checker or the DISM tool to repair corrupted Windows Update files or reset the Windows Update components. For more information, refer to the given options below.
Option 1 – Run the Windows Update troubleshooter in a Clean Boot State
Repairing the “Windows Update components must be repaired” error is not that complicated. One of the things you can try is to run the Windows Update troubleshooter again but this time, in a Clean Boot State. Refer to the steps below to get started.
Log onto your PC as an administrator.
Type in MSConfig in the Start Search to open the System Configuration utility.
From there, go to the General tab and click “Selective startup”.
Clear the “Load Startup items” check box and make sure that the “Load System Services” and “Use Original boot configuration” options are checked.
Next, click the Services tab and select the “Hide All Microsoft Services” check box.
Click Disable all.
Click on Apply/OK and restart your PC. (This will put your PC into a Clean Boot State. And configure Windows to use the usual startup, just simply undo the changes.)
Now try to run the Windows Update troubleshooter again and see if the error is fixed or not.
Option 2 – Try to run System File Checker
If the Windows Update troubleshooter still failed to fix the problem, you can run System File Checker instead. It is a built-in command utility that helps in restoring corrupted files as well as missing files. It replaces bad and corrupted system files with good system files. To run the SFC command, follow the steps given below.
Tap Win + R to launch Run.
Type in cmd in the field and tap Enter.
After opening Command Prompt, type in sfc /scannow
The command will start a system scan which will take a few whiles before it finishes. Once it’s done, you could get the following results:
Windows Resource Protection did not find any integrity violations.
Windows Resource Protection found corrupt files and successfully repaired them.
Windows Resource Protection found corrupt files but was unable to fix some of them.
Option 3 – Run the DISM tool
Running the DISM Tool helps in repairing the Windows System Image as well as the Windows Component Store in Windows 10. Using this built-in tool, you have various options such as the “/ScanHealth”, “/CheckHealth”, and “/RestoreHealth”.
Open the Command Prompt with admin privileges.
Then type in the following commands and make sure to hit Enter right after you type each one of them:
Dism /Online /Cleanup-Image /CheckHealth
Dism /Online /Cleanup-Image /ScanHealth
exe /Online /Cleanup-image /Restorehealth
Do not close the window if the process takes a while as it will probably take a few minutes to finish.
Note: If it happens that the Windows Update client is broken, you need to run the following command to repair it then restart your PC and click on Update once again.
Option 4 – Delete the contents in the Software Distribution folder and Catroot2 folder
You can also delete the contents in both the Software Distribution and Catroot2 folders as it could potentially fix the “Windows Update components must be repaired” error.
Open the WinX Menu.
From there, open Command Prompt as admin.
Then type in the following command – don’t forget to hit Enter right after typing each one of them.
net stop wuauservnet start cryptSvcnet start bitsnet start msiserver
After entering these commands, it will stop the Windows Update Service, Background Intelligent Transfer Service (BITS), Cryptographic, and the MSI Installer
Next, go to the C:/Windows/SoftwareDistribution folder and get rid of all the folders and files thereby tapping the Ctrl + A keys to select them all and then click on Delete. Note that if the files are in use, you won’t be able to delete them.
After resetting the SoftwareDistribution folder, you need to reset the Catroot2 folder to restart the services you just stopped. To do that, follow these steps:
Type each one of the following commands.
net start wuauservnet start cryptSvcnet start bitsnet start msiserver
After that, exit Command Prompt and restart your computer, and then try to run Windows Update once more.
In case you don’t know, Driver Verifier is a built-in utility in the Windows 10 operating system. It is the one that ensures the integrity of all the drivers in the system. It can detect any suspicious behaviors of the drivers and if it finds the driver signature of some suspicious activity during runtime, it stops the suspected action by triggering a BSOD or Blue Screen of Death error and one of these Stop errors is the DRIVER_VERIFIER_DMA_VIOLATION error. When you encounter such an error, you will see the following message on your screen:
“Your PC ran into a problem that it couldn’t handle, and now it needs to restart.If you’d like to know more, you can search online later for this error: DRIVER_VERIFIER_DMA_VIOLATION”
There are several ways you can fix this error. You can try to disable the Driver Verifier or run the Hardware troubleshooter. You could also try to update, roll back or uninstall the drivers on your computer. For more details, refer to each one of the options provided below.
Option 1 – Try to disable the Driver Verifier Manager
The Driver Verifier Manager is another tool in Windows that could help you fix driver-related issues.
Type in the keyword “Verifier” in the Cortana search box to search for Verifier in Windows 10.
After that, select the option “Create custom settings”.
Make sure that you have checked everything except the options “DDI compliance checking” and “Randomized low resources simulation”.
Next, select the option “Select driver names from a list” option.
Afterward, you have to select all the drivers from any unofficial or third-party provider. To simply put it, you have to select all the drivers that are not supplied by Microsoft.
Then click on the Finish button.
Open Command Prompt as administrator and execute this command – verifier /querysettings
The command you just executed will display the Driver Verifier settings so if you see any of the flags enabled boot your Windows 10 PC into Safe Mode.
Open the Command Prompt as admin again and run this command – verifier /reset
The command will reset the Driver Verifier. Once the process is done, restart your PC and check.
Option 2 – Try to reinstall or update device drivers of recently installed hardware
If the first few options didn’t work for you, then it’s time to either update or roll back the device drivers. It is most likely that after you updated your Windows computer that your driver also needs a refresh. On the other hand, if you have just updated your device drivers then you need to roll back the drivers to their previous versions. Whichever applies to you, refer to the steps below.
Open the Devices Manager from the Win X Menu.
Then locate the device drivers and right-click on them to open the Properties.
After that, switch to the Driver tab and click on the Uninstall Device button.
Follow the screen option to completely uninstall it.
Finally, restart your computer. It will just reinstall the device drivers automatically.
Note: You can install a dedicated driver on your computer in case you have it or you could also look for it directly from the website of the manufacturer.
Option 3 – Try running the Blue Screen Troubleshooter
The Blue Screen troubleshooter is a built-in tool in Windows 10 that helps users in fixing BSOD errors like DRIVER_VERIFIER_DMA_VIOLATION. It can be found in the Settings Troubleshooters page. To use it, refer to these steps:
Tap the Win + I keys to open the Settings panel.
Then go to Update & Security > Troubleshoot.
From there, look for the option called “Blue Screen” on your right-hand side and then click the “Run the troubleshooter” button to run the Blue Screen Troubleshooter and then follow the next on-screen options. Note that you might have to boot your PC into Safe Mode.
Note: You could also run the Hardware and Devices troubleshooter as it could also help in fixing the DRIVER_VERIFIER_DMA_VIOLATION error.
Option 4 – Try running Microsoft’s online Blue Screen Troubleshooter
If running the built-in Blue Screen Troubleshooter didn’t work, you can also try running Microsoft’s online Blue Screen Troubleshooter. All you have to do is go to Microsoft’s website and from there, you will see a simple wizard that will walk you through the troubleshooting process.
Hello everyone and welcome to another quick tutorial for your Windows error, this time we will wrestle with error 0x8007000d.
Let's begin:
1. Browse to "C:\Windows\SoftwareDistribution\Download" and delete the contents of the folder.
2. Press ⊞ WINDOWS + X > Click Command Prompt (Admin) then type "wuauclt.exe /updatenow".
Hit Enter
3. Open Control Panel > Windows Update and Windows 10 should begin downloading.
Press ⊞ WINDOWS + X
Click Command Prompt (Admin)
Type in at the prompt OR Copy and Paste these one at a time : (Hit ENTER after each)
NDIS or Network Driver Interface Specification is a programming interface for the network interface cards that aids in the proper functioning of a system driver in a computer network. The NDIS helps the computer system in order to communicate with other connected devices and hardware components on a computer network. In relation, the ndis.sys file is a critical system file developed by Microsoft for the Windows operating system. As you know, sys files or system files are important parts of the Windows operating system as well as a repository of system driver settings used by Windows to communicate with the connected hardware and devices.
The ndis.sys files are stored mostly in a driver folder at C:/Windows/System32/drivers and as mentioned, these files are essential for the system to function properly. Although the presence of ndis.sys system file is not yet known to affect the normal functioning of the Windows OS, some of the Windows 10 users reported that they encountered ndis.sys blue screen errors on their PCs. Blue Screen of Death errors or Stop errors usually occurs when you open a program or a function. Moreover, it could also occur when the driver gets loaded during the system startup or during system shutdown.
It isn’t yet clear what really causes the ndis.sys blue screen error. However, like other Stop errors, it may occur due to corrupted files, misconfigured device drivers, bad drivers, corrupted Windows Registry, missing or damaged system files, and malicious programs. Aside from the aforementioned reasons, the ndis.sys blue screen error might also occur if your hard disk is damaged and if the RAM is corrupted. In such cases, a lot of users usually disable the ndis.sys file. However, it won’t really resolve the issue since the file is required for the normal functioning of the operating system and even when you disable the file, it’s pretty useless as the file will start all over again. In addition, you might want to disable security programs or firewalls and antivirus programs in the meantime to check if these programs are the ones that are causing the error. And if you’ve determined that none of the security programs or firewalls and antivirus programs are to blame, refer to the options below that might help you resolve the DRIVER_IRQL_NOT_LESS_OR_EQUAL or ndis.sys Blue Screen of Death error.
Option 1 – Try to update or reinstall the PC device driver
The Ndis.sys Blue screen error can occur when the device driver in your computer is outdated or corrupted. Thus, you either have to update or reinstall it to fix the issue.
Tap the Win + R keys to launch Run.
Type in devmgmt.msc into the box and tap Enter or click OK to open the Device Manager.
After that, a list of device drivers will be displayed. If you see a red or yellow sign that shows up against the driver, right-click on the driver’s name and select “Update Driver Software” or “Uninstall”. And if you find any “Unknown device”, you need to update it as well.
Select the “Search automatically for updated driver software” option and then follow the instructions to complete the process.
Restart your PC.
Option 2 – Rollback your Network drivers
If you have updated the driver software as of late and you suddenly got this BSOD error, you might have to roll back the device driver – in other words, switch back to the previous working version. To do that, follow these steps:
Tap the Win + R keys to launch the Run window and then type in the “devmgmt.msc” command and hit Enter to open the Device Manager window.
Under the Device Manager, you will see a list of drivers. From there, look for the Network Adapters and expand it.
Next, select the driver entries that are labeled appropriately other than anything in the context of the WAN Miniport.
Then select each one of them and double-click to open a new mini window.
After that, make sure that you’re on the Driver tab and if you are not, just navigate to it then click the Roll Back Driver button to switch back to the previous version of your Network adapters.
Now restart your computer to successfully apply the changes made.
Option 3 – Try running the System File Checker
The SFC or System File Checker scan could detect and automatically repair damaged system files that could be causing the ndis.sys Blue Screen of Death error. SFC is a built-in command utility that helps in restoring corrupted files as well as missing files. It replaces bad and corrupted system files with good system files. To run the SFC command, follow the steps given below.
Tap Win + R to launch Run.
Type in cmd in the field and tap Enter.
After opening Command Prompt, type in sfc /scannow and hit Enter.
The command will start a system scan which will take a few whiles before it finishes. Once it’s done, you could get the following results:
Windows Resource Protection did not find any integrity violations.
Windows Resource Protection found corrupt files and successfully repaired them.
Windows Resource Protection found corrupt files but was unable to fix some of them.
Option 4 – Try running the CHKDSK utility
Running the CHKDSK utility might also help you resolve the Netwtw04.sys failed BSOD error. If your hard drive has issues with integrity, the update will really fail as the system will think that it’s not healthy and that’s where the CHKDSK utility comes in. The CHKDSK utility repairs hard drive errors that might be causing the problem.
Open Command Prompt with admin privileges.
After opening Command Prompt, execute the following command and hit Enter:
chkdsk /f /r
Wait for the process to be completed and then restart your computer.
Option 5 – Run the DISM Tool
The DISM tool is another command-line tool in the Windows operating system that could help users fix various corrupted system files. To use it, follow these steps:
Open the Command Prompt as admin.
Then type in this command: DISM /Online /Cleanup-Image /RestoreHealth
The DISM command you entered will repair the corrupted system image. Do not close the window if the process takes a while as it will probably take a few minutes to finish.
Restart your PC.
Option 6 – Perform a System Restore
Performing a System Restore on your computer can also help you fix the ndis.sys Blue Screen of Death error. You can do this option either by booting into Safe Mode or in System Restore. If you are already in the Advanced Startup Options, just directly select System Restore and proceed with the next steps. And if you have just booted your PC into Safe Mode, refer to the steps below.
Tap the Win + R keys to open the Run dialog box.
After that, type in “sysdm.cpl” in the field and tap Enter.
Next, go to the System Protection tab then click the System Restore button. This will open a new window where you have to select your preferred System Restore point.
After that, follow the on-screen instructions to finish the process and then restart your computer and check if the problem is fixed or not.


 Intel says that the remedy to the issue for these games is the scroll lock fix which can be done so by enabling Legacy Game Compatibility mode from the BIOS of your motherboard. When running the said games, you can press scroll lock to park the E-cores on Intel's Alder Lake Desktop CPUs to get rid of DRM issues.
Certain motherboard manufacturers such as MSI and Gigabyte have made this even easier through software tools with which you don't have to access the BIOS. All you need to do is select a button in the tool which works on both Windows 11 and Windows 10 operating systems and you will enable compatibility mode.
Intel says that the remedy to the issue for these games is the scroll lock fix which can be done so by enabling Legacy Game Compatibility mode from the BIOS of your motherboard. When running the said games, you can press scroll lock to park the E-cores on Intel's Alder Lake Desktop CPUs to get rid of DRM issues.
Certain motherboard manufacturers such as MSI and Gigabyte have made this even easier through software tools with which you don't have to access the BIOS. All you need to do is select a button in the tool which works on both Windows 11 and Windows 10 operating systems and you will enable compatibility mode.