Windows photo viewer was a popular photo viewing application integrated into Windows 7, 8, and 8.1 but in Windows 10 it has been replaced with photos, Microsoft's new application aimed at photo viewing on your desktop. Now if any one of you wonders why should be bringing the old application back to Windows 10 since we have an alternative one, the answer would be resources and speed. The old photo viewer application is lightweight, fast, and reliable, opening the same photo in both photo viewer and in new photos shows us that Microsofts new viewer application takes even three times more RAM, and it's visibly slower in loading times for pictures.
Since I am a person who prefers speed and functionality over fancy looks I would be very glad to have the option to bring back a photo viewer. If you have by any chance Windows 10 as an upgrade, bringing back photo viewer is easy as 1,2,3. you just need to open settings and go to default apps, under photo viewer you should see your current default viewing application, probably photos, click on it to see options and choose photo viewer and exit the Settings menu, and you're done.
Sadly if Windows 10 has been installed clean on the system and not as upgrade things are a little bit more complicated but do not worry, stay with us, keep reading and you will get there.
Activating photo viewer
How technically photo viewer is still in the system but not used we will have to make it available again and this we will do by adding some lines in the Windows registry, that being said, open a notepad and paste the following code as it is in it.
Windows Registry Editor Version 5.00
[HKEY_CLASSES_ROOT\jpegfile\shell\open\DropTarget]
"Clsid"="{FFE2A43C-56B9-4bf5-9A79-CC6D4285608A}"
[HKEY_CLASSES_ROOT\pngfile\shell\open\DropTarget]
"Clsid"="{FFE2A43C-56B9-4bf5-9A79-CC6D4285608A}"
[HKEY_CLASSES_ROOT\Applications\photoviewer.dll\shell\open]
"MuiVerb"="@photoviewer.dll,-3043"
[HKEY_CLASSES_ROOT\Applications\photoviewer.dll\shell\open\command]
@=hex(2):25,00,53,00,79,00,73,00,74,00,65,00,6d,00,52,00,6f,00,6f,00,74,00,25,\
00,5c,00,53,00,79,00,73,00,74,00,65,00,6d,00,33,00,32,00,5c,00,72,00,75,00,\
6e,00,64,00,6c,00,6c,00,33,00,32,00,2e,00,65,00,78,00,65,00,20,00,22,00,25,\
00,50,00,72,00,6f,00,67,00,72,00,61,00,6d,00,46,00,69,00,6c,00,65,00,73,00,\
25,00,5c,00,57,00,69,00,6e,00,64,00,6f,00,77,00,73,00,20,00,50,00,68,00,6f,\
00,74,00,6f,00,20,00,56,00,69,00,65,00,77,00,65,00,72,00,5c,00,50,00,68,00,\
6f,00,74,00,6f,00,56,00,69,00,65,00,77,00,65,00,72,00,2e,00,64,00,6c,00,6c,\
00,22,00,2c,00,20,00,49,00,6d,00,61,00,67,00,65,00,56,00,69,00,65,00,77,00,\
5f,00,46,00,75,00,6c,00,6c,00,73,00,63,00,72,00,65,00,65,00,6e,00,20,00,25,\
00,31,00,00,00
[HKEY_CLASSES_ROOT\Applications\photoviewer.dll\shell\open\DropTarget]
"Clsid"="{FFE2A43C-56B9-4bf5-9A79-CC6D4285608A}"
[HKEY_CLASSES_ROOT\PhotoViewer.FileAssoc.Bitmap]
"ImageOptionFlags"=dword:00000001
"FriendlyTypeName"=hex(2):40,00,25,00,50,00,72,00,6f,00,67,00,72,00,61,00,6d,\
00,46,00,69,00,6c,00,65,00,73,00,25,00,5c,00,57,00,69,00,6e,00,64,00,6f,00,\
77,00,73,00,20,00,50,00,68,00,6f,00,74,00,6f,00,20,00,56,00,69,00,65,00,77,\
00,65,00,72,00,5c,00,50,00,68,00,6f,00,74,00,6f,00,56,00,69,00,65,00,77,00,\
65,00,72,00,2e,00,64,00,6c,00,6c,00,2c,00,2d,00,33,00,30,00,35,00,36,00,00,\
00
[HKEY_CLASSES_ROOT\PhotoViewer.FileAssoc.Bitmap\DefaultIcon]
@="%SystemRoot%\\System32\\imageres.dll,-70"
[HKEY_CLASSES_ROOT\PhotoViewer.FileAssoc.Bitmap\shell\open\command]
@=hex(2):25,00,53,00,79,00,73,00,74,00,65,00,6d,00,52,00,6f,00,6f,00,74,00,25,\
00,5c,00,53,00,79,00,73,00,74,00,65,00,6d,00,33,00,32,00,5c,00,72,00,75,00,\
6e,00,64,00,6c,00,6c,00,33,00,32,00,2e,00,65,00,78,00,65,00,20,00,22,00,25,\
00,50,00,72,00,6f,00,67,00,72,00,61,00,6d,00,46,00,69,00,6c,00,65,00,73,00,\
25,00,5c,00,57,00,69,00,6e,00,64,00,6f,00,77,00,73,00,20,00,50,00,68,00,6f,\
00,74,00,6f,00,20,00,56,00,69,00,65,00,77,00,65,00,72,00,5c,00,50,00,68,00,\
6f,00,74,00,6f,00,56,00,69,00,65,00,77,00,65,00,72,00,2e,00,64,00,6c,00,6c,\
00,22,00,2c,00,20,00,49,00,6d,00,61,00,67,00,65,00,56,00,69,00,65,00,77,00,\
5f,00,46,00,75,00,6c,00,6c,00,73,00,63,00,72,00,65,00,65,00,6e,00,20,00,25,\
00,31,00,00,00
[HKEY_CLASSES_ROOT\PhotoViewer.FileAssoc.Bitmap\shell\open\DropTarget]
"Clsid"="{FFE2A43C-56B9-4bf5-9A79-CC6D4285608A}"
[HKEY_CLASSES_ROOT\Applications\photoviewer.dll\shell\print]
"NeverDefault"=""
[HKEY_CLASSES_ROOT\Applications\photoviewer.dll\shell\print\command]
@=hex(2):25,00,53,00,79,00,73,00,74,00,65,00,6d,00,52,00,6f,00,6f,00,74,00,25,\
00,5c,00,53,00,79,00,73,00,74,00,65,00,6d,00,33,00,32,00,5c,00,72,00,75,00,\
6e,00,64,00,6c,00,6c,00,33,00,32,00,2e,00,65,00,78,00,65,00,20,00,22,00,25,\
00,50,00,72,00,6f,00,67,00,72,00,61,00,6d,00,46,00,69,00,6c,00,65,00,73,00,\
25,00,5c,00,57,00,69,00,6e,00,64,00,6f,00,77,00,73,00,20,00,50,00,68,00,6f,\
00,74,00,6f,00,20,00,56,00,69,00,65,00,77,00,65,00,72,00,5c,00,50,00,68,00,\
6f,00,74,00,6f,00,56,00,69,00,65,00,77,00,65,00,72,00,2e,00,64,00,6c,00,6c,\
00,22,00,2c,00,20,00,49,00,6d,00,61,00,67,00,65,00,56,00,69,00,65,00,77,00,\
5f,00,46,00,75,00,6c,00,6c,00,73,00,63,00,72,00,65,00,65,00,6e,00,20,00,25,\
00,31,00,00,00
[HKEY_CLASSES_ROOT\Applications\photoviewer.dll\shell\print\DropTarget]
"Clsid"="{60fd46de-f830-4894-a628-6fa81bc0190d}"
[HKEY_CLASSES_ROOT\PhotoViewer.FileAssoc.JFIF]
"EditFlags"=dword:00010000
"ImageOptionFlags"=dword:00000001
"FriendlyTypeName"=hex(2):40,00,25,00,50,00,72,00,6f,00,67,00,72,00,61,00,6d,\
00,46,00,69,00,6c,00,65,00,73,00,25,00,5c,00,57,00,69,00,6e,00,64,00,6f,00,\
77,00,73,00,20,00,50,00,68,00,6f,00,74,00,6f,00,20,00,56,00,69,00,65,00,77,\
00,65,00,72,00,5c,00,50,00,68,00,6f,00,74,00,6f,00,56,00,69,00,65,00,77,00,\
65,00,72,00,2e,00,64,00,6c,00,6c,00,2c,00,2d,00,33,00,30,00,35,00,35,00,00,\
00
[HKEY_CLASSES_ROOT\PhotoViewer.FileAssoc.JFIF\DefaultIcon]
@="%SystemRoot%\\System32\\imageres.dll,-72"
[HKEY_CLASSES_ROOT\PhotoViewer.FileAssoc.JFIF\shell\open]
"MuiVerb"=hex(2):40,00,25,00,50,00,72,00,6f,00,67,00,72,00,61,00,6d,00,46,00,\
69,00,6c,00,65,00,73,00,25,00,5c,00,57,00,69,00,6e,00,64,00,6f,00,77,00,73,\
00,20,00,50,00,68,00,6f,00,74,00,6f,00,20,00,56,00,69,00,65,00,77,00,65,00,\
72,00,5c,00,70,00,68,00,6f,00,74,00,6f,00,76,00,69,00,65,00,77,00,65,00,72,\
00,2e,00,64,00,6c,00,6c,00,2c,00,2d,00,33,00,30,00,34,00,33,00,00,00
[HKEY_CLASSES_ROOT\PhotoViewer.FileAssoc.JFIF\shell\open\command]
@=hex(2):25,00,53,00,79,00,73,00,74,00,65,00,6d,00,52,00,6f,00,6f,00,74,00,25,\
00,5c,00,53,00,79,00,73,00,74,00,65,00,6d,00,33,00,32,00,5c,00,72,00,75,00,\
6e,00,64,00,6c,00,6c,00,33,00,32,00,2e,00,65,00,78,00,65,00,20,00,22,00,25,\
00,50,00,72,00,6f,00,67,00,72,00,61,00,6d,00,46,00,69,00,6c,00,65,00,73,00,\
25,00,5c,00,57,00,69,00,6e,00,64,00,6f,00,77,00,73,00,20,00,50,00,68,00,6f,\
00,74,00,6f,00,20,00,56,00,69,00,65,00,77,00,65,00,72,00,5c,00,50,00,68,00,\
6f,00,74,00,6f,00,56,00,69,00,65,00,77,00,65,00,72,00,2e,00,64,00,6c,00,6c,\
00,22,00,2c,00,20,00,49,00,6d,00,61,00,67,00,65,00,56,00,69,00,65,00,77,00,\
5f,00,46,00,75,00,6c,00,6c,00,73,00,63,00,72,00,65,00,65,00,6e,00,20,00,25,\
00,31,00,00,00
[HKEY_CLASSES_ROOT\PhotoViewer.FileAssoc.JFIF\shell\open\DropTarget]
"Clsid"="{FFE2A43C-56B9-4bf5-9A79-CC6D4285608A}"
[HKEY_CLASSES_ROOT\PhotoViewer.FileAssoc.Jpeg]
"EditFlags"=dword:00010000
"ImageOptionFlags"=dword:00000001
"FriendlyTypeName"=hex(2):40,00,25,00,50,00,72,00,6f,00,67,00,72,00,61,00,6d,\
00,46,00,69,00,6c,00,65,00,73,00,25,00,5c,00,57,00,69,00,6e,00,64,00,6f,00,\
77,00,73,00,20,00,50,00,68,00,6f,00,74,00,6f,00,20,00,56,00,69,00,65,00,77,\
00,65,00,72,00,5c,00,50,00,68,00,6f,00,74,00,6f,00,56,00,69,00,65,00,77,00,\
65,00,72,00,2e,00,64,00,6c,00,6c,00,2c,00,2d,00,33,00,30,00,35,00,35,00,00,\
00
[HKEY_CLASSES_ROOT\PhotoViewer.FileAssoc.Jpeg\DefaultIcon]
@="%SystemRoot%\\System32\\imageres.dll,-72"
[HKEY_CLASSES_ROOT\PhotoViewer.FileAssoc.Jpeg\shell\open]
"MuiVerb"=hex(2):40,00,25,00,50,00,72,00,6f,00,67,00,72,00,61,00,6d,00,46,00,\
69,00,6c,00,65,00,73,00,25,00,5c,00,57,00,69,00,6e,00,64,00,6f,00,77,00,73,\
00,20,00,50,00,68,00,6f,00,74,00,6f,00,20,00,56,00,69,00,65,00,77,00,65,00,\
72,00,5c,00,70,00,68,00,6f,00,74,00,6f,00,76,00,69,00,65,00,77,00,65,00,72,\
00,2e,00,64,00,6c,00,6c,00,2c,00,2d,00,33,00,30,00,34,00,33,00,00,00
[HKEY_CLASSES_ROOT\PhotoViewer.FileAssoc.Jpeg\shell\open\command]
@=hex(2):25,00,53,00,79,00,73,00,74,00,65,00,6d,00,52,00,6f,00,6f,00,74,00,25,\
00,5c,00,53,00,79,00,73,00,74,00,65,00,6d,00,33,00,32,00,5c,00,72,00,75,00,\
6e,00,64,00,6c,00,6c,00,33,00,32,00,2e,00,65,00,78,00,65,00,20,00,22,00,25,\
00,50,00,72,00,6f,00,67,00,72,00,61,00,6d,00,46,00,69,00,6c,00,65,00,73,00,\
25,00,5c,00,57,00,69,00,6e,00,64,00,6f,00,77,00,73,00,20,00,50,00,68,00,6f,\
00,74,00,6f,00,20,00,56,00,69,00,65,00,77,00,65,00,72,00,5c,00,50,00,68,00,\
6f,00,74,00,6f,00,56,00,69,00,65,00,77,00,65,00,72,00,2e,00,64,00,6c,00,6c,\
00,22,00,2c,00,20,00,49,00,6d,00,61,00,67,00,65,00,56,00,69,00,65,00,77,00,\
5f,00,46,00,75,00,6c,00,6c,00,73,00,63,00,72,00,65,00,65,00,6e,00,20,00,25,\
00,31,00,00,00
[HKEY_CLASSES_ROOT\PhotoViewer.FileAssoc.Jpeg\shell\open\DropTarget]
"Clsid"="{FFE2A43C-56B9-4bf5-9A79-CC6D4285608A}"
[HKEY_CLASSES_ROOT\PhotoViewer.FileAssoc.Gif]
"ImageOptionFlags"=dword:00000001
"FriendlyTypeName"=hex(2):40,00,25,00,50,00,72,00,6f,00,67,00,72,00,61,00,6d,\
00,46,00,69,00,6c,00,65,00,73,00,25,00,5c,00,57,00,69,00,6e,00,64,00,6f,00,\
77,00,73,00,20,00,50,00,68,00,6f,00,74,00,6f,00,20,00,56,00,69,00,65,00,77,\
00,65,00,72,00,5c,00,50,00,68,00,6f,00,74,00,6f,00,56,00,69,00,65,00,77,00,\
65,00,72,00,2e,00,64,00,6c,00,6c,00,2c,00,2d,00,33,00,30,00,35,00,37,00,00,\
00
[HKEY_CLASSES_ROOT\PhotoViewer.FileAssoc.Gif\DefaultIcon]
@="%SystemRoot%\\System32\\imageres.dll,-83"
[HKEY_CLASSES_ROOT\PhotoViewer.FileAssoc.Gif\shell\open\command]
@=hex(2):25,00,53,00,79,00,73,00,74,00,65,00,6d,00,52,00,6f,00,6f,00,74,00,25,\
00,5c,00,53,00,79,00,73,00,74,00,65,00,6d,00,33,00,32,00,5c,00,72,00,75,00,\
6e,00,64,00,6c,00,6c,00,33,00,32,00,2e,00,65,00,78,00,65,00,20,00,22,00,25,\
00,50,00,72,00,6f,00,67,00,72,00,61,00,6d,00,46,00,69,00,6c,00,65,00,73,00,\
25,00,5c,00,57,00,69,00,6e,00,64,00,6f,00,77,00,73,00,20,00,50,00,68,00,6f,\
00,74,00,6f,00,20,00,56,00,69,00,65,00,77,00,65,00,72,00,5c,00,50,00,68,00,\
6f,00,74,00,6f,00,56,00,69,00,65,00,77,00,65,00,72,00,2e,00,64,00,6c,00,6c,\
00,22,00,2c,00,20,00,49,00,6d,00,61,00,67,00,65,00,56,00,69,00,65,00,77,00,\
5f,00,46,00,75,00,6c,00,6c,00,73,00,63,00,72,00,65,00,65,00,6e,00,20,00,25,\
00,31,00,00,00
[HKEY_CLASSES_ROOT\PhotoViewer.FileAssoc.Gif\shell\open\DropTarget]
"Clsid"="{FFE2A43C-56B9-4bf5-9A79-CC6D4285608A}"
[HKEY_CLASSES_ROOT\PhotoViewer.FileAssoc.Png]
"ImageOptionFlags"=dword:00000001
"FriendlyTypeName"=hex(2):40,00,25,00,50,00,72,00,6f,00,67,00,72,00,61,00,6d,\
00,46,00,69,00,6c,00,65,00,73,00,25,00,5c,00,57,00,69,00,6e,00,64,00,6f,00,\
77,00,73,00,20,00,50,00,68,00,6f,00,74,00,6f,00,20,00,56,00,69,00,65,00,77,\
00,65,00,72,00,5c,00,50,00,68,00,6f,00,74,00,6f,00,56,00,69,00,65,00,77,00,\
65,00,72,00,2e,00,64,00,6c,00,6c,00,2c,00,2d,00,33,00,30,00,35,00,37,00,00,\
00
[HKEY_CLASSES_ROOT\PhotoViewer.FileAssoc.Png\DefaultIcon]
@="%SystemRoot%\\System32\\imageres.dll,-71"
[HKEY_CLASSES_ROOT\PhotoViewer.FileAssoc.Png\shell\open\command]
@=hex(2):25,00,53,00,79,00,73,00,74,00,65,00,6d,00,52,00,6f,00,6f,00,74,00,25,\
00,5c,00,53,00,79,00,73,00,74,00,65,00,6d,00,33,00,32,00,5c,00,72,00,75,00,\
6e,00,64,00,6c,00,6c,00,33,00,32,00,2e,00,65,00,78,00,65,00,20,00,22,00,25,\
00,50,00,72,00,6f,00,67,00,72,00,61,00,6d,00,46,00,69,00,6c,00,65,00,73,00,\
25,00,5c,00,57,00,69,00,6e,00,64,00,6f,00,77,00,73,00,20,00,50,00,68,00,6f,\
00,74,00,6f,00,20,00,56,00,69,00,65,00,77,00,65,00,72,00,5c,00,50,00,68,00,\
6f,00,74,00,6f,00,56,00,69,00,65,00,77,00,65,00,72,00,2e,00,64,00,6c,00,6c,\
00,22,00,2c,00,20,00,49,00,6d,00,61,00,67,00,65,00,56,00,69,00,65,00,77,00,\
5f,00,46,00,75,00,6c,00,6c,00,73,00,63,00,72,00,65,00,65,00,6e,00,20,00,25,\
00,31,00,00,00
[HKEY_CLASSES_ROOT\PhotoViewer.FileAssoc.Png\shell\open\DropTarget]
"Clsid"="{FFE2A43C-56B9-4bf5-9A79-CC6D4285608A}"
[HKEY_CLASSES_ROOT\PhotoViewer.FileAssoc.Wdp]
"EditFlags"=dword:00010000
"ImageOptionFlags"=dword:00000001
[HKEY_CLASSES_ROOT\PhotoViewer.FileAssoc.Wdp\DefaultIcon]
@="%SystemRoot%\\System32\\wmphoto.dll,-400"
[HKEY_CLASSES_ROOT\PhotoViewer.FileAssoc.Wdp\shell\open]
"MuiVerb"=hex(2):40,00,25,00,50,00,72,00,6f,00,67,00,72,00,61,00,6d,00,46,00,\
69,00,6c,00,65,00,73,00,25,00,5c,00,57,00,69,00,6e,00,64,00,6f,00,77,00,73,\
00,20,00,50,00,68,00,6f,00,74,00,6f,00,20,00,56,00,69,00,65,00,77,00,65,00,\
72,00,5c,00,70,00,68,00,6f,00,74,00,6f,00,76,00,69,00,65,00,77,00,65,00,72,\
00,2e,00,64,00,6c,00,6c,00,2c,00,2d,00,33,00,30,00,34,00,33,00,00,00
[HKEY_CLASSES_ROOT\PhotoViewer.FileAssoc.Wdp\shell\open\command]
@=hex(2):25,00,53,00,79,00,73,00,74,00,65,00,6d,00,52,00,6f,00,6f,00,74,00,25,\
00,5c,00,53,00,79,00,73,00,74,00,65,00,6d,00,33,00,32,00,5c,00,72,00,75,00,\
6e,00,64,00,6c,00,6c,00,33,00,32,00,2e,00,65,00,78,00,65,00,20,00,22,00,25,\
00,50,00,72,00,6f,00,67,00,72,00,61,00,6d,00,46,00,69,00,6c,00,65,00,73,00,\
25,00,5c,00,57,00,69,00,6e,00,64,00,6f,00,77,00,73,00,20,00,50,00,68,00,6f,\
00,74,00,6f,00,20,00,56,00,69,00,65,00,77,00,65,00,72,00,5c,00,50,00,68,00,\
6f,00,74,00,6f,00,56,00,69,00,65,00,77,00,65,00,72,00,2e,00,64,00,6c,00,6c,\
00,22,00,2c,00,20,00,49,00,6d,00,61,00,67,00,65,00,56,00,69,00,65,00,77,00,\
5f,00,46,00,75,00,6c,00,6c,00,73,00,63,00,72,00,65,00,65,00,6e,00,20,00,25,\
00,31,00,00,00
[HKEY_CLASSES_ROOT\PhotoViewer.FileAssoc.Wdp\shell\open\DropTarget]
"Clsid"="{FFE2A43C-56B9-4bf5-9A79-CC6D4285608A}"
[HKEY_CLASSES_ROOT\SystemFileAssociations\image\shell\Image Preview\command]
@=hex(2):25,00,53,00,79,00,73,00,74,00,65,00,6d,00,52,00,6f,00,6f,00,74,00,25,\
00,5c,00,53,00,79,00,73,00,74,00,65,00,6d,00,33,00,32,00,5c,00,72,00,75,00,\
6e,00,64,00,6c,00,6c,00,33,00,32,00,2e,00,65,00,78,00,65,00,20,00,22,00,25,\
00,50,00,72,00,6f,00,67,00,72,00,61,00,6d,00,46,00,69,00,6c,00,65,00,73,00,\
25,00,5c,00,57,00,69,00,6e,00,64,00,6f,00,77,00,73,00,20,00,50,00,68,00,6f,\
00,74,00,6f,00,20,00,56,00,69,00,65,00,77,00,65,00,72,00,5c,00,50,00,68,00,\
6f,00,74,00,6f,00,56,00,69,00,65,00,77,00,65,00,72,00,2e,00,64,00,6c,00,6c,\
00,22,00,2c,00,20,00,49,00,6d,00,61,00,67,00,65,00,56,00,69,00,65,00,77,00,\
5f,00,46,00,75,00,6c,00,6c,00,73,00,63,00,72,00,65,00,65,00,6e,00,20,00,25,\
00,31,00,00,00
[HKEY_CLASSES_ROOT\SystemFileAssociations\image\shell\Image Preview\DropTarget]
"{FFE2A43C-56B9-4bf5-9A79-CC6D4285608A}"=""
[HKEY_LOCAL_MACHINE\SOFTWARE\Microsoft\Windows Photo Viewer\Capabilities]
"ApplicationDescription"="@%ProgramFiles%\\Windows Photo Viewer\\photoviewer.dll,-3069"
"ApplicationName"="@%ProgramFiles%\\Windows Photo Viewer\\photoviewer.dll,-3009"
[HKEY_LOCAL_MACHINE\SOFTWARE\Microsoft\Windows Photo Viewer\Capabilities\FileAssociations]
".cr2"="PhotoViewer.FileAssoc.Tiff"
".jpg"="PhotoViewer.FileAssoc.Jpeg"
".wdp"="PhotoViewer.FileAssoc.Wdp"
".jfif"="PhotoViewer.FileAssoc.JFIF"
".dib"="PhotoViewer.FileAssoc.Bitmap"
".png"="PhotoViewer.FileAssoc.Png"
".jxr"="PhotoViewer.FileAssoc.Wdp"
".bmp"="PhotoViewer.FileAssoc.Bitmap"
".jpe"="PhotoViewer.FileAssoc.Jpeg"
".jpeg"="PhotoViewer.FileAssoc.Jpeg"
".gif"="PhotoViewer.FileAssoc.Gif"
".tif"="PhotoViewer.FileAssoc.Tiff"
".tiff"="PhotoViewer.FileAssoc.Tiff"
Yup, that is a lot of keys and settings but you are almost done. Once you have pasted text into your new notepad document save it but as .REG, you can name it however you want but it has to be .REG extension.
Once the file is saved double click on it to merge it into the Windows registry. You might need to turn off UAC for this operation (check our tutorial on this topic) and accept warning messages but once it is done you should now have an old photo viewer as a choice for your default viewing application.
All you have to do now is to go to settings and go to default apps, under photo viewer you should see your current default viewing application, probably photos, click on it to see options and choose photo viewer and exit the Settings menu, and you're done.
Read More

 Error Causes
 Once disguised it will wait patiently for a user's click and once that happens it will replicate itself and further infect the system. This rapid spread can lead to stolen personal data, some system hick-ups, and other system-related issues.
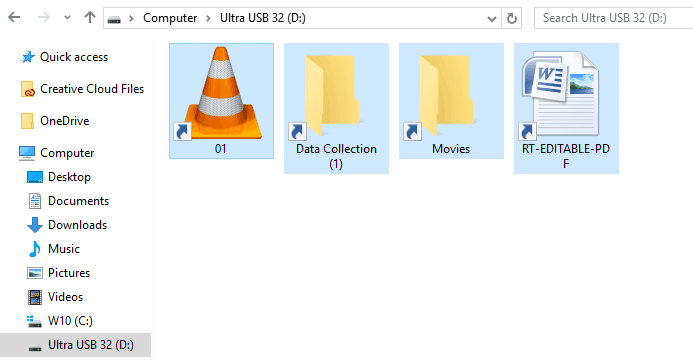
This malware mainly affects physical file transfer devices like for example and most USB drives, hard drives, and SD memory cards and it can easily transfer itself to the computer.
The advantage of this shortcut virus comparing it to others is that it is mostly undetected by a vast variety of antivirus software. So running just anti-virus software maybe not be enough to remove it from your system. Luckily for all unfortunate users that have caught this annoyance, it can be easily removed fully manually in a short time.
Once disguised it will wait patiently for a user's click and once that happens it will replicate itself and further infect the system. This rapid spread can lead to stolen personal data, some system hick-ups, and other system-related issues.
This malware mainly affects physical file transfer devices like for example and most USB drives, hard drives, and SD memory cards and it can easily transfer itself to the computer.
The advantage of this shortcut virus comparing it to others is that it is mostly undetected by a vast variety of antivirus software. So running just anti-virus software maybe not be enough to remove it from your system. Luckily for all unfortunate users that have caught this annoyance, it can be easily removed fully manually in a short time.

 This is a very interesting decision by Microsoft and I fully support it, this time users will be able to pay less and to choose only applications that they need instead of paying for the whole package and not using it.
