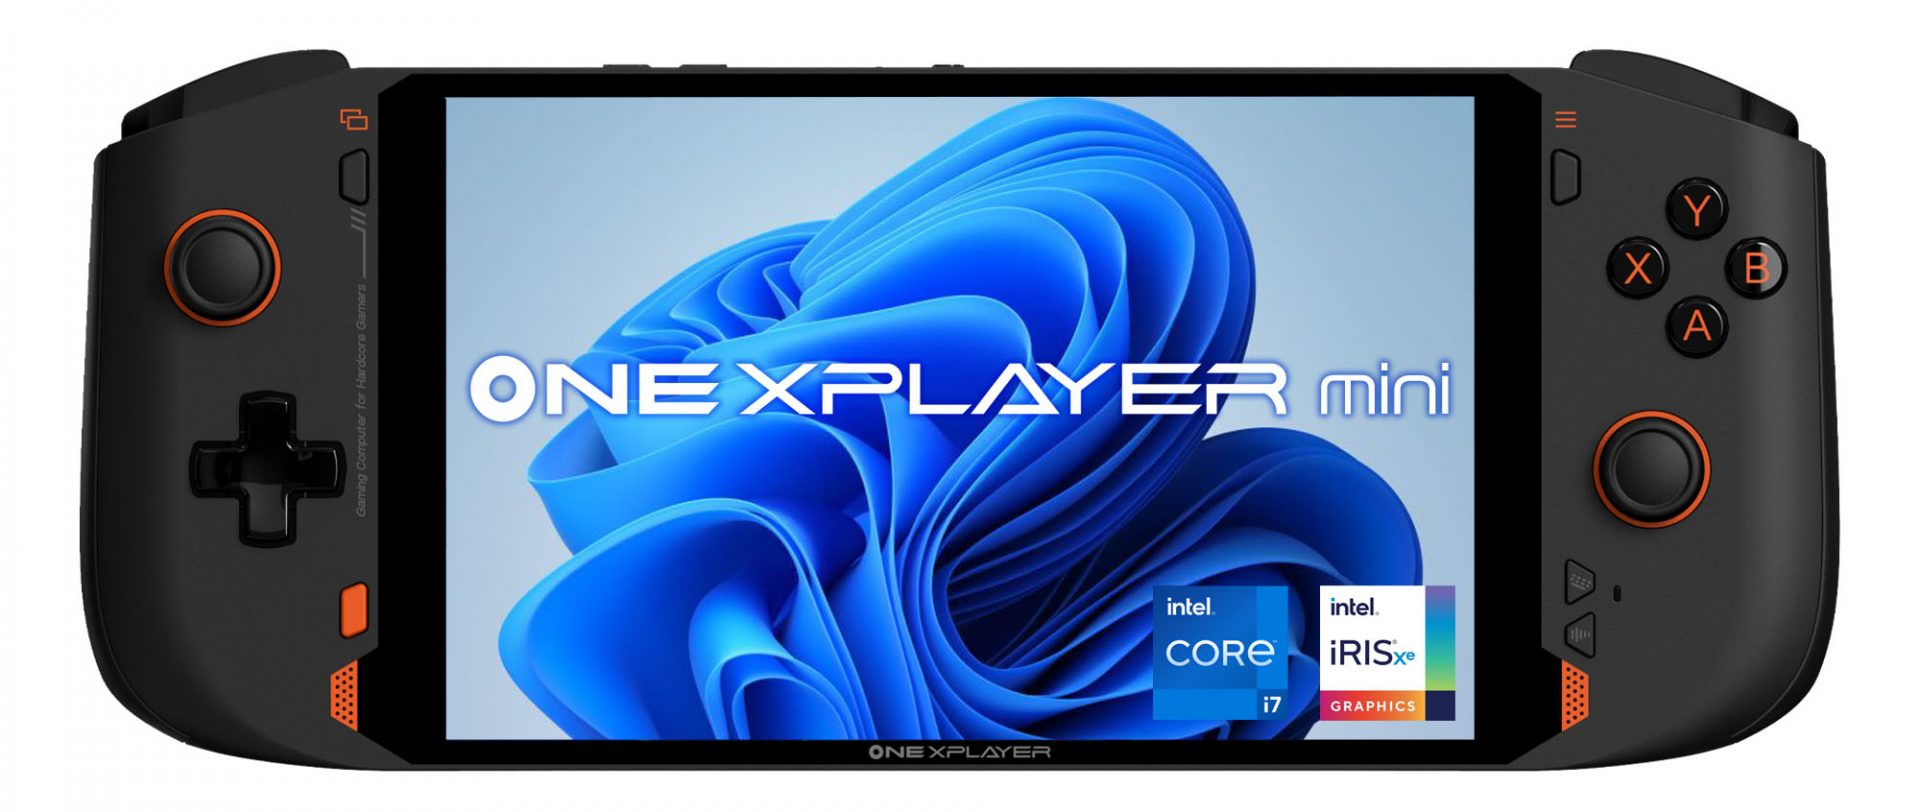
 Valve has announced the first gaming PC handheld console: Steam Deck. At its core, Stead Deck is just a portable, small PC in little casing. It uses AMD Zen 2 CPU and RDNA 2 GPU architecture, has 16GB of RAM, Wi-Fi, and Bluetooth.
It is a portable device with both a touchpad and joystick packing a seven-inch screen with a resolution of 1280x800 (16:10 aspect ratio). The screen has an ambient light sensor for automatic light adjustments same as your modern mobile device.
Stating to Valve battery will hold up from two to eight hours depending on the activity of the user and what exactly he is doing. The handheld comes also with a carrying case.
Out of the box, Steam Dock comes with the latest Valve’s version of SteamOS 3. Just for comparing, the steam box was coming SteamOS 2, so this new Linux-based OS is aimed to provide better performance and better compatibility.
Naturally, all Linux games in your Steam library will work right out of the box but Valve has something called PROTON inside OS, it is emulation software based on Wine that will supposedly let you play all of your Library games on a given OS.
One big thing to mention here is that this is PC after all meaning that if you do not like having SteamOS on it you can install Windows instead and so far as we know it will support Windows 11. Now with Windows 11, you will be able to play all of your Steam games and run any kind of Windows software on it including EPIC store, battle.net, and others.
The initial release date is set for December 2021 and today on July 16th Valve is opening you can reserve your copy if you want to pre-purchase. Follow this link if you want to reserve your copy. Reserve your Steam Deck device
The price of the device will depend on the memory capacity which you would like to have. Please note that each of the 3 offered devices will have the same hardware, the only difference will be in memory available, and the most expensive version will also have anti-glare screen, everything else is identical.
64GB model will be $399, 256GB model will have the price of $529 and largest one with whooping 512GB will be $649
Valve ventures into the digital hardware domain again but it is unsure will they make it this time. Both Steam machine and their controller were in long run failed and later unsupported products so perhaps some customer caution is advised.
Although having a handheld PC is tempting I would advise seeing how the overall market will accept this contraption before throwing money into it.

 Hardware under the hood
 Error Causes
'Error 501: Not implemented or not supported.'
Error Causes2021 is nearing toward the end and with just a couple of days remaining in this year, we are happy to look forward to the next year. So in large anticipation of what will next year bring us, we are taking a good design look at this one and making a list for you of what graphic design software you should learn and use in the upcoming 2022.
 Before we dive into it in more detail and predictions please be aware that this article is based upon my personal opinion drawn from the research of current trends and standards. That being said let's dive right into details.
Whether you like it or not, Adobe has cemented itself with its flagship application Photoshop and how things are looking this situation will not change any time soon. Photoshop is an extraordinary pixel manipulation software that has the ability to work with both animations and vector graphics as well making it a great single application for all-around design needs. It has been industry-standard design software for the web, print, and all other kinds of design all over the globe and this will not change in near future. With its constant updates and expansion of its abilities, this is a must-have tool in your design tool belt. If you are looking to find work as a designer you will have to know how to work with photoshop.
Many will tell you that is photoshop for raster graphics, the illustrator is for vectors. First started as illustrator 88 on Mac right away it took first place for vector graphics from FreeHand and it continued on its path of vector dominance. After some time and more integration with photoshop Adobe managed to overthrow Corel Draw as well winning the title for best vector editing software with illustrator. Same as with photoshop, if you are planning to work in a serious industry you will need to know the illustrator.
We are still in Adobe train and it is moving hard, InDesign is graphic design software aimed for paper publications. If you need to create and prepare any kind of professional publication for printing InDesign is the application to go to. With its specific print aimed features it is a must-have for any graphic designer.
Once the king of vector and print design but dethroned by Adobe Corel Draw still has some punches to stay relevant in the field. With some cool features like symmetry and long shadows, it stands out from its competitors for its ease of use. Corel was always focused on easy to learn, and difficult to master and it is still following that kind of thinking. Granted not many employers will require you to be a master of Corel Draw but some of them will request that you are familiar with the application. One of perhaps the greatest advantages of Corel over Adobe is not locking you into a subscription making Draw suit a great choice for freelancers and designers that want to own software, not rent it.
The first software from Affinity was Photo, made as a cheap version one-time purchase competitor for photoshop. Later it has released Designer, also a one-time purchase competitor for illustrators. If we are going to take a good look into a feature for feature comparison, both Adobe and Corel will win over Affinity but if we take a look at a price that is a one-time purchase Affinity will win over easily. Priced only at $54.99 it is a steal, and taking into account that many designers will not require any very advanced features found in Corel or Adobe applications Affinity is the way to go.
Speaking of price, nothing beats free, and both Inkscape and GIMP are completely free. offering very decent and competitive features applications will require you to get used to their own specific UI and workflow, but once you get a grasp of them, you will be able to do most design work in them. One of the downsides of using these free open source apps is their limited export options but if all that is required from you is to deliver a typical SVG, JPG, EPS, PNG, or PDF file you are good to go.
Free with basic functionality with the option to purchase more advanced features Colorcinch is a great application if you are on quickly developing and creating graphics for social media posts. Add quickly text or filters, quickly do the color adjustment and save for social apps. The application also within its basic boundaries can work directly on the website without you requiring to even install it making it one of a kind. Go try it at the official site and enjoy yourself.
If you have followed the graphic design scene you will notice that nothing has changed and it will not change in near future. This just speaks about how much industry is defined and how little change is there over time. I advise if you can to get and learn adobe suite since it is industry standard and is required from almost every employer today. Rest applications on the list are great alternatives and can bring you income and offer you a way to finish your project.
GoforFiles is a Potentially Unwanted Program that allegedly allows users to easily search for files, movies, apps, and other useful things on the internet. In our testing, this program on further inspection does not work, it only displays an error for every search query. To top this off this program comes bundled up with other programs which could be malicious or unwanted. This program adds startup links into windows, allowing it and its bundled programs to launch every time Windows is restarted or launched. A task scheduled is also made, that lets the launch of the program at different random times during the day. Many anti-virus applications have marked this program and its bundled counterparts as Potentially Unwanted Programs, and it is highly recommended to remove these programs from your computer.
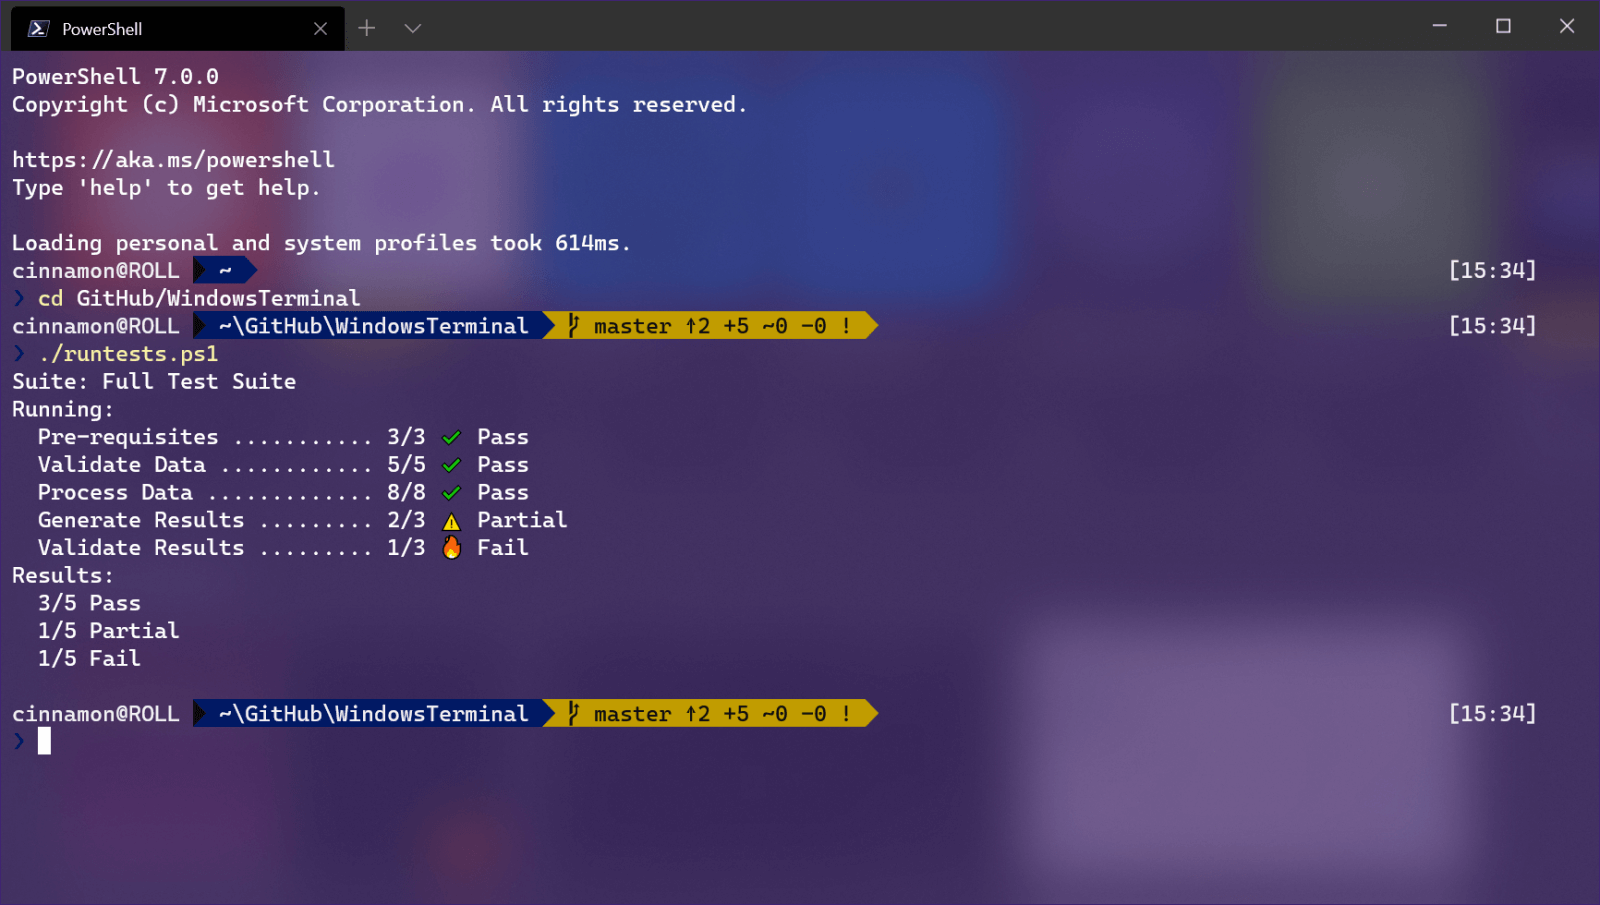 Windows Terminal is a new free Microsoft terminal sort of application. When you open either Power Shell or Command Prompt in Windows they will be opened in different windows, and if you want several of each you will have several windows of each on your screen.
Windows Terminal fixes this by opening each of the Instances of Command Prompt and Power Shell as separate tabs inside itself making it much easier to manage multiple instances of named applications.
You can also run both Power Shell and Command prompt tabs in the same Windows Terminal. Luckily running command prompt and power shell in different tabs is not the only thing you can do. Windows Terminal lets you choose your own theme, it has emoji support, GPU rendering, split panes, and many more customizable options.
Windows 11 will have Terminal as the default command-line environment for opening Power Shell or Command prompt, even Windows Subsystem for Linux (WSL)
Windows Terminal is a new free Microsoft terminal sort of application. When you open either Power Shell or Command Prompt in Windows they will be opened in different windows, and if you want several of each you will have several windows of each on your screen.
Windows Terminal fixes this by opening each of the Instances of Command Prompt and Power Shell as separate tabs inside itself making it much easier to manage multiple instances of named applications.
You can also run both Power Shell and Command prompt tabs in the same Windows Terminal. Luckily running command prompt and power shell in different tabs is not the only thing you can do. Windows Terminal lets you choose your own theme, it has emoji support, GPU rendering, split panes, and many more customizable options.
Windows 11 will have Terminal as the default command-line environment for opening Power Shell or Command prompt, even Windows Subsystem for Linux (WSL)
Error code 12 is a typical Device Manager error code. It usually pops on the computer screen when the computer experiences device driver problems or system resource conflicts.
Error code 12 is mostly displayed on the computer screen in the following format:
‘This device cannot find enough free resources that it can use. If you want to use this device, you will need to disable one of the other devices on this system.’
 Error Causes
The error code 12 occurs when 2 devices installed on your PC are accidentally assigned the same I/O (input/output) ports or the same direct memory access channel.
This assignment is known to be made either by BIOS (Basic Input/output system) or by the operating system. It can sometimes be assigned by a combination of the two. Also, code 12 can also appear on your monitor screen if the BIOS didn’t allocate enough resources to the device.
Although this error code is not fatal, it is nonetheless advisable to fix it immediately to avoid inconvenience and hassle. This error is most likely to lower and hamper the performance of your system.
Here are some of the easiest and most effective do-it-yourself methods to resolve error code 12 on your PC. To perform these fixes, you don’t have to be technically sound or a computer programmer for that matter. Simply follow the steps to fix the problem right away.
To repair error code 12, simply go to the start menu and type Device Manager in the search box. Now go to the Device Properties dialog box. After that click on the ‘General Tab’ and now access Troubleshoot to start the Troubleshooting Wizard.
The Wizard will ask you some questions and provide you a solution accordingly. Follow the instructions and resolution steps provided by the troubleshooting wizard to repair error code 12 on your PC.
By disabling the problematic device in the Device Manager, Windows will ignore that piece of hardware. Once disabled, Windows will then no longer assign system resources to that device and no driver/software will be able to use that device.
To disable, go to the Device Properties in the Device Manager and then click the Driver tab. Click disable located at the bottom of the window. Then you will be prompted with a message stating ‘Disabling this device will cause it to stop functioning. Do you wish to disable it?’ Click yes to continue and then click OK to save changes.
Another method to resolve error code 12 is to restore your PC to its previous state when it was working properly.
For this, it is important to backup all your data first to avoid data loss issues that are likely to occur during this process. Creating backups manually can be a time-consuming and tedious task. To save time and quicken the process, it is best to install a program like DriverFIX.
DriverFIX is a user-friendly and intuitive device driver management software that helps backup all your data automatically and efficiently, while simultaneously restores your PC back to its previous state before you encountered problems.
Click here to download DriverFIX on your system to resolve error code 12
Taking information from the internet or from other sources usually involves selecting the text, copying it into the clipboard, and then pasting it into your file. In today's modern applications pasting text will most of the time take its formating with it.

By formatting what I am talking about are parameters like font size, line breaks, hyperlinks, font styles, etc. and sometimes you do not want any of these in your file, you would like and prefer to have just plain text so you can format it as you wish.
In order to paste just plain text instead of using the CTRL + V keyboard shortcut, press CTRL + SHIFT + V instead. This shortcut will paste the only text into your file.
Leave it to Microsoft to make its shortcut not work in their application. In Microsoft Word, you can only use the standard CTRL + V shortcut, if you press CTRL + SHIFT + V nothing will happen. So in order to paste the only text into a word document, choose to paste special > text only
I have tried CTRL + SHIFT + V in various applications like photoshop, illustrator, InDesign, visual studio code, slack, discord, WordPress installations, etc and only one that has not worked for me was Word and office in general so you are safe to use this trick and have desired results.