Infographic: How To Speed Up PC Startup

A slow PC startup can be pretty annoying. This usually results from various computer issues. If your computer is acting sluggishly, here are four ways to speed up your PC startup.

How-to-Sped-Up-PC-Startup

Do You Need Help with Your Device?

Our Team of Experts May Help
Troubleshoot.Tech Experts are There for You!
Replace damaged files
Restore performance
Free disk space
Remove Malware
Protects WEB browser
Remove Viruses
Stop PC freezing
GET HELP
Troubleshoot.Tech experts work with all versions of Microsoft Windows including Windows 11, with Android, Mac, and more.

Share this article:

You might also like

Fix Error Accessing the Registry in Windows
If you encounter an error saying, “error accessing the registry” when you try to merge a registry key on your Windows 10 computer, you’re not alone as some users also experienced the same problem. According to these users, they encounter the error after they’ve re-installed their Windows version and tried to open a .reg file. Based on the reports, this error could occur if the registry file does not have administrative privileges. Meaning to say, the program does not have the necessary permission to merge the .reg file. This is common with fresh installs as well as reinstalls. Moreover, this kind of issue could also occur due to system file corruption. Whichever the case may be, here are some troubleshooting tips you can check out to resolve the error.

Option 1 – Try to import the .reg file with admin privileges

As pointed out, the error may be due to a lack of admin privileges. It could be that the Registry Editor does not have admin privileges to merge the registry file. This is common with new Windows installations especially since the Registry Editor hasn’t been opened before. So you need to import the .reg file again and this time, with admin privileges.
  • Tap the Win + R keys to open the Run dialog box.
  • Then type “Regedit” in the field and tap the Ctrl + Shift + Enter keys to open the Registry Editor with admin privileges.
  • A User Account Control or UAC prompt will appear where you have to click Yes to proceed.
  • After opening the Registry Editor, go to File > Import using the ribbon bar at the top.
  • Next, use the import menu to go to the location of the file you were trying to merge. Once you’ve found it, click Open to merge it with your current registry. This should fix the problem. If not, refer to the next options below.

Option 2 – Try performing a System Restore

Running System Restore can also help you fix the error when accessing the Registry. You can do this option either by booting into Safe Mode or in System Restore. If you are already in the Advanced Startup Options, just directly select System Restore and proceed with the next steps. And if you have just booted your PC into Safe Mode, refer to the steps below.
  • Tap the Win + R keys to open the Run dialog box.
  • After that, type in “sysdm.cpl” in the field and tap Enter.
  • Next, go to the System Protection tab then click the System Restore button. This will open a new window where you have to select your preferred System Restore point.
  • After that, follow the on-screen instructions to finish the process and then restart your computer and check if the problem is fixed or not.
  • Once the next startup is complete, you have to merge or import the file again and see if the error is now fixed or not.

Option 3 – Try to perform repair install by creating a Windows 10 installation media

  • Click this link and then click the Download Tool Now button.
  • Next, click the “Use the tool to create installation media (USB flash drive, DVD, or ISO file)…” option and follow the next given instructions on the screen.
  • Now select the ISO file option in step 5.
  • After that, you should now have an ISO file.
  • Next, go to the location where you’ve downloaded the ISO file.
  • Then right-click on the Windows 10 ISO file and select the Open with option and then select File Explorer.
  • Now click on “setup.exe” and follow the next instructions that appear on the screen. When asked, you have to select either Nothing (clean install) or Keep personal files only option. Take note that you must not select the “Keep personal files, apps, and Windows settings since it doesn’t really work.

Option 4 – Try running the System File Checker Scan

As mentioned, the error when accessing the Registry might be caused by file corruption. And that’s where the SFC scan comes in. The SFC or System File Checker scan could detect and automatically repair damaged system files. SFC is a built-in command utility that helps in restoring corrupted files as well as missing files. It replaces bad and corrupted system files with good system files. To run the SFC command, follow the steps given below.
  • Tap Win + R to launch Run.
  • Type in cmd in the field and tap Enter.
  • After opening Command Prompt, type in sfc /scannow
The command will start a system scan which will take a few whiles before it finishes. Once it’s done, you could get the following results:
  1. Windows Resource Protection did not find any integrity violations.
  2. Windows Resource Protection found corrupt files and successfully repaired them.
  3. Windows Resource Protection found corrupt files but was unable to fix some of them.
  • Now restart your computer.
Read More
Diablo 2 Resurrected facing server issues
It has been some time since the release of Diablo 2 resurrected and overall reception was pretty good. People are enjoying the old classic game in hi-def. resolution and with new and improved visuals. Sadly some server issues are present still until this day and somewhat spoil the experience for players. diablo 2 server statusThe greatest lag and server crashes are pinpointed to game-creating events. When a player creates a new online game, the server needs to pull a lot of details from the database and make a game, due to some legacy code present this process takes some time and it is demanding a bit on the server-side, and although code was optimized to cater to more modern approach some legacy code still remains. Another thing that was spotted to affect performance itself is player behavior, to be more specific, modern gamer behavior. Where players find good builds and runs on the internet and then go to farm-specific areas or bosses for loot or experience points, which in return boils down to making plenty and short runs that are made by creating games and after run eliminating them. Now pair that with the previous statement about legacy server and database code and you can add 1 and 1 and see how this might be an issue. A lot of short games over legacy code are placing games in a state it was not designed for back in 2001 and therefore we have issues. Sadly solutions without completely rewriting the whole code are not very promising and they include rate limiting, which will prevent players to create many games in succession in a short period of time and maybe even login queues to drop a load on servers. Blizzard reached to people in the whole company, even old diablo 2 developers to ask for advice and they say that they are working on solutions so they could lift limitations and have everything running fine.
Read More
Prompted For A Product Key On Windows 10 - How to Fix It

Prompted For A Product Key – What Is It?

Some Windows 7 or Windows 8/8.1 users are having a hard time upgrading to Windows 10 as they are being prompted for a product key. By default, the Windows 10 operating system does not require a product key and users should not be prompted for one, given you upgraded your computer from an activated Windows 7 or Windows 8/8.1 license or from the Windows 10 Preview build. However, there are some users encountering this problem and there are several reasons for this.

Solution

Restoro box imageError Causes

There are a few reasons why some users are being prompted for a product key when upgrading to Windows 10:

  • Windows 7 or Windows 8/8.1 license is not activated.
  • You’re upgrading to Windows 10 final release from a preview build.
  • There are broken operating system files.
  • Activation servers get overwhelmed due to the high volume of upgrades.
  • The Windows 10 copy you downloaded does not correspond with the current Windows system you are upgrading from.

Further Information and Manual Repair

Before you can fix this problem, you need to know why you’re being prompted for a product key. Some things you should know about Windows 10 product key activation are the following:

  • You cannot activate Windows 10 using your Windows 7 or Windows 8/8.1 product key. Windows 10 has a unique product key.
  • Error codes such as 0x8007232b, 0XC004E003, 0x8007007B, or 0x8007000D might pop up during system upgrade especially when the activation servers get overwhelmed with the high volume of upgrades.
  • You don’t really need to know your Windows 10 product key.

Now, if ever you’re prompted for a product key when you’re upgrading to Windows 10, you can apply the following methods:

Method One: Give It A Few Days

If you’ve been prompted for a product key upon upgrading to Windows 10, you should click on the “Do this later” option. Wait for a few days then Windows 10 will get activated automatically.

Method Two: Download A Copy of Windows 10 Corresponding Your Current System

One of the reasons Windows users are being prompted for a product key when upgrading to Windows 10 is that they have downloaded a wrong edition of Windows 10 and do not correspond with your current system.

  • Users of Home Basic, Home Premium, Windows 7 Starter, Windows 8.0 Core, and Windows 8.1 Core should download Windows 10 Home ISO.
  • Users of Windows 7 Ultimate, Windows 7 Professional, Windows 8.0 Pro, and Windows 8.1 Pro should download Windows 10 Pro ISO.

NOTE: Users of Windows 7 Enterprise, Windows 8.0 Enterprise, and Windows 8.1 Enterprise are not eligible for the free upgrade offer.

Method Three: Ensure Windows Is Activated

If your Windows 7 or Windows 8/8.1 is not genuine or activated, you will get prompted for a product key. You need to make sure first your current system is activated.

  1. Click on Start then right-click Computer. For Windows 8 and up users, you can simply press on Windows key + X then select Choose Properties.
  2. When the Properties window appears, check if the Windows you’re running is activated.

Method Three: Reset License Status

  1. Press on Windows key + X.
  2. Select Command Prompt (Admin).
  3. Once the command prompt window appears, type vbs –rearm then press Enter.
  4. Exit Command Prompt then restart your PC.
  5. Input the product key by following the instructions given.

Method Four: Force Activation

  1. Press on Windows key + X
  2. Select Command Prompt (Admin).
  3. Once the command prompt window appears, type vbs –ato then press Enter.
  4. Exit Command Prompt then restart your PC.

Method Five: Run System File Checker

Another thing you can try doing is to run the system file checker utility to scan if there are any broken operating system files. In doing so, you’ll be able to detect problems that might be preventing the product activation of your Windows 10 upgrade.

Method Six: Contact Microsoft Activation Center

If in case you’ve exhausted all your resources and you are still being prompted for a product key when upgrading to Windows 10, you can try contacting the Microsoft Activation Center for further details. Check here for the appropriate telephone numbers to contact.

Method Seven: Download An Automated Tool

If you still experience the error after doing the methods above, you might want to try a powerful and trusted automated tool to fix the job.

Read More
Malware Guide: How to remove OpenCandy

What is OpenCandy?

OpenCandy is an application that downloads and installs software, including other Internet Browsers to a computer system. Used as a bundle, this application installs additional programs that you may knowingly or unknowingly agree to install. Since most users don’t accept the challenge of reading the EULA in its entirety, they tend to download bundled applications unknowingly.

Assessment of OpenCandy PUP

During the initial assessment of OpenCandy, I was a little skeptical about what to look out for or expect. In fact, I had to install the OpenCandy.exe file twice to discern its behavior. I’m not sure how this application got its name but I do believe it has something to do with the fact that it supposedly helps Internet users open a new world of Internet browsing. That conclusion was arrived at after realizing that OpenCandy.exe installed mostly Internet browsers along with a tune-up tool on the test computer. However, as a result of the system requirements, there was a pop-up message indicating that Internet Explorer 8 was not compatible with the computer system in question. In comparison to the malware I’ve encountered since I started researching malware, OpenCandy is everything but malicious. In fact, this application is only categorized as malware because of its’ subtle covert nature of installing bundled programs unsolicited by the user. Additionally, OpenCandy coerces users into changing their Internet Browsers by installing those unrequested by the user. In fact, it’s no shock that OpenCandy chose to install the Internet Browser ‘Opera’ as a part of this bundle since it’s one of the least used browsers according to the Federal Government. Clearly, this was a smoothly disguised advertisement or promotion to force users into using the Opera Browser, along with Internet Explorer 8.0. While these aforementioned browsers in themselves aren’t malicious and are in no way considered malware, they were installed as a promotional tool and without the request of the user. Despite being mentioned within the EULA, advertisers are capitalizing on this since most users do not bother to read the agreements when installing a program. Furthermore, OpenCandy, like most other bundled applications I’ve dealt with, threw in a tune-up tool as a part of the promotion. I found this tune-up application annoying since I had to hassle my way into getting it to close from the computer screen. I can only imagine the hassle users would go through trying to remove this software. Image 7: Depiction of a scan performed by Tuneup Utilities. The scan detected that several areas on the test PC could be optimized/tuned up. Image 8: After a scan was completed using the Tuneup utility program, I was given an option to buy the full version. Nothing is wrong with this marketing strategy. In fact, most utility tools if not all will scan your computer to detect threats or loopholes, but they won't exactly allow you to fix those problems unless you buy the full version. It's not unfair, it's just business. Programs installed during the installation of OpenCandy include:
  • Web Companion: Developed by Lavasoft, Web Companion is said to be an application that serves as a security defense for your Internet browsers by preventing unauthorized changes (see image below)
  • Tuneup Utilities: Tuneup Utilities does exactly as it says. It cleans up a computer system, whereby preventing unused programs from slowing it down.
  • Opera Stable 30.01.1835.88: Opera is a fast, simple, and effective Internet browser that allows users to get around on the web.
All in all, the intent of installing an application such as OpenCandy is to unleash a world of promotion or advertisements on your computer. They are pretty annoying and in some cases difficult to remove. Furthermore, as a user, you want to control what gets installed on your computer without being dictated to or coerced in some EULA that you probably overlook. To completely remove OpenCandy PUP from your computer, click here to download and install Spyhunter.
Read More
An Easy Guide to Resolve Xpcom.dll Error

Xpcom.dll Error Code - What is it?

To understand the Xpcom.dll error better, first, you need to know what Xpcom.dll file is. Xpcom.dll is basically a typical DLL (Dynamic Link Library) file. It is associated with Firefox developed by Mozilla Foundation for the Windows Operating System. DLL file contains small programs similar to exe (executable) files. Just like any other DLL file, Xpcom.dll helps loads and run programs smoothly. Xpcom.dll functions as a shared file that can be used to run multiple programs on your PC. Xpcom.dll error code occurs when Windows cannot properly load the xpcom.dll file. The error may pop up on the screen in any one of the following formats:
  • "Xpcom.dll not found."
  • "The file xpcom.dll is missing."
  • "Cannot register xpcom.dll."
  • "Cannot find C:\Windows\System32\xpcom.dll."
  • "This application failed to start because xpcom.dll was not found. Re-installing the application may fix this problem."
  • "Xpcom.dll Access Violation."
  • "Cannot start Firefox. A required component is missing: xpcom.dll. Please install Firefox again."
The xpcom.dll error can occur during program installation or while rebooting your PC or when shutting it down.[/section]

Solution

Restoro box imageError Causes

It is difficult to narrow down a single cause of this error code simply because the Xpcom.dll error code may be triggered due to several reasons. Some of the common causes include:
  • Invalid or corrupt xpcom.dll registry entry
  • Viral infection
  • Outdated PC drivers
  • Another program overwrote the required version of xpcom.dll
  • Xpcom.dll file is accidentally deleted or uninstalled
  • Mozilla Foundation hardware failure

Further Information and Manual Repair

Here are the best, quick and easy DIY methods to resolve Xpcom.dll error code on your system within minutes:

Method 1: Update Window Drivers

To resolve the xpcom.dll error on your system, try updating Window drivers. To do this simply use the driver update wizard from within Device Manager. The driver update wizard walks you through the entire drive update process, making it easy and hassle-free for you to update drivers.

Method 2: Download and Install Xpcom.dll File

Since DLL are shared files and used to run and load multiple programs, it is possible that you might have accidentally removed this file while uninstalling a program on your system. This is the reason why the Xpcom.dll file goes missing. To retrieve the Xpcom.dll file simply go to the recycle bin. Reinstall the deleted program. However, if it still doesn’t resolve the error, then it is advisable to download and install the Xpcom.dll file from a trusted DLL file website over the internet.

Method 3: Scan for Viruses and Repair the Registry

If the error code occurs due to malware infection or is related to registry issues, then simply download Restoro. This is a user-friendly and multi-functional PC Fixer deployed with 6 scanners including a powerful antivirus and a registry cleaner. It is compatible with all Windows versions. Simply run it to remove all types of viruses infecting your system and clean/repair the registry. Click here to download Restoro and resolve the Xpcom.dll error on your PC.
Read More
Bluetooth Headset in Windows gets disconnected
Many Windows 10 users use a Bluetooth headset as these kinds of Audio devices, as you know, lack wires since wires tend to get entangled and break which could get quite inconvenient. This is why using a wireless headphone is more preferable since it’s much simpler, however, using a wireless headphone also means it comes with a charging requirement and if it fails to charge, there is no music or audio or anything that you need a Bluetooth headphone for. However, wireless headphones are also susceptible to problems as you might encounter some problems when connecting your wireless headphone to your Windows 10 computer. One of these problems include when you try to get sound from the wireless device but nothing happened. This indicates that the Bluetooth headphone is disconnected in some way for some unknown reason even if you’ve already plugged it in. Thus, if you encounter this scenario, then there are several options you need to check out to fix the problem. To start troubleshooting the problem, here are the options you need to use as a reference.

Option 1 – Try turning off the device and turning it back on

The first thing you can do to resolve the problem is to turn off your wireless audio device and wait for a couple of seconds before you turn it back on. In most cases, this should fix the problem. In fact, you can also try to unpair and pair the Bluetooth audio device and see if it fixes the problem or not.

Option 2 – Try to set the headphone as the default device manually

There are times when you plug a headphone, it does not toggle the default audio device. Thus, to fix this issue, you have to set the default audio device to the headphones manually. To do that, follow these steps:
  • First, right-click on the volume icon located on the system tray.
  • Next, select the Open sound settings option to open the Sound section in the Windows 10 Settings app.
  • After that, go to the Output section and select Headphones for the “Choose your output device” option. This should fix the problem for you.

Option 3 – Try running the Bluetooth Troubleshooter

As you know, Windows 10 has various troubleshooters with user-friendly interfaces where you can utilize them to fix issues in your PC. And since you’re dealing with some Bluetooth problem, you have to run the built-in Bluetooth Troubleshooter. To do this, follow these steps:
  • Open the Windows 10 Settings.
  • Then go to Update & Security > Troubleshoot.
  • You should find the option for Bluetooth on your right-hand side – click on it then click on the “Run the troubleshooter” option.
  • Now follow the next screen options.

Option 4 – Try to update or reinstall the Bluetooth driver

The issue might have something to do with the Bluetooth drivers. It could be that it is outdated and needs to be updated or that you recently updated it and since then you have trouble in removing the Bluetooth devices and so to fix the issue, you can update, roll back or uninstall the Bluetooth drivers. How? Follow the steps below.
  • Tap the Win + X keys to open the Device Manager.
  • Next, look for the Bluetooth device and right-click on it.
  • Select the option “Update driver”.
  • After that, a new popup window will appear. In there, select the option, “Search automatically for updated driver software”.
Note: Checking the update may take a few minutes so you’ll have to wait until it finishes. If it is able to find an update, you must install it. And if you want to reinstall the Bluetooth driver, just select the “Uninstall driver” option and follow the next on-screen instructions that follow.
Read More
Switch audio devices in Windows 11 taskbar
windows 11 audio settings
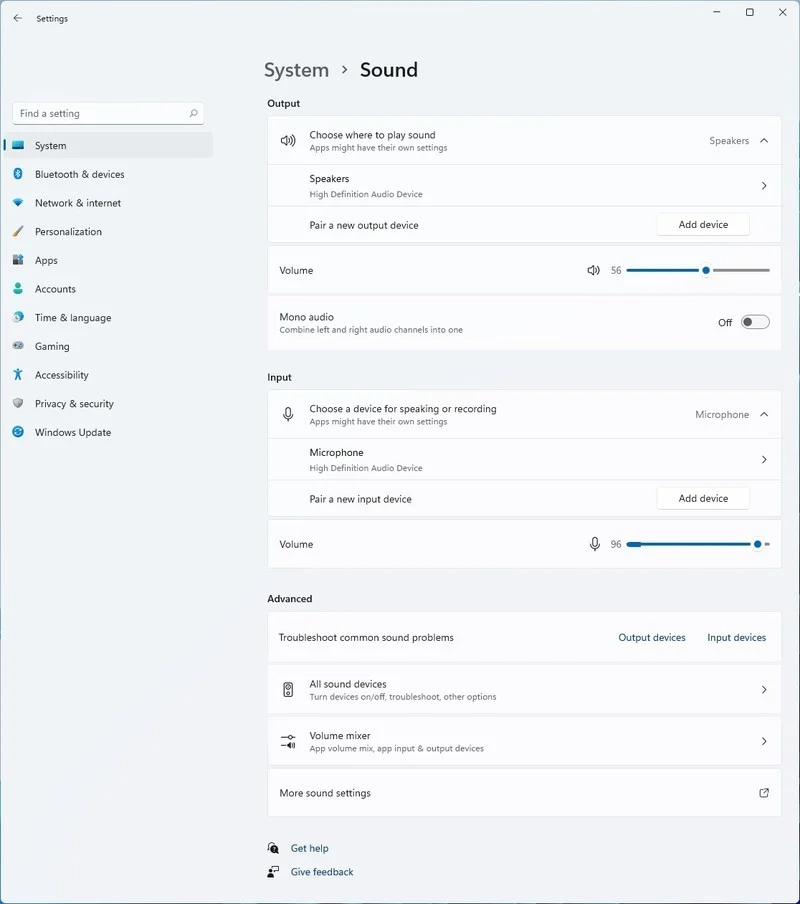
Windows 11 has brought some new features and changed some of the existing ones. One of these changes includes quick switching of audio devices which will play audio. Audio switching can still be done under the taskbar, it is just a little different and one could say even hidden. Follow this quick guide and you will be switching from your headphones to speakers as an example in a matter of seconds.
  1. Click on the speaker icon located in the far-right part of the taskbar.
  2. After the quick settings menu appears click on the right arrow located right of the volume slider. If the arrow is not present, instead of click on the pencil icon, then on add, and finally select Volume from the list.
  3. After clicking on the arrow icon, a list of all enabled audio devices on the system will replace the volume slider. Click on the desired audio device in order to make it active.
  4. Click anywhere outside the quick setting menu to save changes and close it.
Note: in the Quick settings menu if you choose More Volume Settings it will bring you to System > Sound where you can access more sound input and output options.
Read More
GitHub introduction and explanation
If you are starting to get into the “wonderful” world of coding there is a high chance that you have heard of GitHub or Git for short and there is a slight chance that you might be confused about what exactly GitHub is. If this is the case, we are welcoming you to go through our article and find everything about it and why it is so popular and used all around the world.

githubWhat exactly is GitHub?

If we want to go all technical and just point the obvious we could say that GitHub is basically a WEB site and cloud service used for storing and managing code in all languages. But to truly understand why you should use GitHub and not Dropbox or any storage service instead you need to understand concepts like Version Control and Git.

Version Control

Version control is meant to help developers to work separately on different parts of codes and update is separately not breaking the original one. Take note that this option is meant when there is a big project and has more than one coder working on it. If you are a solo coder on your personal project this might not be anything groundbreaking for you personally. But let’s now assume that you are part of a team and that your task is to edit only one function of a project and other people working will also have their tasks. With version control, you could take only part of the code and work on it and once you are finished merge it back into the main repository. All changes in the main code are automatically tracked and can be easily reverted back if needed. The good stuff is that rolling back can be used only let’s say on a code you submitted and other changes made to the source can be kept. As you can see this makes a very good and efficient working space and a good coding environment.

Git

Git itself is a specific version control system, an open-source version control system to be more precise created by Linus Torvalds in 2005. It is a distributed version control system, which means that the entire codebase and history is available on every developer’s computer, which allows for easy branching and merging. Currently, over 87% of worldwide developers are using Git on a daily basis.

So GitHub is?

GitHub is a profit company that offers a cloud-based Git repository hosting service, in other words, it automates and makes it easy for everyone to use Git for version control and collaboration. It focuses on user interface and ease of use so even beginner coders can use it right away without any large confusion and using command lines and setting it themselves manually. GitHub also has a free personal plan in which you can host a public code repository completely free. This option placed GitHub very popular with open source projects. If you are a company you can purchase a plan to have a private code repository shared only to members of your team or company.

Conclusion

As stated almost every developer on a planet uses some version of Git, many of them are on GitHub and there is a lot of open source projects on it. Some employers even ask to see your GitHub repository when deciding if they want to employ you, think of it as a portfolio for coders. There is not a single disadvantage and not a single argument against using it, especially it has a personal free option. So if you want to look better and more professional in the coding world go, make an account and place some code on it, share it with the world, and see how it goes. You might even get some help on projects from other coders if you need it.
Read More
A Quick Guide to Fixing Error Code 7

Error Code 7 - What is it?

This is a typical system error that occurs during Windows setup. To be precise, this error may pop on your computer screen during the text mode portion of Windows setup. The setup hangs and stops responding and the error message is displayed in either one of the following formats:
‘The file I386Ntkrnlmp.exe could not be loaded. The error code is 7.’ or ‘The file I386L_intl.nlf could not be loaded. The error code is 7.’

Solution

Restoro box imageError Causes

Error 7 may be triggered due to several reasons but the 2 most common causes for this error code are:
  • Incorrect settings of the BIOS
  • Faulty RAM modules
  • Registry corruption

Further Information and Manual Repair

To resolve this error on your system, here are some easy and effective DIY methods that you can try.

Method 1 - Change Back the BIOS to its Default Settings

If the underlying cause of error code 7 is related to incorrect BIOS settings, then it is recommended to restore default settings to resolve. You can reset your computer’s BIOS (basic input and output system) settings to factory defaults by selecting the restore defaults option within BIOS or by removing CMOS ( Complementary Metal Oxide Semi-Conductor) battery from your unplugged computer for about five minutes. The battery removal method requires opening the computer case, so only attempt it if you are unable to access BIOS. To reset BIOS follow these steps, reboot your PC and then press the key assigned to loading BIOS during your computer boot splash screen. The key assigned to load and access BIOS varies from manufacturer to manufacturer but usually, it's F1, F2, or F12. Once you enter the BIOS, select the ‘Restore Defaults’ option listed in the menu.  I t may be a keyboard shortcut or be under the Advanced settings menu. Confirm settings and then exit BIOS. Hopefully, this will resolve Error 7.

Method 2 - Remove the Faulty RAM

When error code 7 is triggered by faulty RAM modules, then to resolve it simply remove the memory modules that are installed in the computer. If the error code is displayed again after you remove the memory module, remove a different memory module. This procedure requires you to reboot your PC several times to identify the specific memory module that is not working properly.

Method 3 - Repair the Corrupted Registry

Error code 7 is sometimes also linked with registry issues. If the reason for the error occurrence is a damaged or corrupted registry, then simply download Restoro. This is a powerful PC Fixer embedded with a registry cleaner. It is easy to operate and user-friendly. The registry cleaner detects and removes all errors in seconds. It cleans the registry and repairs the damages in no time. Click here to download Restoro.
Read More
Windows Update Keeps Turning Off in Windows
Keeping your system updated is a must and Windows updates are definitely a great way to do that. These updates are essential since they provide important security and various fixes for bugs in your Windows 10 computer. However, there are plenty of instances when you encounter issues with Windows Updates and one of them is when the Windows Updates turn off automatically at random times. Some users reported that they saw a notification about Windows Updates being turned off. Note that the issue is not with the update itself since many users turned on the Windows Update and the system was properly updated. The issue is that the Windows Updates turned off all by itself. There could be several reasons why the Windows Updates turned off by themselves. It could be due to the antivirus program installed on your computer. Antivirus programs are known to cause issues with other programs, Windows updates components included. This can occur due to false positives as well as odd compatibility issues. Aside from antivirus programs, the Windows Update service itself could also be the root cause of the problem. There could be a corrupted file in the Windows Update folder or it could be that the Windows Update service wasn’t started properly. Any of these issues can be resolved by following the troubleshooting options given below. Make sure to follow each one of them carefully for better results.

Option 1 – Try to disable your antivirus program

Disabling the antivirus program or any security software installed in your computer is always a good idea you can try when the Windows Update process does not go smoothly. So before you try updating your computer again, make sure to disable the antivirus or security program and once the Windows Update is done, don’t forget to enable the antivirus program back again.

Option 2 – Try to make some changes in the Registry

  • Tap the Wins key once and type in “command prompt” in the field.
  • From the search results, right-click on Command Prompt and select the “Run as administrator” option to run it with admin privileges.
  • Next, type the following command and tap Enter:
reg add "HKEY_LOCAL_MACHINESOFTWAREMicrosoftWindowsCurrentVersionWindowsUpdateAuto Update" /v AUOptions /t REG_DWORD /d 0 /f
  • After that, type the following command and hit Enter again:
sc config wuauserv start= auto
 The command you entered will set the Windows Update to auto so you should be good to go.

Option 3 – Try to reset the Windows Update components

If by any chance that the second option didn’t work, resetting the Windows Update components could also help you resolve the problem. How? Refer to the following steps:
  • Open Command Prompt with admin privileges.
  • After that, type each one of the following commands and hit Enter after you key in one after the other.
    • net stop wuauserv
    • net stop cryptsvc
    • net stop bits
    • net stop msiserver
Note: The commands you entered will stop the Windows Update components such as Windows Update service, Cryptographic services, BITS, and MSI Installer.
  • After disabling WU components, you need to rename both the SoftwareDistribution and Catroot2 folders. To do that, type each one of the following commands below, and don’t forget to hit Enter after you type one command after the other.
    • ren C:WindowsSoftwareDistribution SoftwareDistribution.old
    • ren C:WindowsSystem32catroot2 Catroot2.old
  • Next, restart the services you’ve stopped by entering another series of commands. Don’t forget to hit Enter after you key in one command after the other.
    • net start wuauserv
    • net start cryptsvc
    • net start bits
    • net start msiserver
  • Close Command Prompt and reboot your PC.

Option 4 – Run the Windows Update Troubleshooter

Running the built-in Windows Update troubleshooter is one of the things you can first check out as it is known to automatically resolve any Windows Update errors. To run it, go to Settings and then select Troubleshoot from the options. From there, click on Windows Update and then click the “Run the troubleshooter” button. After that, follow the next on-screen instructions and you should be good to go.
Read More
1 2 3 171
Logo
Copyright © 2023, ErrorTools. All Rights Reserved
Trademark: Microsoft Windows logos are registered trademarks of Microsoft. Disclaimer: ErrorTools.com is not affiliated with Microsoft, nor claims direct affiliation.
The information on this page is provided for information purposes only.
DMCA.com Protection Status