If you have a laptop that is slowing down and some usual tasks are sluggish you probably mean that it is time to change it and get a new one. Altho it is a good solution and it will guarantee that you will be able to do your tasks with more speed and comfort, straight purchasing is not always the best thing to do.

There are things you can do and some upgrades that are cheaper and will bring your laptop back into the game and extend its usage for a few more years.
The most common issue for slowing down of computer is dust and dirt that accumulates over time and usage. If the laptop has not been properly cleaned in a while, cleaning it and placing new thermal paste on the CPU can do wonders. If you are not keen on doing this yourself or do not possess the required skillset take it to your local IT center for cleaning.
Various software can have speeding effects on computers, it can have some services running in the background and thus take precious resources slowing the whole system. If you are not using software, uninstall it.
If you are using your computer for basic tasks there is no really need to install the latest and best. A lot of new software will require new hardware and things that offer are not so much better nor even required to justify the upgrade. Let us take office, for example, if you are using it to just write some text and not using any advanced options there is really no need to switch to a newer version, the old one will do just fine tasks that you are in need of.
Now this fits in the domain of upgrading your hardware but still it is much cheaper than replacing the whole laptop. Windows 10 works much better with SSD and SSD itself is faster than your standard HD, especially if it is slower model spinning in only 5400RPM. Operation of HD replacement is simple and straightforward and anyone can do it but the benefits of replacement will be visible right away. With a new SSD instead of an old mechanical one, you will have the feeling that you actually bought a new laptop.
This is basically the last thing you can do in order to speed up your old laptop that will not break your bank account. Upgrading RAM was always the thing that can push your computer to have more power and to behave better while you are doing tasks. One important thing here is to first see how much RAM you have in your computer. If you are packing already 8GB then upgrading will not do much but if you have only 4GB, raising it to 6GB or 8GB will be beneficial. Also, check if the model of the laptop supports more RAM in the first place.
We have covered here a vast array of options in order to get your laptop back into the game with variability between hardware upgrades to taking care of your software. Whatever option you choose to do it will speed up your computer but among all of them, replacing the hard drive will do the most.

Error code 0x800704c7 occurs when Windows users attempt but fail to update their system. It affects various Windows users including those using Windows 8 and 8.1. This error code has common symptoms such as the following:
 Error Causes
Error code 0x800704c7 in Windows 8 often occurs due to a poorly maintained system. It can occur when system files become corrupted or missing. It may also occur when malware infects your system. To resolve this error code, Windows users will need to select at least one of the manual repair methods listed below and follow the instructions given.
Manual repair methods enable users to address the underlying issues causing error code 0x800704c7. These repair methods are not very technical. However, you may need to get help from an IT professional if you find them to be difficult or if your attempts to implement these instructions fail to fix the error code.
The System File Checker Tool (SFC) enables Windows users to check their system for missing or corrupt system files. This utility tool is present on all Windows 8 systems and even other versions of the Windows operating system. Run this tool by following the steps below:
After running these procedures, check if the error code has been resolved by reattempting to update your system. If you are unable to complete the process and the error message reoccurs, try the next manual repair method below.
Various forms of malware, including viruses, can infect your system, causing error codes to occur or even more serious problems. That’s why you’ll need to ensure you have a powerful antimalware program installed on your device. Once this is present on your system, start scanning for viruses, worms, and Trojan horses so as to resolve error code 0x800704c7 in Windows 8.
If the issue causing error code 0x800704c7 on your device is a virus or worm, cleaning your system with a powerful antimalware program will successfully resolve the error code. However, if the error code remains unresolved after completing this manual repair method, proceed to the next method below.
System Restore is a simple method that users can implement to resolve error code 0x800704c7. This enables users to restore their system to a period of time in which their device was not affected by the error code. If done correctly, it can enable users to successfully complete the update process. Follow the steps below.
 In this article we are going to go through the best Stock Photo sites BUT, we will focus on ones that give you royalty-free Photos, so no paying stuff here, just the best of the free world.
 Next-generation of RAM, DDR5 supposed to hit shelves around late summer or fall in 2021if everything goes as planned.
Its goal is to increase speed and efficiency, wants to pack more memory in a single stick, and have better power management.
Next-generation of RAM, DDR5 supposed to hit shelves around late summer or fall in 2021if everything goes as planned.
Its goal is to increase speed and efficiency, wants to pack more memory in a single stick, and have better power management.
chkdsk /f /r
Error Causes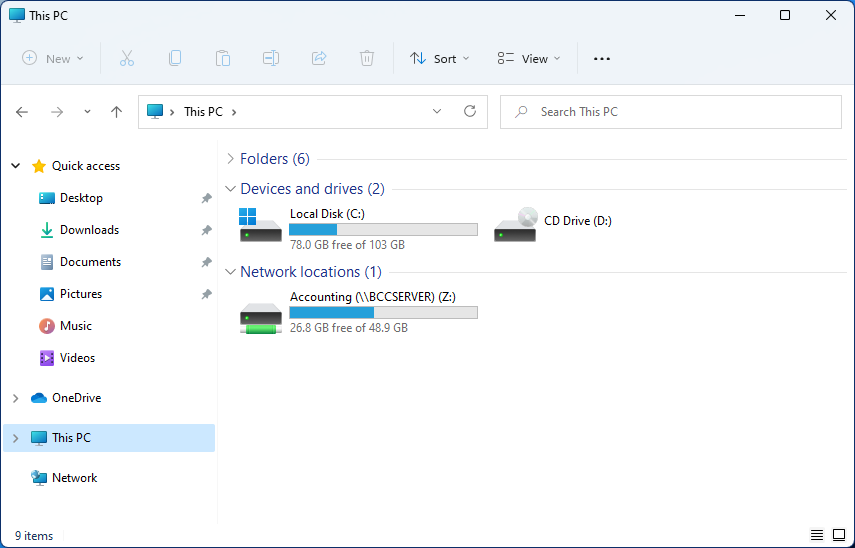 Mapping network drive has many benefits in terms of speed and ease of access of files via network. It lets you access the hard drive over the whole network like it was the hard drive inside your PC case. In order to easily and quickly map a folder as a network drive follow the guide below.
 A stop error or exception error commonly called the blue screen of death (BSoD) or blue screen, is an error screen displayed on Windows computers following a fatal system error. It indicates a system crash, in which the operating system has reached a condition where it can no longer operate safely. This is caused by many different problems, such as a general hardware failure or a crucial process terminating unexpectedly.
 On Windows 10 systems, a Black Screen of Death can be caused by an unfinished Windows Update. To resolve this problem, simply hold the power button down on your PC or laptop to switch off the computer. A cold start should result in the system booting properly.
 It is a diagnostic screen with a white type on a pink background. Pink Screen is mainly seen when the VMkernel of an ESX/ESXi host experiences a critical error, becomes inoperative, and terminates any virtual machines that are running. It is not fatal and generally considered more of a developer testing issue. When encountered, it can be fixed quickly by following the simple action of pressing and holding your computer’s power button to shut down the device.
 The Microsoft Windows 10 Operating System Brown Screen of Death is an on-screen fatal error notification with bug check codes which is seen when a computer crashes due to graphics hardware or software-related problems (failing graphics drivers).
 It affects the functioning of a browser, particularly Mozilla Firefox. The Yellow Screen of Death makes the appearance with a weird buzzing sound in the background when the XML parser refuses to process an XML document causing a parsing error and a weird buzzing sound. The issue persists unless the computer is manually rebooted.
 Commonly the Windows 10 red screen is caused due to the hardware error, particularly if you overclock your Windows PC/laptop. Despite this, sometimes the red screen of death is also caused by outdated or incompatible drivers or due to BIOS issues.
 The Orange Screen of Death on Windows occurs due to fatal hardware errors. Multiple reasons have been reported for the Orange Screen of Death. Some had this issue when watching a YouTube video, some were not able to boot into Windows. It can even occur when waking up from Sleep.
 The green screen of death only appears when you're running an Insider Preview version of Windows 10. It's the same as the blue screen of death, and it will show the same error messages. ... If you see a green screen of death (GSOD) on your PC, that's a sign you're using an Insider Preview build of Windows 10.
 The White Screen on Windows is also an error where the screen of the computer just turns white and freezes. There can be several things that can cause the white screen to appear on the Windows laptop monitor. But the main issue could be because of malfunctioning of the graphics hardware.