Steam has cemented itself as the largest digital game shop in the World. First, release all the way back on September 12
th, 2003, it was meant to be a standalone software client aimed to deliver updates to Valve’s games. It was soon expanded to include titles from third parties.
The greatest Steam expansion and its popularity started in 2004 with the release of Half-life 2. Steam allowed prepurchased editions to be downloaded before the official release of the game making it available for play the moment it was officially out.
Very soon after Steam gained its popularity, Valve has opened doors to other developers and offered them to use Steam as means for a digital distribution platform. Today it hosts over 30000 different game titles, not including DLC or applications.
And how soon Valve’s steam deck is coming out soon we would like to share some great tips and tricks about Steam itself for easy everyday gaming.
Steam guard account security
Security of any of your accounts should be something that you really take seriously. So as always use a strong password for Steam but if you want an extra layer of security for it, and you should, use the Steam built-in feature: Guard Account Security.
In order to activate Security Guard go to
Steam>Settings>Account>Manage Steam Guard Account Security. Once enabled you will be able to use the Steam mobile application for special code when opening Steam or your email address.
Use Steam beta feature
Once a Steam account is created by default you will download and install the client. In the client, you will have the latest features available but there are more Steam features than default ones, beta features that can offer some improved and new functionality, and do not worry, they are stable and bug-free.
I have been in Steam beta for years and not even once have I had any issues with the client itself but I have always had the latest features that will come to regular users later.
To enable beta participation to go to
Steam>Settings>Account, open the drop-down Beta participation menu, and choose Steam Beta Update. Confirm on OK and restart the Steam client. You will now get all the latest features first.
Manage your library via Collections
The collection is a neat idea for organizing your large game library into different collections or sections easily expanded and contracted for easier navigation and organization. To add the game to a collection just right-click on it and select
Add To>New Collection, make a name for a collection like action, RPG, or whatever rocks your boat, and you are done. Once the collection is created other games can be added to it simply just by dragging it into the desired collection.
Make shelves
Shelves are ways to see your collections in the larger areas of the Steam clients. By clicking
Add Shelf>Choose a Shelf, you can now add your collection to a shelf on the larger part of the client as a horizontal scrolling container with your chosen games. There are also some predefined shelves like All Games, Recent friend activity, and more.
Hide Game from Library
By right-clicking on a game and selecting
Manage>Hide This Game you will remove the game from the active view of your Steam library. Note that the game will still be owned and a part of your library, you will just not be able to see it.
This is a great feature when for example you have some things that came as a part of the game pack you are not really interested in when you have 2 different versions of the same game as for example standard and deluxe edition or just by simply not wanting to have game visible in the library.
You can find a hidden game by typing its name in the search box and from there you can unhide it.
Play game soundtracks inside Steam
Some games offer you to purchase their soundtracks if you like music from them and some even include OST with a regular purchase. Steam lets you play these soundtracks and even lets you import your own music library folder into it in order to play all of your music inside the client itself.
It has even options to automatically stop music playing once the game is run and you can make playlists as well. Your purchased game soundtracks are automatically included, the rest you will need to add by pointing Steam to the folder where you keep music in.
Configure gamepad
Inside Steam, you can configure your gamepad’s general settings, big picture settings, desktop settings, etc. Steam embraced the idea that many OC users these days own and play with gamepads so it has implemented configuration options inside it. To configure your pad go to
Steam>Settings>Controller.
Use big picture Steam mode
Big picture mode is Steam's idea of making Steam an entertainment center. Once it is activated it switches from the application into full-screen mode aimed at large TV screens or monitors. You can easily navigate through it via gamepad, mouse, keyboard, or other devices.
You have access to the store, your game library, etc. Same as your typical steam app but a little different. You can easily activate it via
View> Big Picture Mode and see for yourself is this something you prefer over a standard application layout.
Enable Steam Cloud
Steam Cloud is a great feature that uses cloud storage to save your game progress meaning that you can easily switch to another PC, install games there and continue where you have left off. Many games support this feature instead of keeping saves locally and it is a great feature worth turning it ON.
To turn and use Steam Cloud service go to
Steam>Settings>Cloud>Enable Steam Cloud Synchronization. Just remember to check does game you are playing supports this option.
Share your Games via Family sharing
Family sharing is a Steam feature allowing you to share your game library with up to 5 accounts on up to 10 different devices. This is a great way to let other members of your family or even close friends enjoy some games you have or vice versa. They will get as well their own save games so you can sleep safe knowing that your progress can not be changed or hindered.
Family sharing can be turned ON by logging into PC Steam client where you would like to share your library and navigate to
Steam>Settings>Family and then clicking on Authorize Library Sharing On This Computer.
Refund a game
Sometimes the game is not the same as advertised, sometimes it will not work on your PC, sometimes hardware specifications are too high making the game unplayable, etc. For whatever reason, you might have Steam offers you a full game price refund if you wish to do so, you only need to meet 2 criteria, the game must have been purchased within 2 weeks period, older purchases cannot be refunded, and your game playtime must not be over 2 hours of game time.
If you fit into this category all you need to do in order to get the full money back is going to
Help>Steam Support, pick a recent game from the eligible list, and ask for a refund.
Gift a game
As you can buy gifts for your friends or loved ones in real life, Valve made sure you can do it in digital as well. Gifting game via Steam is simple and straightforward. Choose a game you wish to gift, go to your shopping cart and instead of clicking Purchase for myself, click on
Purchase As a Gift, from there you will be taken to your friend list to choose to whom you would like to gift a game along with the option to write a little note to the receiver like happy birthday, enjoy or whatever.
Stream games in Steam itself
Although Steam is not there yet in streaming as Twitch or Facebook gaming is, there is an option to stream your game sessions on it. Click on
Steam>Settings>Broadcast to make all adjustments and start streaming.
You can also watch streams from your friend list and Steam is now broadcasting popular streams directly to its client if you want to watch it.
Take a game screenshot
By pressing
F12, you can take a screenshot from any game and save it inside your Steam cloud library. You can change of course this default screenshot key via
Settings>In-Game and if you would like to see your screenshots you can always do it under
View Screenshot Library on a game’s page.
That’s it, our Steam tips and tricks for easy and good gaming life, I hope to see you soon on errortools.com for your daily articles, tips, and tricks.
 With its Rift model, Oculus set itself as a big player in VR. Now the company is slowly bowing out of the dedicated, tethered VR headset with its latest Quest 2 designed to primarily be a standalone headset.
 Although the headset itself is nothing revolutionary or special its controllers are. They can track individual finger movements, making games (that take advantage of them) much more immersive than the standard trigger grips on other controllers.
 The PlayStation VR is compelling thanks to Sony backing its development, plus the PlayStation 4's affordability and availability compared with gaming PCs. All you need is the headset, a PlayStation 4, and a PlayStation Camera (now included with most PlayStation VR bundles).
 HP headset is one which you get if you want the best image quality in VR headset, sadly controllers did not follow the same quality of headset itself. But this is still a pretty decent headset overall and worth the purchase.
 HTC's Vive Cosmos is the upgraded version of the Vive. It features a higher resolution and replaces the external base stations with outward-facing cameras for motion tracking. It's a comprehensive package for whole-room VR.
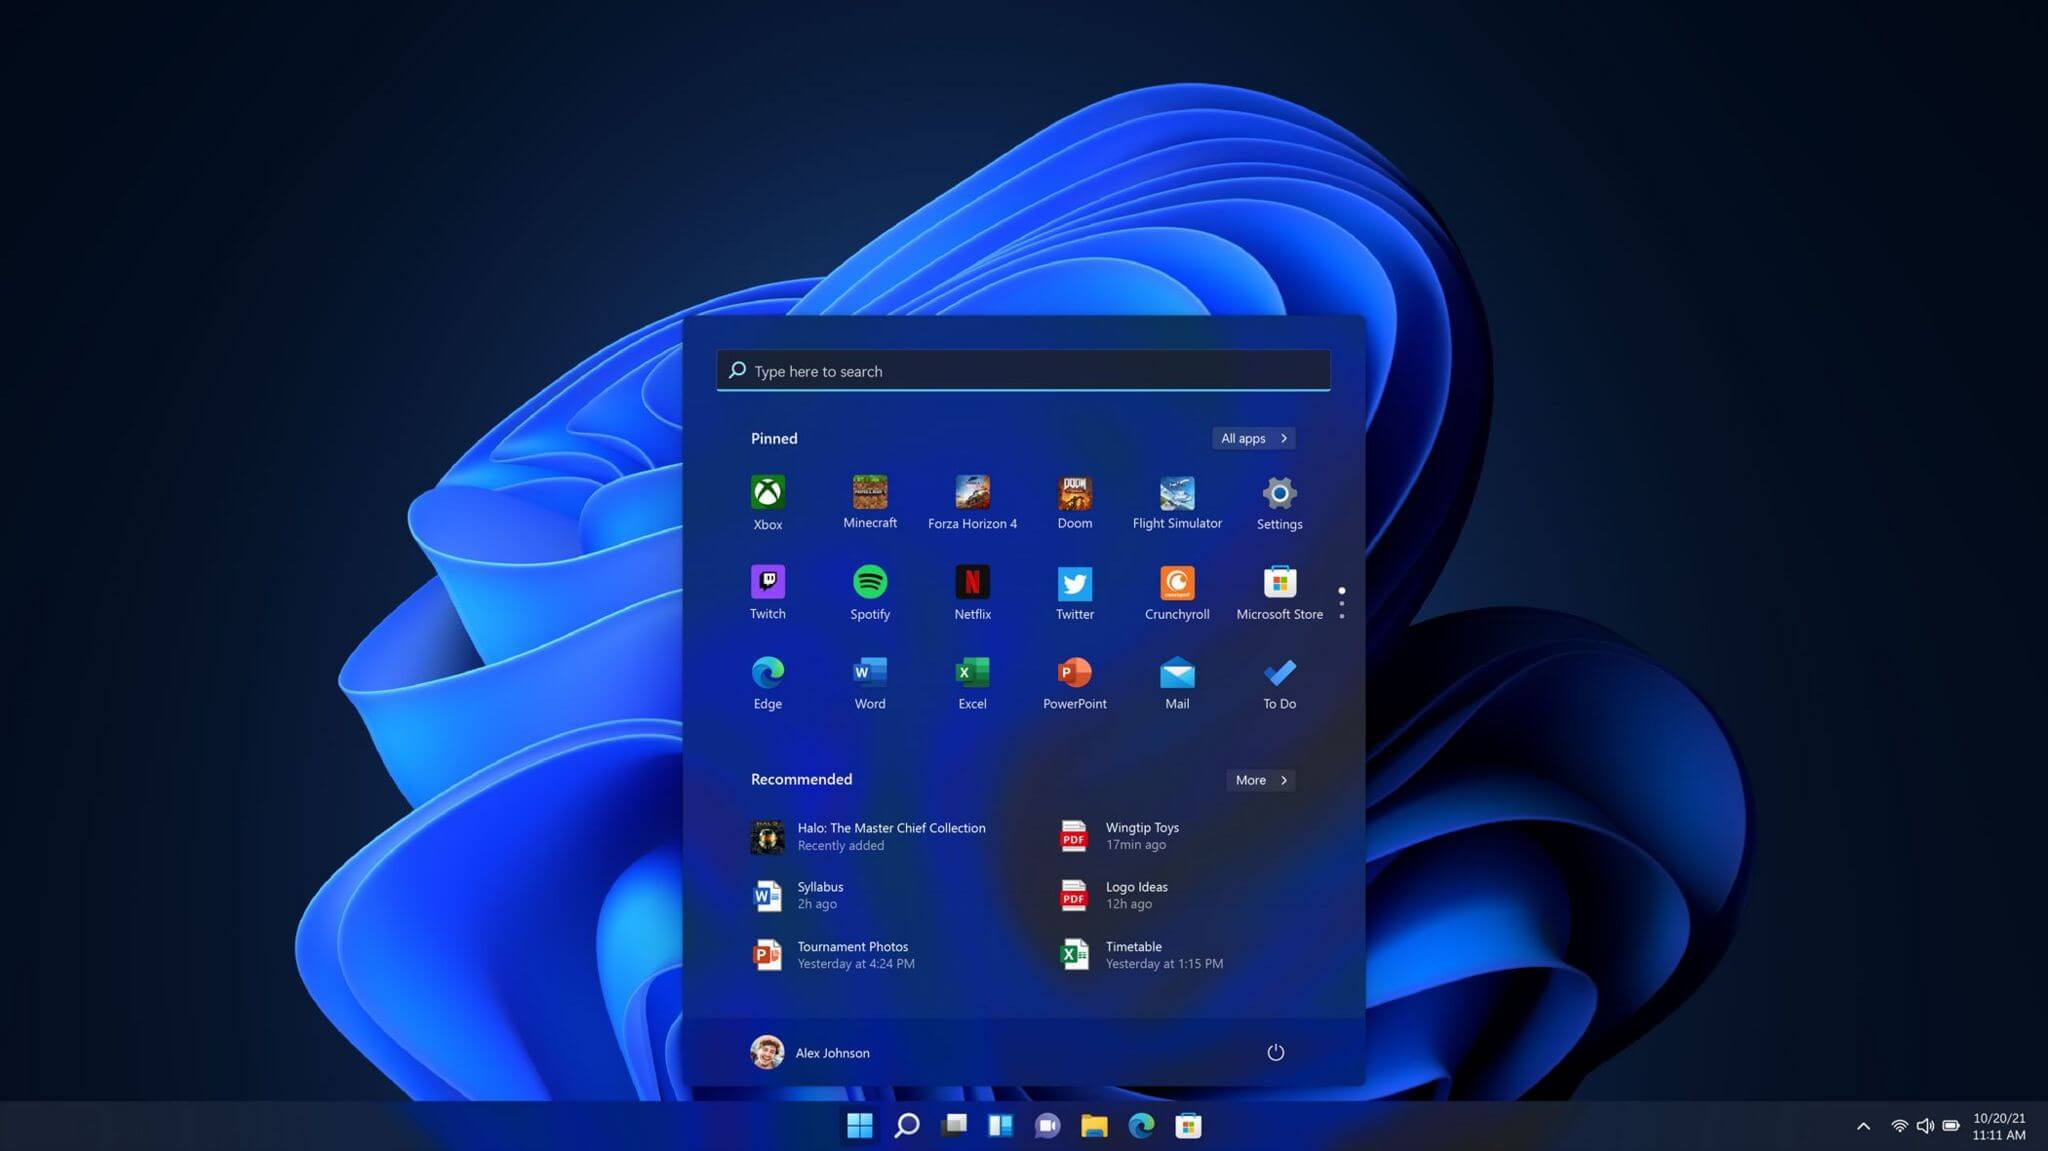 One of the first things that everyone saw when Microsoft has unveiled Windows 11 is its Start menu. Funny enough this is what has caused most of the divide among users, some find it interesting, and some do not like it. Truth is, it is different, and it is centered in the middle instead of the lower left part of the screen.
It has been confirmed however that the Start menu can be moved to any part of the screen so if you want, you could place it on the lower left as it has always been.
Live tiles do not longer exist in the Start menu, instead, we have styled simple icons.
One of the first things that everyone saw when Microsoft has unveiled Windows 11 is its Start menu. Funny enough this is what has caused most of the divide among users, some find it interesting, and some do not like it. Truth is, it is different, and it is centered in the middle instead of the lower left part of the screen.
It has been confirmed however that the Start menu can be moved to any part of the screen so if you want, you could place it on the lower left as it has always been.
Live tiles do not longer exist in the Start menu, instead, we have styled simple icons.
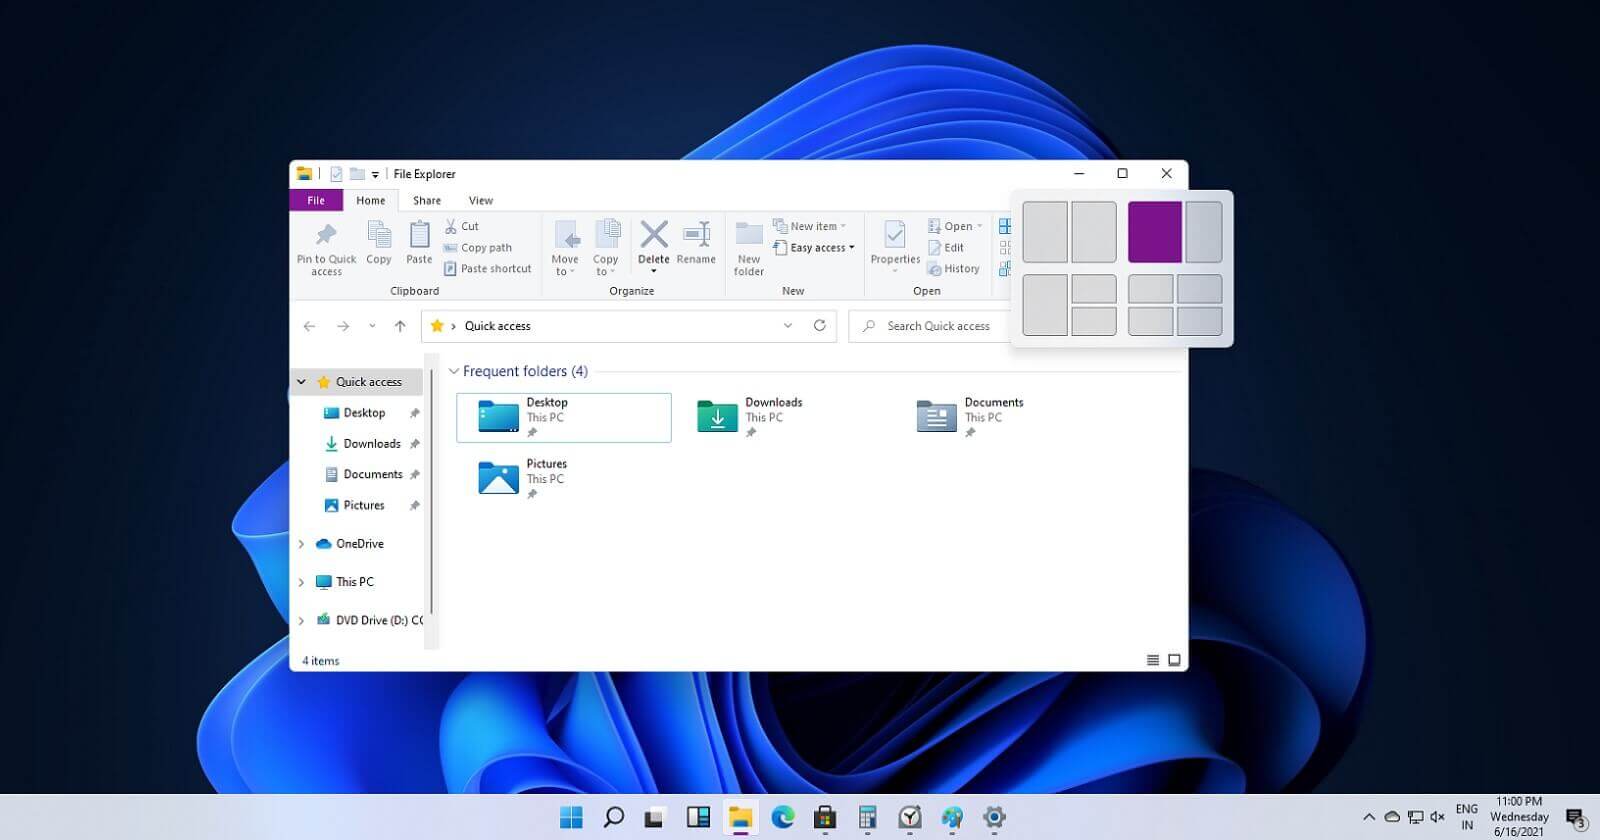 If you have used the cascade option in previous Windows versions then it is most likely that you will like the new Snap controls.
You can quickly snap windows side by side, or arrange them in sections on your desktop just by hovering over maximize button on the title bar.
If you have used the cascade option in previous Windows versions then it is most likely that you will like the new Snap controls.
You can quickly snap windows side by side, or arrange them in sections on your desktop just by hovering over maximize button on the title bar.
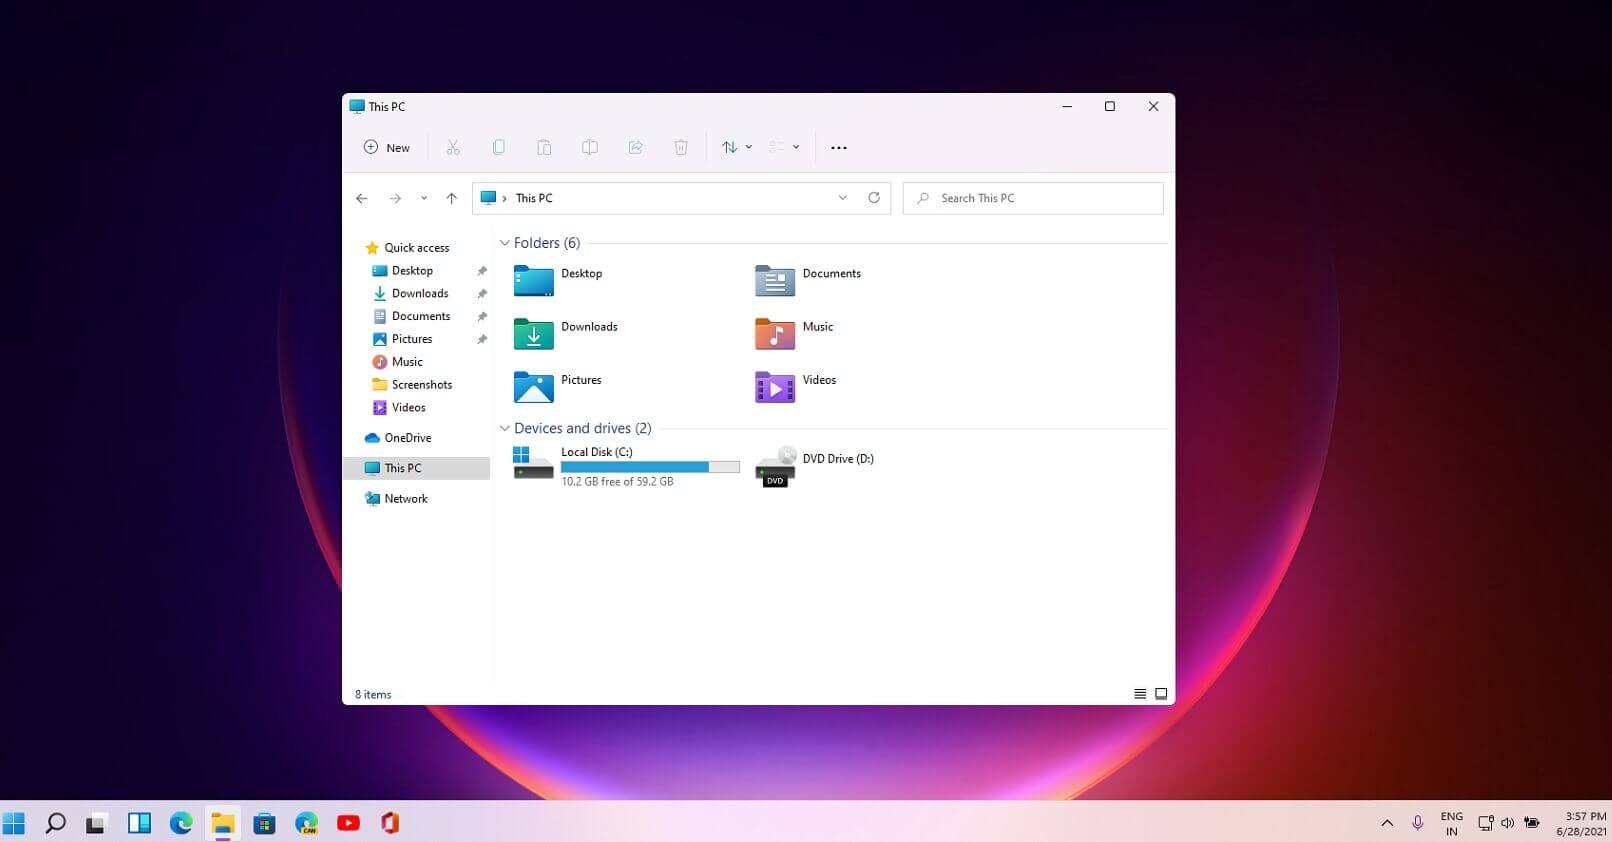 File explorer has gone through some visual and design changes, the ribbon on top has been completely removed and replaced with a header-like feature with a slick and clean design.
The header contains a nice organized and designed single row of icons like cut, paste, copy, rename, delete, and new folder icons.
File explorer has gone through some visual and design changes, the ribbon on top has been completely removed and replaced with a header-like feature with a slick and clean design.
The header contains a nice organized and designed single row of icons like cut, paste, copy, rename, delete, and new folder icons.
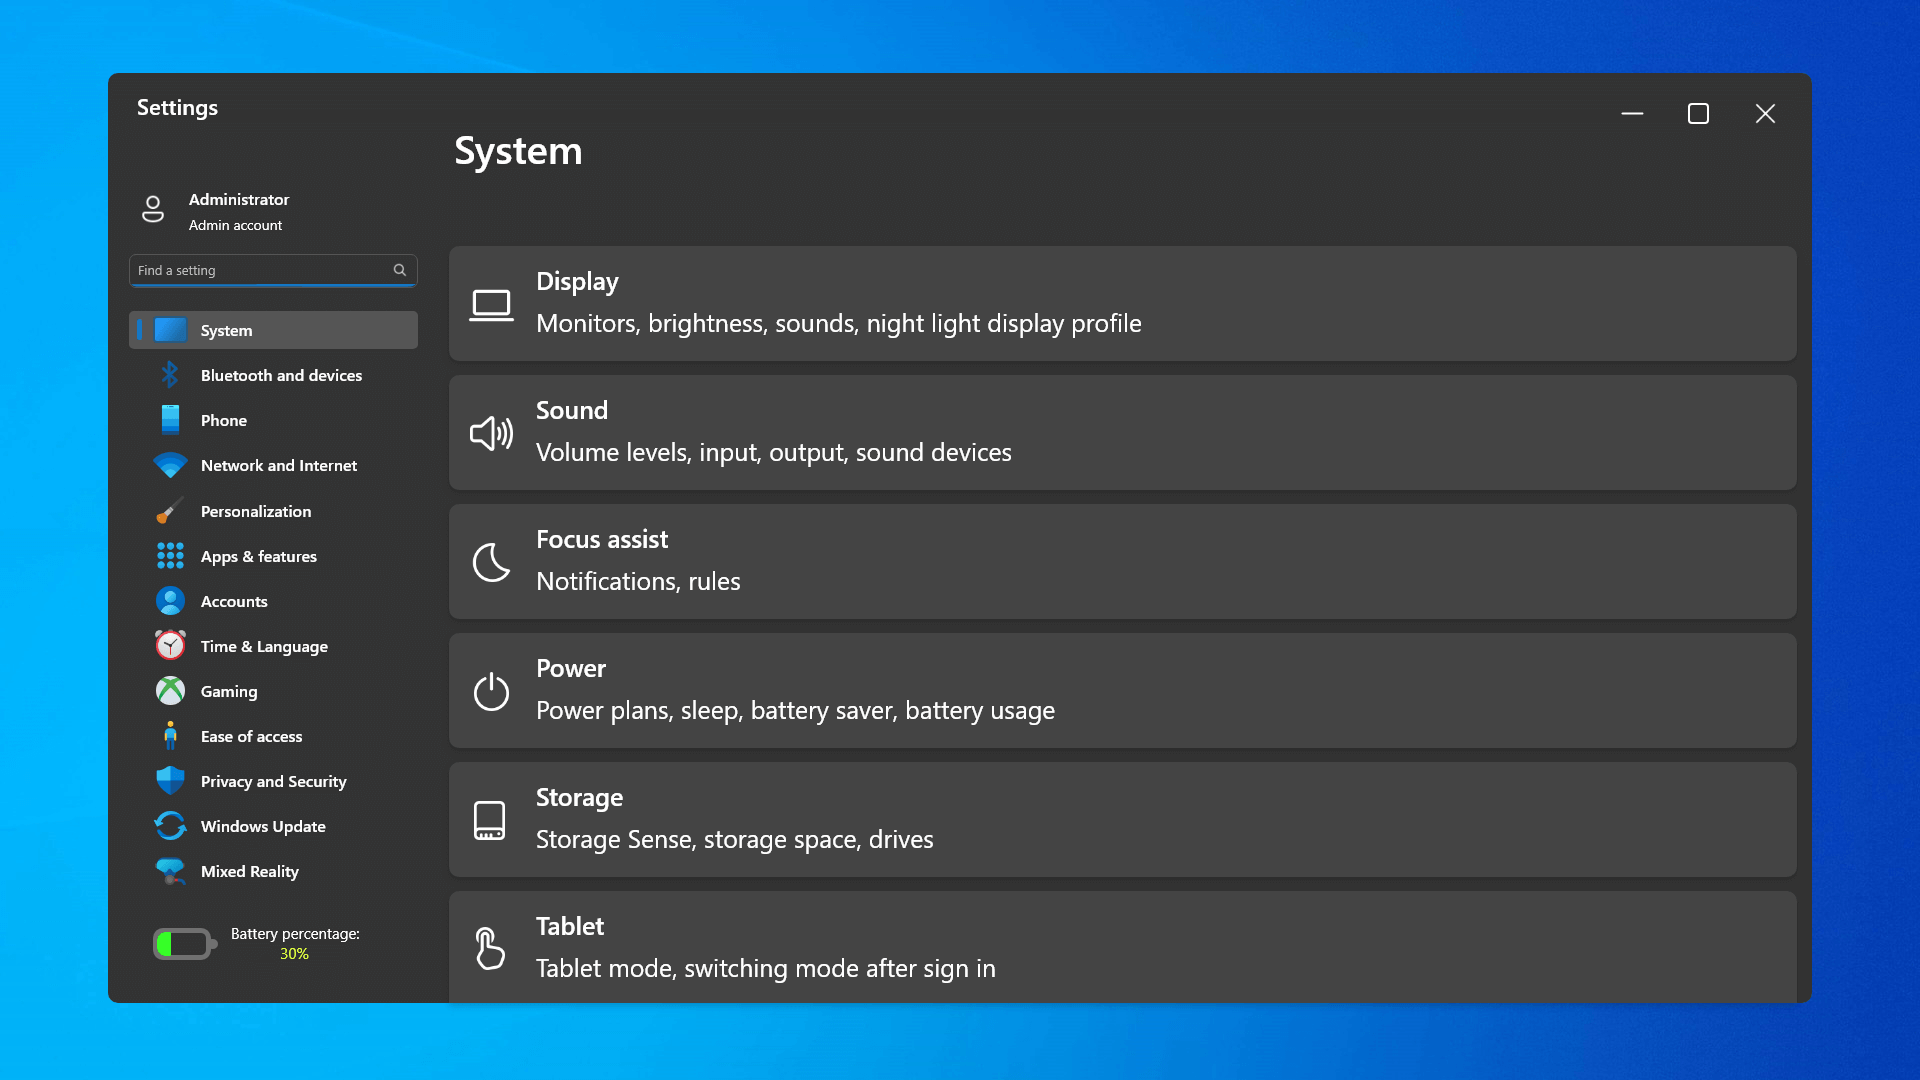 The settings app also has gone through visual and design changes. It has a new design that is very visually appealing and navigation has been simplified and more organized. Finding the right and desired setting is much faster and clearer now.
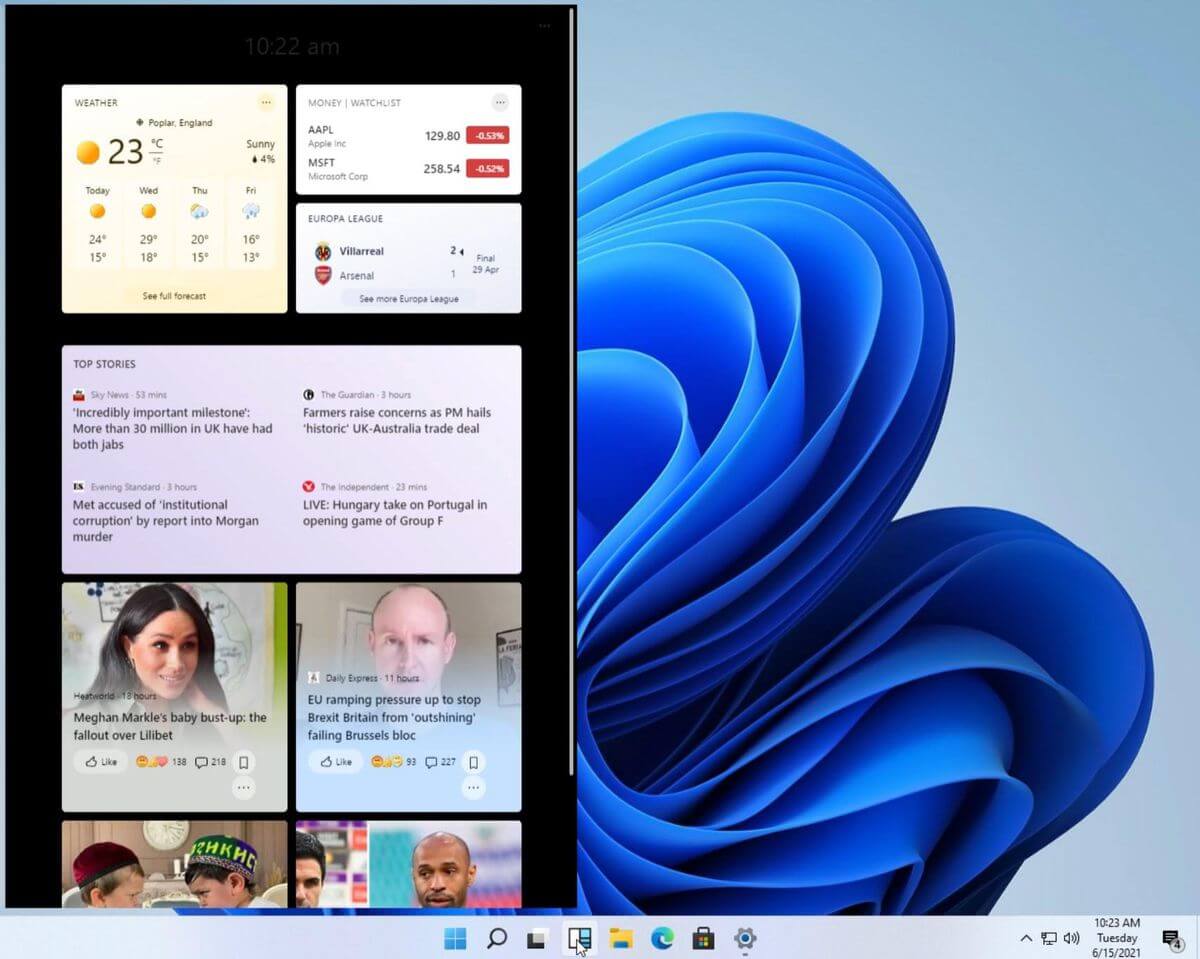 Yes, widgets are back but not like you remember them.
Instead of being all-time present at your desktop like once they used to be, now there is a button on the taskbar which brings the widget bar up that contains desired widgets. This way they are easily accessible and do not clutter desktops.
So far we have weather, news, calendar, and stocks widget but we will see how development on these goes. I expect to have community-made widgets like in old days for all of our needs.
Yes, widgets are back but not like you remember them.
Instead of being all-time present at your desktop like once they used to be, now there is a button on the taskbar which brings the widget bar up that contains desired widgets. This way they are easily accessible and do not clutter desktops.
So far we have weather, news, calendar, and stocks widget but we will see how development on these goes. I expect to have community-made widgets like in old days for all of our needs.
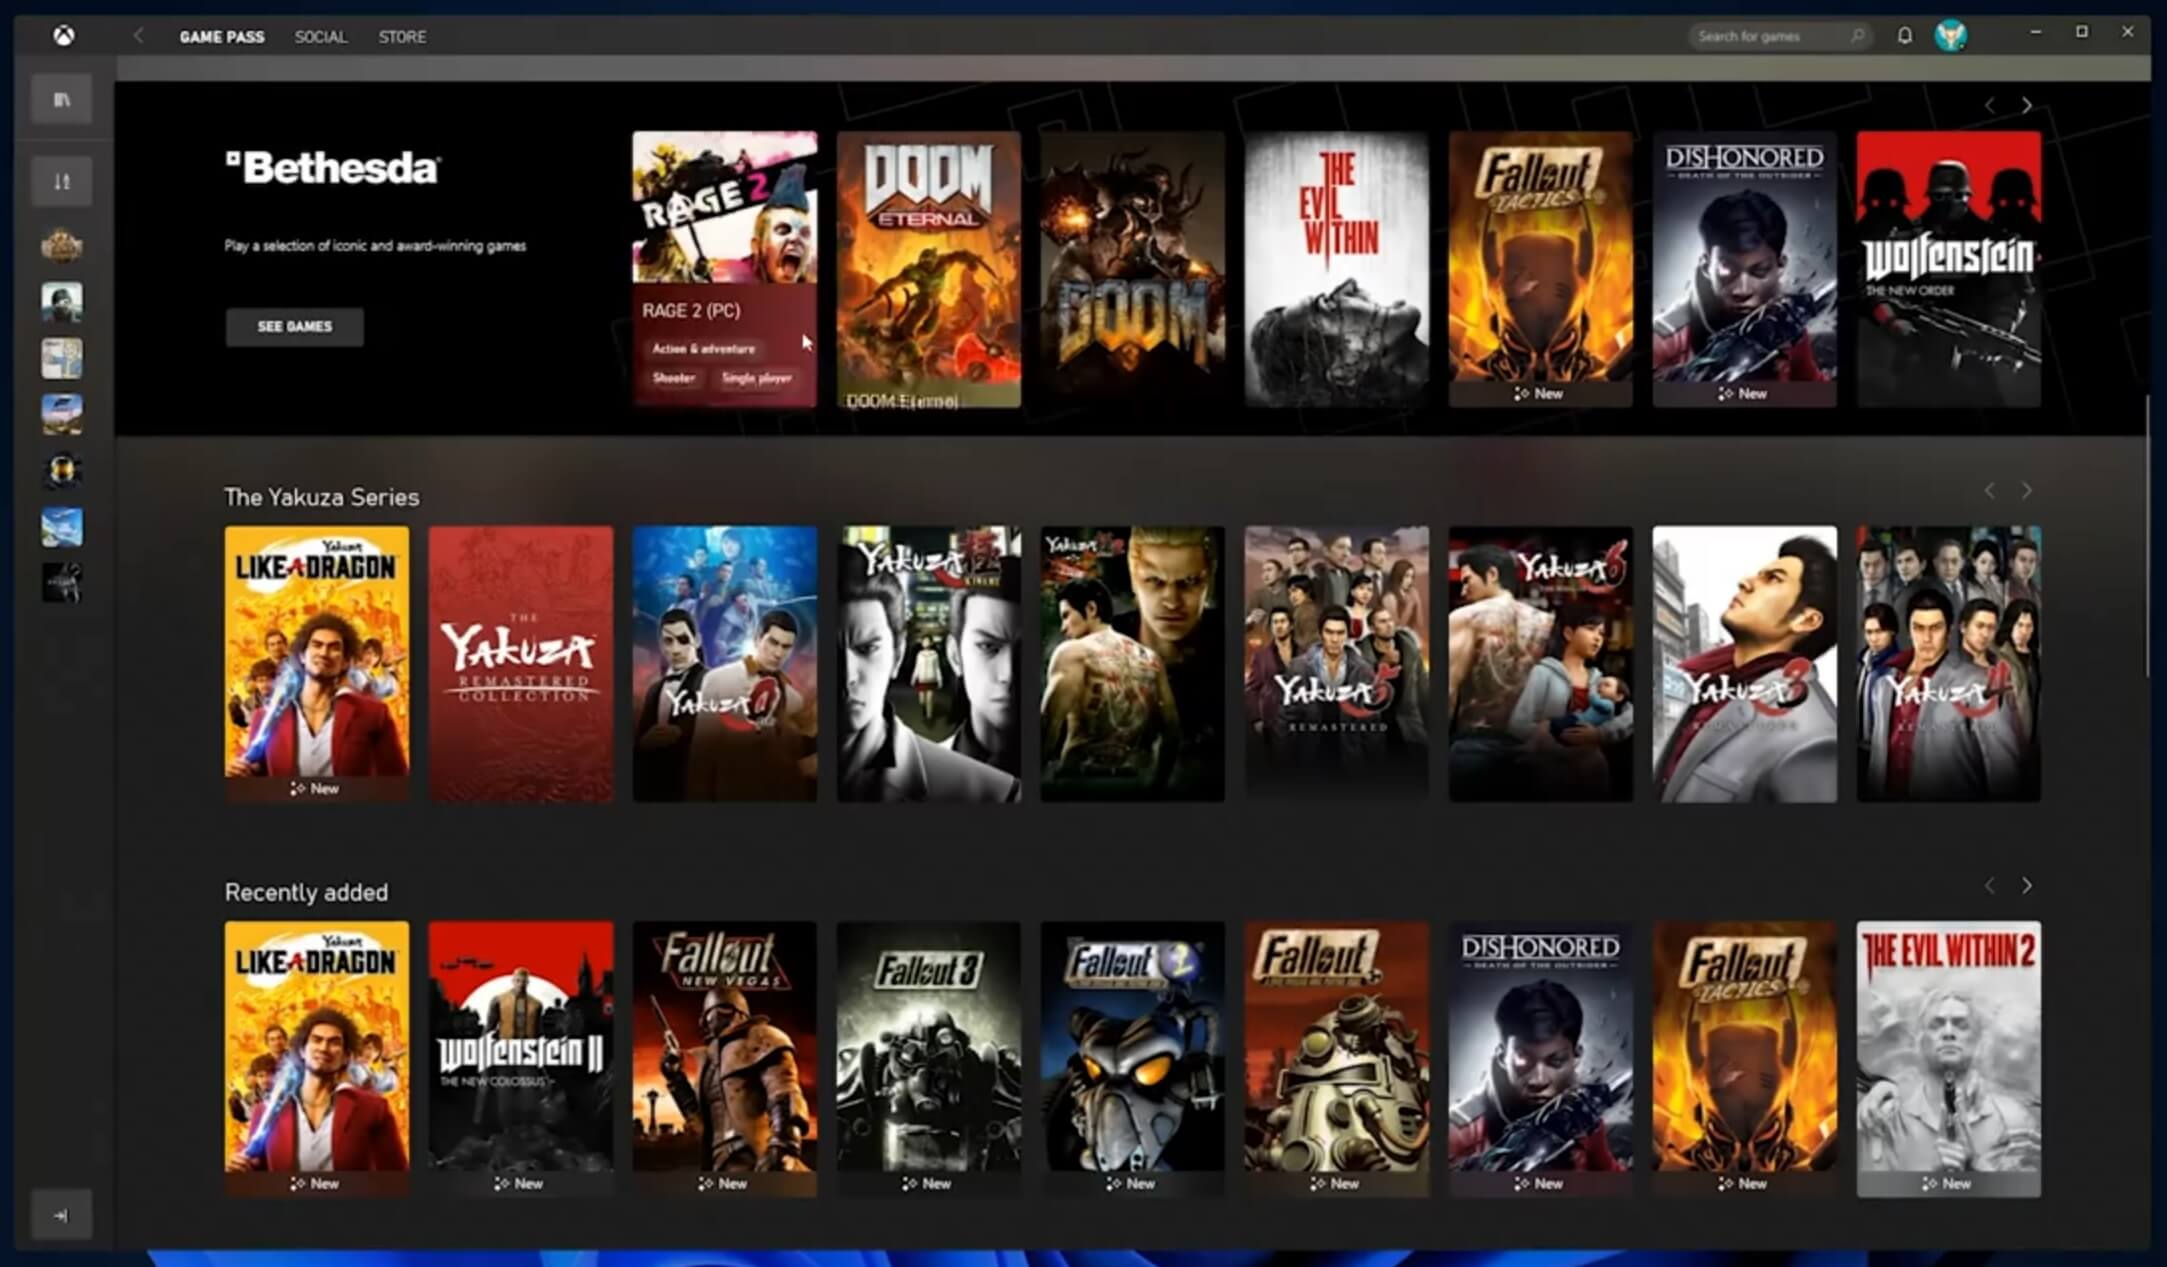 The new Xbox app is now integrated into Windows 11, offering quick access to Xbox Game Pass games, the social parts of the Xbox network, and the Xbox store.
 As widely known by now Windows 11 will require you to have a TPM 2.0 module capable CPU in order to install it.
This system requirement has caused a lot of controversies but essentially it seems that MS's goal is to protect your personal data by using this module.
The upside of course is that your data will be protected much more than in previous Windows versions, the downside, of course, will be that you will need newer hardware to run OS on it.
and that is essentially it, keep on tuned on more Windows 11 information and overall articles tied to PC and technology here at errortools.com
As widely known by now Windows 11 will require you to have a TPM 2.0 module capable CPU in order to install it.
This system requirement has caused a lot of controversies but essentially it seems that MS's goal is to protect your personal data by using this module.
The upside of course is that your data will be protected much more than in previous Windows versions, the downside, of course, will be that you will need newer hardware to run OS on it.
and that is essentially it, keep on tuned on more Windows 11 information and overall articles tied to PC and technology here at errortools.com 
 For people not familiar with recent events, the state of California has sued Blizzard for various things including discrimination and offensive behavior. Later Blizzard executives were caught shredding some evidence and things just started to go to worse from there.
After much drama, many people believed that this is the end for Blizzard entertainment and that they would not be able to recover from this since the community has sided with California and Blizzard has received a large punch as many subscribed WOW players have left the game.
Things are not so grim as they were looking as their Diablo 2 remake has made moderate success despite being released in these troubling times and there are rumors of Overwatch 2 planned release date as of the first quarter of 2022.
For people not familiar with recent events, the state of California has sued Blizzard for various things including discrimination and offensive behavior. Later Blizzard executives were caught shredding some evidence and things just started to go to worse from there.
After much drama, many people believed that this is the end for Blizzard entertainment and that they would not be able to recover from this since the community has sided with California and Blizzard has received a large punch as many subscribed WOW players have left the game.
Things are not so grim as they were looking as their Diablo 2 remake has made moderate success despite being released in these troubling times and there are rumors of Overwatch 2 planned release date as of the first quarter of 2022.
