

5 Windows 10 Upgrade Errors
The recently released Windows 10 captivated the mass but its rollout, polished as it might have been, proved everything but seamless. Surf the Internet and you’ll get the gist. People are complaining and they need assistance. Assistance with what you might ask? Many have attempted to make an upgrade but failed after encountering various strange combinations of letters and numbers. These are none other than error codes. If you’ve tried and failed, feast your visuals below as you might encounter one of these 5 Windows 10 Upgrade errors.
Error Code 0x80073712
Encountering error code 0x80073712 in no way implies that you need to throw out your computer system and acquire a new one. Not at all! This error code simply means that a very important file to Windows might have gone missing or corrupted. This file is crucial to Windows update so without obtaining this file, you won’t be able to proceed with the update.
Error Code 0x800F0923
Likely, there are many programs and drivers installed on your computer. They all play a vital role. However, if you’ve received error code 0x800F0923, it might be time to consider or turn your eyes to installed drivers on your system. Why? Error code 0x800F0923 means that there’s a driver or driver on your current Operating System that’s not compatible with Windows 10. There’s clearly a dilemma here.
“We couldn't complete the updates. Undoing changes. Don't turn off your computer.” Or “Failure configuring Windows Updates. Reverting changes”
That’s a pretty odd error but I will say it's slick… That Windows 10 upgrade error is straightforward. Microsoft is just letting you know that they won’t be able to complete the update to Windows 10 and so they are putting your computer back to where it was. How nice of them.
The error messages above are pretty generic and will manifest when the upgrade fails for one reason or the other. To resolve this issue, you’ll most definitely have to decipher what error code was presented. Identifying that will provide a glimpse into exactly what steps you need to take.
The Update Isn't Applicable to Your Computer
I don’t know about you but I strongly believe Microsoft is subtly letting you know that your computer system is old and needs to be thrown out. Also, this update could imply that your PC needs to install important updates to rev you up to the requirements. All relevant updates to your computer must be installed before you can get past this stage.
Error… “Something Happened”
This Windows 10 upgrade error has been the talk of the Internet. In fact, users of Windows OS have been making it a mockery. Clearly, not many have had success after encountering this error. Obviously, “something happened” but it’s just not easy to decipher what went wrong. Microsoft is still trying to figure it out.
Solution

 From the Device Manager choose the troublesome device and right-click on it, choose properties.
 Device properties floating Window will appear.
 Click on the top tab which says, Driver. From the Driver tab, click on Roll Back Driver.
 Note that if the device is working properly, the Roll Back Driver button will be greyed out and you will not be able to click on it meaning that chosen device is not the issue. If the device is not working properly and you can click on Roll Back driver, do it, choose the previous version, and reboot your computer.
You can use this method to get back to the previous driver version for any device that is causing issues in your computer.
Note that if the device is working properly, the Roll Back Driver button will be greyed out and you will not be able to click on it meaning that chosen device is not the issue. If the device is not working properly and you can click on Roll Back driver, do it, choose the previous version, and reboot your computer.
You can use this method to get back to the previous driver version for any device that is causing issues in your computer.  Bad or good news, depending on your view comes from RIOT for their game Valorant. It seems that Riot has decided to enforce Windows 11 TPM 2.0 feature into Valorant running on Windows 11 and there is a rumor that it will be de facto standard and that it will move to Valorant in general no matter on which system it runs.
Furthermore, there is a rumor circling around that other developers are also talking about implementing TPM 2.0 requirements so they can harvest advanced security features of Windows 11 in order to prevent hacks and other cheats in their games.
This is an interesting point to stand on, on one side, sure, advanced features that will prevent cheating and hacking is a great thing. On other hand denying access to many computers that do not support TPM 2.0 and removing them from the game can be a permanent loss of customers and therefore loss of money. It is a risk to be sure and I am not really sure that alienating gamers is a good choice for long-term income, especially when you will be able to install Windows 11 on an unsupported PC as stated by Microsoft.
We will all see how this Riot decision will reflect on their business, as not a big Valorant player myself I am not impacted too much with this decision, but it will be interesting to see if others will indeed go with this trend or they will decide to wait a while until much more PC’s are upgraded.
Bad or good news, depending on your view comes from RIOT for their game Valorant. It seems that Riot has decided to enforce Windows 11 TPM 2.0 feature into Valorant running on Windows 11 and there is a rumor that it will be de facto standard and that it will move to Valorant in general no matter on which system it runs.
Furthermore, there is a rumor circling around that other developers are also talking about implementing TPM 2.0 requirements so they can harvest advanced security features of Windows 11 in order to prevent hacks and other cheats in their games.
This is an interesting point to stand on, on one side, sure, advanced features that will prevent cheating and hacking is a great thing. On other hand denying access to many computers that do not support TPM 2.0 and removing them from the game can be a permanent loss of customers and therefore loss of money. It is a risk to be sure and I am not really sure that alienating gamers is a good choice for long-term income, especially when you will be able to install Windows 11 on an unsupported PC as stated by Microsoft.
We will all see how this Riot decision will reflect on their business, as not a big Valorant player myself I am not impacted too much with this decision, but it will be interesting to see if others will indeed go with this trend or they will decide to wait a while until much more PC’s are upgraded. 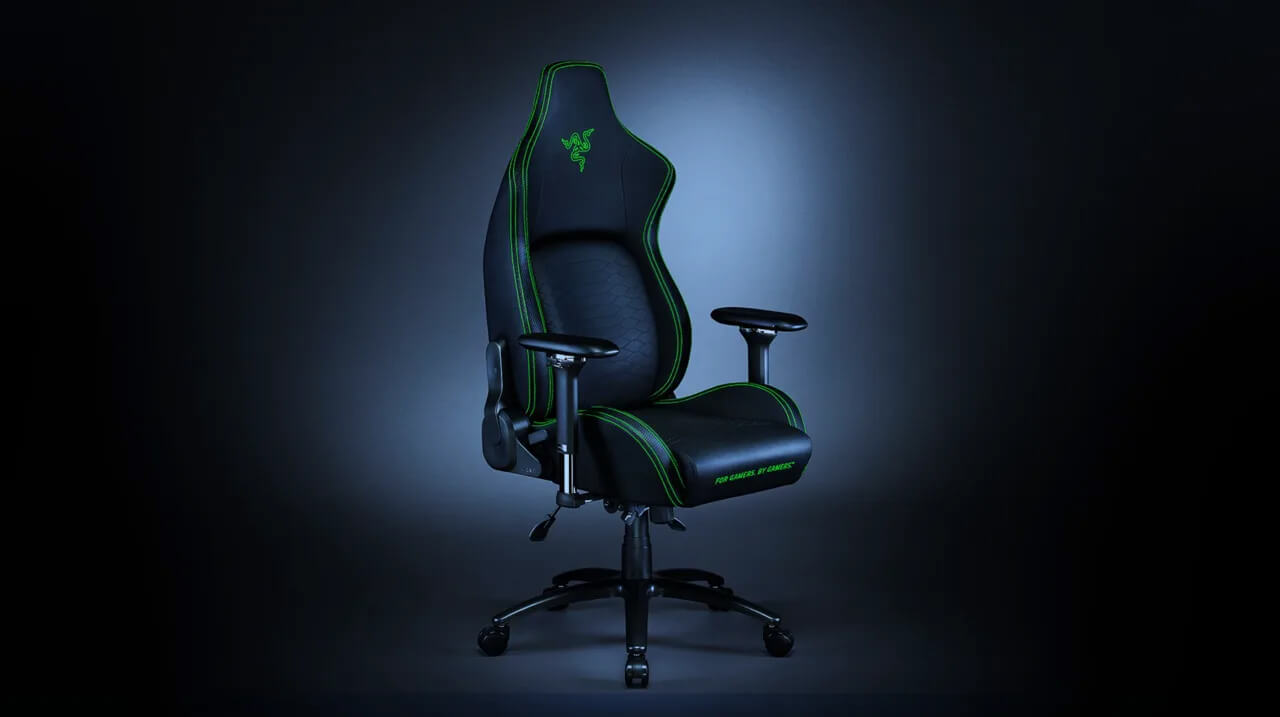 It seems that last few days we were riding some Razer bandwagon but rest assured that we are not sponsored by them in any way, truth is that simply they come up with some interesting accessories which I believe are worth covering.
Gaming Chair itself comes in two colors, fully black and green black combination and it is not really an entry-level chair if we are talking about price. The chair itself is around 600USD depending on the distributor and considering that price range it is placed in more top cream of gaming chairs but it is worth every dime.
It seems that last few days we were riding some Razer bandwagon but rest assured that we are not sponsored by them in any way, truth is that simply they come up with some interesting accessories which I believe are worth covering.
Gaming Chair itself comes in two colors, fully black and green black combination and it is not really an entry-level chair if we are talking about price. The chair itself is around 600USD depending on the distributor and considering that price range it is placed in more top cream of gaming chairs but it is worth every dime.
 If you are about to install Windows 10, then during the installation process, your computer boots into the Install and Configure Windows 10 screen with Cortana that assist you during the setup. Once you reach the last page which is “Choose privacy settings for your device”, you will see the Advertising ID of your computer. Under the Advertising ID, you have to disable or toggle off the “Apps can use advertising ID to provide more personalized advertising in accordance with the privacy policy of the app provider” option. After you disable it, click on the Accept button to proceed with the installation. After that, the copy of your Windows 10 you are using will have the Advertising ID disabled by default.