Security on your PC and on your accounts is the important thing. Security on your phone device is also very very important. That is why we are bringing you a list of 8 applications that are marked by the cybersecurity team as ones that could be used to steal data from you. If you have by any chance any of these applications installed, uninstall them immediately.
List is as follows:
Cake VPN (com.lazycoder.cakevpns)
Pacific VPN (com.protectvpn.freeapp)
eVPN (com.abcd.evpnfree)
BeatPlayer (com.crrl.beatplayers)
QR/Barcode Scanner MAX (com.bezrukd.qrcodebarcode)
The “Unknown Hard” error that keeps on appearing in Windows 10 can put users in an unpleasant situation. This kind of error leads to the freezing of the taskbar, blackening of the screen, and sudden disappearance of the icons on the Desktop. And each time you try to open Windows, the system will only give you an error message saying that it’s a critical error and some applications like Start and Cortana won’t work.
Upon analysis, it seems that the “sihost.exe” is not responding and that it is the one that’s causing the c000021a Unknown Hard error to pop up. Sihost.exe files represent the Shell Infrastructure Host which is an essential component in the Windows operating system. The Windows Shell Infrastructure Host is primarily responsible for handling some graphical elements of the operating system interface such as the Start menu and the taskbar transparency. And so if the Shell Infrastructure or Sihost.exe has stopped, has been removed, or corrupted, you will most likely have issues with the overall functionality of the Windows operating system and you’ll get the Unknown Hard error
In addition, the ctfmom.exe Unknown Hard error may also occur due to incompatible drivers installed on your PC. Ctfmom is a process that identifies inputs such as handwriting, languages, and many more. It’s the one that controls the functions of background behavior. To resolve this issue, you need to first try to identify which application is the one that’s running the sihost.exe file. And if needed, you need to either update or reinstall or completely uninstall the problematic application.
Option 1 – Try to run the System File Checker
The SFC Scan or System File Checker, us a built-in utility in Microsoft Windows that can be found in the C:\Windows\System32 folder. This tool allows users to scan and restore any corrupted system files in Windows that might be causing the Unknown Hard error to appear. Before you use this tool, make sure to find out whether the sihost.exe on your computer is a Trojan that you have to remove or if it’s a file that belongs to a trusted Windows application. Once you have that sorted out, follow the steps below.
Tap Win + R to launch Run.
Type in cmd in the field and tap Enter.
After opening Command Prompt, type in sfc /scannow
The command will start a system scan which will take a few whiles before it finishes. Once it’s done, you could get the following results:
Windows Resource Protection did not find any integrity violations.
Windows Resource Protection found corrupt files and successfully repaired them.
Windows Resource Protection found corrupt files but was unable to fix some of them.
Option 2 – Try to use System Restore
You can also try using System Restore. This is one of the ways you can use it to back up your PC. Since restore points are created automatically each week by System Restore, you can use System Restore to restore your computer back to an earlier good point in time.
Option 3 – Try to troubleshoot the error in a Clean Boot State
Putting your PC in a Clean Boot state can help you diagnose and troubleshoot the issues in your system. During this state, you can start the system with a minimum number of drivers and startup programs that will surely help you in isolating the root cause of the Unknown Hard Error.
Log onto your PC as an administrator.
Type in MSConfig in the Start Search to open the System Configuration utility.
From there, go to the General tab and click “Selective startup”.
Clear the “Load Startup items” checkbox and make sure that the “Load System Services” and “Use Original boot configuration” options are checked.
Next, click the Services tab and select the “Hide All Microsoft Services” checkbox.
Click Disable all.
Click on Apply/OK and restart your PC. (This will put your PC into a Clean Boot State. And configure Windows to use the usual startup, just simply undo the changes.)
After putting your PC in a Clean Boot State, try creating a system restore point and see if the problem still occurs. Clean Boot troubleshooting is designed to help you isolate the problem. For you to execute a clean boot troubleshooting, you must do a couple of actions (the steps are given above) and then restart your PC after every action. You might have to disable one third-party app after the other to really isolate the issue. And once you’ve narrowed down the problem, you can either disable the third-party app that’s causing the problem or remove it. Note that you must switch your PC back into the Normal Startup mode after you’re done troubleshooting the problem. Here’s how you can do it:
From the “Start” menu, go to System Configuration.
After that, switch to the General tab and click the option for “Normal Startup”.
Next, go to the Services tab and clear the checkbox for “Hide all Microsoft services”.
Then find and click “Enable all” and if prompted, you have to confirm.
Afterward, go to the Task Manager and enable all the Startup programs and confirm the action.
One of the important processes in the Windows operating system is the Setting Synchronization or SettingSyncHost.exe. This process is the one responsible for synchronizing the settings of your computer with other devices. It is the one that replicates settings like OneDrive, Internet Explorer, wallpapers, and so on, to other systems. However, it has been known to cause high CPU usage in Windows 10 and there are times when it causes the system to freeze or system lags. So if you notice that the SettingSyncHost.exe process is causing high CPU usage in your computer, worry not for this post will guide you in fixing them.
You have to be cautious when you notice high CPU usages caused by system processes since cybercriminals mostly set the names of viruses in a way that the system or the user won’t be able to identify them. Cyber crooks could name the virus and malware the same as one of the system processes like SettingSyncHost.exe to make it seem like it’s a legitimate process. Thus, you need to keep in mind that original system processes like the SettingSyncHost.exe file are located in the System32 folder.
The original SettingSyncHost.exe file is located in the System32 folder. To check for the same, right-click on the troublesome process in the Task Manager and select Open file location. If the place is any other than the System32 folder, run a full system anti-virus scan on the system.
The SettingSyncHost.exe causes high CPU usage when it gets stuck in the sync process and is not able to come out of the loop. To fix this problem, you need to follow the solutions offered below but before you proceed, make sure that you create a System Restore point first.
Option 1 – Apply some registry tweak
The first thing you can do is to apply some tweaks to the Windows Registry. To get started, follow these steps:
Tap the Win + R keys to open the Run utility and type “Regedit” in the field and then tap Enter to open the Registry Editor.
Next, navigate to this registry path: HKEY_CURRENT_USERSoftwareMicrosoftInputPersonalizationTrainedDataStore
From there, right-click on the key and select Permissions.
After that, check the box next to “Allow” for Full Permission for every user group.
Now click on the Apply and OK buttons to save the changes made.
Then restart your computer.
Option 2 – Close the Host process for setting synchronization
If the registry tweak didn’t work, you can try to close the host process for setting synchronization, especially if this process continues to hog resources. You can terminate this process by opening the Task Manager. From there, end the process or task of the host process. On the other hand, you can also turn off the Host process for synchronization by opening Settings > Accounts > Sync settings located in the left pane. After that, turn off the Sync setting.
Option 3 – Run the Hardware and Devices Troubleshooter or the Performance Troubleshooter
Hardware and Devices Troubleshooter:
The first thing you need to do is click on Start and then on the gear-like icon to pull up the window for Settings.
After opening Settings, look for the Update and Security option and select it.
From there, go to the Troubleshoot option located on the left-hand side of the list.
Next, select Hardware and Devices from the list and open the Troubleshooter and run it. Once it is doing its job, wait for it to complete the process and then restart the system.
After the system restarts, check if the problem’s now fixed. If not, refer to the next option given below.
Performance Troubleshooter:
Tap the Win + R keys to open the Run dialog box.
Type “exe /id PerformanceDiagnostic” in the field and hit Enter to open the Performance troubleshooter.
Then click on Next to get started. Wait until the process is completed.
Option 4 – Try scanning your computer using Windows Defender
As mentioned, it is possible that the SettingSyncHost.exe could be infected with a virus or malware. To eliminate it, you have to scan your computer using security programs like Windows Defender.
Tap the Win + I keys to open Update & Security.
Then click on the Windows Security option and open Windows Defender Security Center.
Next, click on Virus & threat protection > Run a new advanced scan.
Now make sure that Full Scan is selected from the menu and then click the Scan Now button to get started.
If the Task Manager is either blank or is not showing processes on your Windows 10 computer, then here are a few things you can do to resolve this issue. This kind of problem can occur due to some system file corruption or some malware infection in the system.
Here are some suggestions you can try to resolve the problem with the Task Manager on your Windows 10 PC.
Option 1 – Try restarting your computer
The most common and most of the time effective way to resolve this kind of issue is to simply restart your computer. Thus, you have to restart your computer and see if it helps in fixing the Task Manager issue or not. If not, you can try the next given options below.
Option 2 – Run the DISM tool
If the first option didn’t work, then running the Deployment Imaging and Servicing Management tool can help you resolve the issue with the Task Manager as it will repair the Windows System Image as well as the Windows Component Store in Windows 10.
After you access the Advanced Startup options, select Command Prompt by using the arrow keys on your keyboard.
Next, type in this command: DISM /Online /Cleanup-Image /RestoreHealth
Do not close the window if the process takes a while as it will probably take a few minutes to finish.
Option 3 – Make sure that the display columns are selected in the Task Manager
You have to make sure that you have checked or selected the display columns you want to be displayed. So if none of them are selected, you might not see any details at all. Thus, you need to right-click on the space near Name and select the columns.
Option 4 – Run the System File Checker Scan
System File Checker or SFC is a built-in command utility that helps in restoring corrupted files as well as missing files. It replaces bad and corrupted system files with good system files that might be the reason why the Task Manager is blank or is not showing processes. To run the SFC command, follow the steps given below.
Tap Win + R to launch Run.
Type in cmd in the field and tap Enter.
After opening Command Prompt, type in sfc /scannow
The command will start a system scan which will take a few whiles before it finishes. Once it’s done, you could get the following results:
Windows Resource Protection did not find any integrity violations.
Windows Resource Protection found corrupt files and successfully repaired them.
Windows Resource Protection found corrupt files but was unable to fix some of them.
Restart your computer.
Option 5 – Troubleshot the problem in a Clean Boot State
There are some instances that some conflicting programs installed in your computer might be the one that’s causing the Task Manager issue. To identify which program is causing the problem, you need to put your computer in a Clean Boot State. To do so, follow the steps below.
Log onto your PC as an administrator.
Type in MSConfig in the Start Search to open the System Configuration utility.
From there, go to the General tab and click “Selective startup”.
Clear the “Load Startup items” check box and make sure that the “Load System Services” and “Use Original boot configuration” options are checked.
Next, click the Services tab and select the “Hide All Microsoft Services” check box.
Click Disable all.
Click on Apply/OK and restart your PC. (This will put your PC into a Clean Boot State. And configure Windows to use the usual startup, just simply undo the changes.)
From there, start to isolate the problem by checking which one of the programs you installed recently is the root cause of the problem.
Option 6 – Try scanning your computer using Windows Defender
As mentioned, the Task Manager issue might be caused by some malware in the system and so to eliminate the malware, you have to scan your computer using security programs like Windows Defender.
Tap the Win + I keys to open Update & Security.
Then click on the Windows Security option and open Windows Defender Security Center.
Next, click on Virus & threat protection > Run a new advanced scan.
Now make sure that Full Scan is selected from the menu and then click the Scan Now button to get started.
If you were trying to open File Explorer but it suddenly stopped working and you encounter an error message that states, “An attempt was made to reference a token that does not exist”, read on as this post will guide you in fixing this problem. This problem was initially reported after the April Update and Microsoft was able to fix it right after correcting the build. However, this effort seems futile for some users as recently, some reported getting the same error when they try to open not just Windows File Explorer but also with utilities like Microsoft Management Console or MMC, Visual Studio, Task Manager, Printer, Recycle Bin, etc.
Two of the most likely causes of this error are a troublesome Windows Update and corrupted system files. Whatever the cause is, here are some suggestions you can follow to fix the “An attempt was made to reference a token that does not exist” error.
Option 1 – Try to re-register the problematic DLL file
You may have to re-register the ntdll.dll file using the regsvr32.exe before you can successfully install the program and fix the ntdll.dll file crash error. The Regsvr32 tool is a command-line utility that can be used to register and unregister OLE controls like DLL and ActiveX (OCX) control in the Windows operating system. Follow the steps below to use it.
Open Command Prompt as admin from the WinX menu.
Next, type the following commands in the elevated Command Prompt and hit Enter to execute the command. This will re-register the affected DLL file using the Windows operating system tool, regsvr32.exe.
exe /[DLL file]
exe [DLL file]
Note: Replace “[DLL file]” with the name of the DLL file that was pointed out in the error.
After you execute the given commands, you should see a message saying, “DllRegisterServer in vbscript.dll succeeded” if the Regsvr32 tool was able to run successfully. After that, try to install the program again and see if it now works.
Option 2 – Replace the DLL file from a trusted source
First, you need to get the new DLL file from another computer with preferably the same file version number.
After that, you need to boot your PC into Safe Mode and navigate to the paths listed below and then replace the file using a USB drive or other external storage devices.
x86: This PC > C:/Windows/System32
x64: This PC > C:/Windows/SysWOW64
Next, type “cmd” in the Cortana search box and right-click on Command Prompt, and select “Run as administrator” to open it with administrator privileges.
Now type the “regsvr32 ntdll.dll” command and hit Enter.
Restart your PC and check if the error is now fixed.
Option 3 – Perform a System File Checker scan
The System File Checker or SFC scan could detect and automatically repair damaged system files that could be causing the “An attempt was made to reference a token that does not exist” error to pop up. SFC is a built-in command utility that helps in restoring corrupted files as well as missing files. It replaces bad and corrupted system files with good system files. To run the SFC command, follow the steps given below.
Tap Win + R to launch Run.
Type in cmd in the field and tap Enter.
After opening Command Prompt, type in sfc /scannow and hit Enter.
The command will start a system scan which will take a few whiles before it finishes. Once it’s done, you could get the following results:
Windows Resource Protection did not find any integrity violations.
Windows Resource Protection found corrupt files and successfully repaired them.
Windows Resource Protection found corrupt files but was unable to fix some of them.
Option 4 – Try reverting back to the previous build of Windows
This kind of error might have something to do with a Feature Update so you can try to revert your computer to a previous build of Windows 10 as it could help you fix the problem. In this case, it would better if you refrain from updating your Windows 10 computer until this problem is completely resolved by Microsoft.
A new update to popular Microsoft PowerToys has brought a few new features that are aimed at speeding up the workflow.
The first new feature that was slid in is Always on top utility. With this cool utility, you can keep the window as the name suggests, always on top of other windows. To enable this cool feature all you have to do is press the key combination of ⊞ WINDOWS + CTRL + T and an active window will be now always on top of all other windows. To reverse and unlock this window from being always on top just press key combination again.
A second new feature is a really great one and my favorite thing to happen in power toys. Often we are making the search in our browsers to find stuff, things, maybe some explanations, information, etc. The newest update in power toys brings this to a whole new dimension. While you are on PC you just simply need to type ?? followed by questions like: ?? When doctor strange 2 is coming out and that will launch your default browser with your chosen search engine and provide you with the answer.
Third and final thing is G-code support in the file explorer preview pane and thumbnails, meaning that if you work with CNC equipment you can now have a thumbnail preview of the code itself inside File Explorer.
And that’s it for now, thank you for coming and reading, Take care and I hope to see you next time.
Bluetooth perhaps is slowly becoming an outdated feature but sometimes you can really used it and need it.
By default, in Windows 11 Bluetooth is turned OFF so if you need it, you will need to turn it ON first. Luckily turning it ON is easy and we will guide you through the process
Turning Bluetooth using the Quick Settings menu
The easiest and fastest way to turn the Bluetooth ON is using the quick setting menu:
Click on indicator icons located left of date and time in Taskbar
Click on the Bluetooth icon (if the icon is not displayed, click on the pencil icon, then click on Add and add Bluetooth icon from the list)
Right-click on the Bluetooth icon and select go to Settings
Go to Adding a Bluetooth Device to Windows 11 section
Switch it ON via Windows Settings
Open Windows settings by using ⊞ WINDOWS + I combination
Click on Bluetooth & Devices
Inside settings turn Switch to ON beside Bluetooth
Click + Add Device large button on top
Click Bluetooth
Select device in the list of found devices (make sure device is turned ON, it has Bluetooth sharing ON, and that it is in pairing mode)
If the device needs the password, type it in
When the message Your device is ready to go is showed on the screen click on the Done
Advice on Bluetooth devices
Note that the Bluetooth devices you connect to Windows 11 stay linked to your PC unless you pair them with a different PC, smartphone, or tablet later.
After a time, most Bluetooth devices power down automatically to save battery life. To continue where you left off, either power the Bluetooth device up (if it has a power button) or press a button on a keyboard or mouse, and it should automatically turn on and reconnect with your PC.
If you’re having trouble connecting your Bluetooth device, make sure that Windows 11 is fully updated and that you’ve installed any drivers that came with your device.
Make sure that the device is fully charged or that it has a fresh set of batteries.
while Windows is searching. You’ll need to remove the device from Windows 11 first and then attempt to pair it with your PC again.
Removing devices
If you need to remove (un-pair) a Bluetooth device, just open Windows Settings and navigate to Bluetooth & Devices. Locate the name of the device that you want to remove, click the three dots button in the corner of its square and select Remove Device.
If you got encounter an error message saying, “Error opening file for writing” while running a setup file to install some program on your computer, read on as this post will give you some suggestions on how you can fix it. You can encounter this error when running a setup file for installing a program like GlassWire, Notepad++, VLC, Steam, OBS, Mod Organizer, WinpCap, NSIS, FileZilla, BSPlayer, Kodi, Wireshark, rtcore64, qt5core.dll, MSI Afterburner, GWCtlSrv.exe, npf.sys, vcredist_86 and many more. And so when this error pops up while you run a setup file, refer to the steps given below which might help resolve the problem.
Step 1: First, you have to make sure that there is no other installation in progress as multiple installations can most likely cause this error to show up. You can restart your computer and try to run the setup file again.
Step 2: If you still got the error even after your restart your computer, click on Retry to try again and if it does nothing, click Abort to terminate the installation. After that, go to the folder where you’ve placed the setup file and then delete it.
Step 3: Make sure that you have enough disk space on your computer. You can use the Windows 10 Storage Sense feature which can clean all the temporary files from your computer and help you save storage space. To use Storage Sense, follow the steps below.
Open Setting > System > Storage from the WinX Menu.
From there, you will see a list of all the local and connected storage devices along with the details on the free space.
Now make sure that the Storage Sense feature is turned On then go find a link that says “Free Up Space” and click it to open.
After that, a screen which is the built-in program in Windows 10 will appear and will scan your computer for the following junk files so you can free up disk space:
Windows Upgrade Log Files
The system created Windows Error Reporting Files
Thumbnails
Temporary Internet Files
Previous Windows Installation Files
Delivery Optimisation Files
DirectX Shader Cache
Note: Once you’re done freeing up space on your drive, try to run the setup file again.
Step 4: If freeing up space didn’t help, you can just delete the setup file and download another one from the official homepage of the program. From there download the setup file and place it in a different location. After that, run the setup file once again.
Step 5: Make sure that you have downloaded the correct setup file according to your operating system, i.e. x64 or x86.
Step 6: Restart your computer once more and make sure that you sign in as administrator. After that, right-click on the setup file and click “Run as administrator”.
If it still didn’t help, you might want to take ownership of the folder where you saved the setup file. How? Follow the steps below but before you do that, you have to create a System Restore Point first, once that’s done, proceed.
First, locate the concerned folder and right-click on it then select Properties.
Next, click on the Edit button in the Properties window and click OK to confirm if you got a User Account Control elevation request.
After that, select user/group from the permission windows or click on the Add button to add another user or group. It would be best if you add “Everyone” to give permission.
Then check “Full Control” under the “Allow” column to assign full access rights control permissions.
Now edit the permission to Full Control for “Everyone”.
If you encounter an error message saying, “The connection was denied because the user account is not authorized for remote login” when you try to establish a remote connection, read on as this post will help you resolve the problem. This kind of error occurs when the targeted host does not allow you to access that system remotely. Based on the error, you are not authorized to log in remotely which means that you need to obtain the correct permission.
There are several potential fixes you can try for this error. You can try to check the Remote Desktop Users group or add users to the Security group or check the Remote Desktop Service itself.
Refer to the options provided below for more detailed instructions to fix the “The connection was denied because the user account is not authorized for remote login” error.
Option 1 – Try checking the Remote Desktop Users group
You can encounter this error when the Remote Desktop Users group does not have any permission for your user account that you are using to establish a remote connection. Thus, you need to make sure that your user account is a member of the Remote Desktop Users group. How? Refer to these steps:
Tap the Win + R keys on your keyboard and then type “cmd” in the field and tap Enter or click OK to open Command Prompt.
After opening Command Prompt, type the “lusrmgr.msc” command and tap Enter to execute it.
Alternatively, you can also search for “lusrmgr.msc” in the Start Search and once you’ve opened it, select Users and then double click on your user name to open its Properties.
From there, switch from the “General” tab to the “Member Of” tab.
Next, if you can’t see any Remote Desktop Users group under the Administrator, you have to add it. To do that, just click on the Add button.
After that, on the newly opened window, click on the Advanced and Find Now buttons, respectively.
And in the Search results box, double click on Remote Desktop Users.
Now click on the OK button to save the changes made and check if you can now connect to a remote host or not.
Option 2 – Try to add a user to the Security group
You can actually block or allow a user from logging on through the Remote Desktop Services. However, if you do not have the right setting, you won’t be able to use this functionality. Thus, you need to confirm this setting. To do that, follow the steps below.
In the Start Search, type “secpol.msc” in the field and tap Enter to open the Local Security Policy panel.
From there, go to User Rights Assignment.
Next, look for a policy named “Allow log on through Remote Desktop Services” located on your right-hand side and then double click on it to open its Properties.
If you were not able to find the Remote Desktop Users under Administrator, then you have to add it by simply clicking on the Add User or Group button.
After that, enter “Remote Desktop Users” in the blank field and click the OK button to save the changes made.
Now restart your computer and try connecting again to the remote host.
Option 3 – Try checking the Remote Desktop Users group
There is a service that’s supposed to be running and needs to be set up correctly for you to connect to the remote host. And so you need to ensure that this service is up and running. To do so, follow these steps:
Tap the Win + R keys to launch the Run utility.
Then type “services.msc” in the field and hit Enter or click OK to open the Services Manager.
Next, look for the Remote Desktop Services and double click on it to open its Properties.
After that, go to the “Log On” tab and select the “This account” option and then click on the Browse button.
On the next screen that appears, look for the Advanced button and click on it and use the Find Now button to search.
You will see “NETWORK SERVICE”. Double click on it and then save the changes you’ve made to the settings.
Finally, restart your PC and see if the problem is now fixed.
Have you been feeling anxious in the digital space? Feeling like you have a million eyes on you each time you visit a website? It can definitely make you uneasy. Luckily there’s an easy fix, and it’s called a VPN.
In this article we’ll take you through the basics of what a VPN does and some of the biggest benefits you can reap from buying one.
VPN: definition and how it works
VPN stands for Virtual Private Network, so its name already says a lot about what it does.
A VPN is specialized software that keeps your browsing private and secure. Essentially it hides your identity, preventing possible cyberattacks and data theft. This is especially important in cases of public network use, where you’re highly exposed to potential threats.
To be more specific, this software encrypts your Internet Protocol (IP) address by filtering it through a server hosted by the VPN provider first. That way, it prevents your Internet service provider, third parties and lurking online thieves from tracking the actual you.
Credit: FLY:D on Unsplash
Some providers, such as Surfshark VPN with its IP Rotator feature, even make it a habit to frequently change your IP address to further protect your identity. With most VPN providers, you can also appear to be in a completely different country, adding to your disguise.
There are tons of advantages you can look forward to if you decide to use a VPN. Take a look at some of the crucial ones.
Benefits of using a VPN
When choosing a VPN, you can find both free and paid options. We recommend you go with the paid ones, since they have stronger security, encryption and data protection, as well as more advanced features. Free VPNs come with limitations and risk of malicious attacks on the software itself.
You can choose to buy a singular VPN service or opt for antivirus software that has a VPN built in, for example Bitdefender’s Ultimate Security plan. That depends on what you use your computer for and how much.
When you pick one, here’s what it can do for you.
1. Access region-specific content
When we said you could change your location, we meant it. Say you’re using a streaming service and a show you desperately want to watch isn’t available in your country. You can use your VPN to make it look like you’re browsing from a country where it’s unlocked.
This option is also convenient for gamers who want to access maps, skins and other in-game items unavailable in their location.
In addition, you can use this powerful feature when you’re traveling to a region where some of your favorite content may not be accessible.
Do keep in mind that you need to read the Terms and Conditions (yeah, we know - who does that?) of your games and services before doing this, since you could end up getting a penalty. It’s also important to remember that there are entire countries that have strict regulations or even bans on VPNs, for example Belarus, Russia and China. So make sure to be very cautious with your VPN use, friends.
2. Browse like no one’s watching
VPNs shield your browsing habits from prying eyes on the web. Those can be malicious hackers or just third-party cookies tracking your every move to later bombard you with targeted ads. For example, Surfshark VPN features a Cookie blocker that blocks all cookie-related pop-ups and lets you browse in peace (and secret). It works even when the VPN is turned off, which is also pretty neat.
In addition, their CleanWeb 2.0 technology makes sure ads and especially malware don’t stand a chance at all, since they’re blocked before they can even load.
The inability of sites to track your browsing means they can’t collect and analyze any of your data. So, your personal information - or your company’s information in case that’s what you’re using your computer for - is entirely hidden and secure.
3. Save money
It’s well-known that the prices of certain items and services vary based on your location, browsing time, age and many other factors. This most commonly goes for airline tickets and hotel stays.
You can use your VPN to avoid high prices and surcharges. Clear all cookies, turn on your VPN and visit an online shopping site to check out their prices. Then compare your findings with the offers you see when your VPN is off, when you spend a long time on the site or have an active account with the company.
Sometimes this can really help you find the best deals and avoid breaking the bank. But again, check the Terms and Conditions before you purchase something using a VPN.
4. Secure your smart home
The more smart devices you have connected to your network, the more exposed you are to potential cyberattacks. Phones and computers are generally designed to be decently secure even without a VPN or antivirus, but smart home devices leave a lot to be desired in that regard.
Protecting your home network with a VPN software means all devices connected to it are secure, be it an air purifier or Alexa.
Credit: Bence Boros on Unsplash
5. Prevent connection slowdown
Your ISP can intentionally slow down your internet speed based on how much data you’ve consumed (data throttling) or your activities online (bandwidth throttling).
But with a VPN, what kind of data you send and receive and how much is entirely hidden. Therefore, if your ISP can’t see you, they can’t control you and they can’t throttle down your speed.
The bottom line
You can never be too safe online. So definitely think about getting yourself a solid VPN to pump up your privacy and security as much as you can. And if you have any questions or need help choosing the perfect software for you, feel free to reach out to us.
NDIS or Network Driver Interface Specification is a programming interface for the network interface cards that aids in the proper functioning of a system driver in a computer network. The NDIS helps the computer system in order to communicate with other connected devices and hardware components on a computer network. In relation, the ndis.sys file is a critical system file developed by Microsoft for the Windows operating system. As you know, sys files or system files are important parts of the Windows operating system as well as a repository of system driver settings used by Windows to communicate with the connected hardware and devices.
The ndis.sys files are stored mostly in a driver folder at C:/Windows/System32/drivers and as mentioned, these files are essential for the system to function properly. Although the presence of ndis.sys system file is not yet known to affect the normal functioning of the Windows OS, some of the Windows 10 users reported that they encountered ndis.sys blue screen errors on their PCs. Blue Screen of Death errors or Stop errors usually occurs when you open a program or a function. Moreover, it could also occur when the driver gets loaded during the system startup or during system shutdown.
It isn’t yet clear what really causes the ndis.sys blue screen error. However, like other Stop errors, it may occur due to corrupted files, misconfigured device drivers, bad drivers, corrupted Windows Registry, missing or damaged system files, and malicious programs. Aside from the aforementioned reasons, the ndis.sys blue screen error might also occur if your hard disk is damaged and if the RAM is corrupted. In such cases, a lot of users usually disable the ndis.sys file. However, it won’t really resolve the issue since the file is required for the normal functioning of the operating system and even when you disable the file, it’s pretty useless as the file will start all over again. In addition, you might want to disable security programs or firewalls and antivirus programs in the meantime to check if these programs are the ones that are causing the error. And if you’ve determined that none of the security programs or firewalls and antivirus programs are to blame, refer to the options below that might help you resolve the DRIVER_IRQL_NOT_LESS_OR_EQUAL or ndis.sys Blue Screen of Death error.
Option 1 – Try to update or reinstall the PC device driver
The Ndis.sys Blue screen error can occur when the device driver in your computer is outdated or corrupted. Thus, you either have to update or reinstall it to fix the issue.
Tap the Win + R keys to launch Run.
Type in devmgmt.msc into the box and tap Enter or click OK to open the Device Manager.
After that, a list of device drivers will be displayed. If you see a red or yellow sign that shows up against the driver, right-click on the driver’s name and select “Update Driver Software” or “Uninstall”. And if you find any “Unknown device”, you need to update it as well.
Select the “Search automatically for updated driver software” option and then follow the instructions to complete the process.
Restart your PC.
Option 2 – Rollback your Network drivers
If you have updated the driver software as of late and you suddenly got this BSOD error, you might have to roll back the device driver – in other words, switch back to the previous working version. To do that, follow these steps:
Tap the Win + R keys to launch the Run window and then type in the “devmgmt.msc” command and hit Enter to open the Device Manager window.
Under the Device Manager, you will see a list of drivers. From there, look for the Network Adapters and expand it.
Next, select the driver entries that are labeled appropriately other than anything in the context of the WAN Miniport.
Then select each one of them and double-click to open a new mini window.
After that, make sure that you’re on the Driver tab and if you are not, just navigate to it then click the Roll Back Driver button to switch back to the previous version of your Network adapters.
Now restart your computer to successfully apply the changes made.
Option 3 – Try running the System File Checker
The SFC or System File Checker scan could detect and automatically repair damaged system files that could be causing the ndis.sys Blue Screen of Death error. SFC is a built-in command utility that helps in restoring corrupted files as well as missing files. It replaces bad and corrupted system files with good system files. To run the SFC command, follow the steps given below.
Tap Win + R to launch Run.
Type in cmd in the field and tap Enter.
After opening Command Prompt, type in sfc /scannow and hit Enter.
The command will start a system scan which will take a few whiles before it finishes. Once it’s done, you could get the following results:
Windows Resource Protection did not find any integrity violations.
Windows Resource Protection found corrupt files and successfully repaired them.
Windows Resource Protection found corrupt files but was unable to fix some of them.
Option 4 – Try running the CHKDSK utility
Running the CHKDSK utility might also help you resolve the Netwtw04.sys failed BSOD error. If your hard drive has issues with integrity, the update will really fail as the system will think that it’s not healthy and that’s where the CHKDSK utility comes in. The CHKDSK utility repairs hard drive errors that might be causing the problem.
Open Command Prompt with admin privileges.
After opening Command Prompt, execute the following command and hit Enter:
chkdsk /f /r
Wait for the process to be completed and then restart your computer.
Option 5 – Run the DISM Tool
The DISM tool is another command-line tool in the Windows operating system that could help users fix various corrupted system files. To use it, follow these steps:
Open the Command Prompt as admin.
Then type in this command: DISM /Online /Cleanup-Image /RestoreHealth
The DISM command you entered will repair the corrupted system image. Do not close the window if the process takes a while as it will probably take a few minutes to finish.
Restart your PC.
Option 6 – Perform a System Restore
Performing a System Restore on your computer can also help you fix the ndis.sys Blue Screen of Death error. You can do this option either by booting into Safe Mode or in System Restore. If you are already in the Advanced Startup Options, just directly select System Restore and proceed with the next steps. And if you have just booted your PC into Safe Mode, refer to the steps below.
Tap the Win + R keys to open the Run dialog box.
After that, type in “sysdm.cpl” in the field and tap Enter.
Next, go to the System Protection tab then click the System Restore button. This will open a new window where you have to select your preferred System Restore point.
After that, follow the on-screen instructions to finish the process and then restart your computer and check if the problem is fixed or not.

 The first new feature that was slid in is Always on top utility. With this cool utility, you can keep the window as the name suggests, always on top of other windows. To enable this cool feature all you have to do is press the key combination of ⊞ WINDOWS + CTRL + T and an active window will be now always on top of all other windows. To reverse and unlock this window from being always on top just press key combination again.
A second new feature is a really great one and my favorite thing to happen in power toys. Often we are making the search in our browsers to find stuff, things, maybe some explanations, information, etc. The newest update in power toys brings this to a whole new dimension. While you are on PC you just simply need to type ?? followed by questions like: ?? When doctor strange 2 is coming out and that will launch your default browser with your chosen search engine and provide you with the answer.
Third and final thing is G-code support in the file explorer preview pane and thumbnails, meaning that if you work with CNC equipment you can now have a thumbnail preview of the code itself inside File Explorer.
And that’s it for now, thank you for coming and reading, Take care and I hope to see you next time.
The first new feature that was slid in is Always on top utility. With this cool utility, you can keep the window as the name suggests, always on top of other windows. To enable this cool feature all you have to do is press the key combination of ⊞ WINDOWS + CTRL + T and an active window will be now always on top of all other windows. To reverse and unlock this window from being always on top just press key combination again.
A second new feature is a really great one and my favorite thing to happen in power toys. Often we are making the search in our browsers to find stuff, things, maybe some explanations, information, etc. The newest update in power toys brings this to a whole new dimension. While you are on PC you just simply need to type ?? followed by questions like: ?? When doctor strange 2 is coming out and that will launch your default browser with your chosen search engine and provide you with the answer.
Third and final thing is G-code support in the file explorer preview pane and thumbnails, meaning that if you work with CNC equipment you can now have a thumbnail preview of the code itself inside File Explorer.
And that’s it for now, thank you for coming and reading, Take care and I hope to see you next time. 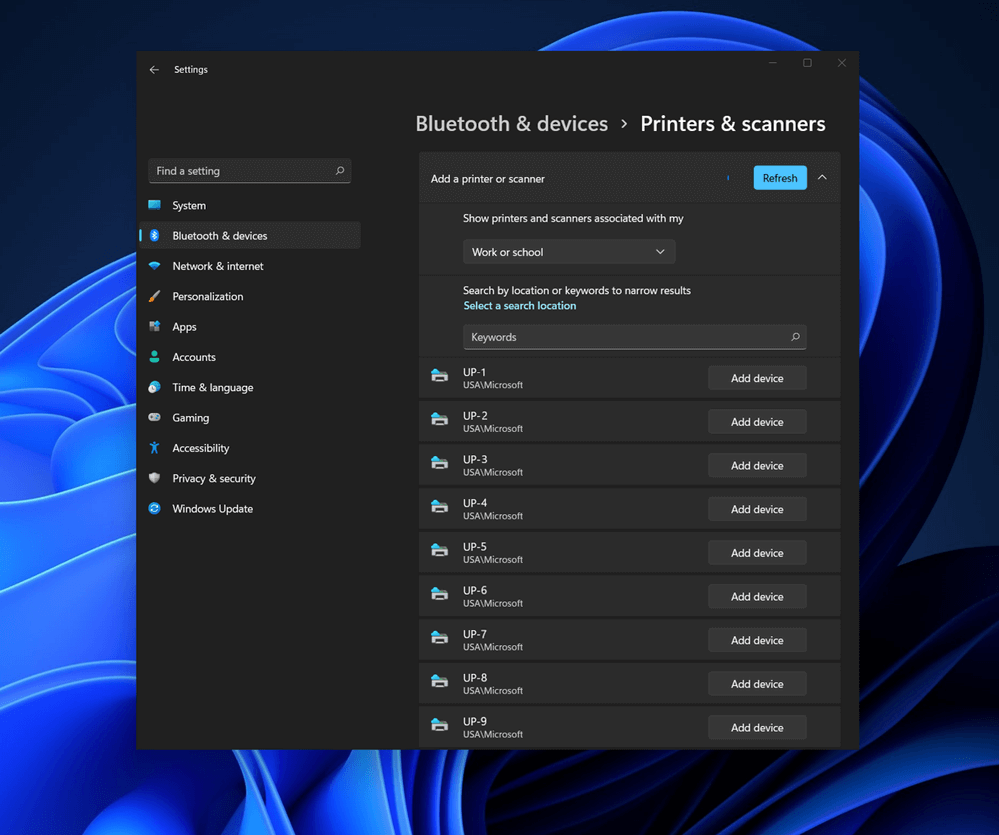 Bluetooth perhaps is slowly becoming an outdated feature but sometimes you can really used it and need it.
By default, in Windows 11 Bluetooth is turned OFF so if you need it, you will need to turn it ON first. Luckily turning it ON is easy and we will guide you through the process
Bluetooth perhaps is slowly becoming an outdated feature but sometimes you can really used it and need it.
By default, in Windows 11 Bluetooth is turned OFF so if you need it, you will need to turn it ON first. Luckily turning it ON is easy and we will guide you through the process


