If you encounter an error message that says, “<Drive>: is not accessible, The File or directory is corrupted and unreadable” when you try to connect your USB or external device, then the File System could have been corrupted or the external device might be infected with malware. On the other hand, it is also possible that the device might have some physical damage.
To fix the “The file or directory is corrupted and unreadable” error, you can try to run Check Disk or scan your computer for malware or you could also format the destination drive. For more details, refer to each one of the given options below.
Option 1 – Run the Check Disk utility
You can also run the Check Disk utility to fix the error when you connect your USB or external device.
In the Windows Search box, type “command prompt” and from the search results, right click on Command Prompt and select “Run as administrator”.
After opening Command Prompt, type this command and tap Enter: chkdsk <Partition Letter>: /f /r /x /b
The command you entered will start to check for errors and fix them automatically. Else, it will throw an error message saying, “Chkdsk cannot run because the volume is in use by another process. Would you like the schedule this volume to be checked the next time the system restarts? (Y/N)”.
Tap the Y key to schedule Disk Check the next time your computer restarts.
Option 2 – Try to format the destination drive
Formatting the drive can also help you resolve the error. To format it, follow these steps:
To get started formatting your drive, tap the Win + E keys and then go the access page of the drive.
Next, right click on the drive and select Format.
After that, uncheck the “Quick Format” option and then format your drive properly.
Now once the formatting process is finished, unplug the drive and plug it back in afterwards.
Check if the error is already fixed. If the drive is not initialized, tap the Win + R keys and hit Enter.
After opening the Run dialog box, type “diskmgmt.msc” and hit Enter to open Disk Management.
From there, right click on the drive volume and select initialize Disk.
Next, select the correct partition type and proceed.
Option 3 – Try scanning your computer for malware using Windows Defender
Your computer could be infected with malware which might have triggered the “The file or directory is corrupted and unreadable” error. To fix this, you need to scan your computer using a reliable program like Windows Defender.
Tap the Win + I keys to open Update & Security.
Then click on the Windows Security option and open Windows Defender Security Center.
Next, click on Virus & threat protection > Run a new advanced scan.
Now make sure that Full Scan is selected from the menu and then click the Scan Now button to get started.
As previously announced by Google feature to quickly delete the last 15min of browsing history via one button is rolling out now.
For now, only Apple users will be available to use this feature but the Android update is scheduled for later this year, a strange move by Google but it is what it is.
For anyone who is unfamiliar with this feature, basically, Google wants a quick way to remove the last 15min of browsing history as a supposedly stated request to make deleting browsing history much easier.
Google came up with this idea so you can keep the previous history intact but remove just 15min time frame, no additional explanation was given on why 15 but I presume it is some round number that came up as the middle one with research, read telemetry info.
Using quick delete requires being signed into Search with a Google account. Users can access the option by simply tapping on the avatar icon to access the settings then choosing "Delete last 15 minutes."
There is a central location in Windows 10 that allows users to view all the notifications from its Action Center. Aside from viewing notifications, users can also manage them and take necessary actions in just one single place. Notifications in Windows 10 look similar to a message icon but can be at variance in function. However, recently, a number of users reported that even though they receive notifications about new actions but when opening them, they see nothing. In other words, the notification is false, and to fix this, read on as this post will provide you a couple of workarounds.
The Windows 10 Notifications and Action Center notification messages might show a mismatch. For instance, Windows 10 may say that you have some notifications but when you open Action Center, you find it empty and there are actually no notifications there. Take the case of the following screenshot, the Windows 10 Notification says that there are 6 new notifications available for viewing but the Action Center says otherwise.
Before you troubleshoot the problem, you might want to run System Restore especially if you’ve made some changes in your computer prior to this issue which might have messed with the Windows 10 Notifications and Action Center. To perform System Restore, refer to these steps:
First, press the Win + R keys to open the Run dialog box.
After that, type in “sysdm.cpl” in the field and tap Enter.
Next, go to the System Protection tab then click the System Restore button. This will open a new window where you have to select your preferred System Restore point.
After that, follow the on-screen instructions to finish the process and then restart your computer and check if the problem is fixed or not.
If the problem wasn’t fixed and you’re still getting false notifications, you might want to troubleshoot the problem further using the options given below.
Option 1 – via Windows PowerShell
In the Start search, type “PowerShell” in the field and hit Enter to pull up the Windows PowerShell window.
Next, copy and paste this command and hit Enter to execute it: Get-AppxPackage | % { Add-AppxPackage -DisableDevelopmentMode -Register “$($_.InstallLocation)AppxManifest.xml” -verbose }
After that, reboot your computer and check if the false notifications are now gone.
Option 2 – Try renaming the Usrclass.dat file
DAT errors like the ones that are associated with the Usrclass.dat file, most likely occur during computer startup, program startup, or while you try to use a specific function in your program. Even so, it can easily be fixed. How? Refer to the given steps below.
Tap the Win + R keys to open the Run dialog box.
Then type %localappdata%MicrosoftWindows and hit Enter to get to the location of the UsrClass.dat file.
After that, look for a file named UsrClass.dat and once you’ve found it, right-click on it and select the Rename option.
Now rename the file to UsrClass.old.dat and then restart your computer and see if the problem is now fixed or not.
When it comes to computer peripherals first thing that comes to people's minds is probably Mouse and Keyboard. Also when discussing peripherals brands, Razer is not a stranger and over the years it has built its name and cult following.
Razer’s mechanical keyboards have been always in the upper field of quality and trust from users and Huntsman is no different.
Tech specifics of Huntsman keyboard
Mechanical optical switches
Razer has introduced their new optical technology switch with this keyboard. These switches are faster and more accurate than typical mechanical switches and if tests are to be believed this is the fastest keyboard currently on the market.
Multi-functional digital dial
A multi-function digital dial with three tactile media keys gives you instant access to everything from brightness to volume in seconds. All programmable and customizable through Synapse 3, so you can set your preferred configurations right at your fingertips.
10-key rollover
Anti-ghosting technology that enables 10-key simultaneous presses at the same time
4-side underglow with Razer chroma
Go crazy and personalize lighting effects any way you want with a full 4-side underglow and 38 customization zones. Powered by Razer Chroma
Feel and noise
In the department of noise, well it is the mechanical keyboard so naturally, it will be louder than membrane ones but in terms of comparing it to other mechanical keyboards it is within the same noise range, maybe just a tiny bit silenced.
The keyboard comes with 2 different types of switches, purple clicky ones that are louder and have that *click* sound for sound feedback, and red ones, that are not equipped with clicky sound but are linear providing slightly faster performance.
If you choose the Huntsman elite model of the keyboard it will come with a nice hand resting mat that is very comfortable and feels right. Using a keyboard feels like using a Razer keyboard, it is responsive and gives that superior mechanical feeling.
Conclusion
Razer Huntsman mechanical keyboard is not the cheapest nor the best on the market but it is the fastest one out. It is in the top tier of keyboards and worth the investment.
As you know, aside from making computing a lot easier, mouse and touchpad, it also makes computing more efficient and less time-consuming. And so life is unimaginable without these useful devices. However, it is a known fact that you can’t customize these devices since all touchpads and mice come with their own default scrolling direction but worry not for in this post you will be guided on how you can reverse their default scrolling directions.
Every user has their own different preferences when it comes to scrolling directions. You might want the scrolling directions to look like the page is being scrolled in the same direction in where you move your fingers over the touchpad or you might prefer it in an inverted way. Reversing the scroll direction for your device’s touchpad is really easy as Windows by default offers this customization. So if you are trying to find a way to reverse the scrolling direction of your mouse, then you have to follow a tricky little method which will be provided in this post.
It is apparent from the number of settings the touchpad is available that it has become more customizable. You can configure everything, from its gestures, taps, sensitivity, and even its scrolling direction. And now, if you want to reverse its scrolling direction, here’s what you have to do:
Step 1: Tap the Win + I keys to open Settings.
Step 2: From there, go to Devices and select Touchpad from the menu.
Step 3: Next, look for the Scrolling Direction setting.
Step 4: Then click on the drop-down and select your preferred setting. If you want the same direction scrolling, just select the “Downwards motion scrolls down” option, and if you want the opposite select the other one.
After you carry out these steps, the settings will be applied right away and you will see the changes. On the other hand, if you want to change the scrolling direction for your mouse, the procedure is not as simple as it was for the touchpad.
To reverse the scrolling direction for a mouse, refer to these steps:
Step 1: In the Start Search, type “device manager” and click on the appropriate result to open the Device Manager.
Step 2: After opening the Device Manager, look for your Mouse under the “Mice and other pointing devices” section. It is mostly listed as an “HID-compliant mouse”.
Step 3: Right-click on your mouse and click Properties.
Step 4: From there, go to the Details tab and from the drop-down menu, select Device Instance Path.
Step 5: Now take note of the value displayed on its value field and then tap the Win + R keys to open the Run dialog box.
Step 6: Type in “Regedit” in the field and hit Enter to open the Registry Editor.
Step 7: Next, navigate to the following location:
HKEY_LOCAL_MACHINESYSTEMCurrentControlSetEnumHID
Step 8: From this folder, you have to start matching the values in the first part of the value you’ve taken note of.
Step 9: Open the folder which has the same value and repeat this for the second part of the value.
Step 10: Afterwards, click on the Device Parameters and look for a property named “FlipFlopWheel” and invert its value from 0 to 1 or 1 to 0 to reverse the scrolling direction. And then restart your PC to apply the changes made.
After you restart your PC, you should see the changes in the scrolling direction of your mouse. Note that you can change the value back to its original value or just use the registry backup to undo the changes you’ve made.
Website breaches and stealing user data is nothing new in the world of the internet. Although a very unpleasant experience it still happens even on some high-quality websites. In this article, we will not focus on how can you not be the target of this kind of attack, because you really cannot. Weel you can kind of if you decide not to have your data on websites at all, but let's just say that is not something you are willing to do.
So, in this case, you have some social, forum, or gaming accounts but you heard that service has been breached and that your email or password might be stolen. Well in this case all you need to do is of course to login into the service and change your password. But, what happens if you are not aware at all that service has been compromised?
Mozilla foundation has asked themselves this same question it seems and they have decided to help us out. They have placed a free online service where you can just by typing in your email address find out if your email or data has been compromised in any way.
Go to https://monitor.firefox.com/ and check it out, if you find out that there is some website that you did not know was breached, change your password right away, and if you have used the same password for anything else (I hope not), change them as well.
Error Code 0x80070422 can be found on many versions of the Windows operating system including Windows 7, Windows 8, and 8.1, and Windows 10. The reason for its occurrence may vary, however, depending on the version of the operating system that you use.
In the case of error code 0x80070422 in Windows 8, it often occurs when users attempt to update their firewall or download apps from the Windows store. When this error occurs the user is unable to complete the updates and will need to apply different solutions to correct the issue.
Solution
Error Causes
Whenever error code 0x80070422 is encountered on Windows 8 or 8.1, it might be a result of various factors. These error codes include:
Registry errors – This occurs when new programs are installed over old ones
Malicious software such as adware, spyware, and or viruses
Further Information and Manual Repair
You do not need to be a Windows expert to attempt to solve errors like the 0x80070422 Windows 8 error code. Simply try the solutions below. If however, you feel you need a professional’s help, contact a certified Windows technician.
Check for any viruses or malicious software
Viruses and other malicious software are often the cause of various issues within the PC. For this reason, be sure to check your machine for a possible virus infestation. If you are unable to use your anti-virus software or if none is present you might need to download an automated tool that offers overall repair and other solutions.
Disable third-party security apps
Another step you can take is to disable third-party security apps. When these apps are downloaded onto your device, it can lead to the disabling of your Firewall and the inability of your device to download other apps. If this is the source of the 0x80070422 error code on your machine, the issue will be resolved after you disable the third-party apps and reboot your computer.
Disable Firewall
If error code 0x80070422 in Windows 8 or 8.1 occurred while you attempted to update Windows firewall, one of the best solutions you can try is to disable the firewall. Note however that disabling your firewall should be temporary as it protects your computer from worms as well as hackers that might infect or compromise your PC. Access the firewall by swiping right on the screen then searching for “firewall”. Click “Windows firewall” then select “Turn off Windows firewall”.
Performs a clean boot
Another option is for you to perform a clean boot. This simply refers to a reboot in Windows where only a minimum set of drivers and programs are used. A clean boot can help resolve issues related to software conflict which can occur when Windows users install programs or updates or simply run a program. Note that you must log on to the computer as an administrator. Otherwise, you will not be able to perform the clean boot.
Clean registry
The source of many errors related to Windows can lie within the registry. This is because the registry is involved in every aspect of a Windows computer’s operation. If there is an issue in the files of the registry or if it has been hacked, your computer will not function. For this reason, begin by cleaning the registry regularly. To clean our registry, use a powerful tool that is both reputable and user-friendly. Research your option before you make a selection as choosing the wrong tool could lead to even more errors or computer malfunctions.
Set Windows Update to Automatic
Another important method to solve issues related to error code 0x80070422 in Windows 8 or 8.1 is your Windows Update service. Though you may have never noticed this feature before now, the Windows Update services allow PC owners to access updates to their operating system automatically. This leads to a properly functioning PC as your machine will always have the latest features and tools available. However, if the setting is not correct, your computer may end up experiencing error code 0x80070422. Check if this is the source of your problems by verifying if your Windows Update settings are automatic. Once the settings are on automatic, reboot your machine to ensure your computer responds to the changes.
Download an Automate Tool
Always be prepared for the possibility of other errors. You can do this by downloading powerful software. This enables users to regularly check for issues that may cause errors on their Windows device.
If you have been stuck on allocating disk space on steam you know how annoying this error could be. Here you are, with your new game eager to play it and relax a little and all of the sudden steam gets stuck on allocating disc space.
Luckily this error is fixable, follow provided guide to fix the error and continue with installing the game.
Restart computer
An old age solution of turning it off and turning it back on but in this case, it works 90% of the time.
Run Steam as administrator
Allocating disk space when done by a third-party application can be a task that requires privileges higher than the normal user. Find the steam executable file in the installation folder, right-click on it and run it as an administrator
Clear Steam cache
Launch Steam in admin mode.
Once in the client, click on Steam at the top left corner of the screen.
From the drop-down box, click on Settings.
Once in the Settings, navigate to the Downloads tab.
Click the Clear Download Cache option.
Click OK on the prompt to confirm your action. Wait for the process to complete.
When done, save changes and exit the client.
Change download server
Launch Steam client in admin mode.
Once in the client, click on Steam at the top left corner of the screen.
From the drop-down box, click on Settings.
Once in the Settings, navigate to the Downloads tab.
Click the drop-down menu under the Download Region.
Choose a different server to download from.
Exit the Steam client.
Refresh installation files
Kill a Steam process in Task Manager.
Navigate to your Steam folder
Inside the Steam folder, select everything except the steamapps folder and the Steam.exe executable file.
Tap the Delete key on your keyboard.
Turn off firewall
Firewall can prevent steam and cut access to system operations, disable firewall to fix this issue.
Stop overclocking
If you have overclocked your PC, you can simply reverse the change. The steps you will need to take depends on the overclocking software. Launch the software and look for the option to stop the overclocking. Once done, restart your computer, rerun the game installation.
Disk partitioning is a concept that’s been around for so long, but is still only familiar to few. If done right, it can help get your computer in perfect order.
Today we bring you a simple definition of disk partitioning, its pros and cons, and a quick tip on how to do it properly to reap its full benefit!
Definition and purpose
The simplest way to define disk partitioning would be: it’s exactly what it sounds like. It means taking a hard disk drive and separating it into different segments. These segments are called partitions. You can visualize it as cutting a cake into smaller pieces - not necessarily of the same size, though.
So what is the purpose of these pieces?
Well, when you first get a hard drive, it’s basically just a bunch of unallocated storage space. Until there’s at least one partition, this space is unusable to your operating system. Once you create a partition, your OS will recognize it as usable storage space.
You can choose to create a single partition and use it for all your files, from program files to personal data. A lot of off-the-shelf computers come with one primary partition like this and a small secondary one reserved for recovery purposes.
Whether or not you want to split your disk into more than one segment is up to you. We would generally recommend it, though. The whole point of partitioning is for each segment to have its own purpose.
So treating all your storage space as a single unit containing different file types would be like constructing an office building with only one massive room for everything - day-to-day work, conferences, interviews, etc. And all of this for different departments of the company. You can see how this might get a little messy.
Creating multiple partitions eliminates the task of running several different types of files from the same place. This takes a heavy load off the entire process of accessing data.
Disk partitioning also brings a ton of other benefits to the table. An important disclaimer, though: there are disadvantages too. We will walk you through both sides to help you get an objective idea and make an informed decision.
Source: Kina on Unsplash
What are the benefits of disk partitioning?
1. Better file organization
This is the most obvious and perhaps the biggest advantage of partitioning your hard drive.
As we already mentioned, partitioning allows you to create separate segments for different file and data types. You wouldn’t want to use the same partition for your system files and for games, would you?
If organization and time management are important to you, then multiple partitions are the right solution. Searching for specific files will be much easier overall. Say you have one hard drive, but three partitions: C for the system files alone, D for multimedia files and documents, and E for games and apps. Your computer loads the system from C without interference from the other two, and you know exactly where to look when searching for a file.
2. Easy reinstallation
File management isn’t the only thing made faster and simpler thanks to partitioning. If you opt for creating multiple segments on your drive, reinstalling Windows will be easy peasy.
That’s because all you need to do is format the partition your system is on. Then you reinstall the OS on it, and there you go. Now you have a clean installation, with all your files saved on other partitions intact. You can even make a copy of your system partition, so you can revisit the exact same installation in the future if you want. And the whole time your pictures, music, documents stay exactly where you left them.
Source: Andrew M on Unsplash
3. Possibility of using multiple file systems
By now you’ve understood that partitions function completely separately. This means that, if for some reason you need multiple file system capabilities, partitioning will allow that.
One segment could be used for, say, an NTFS file system, while another could run ext or APFS.
4. Running different OSes
You’re an avid Windows user but need to use Linux on the side? No problem. You don’t need to buy a separate computer or anything. The possibility of running different file systems also means you can use partitioning to run multiple operating systems.
Doesn’t that sound enticing? One machine for multiple totally different uses!
5. Backup and recovery made simple
Data loss can happen on any disk, partitioned or not. However, it’s much easier to get it back on a partitioned one. You know where you stored what, and each partition can be backed up exactly as it is. It’s also a lot faster to back up single partitions than entire hard drives.
Ultimately this also means a faster path to recovery. If you lose or accidentally delete important files and data, you might want to use a recovery tool like Recuva to scan for them and get them back. Recuva is even powerful enough to recover data from damaged hard drives. But no matter how powerful, scanning a whole drive is strenuous for any recovery tool. Scanning independent partitions is a lot more convenient than that, and will get you to your goal more efficiently.
6. Optimized performance
Now, let’s keep in mind that computer performance is influenced by a number of factors. Partitioning alone isn’t what makes it better or worse. However, it can contribute to optimization. It’s easier for your computer to scan, say, a 40 GB partition to fetch the system file it needs than scanning the entire capacity of your drive.
7. Improved security (possibly*)
Separate partitions can help make your system more secure. Firstly, they minimize file corruption. If one partition gets corrupted, the others should remain unaffected. And keeping in mind the previous point about backup and recovery, ‘fixing’ the damaged partition would be much easier than fixing the entire hard drive.
Partitioning also improves security in terms of malware protection. A malicious attack on one partition is easier to deal with than malware on the whole drive. If your system partition gets infected, you can simply reinstall your OS and that should do the trick.
*Do keep in mind that partitioning can’t defend you against more advanced attacks. So make sure not to give in to a false sense of security.
What are the disadvantages of partitioning?
1. Data is still vulnerable
Yes, it’s easier to back up and recover data from independent partitions. And yes, partitioning may help protect separated files and data to a higher degree. But remember: everything is still on a single physical drive. So while digital errors and issues may be easier to deal with on partitioned drives, physical damage obviously won’t be.
If your hard drive is destroyed in some way, all data on it will be gone. That’s why, if you have crucial files on your PC, it’s important to give them the proper backup treatment before it’s too late.
2. Disbalance of space
Allocating storage space on separate partitions may be a little more tricky than you think. You may fill up one partition a lot faster than another. So on one side you’re struggling with space, and on another you have too much of it to spare. Imagine nearly filling up your system partition and then it turns out you need a lot more space for its updates than you thought.
That’s why you really have to be sure you actually have enough files of different types that you need help managing efficiently. Otherwise you’ll just create a struggle and disbalance in terms of storage.
3. Increased risk of error
If done incorrectly, partitioning can lead to more harm than good. Aside from space disbalance, there is an increased risk of incorrect partition sizes and formatting. Plus, human error is also a factor: in a moment of distraction, you may erase one partition when you meant another. Undoing such mistakes will definitely be tedious and time-consuming.
4. SSDs eliminate the need of partitioning
SSDs (solid-state drives) don’t function in the same way that HDDs do. They have faster read times and can organize files on their own. This quite literally eliminates the need for organization on your part.
Partitioning: yes or no?
The bottom line is that multiple partitions might not be necessary for the average user. But if you’re planning on storing many file types or different file and operating systems on the same PC, then you should give it a shot. It’s also an excellent solution for businesses, of course.
And if our pros and cons list isn’t enough to help you decide, you can always send us a message and we’ll help you make the right choice.
Decided to partition your hard drive?
If you’ve decided to give it a go, you definitely should make sure to do it right.
The two most effective and reliable ways to partition are using the built-in options on Windows or investing in a dedicated partitioning tool, like the EaseUS Partition Master. Which one you'll opt for depends on your specific needs.
Option 1 may be more suitable for users with at least some level of experience. In this case, you’d have to know exactly which steps to take without making errors. This is done in Disk Management on Windows 10/11. From there, you can select the partitions you’d like to split into different volumes of selected sizes.
If this is your first time partitioning, we highly suggest you either consult professionals for this or move on to option 2. The EaseUS partitioning software is specifically designed for beginners, with an intuitive interface helping you succeed in the process. All you need to do is pick the Partition Master package tailored to your needs and follow their guide.
Each package offers technical support as well, and even free upgrades (to varying degrees based on your subscription). Plus, all of this is valid for not one, but two PCs.
It’s the perfect solution for a smooth and error-free partitioning process. If you want to organize your hard drives efficiently and make the most of all your space without doing irreparable damage, it’s definitely worth the investment.
When upgrading to Microsoft Windows 10, some users may encounter Error Code 8024402C. This error, while attempting to update, is a result of five possible issues. The error code itself is not a critical concern, yet while the error is occurring, users will not be able to upgrade their Windows software. As with any Microsoft error code, even if it is not critical, it is recommended that the error be addressed sooner rather than later. An insignificant error now could lead to a larger, more catastrophic error later on.
Common symptoms include:
A dialog box appears with the Error Code 8024402C when attempting to upgrade to Microsoft Windows 10.
Your current version of Windows is unable to recognize the need for an update to Microsoft Windows 10.
Solution
Error Causes
As previously stated, there are five major reasons why error code 8024402C occurs.
An erroneous character in the proxy override settings
A wrongly configured firewall is preventing the update from taking place.
Attempting to access the Windows 10 update through a VPN (Virtual Private Network) connection.
Workstations that operate behind a corporate ISA server.
A corporate network system that does not have auto proxy enabled.
The sooner these known causes are addressed, the sooner you will be able to successfully upgrade to Microsoft Windows 10.
Further Information and Manual Repair
Microsoft Support posits four different resolutions to these known error code 8024402C issues. Some of these methods will be more comfortable for at-home users than others. If you are experiencing this issue in a corporate or business setting, it may be better to have your IT tech or department attempt the methods.
Method 1: When your firewall is causing the issue.
Access your firewall software.
Specifically, look into the settings associated with your firewall.
Make sure that the following three websites are listed as exceptions to your firewall or proxy.
https://*.windowsupdate.microsoft.com
http://download.windowsupdate.com
http://*.windowsupdate.microsoft.com
If any of these websites are missing from your firewall list, add them to the list.
Restart your Microsoft Windows 10 update.
Method 2: For an erroneous character in the proxy override settings.
Open internet explorer, if you use another program to access the internet, you will still need to use internet explorer for this solution.
Open your internet explorer tools window.
Click on internet options.
Choose the connections tab.
Select LAN settings.
Choose the Advanced option.
Delete anything that appears in the exceptions section.
Closeout of internet explorer.
Click on your start button.
Select RUN and type CMD into the field, press ENTER.
This will access the command prompt screen. Type “proxycfg -d” and press ENTER.
Type the command “net stop wuauserv” and press ENTER.
Finally, type “net start wuauserv” and press ENTER.
Now you have cleared your proxy cache. Access the Microsoft Windows 10 update again to download.
Method 3: If a VPN connection is causing error code 8024402C.
Disconnect from your VPN connection, thus connecting directly to the internet without a proxy or network.
Retry the Microsoft Windows 10 update.
After the update is successful, reconnect to the VPN network.
Method 4: Use this is an ISA server is in place at your networked business site.
Access the ISA firewall client option. From here your goal is to initiate the ISA server automatic detection feature.
From the control panel, select the firewall client option.
Choose the configure option.
Check the box next to “automatically detect firewall server”.
Select the “update now” button.
Click the OK button.
Restart your Microsoft Windows 10 update.
Again, not all of these methods are meant for computer users who do not usually explore and change software settings of this nature. If you do not feel comfortable with any of these methods, you can opt to download and install a powerful automated tool to repair Windows error code 8024402C.
When you update or upgrade your computer to Windows 10, the setup will look for the compatibility of both the hardware and software. And in this process, if suddenly got an error message saying, “Some apps need to be uninstalled” or “You need to uninstall a program in order to continue”, you have to look for the program(s) that might be causing the compatibility issues. But worry not as this post will help you resolve the issue. Simply follow the given suggestions below.
Option 1 – Look for the incompatible programs
There are times when Windows 10 will point out the programs that are incompatible with Windows 10. In this situation, just click on the Uninstall and continue button and then wait for the process to be completed.
For more information, you can check out the official site Ready for Windows by Microsoft. This site can help you determine which software versions are compatible with Windows 10 and which ones are not. All you have to do is select the Windows 10 version and type your App name, after that, you will see the results about its compatibility. Thus, it’s now easier for you to figure out which software is causing an issue and if there is a new updated version available that you can install instead.
Option 2 – Try to install the Windows Update in a Clean Boot State
Putting your PC in a Clean Boot state can also help you install Windows Updates or Upgrades without any trouble because, during this state, you can start the system with a minimum number of drivers and startup programs that will surely help you in isolating the root cause of the issue.
Log onto your PC as an administrator.
Type in MSConfig in the Start Search to open the System Configuration utility.
From there, go to the General tab and click “Selective startup”.
Clear the “Load Startup items” checkbox and make sure that the “Load System Services” and “Use Original boot configuration” options are checked.
Next, click the Services tab and select the “Hide All Microsoft Services” check box.
Click Disable all.
Click on Apply/OK and restart your PC. (This will put your PC into a Clean Boot State. And configure Windows to use the usual startup, just simply undo the changes.)
After that, try to install the Windows Updates or upgrade again.
Option 3 – Try creating a new user account
Creating a new user account can resolve the “Some apps need to be uninstalled” error when upgrading or updating your Windows 10 PC. All you have to do is create a new admin account and initiate the setup. And this is a new user account, there will be no third-party applications installed on your computer. Thus, the installation should go through without any trouble. And in case you’ve already installed programs for that user, you just have to uninstall them all and then re-run the setup.
Option 4 – Perform a clean install
If none of the options worked, you can try to clean install Windows 10. Just make sure that you have the ISO from the official Microsoft Website and then a bootable USB drive to install Windows 10 again. Take note that this will delete all the data from your drive where Windows 10 was installed previously.

 As previously announced by Google feature to quickly delete the last 15min of browsing history via one button is rolling out now.
For now, only Apple users will be available to use this feature but the Android update is scheduled for later this year, a strange move by Google but it is what it is.
For anyone who is unfamiliar with this feature, basically, Google wants a quick way to remove the last 15min of browsing history as a supposedly stated request to make deleting browsing history much easier.
Google came up with this idea so you can keep the previous history intact but remove just 15min time frame, no additional explanation was given on why 15 but I presume it is some round number that came up as the middle one with research, read telemetry info.
Using quick delete requires being signed into Search with a Google account. Users can access the option by simply tapping on the avatar icon to access the settings then choosing "Delete last 15 minutes."
As previously announced by Google feature to quickly delete the last 15min of browsing history via one button is rolling out now.
For now, only Apple users will be available to use this feature but the Android update is scheduled for later this year, a strange move by Google but it is what it is.
For anyone who is unfamiliar with this feature, basically, Google wants a quick way to remove the last 15min of browsing history as a supposedly stated request to make deleting browsing history much easier.
Google came up with this idea so you can keep the previous history intact but remove just 15min time frame, no additional explanation was given on why 15 but I presume it is some round number that came up as the middle one with research, read telemetry info.
Using quick delete requires being signed into Search with a Google account. Users can access the option by simply tapping on the avatar icon to access the settings then choosing "Delete last 15 minutes." 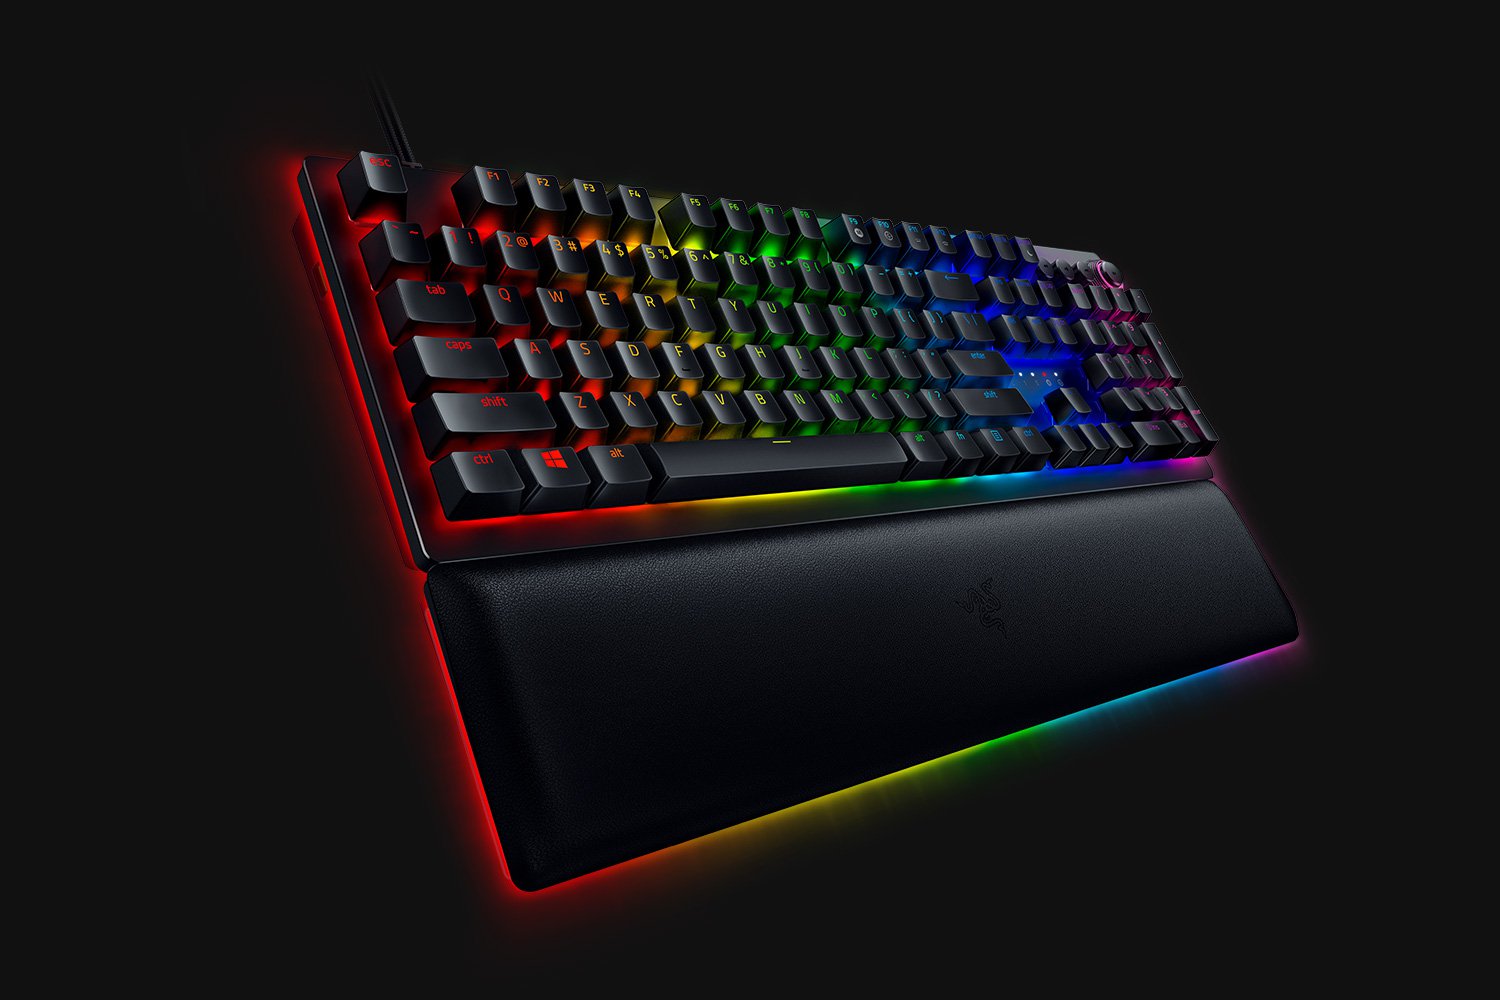 When it comes to computer peripherals first thing that comes to people's minds is probably Mouse and Keyboard. Also when discussing peripherals brands, Razer is not a stranger and over the years it has built its name and cult following.
Razer’s mechanical keyboards have been always in the upper field of quality and trust from users and Huntsman is no different.
When it comes to computer peripherals first thing that comes to people's minds is probably Mouse and Keyboard. Also when discussing peripherals brands, Razer is not a stranger and over the years it has built its name and cult following.
Razer’s mechanical keyboards have been always in the upper field of quality and trust from users and Huntsman is no different.
 So, in this case, you have some social, forum, or gaming accounts but you heard that service has been breached and that your email or password might be stolen. Well in this case all you need to do is of course to login into the service and change your password. But, what happens if you are not aware at all that service has been compromised?

