Many Windows 10 users often change the IP addresses of their computers’ network adapter in order to connect to the internet or network they belong to in times when there is no automatic connection for their computers. In most cases, access to modifying this setting is restricted for some odd reason even if you are an administrator. So if you are one of the users whose Windows 10 VPN IPv4 Properties are not working, this post can help you remedy that so that you can open and edit the IPv4 Properties on your Windows 10 PC.
The common way to change IP settings is by going to Settings > Network and then to Internet > Change adapter options > Select Network adapter > right click and open Properties. From there, you can select TCP/IP 4 and modify it. If you aren’t able to do this, refer to the instructions laid out below to troubleshoot the problem in accessing the IPv4 Properties.
Option 1 – Try using PowerShell to manually set the IPv4 properties
As you are not able to set it using the interface, you can do so using PowerShell instead. Note that this option will only work for you if you run PowerShell with administrator privileges.
After opening PowerShell, according to many users, you have to run the this command – set-DnsClientServerAddress -InterfaceAlias “Ethernet” -ServerAddresses xxx.xx.xxx.xxx,x.x.x.x,xxx.xx.xxx.xxx,x.x.x.x
Usually, Ethernet is the name of your network adapter which is set by default. If you want to see the actual name of your network adapter, you can just type this command and tap Enter after doing so – Get-NetAdapter -physical | where status -eq 'up'
After entering the given command, you will see a list of active Ethernet adapter in your computer as you can see on the image above. Note that the 4 sets of X like the one on the image below should match with the sequence:
Option 2 – Try editing the rasphone.pbk files
The rasphone.pbk files stores property for the connections and since you are not able to access the IPv4 properties, it is most likely that it has been disabled here. The good thing is that you can open these files and edit them using Notepad. Refer to the steps below to do so.
Open the Windows Explorer and then enable the show hidden files option.
After that, look for the files at this location – C:Users <username>AppDataRoamingMicrosoftNetworkConnectionsPbk_hiddenPbkrasphone.pbk
Then right-click on it and select the “Open with” option and choose the Notepad app.
After opening the file, look for “IpPrioritizeRemote” from the long list.
Once you found it, set its value from “1” to “0”.
After that, look for “IPInterfaceMetric” and set its value to “1” and tap Ctrl + S to save the changes you’ve made, and then exit and try accessing the IPv4 properties again. It should work, but if you’re still unable to access it, try the next option below.
Option 3 – Enable the Split Tunneling if you use VPN
All data goes back and forth when you are using a VPN service on your computer. And since you are using VPN, it could be that it disables the IPv4 interface. If that’s the case, you need to stay connected with both the local network and VPN and to do so, you have to enable Split Tunneling. How? Follow these steps:
Open PowerShell with administrator privileges.
Next, type in “Get-VpnConnection” and tap Enter. After doing so, it will give you the exact name of your VPN.
After that, type in “Set-VpnConnection -Name “yourVPNName” -SplitTunneling $True” and tap Enter. Once you enter the command, it will free your IPv5 settings so that you can change it to connect with your local network if you prefer it to.
Running the Windows Setup does not always go smoothly as you could encounter some errors along the way. One of these errors is the “Something happened, Setup has failed to determine supported install choices” error. The only given option in such cases is to click the Close button and exit the setup.
This kind of error in Windows setup can occur when you try to downgrade to the previous version of Windows using the built-in mechanism. This error could be caused by a corrupted image or it is also possible that the set of files are incomplete. Aside from that, it could also be due to compatibility issues or that the module used to downgrade the Windows operating system is not configured properly. To fix this error, you have to run the Windows Setup program in compatibility mode so that you can downgrade Windows. You could also use the image for the lower version of Windows that’s available on the official site of Microsoft. But before you do any of these, make sure that you’re logged in as an administrator.
To fix the “Something happened, Setup has failed to determine supported install choices” error, follow the given options below sequentially.
Option 1 – Try to run the Installer of the downgraded version in Compatibility Mode
This is the first thing you can try to resolve the issue instead of going right ahead on making a bootable device. So if you are downgrading Windows, you can try to run the installer in the compatibility mode for that specific Windows version.
Look for the setup file.
Once you find it, right-click on it and select Properties from the context menu.
After that, go to the Compatibility tab and mark the checkbox for “Run this program in compatibility mode for:” and from the drop-down list, select either Windows 7 or Windows 8.
You also have to check the “Run as administrator” option.
Now click the Apply button and then click OK to save the changes made and check if it has resolved the issue or not.
Option 2 – Try to troubleshoot compatibility
This option is almost the same as the first one except it is an alternative way of fixing the “Setup has failed to determine supported install choices” error in case the first one didn’t work. In this option, you will troubleshoot the compatibility issue.
Look for the setup file.
Then right-click on it and select the “Troubleshoot compatibility” from the context menu.
After that, click on the “Try recommended setting” option. Once the process is done, the error message should be gone.
Option 3 – Run the DISM tool
You can run the DISM tool as well to help fix the error code 0x80244022 during Windows Update. Using this built-in tool, you have various options such as the “/ScanHealth”, “/CheckHealth”, and “/RestoreHealth”.
Open the Command Prompt with admin privileges.
Then type in the following commands and make sure to hit Enter right after you type each one of them:
Dism /Online /Cleanup-Image /CheckHealth
Dism /Online /Cleanup-Image /ScanHealth
exe /Online /Cleanup-image /Restorehealth
Do not close the window if the process takes a while as it will probably take a few minutes to finish.
Option 4 – Try using the image from the official site of Microsoft
If none of the options given above worked, you can try to use the image from Microsoft’s official site. This would help, especially if the error is caused by a corrupted image or image folder with incomplete files.
Ms-Outlook is the widely used and most favored program to get and to send e-mails within workplaces.
In addition, it eases customers' business execution through additional features like producing schedule records to retaining track of important dates and sessions, preserving details on addresses, producing several files for handling significant e-mails and accessories, and additionally preserving drafts of emails individuals intend to send in future.
Ms-Outlook helps individuals handle functions and organize with each other effectively and economically.
Nevertheless, everything may suddenly halt when the problem code information screen is experienced by the Outlook user, you.
This is time-consuming and annoying as it prevents you from getting into your account and could lock you away from your view e-mail account.
Error code 0x80040116 is a familiar Outlook error that jumps up with no caution on the display.
Besides restricting your capacity to utilize your Outlook account, it presents a critical risk to the private data you've stored inside. Additionally, there is the chance of losing parts and information preserved in your e-mail account.
Error Causes
Finding and determining error code 0x80040116 cause isn't fairly easy. The truth is that there are several distinct causes that could activate this error
A few of the major causes of this error include:-
Broken PST list document. Ms-outlook uses this file to handle the users' requests. You can encounter this problem signal when it gets ruined.
2 gigabytes limit is exceeded by the PST record. You have been incorporating data to Outlook accounts for years frequently without any erasures. When the 2GB limit is reached this error may surface.
PST file gets damaged. This generally occurs thanks to virus contamination to the System or sudden system shutdown.
Problems with account settings.
Further Information and Manual Repair
The error 0x80040116 is displayed in just one of these types:
"Outlook.pst cannot be accessed - 0x80040116(where "Outlook.pst" is PST file name)"
"Sending and receiving reported error (0x80040116): Unknown error 0x80040116"
"Outlook.pst cannot be accessed – 0x80040116"
When you have this error, it is advisable to correct it promptly to ensure it doesn't interfere with your productivity and work.
You do not require to contact an IT expert, to solve this issue. It's graded as an error signal that's easy to repair. So you do not want need deep IT knowledge to fix it.
There are two methods to remove this problem signal. Erase some memory if the error is created by excessive data.
This technique functions in the event the error's cause is PST size. However, that is not likely the best method to repair it if dropping the data that is outdated is no alternative.
Maybe the one that is greatest and the 2nd alternative is to install and to obtain Stellar Phoenix Outlook PST Repair.
Why is this the solution that is most effective to repair and solve the problem code 0x80040116 out there is that the software can fix the malfunction no matter the trigger?
What this means is you do not have to understand the nitty-gritty of determining a problem signal and then locate a unique option to fix its cause.
Wait there is a lot more! Stellar Phoenix Outlook PST fix tool is compatible with all versions of Windows.
Therefore, whether you've got 2007, the 2000 version, or 2010 Outlook editions, you do not have to be concerned about the compatibility like with several other repair resources out there.
Also, it solves the issue in a short while as well as re-establishes each of the e-mails, contact records, and diary info. That means that if you had lost the info as a result of error code 0x80040116, it is possible to heave a sigh of relief as everything is going to be regained right back.
What you need to do is click here, Download, and run Stellar Phoenix Outlook PST on your computer to recover your ms-outlook accounts now and fix error code 0x80040116.
Error 12031 indicates that the connection with the server has been reset or is not properly connected.
In other words, it signifies that the File Transfer Protocol which is the standard network protocol that is used to transfer files from one host to another over the internet is either reset or not working properly.
For example, if you are using a wireless adapter, then you may experience this error code when the adapter loses its association with the access point.
The error code is often displayed in the following format:
"ERROR_INTERNET_CONNECTION_RESET"
"Cannot Connect to the FTP Server"
Solution
Error Causes
Though the error 12031 is largely caused by poor internet connection and failure to obtain files from the FTP server, however, sometimes the error may be caused by invalid registry entries and outdated drivers. Furthermore, it may also be a Firewall issue.
Further Information and Manual Repair
To resolve this issue on your system, we have listed down the best and easy DIY solutions. These solutions are simple to perform and do not require any kind of technical expertise or knowledge. Just follow the steps and you will be able to resolve it in a couple of minutes.
Solution 1: Disable Firewall
If you are unable to connect to the server and you encounter the error code 12031 on your system, then to resolve this issue, disable the Firewall on your PC.
Solution 2: Reset IE (Internet Explorer) Settings
This error is typically experienced by IE7 users. If you can’t access some websites in Internet Explorer and you come across a 12031 error code, then try resetting your IE settings.
To do this, open Internet Explorer, click on tools, and then click on Internet Options. Now go to the advanced tab and select Use Passive FTP. After checking the box, exit and then try accessing those sites that were not accessible before.
If after modifying IE settings you are able to access the sites without any error message display, then this means the error is resolved. Nonetheless, if the error still persists, then the error could be generated due to invalid registry entries.
Solution3: Download and Run Restoro
To remove invalid registry entries from your system and resolve the 12031 error immediately, it is advisable to download and run Restoro. This is a new, cutting-edge, and multi-functional PC repair tool integrated with multiple utilities like a powerful registry cleaner, an antivirus, and a system optimizer.
The registry cleaning utility scans your PC for all registry errors. It wipes out unnecessary files, bad and invalid registry entries, repairs damaged files, and restores the registry thereby resolving the 12031 error on your PC.
This error tool has a user-friendly interface and simple navigations. It is easy to use and compatible with all Windows versions.
In addition to this, you can also use it to scan for malicious software and remove malware. It also functions as a system optimizer and boosts your computer’s speed dramatically.
Click here to download Restoro on your PC and resolve error 12031 right away!
Error 118 is a typical Google Chrome error. It pops up when Google Chrome fails to load websites like Facebook. It is usually displayed in the following format:
‘Error Message: Error 118 (net::ERR_CONNECTION_TIMED_OUT): The operation timed out.’
Solution
Error Causes
Error 118 may be triggered due to several reasons. This includes:
Problems with DNS setting
IP Address is filtering websites
Cookies and invalid registry entries
Further Information and Manual Repair
To ensure smooth internet browsing on Google Chrome, it is advisable to repair the error 118. If error 118 is not resolved you will be unable to load and access your desired websites.
To avoid inconvenience and resolve the issue immediately, try the methods suggested below. These are easy and effective do-it-yourself methods that require no technical skills.
Method 1 - Change Proxy Settings
If your IP address is filtering websites, then you might experience error 118 while using Google Chrome. When this is the error cause, then it is advisable to add a proxy for your PC.
To change proxy settings and add a new proxy, simply click on Customize and Control Google Chrome menu. Now click the options button. Under the Google Chrome Options window select the Under the Hood tab.
After that in the Network, section click the change proxy settings button.
Check Show Suggestions for navigation errors and Use DNS pre-fetching to improve page load performance boxes. Now under Internet Properties, click LAN Settings.
Under LAN settings you will see the Proxy Server box, check it, and enter your new proxy settings. Click OK to confirm and save settings. This will hopefully resolve the issue.
Method 2 - Change to Google DNS
When the error is related to DNS settings then try this method to resolve it. Simply set DNS to use Google DNS. Here’s how it’s done:
Go to the start menu, click Windows Control Panel, Network and Internet, and change adapter settings. Here you will see Local Area Connection.
Right click to select properties at the bottom.
Check Internet Protocol Version 4 and click properties.
Now check the ‘Obtain an IP address automatically’ box and also select the option that says ‘Use the following DNS server addresses’.
Change Preferred DNS to 8.8.4.4 and Alternate DNS server to 8.8.8.8 now click OK to confirm.
Method 3 - Remove the Bad Entries and Cookies Damaging the Registry
Bad entries and cookies saved in the registry can also trigger error 118.
To fix the issue immediately download Restoro. This is PC Fixer with multiple utilities including a registry cleaner. The registry cleaner removes all bad entries and cookies in seconds and repairs the damaged registry.
Click here to download Restoro and resolve error 118.
As we near the end of 2022 we look at the current best antivirus software for popular platforms, why they are the best, and why you should get them.
Avira, a great free Antivirus
Avira has been around a long time with its free antivirus version of the larger protection suite. It had its ups and downs but the latest versions are really great. With high-speed scans and low system impact, Avira antivirus is really one of the best free antivirus software currently on the market.
The software itself has also received UI & UX updates making it straightforward and easy to use. The virus scanning engine is the same as in paid version that ranks among the top engines in the world for this type of work. The package also gives you some great browser protection and a good firewall as well, there is really no excuse to skip on this if you want a free solution.
The only thing that we would say is not so great in Avira is reporting some false positives, sometimes even for MS updates, it is rare but it can happen.
Malwarebytes, a powerful Windows antivirus
Malwarebytes Premium is easy to use, simple antivirus solution that shies away from complicated UI, and simply put, it just works. Its scanning engine is well-known and places among the top and best in the world often finding some malware that other can miss.
Another great thing is its integration with Windows itself, it is one of the rare applications that can and will work incredibly well beside your typical Windows protection tools so you can have both of them running at the same time.
Installation and running are really simple and every typical PC user will find it as easy as walking in the park. On the other hand, sadly system impact is a little high and it will have issues running on lower-end systems due to its memory requirements.
Intego MAC Internet Security X9, the best Mac antivirus
Gone are the days when MAC had no virus issues, since MAC rose in popularity among the users, also rose the number of viruses and malware. The system itself has some great protection built it inside but for more security and better control of it, you will need a third-party dedicated solution.
Intego was made by Mac antivirus experts who have been building this kind of software last 25 years. The interface is easy to use and premade presets are really helpful, but the security suite can also be customized to fit your needs and desires.
Since this is only available as a security suite, you are getting a firewall and some other security tools along with your antivirus that will run as a part of it.
The bad side is that scans can sometimes run slow, most of the time they are OK in terms of speed but occasionally they can switch to slower speeds and impact scanning time to some annoying times. Also, there is no webcam protection nor VPN service included where others on this list have them.
Bitdefender mobile security: best Android protection
While protection is not only needed for your gaming or workstation, software suites that are dealing with mobile and tablet security exist. The best of them is the Bitdefender antivirus mobile suite. Low on system resources and low on performance impact with the really great virus detection rate Bitdefender is at the top of suites for your phone.
Consistent high virus detection packed with low battery impact is great but the suite comes with tons of other tools as well like browser security tools, email protection, and real-time link and notification protection.
The application will always scan each file and newly installed application in the background and alert and cut off any found threat. App itself is easy to install and use and most of the time it will do everything in the background for you but offer you customization if you need it.
The package also includes VPN and application lock that will let you protect the critical applications from being accessed as well as an online account scanner. Anti-theft and anti-loss tools, which allow you to find, remotely lock or wipe a stolen or lost device, add yet another layer of protection.
One thing that is missing from this great package is fraudulent call protection. Newer Android phones have this feature inside but it would be nice if Bitdefender had it as well.
Bitdefender, the best antivirus software
Now that we have covered specific cases of each platform, there is one player that has all of them covered and with a quality product, that player is BitDefender and it is great. Personally, this is my protection suite of choice and as I type this it is running in the background.
Bitdefender has it all, low system impact, as a matter of fact, it is one, if not, the lowest performance impact engine on the market currently and that is packed with a great and highly consistent virus & malware detection suite. Along with real-time malware protection, browser security, and anti-spam tools, you also get anti-phishing defenses, ransomware protection, and a strong firewall.
Bitdefender scores are very high in both the zero-day threat and real-world protection tests at AV-Test, an established organization that tests antivirus software. Despite being tested against tens of thousands of well-known and widespread malware threats, the software consistently achieves a 100% blocking rate.
The suite also comes with a restricted free VPN and with parental controls as well. Webcam and microphone protection are also included in the suite and on top of all, it has great pricing plans and constant discounts.
BitDefender is really a great package and it might sound too good, but after years and years of personally using it I have not had single malware or virus issue, the only thing that I would put as a negative is that system is severely slowed down when system scans are performed so be sure to run or schedule them when you are not using your computer. This, of course, can put some people off and I will admit it is a serious drawback but for me, the security of my workstation is more important than leaving the computer for 20 or so minutes in order to perform a full scan of the system.
A lot of Windows users, use a second GPU for their computer systems, especially gamers above the dedicated graphics card. The operating system is set such that the dedicated high-end graphics card is set to default but there are times when the system does not recognize or detect the second graphics card.
Even though every computer system comes with an integrated graphics card, for the most part, it is insufficient for graphics-intensive games and software which is why if you have an extra dedicated graphics card and your computer does not seem to detect or recognize it, then this post is for you. It could be that the dedicated graphics card has failed or it could also be an issue with the drivers and so on. Follow the suggested options below to resolve the problem.
Option 1 – Update your Graphics drivers
First, boot your computer into Safe Mode.
After that, tap the Win + R keys to launch Run.
Type in msc into the box and tap Enter or click OK to open the Device Manager.
After that, a list of device drivers will be displayed. From there, look for the Display Adapters and click on them.
After that, right-click on each entry under the Display Adapters and select the “Uninstall Device” option from the menu.
Now restart your computer.
After restarting your computer, go to the Settings app and Check for Updates in the Windows Update section.
Note: You also have the option to go directly to the website of your graphics card manufacturers like NVIDIA, Intel, or AMD and go to the section called Drivers then check if there’s a new available update – if there is, download and install it.
Option 2 – Update the BIOS
Take note that you have to be careful when modifying something in the BIOS. So if you don’t know much about it, it’s best if you skip on this option and try the other ones instead. However, if you are well-versed in navigating the BIOS, then follow the steps below.
Tap the Win + R keys to open the Run dialog box.
Next, type “msinfo32” in the field and press Enter to open System Information.
From there, you should find a search field on the bottom where you have to search for the BIOS version and then press Enter.
After that, you should see the developer and version of the BIOS installed on your PC.
Go to your manufacturer’s website and then download the latest version of BIOS on your computer.
If you are using a laptop, make sure that you keep it plugged in until you have updated the BIOS.
Now double click on the downloaded file and install the new BIOS version on your computer.
Now restart your computer to apply the changes made.
Option 3 – Try changing the GPU settings
Right-click on any empty space on your Desktop and select Graphics Properties. Note that the Graphics Properties screen depends on the graphics drivers installed on your computer and are system-specific as they may be different for other systems but they aren’t hard to find.
After that, make sure that the dedicated Graphics card is selected as Default under the Select Display drop-down.
If the Graphics card isn’t set as Default, set it and click Apply and Exit.
Option 4 – Try disabling the driver for the integrated Graphics card
Tap the Win + R keys to open the Run dialog box.
Next, type “devmgmt.msc” in the field and hit Enter to open the Device Manager.
From there, expand the list of Display Adapters and then right-click and select Disable device for the Integrated Graphics card. However, if the dedicated Graphics card fails, the display won’t work so you need to restart the system and enable it.
When visiting the Windows Update Website or the Microsoft Update Website to download the latest update for hardware drives, you could possibly receive Error Code 0x80070103 when clicking on the update driver. This error code occurs when Windows tries to download a piece of identical hardware for a second time. It could also occur when Windows tries to update a currently installed driver to an unsuitable version of that driver.
Solution
Further Information and Manual Repair
There aren’t many ways to handle this issue. Below are two methods of fixing Error Code 0x80070103.
After the "scan for updates" is complete, click the Welcome or Custom page.
Next, click Hardware, in the navigation panel, and then on the tab for "optional hardware Updates", the Update client will display the available updates.
For the graphics card, scan the second update after which you'll click to select the option that says "do not show this update again".
Hit the "Review and install updates" button.
Confirm that the second update for the graphics card is not present, then move on the installing the updates.
Click on the start button, go to All Programs, and then click on Windows Update.
Hit the "Check for updates" tab.
After the "scan for updates" is over, click the"Optional updates" link.
In the "Select the updates you want to install" section, right-click the update that is not needed and hide them.
Hit the OK button.
To install any additional updates that are selected, click "Install Updates". Close Windows Update if no other updates are selected,
For touch screens, swipe in from the right edge of the screen, tap Search (or point to the upper-right corner of the screen if you're using a mouse, moving the pointer down, before clicking Search). Enter "Windows Updates" in the search box, click Settings, and then click "Check for updates".
After the scan is complete, click the"Optional updates are available" link.
Right-click or Tap and hold the update you want to hide, select"Hide update", and then select OK.
If any other updates are available, save all work in "other programs", then restart the computer to the install updates; otherwise, opt out of the Windows Update window.
Open the search window and type “Windows Update” in the search box.
Method 2:
When trying to repair error code 0x80070103, if you find method one hard to follow, can contact Microsoft directly. Call up the help center number listed on their website, and a technician will be able to walk you through the process of ensuring the updater is not attempting to download multiple copies of hardware or trying to install unusable updates on your computer. Because the Windows Updater is set to a generic method of searching for updates, it may not be set to optimize the personal computer's settings. This is why you must select all of the optional update options and why this process is so long. It may be made easier by having a computer repairs technician walk you through it.
However, if you want to automate the process of getting that problem solved, you can use a powerful tool to get the job done.
The Error Code 0x802400d most often occurs when users attempt to use the Windows Update tool on their computers to move from one version of the software to another. In some cases, this error is more likely to appear on your computer during the process if you have not performed regular updates to the software as they have been available.
Common symptoms include:
Inability to finish the download of the necessary update to Windows 10
Incomplete installation of the desired Windows 10 update
While it can take additional time to deal with the issues that cause Error Code 0x802400d to appear on your computer, there are several steps that you can take to address the problem. These are fairly simple to perform and do not require advanced knowledge of the system to employ.
Solution
Error Causes
The most basic cause for Error Code 0x802400d is that there is a file or a process that is causing the update process to hiccup. In many cases, this error appears when a user attempts to begin the process of updating their computer if they have several stacked updates to perform. Computers that are several updates behind where they should be will display this error more often than computers that are kept on a schedule of recommended updates.
Further Information and Manual Repair
While there are multiple reasons why the Error Code 0x802400d may appear on your computer during the Windows Update process, there are several methods that can be used to attempt to resolve the problem on your own. These are generally easy to do and do not require advanced techniques. However, if you do not feel comfortable addressing the issue on your own, contact a qualified Windows repair technician.
Here are some of the best methods that users can employ to resolve Error Code 0x802400d:
Method 1: Run the System Update Readiness Tool
There are a number of different processes, files, and settings that could cause Error Code 0x802400d to appear on your computer during the Windows 10 Update process. For this reason, the most efficient way to determine what the culprit is for your specific issue is to download and use the System Update Readiness function.
This tool is available directly from Windows. Although there are other tools available on the Internet that claim to be able to fix the problem, these can contain viruses and malware, so be cautious if you decide to employ these instead. There are also several versions of the tool on the Windows website, so be sure to download the version that matches the operating system and version of your computer.
Once you have downloaded the Readiness tool from the Windows website, allow it to run a scan on your system. At a minimum, this process will take about fifteen minutes to complete. Although you will see a progress bar at the bottom of the window, it does not always update effectively. Some users have reported that the update appears to stop when it is two-thirds complete. Continue to let the scan run if this happens, rather than canceling it out. Even if the progress bar doesn’t update, the scan is still running.
Method 2: Remove New Software and Re-Attempt the Update Process
If you have recently installed new software on your machine, it can sometimes cause problems with the update process. The best way to resolve this issue is to remove or uninstall the software, run the update process again, and then reinstall the software once the Windows system has been successfully updated.
If the above methods are not successful in resolving Error Code 0x802400d from your machine and you are still unable to complete the Windows 10 Update process or if you are not confident in your ability to complete these steps successfully on your own, get in touch with a qualified computer repair technician who is familiar with the issues surrounding Windows 10 in particular. Microsoft offers certifications for Windows repair technicians, so look for a professional who has the experience, skills, and knowledge necessary to adequately address Error Code 0x802400d on your machine.
If you wish to always have at your disposal a utility tool to fix these Windows 10 and other related issues when they do arise, download and install a powerful automated tool.
High Dynamic Range or HDR is a technique that’s used to create lifelike videos which have improved and better dynamic range, especially when it comes to details. And as you know, Windows 10 supports the steaming of HDR videos as long as the display supports it and it comes with the option to enable the HDR Playback for Windows 10 Video Streaming apps. However, before you can get the best viewing experience, you need to calibrate the display further for HDR video on your Windows 10 PC.
Take note that even when you have the HDR Playback feature enabled on your computer, you still need a display that supports it. To make sure that your display supports this feature, you can use the DirectX Diagnostic Tool to have the display correctly wired and have the latest WDDM 2.4 drivers installed as well as set the other settings properly.
Once you’ve made sure that your computer’s display really supports HDR and you’ve already enabled the HDR Playback feature, now it’s time for you to calibrate. Remember that when you calibrate the display, you should make an external monitor your primary display if you are using it for HDR and then adjust the settings to your liking. And if you are calibrating for primary display, you need to disconnect all other displays.
Follow the given steps below to calibrate the display of your PC.
Step 1: You need to open the Video Playback first. To do so, navigate to Settings > Apps > Video Playback.
Step 2: Under the Video Playback settings, uncheck the “Don’t increase display brightness when watching HDR video on battery” checkbox or plug in your PC.
Step 3: Next, click the “Change calibration settings for HDR video on my built-in display” link located on the right side.
Step 4: After that, click on the Play button located on the left side to play the video. Then move the sliders to the left or right so you can start to calibrate. Once you see that the quality of the image is to your preference, stop.
Note: Just a tip when calibrating – you just have to find the right balance between the details in the darker parts of a scene. For instance, you have Mountains in the background and buildings in the front – you need to drag the slider to the right to add more details to the snow on the mountain or drag the slider to the left to add more details to the buildings. After that, you can pause the video and exit the full-screen mode. Keep in mind that the quality of HDR depends on you as it is a personal choice. Some users might like a brighter shade while other ones want the darker shade so it really depends on your taste. If you are not satisfied with how your HDR turned out, you can just try calibrating the display again. Simply go back to the default HDR video calibration and click or tap the Reset calibration button.
Another thing to remember. First, you can only see HDR content on the full screen and if you’re using a laptop, you need to make sure to watch videos when plugged in and check that the battery settings won't’ lower the brightness.
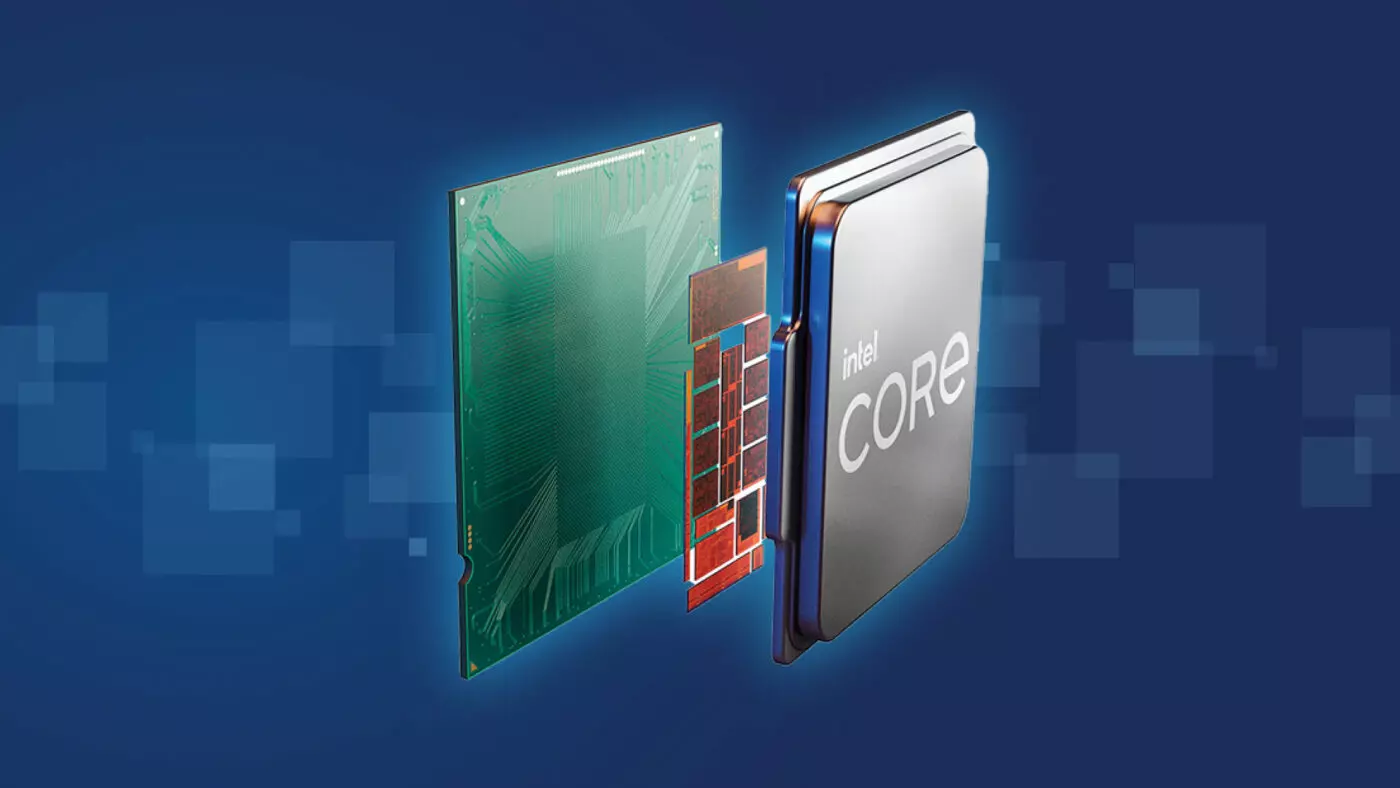
Raptor Lake, a new and upcoming Intel 13th generation CPU will break the 6GHz barrier for the first time ever in normal working mode, overclocked mode in Intel words will go as high as 8GHz. CPU will be 15% faster than Alder lake in single-threaded tasks and a stunning 41% faster in multi-threaded workloads.
The current world record for overclocking is 8.72GHz done with AMD FX-8370 and Intel is aiming at breaking that record with Raptor Lake, of course, this kind of extreme overclocking will require some top-of-the-line nitrogen cooling systems.
Raptor Lake will run on the current LGA 1700 socket, so you will not need to buy another motherboard for CPU and they will also be manufactured on a 10nm process which means that you will need to take care of cooling and power supply if they really go over 6GHz.
Mid-range Intel Core i5-13600K processor will come with 14 cores inside and 20 threads running at a maximum P-core frequency of 5.1GHz, while Core i7-13700K will have 16 cores and 24 threads and run on 5.3GHz max P-core frequency. Best i9-13900K will come packed with 24 cores, 8 of them will be P-cores, and the rest 16 are E-cores, and 32 threads. It will reach 5.4GHz frequency but it was stated it can go to 5.8GHz with Thermal Velocity Boost.
After this statement, we can clearly see that the 6GHz breaker CPU will probably be an i9 special KS variant. In other words, specially tested and picked existing i9 running at higher speeds as was with Alder Lake as well where normal i9-12900K ran at 5.2GHz while i9-12900KS was running at 5.5GHz.