Code 39 is a device driver error code that pops up when the Windows operating system cannot load the driver for the hardware you want to use.
This hampers your ability to use the hardware properly. The error code is almost always presented in the following format:
“Windows cannot load the device driver for this hardware. The driver may be corrupted or missing.” Code 39
Error Causes
A device driver is a software program that tells the operating system how to control a particular hardware device. Each hardware device has a different driver.
There are separate device drivers for printers, CD-ROM readers, and keyboards, to name a few.
Many device drivers are already built into the operating system. But sometimes you will need to install a new device driver when you want to use a new piece of hardware device that the operating system is not familiar with, or does not anticipate.
Regardless of whether or not the drivers are already integrated into the operating system, you may still experience code 39, typically because of the corrupted or outdated drivers.
Outdated and corrupted drivers cause hardware malfunction and failure, which trigger device driver error codes like code 39. Other causes include incorrect registry values.
Further Information and Manual Repair
Below are some of the easiest and most effective methods to resolve Device Manager error code 39 on your PC.
To follow and implement these methods, you don’t require any technical knowledge or expertise. Simply follow these instructions to fix the error right away.
Method 1 - Fix with a Simple Reboot
There is a possibility that the error code 39 is caused by some fluke within the Device Manager or your BIOS.
If that’s the reason, then a simple PC reboot can resolve the issue immediately. Therefore, before you try anything, it is advisable to restart your system.
If it works, then that is great, but if it doesn’t, then don’t worry, try other methods given below to fix this problem successfully.
Method 2 - Uninstall and Reinstall Drivers
If the error code 39 is generated due to faulty or outdated drivers, then simply uninstall and remove them and then reinstall new driver versions. There are two ways to remove faulty drivers.
Method One
One is, to go to the start menu, click on Control Panel, and then Add/Remove Programs.
Remove the program and the driver you think is causing problems. This will thoroughly remove all traces of the faulty driver.
To reinstall, follow the same steps but this time install the new device driver version.
Method Two
The other way is to go to the start menu, type Device Manager in the search bar, and then press enter to continue.
In the Device Manager, find and locate the problematic device.
After that, double-click the category of device that you wish to uninstall. Let’s say, Windows is unable to load the graphics card driver.
This means you will have to click on the Display Adapter category in the Device Manager to uninstall the graphics card.
After you have successfully uninstalled, Windows will prompt you to confirm device removal.
Simply click OK to confirm and proceed. To activate the changes, restart your PC.
To reinstall, go to the Device Manager, click on the Action tab and then select the option ‘Scan for Hardware Changes.’
This method, although effective in resolving error code 39, can be time-consuming. To avoid the hassle and save time, try method 3.
Method 3 - Update Drivers Automatically with DRIVERFIX
If you would like to read more helpful articles and tips about various software and hardware visit errortools.com daily.
0x Referenced Memory at 0x is an error code that occurs when the random memory addresses conflict.
This error causes running programs or browsers to crash. Referenced memory at error code is considered as a service violation error. It is displayed as the following:
“The instruction at 0xf77041d24 referenced memory at 0×00000000. The memory could not be read.”
Solution
Error Causes
The ‘referenced memory at’ errors is either triggered by:
Hardware failure
Problems with the RAM and the registry
Hardware failure may result if the driver is not installed properly. The problems in the RAM indicate registry issues that occur due to data overload in the hard disk and poor PC maintenance.
The registry saves all the information and activities you perform on your system on the hard disk.
This includes the junk files, temporary files, invalid registry entries, and files of both installed and uninstalled programs. These files accumulate and take over a lot of RAM space.
Also, the referenced memory at error can be considered to be a form of memory leak where unknown third-party software can take up the memory space that has been reserved for a particular program.
For example, if you have toolbars and add-ons installed in your browser, it can also lead to invalid registry storage in the registry.
If you don’t clean the registry, these unnecessary files can overload your data and lead to hard disk/RAM damage and corruption triggering obscure error messages like referenced memory at error.
Further Information and Manual Repair
Referenced memory is a critical error; if not resolved it can lead to serious PC damages like a system failure. To avoid this, it is advisable to fix it right away.
Here are a couple of ways to repair this issue on your system:
Cause: Hardware Failure
Solution: If the referenced memory at error is generated due to hardware failure then to resolve this error you must reinstall the driver that has caused the error to appear.
Let’s say if the error pops up because of the printer driver, reinstall it. For re-installation of the driver, simply go to the control panel and click on the Device Manager option.
Once you click it you will see a detailed page with a list of devices.
Now click on the printer (the problematic driver in this situation) to reinstall the driver software. Double click on it to open the properties dialog box and then click the driver tab and update the driver. Once you have updated the driver, try using the printer. Check if it works.
If it works and the referenced memory at the error code does not appear on the screen, this means the problem was with the hardware. However, if the error still pops up then this means the problem is deeper. It’s related to the registry.
Cause: Problems with the RAM and the registry
Solution: If the problem is with the RAM and the registry, then it is advisable to download Restoro.
Restoro is a new, next-generation, and highly functional registry cleaner.
It detects and removes all the registry issues, unnecessary and obsolete files saved in the hard disk taking up a lot of RAM space. It clears the RAM and cleans up the disk.
Furthermore, it repairs the damaged files, fragmented disk, and the corrupt registry in seconds enabling you to resume the program that you were running before the error occurred.
Restoro has a user-friendly interface and easy navigation.
To run and operate this system you don’t need any kind of technical expertise. In just a few clicks you can resolve the critical referenced memory at error on your PC.
It is compatible with all Windows versions
Click here to download and install Restoro on your PC and fix the referenced memory error code now.
If when hovering over the upgrade icon on the taskbar you get:
Your version of Windows 10 would reach the end of service soon, Click to download a newer version of Windows 10 to stay supported.orAn unsupported version of Windows will no longer receive software updates from Windows Update. These updates include security updates that can help protect your PC from harmful viruses, spyware, and other malicious software which can steal your personal information. Windows Update also installs the latest software updates to improve the reliability of Windows—such as new drivers for your hardware.
and you are unable to perform updates then this guide is for you. There are several things you can do to fix this issue presented here, it is advisable to follow them in a way how they are presented for best performance and system safety.
Run setupdiag
Download and run Setupdiag from the official MICROSOFT website. SetupDiag is a standalone diagnostic tool that can be used to obtain details about why a Windows 10 upgrade was unsuccessful. It works by examining Windows Setup log files to determine the root cause of a failure to update or upgrade the computer. Once the scan is completed, check the generated log files. The SetupDiagResults.log will be generated and saved in the same folder where you downloaded Setupdiag. Open SetupDiagResults.log using Notepad. You may need to take a look at these folders:
\Windows\Panther
\$Windows.~bt\sources\panther
\$Windows.~bt\Sources\Rollback
\Windows\Panther\NewOS
If there are any issues or conditions that are blocking the upgrade, they will be listed here.
Edit TargetReleaseVersionInfo Registry key
Press ⊞ WINDOWS + R to open the run dialog
In run dialog type Regedit and press ENTER
Locate: HKLM\SOFTWARE\Policies\Microsoft\Windows\WindowsUpdate
Locate two DWORD files, if they do not exist, create them as:
TargetReleaseVersionTargetReleaseVersionInfo
Set the value of TargetReleaseVersion to 1
If you are stuck on Windows 10 1909 and want to upgrade to Windows 10 20H2 now, you need to set the value for TargetReleaseVersionInfo to 20H2Reboot the computer
Use Windows 10 update assistant
Visit Microsoft.com and hit the ‘Update now’ button visible on the page
Download tool and run it
Click on Update now to start the upgrade process
One of the most interesting innovations that were released by Microsoft is the Surface Dial. This only goes to show that Microsoft is very competent not just in hardware but in overall innovation. Although it’s quite a piece of technology and as far as the consensus is concerned, it works pretty well, there are still some issues encountered by users. One of the particular issues experienced by users is that the Surface Dial fails to pair with every Windows 10 PC.
At a time of writing, it is still not clear what the cause of the problem really is. However, their possible solutions are provided in this post that might help you resolve the problem. Before you get started troubleshooting the problem, make sure that there are two AAA batteries fitted inside properly.
Option 1 – Check if your PC supports Bluetooth 4.0 LE
In case you don’t know, the Surface Dial only works with the Windows 10 Anniversary Update and later PCs that support Bluetooth 4.0 LE. Thus, you have to check if this is supported or not before you troubleshoot further.
Tap the Win + R keys on your keyboard to open the Run dialog box.
Next, type “devmgmt.msc” in the field and hit Enter to open the Device Manager.
From there, click on Bluetooth and select “Microsoft Bluetooth LE Enumerator” from the drop-down menu. However, if it is not there, then it simply means that your computer does not support this standard which is most likely why you were unable to pair with other Windows 10 PCs. On the other hand, if you were able to see it, then proceed to the next troubleshooting steps below.
Option 2 – Check if Bluetooth is on
The next thing you have to do is to check if Bluetooth is turned on. As you know, the Surface Dial connects to your computer using Bluetooth and so you need to check if it’s really on or not. Aside from that, you also have to verify pairing.
Tap the Win + I keys to open Windows Settings.
Next, select Devices from the menu and click on Bluetooth.
After that, make sure that the toggle switch for Bluetooth is turned on.
Now all you have to do is to verify pairing by pressing and holding the pairing button located beside the batteries and then wait for a few seconds until the Bluetooth light begins to flash.
Then go back to the Bluetooth section and click on Bluetooth or other devices.
From there, click on Add Bluetooth and select Surface Dial.
Follow the next instructions on the screen and click on Done once everything is completed. That should fix the problem.
Option 3 – Check if Surface Dial is connected to another PC
If you think that connecting a Bluetooth device to two different PCs at the same time is wise, then think again as it does not really bode well for the overall user experience. Thus, you need to disconnect the Surface Dial from the system that you are currently using.
On the other hand, if everything fails, then it’s most likely that the Bluetooth adapter is the one at fault. So you may have to get a third-party device that connects to your system via USB and then see if it works or not.
This is a typical system error that occurs during Windows setup. To be precise, this error may pop on your computer screen during the text mode portion of Windows setup.
The setup hangs and stops responding and the error message is displayed in either one of the following formats:
‘The file I386Ntkrnlmp.exe could not be loaded. The error code is 7.’or ‘The file I386L_intl.nlf could not be loaded. The error code is 7.’
Solution
Error Causes
Error 7 may be triggered due to several reasons but the 2 most common causes for this error code are:
Incorrect settings of the BIOS
Faulty RAM modules
Registry corruption
Further Information and Manual Repair
To resolve this error on your system, here are some easy and effective DIY methods that you can try.
Method 1 - Change Back the BIOS to its Default Settings
If the underlying cause of error code 7 is related to incorrect BIOS settings, then it is recommended to restore default settings to resolve.
You can reset your computer’s BIOS (basic input and output system) settings to factory defaults by selecting the restore defaults option within BIOS or by removing CMOS ( Complementary Metal Oxide Semi-Conductor) battery from your unplugged computer for about five minutes.
The battery removal method requires opening the computer case, so only attempt it if you are unable to access BIOS.
To reset BIOS follow these steps, reboot your PC and then press the key assigned to loading BIOS during your computer boot splash screen.
The key assigned to load and access BIOS varies from manufacturer to manufacturer but usually, it's F1, F2, or F12. Once you enter the BIOS, select the ‘Restore Defaults’ option listed in the menu. I
t may be a keyboard shortcut or be under the Advanced settings menu. Confirm settings and then exit BIOS. Hopefully, this will resolve Error 7.
Method 2 - Remove the Faulty RAM
When error code 7 is triggered by faulty RAM modules, then to resolve it simply remove the memory modules that are installed in the computer.
If the error code is displayed again after you remove the memory module, remove a different memory module. This procedure requires you to reboot your PC several times to identify the specific memory module that is not working properly.
Method 3 - Repair the Corrupted Registry
Error code 7 is sometimes also linked with registry issues. If the reason for the error occurrence is a damaged or corrupted registry, then simply download Restoro.
This is a powerful PC Fixer embedded with a registry cleaner. It is easy to operate and user-friendly. The registry cleaner detects and removes all errors in seconds. It cleans the registry and repairs the damages in no time.
Click here to download Restoro.
So, you have finished with work, game, movie, music, email, or whatever on your PC, you look at the clock, it is late, you decide to go to sleep or outside, you click on the power button and choose shutdown. Now when a PC is shut down you feel good and go with your business but the next time you power it up you get the same error like the computer never really shut down in the first place. You wonder why and reboot it, just in case and all of the sudden error is gone.
If something similar has happened to you or you had the feeling that after shutting down your computer has not really felt like shutting it down, do not seek professional help, everything is OK with you because when you click on shut down, your computer does not really shut down!
Truth is that Microsoft has changed how to shut down works and how rebooting works in Windows with an update but has not publicly said anything about it so some users may experience this feeling of not shutdown phenomenon and might even think there is something wrong with their PC.
Why this change?
A few years ago shutdown button and option in Windows were really shutting down OS, but things changed when Microsoft wanted to increase boot-up speed. Now when that decision was made shutdown option was changed. So, what was changed? Well in order to increase Windows booting time, the shutdown will now turn off power to PC components and it will look like everything is indeed shutdown but the Windows kernel will actually be saved to a hard drive with all settings and just awaken once the PC is turned back ON. This will result in all errors and other stuff being just still present same as they were once the system was instructed to be turned off.
Rebooting your PC will now clear kernel and file from the hard drive and you will get a clean system startup without any issues tied with the kernel itself.
Workaround
Now that we know why and what change has been made to Windows logical question is can we shut down our PC at all properly? Luckily for us, the answer is yes and we will not need any external application to do it, we can still do it inside Windows itself and it is quite quick and easy.
Bringing back the old shutdown
In order to bring the old shutdown functionality of your PC please follow the instructions but be aware that by doing this your PC will boot a little bit slower since it will have to load the kernel from scratch each time computer is turned ON.
First thing is to go to settings and go to System
Then once you are inside the system, navigate to the power and sleep and click on it to select it. Once you have it selected to all the way to the right and click on additional power settings.
When you click on advanced power settings you should be led to the control panel's power options. Inside this panel click on top left link where it says Choose what the power button does.
Inside options, you will need to untick the box next to Turn on fast startup (recommended), this option has been ticked ON by the Windows update and probably without notifying you. Option means exactly what was described, it will save kernel state on the hard drive for faster boot time but sadly it can cause some issues since it will never be reloaded from 0.
If you are unable to uncheck the box click on the text beside the shield icon that says: Change settings that are currently unavailable (you will have to be logged in as administrator).
Conclusion
Altho turning off fast startup and shutting down the PC completely will for sure extend your bootup time I still believe that it is the right choice since sometimes a lot of clutter and bad things accumulate over time inside the OS and can cause a vast variety of problems in a long run. So stay safe and shut down that PC as it used to be in the past.
Did you know you can use emoji in file names inside Windows 10?
It is no secret that emojis are basically everywhere and Microsoft has seen this and integrated them into Windows itself, so you can name files using emojis or combine them with text.
Placing emojis in file names or in the text is extremely easy, all you have to do is press ⊞ WINDOWS + . and the emoji dialog will open from where you can find which emoji you would like to use.
And that's it, you just used emoji for the file naming.
!!!NOTE!!!
In theory, some applications may not like these emojis if they don’t support Unicode characters. However, modern applications are designed to work with a broad set of languages that should properly support emojis.
For example, the classic Windows Command Prompt can’t see emoji characters in file names properly, but both PowerShell and Microsoft’s new Windows Terminal can display them properly.
If you do run into a problem, you can always open File Explorer and rename the affected files and folders to remove the emoji characters. You can then use those files in applications that don’t properly support emoji file names.
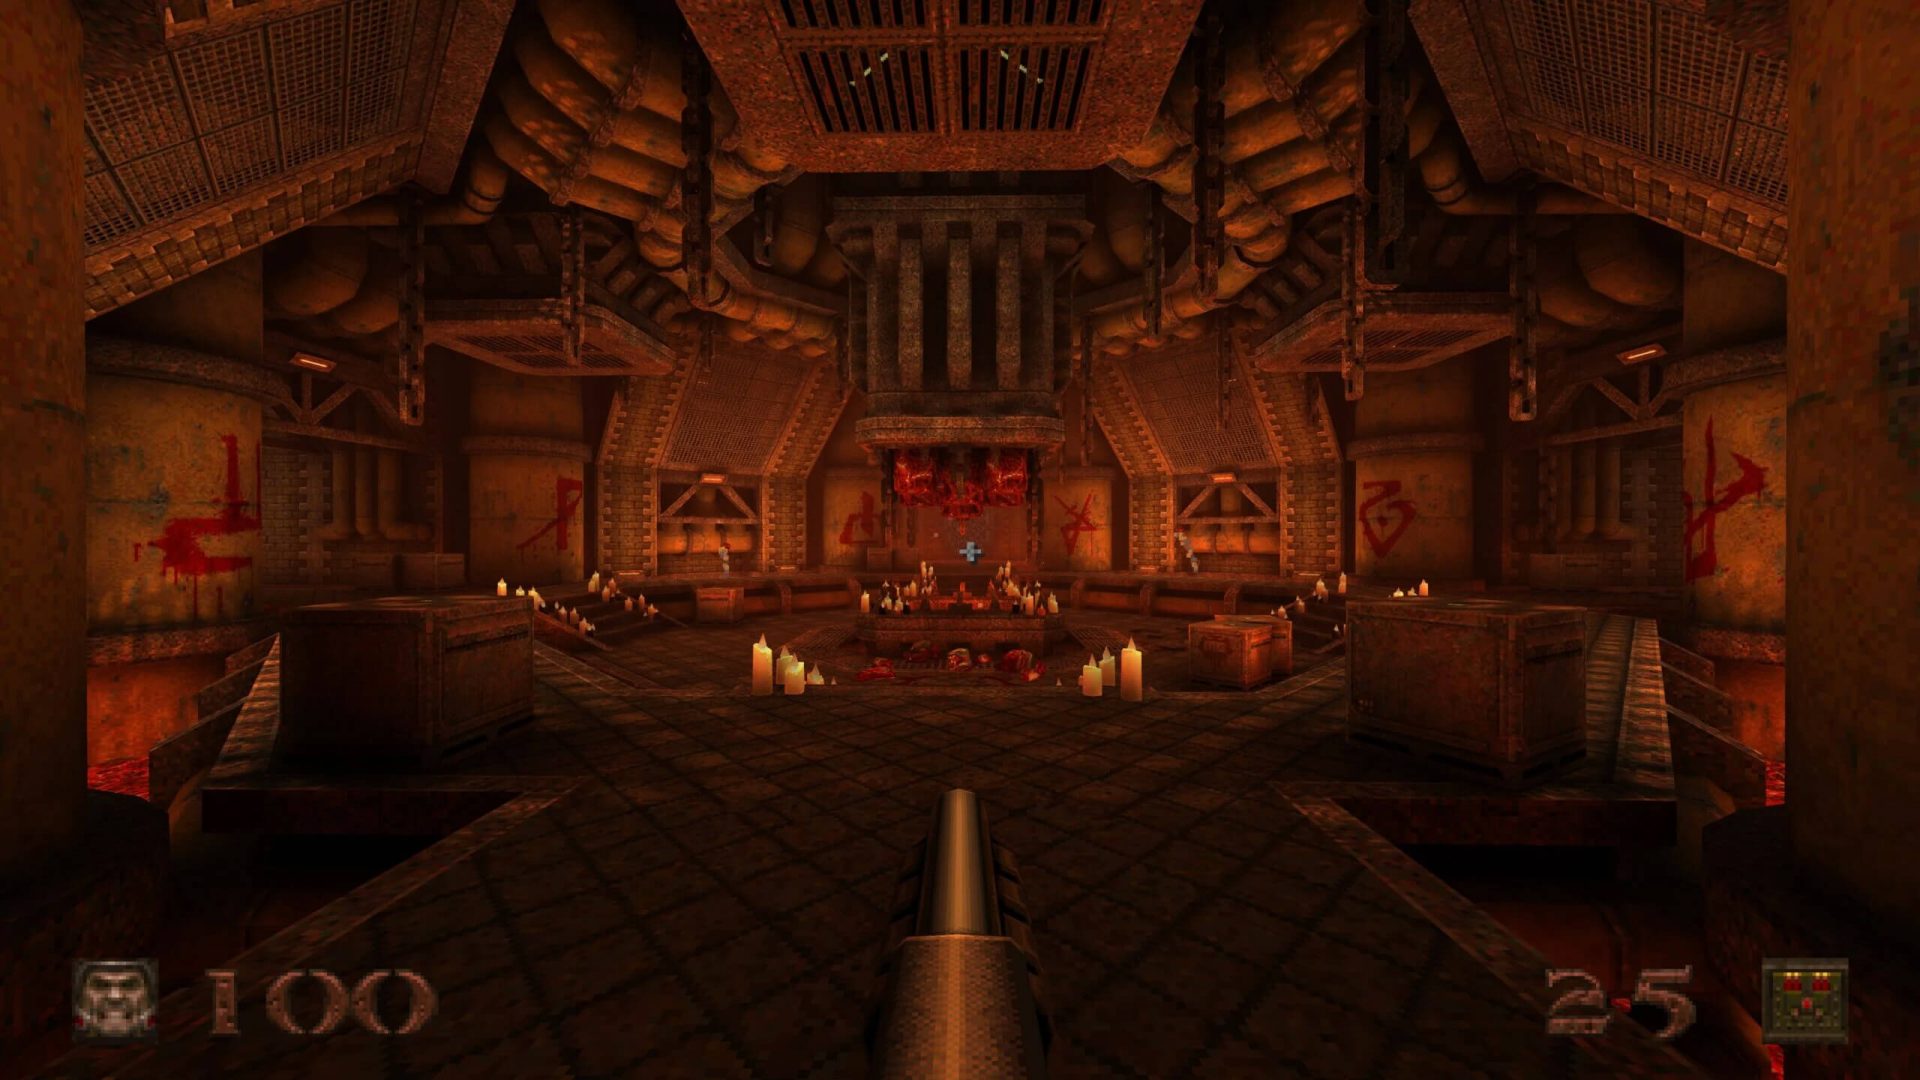
Without any fanfare, news, or information Bethesda has released a completely free upgrade for legendary Quake 1. Free upgrade is automatically applied to all users who possess the original game and it has already been rolled out.
What has changed for good?
New textures, effects, and resolutions are one thing that will come first into your focus when you start the game. From the moment game is started it feels and looks like a game you remember from a long time ago. Models are also upgraded with a higher polygon count.
Another thing that will hit you right away is the legendary OST by Trent Reznor in its full glory. If you have the original Quake and played it you will know that OST was missing from the Steam release and having it fully back is a great feature. I would argue that placing just OST alone in the steam release is enough for people to play it again since it adds so much atmosphere.
Deathmatch and other multiplayer goodies are all here as well and there is a completely free new episode in the game with several levels. Yes, you get a free Quake upgrade in HD with an extra episode completely free.
The bad side of Quake coin
So this might come as a purist or obsessive nit-picking but there were two things that I, personally am not a fan of and have noticed during my gameplay. Please know that this is personal preference and by no other chance reflects the quality of the game itself but I just had to talk about it.
Quake remake is made in a new engine and as such dynamic and gunplay feel different from the original, granted they have done the best they could to replicate the authentic feeling of the original game but there are parts of the game where I have felt that simply put, it feels different.
Another thing is also tied to technology and the overall game is somewhat a little brighter and in some areas little softer in dark areas. Like I said this is purely personal preference and might come as nitpicking but I preferred the darker and grittier look of the original game. Darkplaces, the free custom-made upgrade did this in my opinion better.
If you suddenly encounter Error 0x80000003 while trying to execute a random file then read on as this post will show you how you can fix such an error. Obviously, it mostly happens on executable files or .exe files and is most likely caused by the conflict in the execution of some registry files or it could also be caused by missing drivers or it could also be due to some incompatible hardware which is why you’re unable to run the executable file.
When you encounter this error, you will see the following error message on your screen:
“The exception Breakpoint, A breakpoint has been reached, (0x80000003) occurred in the application.”
As you can tell, the Windows Executive STATUS message is a warning and if you are given an option, you must select one of the options from the message box. So if you are running the application in an end-user environment rather than in a development environment, you must contact the supplier of the running application regarding this error message since this shouldn’t be happening when a finished program is running.
Before you get started executing the troubleshooting guide given below, make sure that you create a System Restore Point first since you will be dealing with some critical settings in Windows. Having done this, proceed to the options provided below.
Option 1 – Try to run the CHKDSK utility
Running the CHKDSK utility might also help you resolve Error 0x80000003. If your hard drive has issues with integrity, the update will really fail as the system will think that it’s not healthy and that’s where the CHKDSK utility comes in. The CHKDSK utility repairs hard drive errors that might be causing the problem.
Open Command Prompt with admin privileges.
After opening Command Prompt, execute the following command and hit Enter:
chkdsk /f /r
Wait for the process to be completed and then restart your computer.
Option 2 – Try to run a System File Checker scan
You can also try to run a System File Checker or SFC scan in order to scan your computer for corrupted files that might be the cause behind the Error 0x80000003. Once it finds any corrupted system files, it will automatically fix them. To run System File Checker, here’s what you have to do:
Tap Win + R to launch Run.
Type in cmd in the field and tap Enter.
After opening Command Prompt, type in sfc /scannow
The command will start a system scan which will take a few whiles before it finishes. Once it’s done, you could get the following results:
Windows Resource Protection did not find any integrity violations.
Windows Resource Protection found corrupt files and successfully repaired them.
Windows Resource Protection found corrupt files but was unable to fix some of them.
Restart your computer after the scan is completed.
Option 3 – Perform a Clean Boot
There are some instances that some conflicting programs installed in your computer might be the one that’s causing the Error 0x80000003 to appear. To identify which program is causing the problem, you need to put your computer in a Clean Boot State. To do so, follow the steps below.
Log onto your PC as an administrator.
Type in MSConfig in the Start Search to open the System Configuration utility.
From there, go to the General tab and click “Selective startup”.
Clear the “Load Startup items” check box and make sure that the “Load System Services” and “Use Original boot configuration” options are checked.
Next, click the Services tab and select the “Hide All Microsoft Services” check box.
Click Disable all.
Click on Apply/OK and restart your PC. (This will put your PC into a Clean Boot State. And configure Windows to use the usual startup, just simply undo the changes.)
From there, start to isolate the problem by checking which one of the programs you installed recently is the root cause of the problem.
Option 4 – Run the Memory Diagnostic Tool to check for Memory leaks
Tap the Win + R keys to open Run and type mdsched.exe and hit Enter to open the Windows Memory Diagnostic Tool.
After that, it will give two options such as:
Restart now and check for problems (Recommended)
Check for problems the next time I start my computer
Once your computer has restarted, perform a basic scan or you could also go for the “Advanced” options such as “Test mix” or “Pass count”. Simply tap the F10 key to start the test.
Option 5 – Try contacting the developer
If you find that you’re getting Error 0x80000003 on only one particular application, then you can try to contact the developer of the software that’s throwing up this error. All you have to do is search the web for the official support channel of the software and discuss the error from there.
The Windows 10 operating system supports the logging in of multiple users at the same time. Aside from that, it also allows administrators to create a Guest Account that has limited rights. However, there are some instances when you could encounter an error when you use the Guest Account.
The error may state:
“Shell Infrastructure Host has stopped working. A problem caused the program to stop working correctly. Please close the program”.
This error indicates that the Shell Infrastructure Host or SiHost.exe process that is used for handling graphical elements, has crashed. And to fix this error, there are several options you can check out. You can try to reinstall the Microsoft Redistributable Packages or run a System File Checker scan. In addition, you can also use a new Guest Account or troubleshoot the problem in a Clean Boot State.
Option 1 – Try to install or repair Microsoft Visual C++ Redistributable 2013
A corrupted Microsoft Visual C++ Redistributable package or the absence of it can trigger the “Shell Infrastructure Host has stopped working” error – so if you do not have this package yet, you have to install it but if you already have it, follow the steps below to repair it.
Open Control Panel and proceed to Program and Features.
Under Programs and Features, look for Microsoft Visual C++ Redistributable package among the list.
Then right-click on it and click the Change button.
Next, you should see the Repair option – click on it to repair the installation of the Microsoft Visual C++ Redistributable package.
The process may take a couple of minutes before it finishes so once it does, you have to restart your PC.
After doing all these steps and you still encounter the problem, you might have to uninstall this package and download it directly from Microsoft’s website. However, if you are using Windows 10, you might not be able to do so since it only supports Windows versions up to Windows 8.1 so just proceed to the next option below.
Option 2 – Try to run a System File Checker scan
In the Windows Start Search, type “command prompt” and right-click on Command Prompt from the search results, and then select the “Run as administrator” option.
After opening Command Prompt with admin privileges, type the “sfc /scannow” and tap Enter to execute it.
Once the scan is finished, restart your computer and see if the Windows Script Host error.
Option 3 – Try using a new Guest Account
You might want to use a new Guest Account as it could help get rid of the error. All you have to do is have your admin delete the old Guest Account and create a new one and see if it helps in fixing the error.
Option 4 – Try troubleshooting the problem in a Clean Boot State
Setting your computer in a Clean Boot State can help you diagnose and later troubleshoot the problems in your computer. During this state, the system will start with a minimal number of drivers and startup programs that help in isolating the problem with the interfering software. To put your computer in a Clean Boot State, follow the given steps below.
Log onto your computer as an administrator.
Type in MSConfig in the Start Search to open the System Configuration utility.
From there, go to the General tab and click “Selective startup”.
Clear the “Load Startup items” check box and make sure that the “Load System Services” and “Use Original boot configuration” options are checked.
Next, click the Services tab and select the “Hide All Microsoft Services” check box.
Click Disable all.
Click on Apply/OK and restart your PC. (This will put your PC into a Clean Boot State. And configure Windows to use the usual startup, just simply undo the changes.)
From there, start to isolate the problem by checking which one of the programs you installed recently is the root cause of the problem.
If you encounter an error saying, “Invalid file handle” when you try to rename, copy, delete a file or other operations in your Windows 10 computer, then read on as this post will guide you in what you can do to fix it. This kind of error pops up when the operating system tries to carry out an operation on a folder or file using the following words:
When you rename or create a folder or file using the reserved words given above, you could encounter an error that says, “The specified device name is invalid”. This occurs since these words are Windows system reserved words that you can’t use, unlike any other words. Thus, if you have a folder or file which contains any of the reserved words on another computer that runs a non-Windows operating system and you try to copy or rename it Windows, then it’s no wonder why you’re getting this error message.
In such cases, you can always click on the Skip button to stop the operation. However, if there are various folders or files, you can just use the Command Prompt to carry out the task. All it takes is a simple command that will get rid of the folder as well as the files in it. How? Refer to the instructions given below.
Step 1: Tap the Win + R keys to open the Run utility.
Step 2: Next, type “cmd” in the field and then tap Enter to open Command Prompt.
Step 3: After opening Command Prompt, execute the following command:
rd \.file-folder-path /S /Q
Note: The “rd” command will remove the directory or the folder while the “\.” command will select the current computer. The “/S” command, on the other hand, helps you in removing all the sub-directories and the files that are in the CON folder. The “/Q” command is not really mandatory since it helps you remove everything silently without any confirmation message. For example, if you have a folder named “CON” located on your Desktop, the path will be like this “C:/Users/<username>/Desktop/CON”. In this case, the command should be like this:
rd \.C:Users<username>DesktopCON /S /Q
However, if the error pops up for a whole different reason, you could use the following command instead to remove the reparse point extended functionality. Once you’ve entered the given command below, you should now be able to delete the file.

 Error Causes


 Without any fanfare, news, or information Bethesda has released a completely free upgrade for legendary Quake 1. Free upgrade is automatically applied to all users who possess the original game and it has already been rolled out.