This is a typical system error that occurs during Windows setup. To be precise, this error may pop on your computer screen during the text mode portion of Windows setup.
The setup hangs and stops responding and the error message is displayed in either one of the following formats:
‘The file I386Ntkrnlmp.exe could not be loaded. The error code is 7.’ or ‘The file I386L_intl.nlf could not be loaded. The error code is 7.’
Solution
Error Causes
Error 7 may be triggered due to several reasons but the 2 most common causes for this error code are:
Incorrect settings of the BIOS
Faulty RAM modules
Registry corruption
Further Information and Manual Repair
To resolve this error on your system, here are some easy and effective DIY methods that you can try.
Method 1 - Change Back the BIOS to its Default Settings
If the underlying cause of error code 7 is related to incorrect BIOS settings, then it is recommended to restore default settings to resolve.
You can reset your computer’s BIOS (basic input and output system) settings to factory defaults by selecting the restore defaults option within BIOS or by removing CMOS ( Complementary Metal Oxide Semi-Conductor) battery from your unplugged computer for about five minutes.
The battery removal method requires opening the computer case, so only attempt it if you are unable to access BIOS.
To reset BIOS follow these steps, reboot your PC and then press the key assigned to loading BIOS during your computer boot splash screen.
The key assigned to load and access BIOS varies from manufacturer to manufacturer but usually, it's F1, F2, or F12. Once you enter the BIOS, select the ‘Restore Defaults’ option listed in the menu. I
t may be a keyboard shortcut or be under the Advanced settings menu. Confirm settings and then exit BIOS. Hopefully, this will resolve Error 7.
Method 2 - Remove the Faulty RAM
When error code 7 is triggered by faulty RAM modules, then to resolve it simply remove the memory modules that are installed in the computer.
If the error code is displayed again after you remove the memory module, remove a different memory module. This procedure requires you to reboot your PC several times to identify the specific memory module that is not working properly.
Method 3 - Repair the Corrupted Registry
Error code 7 is sometimes also linked with registry issues. If the reason for the error occurrence is a damaged or corrupted registry, then simply download Restoro.
This is a powerful PC Fixer embedded with a registry cleaner. It is easy to operate and user-friendly. The registry cleaner detects and removes all errors in seconds. It cleans the registry and repairs the damages in no time.
D3dx9_43.dll is a type of Dynamic Link Library containing small programs. This file is associated with Microsoft DirectX software. It is used and utilized by most Windows-based games and DirectX advanced graphic programs.
The error D3dx9_43.dll pops on your computer screen when there is some issue when running or loading Microsoft DirectX programs.
This error is often displayed in any one of the following formats:
“D3dx9_43.DLL Not Found"
"D3dx9_43.dll not found. Reinstalling might help fix this."
"The file d3dx9_43.dll is missing"
"File d3dx9_43.dll not found"
The good news is that this error code is not fatal.
This means it will not result in system crashes, failure, or data loss. But it may hamper your ability to access, run and load Windows-based games associated with DirectX therefore to avoid the inconvenience it is advisable to repair it immediately.
Solution
Error Causes
D3dx9_43.dll error code can occur due to several reasons. These include but are not limited to:
Missing or corrupt D3dx9_43.dll file
Outdated drivers
Corrupt registry
Viral infection
Further Information and Manual Repair
To fix the D3dx9_43.dll error on your PC, try the manual easy to do methods illustrated below. To perform these methods to repair the issue, you don’t need to be a technical whiz. These are simple methods and easy to perform.
Method 1 - Check Your Recycle Bin or Download D3dx9_43.dll File
If you just recently uninstalled a program from your PC, then there is a possibility that the D3dx9_43.dll file got accidentally deleted during the process.
This happens because DLL is a shared file. The program you uninstalled might be running with the same file. In case of accidental deletion of the D3dx9_43.dll file, it is advisable to check your recycle bin to repair the issue.
Simply go to the recycle bin and look for the deleted file; if you locate it simply reinstall. However, if you are unable to find it, then if you have access to an internet connection, simply download the D3dx9_43.dll file from a reliable DLL website.
Method 2 - Update Drivers
If the error code occurs due to outdated drivers, then it is recommended to update drivers on your system. For example, the D3dx9_43.dll file error indicates an outdated video card driver since this file is linked to video game software.
Therefore, simply update the drivers for your video card. Drivers can be updated in Windows by using a driver update wizard from within Device Manager. The wizard will walk you through the entire driver update process, making the updating task a lot simple and hassle-free.
Method 3 - Install an Antivirus
In case of malware infection, it is advisable to install a powerful antivirus. Simply run it to scan your entire PC for viruses. Then remove them to resolve the issue.
Method 4 - Clean and Repair the Registry
D3dx9_43.dll error may also pop up due to registry corruption.
This happens when the registry loads with unnecessary and obsolete files like cookies, junk files, internet history, and bad registry entries.
These files take up all the space and damage the registry. It also results in DLL file corruption and disk fragmentation.
To resolve this it is important to clean the registry and repair it.
A quick way to perform registry clean-up is to download Restoro. This is an advanced PC Fixer embedded with a powerful registry cleaner. It scans for all registry-related errors instantly, removes them, cleans the registry, and repairs the damaged files.
Click here to download Restoro on your PC and resolve error D3dx9_43.dll today!
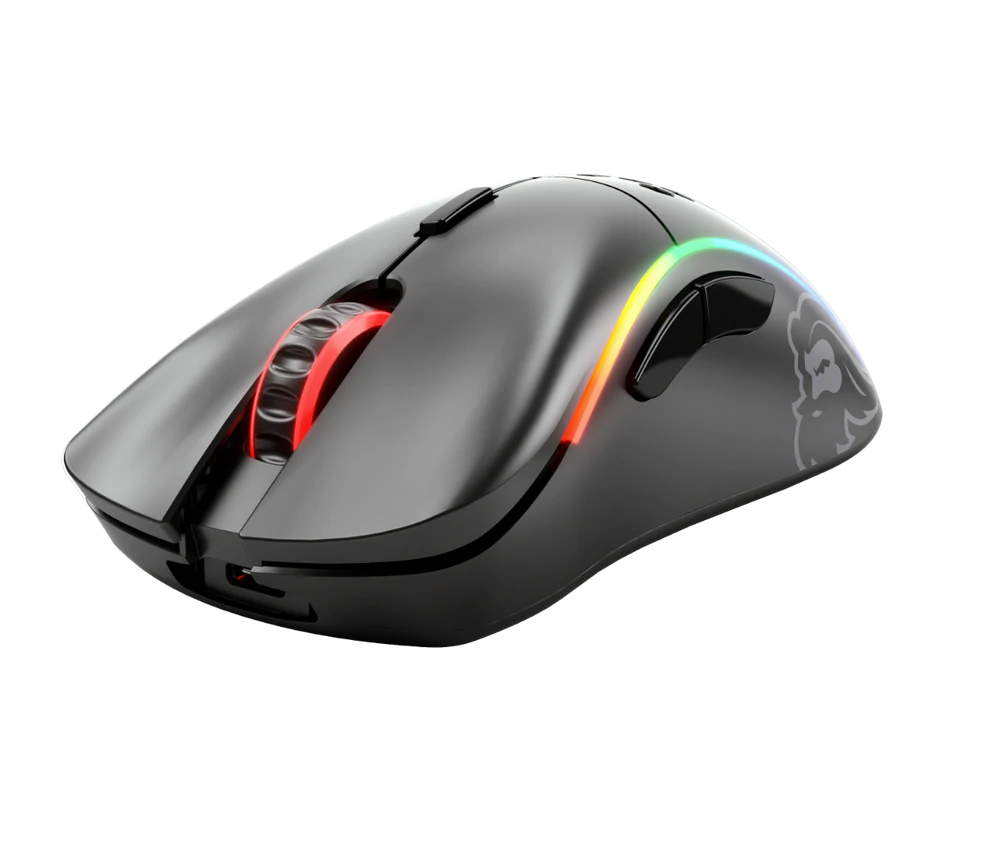
You have probably heard a lot of good things about gaming mice, how they are better feeling, better in any way possible and it is all true, everything you heard is actually true, they are superior in any way to a regular mouse but with one big disadvantage, and that would be the price. While you can find a regular mouse for pocket change, a gaming mouse is in comparison very expensive even for entry-level ones.
In this article we will explore all advantages and compare it with the regular one so you can come up with your own conclusion about do you really need one for yourself or if you are fine with regular.
Price
As stated price is one factor that does not favor gaming mice. Regular mouse for a personal computer goes around 10 or 20 USD, while entry-level in gaming one will be 40 USD and can go up to 250 USD, this large gap in price is usually determining factor why people pick up regular one. If you are on a really tight budget go for the regular one, but if you can afford a gaming one get it without second thoughts.
Software
This is where you will see the big difference between mice. Regular ones when connected are recognized and the driver is automatically installed and you can use it, same goes with gaming ones but with one big difference, you have an option to install additional manufacturers' software specially tailored for your mouse. In the application, you will be able to access some features that are specific to the mouse model that you could not set in typical Windows mouse properties. Beside more options software can also have features like setting your profiles and saving them to be recalled when you need them on the fly.
Sensitivity of mouse
The sensitivity of the mouse is measured in dots per one inch or short DPI, this is directly shown on your screen by how fast your mouse can move, higher sensitivity means your mouse will move faster across the screen and lower means it will move slower. All gaming mice come with buttons and settings that will allow you to change DPI on the fly and you can choose precise DPI settings in the software.
The regular mouse comes with DPI around 800 and goes to 1200 typically and does not have usually the option to change this while gaming mice start at 400 and can go as high as 26000 with the option to change it. Some regular mice can have only 1 option of DPI, usually very cheap ones.
Polling rates in mice
Pooling rate is the measurement of how often your mouse reports where it is positioned on the computer. The higher the pooling rate, the more responsive your mouse will be and vice versa. It is measured in hertz (Hz) and regular mice have them around 125Hz that is enough if you are using a computer for office, internet, and mail work.
If you are working in design or gaming you will need more than 125Hz polling rate, luckily gaming mice come with a minimum of 500Hz as an entry point and some hi-end models are going as far as 8000Hz. This very high pooling rate will get some extra load on your CPU but the mouse itself will be maximally responsive and will respond even to the smallest moves.
Ergonomics
Regular mice are well just mice, they are typical shape and size, gaming mice are made with ergonomics in mind. How they are made for extensive daily use of several hours per day they are constructed in a way to offer a pleasant and pain-free experience.
If you work on a computer for long periods of time consider gaming an ergonomic mouse since it will take the strain from hands and place them in a more natural position.
Macro keys
Gaming mice most of the time come with more keys compared with regular ones and good thing is that via its software you can tie certain actions to these extra keys making work or gaming more pleasant and quicker.
Components and material quality
In order to make regular mice more affordable and cheaper materials and quality of components had to suffer. Gaming mice have millions of guaranteed clicks by companies that make them before they break and regular ones usually do not guarantee a single one. This is due of course quality of materials that have been used in constructing these devices.
In the long term, if you use a gaming mouse for typical daily tasks it will outlive your regular one and on the side offer you more pleasant and responsive use along the way.
The Makecab.exe process that’s running on your Windows 10 computer is a program that compresses the Component-Based Servicing log or CBS log files and they can get really huge if they’re not compressed. As a result, it would utilize important space on your operating system although makecab.exe does not consume high CPU resources in doing so. However, there are times when it recreates thousands of instances of itself and could cause overconsumption of system resources which slows down your computer. So when the makecab.exe process causes high CPU usage in your system, this could mean that there is a failed Windows Update. In addition, the high CPU usage of the makecab.exe process could also mean that your computer is infected with a virus or malware. Whichever the case is, you can check out several possible solutions that are given in this post to resolve the problem.
Option 1 – Try to delete log file using File Explorer
The CBS log files could reach up to 20GB size and so if you delete them, it would help in saving space in your computer and since they’re not much of use, deleting them won’t negatively affect the system at all. To delete the CBS log files, all you have to do is open the File Explorer and then go to C:/Windows/Logs/CBS and from there, open the CBS log files and delete them all. Doing so should ease the load in the makecab.exe process since it no longer has to compress the CBS log files. As a result, the process would be more relaxed. After that, you can restart your computer and check if the problem’s now fixed.
Option 2 – Try deleting the log file via Command Prompt
You can also try to delete the log files using an elevated Command Prompt. Refer to these steps to do so:
Type “command prompt” in the Windows Search bar and then right-click on the related search result and select the “Run as administrator” option.
Next, type the following command and hit Enter to execute it:
del /f %windir%logscbs*.log
Restart your computer afterward once the command has been executed. This should end the high disk usage by makecab.exe, if not, proceed to the next given options below.
Option 3 – Uninstall any suspicious programs you’ve installed recently
If you have recently installed some programs on your Windows 10 computer, and since then you’ve experienced high CPU usage brought on by makecab.exe, then you might want to uninstall those programs.
Tap the Win + R keys to open the Run dialog box
Then type “appwiz.cpl” in the field and hit Enter to open the Programs and Features in Control Panel.
From there, look for the suspicious programs you’ve installed, select them and then click on Uninstall to remove them.
After that, restart your computer and try to install the latest version of the program again. It should work now. If not, proceed to the next available option below.
Option 4 – Try running Disk Cleanup
You might want to run the Disk Cleanup utility as it is a useful tool that could delete temporary and useless files on your computer.
Tap the Win + R keys to open the Run dialog box and then type “cleanmgr” in the field and hit Enter to open the Disk Cleanup window.
After that, select the drive you want to clean.
Now click OK to clean the disk and restart your computer.
Option 5 – Try to run System File Checker scan
System File Checker or SFC is a built-in command utility that helps in restoring corrupted files and missing files. It replaces bad and corrupted system files to good system files. To run the SFC command, follow the steps given below.
Tap Win + R to launch Run.
Type in cmd in the field and tap Enter.
After opening Command Prompt, type in sfc /scannow
The command will start a system scan which will take a few whiles before it finishes. Once it’s done, you could get the following results:
Windows Resource Protection did not find any integrity violations.
Windows Resource Protection found corrupt files and successfully repaired them.
Windows Resource Protection found corrupt files but was unable to fix some of them.
Restart your PC.
Option 6 – Try scanning your computer using Windows Defender
As mentioned, the high CPU usage of makecab.exe might be caused by some malware or virus in the system and so to eliminate it, you have to scan your computer using security programs like Windows Defender.
Tap the Win + I keys to open Update & Security.
Then click on the Windows Security option and open Windows Defender Security Center.
Next, click on Virus & threat protection > Run a new advanced scan.
Now make sure that Full Scan is selected from the menu and then click the Scan Now button to get started.
This post will help you fix the ATTEMPTED_WRITE_TO_READONLY_MEMORY Blue Screen issue with an error code 0x000000BE. If you encounter this kind of BSOD error when you try to boot into your Windows 10 computer, note that there are various possible causes for this error. It could be caused by an error with a device driver, hardware issues, or some error in the BIOS of your computer.
The ATTEMPTED_WRITE_TO_READONLY_MEMORY Blue Screen error with a bug check of 0x000000BE appears when a driver tries to write a read-only memory segment. You’ll be able to see the name of the driver in the Blue Screen error if the driver that’s causing the error can be identified. You can also see it in memory at the location (PUNICODE_STRING) KiBugCheckDriver. In most cases, this kind of error is usually caused by various files such as iusb3hub.sys, ntkrnlpa exe or vhdmp.sys, ntoskrnl.exe, ntfs.sys, dxgkrnl.sys, tcpip.sys, atikmdag.sys, and win32k.sys. There are several possible fixes you can try to fix this issue but the main issue lies within booting into Windows since the error occurs as soon as you boot into your Windows 10 computer.
Refer to each one of the options provided below to resolve the ATTEMPTED_WRITE_TO_READONLY_MEMORY Blue Screen error.
Option 1 – Try to rollback, update or disable drivers
The first thing you can do to fix the ATTEMPTED_WRITE_TO_READONLY_MEMORY Stop error is to roll back, or update, or disable device drivers. It is most likely that after you updated your Windows computer that your driver also needs a refresh. On the other hand, if you have just updated your device drivers then you need to roll back the drivers to their previous versions. Whichever applies to you, refer to the steps below.
Open the Devices Manager from the Win X Menu.
Then locate the device drivers and right-click on them to open the Properties.
After that, switch to the Driver tab and click on the Uninstall Device button.
Follow the screen option to completely uninstall it.
Finally, restart your computer. It will just reinstall the device drivers automatically.
Note: You can install a dedicated driver on your computer in case you have it or you could also look for it directly from the website of the manufacturer.
Option 2 – Try running the Memory Diagnostic Tool
The Memory Diagnostic tool in windows can help resolve the ATTEMPTED_WRITE_TO_READONLY_MEMORY Blue Screen error by checking and automatically fixing any memory-based issues. To run it, refer to these steps:
Tap the Win + R keys to open Run and type exe and hit Enter to open the Windows Memory Diagnostic Tool.
After that, it will give two options such as:
Restart now and check for problems (Recommended)
Check for problems the next time I start my computer
Once your computer has restarted, perform a basic scan or you could also go for the “Advanced” options such as “Test mix” or “Pass count”. Simply tap the F10 key to start the test.
Note: After you select your preferred option, your computer will restart and check for memory-based issues. If it finds any issues, it will automatically fix them and if there’s no issue found, then it’s most likely not a memory-based issue so you should try the other options given below.
Option 3 – Try to update the BIOS
Updating the BIOS can help you fix the ATTEMPTED_WRITE_TO_READONLY_MEMORY BSOD error but as you know, BIOS is a sensitive part of a computer. Even though it is a software component, the functioning of the hardware depends on it largely. Thus, you must be careful when modifying something in the BIOS. So if you don’t know much about it, it’s best if you skip on this option and try the other ones instead. However, if you are well-versed in navigating the BIOS, then follow the steps below.
Tap the Win + R keys to open the Run dialog box.
Next, type “msinfo32” in the field and press Enter to open System Information.
From there, you should find a search field on the bottom where you have to search for the BIOS version and then press Enter.
After that, you should see the developer and version of the BIOS installed on your PC.
Go to your manufacturer’s website and then download the latest version of BIOS on your computer.
If you are using a laptop, make sure that you keep it plugged in until you have updated the BIOS.
Now double click on the downloaded file and install the new BIOS version on your computer.
Now restart your computer to apply the changes made.
Option 4 – Try disabling BIOS Memory Options
Disabling the BIOS Memory options such as Caching and Shadowing can help you in fixing the ATTEMPTED_WRITE_TO_READONLY_MEMORY Stop error. All you have to do is enter the BIOS first and then use the Arrow and Enter keys to select your choices. And if you can’t seem to find it, look for specific instructions from your OEM or you could also look out for instructions from the manufacturer of your motherboard.
Option 5 – Try running the Blue Screen Troubleshooter
The Blue Screen troubleshooter is a built-in tool in Windows 10 that helps users in fixing BSOD errors like ATTEMPTED_WRITE_TO_READONLY_MEMORY. It can be found on the Settings Troubleshooters page. To use it, refer to these steps:
Tap the Win + I keys to open the Settings panel.
Then go to Update & Security > Troubleshoot.
From there, look for the option called “Blue Screen” on your right-hand side and then click the “Run the troubleshooter” button to run the Blue Screen Troubleshooter and then follow the next on-screen options. Note that you might have to boot your PC into Safe Mode.
Stop 0x000000A is a type of blue screen of death error associated with Windows XP. It occurs either during or after the installation of Windows XP. In other cases, the stop 0x000000A error may occur when the device driver uses an incorrect memory address, causing an IRQ conflict.
The Stop 0x000000A error message means that a process or a driver attempted to access a memory section without permission. The stop error message is displayed in the following format:
Stop: 0x0000000A (parameter1, parameter2, parameter3, parameter4) IRQL_NOT_LESS_OR_EQUAL *** Address x has base at x - filename
Solution
Error Causes
The stop 0x000000A error is triggered due to multiple reasons. These include:
Faulty hardware
The poor device driver installation
Incompatible device driver
Viruses and malware attack
Disk fragmentation
Blue screen of death errors like the stop 0x000000A error code is critical. These errors may pose serious PC threats. When this error occurs the computer screen turns blue, the program running on the system stops and if the error is not fixed in time it may also result in a system crash and failure.
Further Information and Manual Repair
To resolve the Stop 0x000000A error on your PC, here are some solutions that you can try:
1. Roll Back Drivers
To do this, click on the start button and go to the control panel. Then double click the system icon and locate the ‘System Properties’ window. After that click on the ‘hardware’ tab and then click the ‘Device Manager’ button. Here locate the device that you recently updated which could be causing the IRQ conflict.
Now double click the device recently updated and click the driver tab. Then click on the ‘Roll Back Driver' button. Wait for the process to finish and then simply reboot your system.
2. Specify the Hardware Abstraction Layer (HAL)
Another method to resolve the Stop 0x000000A error on your system is to specify the hardware abstraction layer (HAL). This can be done during Windows XP installation startup. Simply press the F5 button on your keyboard while the “Setup is inspecting your computer’s hardware configuration’.
When prompted, make sure that you specify the correct computer type and HAL (the Hardware Abstraction Layer). Most computers use a single processor, if your computer also has a single processor then simply select ‘Standard PC HAL’ computer type from the menu. Now reboot your PC and then reinstall the Windows XP operating system.
If the error is still not resolved then try turning off features in CMOS settings
3. Turn off Features in CMOS Settings
Turn off all the following features in the CMOS settings:
All caching, including L2, BIOS, internal/external, and write back caching on disk controllers
Plug and Play
All shadowing
Any BIOS-based virus protection feature
After turning off these features, try reinstalling Windows XP again. If this works, then that’s great! However, if it doesn’t, then try method 4; maybe the cause of the stop 0x000000A is associated with incompatible drivers.
4. Install Windows XP compatible Drivers
Sometimes device driver compatibility can also shoot up the stop 0x000000A error message.
First, remove the drivers that are incompatible with Windows XP. Now obtain and install new Windows XP compatible drivers. To do this, go to the start menu and the control panel. Now double click on Add or Remove Programs icon. Select the drivers that are incompatible with Windows XP and click on the remove button.
After that restart PC and install Windows XP, compatible drivers, for the hardware devices on your system.
5. Scan for Viruses and Repair the Registry
If all the methods discussed above do not resolve the stop 0x000000A error on your PC, then it means either your computer is affected by an infection virus or the problem is associated with the registry like disk fragmentation and invalid entries.
To scan for both viruses and registry issues simultaneously in seconds, it is advisable to download Restoro.
Restoro is an advanced and multi-functional PC repair tool integrated with powerful utilities including a registry cleaner, antivirus, and a system optimizer. It also scans for Active X controls and class ID errors.
The registry cleaning utility scans your entire PC for all possible registry issues triggering different error codes including the stop 0x000000A error. It wipes out all the unnecessary files cluttering and damaging the registry including cookies, temporary files, junk files, and invalid entries.
It repairs the fragmented disk and the registry thereby resolving the stop 0x000000A error on your system.
The privacy error utility functions like an antivirus. It detects all kinds of malicious software on your system including malware, adware, spyware, and viruses. These are removed immediately thus making your PC error-free.
Restoro is safe, efficient, and user-friendly. It is compatible with all Windows versions including XP. It has a sophisticated interface and a neat layout which makes it quite easy to operate and workaround.
Click here to download Restoro and repair your PC and resolve the stop 0x000000A error code now!
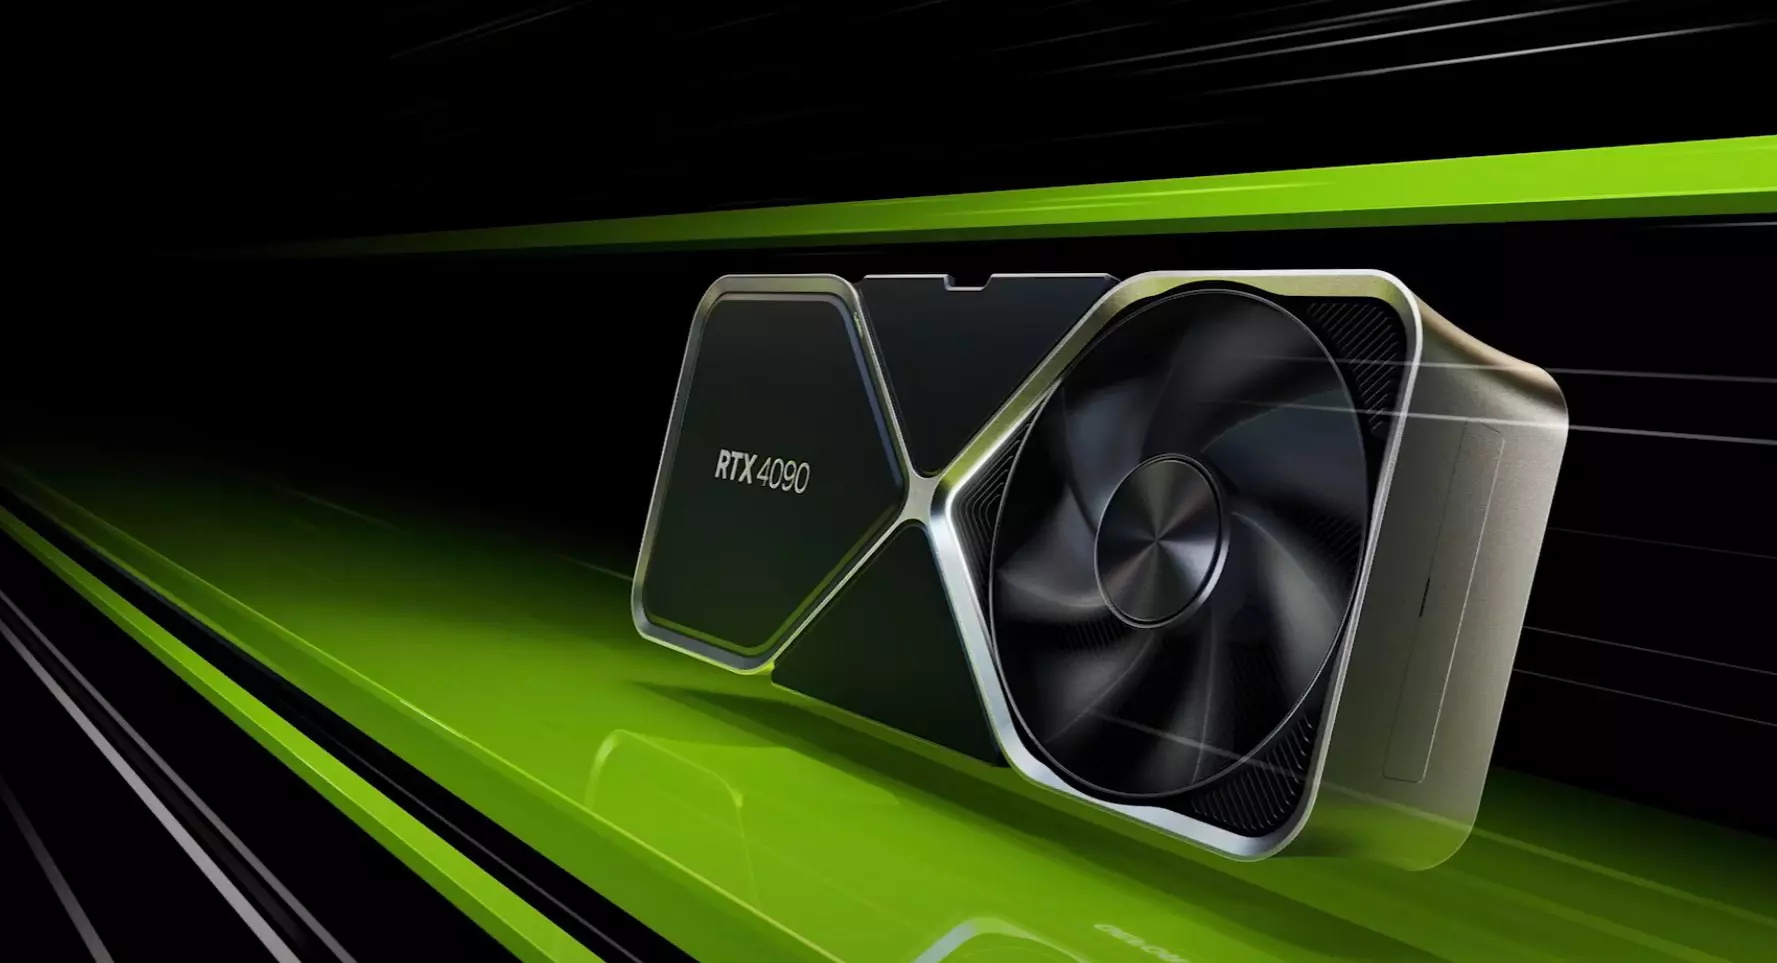
Nvidia announced the third generation of GeForce RTX GPUs called Ada Lovelace. New technology is bringing 76 billion transistors with 18,000 CUDA cores along with new gen ray tracing cores and improved Tensor cores as well. The new lineup also comes with DLSS 3 which is vastly improved from its previous version pushing a 4 times increase in frame rates over native rendering.
RTX 4090, a better model of GPU will come with 16,384 CUDA cores and a boost clock speed of 2.52 GHz. Also, it is packed with stunning 24 GB of GDDR6V VRAM. In Nvidia's words, its performance is twice faster than the 3090 Ti in games like Flight simulator, three times faster on Portal RTX, and four times faster on RacerX.
RTX 4080 comes in two modes, one with 12GB VRAM and a stronger one with 16GB VRAM but differences do not end here. The lower model is packing 7,680 CUDA cores while the stronger one is going to 9,728 CUDA cores. We will wait to see how will these cores count impact real-world performance in games.
As for prices, the flagship model RTX 4090 will be $1,600 USD and it will hit the market on October 12th. RTX 4080 12GB model will be $900 USD and the model with 16GB VRAM will go up to $1,200 USD. This, of course, is the price for Founders Edition cards, OEM cards from third parties like ASUS, MSI, Gigatech, etc will cost more.
DuckDuckGo has risen in the public eye as a private search engine offering searches without tracking. A less known fact about DuckDuckGo is that they have their own browser, well they have it for the Android platform and it was stated that it is coming for desktops soon.
People were excited for this new browser for a few reasons, one of them being privacy and another that it is built from scratch, not using existing chromium runtime that assured users that privacy is the main focus. Still, lately, things got a little out of control. Duckduckgo is under fire from users since a security researcher has discovered that there is an exception for Microsoft trackers inside Browser.
The main feature of their browser is that it blocks tracking scripts and most online advertising with the goal of preventing servers from collecting data about your online behavior. Of course, tracking protection is never 100% effective since it requires a lot of manual labor from people to add sites and links to blocklists but it was discovered that DuckDuckGo has a defined exception in the browser for Microsoft owned ad networks and tracking scripts giving them free pass even when they are related to privacy compromisation.
Zach Edwards first pointed out the exception in a series of tweets, after noticing DuckDuckGo on iPhone and Android wasn’t blocking LinkedIn and Bing advertisements on Facebook’s Workplace site.
You can capture data within the DuckDuckGo so-called private browser on a website like Facebook's https://t.co/u8W44qvsqF and you'll see that DDG does NOT stop data flows to Microsoft's Linkedin domains or their Bing advertising domains.
DuckDuckGo’s CEO and founder, Gabriel Weinberg, replied with his own series of tweets.
Most of our other protections also apply to MSFT-owned properties as well. This is just about non-DuckDuckGo and non-Microsoft sites, where our search syndication agreement prevents us from stopping Microsoft-owned scripts from loading, though we can still apply protections post-load (like 3rd party cookie blocking). We are also working to change that.
DuckDuckGo says it uses over 400 sources for search engine results, including the company’s own web crawler, but typical link results are sourced most commonly from Bing. According to Weinberg, DuckDuckGo’s ability to use Bing search results depends on a carved-out exception for Microsoft’s ads in the mobile browser. A representative from DuckDuckGo told that third-party cookies from Microsoft services are still blocked.
Of course, the main aim and campaign of DUckDuckGo's rise was private search and private browsing so this kind of news did not go well among long supporters. The latest statement from them is as follows:
We have always been extremely careful to never promise anonymity when browsing, because that frankly isn’t possible given how quickly trackers change how they work to evade protections and the tools we currently offer. When most other browsers on the market talk about tracking protection, they are usually referring to 3rd-party cookie protection and fingerprinting protection, and our browsers for iOS, Android, and our new Mac beta, impose these restrictions on third-party tracking scripts, including those from Microsoft.
What we’re talking about here is an above-and-beyond protection that most browsers don’t even attempt to do — that is, blocking third-party tracking scripts before they load on 3rd party websites. Because we’re doing this where we can, users are still getting significantly more privacy protection with DuckDuckGo than they would using Safari, Firefox and other browsers. This blog post we published gets into the real benefits users enjoy from this approach, like faster load times (46% average decrease) and less data transferred (34% average decrease). Our goal has always been to provide the most privacy we can in one download, by default without any complicated settings.
Error Code 1723 is a peculiar error type common in Windows PC. It is related to the Windows Installer package. This error is displayed in the following format:
"Error 1723- There is a problem with this Windows Installer package. A DLL required for this install could not be run. Contact your support personnel or package vendor...”
You are most likely to come across the error code 1723 if the Java installation is not completed successfully. In other words, the error indicates that the installation process has failed.
Solution
Error Causes
The 1723 error may occur due to several reasons, the most common being:
Corrupted installers
Files are not extracted successfully
Registry problems
Missing DLL files
Further Information and Manual Repair
To resolve this issue on your PC, you don’t always have to hire a professional technician and pay hundreds of dollars to get it fixed. The error code 1723 may not be a common Windows PC error but it is easy to fix.
Here we have listed some of the best and easiest DIY ways to resolve this error on your system. These solutions are so easy to perform that even if you are not a computer programmer or technically adept, you can work through them and resolve the error in just a few simple clicks.
So, let’s get started:
Solution 1: Install the latest Java Version
If the Java version previously installed on your system is not working properly and showing 1723 error messages then it is advisable to install the latest Java version.
However, to do this first you will have to uninstall the old version and then download the latest Java version on your PC from a trusted website to ensure it does not contain malicious viruses and malware.
Solution 2: Ensure the Required Files are extracted in the ‘Temp’ Folder for Installers
Another method to resolve the 1723 error code is to check whether the required files are extracted in the temp folder for installers or not.
The error may occur if the location is incorrect and the account is not permitted to extract files in the temp folder.
In this scenario, the best way to resolve the issue is to change the permissions of the temp folder. This can be done by logging in to your account and opening file explorer or ‘My Computer’. Now copy and paste this link address in the address bar: DL:UsersUSERNAMEAppDataLocal.
Please note, here DL is the drive letter of the Windows drive, and in the username insert the username of the account that you are using.
Now right-click the ‘temp’ folder. Select properties and click on the Security tab.
After that click edit below the list and press add. Again type the username here and click OK. The next step is to select the added account from the list and tick ‘FULL CONTROL’ box under ‘Permissions for Username’. Click OK and then close the properties. Once this process is complete, now try running the installer again. This will most likely resolve the issue.
Nonetheless, if the error still persists, then this means the underlying cause of the error is deeper than you think. The error may be related to registry issues. In such situations, try solution 3 to fix the error 1723 on your system.
Solution 3: Download Restoro.
When the error code 1723 is triggered due to registry issues, then it is advisable to scan your PC with Restoro. Registry issues should be resolved immediately because they pose serious threats to your system. It can lead to system failure, crash and valuable data loss.
Registry basically saves practically all the information and activities performed on your PC including the unnecessary and obsolete files like junk files, cookies, temporary files, and invalid entries.
If these files are not removed they can corrupt the registry, damage dll files and installers thereby generating error codes like 1723 on your system.
The easiest way to repair and clean the registry in seconds is to run Restoro on your PC.
It is a smart, intuitive, advanced, and multi-functional PC repair tool. It is embedded with multiple powerful utilities and is a one-stop solution for all PC related issues. This software is compatible with all Windows versions.
It is deployed with a highly functional registry cleaner that scans and detects all registry issues on your PC and removes them right away. It wipes out the unwanted files, repairs the damaged dll files and restores the registry.
Other powerful utilities that are embedded in this software include an antivirus, a system optimizer and Active X controls and class modules.
To resolve 1723 error code on your PC today, click here to download Restoro.
To understand the Xpcom.dll error better, first, you need to know what Xpcom.dll file is. Xpcom.dll is basically a typical DLL (Dynamic Link Library) file. It is associated with Firefox developed by Mozilla Foundation for the Windows Operating System.
DLL file contains small programs similar to exe (executable) files. Just like any other DLL file, Xpcom.dll helps loads and run programs smoothly. Xpcom.dll functions as a shared file that can be used to run multiple programs on your PC.
Xpcom.dll error code occurs when Windows cannot properly load the xpcom.dll file. The error may pop up on the screen in any one of the following formats:
"Xpcom.dll not found."
"The file xpcom.dll is missing."
"Cannot register xpcom.dll."
"Cannot find C:\Windows\System32\xpcom.dll."
"This application failed to start because xpcom.dll was not found. Re-installing the application may fix this problem."
"Xpcom.dll Access Violation."
"Cannot start Firefox. A required component is missing: xpcom.dll. Please install Firefox again."
The xpcom.dll error can occur during program installation or while rebooting your PC or when shutting it down.[/section]
Solution
Error Causes
It is difficult to narrow down a single cause of this error code simply because the Xpcom.dll error code may be triggered due to several reasons. Some of the common causes include:
Invalid or corrupt xpcom.dll registry entry
Viral infection
Outdated PC drivers
Another program overwrote the required version of xpcom.dll
Xpcom.dll file is accidentally deleted or uninstalled
Mozilla Foundation hardware failure
Further Information and Manual Repair
Here are the best, quick and easy DIY methods to resolve Xpcom.dll error code on your system within minutes:
Method 1: Update Window Drivers
To resolve the xpcom.dll error on your system, try updating Window drivers. To do this simply use the driver update wizard from within Device Manager.
The driver update wizard walks you through the entire drive update process, making it easy and hassle-free for you to update drivers.
Method 2: Download and Install Xpcom.dll File
Since DLL are shared files and used to run and load multiple programs, it is possible that you might have accidentally removed this file while uninstalling a program on your system. This is the reason why the Xpcom.dll file goes missing.
To retrieve the Xpcom.dll file simply go to the recycle bin. Reinstall the deleted program. However, if it still doesn’t resolve the error, then it is advisable to download and install the Xpcom.dll file from a trusted DLL file website over the internet.
Method 3: Scan for Viruses and Repair the Registry
If the error code occurs due to malware infection or is related to registry issues, then simply download Restoro. This is a user-friendly and multi-functional PC Fixer deployed with 6 scanners including a powerful antivirus and a registry cleaner.
It is compatible with all Windows versions. Simply run it to remove all types of viruses infecting your system and clean/repair the registry.
Click here to download Restoro and resolve the Xpcom.dll error on your PC.
Did you know you can use emoji in file names inside Windows 10?
It is no secret that emojis are basically everywhere and Microsoft has seen this and integrated them into Windows itself, so you can name files using emojis or combine them with text.
Placing emojis in file names or in the text is extremely easy, all you have to do is press ⊞ WINDOWS + . and the emoji dialog will open from where you can find which emoji you would like to use.
And that's it, you just used emoji for the file naming.
!!!NOTE!!!
In theory, some applications may not like these emojis if they don’t support Unicode characters. However, modern applications are designed to work with a broad set of languages that should properly support emojis.
For example, the classic Windows Command Prompt can’t see emoji characters in file names properly, but both PowerShell and Microsoft’s new Windows Terminal can display them properly.
If you do run into a problem, you can always open File Explorer and rename the affected files and folders to remove the emoji characters. You can then use those files in applications that don’t properly support emoji file names.







 Error Causes