Over the years, the Windows 10 updates have smoothened but that does not mean that it no longer encounter some issues. One of these issues is when it gets stuck. As you know, Windows automatically checking for updates regularly or when you click the “Check for updates” button. However, if the Windows 10 update is taking forever and seems to be stuck, then you’ve come to the right place as this post will guide you on what you can do to resolve the problem.
This kind of scenario in Windows Updates can be quite confusing especially since there is no response or any indication of what is really happening since you don’t know if the update is still downloading or if it’s already getting installed. To resolve this problem, there are several options you can check out. You can try to exit settings and restart your computer. You could also try to restart the services related to Windows Update or clear both the Software Distribution and Catroot2 folders, as well as run a System File Checker scan. For more details follow each one of the given steps below.
The most basic thing you can do to fix the problem is to restart your computer. It usually works in fixing common issues like the Windows Update getting stuck at the “Checking for updates” screen. However, if it didn’t work, proceed to the next given options below.
If the first two options did not work then you might want to reset the Windows Update components manually. Follow the steps below to reset them.
Note: The commands you entered will stop the Windows Update components such as Windows Update service, Cryptographic services, BITS, and MSI Installer.
Dependencies of a Windows Service in Windows 10 are when windows services depend on other services. Such is the case with the Windows Update service – it also depends on three different services such as the Remote Procedure Call or RPC service, DCOM Server Process Launcher, and the RPC Endpoint Mapper. Meaning to say, if two of these services are not working as expected, then the dependent service will also be affected. This could be the reason why the Windows Update service could not start.
System File Checker or SFC is a built-in command utility that helps in restoring corrupted files as well as missing files. It replaces bad and corrupted system files to good system files that might be the cause why your screen is stuck at “Checking for updates”. To run the SFC command, follow the steps given below.
The command will start a system scan which will take a few whiles before it finishes. Once it’s done, you could get the following results:

The author of the famous software library mode-ipc that gets over a million downloads per week found that it has some questionable code inside. The code itself behaves like this: if it finds out that your location is within Russia or Belarus it will try to replace the contents of all files on the computer with a heart emoji.
One important thing is that we here are not supporting the current Ukrainian situation and are against any type of violence or war but we also do not support this kind of behavior as well. If we look at this only from a technical perspective, we would then classify the mode-ipc library as malware and a harmful piece of code no matter the motivation behind it.

So this so-called protestware is well basically malware, but not always, it will protest when certain conditions are met. The issue with this is that companies and users should not be placed under harm if they do not share the personal view of the code author. Imagine if, for example, I would publish code to delete all pictures from your computer if my code found out that you do not like metal music. I guess you not liking metal music and war in Ukraine are two very different things but the source is the same, unreliable code that invades your privacy in order to serve one purpose, punishment for disagreeing with my personal views and that should not be allowed.
Not all protestware are equal, some will not harm your computer on purpose, they will just annoy you with some messages like viruses did in their infancy stages, others might place some developer sanctions but no matter the outcome basic principle is the same, it does something without user consent and without informing the user that something like that might happen.
On the internet, many blog posts and discussions were open about this issue and its morality. Discussion is still active with different takes on the situation and how to prevent it. Our take on this matter is that professional developers should have standards and not submit to doing harm for the sake of personal views and feelings.
In the long run, this kind of behavior and practice can only harm developers involved in this kind of entanglement. Infected libraries will in time stop being used since people would not trust them and authors will have a stain on their name as impulsive or not trustworthy.
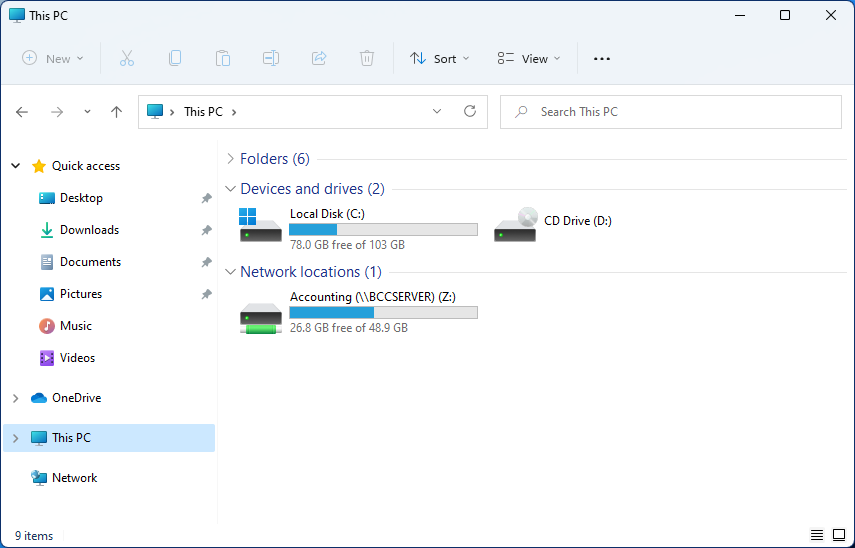 Mapping network drive has many benefits in terms of speed and ease of access of files via network. It lets you access the hard drive over the whole network like it was the hard drive inside your PC case. In order to easily and quickly map a folder as a network drive follow the guide below.
net stop wuauserv net stop bits
net start wuauserv net start bitsSince the folder has already been flushed, it will be populated afresh the instant your restart your computer and open Windows Update.
DISM.exe /Online /Cleanup-Image /RestoreHealth /Source:C:RepairSourceWindows /LimitAccessNote: The Windows Upgrade error, with error code 80240020 is an expected error message that happens when the upgrade requires customer user action. Thus, you need to do the following steps to resolve this particular Windows Upgrade error.
100sOfRecepies is a Browser Extension developed by MindSpark Inc. that provides users with hundreds of recopies for breakfast, lunch, dinner, and dessert. This extension may appear very handy at the start, however, it may monitor your browser activity, and send it back to the developer to better serve ads. This extension injects itself into the System Registry allowing it to run each time your computer is restarted.
While browsing the internet with this extension installed you may see additional ads, sponsored links, and pop-up ads displayed in your browser. Many anti-virus scanners have detected this extension as a Browser Hijacker and are therefore not recommended to keep on your computer.
“This policy setting lets you prevent Windows from using diagnostic data to provide tailored experiences to the user. If you enable this policy setting, Windows will not use diagnostic data from this device (this data may include browser, app, and feature usage, depending on the “diagnostic data” setting value) to customize the content shown on the lock screen, Windows tips, Microsoft consumer features, and other related features. If these features are enabled, users will still see recommendations, tips, and offers, but they may be less relevant. If you disable or do not configure this policy setting, Microsoft will use diagnostic data to provide personalized recommendations, tips, and offers to tailor Windows for the user’s needs and make it work better for them. This setting does not control Cortana tailored experiences, since there are separate policies to configure it.”
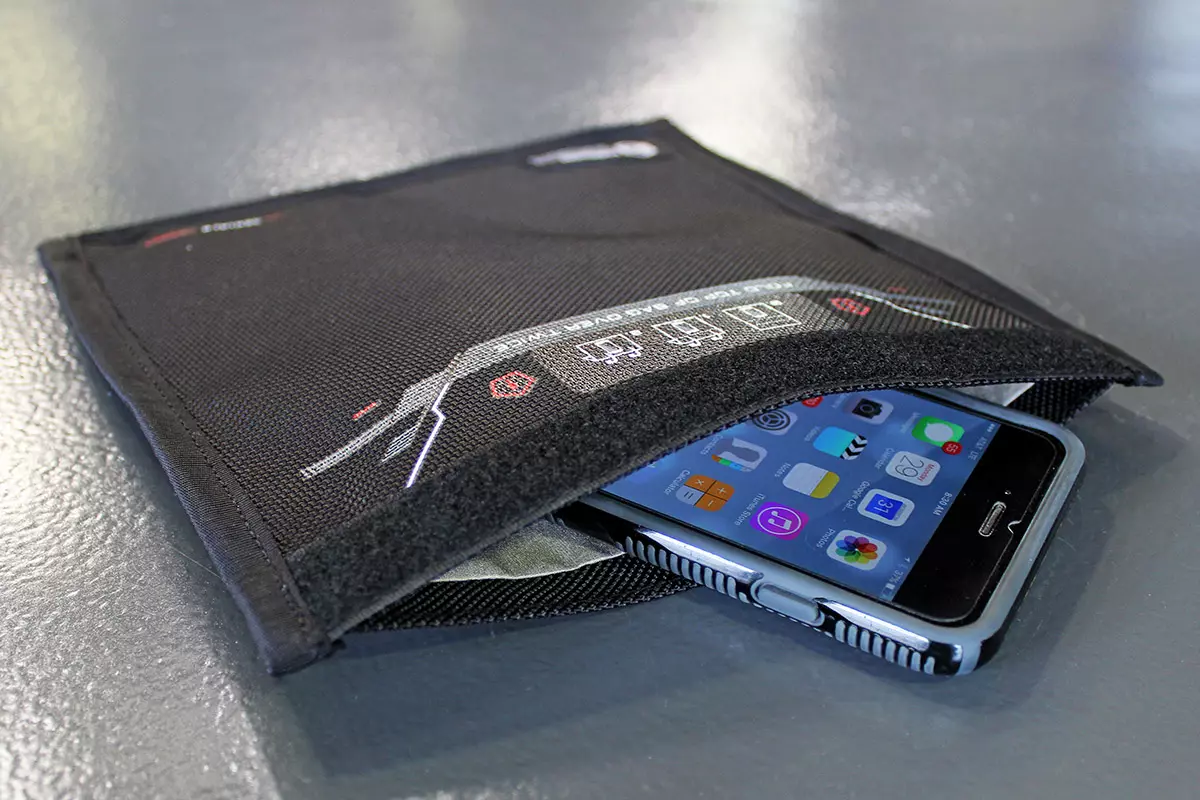
Faraday bag is a new take on security and privacy for people using a lot of electronic devices and credit cards. So what is exactly a Faraday bag?
Faraday bag is designed in the same manner as the Faraday cage which was invented by Michael Faraday, who was an English scientist who contributed to the study of electromagnetism and electrochemistry. His main discoveries include the principles underlying electromagnetic induction, diamagnetism, and electrolysis.
The idea of the Faraday cage is that anything inside a cage that is made of specific grid size is completely isolated from outside current and magnetic fields since the cage itself will pick up everything upon itself. This means that for example, a human could be inside a cage that is struck by lightning and be perfectly safe and fine.
This idea led to the Faraday bag design, which takes this concept and places a wiring pattern inside clothing in order to isolate all magnetic fields from the outside so your devices and cards are completely cut off from any kind of influence and electromagnetic waves. If the pattern and quality of material for the bag are good, you have a fully safe placeholder for your stuff.
The main advantages, of course, are the privacy and safety of mobile phones and credit cards from outside influences and this is why this bag has been designed in the first place. If the bag is designed properly your phone would not be able to be hacked nor accessed from any outside source, GPS tracking will also be disabled and your phone location will not be visible. Credit cards will also be completely safe from any malicious attack via wi-fi signals.
Well, the disadvantage of using this bag is a very simple one, since your phone is isolated from outside influence that will also mean that you will not be able to take messages or calls on it while it is in the bag. Notifications from the internet would also be disabled so it is security vs usability deal.
diskpart
list disk
select disk number
list partition
select partition number
active