If your USB keeps disconnecting and reconnecting after you connect your USB device on its own randomly, then the problem might have something to do with a hardware or driver issue. The first thing you have to do in such a case is to make sure that the device is working on another computer. This will help you isolate the problem and if it turns out that it works, then the problem lies in your computer and not your USB device.
To fix this connection problem between your USB device and Windows 10 computer, you can use the options given below as a reference.
Since it could be a driver issue, you can try to update or reinstall the Universal Serial Bus Controller drivers using the Device Manager. Refer to the following steps:
Note: If it is a regular USB drive, then it will be listed as a USB Mass Storage Device but if you have a USB 3.0 device, then look for a USB 3.0 Extensible Host Controller.
Note: If updating the USB Controller drivers didn’t work, you can try to reinstall them instead.
You might want to change the USB port since modern computers have a variety of USB ports. So if your USB drive supports USB 3.0 or 3.1, make sure that you plug it inside a USB 3.0 or 3.1 ports. If you’re not sure which port, just keep in mind that the USB 3 port is usually blue or you can also use your computer’s documentation or manual as a reference to locate it.
You could also try to turn off the Power Saving option to resolve the problem. All you have to do is switch to Power Management after you select the Properties of the USB device and from there, uncheck the “Allow the computer to turn off the device to save power” option. On the other hand, if you are using a laptop and did not use the USB device for a long time, then it could be powered off. This will ensure that the system does not turn off the USB device.
If you were unable to install the Universal Serial Bus controller drivers you’ve downloaded, you can try installing them again but this time using Compatibility mode. Follow the steps below to do so:
Note: If you have other programs that won’t work on the existing version of Windows, then make sure to run the program in a Compatibility mode.

 Error Causes
 The World of Superhero movies has gone through some interesting variations, from good ones to bad ones, from big-budget ones to small ventures, even from large well-known characters to niche ones.
No matter what you think of some of them no one would disagree that since the release of Iron Man and starting Marvel cinematic universe superheroes movies exploded in popularity.
Following the Superhero craze, let’s see what is coming up in comic books transferred to big screens with their release dates.
The World of Superhero movies has gone through some interesting variations, from good ones to bad ones, from big-budget ones to small ventures, even from large well-known characters to niche ones.
No matter what you think of some of them no one would disagree that since the release of Iron Man and starting Marvel cinematic universe superheroes movies exploded in popularity.
Following the Superhero craze, let’s see what is coming up in comic books transferred to big screens with their release dates.
“Something went wrong with the projection”.This kind of error is caused by some issues with the Display driver, hardware, corrupted or damaged system files, and so on. And to fix it, there are several methods you can check out. You can try to update, roll back or reinstall the Display drivers. You could also run the Network Adapter troubleshooter or the Video Playback troubleshooter as well as run System Restore to undo any recent changes that might have triggered the error or reset your Windows 10 computer without deleting any files. For more details, refer to each one of the options provided below.
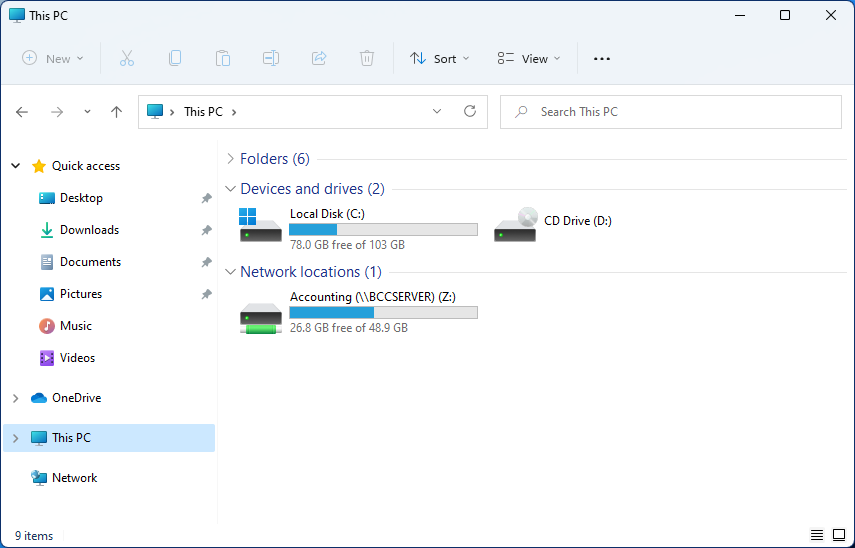 Mapping network drive has many benefits in terms of speed and ease of access of files via network. It lets you access the hard drive over the whole network like it was the hard drive inside your PC case. In order to easily and quickly map a folder as a network drive follow the guide below.
 If you are one of the users that are experiencing this kind of annoyance, we have a solution for you. Follow this guide as presented and repair this annoying error.
“Close other apps. It looks as though another app is already using the camera. If you need it, here’s the error code: 0xA00F4243 (0xC00D3704)”To fix the error code: 0xA00F4243 (0xC00D3704) in the Camera UWP app, you can try to run the Windows Store Apps troubleshooter or reset the Camera app or update or reinstall the driver or apply some tweaks in the Registry Editor. In addition, you can also try checking the Windows Services or run the System File Checker.
Error Causes“Sfc /scannow”
 Storage management Page update
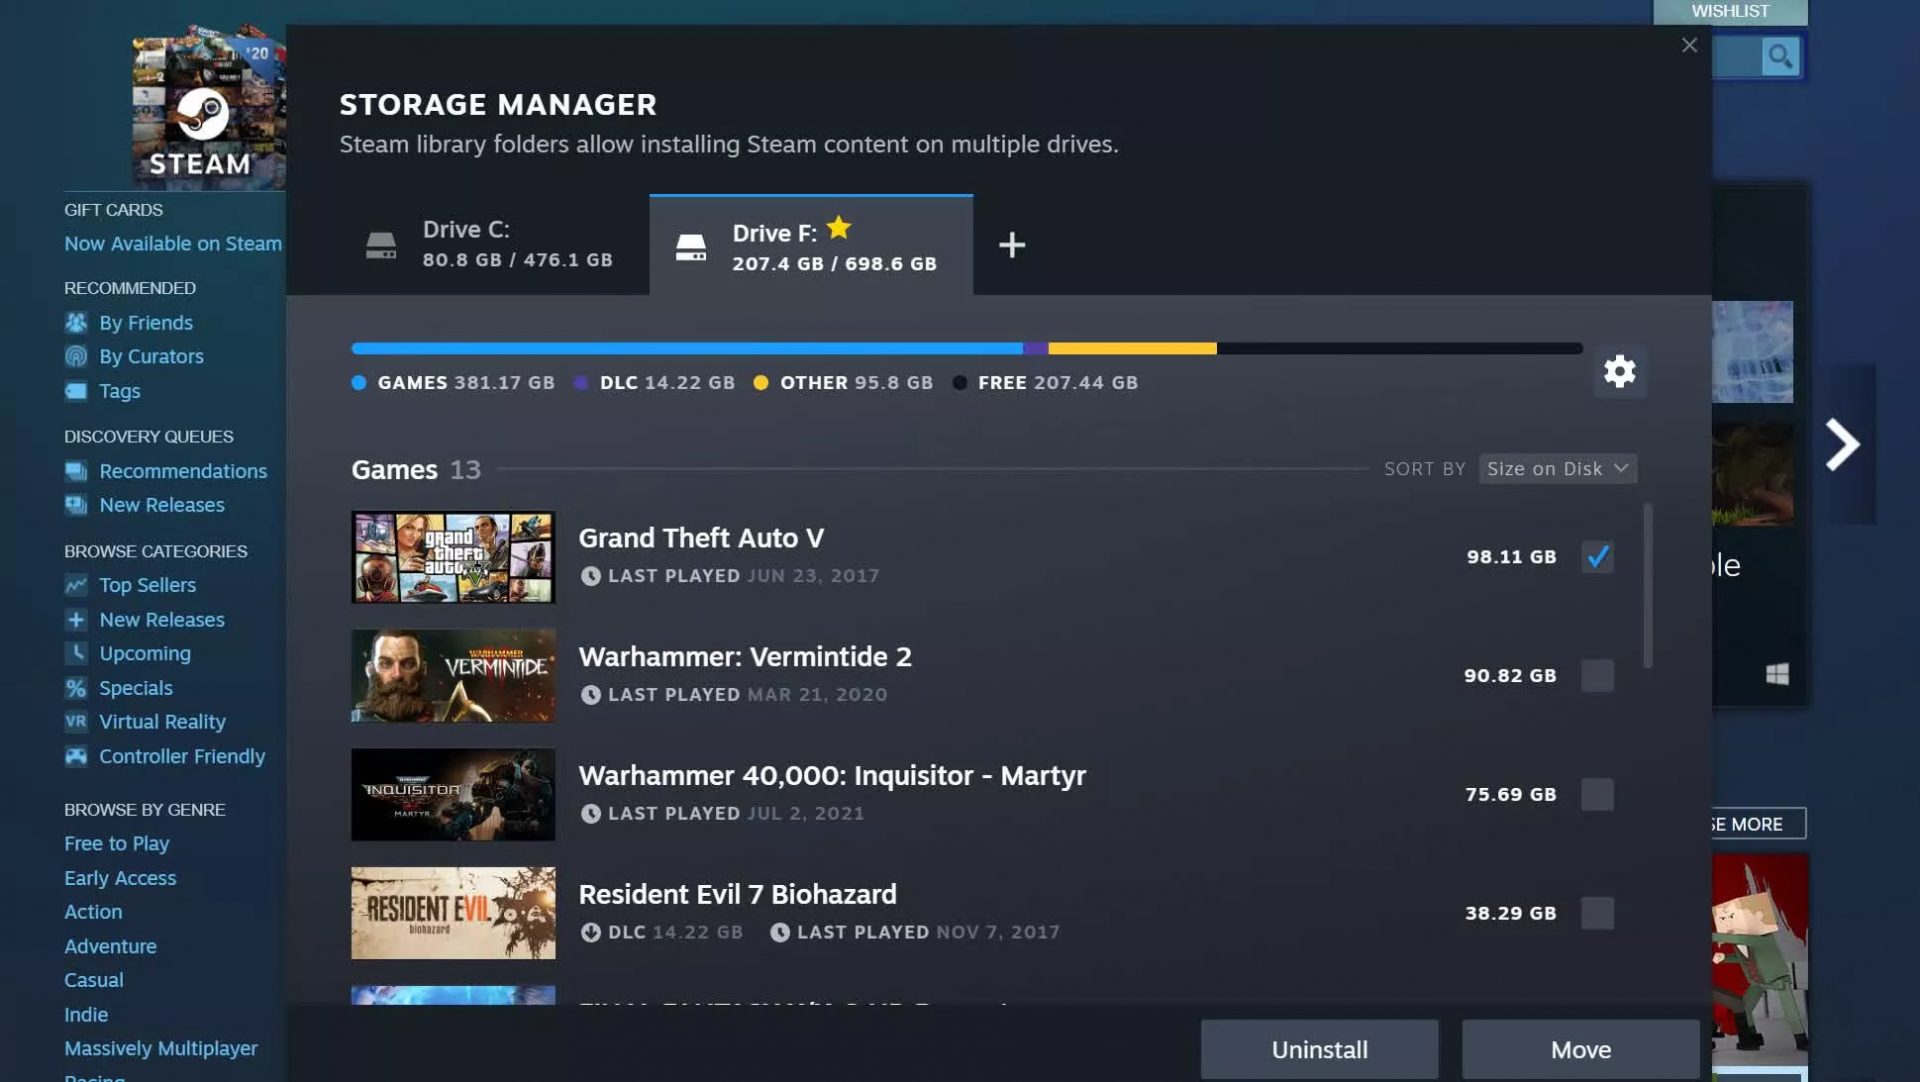 Another thing with the Steam store management page is the ability to move installation files from one location to another. Let’s say that you have two or more hard disk drivers in your machine and that you have SSD that you use for running stuff since it is fast and larger and slower one for storage. Now you can easily and quickly move one installation from one to another in order to take advantage of your faster SSD for quicker LOAD game times without making a new installation.
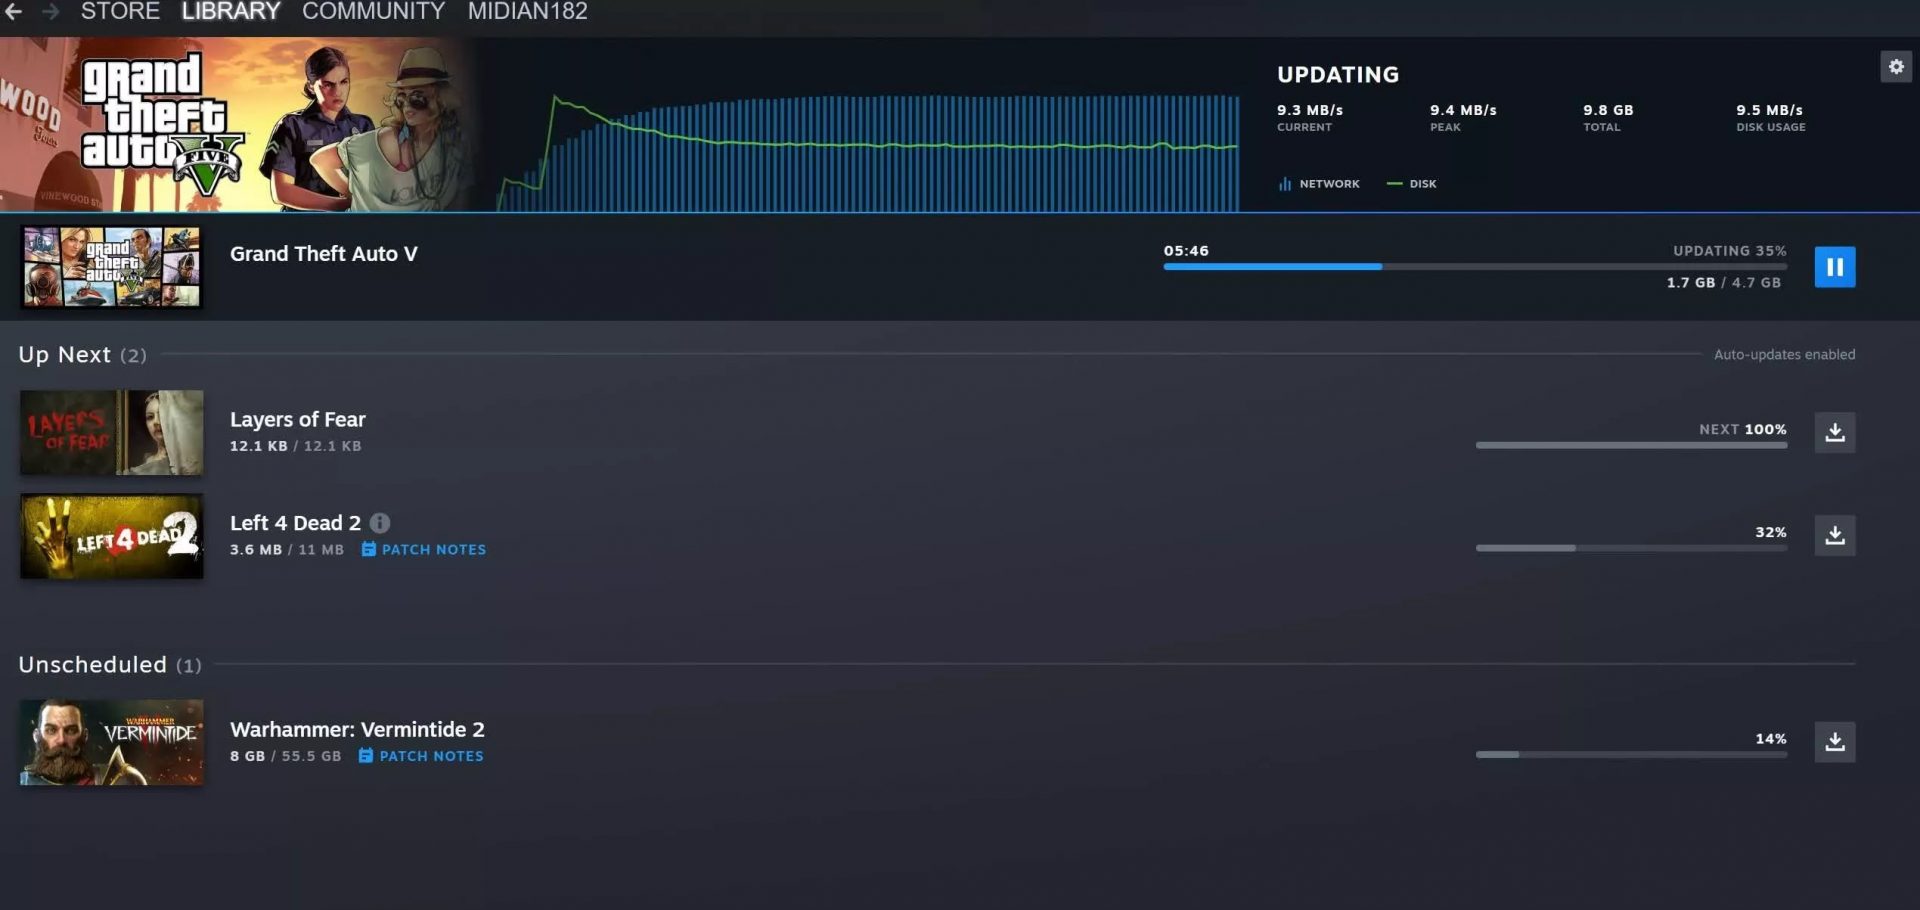 Also, you can now drag and drop items in the download bracket to reorder download orders or place them as active downloads to start downloading right away.