The Event Viewer in the Windows operating system is used to troubleshoot any computer issues. It is one of the most useful tools that keep logs of both security and system events. It also monitors for both software and hardware problems in the computer. This tool is the only one with amazing features that maintain logs about everything that’s going on in the computer system. It keeps track of all the information to the point where going over them will take a lot of time.
Luckily, the Event Viewer tool now allows users to create custom views where you can set the filters and sort the data recorded to limit the information details to only what you’re interested in seeing. For instance, if you want to troubleshoot with one hard drive, you can just create a special custom view to display only the hard drive warnings in the security logs. This will save you hassle and time.
Take note that the logs in the Event Viewer are divided into two main categories namely the Window logs and the Application and Services logs. You can just set the filter to the logs by their event id, specific date, and many other events when you have to troubleshoot some problem in your computer. So if you are trying to troubleshoot a problem in your Windows 10 computer and you’re checking the Event Viewer, read on as this post will guide you in creating custom event views in the Event Viewer. To get started, refer to the instructions given below.
Step 1: Go to the Start menu and in the search box, type “event viewer” and then click on Event Viewer from the search results to open it.
Step 2: After opening Event Viewer, click on Custom Views located in the left pane of the window.
Step 3: Next, click on the Administrative events under the Custom View to create special log views.
Step 4: Then on the right side of the window, click on Create Custom View to open the Create Custom View window.
Step 5: There is a logged drop-down list under Filter. From there, you have the option to choose an appropriate predefined time or use a custom time range for your Custom log views.
Step 6: After that, select an appropriate event level for your custom view. You have fine entry-level options to choose from such as critical event level, error, warning, information and verbose.
- Critical – select this if you want to see the events that require your immediate attention in the custom view.
- Error – select this if you want your Event Viewer to display the events that are less critical but hints at the problems.
- Warning – select this event-level if you want to see the event with the potential problem but may not bound to happen.
- Verbose – select this if you want to see detailed information about all the events.
Step 7: After you’ve selected the event level, you now have to select how you want the events to be filtered. They can either be filtered By the log or By the source.
- By the log – you can select two options called Windows log and, Application and Service logs. The Windows logs allow you to filter the logs created during events like setup, security, applications, and system events. While the Application and Service logs filter the log created by the installed applications in your system.
- By the source – select this if you want your Custom View to search for information in event sources. It allows you to view events in detail for various applications and devices.
Note: You have the option to further customize the event logs with more filters like Event IDs, task category, keywords, User, and Computer. Using these additional filters, you can choose to filter the events in the special views by specifying event id numbers in the Event IDs, entering predefined Windows words in the Keyword, specify the user accounts in the User field, as well as choose the system from the server to maintain logs in the Computer field.
Step 8: Once you’re done customizing the log filter, click on OK to apply the changes made.
Step 9: After that, a Save Filter should be displayed in the Custom View window. Just enter the Custom View name and select the Event Viewer folder where you want to save the Custom view. The folder name should be Custom View by default. And if you want, you can also create your own folder if you want your custom views to be visible to all the system users.
Step 10: Next, check all the Users box located in the lower corner of the window and then click the OK button after you’re done.
You should now see the customized filter you just created on the left side of the window. Just click on it to check your filtered events in the center of the Event Viewer window. And for you to save the custom view logs, simply right-click on the Custom views you created and then click on Save All Events in the Custom View As from the drop-down menu. Then put a name on the file and select the appropriate location where you want to save the logs and click on the Save button. Note that the log file is saved with the “.EVTX” file extension and when you double click on it, it will open the file in the Event Viewer.


 This error is very frustrating and it annoys pretty much anyone who encountered it but do not worry we have a solution for you.
First thing is to confirm the error prompt, Click on the OK button and then on X to exit Windows 10 installation wizard. Click on yes to confirm that you want to exit the setup.
You will find yourself in original installation windows.
On that screen choose and click on Repair your computer. Choose an option screen that will pop up, click on Troubleshoot. In the advanced options, click on the command prompt.
Once you are in command prompts type DISKPART and hit ENTER
In the diskpart prompt type LIST DISK and hit ENTER again.
type SELECT DISK #, where # is listed disk number where you would like to install Windows.
type LIST VOLUME in order to list volumes in the selected disk and hit ENTER
You need to select the volume on which you would like to place your WINDOWS, to do this type in SELECT VOLUME #, where # is the listed number of the volume
Finally, type FORMAT FS=NTFS and hit ENTER
You have successfully formated a given volume, you can now exit DISKPART and return to setup, to exit DISKPART simply type exit and hit ENTER.
Leave command prompt as well by again typing exit and hitting ENTER
You will be returned to Choose an option screen, click on Turn off your PC.
Your drive has been successfully formatted and it is ready for clean Windows installation, you can now restart your Windows 10 installation and the process will complete without errors.
This error is very frustrating and it annoys pretty much anyone who encountered it but do not worry we have a solution for you.
First thing is to confirm the error prompt, Click on the OK button and then on X to exit Windows 10 installation wizard. Click on yes to confirm that you want to exit the setup.
You will find yourself in original installation windows.
On that screen choose and click on Repair your computer. Choose an option screen that will pop up, click on Troubleshoot. In the advanced options, click on the command prompt.
Once you are in command prompts type DISKPART and hit ENTER
In the diskpart prompt type LIST DISK and hit ENTER again.
type SELECT DISK #, where # is listed disk number where you would like to install Windows.
type LIST VOLUME in order to list volumes in the selected disk and hit ENTER
You need to select the volume on which you would like to place your WINDOWS, to do this type in SELECT VOLUME #, where # is the listed number of the volume
Finally, type FORMAT FS=NTFS and hit ENTER
You have successfully formated a given volume, you can now exit DISKPART and return to setup, to exit DISKPART simply type exit and hit ENTER.
Leave command prompt as well by again typing exit and hitting ENTER
You will be returned to Choose an option screen, click on Turn off your PC.
Your drive has been successfully formatted and it is ready for clean Windows installation, you can now restart your Windows 10 installation and the process will complete without errors.  If you are one of the mentioned users and for any reason, you do not wish to have a touchscreen-enabled then sit back and relax, we have you covered in this tutorial on how to fully disable touchscreen inside Windows 11.

 History of Commodore
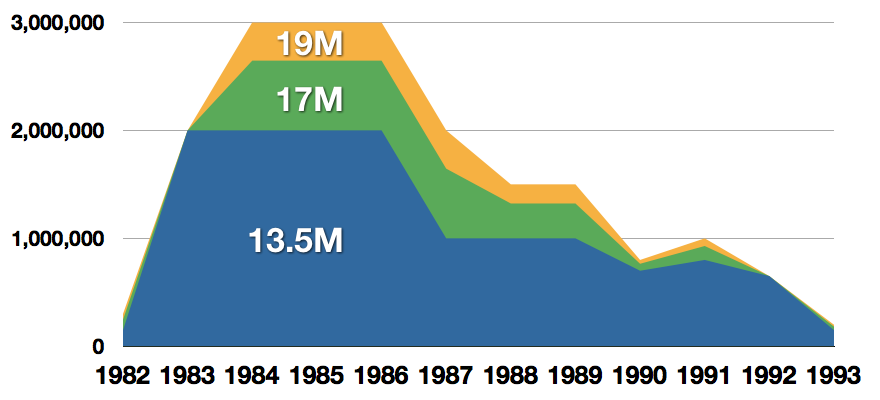
 With sales booming and the early reliability issues with the hardware addressed, software for the C64 began to grow in size and ambition during 1984. This growth shifted to the primary focus of most US game developers. The two holdouts were Sierra, who largely skipped over the C64 in favor of Apple and PC compatible machines, and Broderbund, who was heavily invested in educational software and developed primarily around the Apple II. In the North American market, the disk format had become nearly universal while cassette and cartridge-based software all but disappeared. So most US-developed games by this point grew large enough to require multi-loading.
At a mid-1984 conference of game developers and experts at Origins Game Fair, Dan Bunten, Sid Meier, and a representative of Avalon Hill said that they were developing games for the C64 first as the most promising market. By 1985, games were an estimated 60 to 70% of Commodore 64 software. Over 35% of SSI's 1986 sales were for the C64, ten points higher than for the Apple II.
Everything was great for Commodore but the industry was moving forward and by the year 1988, PC compatible computers were stated to be the largest and fastest-growing home entertainment systems pushing C64 on to second place. Also, Nintendo’s gaming system has started to take hold in the world with amazing 7 million systems sold in 1988 only.
By the year 1991, many developers exited the gaming market for Commodore 64 home computer system and its popularity started to fall due to lack of software and not so many hardware changes.
With sales booming and the early reliability issues with the hardware addressed, software for the C64 began to grow in size and ambition during 1984. This growth shifted to the primary focus of most US game developers. The two holdouts were Sierra, who largely skipped over the C64 in favor of Apple and PC compatible machines, and Broderbund, who was heavily invested in educational software and developed primarily around the Apple II. In the North American market, the disk format had become nearly universal while cassette and cartridge-based software all but disappeared. So most US-developed games by this point grew large enough to require multi-loading.
At a mid-1984 conference of game developers and experts at Origins Game Fair, Dan Bunten, Sid Meier, and a representative of Avalon Hill said that they were developing games for the C64 first as the most promising market. By 1985, games were an estimated 60 to 70% of Commodore 64 software. Over 35% of SSI's 1986 sales were for the C64, ten points higher than for the Apple II.
Everything was great for Commodore but the industry was moving forward and by the year 1988, PC compatible computers were stated to be the largest and fastest-growing home entertainment systems pushing C64 on to second place. Also, Nintendo’s gaming system has started to take hold in the world with amazing 7 million systems sold in 1988 only.
By the year 1991, many developers exited the gaming market for Commodore 64 home computer system and its popularity started to fall due to lack of software and not so many hardware changes.
 Commodore announced that the C64 would be finally discontinued in 1995.
However, only one month later in April 1994, the company filed for bankruptcy. When Commodore went bankrupt, all production on their inventory, including the C64, was discontinued, thus ending the C64's 11 and a half year production.
Commodore announced that the C64 would be finally discontinued in 1995.
However, only one month later in April 1994, the company filed for bankruptcy. When Commodore went bankrupt, all production on their inventory, including the C64, was discontinued, thus ending the C64's 11 and a half year production.
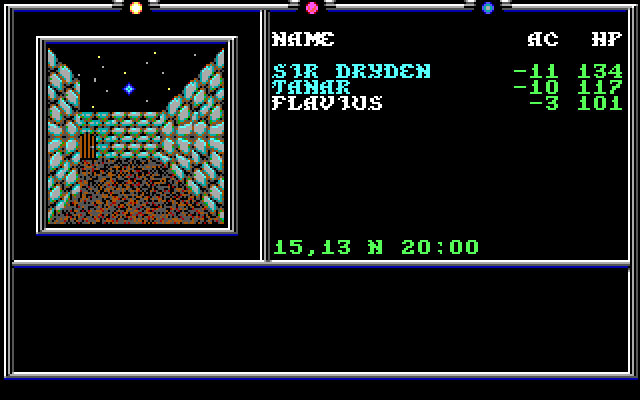
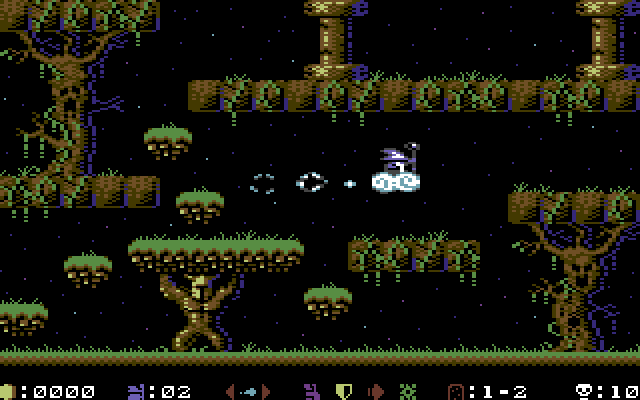 Zak McKracken and the Alien Mindbenders
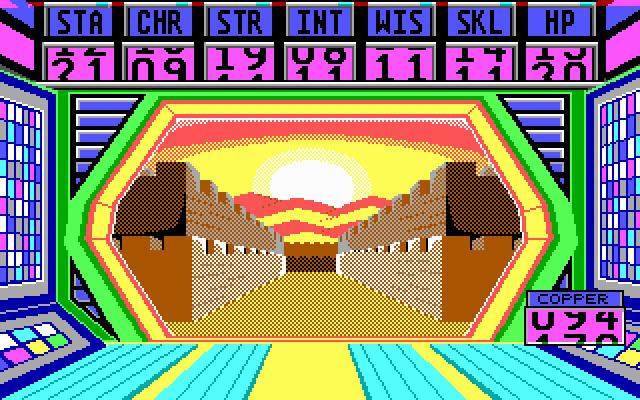
 If you are not keen on spending money for reliving and checking games or software of C64 here are some links to help you to at least experience part of it completely free.
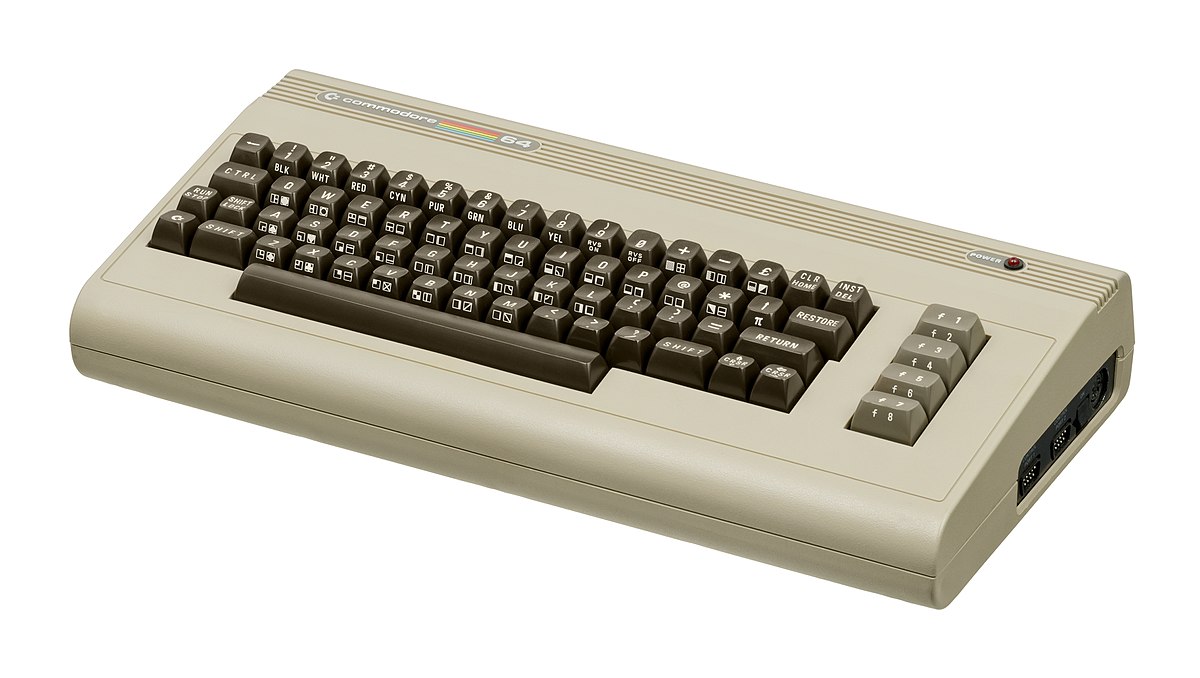
Commodore 64
If you are not keen on spending money for reliving and checking games or software of C64 here are some links to help you to at least experience part of it completely free.
Commodore 64