As you know, “JPEG” is one of the commonly used formats for image files which is a compression of digital images. It is one of the topmost used file formats by mobile phones and digital cameras and usually achieves a 10:1 compression with little visible loss in the quality of the image.
There are tons of cases as of late, most particularly after the latest Windows 10 update where users were not able to open JPEG files on their PCs. Every time they try to open any JPEG file, they either get an error or nothing happens at all. This issue could be due to the default handler application for JPEG applications not being set or there could be some third-party image viewer not working properly. To fix this issue with JPEG files, refer to the troubleshooting options below.
Option 1 – Try to change the file type association
You need to check if the file type association of the JPEG files are correctly set or not since there are tons of third party programs that change the file type association automatically to themselves without your permission the instant they are installed and so if any of these third-party programs are broken, then naturally, your JPEG files won’t really open. That’s why you can try changing the setting to the default photo viewer instead of the third-party one. To do so, follow the steps below.
Tap the Win + R keys to open the Run dialog box.
Then type in “control panel” in the field and hit Enter to open the Control Panel.
After opening Control Panel, click on the Programs category and select the “Default Programs” option from the menu.
Next, select the second option “Associate a file type or protocol with a program” and then select the “Choose default apps by file type” option.
After that, click on the .jpg file extension and choose the option from the pop-up.
Now restart your PC to refresh all your programs and then see if it has fixed the problem or not.
Option 2 – Try to update your computer
Microsoft frequently releases updates to target bugs and improve users’ experience. And this particular error where JPEG files won’t open is already acknowledged by Microsoft so you need to make sure that your Windows 10 PC is updated to the latest released update and that there are no pending updates.
Tap the Win + S keys to open Search and then type in “update” in the field and open the system setting from the search results.
After that, check for updates and then download and install them if needed.
Now restart your PC once the update is done and check if you can now open JPEG files.
Option 3 – Try to reset the Photos app via Settings
Resetting the Photos app could also help you in fixing the problem. Note that this option will reset all the configurations and your data associated with your Photos and makes the application go into a state when you first started using it and that this option will fix any discrepancies that your application might be experiencing right now.
Tap the Win + S keys to open the search bar.
Then type in “settings” in the field to open the Settings application.
After opening Settings, click the “Apps” category.
From there, a list of applications installed on your computer will appear.
Navigate through these applications until you find the Photos app and then click on the Advanced options.
Afterward, click the Reset button that appears on the next screen. Then a new pop-up comes up and will warn you that all the preferences, as well as sign-in information, will be lost. Click on “Reset” anyway to proceed in resetting the Photos app.
Restart your PC once the reset is done.
Option 4 – Try to reinstall the Photos app
Before you start using other third-party image viewers just yet, you can try to reinstall the Photos app first. Thus, if there is something wrong with it, it will instantly get fixed right after it reinstalls. Just take note that this option requires administrative privileges so you need to be logged in as an administrator.
The first thing you have to do is tap the Windows + S keys and type in “PowerShell”.
Next, right-click on the file and click on the “Run as administrator” option from the context menu.
Once PowerShell is opened, execute this command: get-appxpackage *Microsoft.Windows.Photos* | remove-appxpackage
The command you just entered will remove the Photos app. After the process is done, go to the Microsoft Store and look for Microsoft Photos then download and install it again.
While browsing the internet, if you suddenly encounter a warning with an error message saying, “Server certificate has been revoked ERR CERT REVOKED” then it indicates that the SSL certificate used by the website has been revoked by its issuer. This kind of problem can only be fixed by the website owner but that does not mean that you can’t do anything about it. In fact, you have the option to bypass this error as well as contact the certificate issuer – all this and more.
Just a reminder, if a website that accepts payment, its passwords don’t have SSL or has some certification issue, you should never trust it. For instance, if you are trying to purchase something online and you’re on the payment stage but you encounter the “Server certificate has been revoked ERR CERT REVOKED” error, you must not proceed.
To resolve the “Server certificate has been revoked ERR CERT REVOKED” error, here are some things you can do.
Option 1 – Try contacting the Certificate Issuer
If you are the website owner, of course, the best thing you can is to get in touch with the Certificate Issuer in order to resolve the problem.
Option 2 – Try fixing the Date and Time
You have to check your computer’s Date and Time. There are cases when this simple setting causes a connection problem. So if your computer Date and Time is set to date or time that this after the certificate expiration date, then you have to make sure that you set it to automatically configure time. To do so, just open Settings > Time and Language. From there, turn on the toggle for “Set time automatically” and “Set time zone automatically” options. After that, check if it fixes the error, if not, you need to check if the manual selection is correctly set or not.
Option 3 – Bypass the Certificate Revocation Check
As pointed out earlier, you have the option to bypass the Certificate Revocation check. All you have to do is follow the steps below.
In the search box of your browser, type “internet options” and open it once it appears.
After that, go to the Advanced tab and navigate to the Security subheading.
Next, uncheck the “Check for publisher’s certificate revocation” option as well as the “Check for server certificate revocation” option.
Now restart your computer. Upon the next startup, try opening the website again. This time, your browser will stop checking it for certificate issues. However, it’s not safe to leave those options unchecked so make sure that once the website’s SSL certificate is fixed or once you no longer have to visit that website, you recheck those options.
If you have multiple keyboards, things can get quite tricky. There are times when the keyboard language changes on its own since the keyboard changes while you are typing. The thing is, the keyboard changes because sometimes we accidentally tap shortcuts like Win key + Space key or Alt + Shift or Ctrl + Shift which changes the keyboard pairs or language. Thus, if your keyboard language changes on its own, there are two ways to resolve it. First, you have to make sure that Windows 10 does not add keyboards without your permission. Second, you have to make sure that the shortcut keys don’t change the keyboard language. This second option is what we’re going to discuss in this post.
You need to first set a different input method for each app window. To do that, you have to disable the change in layout. Refer to these steps:
Go to Settings > Language and input.
Next, type “switching input methods” to open the Advanced keyboard settings with this option inside.
After that, select the checkbox labeled as “Let me set a different input method for each app window” and then click the Save button.
Restart your computer.
Now that you’ve disabled the change in layout, you now have to find the keyboard settings. Just go to Settings > Devices > Typing > Advanced Keyboard settings. From there, you have the option to select which keyboard is going to be used for any app. When you change the keyboard every time you use an app, usually, Windows remember it so that you won’t have to set it up all over again. In addition, the Advanced keyboard settings page also allows you to override the default input method which could be different from the first one in your language list. Aside from that, there is also a Language bar option that comes in handy as you can quickly switch between keyboards. And if you removed it, you have the option to restore the language bar back as well.
Now all that’s left for you to do is to change the Language Settings under the Administrative tab. A user from a forum that came up with this solution, reported that the issue occurred when he started typing in some program with non-Unicode characters which caused Windows to use the default system local language to interpret these characters even though the language is unavailable in the Language bar. To change the Language Settings under the Administrative tab, follow these steps:
Go to Settings > Time and Language > Language > Administrative language settings.
After that, click on Copy Settings under the Administrative tab.
Now make sure that all the Display language, Input language, and Format are English (United States) or any language you prefer.
Then mark the two checkboxes in “Copy your current settings to Welcome screen and system accounts & New user accounts”.
After that, click OK and then exit.
Note: You also have the option to disable those shortcut combinations which can change your keyboard settings accidentally.
When visiting the Windows Update Website or the Microsoft Update Website to download the latest update for hardware drives, you could possibly receive Error Code 0x80070103 when clicking on the update driver. This error code occurs when Windows tries to download a piece of identical hardware for a second time. It could also occur when Windows tries to update a currently installed driver to an unsuitable version of that driver.
Solution
Further Information and Manual Repair
There aren’t many ways to handle this issue. Below are two methods of fixing Error Code 0x80070103.
After the "scan for updates" is complete, click the Welcome or Custom page.
Next, click Hardware, in the navigation panel, and then on the tab for "optional hardware Updates", the Update client will display the available updates.
For the graphics card, scan the second update after which you'll click to select the option that says "do not show this update again".
Hit the "Review and install updates" button.
Confirm that the second update for the graphics card is not present, then move on the installing the updates.
Click on the start button, go to All Programs, and then click on Windows Update.
Hit the "Check for updates" tab.
After the "scan for updates" is over, click the"Optional updates" link.
In the "Select the updates you want to install" section, right-click the update that is not needed and hide them.
Hit the OK button.
To install any additional updates that are selected, click "Install Updates". Close Windows Update if no other updates are selected,
For touch screens, swipe in from the right edge of the screen, tap Search (or point to the upper-right corner of the screen if you're using a mouse, moving the pointer down, before clicking Search). Enter "Windows Updates" in the search box, click Settings, and then click "Check for updates".
After the scan is complete, click the"Optional updates are available" link.
Right-click or Tap and hold the update you want to hide, select"Hide update", and then select OK.
If any other updates are available, save all work in "other programs", then restart the computer to the install updates; otherwise, opt out of the Windows Update window.
Open the search window and type “Windows Update” in the search box.
Method 2:
When trying to repair error code 0x80070103, if you find method one hard to follow, can contact Microsoft directly. Call up the help center number listed on their website, and a technician will be able to walk you through the process of ensuring the updater is not attempting to download multiple copies of hardware or trying to install unusable updates on your computer. Because the Windows Updater is set to a generic method of searching for updates, it may not be set to optimize the personal computer's settings. This is why you must select all of the optional update options and why this process is so long. It may be made easier by having a computer repairs technician walk you through it.
However, if you want to automate the process of getting that problem solved, you can use a powerful tool to get the job done.
Steam Autumn sale is still raging and other storefronts like EPIC and GOG have also had their go, and as the year slowly closes we reflect on the best games released this year.
The games presented are not in any particular order and as sales are still raging pick one for you for a good time.
F1 Manager 22
If you are into formula racing this new manager is something we will wholeheartedly recommend. How it has been a very long time since a good F1 manager has been released this one is breath of fresh air. Masterfully done and fun to play, also licensed with real teams and cars get it here: https://store.steampowered.com/app/1708520/F1_Manager_2022/
Stray
I like cats, but this game is on another level from its competitors. Unique approach, great storyline, and of course orange cat as the main character! Set in a cyberpunk environment following the story of some unfortunate androids you can do most cat things like playing in boxes, etc but essentially the game is a puzzle platformer which in my opinion is a great thing. Meow your things and get the game while it is discounted: https://store.steampowered.com/app/1332010/Stray/
Neon White
Mirror's Edge was the very unique game when it was released introducing parkour into the gaming world, and Neon white brings it one level up. With competitive parkour FPS gameplay this game is great for killing some time and competing with your friends but most of all it is fun to play experience. Get it here: https://store.steampowered.com/app/1533420/Neon_White/
This game needs to be experienced in order to fully grasp its magnitude and quirkiness. From the creators of borderlands comes a new IP fusion of fantasy, guns, and crazy ideas all wrapped into an action RPG looter shooter with a recognizable borderlands style of graphics. https://store.steampowered.com/app/1286680/Tiny_Tinas_Wonderlands/
Norco
Winner of multiple awards, Norco is a classic point-and-click adventure game with a great sci-fi story with a lot of environmental focus. Story and atmosphere are the main selling points for the game and if you enjoy good stories with interesting characters give this one a go: https://store.steampowered.com/app/1221250/NORCO/
Final Fantasy 14: Endwalker
Expansion for Massive multiplayer online roleplaying game brings so much to the table that we just could not oversee it and place it aside. Technically not full standing game since it is the expansion it still delivers on many fronts and since it is supposedly the last expansion now is the best time to pick it up and give a final fantasy 14 a go: https://store.steampowered.com/app/1592500/FINAL_FANTASY_XIV_Endwalker/
Elden Ring
Of course, the list would not be complete if we did not include Elden ring, a great example of how a difficult but well-executed game can go over and beyond. With a story on par with great epics and compact as in dark souls, this title will provide you with many hours of gameplay and content. https://store.steampowered.com/app/1245620/ELDEN_RING/
For a while now, Microsoft has been working hard to add various built-in troubleshooters in Windows 10. In fact, there is a troubleshooter for almost every standard or common error in Windows 10. And now with the newly released Windows 10 v1903, Microsoft has added the Recommended Troubleshooting which allows Windows 10 to automatically fix a lot of critical issues on your computer, and in this post, you will be guided on how you can turn on or off the Recommended Troubleshooting in Windows 10.
The Microsoft Diagnostic & Feedback data only provides two settings – Basic and Full. So if you want to turn off the Recommended Troubleshooting for some reason, the only way to do so is to stop it from collecting complete data from your PC. And to turn it on or off, you can choose to switch between them. To do that, navigate to Settings > Privacy > Diagnostics & feedback and from there, select Basic under the Diagnostic Data section. After that, go back to Settings and go to Update & security > Troubleshoot. Once you’re there, you should see a warning message saying, “Share Full Diagnostic data to get additional troubleshooting recommendations”. Based on the message, Microsoft will only offer the recommended troubleshooting based on the Full Diagnostic data which it collects from your computer.
On the other hand, if you know how to navigate and use the Windows Registry, then you can enable or disable the Recommended Troubleshooting via Registry Editor but before you proceed, make sure that you create a System Restore point. Once that’s covered, follow these steps:
Tap the Win + R keys to open the Run dialog box and type “regedit” in the field and tap Enter to open the Registry Editor.
Next, navigate to this registry path: HKEY_LOCAL_MACHINESOFTWAREMicrosoft
From there, look for the key named “WindowsMigration”. If you can’t find it, just right-click on the left pane and create a new key and then name it “WindowsMigration”.
After that, create a DWORD “UserPreference” and double click on it to set its value to “0” if you want to turn it off or “1” if you want to turn it on.
Exit the Registry Editor and restart your computer to apply the changes made.
Note: The Recommended Troubleshooting functionality can look into the error logs sent back to the Microsoft team and use an algorithm to set up a solution for you and they’re nothing but Diagnostics and Feedback data that Windows collects and sends back to Microsoft. Moreover, the recommendations are only visible if you are connected to the internet, else it will show the same message.
Interrupts are designed so that the resource requests don’t get into a headlock when it comes to the hardware level. To simply put it, it is used to break a loop that never ends. Aside from that, developers also designed levels in order to prioritize interrupts. It is also known as “Interrupt Request Level” or IRQL. And if you suddenly encounter a “Bugcode 0xA –IRQL_NOT_LESS_OR_EQUAL” error, this means that a driver has accessed a memory location illegally while NT is operating at a specific IRQL.
The Bugcode 0xA –IRQL_NOT_LESS_OR_EQUAL is a fatal driver coding error and as an end-user, there isn’t much that you can do to resolve it but if you’re a developer, then this means that your code is trying to access an invalid memory location. You could check on different parameters such as memory location that was referenced and code addressed which referenced memory. The technical parameters are:
a memory location that was referenced
IRQL at time of reference
0 = read, 1 = write
code addressed which referenced memory
As mentioned earlier, if you are an end-user, there is nothing much that you can do to resolve this problem, but worry not for there are still possible solutions that could help you in fixing it. Refer to the suggestions laid out below to fix Bugcode 0xA –IRQL_NOT_LESS_OR_EQUAL error.
Option 1 – Try running the Hardware and Devices Troubleshooter
The first thing you can do to fix the problem is by running the Hardware Troubleshooter. Although it won’t make much of a difference, there’s still a possibility that it could automatically fix the problem. To use it, refer to these steps:
The first thing you need to do is click on Start and then on the gear-like icon to pull up the window for Settings.
After opening Settings, look for the Update and Security option and select it.
From there, go to the Troubleshoot option located on the left-hand side of the list.
Next, select Hardware and Devices from the list and open the Troubleshooter and run it. Once it is doing its job, wait for it to complete the process and then restart the system.
After the system restarts, check if the problem’s now fixed. If not, refer to the next option given below.
Option 2 – Try to update or rollback your device drivers
If the first option didn’t work for you, then it’s time to either update or roll back the device drivers. It is most likely that after you updated your Windows computer that your driver also needs a refresh. On the other hand, if you have just updated your device drivers then you need to roll back the drivers to their previous versions. Whichever applies to you, refer to the steps below.
Open the Devices Manager from the Win X Menu.
Then locate the device drivers and right-click on them to open the Properties.
After that, switch to the Driver tab and click on the Uninstall Device button.
Follow the screen option to completely uninstall it.
Finally, restart your computer. It will just reinstall the device drivers automatically.
Note: You can install a dedicated driver on your computer in case you have it or you could also look for it directly from the website of the manufacturer.
Option 3 – Run the Memory Diagnostic Tool to check for Memory leaks
Tap the Win + R keys to open Run and type exe and hit Enter to open the Windows Memory Diagnostic Tool.
After that, it will give two options such as:
Restart now and check for problems (Recommended)
Check for problems the next time I start my computer
Once your computer has restarted, perform a basic scan or you could also go for the “Advanced” options such as “Test mix” or “Pass count”. Simply tap the F10 key to start the test.
Note: After you select the option, your PC will restart and check for memory-based issues. If it finds any issues, it will automatically fix them and if there’s no issue found, then it’s most likely not a memory-based issue so you should try the other options given below.
If you own an iPhone, iPad, or iPod you might be aware of the phenomenon of connecting and disconnecting your device. In one moment device is connected and then it somehow loses connection and you have to plug in back again to be recognized.
In this troubleshooting guide, we will address ways to eliminate this issue and to connect and have your devices working properly. We will go from the most common ones to the most uncommon so it is advisable to try solutions in order to how they are presented.
Check cable
The most common issue with this kind of behavior comes from a broken cable if you have the opportunity try another working cable to see if the device will behave differently. If everything is working fine with another cable, the issue is in the previous cable.
Check USB ports and Cable Jack
Usually, it is a cable issue, but it can also be a USB jack on cable or even a USB port on a PC, try putting the jack into another port to see if this will solve the issue.
Check device settings
From updates on your device comes a change of setting about privacy which can reflect on connection with the computer. In order to eliminate this, you will need to reset your device.
Go to device settings and go to general
Scroll down until you find the reset section and go into it
In the reset, section click on reset location and privacy
You will have to authenticate using your pin/passcode in order to complete the reset function
Enter your passcode (or use any other authentication method you have chosen) and you can now reset the Location and Privacy settings.
Click on reset
Connect the device to PC and choose trust this device
Update iTunes
Outdated iTunes can also be a problem with this particular issue. Go to the apple website and download the latest version of iTunes or updating it via apple updater.
Wondering if upgrading to Windows 11 will boost your gaming experience? We can’t give you a straightforward answer, sadly. But we can take you through the tweaks you can expect if you have all the right requirements and help you make a final decision.
Is Windows 11 good for gaming?
Essentially, the answer to this question is yes. Microsoft has definitely added a bunch of enhancements and features to its latest OS to give gamers the best possible experience. However, you have to keep in mind that this may not work out smoothly for every single user.
Whether you’ll be able to fully take advantage of the Windows 11 gaming features really depends on your setup. As expected, Windows 11 has more demanding system requirements than its predecessor.
Credit: Florian Olivo on Unsplash
So, unless your hardware can run the new OS comfortably, you might not be able to make the most of all these gaming perks. In that case, we recommend you first upgrade your hardware and then make the switch. Be prepared to be a little surprised by a few other interesting changes in comparison to Windows 10, though!
For some of the new gaming features to work, it’ll also be necessary for you to have an NVMe SSD and an HDR-compatible monitor. So let’s take a look at 4 big improvements you can expect if your setup is compatible.
Gaming enhancements on Windows 11
1. Enjoy faster loading speed with DirectStorage
For this powerful feature to work, you need a compatible graphics card and, as stated before, an NVMe SSD. It’s also important for your GPU to support the DirectX 12 graphics API at least. And since we’re on that subject, you’ll be happy to know that Windows 11 has also introduced a new version of the API called DirectX 12 Ultimate.
Now, what does DirectStorage do? It’s a new feature designed to make full use of the speedy storage of NVMe SSDs. It also transfers game data directly onto the graphics card, lightening the load on your CPU. Normally the CPU would have to decompress the data first, but DirectStorage helps bypass this. That’s how loading times are reduced and games run more smoothly.
2. Fully immerse yourself through Game Mode
Windows 11’s Game Mode is certainly a welcomed addition. When you turn on Game Mode, usage of background apps that aren’t essential to your game is reduced. This results in the game you’re running becoming a priority process. This way, it uses your hardware and system resources to the max. Ultimately, the Game Mode means less lag and higher frame rates so you can play undisturbed and fully enjoy your gaming session.
3. Vibrant visual experience thanks to AutoHDR
For this one you’ll absolutely need an HDR-compatible monitor. Basically, HDR (High Dynamic Range) means a wider range of contrasts and colors that can be displayed on a monitor.
Windows 10 has an HDR feature, but you have to turn it on and off manually (“Use HDR”). Plus, users have reported that, if left on, it results in an unappealing appearance of content other than movies and games.
Windows 11 fixes that problem with its AutoHDR feature. Toggling it results in the system automatically adjusting the color contrast, balance and brightness based on what you’re currently looking at. For gamers, this means vivid imagery in every single game, resulting in a supreme visual experience. You can check out Microsoft’s own video showcasing the power of AutoHDR.
Aside from AutoHDR, another way Windows 11 improves the visual aspect is through its support for refresh rates of up to 360Hz.
4. Xbox Game Pass & Game Bar
It’s no secret that Microsoft wants to integrate Windows and Xbox. We’ve seen some attempts with Windows 10, but they’re pretty wonky compared to the new OS.
Windows 11’s built-in Xbox Game Bar enables quite a few options all gamers desire. You can take screenshots and videos of your game and send them, for starters. Furthermore, you can use it to see audio settings and monitor your PC’s performance without having to leave the game or open the Task Manager.
Widgets are also a really cool part of the Game Bar. You can choose from a wide variety of widgets, such as Xbox Achievements, Spotify, Gallery, Xbox Social and more.
Moreover, the Xbox Game Pass has been streamlined on Windows 11. Game Pass is a subscription service that unlocks hundreds of awesome games and supports cloud streaming. Do keep in mind that the games are only unlocked for a certain period of time, as the selection rotates once in a while.
What can you do for a better gaming experience?
Windows 11 does offer tweaks that require zero input from you. However, there are a few things you can do manually to get even more out of your new OS while gaming.
Turn off enhanced pointer precision. Most games enhance precision by default, so having this feature on might interfere with that.
Make sure to select your high performance graphics card for each game. Go to Settings > Gaming > Game Mode and tap ‘Graphics’ from the ‘Related settings’ menu. Find the game you want to adjust, click on ‘Options’ and choose your high performance graphics card to be the default setting. While there, you can also turn on ‘Hardware-accelerated GPU scheduling’ at the top.
Disable unnecessary apps and programs. As long as they aren’t essential to running your game, they might take up valuable system resources, so disable them to make space for your gaming requirements.
Check for pending updates and install them. It’s well-known that out-of-date software causes bugs, latency and crashes. The same goes for your GPU drivers.
Use the High-performance power plan (Control Panel > Power Options > Additional plans) to maximize the use of resources for the best possible performance.
Summary
Windows 11 has done quite a bit for avid gamers. We hope your setup is compatible with all these new features and you can experience these enhancements ASAP!
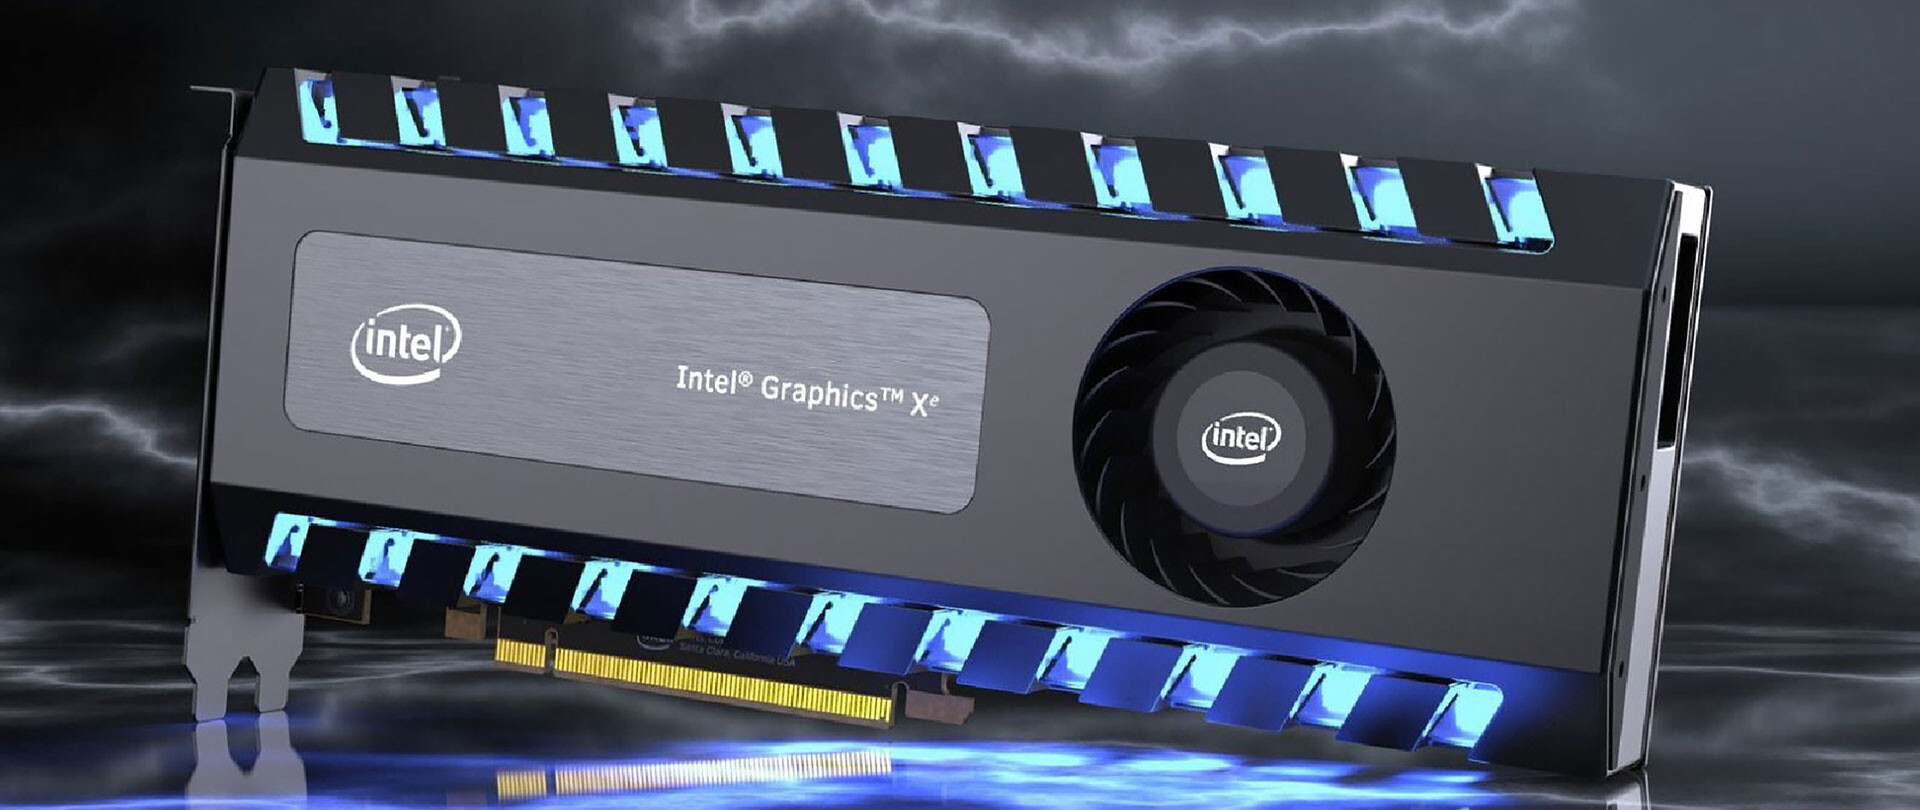
This is not the first time that Intel is trying to enter the GPU field but its adventures so far were, well let us agree not so good. All of that is hoping to be changed with the upcoming ARC GPU. The first generation of Arc graphics, code-named Alchemist and previously known as DG2, will support desktop PCs and laptops and is set to arrive in the first quarter of 2022.
Alchemist will have hardware-based Ray tracing and AI-driven supersampling. This indicates that GPU is aimed to compete in the Hi-end spectrum and battle side by side with Nvidia and AMD on the market. Alchemist will also pack full DirectX 12 Ultimate support.
Intel also released names for the next upcoming future generations of ARC GPUs: Battlemage, Celestial & Druid. More information about ARC products will be released later this year.
“Today marks a key moment in the graphics journey we started just a few years ago. The launch of the Intel Arc brand and the reveal of future hardware generations signifies Intel’s deep and continued commitment to gamers and creators everywhere,” Roger Chandler, Intel vice president, and general manager of client graphics products and solutions.
Windows 10 is has a lot of features that help a user in optimizing a computer. So when the operating system encounters a problem, it is able to provide users with proper resources to get the problem fixed. There are even times when a user is not notified and an issue is either being repaired or dodged in the background. This kind of feature is known as the Diagnosis of the Automatic Repair feature that starts when your computer is booting. In such times, you will either see the “Diagnosing your PC” or “Preparing Automatic Repair” message on your screen.
Although this feature is useful and has proven to be effective, some users reported that the process gets stuck. If you experience the same problem, read on as this post will guide you on what to do to fix it but before you start troubleshooting the problem, you might want to perform a Hard Boot first. All you have to do is to power down your computer, remove the battery and the AC adapter and then reconnect them. After that, tap and hold the power button for about 20 seconds and see if your computer boots up properly. If it doesn’t, follow the given fixes below.
Option 1 – Try disabling the automatic Startup Repair
The Automatic Startup Repair window will automatically open during boot when you have some system driver-related problem. So if you think that this is where the problem lies, you can try to disable the automatic Startup Repair.
Click on Troubleshoot and go to the Advanced options.
After that, select Command Prompt and execute the following command:
bcdedit /set recoveryenabled NO
Restart your computer after that and then check.
Option 2 – Run the System File Checker
System File Checker or SFC is a built-in command utility that helps in restoring corrupted files as well as missing files. It replaces bad and corrupted system files to good system files that might be the cause why you’re facing this problem. To run the SFC command, follow the steps given below.
Type “cmd” in the Start search and then right-click on the appropriate search result.
Next, select “Run as administrator” to open Command Prompt with admin privileges.
After opening Command Prompt, type in sfc /scannow
The command will start a system scan which will take a few whiles before it finishes. Once it’s done, you could get the following results:
Windows Resource Protection did not find any integrity violations.
Windows Resource Protection found corrupt files and successfully repaired them.
Windows Resource Protection found corrupt files but was unable to fix some of them.
Now restart your computer and see if the problem is fixed or not.
Option 3 – Run CHKDSK to check your disk for errors
When it comes to some issues concerning the hard drive or removable devices, there is a utility in Windows that might help which is called “chkdsk”. This error check utility can help with several issues in the system.
Tap the Win + S keys to open the Search box.
Then type “command prompt” in the field and from the search results that appear, right-click on Command Prompt and select “Run as administrator”.
After opening an elevated command prompt, copy and paste the following command and hit Enter:
chkdsk /r /f
Now if you are prompted to run CHKDSK after your reboot your computer, just tap Y and reboot your PC.
If CHKDSK is not able to find any errors, tap the Win + E keys and navigate the access window. From there, right-click on the concerned drive and click on Properties.
After opening Properties, click on the tab Tools and then click on the “Check” button under the Error-checking section.
Wait until the process is completed and then restart your computer.
Once your computer has restarted, try accessing the file and check if the error persists.
Option 4 – Run the DISM tool
The next thing you can do is run the DISM tool. This tool is known to repair potentially corrupted files in your system as having them could also system issues like your computer getting stuck in the “Diagnosing your PC” or “Preparing Automatic Repair” screen.
Tap the Win + X keys and click on the “Command Prompt (Admin)” option.
After that, input each one of the commands listed below sequentially to execute them:
Dism /Online /Cleanup-Image /CheckHealth
Dism /Online /Cleanup-Image /ScanHealth
Dism /Online /Cleanup-Image /RestoreHealth
Once you’ve executed the commands given above, restart your computer and check if the problem is now fixed.
Option 5 – Try to use installation media to boot and repair your computer
Another thing you can try to resolve the issue is to use the Windows installation bootable media so you can boot and repair the operating system. To use it, follow these steps:
You need to first create an installation media which has the dame version of the operating system installed in your computer.
After that, once you reach the Install Windows screen, click on the “Repair your computer” link.
Wait until the repair is completed and then shut down your computer
Now once your computer has restarted, check if it can now boot properly.


 This is not the first time that Intel is trying to enter the GPU field but its adventures so far were, well let us agree not so good. All of that is hoping to be changed with the upcoming ARC GPU. The first generation of Arc graphics, code-named Alchemist and previously known as DG2, will support desktop PCs and laptops and is set to arrive in the first quarter of 2022.
Alchemist will have hardware-based Ray tracing and AI-driven supersampling. This indicates that GPU is aimed to compete in the Hi-end spectrum and battle side by side with Nvidia and AMD on the market. Alchemist will also pack full DirectX 12 Ultimate support.
Intel also released names for the next upcoming future generations of ARC GPUs: Battlemage, Celestial & Druid. More information about ARC products will be released later this year.
“Today marks a key moment in the graphics journey we started just a few years ago. The launch of the Intel Arc brand and the reveal of future hardware generations signifies Intel’s deep and continued commitment to gamers and creators everywhere,” Roger Chandler, Intel vice president, and general manager of client graphics products and solutions.
This is not the first time that Intel is trying to enter the GPU field but its adventures so far were, well let us agree not so good. All of that is hoping to be changed with the upcoming ARC GPU. The first generation of Arc graphics, code-named Alchemist and previously known as DG2, will support desktop PCs and laptops and is set to arrive in the first quarter of 2022.
Alchemist will have hardware-based Ray tracing and AI-driven supersampling. This indicates that GPU is aimed to compete in the Hi-end spectrum and battle side by side with Nvidia and AMD on the market. Alchemist will also pack full DirectX 12 Ultimate support.
Intel also released names for the next upcoming future generations of ARC GPUs: Battlemage, Celestial & Druid. More information about ARC products will be released later this year.
“Today marks a key moment in the graphics journey we started just a few years ago. The launch of the Intel Arc brand and the reveal of future hardware generations signifies Intel’s deep and continued commitment to gamers and creators everywhere,” Roger Chandler, Intel vice president, and general manager of client graphics products and solutions.