Having a PC is a great thing, more often we are enjoying it than we have issues, but as time passes it seems that our computer is slowing more and more as new applications and games are coming which demand more powerful computers.
Before you decide to throw away your computer and buy a new one because you feel it is a bit slow, read through this guide where we will guide you to common tips & trick to make your PC run faster:
Slowdowns and many other issues, even hardware failures can come from dirty PC. Make sure your PC is clean and tidy for maximum performance.
Airflow is very important so your GPU and CPU and overall all hardware components can be kept in optimal working temperatures. If any device inside the casing is working in abnormal temperatures you will experience slowdowns and freezing on daily basis. Make sure that all fans are working and that your temperatures are in the optimal range to prevent overheating and make sure to have maximum performance.
Viruses, worms, and overall all malware can drastically reduce system performance. Make sure that your protection software is up to date with the latest definitions and that you have the latest Windows updates installed.
Windows power plans can be a very useful feature, especially if you are working on laptop but in order to boost performance and drain maximum, you will need to switch to a hi-performance power plan.
Having little to no space on your Windows system drive can lead to extreme slowdowns, make sure that your hard drive is not on red when viewed from File explorer or you will experience even 50% poorer performance.
If you have many applications starting up with your Windows and many of them running in the background you will experience performance issues. Each application that runs in the background is taking RAM and CPU time for themselves which could be free and used for the program that you need.
Having too many tabs in Browser while working on a computer can also cause slowdowns, each tab is taking RAM for itself and even can cause Browser poor performance if a tab is LIVE and refreshing with new content all the time.
Speaking of browser, having too many installed extensions which are active as soon as the browser is up and running can also lead to poor performances. Remove all which you really do not need and your computer will gain in speed.
Sometimes your system is just a little outdated, upgrading more RAM or switching to a new SSD with the greater speed can cause a world of difference in PC performance. Check to see how RAM is standard and upgrade accordingly, you can also upgrade the CPU and other bottlenecks in your system this way instead of completely buying a new PC.
Drives, application traces, registry entries, etc. are piling up in your system over time, and if enough time is given it will clog your computer. From time to time it is a good idea to backup files and do a completely clean full format of HD and install a new and fresh copy of Windows with new and clean copies of applications and drivers.
That's it, 10 tips on how to make your Windows and PC perform better and speed it up. I hope that you found the read informative and helpful and I hope that I will see you soon.

Error code 0x80070002 is a Windows Update error code. It occurs due to corruption errors which result when missing files in Windows Update prevent users from accessing updates on their system. It affects Windows 10 users and presents similar symptoms as error code 0x80070003, another Windows Update error. These symptoms include the following:
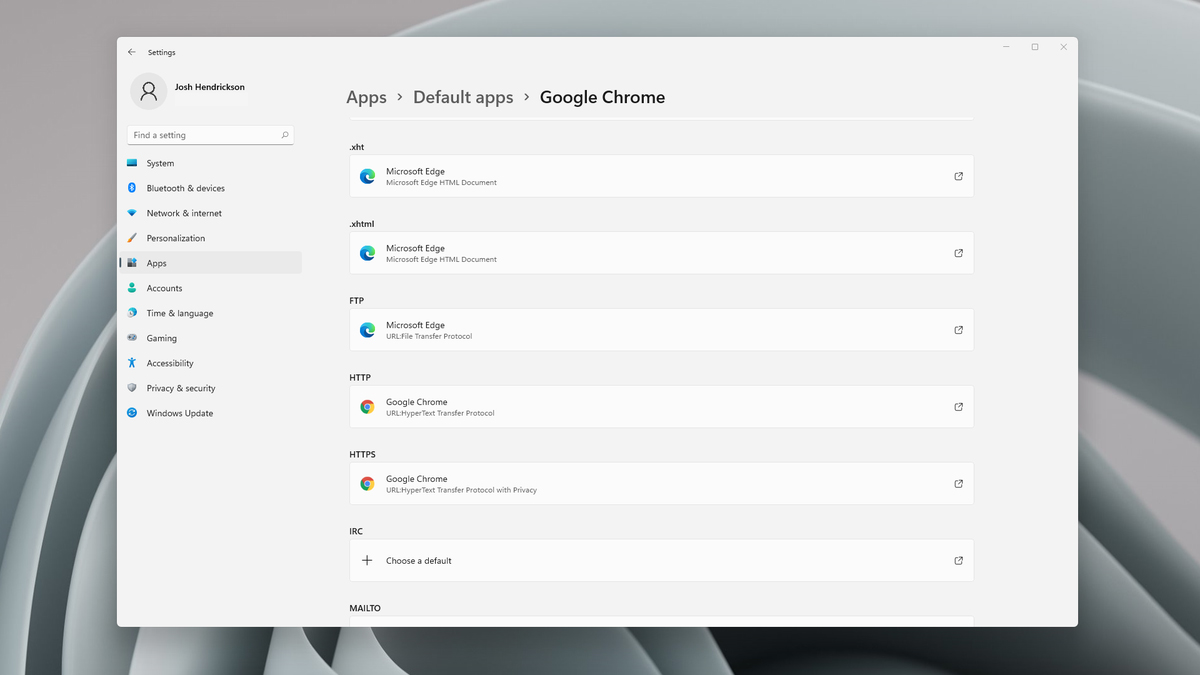 Choosing default browser in settings
 When the Apps screen opens on the left click on Default apps.
 On right, you will get a list of Windows default applications for certain types of files. Click on any application you would like to change and choose from the drop-down list a new one. Click on it and you are done.
 “In Microsoft Windows accounts protected by Family Safety settings, secure connections on popular websites like Google, Facebook and YouTube might be intercepted and their certificates replaced by a certificate issued by Microsoft in order to filter and record search activity.”And if you are connected to a corporate network, there might be a monitoring/filtering product that could be replacing certificates. Moreover, there are also users who reported getting this issue when they use the Nightly version of Firefox. And if that’s the case, you have to try accessing secure websites using only the stable build especially when it comes to payments. However, if you are not doing that, then here are some options you need to check out.
“The selected disk is not a fixed MBR disk. The ACTIVE command can only be used on fixed MBR disks.”This kind of error only occurs when you try to activate a disk partition on a UEFI system partition. However, the command works only if your computer is based on BIOS/MBR. The UEFI method has no concept of the active partition and since you have a UEFI system, the disk type is GPT instead of MBR. To simply put it, your BIOS needs the MBR disk type while the UEFI needs the GPT disk type. To fix the “The selected disk is not a fixed MBR disk when trying to use the DISKPART utility” error, there are various potential fixes you can try. You might have to disable Secure Boot, convert the disk to MBR or fix the Boot Manager. For more instructions, follow the options provided below.
“There were problems installing some updates, but we’ll try again later. If you keep seeing this and want to search the web or contact support for information, this may help 0x80004005.”This kind of Windows Update error occurs due to an issue while either installing or downloading an update. There are several ways you can fix the problem. You can try to replace the dpcdll.dll file, reset the Windows Update-related services, run the Windows Update troubleshooter or manually install the Windows Updates. For more details, check out the options given below.