Task View feature inside Windows 11 is actually a great feature, letting you quickly view open windows and virtual desktops. How Task view itself could be reached with keyboard shortcut combination of ⊞ WINDOWS + TAB some users will prefer this way of using it and thus button on the taskbar is something you do not want or need.
There is a very easy way to remove mentioned button and I will show you how to do it.
Right-click the taskbar button itself and click on Hide From Taskbar.
That’s it, you have done it.
Now in order for you to bring it back if you change your mind, you will have to do some extra steps but it is nothing difficult.
Right-click on the taskbar and click on Taskbar settings, you will be lead to Personalization > Taskbar.
Inside locate Taskbar Items and switch Task View to ON, you will see the Task View button right away showing itself again.
As you know, one of the useful and efficient utilities in Windows 10 is the DISM tool. It can be used with the Command Prompt command line which allows users to carry out various tasks. However, there are instances when the DISM tool could encounter some errors when you try to execute a command. One of these errors is the one that states, “The component store has been corrupted”. This kind of DISM error is due to an error in the image file.
When you encounter the DISM Error 14098 when running the DISM tool, you will see the following content in the command line:
“C:>Dism /Online /Cleanup-Image /RestoreHealth /Source:c:testmountwindows /LimitAccessDeployment Image Servicing and Management toolVersion: 10.0.10586.0Image Version: 10.0.10586.0[==========================100.0%Error: 14098The component store has been corrupted.The DISM log file can be found at C:WINDOWSLogsDISMdism.logC:>”
There are several fixes you can check out to fix the DISM Error 14098, “The component store has been corrupted”. You can try to run the Restore Health command or reset the Windows Update components, or whitelist the dism.exe in your antivirus program, as well as try to uninstall any recently installed updates. Follow the options provided below for more details.
Option 1 – Run the Restore Health command in a Clean Boot State
First, you need to put your computer in a Clean Boot State.
Type in MSConfig in the Start Search to open the System Configuration utility.
From there, go to the General tab and click “Selective startup”.
Clear the “Load Startup items” check box and make sure that the “Load System Services” and “Use Original boot configuration” options are checked.
Next, click the Services tab and select the “Hide All Microsoft Services” check box.
Click Disable all.
Click on Apply/OK and restart your PC. (This will put your PC into a Clean Boot State. And configure Windows to use the usual startup, just simply undo the changes.)
Now open Command Prompt with admin privileges.
Then type and enter this command to execute it: Dism /Online /Cleanup-Image /RestoreHealth
Wait until the process is completed and restart your computer.
Note: If the Restore Health command fails, you can use the “/StartComponentCleanup parameter” by executing this command: Dism /Online /Cleanup-Image /StartComponentCleanup
Option 2 – Try to reset the Windows Update components
If by any chance that the second option didn’t work, resetting the Windows Update components could also help you resolve the problem. How? Refer to the following steps:
Open Command Prompt with admin privileges.
After that, type each one of the following commands and hit Enter after you key in one after the other.
net stop wuauserv
net stop cryptsvc
net stop bits
net stop msiserver
Note: The commands you entered will stop the Windows Update components such as Windows Update service, Cryptographic services, BITS, and MSI Installer.
After disabling WU components, you need to rename both the SoftwareDistribution and Catroot2 folders. To do that, type each one of the following commands below, and don’t forget to hit Enter after you type one command after the other.
Next, restart the services you’ve stopped by entering another series of commands. Don’t forget to hit Enter after you key in one command after the other.
net start wuauserv
net start cryptsvc
net start bits
net start msiserver
Close Command Prompt and reboot your PC.
Option 3 – Whitelist the “dism.exe” in your antivirus program
The DISM error 14098 might also be caused by your antivirus program which could be interfering it from running. To fix this, you have to whitelist dism.exe. How? Refer to these steps:
Open the Windows Defender Security Center from the system tray area.
Next, click the “Virus & threat protection” option and then open the “Virus and threat protection settings”.
After that, scroll down until you find the “Exclusions” and click on the “Add or remove exclusions” option.
Then click the plus button and select the type of exclusion you want to add and from the drop-down list, select Folder.
Next, navigate to this path and select the WinSxS folder: C:/Windows/WinSxS
When a User Account Control or UAC prompt, just click on Yes to proceed.
Option 4 – Try to uninstall recently installed updates
There are times when some Windows Updates affect some mechanism internally when you update your Windows 10 computer. As a result, it causes issues with other components of the operating system which could be the reason why you’re getting the DISM error 14098.
Go to Settings and select Update and Security > Windows Update.
From there, click on the “View update history” option and then click on the “Uninstall Updates” option.
This will open a new window that contains the list of installed Windows Updates.
Now right click on the Windows Update you wish to uninstall and click Uninstall.
There are not many applications for creating mind maps, even fewer that are completely free, so it is with great pleasure to present you with Freeplane. Freeplane is mind mapping, Knowledge Management, and Project Management software completely free and open source.
You can it here: https://sourceforge.net/projects/freeplane/files/latest/download
And from developers git page and I quote:
Freeplane is a free and open-source software application that supports thinking, sharing information, and getting things done at work, in school, and at home. The core of the software is tools for mind mapping (also known as concept mapping or information mapping) and using mapped information. Freeplane is written in Java using OSGi and Java Swing. It runs on any operating system that has a current version of Java installed. It can be run locally or portably from removable storage like a USB drive.
We use Github only as of the main code repository, all other project parts are hosted at the source forge. So all bugs and feature requests are managed in a separate issue tracker. There is a drop-down box for selecting different types of issues. Other sources of inspiration are our new forum and old forum. Some users write their ideas there. Every contributor and every team member freely decides what task he is going to work on, but for making the best decision we can communicate our self-set goals in the above forum. It is supposed to enable early discussions and community feedback and also to motivate you and other people.
How to start hacking and contributing
People new to the project can start with implementing a new small feature or doing some refactoring or documentation and not with the bug fixing. Not all bug reports seem to be equally important, and if there are important bugs they usually get fixed by people who broke the functionality. I think you should first get there :).
For internal developer discussions, there is a private mailing list. It is held private to avoid spam mails. If you want to be subscribed let us know what mail address you are going to use with it. This list is the preferred way to ask all code-related questions because they usually get answered soon and by the most competent team member.
Some documentation for new developers is available in Freeplane wiki https://www.freeplane.org/wiki/index.php/How_to_build_Freeplane and also here and here. It is written for new guys and should also be maintained by the new guys to stay up to date.
Looking forward to any questions and contributions,
Freeplane development team
A lot of controversies and mixed emotions have come from statements about Windows 11 minimum system requirements, especially ones linked to TPM.
Naturally, each time some software company giant announces how things are must have there are people who go out and prove them wrong.
This time Raspberry Pi community was one which demonstrated that not only Raspberry Pi does not have a TPM module, it can run the full desktop version of Windows 11
Raspberry Pi 4 and things you need for Windows 11 installation
In order to actually install Windows 11 on your Pi, there are certain things that you will need. Check out the below list and prepare everything.
Raspberry Pi 4 4GB or 8GB
A 32GB or larger SSD via a USB 3 caddy. Best for performance or 16GB or larger microSD card
USB boot enabled, see below.
A micro SD card with the latest Raspberry Pi OS
Windows 10 PC
USB to Ethernet or WiFi dongle
Bluetooth dongle (if you want Bluetooth)
Keyboard, mouse, HDMI, and power for your Raspberry Pi
Configuring Pi to boot from SSD
In order to boot from SSD be sure that firmware and bootloader are up to date on the latest version and upgrade if needed. Be aware that this firmware update can only be performed using the official Raspberry Pi OS.
Also if you are eager and want to use a standard microSSD card instead of an SSD to run Windows 11 feel free to skip this entire section.
Boot from microSSD with the latest Raspberry Pi OS on it.
Update firmware and OS using the terminal by typing
sudo apt updatesudo apt full-upgradesudo rpi-update
Reboot your Pi
Install the latest version of bootloader again using the terminal with the command
sudo rpi-eeprom-update -d – a
Reboot Pi
Launch raspi-config on your Pi via terminal with
sudo raspi-config
Select option 3 (Boot options – Configure options for start-up) from boot options
Select Boot ROM version and press ENTER
Select latest and then OK
Select NO when prompted to reset boot ROM to defaults on the latest version boot ROM selected screen. Press OK
Select Boot order and press ENTER
Select USB Boot and click on OK and remove microSD card from Pi
Select Finish and click on NO when prompted to reboot
Creating Windows 11 installation image for Pi 4
In order to install Windows 11 on our Pi, we must create an installation image, follow the steps below explaining the process.
Download Windows on Raspberry imager and extract it into the win11 folder
Open Imager and allow it to make changes to your computer, set your language, and click on next
Select storage drive where you would like to install Windows
Set device type and click on next
Select our Windows 11 ISO image we created and click on next
On the drivers screen select Use the latest driver package available on the server
On UEFI firmware select screen choose Use the latest firmware available on the server
On configuration screen click on next
Check your setting on the installation overview and if everything is ok click on install
Wait for the whole process to be finished
Once the process is completed, close Windows on Raspberry imager, take out SSD or microSSD card from PC and connect it on your Pi along with Pi peripherals.
Setting Windows 11 on Pi
In order to actually use Windows 11 on our Raspberry Pi we now have to set up the Windows 11 install using the standard post-installation setup sequence.
Power up Pi and press ESC when prompted
Go to Device manager and press ENTER
Select Raspberry Pi Configuration
Select Advanced configuration
Set Limit RAM to 3GB to a disabled state, press F10 to save, and ESC to exit.
Select Display configuration
Set the resolution to desired option and press ENTER, F10 to save, and ESC to exit
Go to CPU configuration
Check if the CPU clock is set to default, if not set it
Press ESC to go back all the way to the main menu
Select Continue to exit BIOS and boot your Raspberry Pi with Windows 11 on it
And there you have it, fully working Windows 11 OS on Raspberry Pi despite what Microsoft says
Note that due to lack of some drivers performance can be less than optimal, for example, full HD videos will not work since there are no compatible graphic drivers for Pi and some other stuff like Wi-Fi will also cause some issues but overall Windows 11 is working pretty well.
Kindle is, without doubt, a great piece of hardware, perhaps it is the closest thing to a book within the domain of digital devices. With its low price and usability, it has found itself in many homes and within the grasp of many readers in the world. You can buy digital books in the Amazon store for fraction of a regular price if it digital Kindle edition. You keep your library in the cloud and download just books you want to read on your device.
In this article, we will explore how you can send your existing PDF or any other supported file that you already have to your kindle device so you can read it on it.
Before we begin, you should make sure the file you're trying to convert is compatible with the Kindle:
HTML
RTF
JPEG
GIF
PNG
BMP or
PDF
The compatible file types cover most formats you're likely using, but if you find the document you want on your Kindle isn't compatible, there are a few ways to convert it. In the program it typically opens into, like Microsoft Word for .doc files or an image editing apps for .PNG ones, select 'Save As', and in the drop-down menu, see if any of the compatible options are available.
If not, you could try a PDF converter tool. There are plenty of great paid options and a few good free ones too.
Transfering PDF
To get a PDF on a Kindle, you're going to need to know your Kindle's email address. You'll need to head over to the Amazon website and sign in first. Select 'Your devices and content', click 'Manage Devices'. You should see a list of the books you have assigned to your Kindle account, above this list, in a toolbar should be some options - you'll currently be on 'Content', which should be followed by 'Devices', 'Preferences' and 'Privacy Settings'. Click on 'Devices', and in the next menu, select the option for the Kindle you want the document on. You'll be brought to a Device Summary page which tells you your Kindle email as well as the type of device it is.
You now need to approve your personal email, so that when the Kindle receives your PDF, it knows to download this. Make sure the email you approve is the one you're planning to send documents to your Kindle from otherwise it won't work. To approve your email address follow the steps for finding your Kindle email address but instead of selecting 'Devices' in the top bar, click 'Preferences'.
Scroll down this list until you find Personal Document Settings, and select this option so it expands into more options. From here, scroll down until you find 'Approved Personal Document E-mail List'. This list will show people who can email stuff to your Kindle, Below the emails is an option to 'Add a new approved e-mail address', which you should select. Enter your email address and click 'Add address' to get yourself approved.
Head over to your email client of choice, attach the file to an email, and send the email to your Kindle email address. You're able to send multiple documents at once, so if you have loads of files you want on your Kindle, you don't need to send separate emails. If you're sending over a PDF file, you can ask Amazon to automatically convert the file into a Kindle one, which lets you annotate the sections and change the font size. Simply put the word 'convert' as the subject line and the rest will be handled for you. 'Sync Your Kindle'.
Device drivers serve as a connection between the hardware in your computer and the operating system. So if any of the device drivers fail, the concerned hardware will stop communicating with Windows. And when you encounter some network-related issues, you can run the Network Adapter troubleshooter to fix them. However, this built-in troubleshooter does not work all the time as there are still problems that it can’t fix on its own and you’ll see the following error message:
“Windows could not find a driver for your network adapter.”
If you encounter this kind of error, read on as this post will help you in fixing the problem but before you get started in troubleshooting the problem, try running the Network Adapter Troubleshooter again.
Open the Search bar on your computer and type in “troubleshoot” to open the Troubleshoot settings.
Next, scroll down and select the “Network Adapter” option from the right pane.
Then click on the Run Troubleshooter” button.
After that, your computer will check for any possible errors and will pinpoint the root cause of the problem if possible.
Refer to each one of the solutions given below to get started:
Option 1 – Update the Network Adapter drivers
Of course, the first thing you can try to do is to update the Network Adapter drivers to resolve the error.
Tap the Win + R keys to launch the Run window and then type in the “devmgmt.msc” command and hit Enter to open the Device Manager window.
Under the Device Manager, you will see a list of drivers. From there, look for the Network Adapters and expand it.
Then right-click on each one of the Network drivers and update them all.
Restart your PC and see if it helped in fixing the BSOD error.
Note: If updating the network drivers didn’t help in fixing the “Windows could not find a driver for your network adapter” error, you can also try to uninstall the very same drivers and restart your Windows 10 PC. After that, the system itself will reinstall the drivers you just uninstalled. Alternatively, you can also download and install the drivers from the manufacturer’s website directly.
To reinstall the network adapter driver, refer to these steps:
Open the Devices Manager from the Win X Menu.
Then locate the device drivers and right-click on them to open the Properties.
After that, switch to the Driver tab and click on the Uninstall Device button.
Follow the screen option to completely uninstall it.
Finally, restart your computer. It will just reinstall the device drivers automatically.
Option 2 – Try running the Hardware and Devices Troubleshooter
Apart from the Network Adapter Troubleshooter, you can also run another built-in troubleshooter in Windows, the Hardware and Devices Troubleshooter, as it can also help you in resolving the “Windows could not find a driver for your network adapter” error.
The first thing you need to do is click on Start and then on the gear-like icon to pull up the window for Settings.
After opening Settings, look for the Update and Security option and select it.
From there, go to the Troubleshoot option located on the left-hand side of the list.
Next, select Hardware and Devices from the list and open the Troubleshooter and run it. Once it is doing its job, wait for it to complete the process and then restart the system.
After the system restarts, check if the problem’s now fixed. If not, refer to the next option given below.
Option 3 – Try performing a System Restore
You might also want to perform a System Restore that might help you in fixing the error. You can do this option either by booting into Safe Mode or in System Restore. If you are already in the Advanced Startup Options, just directly select System Restore and proceed with the next steps. And if you have just booted your PC into Safe Mode, refer to the steps below.
Tap the Win + R keys to open the Run dialog box.
After that, type in “sysdm.cpl” in the field and tap Enter.
Next, go to the System Protection tab then click the System Restore button. This will open a new window where you have to select your preferred System Restore point.
After that, follow the on-screen instructions to finish the process and then restart your computer and check if the problem is fixed or not.
We have all experienced Windows errors over time and that can range from simple ones that will do very little to no harm and can be even system breaking making us lose our work or completely making the PC unusable. No one likes them but they happen, and usually, they happen once we least expect them.
No matter how frequent and unpleasant they might be there are ways to keep them at the minimum and even avoid them.
We will discuss steps that you can take in order to do this, simple tips and guides on how to keep your computer in top form and eliminate not just Windows, but any kind of errors altogether.
Keep your hardware clean
Believe it or not, some serious Windows errors like the dreaded blue screen of death can come from hardware issues not from the software at all. It is very important to keep your computer clean and with enough air flow so it can function properly.
Keeping applications on the drive might seem harmless but sadly that is not the case. Some applications have a certain impact on the system itself after all most of them are tweaking registry entries in Windows and sometimes having too many applications means an increased possibility of conflict over certain resources even when they are not running.
Some applications like adobe creative suite, for example, will have certain services always running in the background, and more of these kinds of applications you have, more services, more places for unexpected errors when they collide. Some of them will also install certain dependencies that could be problematic.
The general idea is: if you are not using it, uninstall it and you will be safer and more resilient to errors inside OS.
Do not use pirated or cracked software
Besides moral and law implications that using pirated or cracked software might bring you there are also certain other things that might be problematic. Certain "free" software might come packet with some problematic malware, for example, it is not uncommon for attackers to use some popular software to pack their malicious application with it.
Other things might be wrong and incomplete tweaking with application in order to bypass security and thus bringing some instability due to scripts needed to run in order to achieve this goal.
Keep your drivers updated
Errors can also come from old drivers or bad drivers, device manufacturers are not all-knowing and perfect, and sometimes drivers can wreak havoc on the system. Having updated drivers can minimize any kind of unexpected behaviors inside the operating system making it more stable and reliable.
You can check your driver version in the control panel inside the Windows OS and then compare it to the ones found on the manufacturer's site, if there are newer available it is recommended to download and install them,
Keep software updated
Applications can have bugs, and bugs can lead to certain errors both in the system and when using the app as well. It is in your best interest to get the latest patch or newer version of the software in order to avoid these unpleasant experiences.
Also, certain codecs and extensions that are installed directly in Windows can also have some unpredictable behavior, updating is the best solution to keep them in line.
Keep Windows updated
Same as with drivers and applications, Windows itself is not immune from bugs and some unpredictable issues. Luckily Microsoft is always working on fixes and features of Windows but in order to actually have benefited from that work, you will need to keep Windows updated. Sometimes a bad update can introduce some errors but you can always roll back to the previous and wait for them to fix everything and then download them all.
Check the health of your hardware regularly
Hardware components have their life cycle, more quality ones tend to last longer but eventually, they will reach the end of their lifecycle. There are a lot of testers for various components in your computer that can check different things and provide you with information about the state of your components.
If you are on Windows 11, Microsoft has included a basic health app inside OS, just type PC health check in search and start the app. For some more detailed information and advanced checks, you will have to use a custom application. There are plenty of them specialized for single components like RAM, SSD, etc. A simple google search with providing you with top results and most of them are free for personal use.
Remember, a faulty component or component that is reaching its life cycle can produce many errors inside the operating system.
The error code 0X8019019A is shown when a user fails to add his Yahoo account to the Mail app due to the outdated or corrupt installation of the Mail app. Not using an App-specific but a normal Yahoo account password may also result in the error at hand.
In this guide, we will show you how to effectively fix this error so you can set up Yahoo mail.
Reboot PC
Perform a restart of your system to rule out a temporary glitch in the system. Also, check if you can successfully access your email through a web browser using the same credentials as you are using with the Mail app. Additionally, make sure that no VPN or proxy server is being used to access the internet (VPN/proxy may work fine with the web version of Yahoo mail but may hinder the access through a mail client).
Update Windows and the Mail App to the Latest Build
If your system is not updated to the latest build it can create incompatibility between the OS modules. Updating the Windows and Mail app of your system to the latest build may solve the problem.
Re-add the Yahoo Account to the Mail App
The Yahoo account issue could be a result of a temporary glitch in the communication modules of the system. The glitch may get cleared if you remove and then re-add the Yahoo account to the Mail app.
Reset the Mail App to the Defaults
You may fail to add the Yahoo account to the Mail app if the installation of Mail itself is corrupt. In this scenario, resetting the Mail app to the defaults may solve the problem.
Generate an App Password and Use it to Add the Yahoo Account to the Mail App
Yahoo has implemented tons of security features to its accounts. One such feature is the use of app-specific passwords for less secure apps like the Mail app. If your Yahoo username or password is not working with the Mail app, then using the App-specific password may solve the problem.
External hard drives have become essentials as they store data. However, they are also prone to issues and one of them is the “The device is not ready”. You could encounter this error when you try to access your connected hard drive. This error won’t allow you to access the contents of your hard drive so unless you fix it, you won’t be able to access any of the files on your hard drive.
One of the most likely causes of this error is a hardware defect. Aside from that, it could also be due to loose connections, obsolete device drivers, as well as compatibility issues between the operating system and the hard drive. Before you start troubleshooting the problem, you need to determine if you were able to access your hard drive before you encountered the error or not. If not, you need to check the compatibility of the device with your operating system as it could be the reason why you’re getting the error.
There are several potential fixes you can check out to fix this error. You can try to check the hardware connections, run the built-in Hardware and Devices troubleshooter, as well as the USB troubleshooter. You could also run the CHKDSK utility or update the drivers of the device or the USB drivers.
Option 1 – Try checking the hardware connections
The first thing you have to do before you further troubleshoot the problem is to check the hardware connections of your computer and see if there are damaged ones, just like with USB ports, it would also affect the overall connectivity of the device with the computer. So if you notice some irregularities in the connecting cable physically, you might have to buy another one and replace it and then see if it fixes the problem or not.
Option 2 – Run the Hardware and Devices Troubleshooters
The first thing you need to do is click on Start and then on the gear-like icon to pull up the window for Settings.
After opening Settings, look for the Update and Security option and select it.
From there, go to the Troubleshoot option located on the left-hand side of the list.
Next, select Hardware and Devices from the list and open the Troubleshooter and run it. Once it is doing its job, wait for it to complete the process and then restart the system.
After the system restarts, check if the problem’s now fixed. If not, refer to the next option given below.
Note: You could also try to run the USB troubleshooter as it could also resolve the problem.
Option 3 – Run the CHKDSK utility
As you know, the CHKDSK utility can help you in identifying the bad sectors in a drive and fix them automatically. Thus, you can run it to fix the “The device is not ready” error when you connect your USB drive to your computer.
Open Command Prompt with admin privileges.
Next, type and enter this command to execute it: chkdsk /f <drive>
Now, wait until the process is completed and exit Command Prompt.
Restart your computer and try connecting the USB drive again and see if the error is fixed.
Option 4 – Try to update the drivers of the device
Although you can always update the device drivers using the Device Manager, you might want to try downloading the latest set of drivers directly from the manufacturer’s website. Once you’ve downloaded them, install them right away and then correct the external hard drive.
Option 5 – Update or reinstall the Universal Serial Bus Controller driver
If updating the drivers of the device did not fix the “The device is not ready” error, you can try to update or reinstall the Universal Serial Bus Controller drivers instead of using the Device Manager. Refer to the following steps:
First, click the Start button and type “device manager”.
Then click on the “Device Manager” from the search results to open it.
From there, look for the “Universal Serial Bus controllers” option and then right-click on each one of the USB drivers and select the Update Driver from the menu.
Note: If it is a regular USB drive, then it will be listed as a USB Mass Storage Device but if you have a USB 3.0 device, then look for a USB 3.0 Extensible Host Controller.
Restart your PC and then click the “Search automatically for updated driver software” option.
Note: If updating the USB Controller drivers didn’t work, you can try to reinstall them instead.
Option 6 – Restart your computer in a Clean Boot State
If the first three given options didn’t work and you still see the error when you connect external devices, you can try putting your computer in a Clean Boot State and then try connecting them again.
Log onto your PC as an administrator.
Type in MSConfig in the Start Search to open the System Configuration utility.
From there, go to the General tab and click “Selective startup”.
Clear the “Load Startup items” check box and make sure that the “Load System Services” and “Use Original boot configuration” options are checked.
Next, click the Services tab and select the “Hide All Microsoft Services” check box.
Click Disable all.
Click on Apply/OK and restart your PC. (This will put your PC into a Clean Boot State. And configure Windows to use the usual startup, just simply undo the changes.)
Now try to connect the external devices and check if the error is now gone.
The Adaptive Brightness setting in Windows 10 is a useful setting you can use in adjusting your computer’s brightness. It helps you get the brightness automatically based on the light around your computer. However, there are times when it does not work or it doesn’t turn off when you want it to. If this issue happened right after you update or install Windows 10, then read on as this post will give you a couple of options you can try to resolve the problem.
Option 1 – Try to run the Power Troubleshooter
The first thing you can do to resolve the issue with Adaptive Brightness is to run the Power Troubleshooter as the problem could occur due to some conflicted power settings. To use it, refer to the following steps:
Open the Windows 10 Settings panel and go to Update & Security and then to Troubleshoot.
After that, scroll down to your left-hand side and click the Power option.
From there, you should see the “Run the troubleshooter” button. Click on it to fix the problem.
Afterward, follow the next on-screen instructions that follow.
Option 2 – Try disabling or turning off the corresponding options in GPU settings
The problem might be due to the Graphics card settings. If you are using either an AMD graphics card or the HD graphics of Intel, you may have to disable the power-related options in the GPU settings. To be specific, you have to disable the Vari-Bright in AMD graphics card settings or the Display Power Saving Technology under Intel’s Graphics panel.
AMD users:
Open the AMD Radeon settings panel.
Then go to Preferences. From there, select Radeon Additional Settings.
Next, go to the Power tab and click the PowerPlay option.
You should find an option called “Enable Vari-Bright” located on your right-hand side. Remove the mark from its checkbox and then save the changes you’ve made.
Intel users:
Open the Intel Graphics and Media Control Panel from your Desktop.
Then select the Basic mode and go to the Power tab.
From there, select “On battery” as Power Source and then you’ll get the Display Power Saving Technology option. It should be set to enabled by default.
Now remove the mark from the checkbox and then save the changes you’ve made.
Option 3 – Try resetting the Power Plan defaults
You might also want to use a command-line tool to resolve the problem. This command-line tool is known as PowerCfg. It is a command utility tool that will scan your computer for 60 seconds to know its power. This tool gives detailed results in the form of an HTML report that will help you in evaluating the real cause of the battery drain issues. You can also use this tool to reset the Power Plan defaults of your computer. To use it, follow the steps below.
Open the Command Prompt as administrator.
Then type in the following command and tap Enter to execute it:
powercfg –restoredefaultschemes
After the command has been executed, restart your computer.
Option 4 – Try updating your Graphics drivers
First, boot your computer into Safe Mode.
After that, tap the Win + R keys to launch Run.
Type in devmgmt.msc into the box and tap Enter or click OK to open the Device Manager.
After that, a list of device drivers will be displayed. From there, look for the Display Adapters and click on them.
After that, right-click on each entry under the Display Adapters and select the “Uninstall Device” option from the menu.
Now restart your computer.
After restarting your computer, go to the Settings app and Check for Updates in the Windows Update section.
Note: You also have the option to go directly to the website of your graphics card manufacturers like NVIDIA, Intel, or AMD and go to the section called Drivers then check if there’s a new available update – if there is, download and install it.
Option 5 – Try disabling adaptive brightness via Registry Editor
Since you will be dealing with Registry files in this post, you need to create a System Restore point first. Once you have that covered, proceed to the following steps:
Tap the Win + R keys to open the Run dialog box.
Next, type “regedit” in the field and hit Enter to open the Registry Editor.
After that, navigate to this path: HKEY_LOCAL_MACHINESOFTWAREIntelDisplayigfxcuiprofilesMediaBrighten Movie
Now double click on the “ProcAmpBrightness” and set its value to “0”.
Now go to this path: HKEY_LOCAL_MACHINESOFTWAREIntelDisplayigfxcuiprofilesMediaDarken Movie
From there, double click on “ProcAmpBrightness” and set the value to “0”.
Then close the Registry Editor and restart your PC and then see if the problem’s fixed or not.
Error Code 45 is a common device manager problem that users encounter on any Windows 2000 and later operating system versions.
The error occurs when your Windows system fails to acknowledge the connected device by either stating that the device is not present or that it was previously attached to a computer.
The error pops up and appears on your computer screen with the following message:
“Currently, this hardware device is not connected to the computer” (Code 45)
Solution
Error Causes
The error is prompted either due to a temporary system file malfunction or a problem in the Windows registry system files. In the latter case, it could be due to a damaged or corrupted Windows registry.
Further Information and Manual Repair
While it may appear that Error Code 45 is a serious threat to your computer, it cannot be farther from the truth. Error Code 45, unlike other error codes, is the easiest one to fix. Here is how you can do it.
Method 1 – Reconnect the device to your computer
Unplugging and plugging the USB cable of the device into the computer is the easiest way to solve the error.
Doing this will help refresh the system and increase the likelihood of the device driver files loading and function properly.
It is often only a case of reconnecting the device back to your computer which helps eliminate the error and does not require any particular resolution other than this.
Method 2 – Install DriverFIX
Although reconnecting the disconnected device is all you need to fix the error code, it is always safer to fix your Windows registry system files by using a program like DriverFIX.
DriverFIX, with its user-friendly approach to help you fix your PC issues, comes with an integrated database that detects which drivers you need to reconfigure within just a few seconds and downloads it automatically.
It further ensures that your drivers are installed in their entirety leaving no room for any corrupted or damaged registry.
It also has the added advantage of being able to backup and restores your files should there be the slightest possibility of system file damage.
Thus, registry damage can be averted by letting the software roll back the system files to an earlier healthy checkpoint. DriverFIX is the answer to fixing your PC error codes accurately and quickly.
 Task View feature inside Windows 11 is actually a great feature, letting you quickly view open windows and virtual desktops. How Task view itself could be reached with keyboard shortcut combination of ⊞ WINDOWS + TAB some users will prefer this way of using it and thus button on the taskbar is something you do not want or need.
 You can it here:
 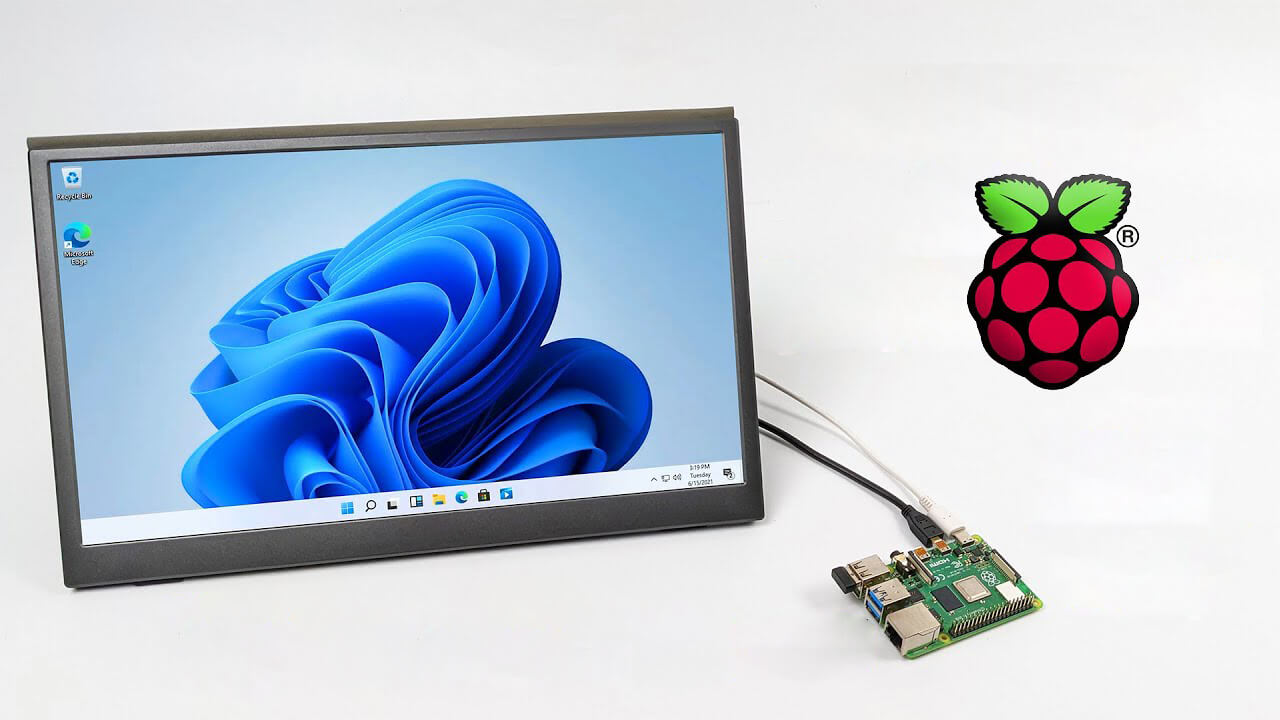 Raspberry Pi 4 and things you need for Windows 11 installation
