Libvlc.dll error is a type of DLL file error. Libvlc.dll is a type of Dynamic Link Library file associated with 3rd party software developed by the Videolan Team for the Windows OS.
Libvlc.dll file contains small programs similar to EXE executable files which allow multiple software programs to share the same functionality. It helps load and run certain programs developed by Videolan Team on your system.
The Libvlc.dll error pops up when the file fails to load and run your desired program. This error is usually triggered during program installation while a Libvlc.dll related software is running on the PC or during Windows start-up or shut down.
Libvlc.dll error code may appear on your Windows computer in any of the following formats:
"Libvlc.dll not found."
"The file libvlc.dll is missing."
"Cannot register libvlc.dll."
"Cannot find C:WindowsSystem32\libvlc.dll."
"Libvlc.dll Access Violation."
"Cannot start Third-Party Software. A required component is missing: libvlc.dll. Please install Third-Party Software again."
"This application failed to start because libvlc.dll was not found. Re-installing the application may fix this problem."
Though Libvlc.dll error is not a fatal error code but nonetheless it is advisable to resolve it immediately to avoid any inconvenience.
 Error Causes
Libvlc.dll error code may occur due to several reasons including but not limited to:
Here are some of the best and easy-to-work-around methods that you can try to resolve Libvlc DLL error on your system in minutes. Let’s get started:
Since DLL are shared files, sometimes the error code may pop up if it is deleted accidentally while uninstalling a program that is also run by the same file.
In such a situation, to resolve the Libvlc.dll error all you have to do is re-install the deleted file by going into the recycle bin. If you find it reinstall, but if you don’t then simply download Libvlc.dll file from a reliable DLL file website and install. Hopefully this will resolve the issue.
Alternatively, you can re-install VLC which should come with a complete copy of the libvlc.dll.
However, if the error code still persists, then try other methods given below.
Another way to resolve Libvlc dll error is to restore your Windows system to an earlier point.
System Restore can return your PC system files and programs back to a time when everything was working absolutely fine. This can help you avoid hours of troubleshooting headaches.
This can be easily done by going to the start menu. In the search box type System Restore and press enter. Now click System Restore and enter administrator password if prompted. Follow the steps in the Wizard to choose a restore point and then reboot to activate changes.
The Libvlc dll error can be triggered by invalid registry entries. To resolve, simply download Restoro. This is a user-friendly and multi-functional PC Fixer embedded with a powerful registry cleaner. It removes all the invalid files, repairs the damaged DLL files, and cleans the registry in seconds.
Click here to download Restoro and resolve Libvlc dll error today!

 1. File-infecting Virus
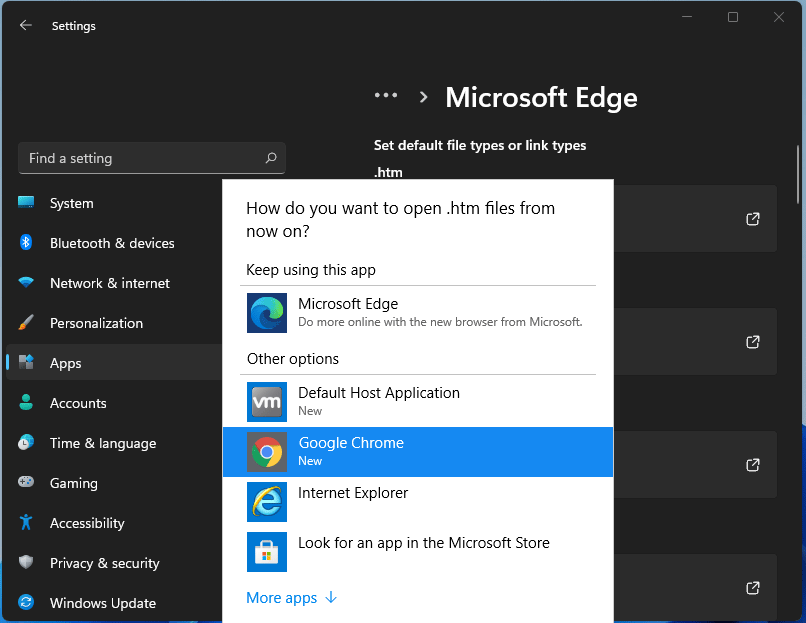 For anyone who is not aware, when Windows 11 was released if you wanted to switch to another browser you had to go into the settings app and choose the default browser for different types of file extensions like HTML, HTM, PDF for opening on the web, etc. Of course, this was completely unnecessary and it was not well received by users. So after some time, Microsoft backpedaled to standard one click, choose your default browser solution that existed in the previous version of Windows OS.
Altho sometimes Microsoft knows how to irritate its users base, it is good to know that they can also listen and fix things that are required.
For anyone who is not aware, when Windows 11 was released if you wanted to switch to another browser you had to go into the settings app and choose the default browser for different types of file extensions like HTML, HTM, PDF for opening on the web, etc. Of course, this was completely unnecessary and it was not well received by users. So after some time, Microsoft backpedaled to standard one click, choose your default browser solution that existed in the previous version of Windows OS.
Altho sometimes Microsoft knows how to irritate its users base, it is good to know that they can also listen and fix things that are required. 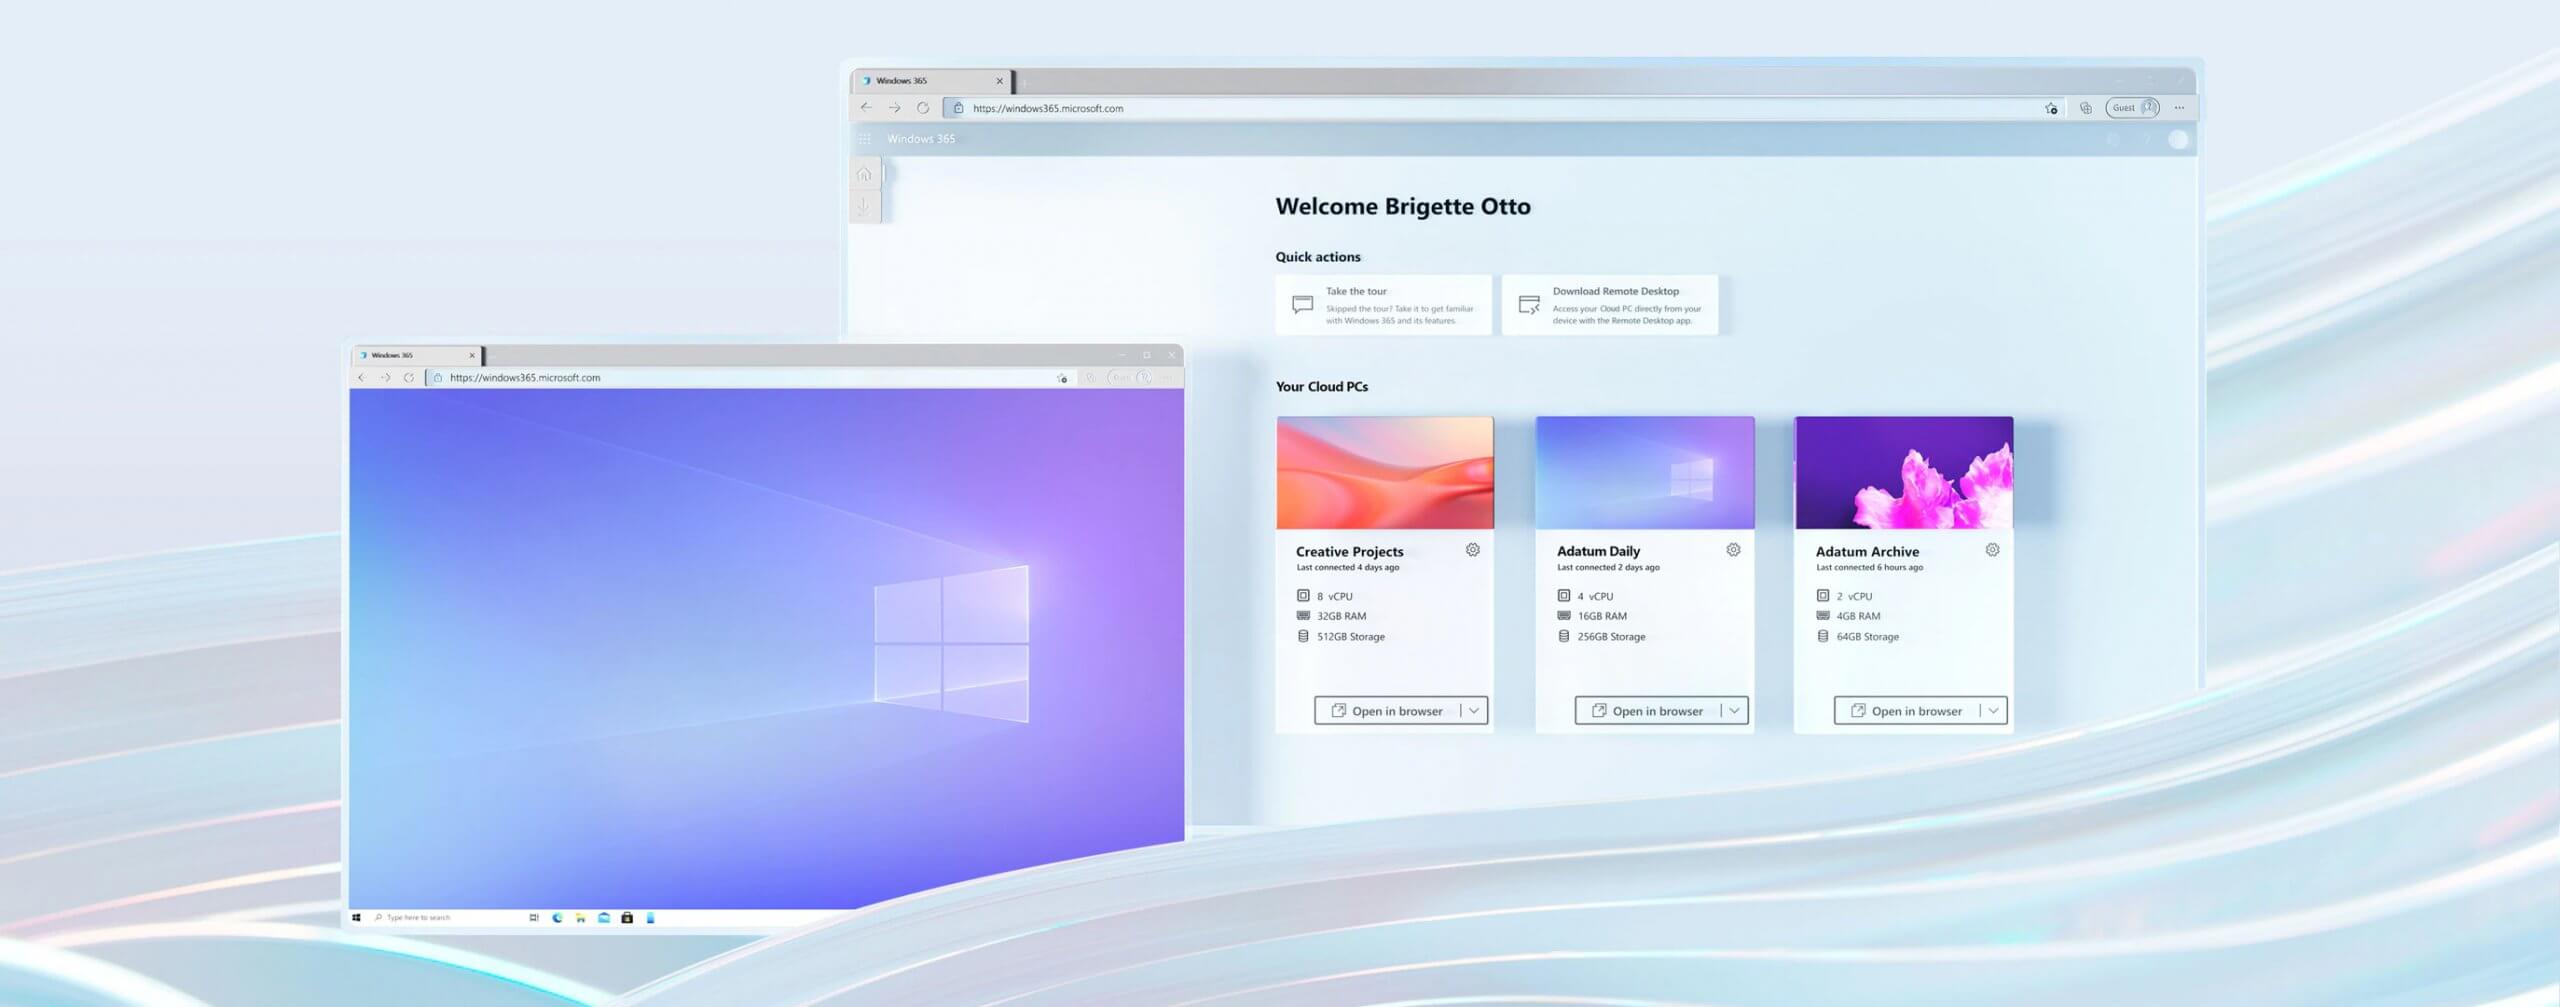 Microsoft has announced Windows 365, a new cloud-based operating system aimed mainly at businesses of all sizes.
Just after Windows 11 announcement and presentation, we are seeing another Windows announcement from Microsoft. Dive into the following text in order to find out what exactly is new Windows 365, its role in today's IT world, and do you need it?
Microsoft has announced Windows 365, a new cloud-based operating system aimed mainly at businesses of all sizes.
Just after Windows 11 announcement and presentation, we are seeing another Windows announcement from Microsoft. Dive into the following text in order to find out what exactly is new Windows 365, its role in today's IT world, and do you need it?
takeown /f FileNameAndPathNote: In the given command, “FileNameAndPath” represents the name and the path of the corrupted file. For instance, the corrupted file is named “wuapi.dll”, then you need to type “takeown /f C:/Windows/System32/wuapi.dll” Step 5: Next, you need to grant administrators full access & control to the corrupted file and you can do that via Command Prompt again. Step 6: In the elevated Command Prompt, type and enter the following command to execute it:
icacls FileNameAndPath /GRANT ADMINISTRATORS:FNote: We’re going to use the wuapi.dll again as an example. So the command should be like this: icacls “C:/Windows/System32/wuapi.dll /grant administrators: F”. Step 7: Now all that’s left to do is replace the corrupted system file with a good copy from a trusted source. Once you have a copy, open an elevated Command Prompt again and execute the following command:
copy NewFileLocation FileNameAndPathNote: In the command given above, the “NewFileLocation” is the location where you have saved the copy of the file. For instance, if you’ve saved it on your desktop, this is how it should look: “copy C:/Users/<username>/Desktop/wuapi.dll C:/windows/system32/wuapi.dll”
Error Causes Once you are in the system, on the left tabs find and click on Clipboard.
 If you are not logged in to your Microsoft account do so on the right panel by locating Sync across devices and click on sign in.
 When you are signed in click on the option to turn it on.
 One option is turned ON, you will be greeted with two choices, to copy everything from the clipboard automatically or to choose text which you want to sync and paste it with ⊞ WINDOWS + V. Choose whatever better suits your needs, and you are done.
Repeat these steps for other devices and you are done.
One option is turned ON, you will be greeted with two choices, to copy everything from the clipboard automatically or to choose text which you want to sync and paste it with ⊞ WINDOWS + V. Choose whatever better suits your needs, and you are done.
Repeat these steps for other devices and you are done. “This policy setting allows you to prevent Windows from installing removable devices. A device is considered removable when the driver for the device to which it is connected indicates that the device is removable. For example, a Universal Serial Bus (USB) device is reported to be removable by the drivers for the USB hub to which the device is connected. This policy setting takes precedence over any other policy setting that allows Windows to install a device. If you enable this policy setting, Windows is prevented from installing removable devices and existing removable devices cannot have their drivers updated. If you enable this policy setting on a remote desktop server, the policy setting affects redirection of removable devices from a remote desktop client to the remote desktop server. If you disable or do not configure this policy setting, Windows can install and update device drivers for removable devices as allowed or prevented by other policy settings.”
Error Causes