Keyboard folder shortcut in Windows 11

If you are visiting a single folder many times during the day it might be beneficial to place its shortcut on the desktop for easy access. But did you know that you can also set a keyboard shortcut for that same folder shortcut making it available simply by clicking desired key combination?

keyboard shortcutIn order to make a keyboard shortcut for the desired folder know that it is available only when you have a shortcut of the desired folder, it cannot be done on the folder itself, only on its shortcut. Now folder shortcut does not need to reside on desktop, you can place it anywhere you like, but it must be a shortcut.

So the first step is of course to make a shortcut of the folder that you wish to have access via keyboard key combination and place it where you wish.

Once you have done this step, right-click on it and choose properties. Inside properties at the top click on the Shortcut tab and then inside Shortcut Key, press the key combination that you wish to associate with this folder. Confirm with OK and start using fast folder access with your desired key combination.

Do You Need Help with Your Device?

Our Team of Experts May Help
Troubleshoot.Tech Experts are There for You!
Replace damaged files
Restore performance
Free disk space
Remove Malware
Protects WEB browser
Remove Viruses
Stop PC freezing
GET HELP
Troubleshoot.Tech experts work with all versions of Microsoft Windows including Windows 11, with Android, Mac, and more.

Share this article:

You might also like

Can’t connect to this network Windows issue
Can’t connect to this network Internet connectivity issues present a complex problem with simple solutions for PC and laptop users. First, it is usually recommended that users rule out problems with the internet connection, router, and Wi-Fi settings before proceeding to troubleshoot settings on your PC/laptop. Once the rest are ruled out, we can then proceed with the following troubleshooting steps and guidelines to fix your wifi connection issue: The first step is to update your windows network adapter driver. Connectivity problems may arise if your network driver is not updated or if it is incompatible with the network adapter. To do so, you may resort to any third-party driver scanning and installing programs found online. This solution should have resorted if users don’t want the hassle of perusing through windows settings that users may not be familiar with. However, this solution requires a pre-existing internet connection other than wifi, so it is recommended you have a backup internet connection via ethernet.

The second step is to uninstall the driver for your network adapter. This solution is to be reported if there is an issue with the driver as restarting the PC after the following steps let windows reinstall the driver again:

  • Open the quick access menu on your keyboard by pressing the Windows key and X key at the same time and select “Device Manager” from the menu list.
  • From the list of devices, select “Network Adapters”
  • Usually on the top of the list is the Wireless Network Adapter
  • Right-click the Wireless Network Adapter and select the option to “Uninstall device”
  • You will be given a confirmation in a new separate window to proceed. Click “Uninstall” to proceed.
  • After completing the previous steps, try rebooting your Windows PC and reconnecting to see if it works.

A third step is to disable the 802.1 1n modes of your network adapter by following the next steps:

  • First press the Windows logo key and the X key at the same time to bring up the quick-access menu. And like the previous step, select “Device Manager”
  • From the list of devices, select “Network Adapters”
  • Right-click the Wireless Network Adapter from the drop-down menu and select properties
  • Under properties, select the “Advanced” tab then select the 802.1 1n Mode. To the right drop-down menu change the option to  “Disabled” and click “Ok”
  • After, try to re-establish the connection to see if the steps have worked.
In the event that any of the preceding did not fix your problem, it helps to take a second look at the router and network settings using the interface provided by your ISP. A simple reset to the back of your router often fixes the issue. Also, try to check if you have any other administrative capabilities over the network to determine whether your device, in particular, has been MAC filtered or if the frequency of your wireless adapter is not compatible with the broadcast frequency of your router.
Read More
Fix Libmysql.dll is Missing Error in Windows
Libmysql.dll is missing or not found error appears in Windows when the user is trying to open and run the application. In this guide, we will offer you solutions on how to fix and remove this annoying error.
  1. Check recycle bin

    Some applications or purely by accident itself libmysql.dll gets deleted. If you have not turned recycle bin off go to it and check to see if the file is by any chance there. If you find it, right-click on it, choose restore, the error will be gone.
  2. Update drivers

    Press ⊞ WINDOWS + X to open the Windows menu and click on Device manager In device manager locate device which has alert mark next to it Right-click on it and choose update driver Reboot your computer
  3. Run SFC scan

    Press ⊞ WINDOWS + X and choose command prompt (admin) In command prompt type in sfc /scannow and press ENTER wait for the operation to complete and Reboot your system
  4. Reinstall application

    if you are getting an error only on one application or an error has started to appear after the installation of a particular application go to Windows applications, uninstall it and then install it again. There is a chance that the file has been corrupted during the installation process.
Read More
How to Fix Propsys.dll Error
Isn’t it annoying when you get an error message pop up stating ‘Cannot find propsys.dll” or “propsys.dll not found” when you start your computer or open a particular program? The propsys.dll file is crucial to the Windows operating system. This file is located in one of the following locations: "C:\Windows", C:\Program Files, C:\WINDOWS\system32, or C:\Program Files\Common Files". And the propsys.dll error indicates that the propsys digital library file is damaged and corrupt. The propsys.dll error may lead to a very unstable operating system. It may also hamper your ability to access many programs on your computer, lead to program and system crash and slow down the system’s performance. Therefore, to avoid these system threats, it is advisable to fix the error immediately.

Solution

Restoro box imageError Causes

The common causes of propsys.dll file error are:
  • Registry problem
  • The propsys.dll file is damaged due to a virus or spyware
  • Improper software removal
  • Hardware Failure
The propsys.dll error message is displayed in either of the following forms:
  • Propsys.dll not found
  • Cannot find [Path]propsys.dll
  • This application failed to start because propsys.dll was not found. Reinstalling the application may fix this problem
  • The propsys.dll file is missing

Further Information and Manual Repair

There are many ways to fix the propsys.dll error. However, for optimum results from the fix, you must first identify the cause of the error and then choose the solution accordingly.
  • Recommended Solution for Registry Issue
If you use your system daily the resulting wasted/invalid/junk entries may dilate the registries. This can result in registry malfunctioning which may result in a propsys.dll error on your screen. When this happens, it is advisable to use a registry cleaner to fix the problem. Registry cleaner helps clean up the junk entries and repairing the corrupted registries. For this, you will first have to download a registry cleaner repair tool. Download and install the software on your computer. After downloading it, click the start scan button to run. This helps scan and diagnose system errors on your computer in seconds. Once the scanning is complete, click on the fix button to repair the registry problem.
  • Recommended Solution for File Damage and Corruption
Use the ‘System Restore’ option to restore corrupt and damaged files.  The ‘System Restore’ function will help you get a fresh copy back and simultaneously help fix the error. Here’s how to use and access the ‘System Restore’ function on your computer: Simply go to the start menu and in the search box type restore. Once you type, it will show you the system restore option. Now select ‘choose a different restore point’. After this, you will be presented with a list of restore points. Choose a point that you believe happened before the propsys.dll error. Confirm your selection and restart. Another alternative solution for file damage is to run a virus scan of your entire system; the damage could be related to a virus or malware infection.
  • Recommended Solution for Hardware Failure
If a propsys.dll error occurs due to hardware failure, then it is advisable to update the drivers for hardware devices that you think are related to propsys.dll. For example, if you receive the propsys.dll error when you play a 3D video game, then try updating the driver for your video card.
Read More
How to remove SearchAnonymo from your computer

SearchAnonymo is a Google Chrome browser extension. This extension allegedly allows you to browse the internet anonymously without your data being tracked. From the Author: Search Anonymo – Search the Web Privately

Switch your default search to Search Anonymo and become safer on the web. Search through our Search Anonymo extension instead of search engines that track your personal profile and your search history. Search Anonymo provides you with an easy and safe search tool. -Advanced Security -No User Profiling -No Tracking -No Search Leakage This extension replaces your Default Search to Search Anonymo. This extension reroutes your search algorithms through a few websites before finally forwarding it to Yahoo Search. It changes your default search engine to Yahoo, which keeps track of any search information you make. It will change your homepage, search provider, and in our testing added considerable delay to the speed of search. This browser hijacker is considered a low-risk threat but is detected for optional removal for previous reasons.

About Browser Hijackers

Browser hijacking means that a malicious program code has power over and altered the settings of your internet browser, without your permission. Nearly all browser hijackers are created for marketing or advertising purposes. In most cases, it will force users to predetermined websites that are trying to increase their advertising campaign revenue. Nonetheless, it isn’t that harmless. Your web safety is compromised and it is also really irritating. Browser hijackers can also let other malicious programs without your knowledge further damage your PC.

How one can know whether the web browser is hijacked?

There are many symptoms that could indicate a browser hijacking: the browser’s home-page is changed; you see new unwanted favorites or bookmarks added, typically directed to ad-filled or porn sites; the default browser configurations have been changed and/or your default search engine is altered; you’re getting browser toolbars you have never found before; never-ending pop-up ads appear and/or your web browser popup blocker is disabled; web pages load very slowly and at times incomplete; you can’t visit specific sites like homepages of security software.

How they get into your computer or laptop

There are a number of ways your PC can get infected by a browser hijacker. They usually arrive by way of spam e-mail, via file-sharing networks, or by a drive-by download. They can be included with toolbars, BHO, add-ons, plugins, or browser extensions. Also, certain freeware and shareware can put the hijacker in your PC through “bundling”. Examples of well-known browser hijackers are Fireball, GoSave, Ask Toolbar, CoolWebSearch, Babylon Toolbar, and RocketTab. The presence of any browser hijacker on your computer can considerably diminish the browsing experience, record your internet activities that lead to major privacy issues, develop system stability problems, and eventually cause your computer to slow down or to a practically unusable condition.

Getting rid of browser hijackers

Certain hijackers could be removed by just uninstalling the related freeware or add-ons through the Add or Remove Programs in the Windows control panel. Having said that, the majority of hijackers are very tenacious and need specialized tools to get rid of them. And there’s no denying the very fact that the manual fixes and removal methods can be a complicated job for a novice computer user. Additionally, there are plenty of risks connected with tinkering around with the system registry files. You can opt for automatic browser hijacker removal methods by simply installing and running an efficient anti-malware application. To eradicate any browser hijacker from your PC, you can download this particular certified malware removal application – SafeBytes Anti-Malware. In addition to anti-malware, a system optimizer software can help you correct registry errors, get rid of unwanted toolbars, secure internet privacy, and stabilize software programs installed on your computer.

What you can do if Virus Stops You From Downloading Or Installing Anti-malware?

All malware is inherently harmful, but certain kinds of malicious software do a lot more damage to your PC than others. Some malware is designed to hinder or prevent things that you want to do on your computer system. It may not allow you to download anything from the web or stop you from accessing some or all websites, especially the anti-virus sites. If you’re reading this, chances are you’re stuck with a malware infection that is preventing you to download or install Safebytes Anti-Malware software on your system. Do as instructed below to get rid of the malware by alternate methods.

Use Safe Mode to fix the problem

In Safe Mode, you could change Windows settings, un-install or install some software, and get rid of hard-to-delete viruses. In the event the malware is blocking internet connection and affecting your computer, starting it in Safe Mode enables you to download antivirus and run a scan while limiting possible damage. In order to get into Safe Mode or Safe Mode with Networking, press the F8 key while the PC is starting up or run MSConfig and locate the “Safe Boot” options in the “Boot” tab. As soon as you restart the PC into Safe Mode with Networking, you could download, install, as well as update anti-malware software from there. After installation, run the malware scanner to remove standard infections.

Switch to an alternate web browser

Some malware mainly targets particular internet browsers. If this sounds like your case, make use of another web browser as it might circumvent the virus. When you suspect that your Internet Explorer happens to be hijacked by a trojan or otherwise compromised by online hackers, the best thing to do is to switch over to an alternate browser such as Firefox, Chrome, or Safari to download your chosen security software – Safebytes Anti-Malware.

Run anti-malware from your USB drive

Another technique is to download and transfer anti-malware software from a clean PC to run a scan on the infected system. Do these simple actions to clean up your infected computer by using a portable antivirus. 1) On a virus-free computer, download and install Safebytes Anti-Malware. 2) Plug in the pen drive into the clean computer. 3) Double-click the executable file to run the installation wizard. 4) Select the USB flash drive as the location for saving the software file. Follow the onscreen instructions to finish the installation process. 5) Now, transfer the USB drive to the infected PC. 6) Run the Safebytes Anti-malware directly from the USB drive by double-clicking the icon. 7) Run Full System Scan to identify and get rid of all kinds of malware.

Overview of SafeBytes Anti-Malware

Do you want to install the very best anti-malware software program for your PC? There are numerous applications in the market that comes in paid and free versions for Windows systems. A few of them are great and some are scamware applications that pretend as legitimate anti-malware programs waiting to wreak havoc on your personal computer. When searching for anti-malware software, choose one that gives dependable, efficient, and comprehensive protection against all known viruses and malware. Amongst few good applications, SafeBytes Anti-Malware is the strongly recommended tool for the security-conscious individual. SafeBytes can be described as a powerful, real-time anti-malware application that is created to assist the everyday computer end user in protecting their PC from malicious threats. With its cutting-edge technology, this application will help you get rid of multiples types of malware such as computer viruses, worms, PUPs, trojans, adware, ransomware, and browser hijackers. SafeBytes anti-malware offers an array of enhanced features that sets it apart from all others. Listed below are some of the features you may like in SafeBytes. Most effective AntiMalware Protection: Built on a highly acclaimed anti-virus engine, this malware removal tool can find and remove numerous obstinate malware threats like browser hijackers, potentially unwanted programs, and ransomware that other common anti-virus applications will miss. Real-time Threat Response: SafeBytes offers a completely hands-free real-time protection that is set to monitor, block and destroy all threats at its first encounter. It will regularly monitor your pc for hacker activity and also gives end-users superior firewall protection. Web protection: SafeBytes checks the hyperlinks present on a webpage for possible threats and tells you whether the site is safe to visit or not, through its unique safety rating system. Lightweight: SafeBytes is renowned for its low effect on computer resources and great detection rate of countless threats. It runs quietly and efficiently in the background so you’re free to utilize your computer or laptop at full power all the time. 24/7 Guidance: You will get 24/7 technical assistance to immediately resolve any issue with your security application. To sum it up, SafeBytes Anti-Malware is pretty great for securing your computer against all sorts of malware threats. Malware problems can become a thing of the past once you put this tool to use. If you want advanced forms of protection features & threat detections, purchasing SafeBytes Anti-Malware will be well worth the dollars!

Technical Details and Manual Removal (Advanced Users)

If you wish to manually remove SearchAnonymo without using an automated tool, it may be possible to do so by removing the program from the Windows Add/Remove Programs menu, or in cases of web browser plug-ins, going to the browser’s AddOn/Extension manager and removing it. Additionally, it is suggested to reset your browser to its default state to fix corrupt settings. In order to ensure the complete removal, manually check your hard drive and computer registry for all the following and eliminate or reset the values as needed. But bear in mind, this is often a complicated task and only computer professionals could accomplish it safely. Furthermore, certain malware is capable of replicating itself or preventing deletion. Carrying out this in Safe Mode is recommended.
Read More
How to Fix QTCF.dll Error

What is QTCF.dll Error?

Sometimes you may experience QTCF.dll error on your computer either during installation or while upgrading applications like iTunes and QuickTime. This error indicates that the installation or the upgrading of the desired application was unsuccessful. The QTCF.dll error is recognized by the Apple Support Community and they have provided a solution to fix this error easily.

Solution

Restoro box imageError Causes

QTCF.dll error occurs because the computer overloads with too much data which corrupts and damages registry files. And therefore the desired program fails to download and start on your PC. When this happens you see a pop up on your screen and the QTCF.dll error message that is usually displayed as:
  • QTCF.dll not found
  • QTCF.dll file is missing
Such message display hinders your ability to use iTunes or QuickTime applications on your PC. Furthermore, it also slows the performance of your system and you may encounter startup and shutdown problems. Therefore, it is advisable to repair the problem and fix the QTCF.dll error right away.

Further Information and Manual Repair

The good news is that you don’t need to go to a professional or be an IT expert in order to fix the QTCF.dll error. Since this error means that the installation or the attempt to upgrade the system was unsuccessful therefore you need to reinstall the fresh copy of the application. Here’s how you can easily fix the problem by yourself and install a fresh copy of the application: Step 1: First close all the applications running on your computer. Step 2: Now uninstall the application that you were trying to install such as iTunes or QuickTime.  To do this, go to the start menu, click on settings, control panel, and programs. Now click on the application you want to remove. Step 3: Once the application is uninstalled and removed from your computer, then restart it again. Step 4: Now download a fresh version of the application (iTunes or QuickTime) from Apple’s official website http://www.apple.com/quicktime/download/. Step 5: Run the installer. If reinstalling doesn’t work, then it is advisable to download the QTCF.dll repair tool. This repair tool will scan your PC for errors in seconds. Once the scanning is complete, click on the ‘fix all’ button to repair your computer. Once the error is fixed, restart your computer and then try reinstalling the desired application one more time.

A Word of Advice

For regular PC users, it is advisable to install an anti-virus and malware scanner and run it every time you use your computer. This helps you keep informed about the viruses or errors that your computer might be exposed to. And you can take timely actions before you experience file corruption and damage.
Read More
Guide to Fixing 0x80040600 Error

What Is 0x80040600 Error?

The 0x80040600 error is a common error that becomes particularly distressing for Outlook users. This error prevents users from sending or receiving emails through Microsoft Outlook. Users may also encounter this problem while altering an entry on the calendar or adding a new contact. There is no obvious message that is displayed to the user when this error occurs. However, Outlook displays a vague message that includes the code 0x80040600.

Solution

Download available to recover all lost Outlook data

Restoro box imageError Causes

The primary cause of this error is a problem with the PST file. When the PST file is corrupt, missing, or damaged, this error occurs at once. The PST file is essentially an important file that stores crucial and personal information of an individual’s accounts. Sometimes this error is because the file is corrupt while at other times, the reason that it occurs is that the file is too full to accommodate any further information. Irrespective of the causes of this problem, it is important that this error is promptly fixed to ensure the proper and uninterrupted functioning of Outlook in the future.

Further Information and Manual Repair

The error occurs because the Outlook application encounters problems while attempting to receive, send or read emails. Some solutions that can work wonders and help you get rid of the problem are outlined below.
  • As soon as the error appears, the first solution is to restart the system. This is the first thing that must be done because a lot of times, these errors can be removed by simply restarting the system. This will, hence, save the user the inconvenience of manually fixing this problem.
If restarting the system doesn’t resolve the problem and the error message displays again, it is advised the user makes use of the ‘Inbox Repair Tool’. This is the most commonly used and effective approach to fixing a corrupt PST file. The procedure to remedy this Personal Storage Table file or PST file is listed below.
  • Go to the start menu. Type Run and launch the Inbox Repair Tool by typing the following path:  drive name: Program FilesCommon FilesSystemMapiLocale IDscanpst.exe. Now click Ok. A pop-up message will appear. Enter the file name and path of the damaged PST file. Now click on the Start button. Here it is important to mention that the inbox repair tool may take a long time depending upon the file size and the amount of data that has to be recovered. However, it is the most effective way of fixing this problem.
Read More
Change Network from Public to Private error
You have the option to choose to configure the Network to Private or Public when you set it on Windows 10 PC. On the other hand, if the option to change the Network from Public to Private goes missing in Windows Settings then this post will surely help. You can find this setting under Settings > Network and Internet > Ethernet and appears when you click on it. If you are not able to see the option to change the network profile, then you either can’t open the settings, or the option to change it has been disabled. To resolve this issue, you can either use the Registry Editor or Windows PowerShell. Refer to the options given below for more details.

Option 1 – Change the Network Profile via Registry Editor

Changing the Network Profile can be done using the Registry Editor. But before you proceed, make sure that you create a System Restore Point first just in case. Refer to the steps below to do so.
  • Tap the Win + R keys to open the Run dialog box.
  • Then type “Regedit” in the field and hit Enter to open the Registry Editor.
  • After that, navigate to this key: HKEY_LOCAL_MACHINESOFTWAREMicrosoftWindows NTCurrentVersionNetworkListProfiles
  • Now expand the Profiles key folder located in the left pane to see one or more folders.
  • Next, expand each one of these folders and look for the “Description” sub-key which should match the name of your network.
  • After you find the Description sub-key, look for another sub-key named “Category” and double click on it to open it.
  • Now change its value from “0” to “1” to change the Network Profile from Public to Private.

Option 2 – Change the Network Profile via Windows PowerShell

Aside from the Windows Registry, you can also use Windows PowerShell in changing the Network Profile from Public to Private and so on. Take note that you have to use PowerShell with admin privileges. Just refer to the steps below to do so.
  • Tap the Win + X keys and then select the “PowerShell (Admin)” option.
  • Next, click on Yes if the User Account Control prompt appears.
  • After that, execute the commands listed below. Hit Enter right after you key in each one of them.
    • Get-NetConnectionProfile
    • Set-NetConnectionProfile -InterfaceIndex <index number> -NetworkCategory Private
Note: Since every Network Profile has an index number, you can check the label “Name” to identify the network that you want to change.
Read More
MyImageConverter Removal Guide for Windows

This toolbar/web browser extension is ad/search-supported that is typically installed as an optional offer, users generally have this bundled with 3rd party software. During setup, this toolbar will modify the home page and new tab pages to the affiliate search portal MyWay.com using a primary search engine to collect shared search revenue. It will also modify the default search provider as well. While this extension is installed users will experience a display of additional ads and sponsored content throughout their browsing sessions, as well as the possibility of pop-up ads. Several anti-virus scanners have marked this extension as a Browser Hijacker and it is recommended to remove it from your computer.

About Browser Hijackers

Browser hijacking means that a malicious code has taken control over and altered the settings of your internet browser, without your consent. They are designed to interfere with browser programs for a variety of purposes. Usually, it’ll drive users to predetermined websites that are looking to increase their advertising campaign income. Though it may seem naive, all browser hijackers are damaging and thus always regarded as security risks. In a worst-case scenario, your internet browser can be hijacked to download malicious software that can do a great deal of damage to your laptop or computer.

How to know if your internet browser has been hijacked

The common symptoms that indicate having this malicious software on your PC are: 1. home page is modified 2. bookmark and the new tab are likewise modified 3. default online search engine is changed 4. you’re getting new toolbars you have never found before 5. your internet browser displays endless pop-up ads 6. your web browser has become unstable or starts running slowly 7. you can’t visit certain websites like homepages of anti-malware software.

Exactly how browser hijacker finds its way onto your computer system

Browser hijackers can enter a computer by some means or other, including via downloads, file sharing, and e-mail also. They may also come from any BHO, extension, add-on, toolbar, or plug-in with malicious intent. Browser hijackers sneak into your pc in addition to free software application downloads that you unintentionally install alongside the original. Some of the most popular hijackers are MyImageConverter, Conduit Search, Babylon Toolbar, Sweet Page, OneWebSearch, and CoolWebSearch.

Learn how to get rid of browser hijackers

Certain hijackers could be removed by just uninstalling the related freeware or add-ons through the Add or Remove Programs in the Windows control panel. In some cases, it could be a difficult job to find and remove the malicious piece because the associated file could be running as part of the operating system process. Besides, browser hijackers can modify the Windows registry so it can be quite tough to restore all the values manually, especially when you are not a very tech-savvy person. You can choose automatic browser hijacker removal by just installing and running an efficient anti-malware program. SafeBytes Anti-Malware detects all types of hijackers – including MyImageConverter – and eliminates every trace quickly and efficiently. In addition to anti-virus software, a PC optimizer program, like Total System Care, can help you fix Windows registry errors, remove unwanted toolbars, secure your internet privacy, and boost overall computer performance.

What to Do if Virus Stops You From Downloading Or Installing Antivirus?

Practically all malware is bad, but certain types of malware do much more damage to your PC than others. Some malware variants alter web browser settings by adding a proxy server or change the PC’s DNS configuration settings. In such cases, you’ll be unable to visit some or all of the websites, and therefore not able to download or install the required security software to clear out the computer virus. If you are reading this now, you might have perhaps realized that virus infection is a reason behind your blocked net connectivity. So how to proceed if you need to install an anti-virus software like Safebytes? Follow the instructions below to remove malware by alternate methods.

Download the software in Safe Mode with Networking

The Windows operating system comes with a special mode referred to as “Safe Mode” in which only the minimum required programs and services are loaded. In the event the malware is blocking internet connection and affecting your computer, running it in Safe Mode enables you to download anti-virus and run a diagnostic scan whilst limiting potential damage. To get into Safe Mode or Safe Mode with Networking, press F8 while the system is booting up or run MSCONFIG and locate the “Safe Boot” options in the “Boot” tab. Once you are in safe mode, you can try to install your anti-malware application without the hindrance of the malware. Now, you can run the antivirus scan to get rid of viruses and malware without hindrance from another malicious application.

Download the security software using an alternate internet browser

Some malware only targets particular web browsers. If this sounds like your situation, utilize another web browser as it might circumvent the virus. If you seem to have a trojan attached to Internet Explorer, then switch to an alternate web browser with built-in safety features, such as Firefox or Chrome, to download your preferred anti-malware program – Safebytes.

Install anti-malware on a USB drive

Another option would be to make a portable antivirus program on your USB flash drive. To run anti-malware from a USB pen drive, follow these simple measures: 1) On a virus-free computer, download and install Safebytes Anti-Malware. 2) Plug the USB drive into the clean computer. 3) Double-click on the downloaded file to open the installation wizard. 4) Select the drive letter of the flash drive as the location when the wizard asks you exactly where you want to install the antivirus. Follow the on-screen instructions to finish the installation process. 5) Transfer the flash drive from the uninfected computer to the infected computer. 6) Double-click the Safebytes Anti-malware icon on the USB drive to run the software. 7) Hit the “Scan” button to run a full computer scan and remove viruses automatically.

Protect Your PC and Privacy With SafeBytes Anti-Malware

Are you looking to install the best anti-malware software program for your PC? You can find many applications on the market which come in free and paid versions for Windows systems. A few of them do a great job in eradicating malware threats while some will affect your PC themselves. You should look for a product that has obtained a good reputation and detects not only viruses but other types of malware as well. While considering the highly regarded applications, Safebytes AntiMalware is certainly the highly recommended one. SafeBytes anti-malware is trustworthy software that not only secures your PC completely but is also quite user-friendly for people of all ability levels. Through its cutting-edge technology, this software will help you protect your computer against infections caused by various kinds of malware and similar internet threats, including adware, spyware, viruses, worms, trojans, keyloggers, ransomware, and potentially unwanted program (PUPs).

SafeBytes anti-malware offers an array of advanced features which sets it aside from all others. Let’s take a look at a few of them below:

Real-time Threat Response: SafeBytes provides real-time active supervision and protection from all known computer viruses and malware. It’ll inspect your personal computer for suspicious activity regularly and its unrivaled firewall protects your computer from illegal access by the outside world. World-class AntiMalware Protection: Using a critically acclaimed anti-malware engine, SafeBytes offers multilayered protection which is designed to catch and get rid of viruses and malware that are hidden deep inside your computer’s operating system. Web protection: SafeBytes inspects the hyperlinks present on a webpage for possible threats and notifies you if the site is safe to visit or not, through its unique safety ranking system. Light-weight: This application is not “heavy” on the computer’s resources, so you’ll not see any performance troubles when SafeBytes is working in the background. 24/7 Customer Support: Support service is readily available 24 x 7 x 365 days through email and chats to answer your concerns. SafeBytes has developed a great anti-malware solution to help you conquer the latest malware threats and virus attacks. You can be sure that your computer will be protected in real-time once you put this tool to use. So if you’re looking for the absolute best malware removal application out there, and if you don’t mind paying out a few bucks for it, opt for SafeBytes Anti-Malware.

Technical Details and Manual Removal (Advanced Users)

To get rid of MyImageConverter manually, navigate to the Add or Remove programs list in the Control Panel and choose the program you want to get rid of. For web browser extensions, go to your browser’s Addon/Extension manager and choose the plug-in you intend to disable or remove. You may also want to reset your home page and search engine providers, and also delete temporary files, browsing history, and cookies. If you opt to manually delete the system files and Windows registry entries, utilize the following checklist to make sure you know precisely what files to remove before performing any actions. But bear in mind, editing the Windows registry is usually a difficult task that only advanced users and professionals should attempt to fix the problem. In addition, some malware is capable of replicating or preventing removal. It is highly recommended that you carry out the removal procedure in Windows Safe Mode.
Files: %PROGRAMFILES(x86)%4zUninstall MyImageConverter.dll %SystemDrive%\Users\wsierra\AppData\Roaming\Mozilla\Firefox\Profiles\pe3eufs0.default\extensionszffxtbr-bs@MyImageConverter_4z.com\content\MyImageConverter.exe %LOCALAPPDATA%\MyImageConverter_4z %PROGRAMFILES%\MyImageConverter_4z %UserProfile%\Local Settings\Application Data\amailnkkmeeoijlkjdgloiclaiifpojf %LOCALAPPDATA%\amailnkkmeeoijlkjdgloiclaiifpojf %ProgramFiles%\MyImageConverter %UserProfile%\Local Settings\Application Data\Google\Chrome\User Data\Default\Sync Extension Settings\oeabadoffdnkmmecmhpknaklgmabippp %ProgramFiles(x86)%\MyImageConverter %UserProfile%\Local Settings\Application Data\Google\Chrome\User Data\Default\Extensions\ikgjglmlehllifdekcggaapkaplbdpje %LOCALAPPDATA%\Google\Chrome\User Data\Default\Extensions\ikgjglmlehllifdekcggaapkaplbdpje %LOCALAPPDATA%\Google\Chrome\User Data\Default\Sync Extension Settings\ikgjglmlehllifdekcggaapkaplbdpje %UserProfile%\Local Settings\Application Data\Google\Chrome\User Data\Default\Sync Extension Settings\ikgjglmlehllifdekcggaapkaplbdpje %UserProfile%\Local Settings\Application Data\MyImageConverterTooltab %LOCALAPPDATA%\MyImageConverterTooltab Registry: HKEY_CURRENT_USER\HKEY_CURRENT_USER\Software\ HKEY_CURRENT_USER\Software\AppDataLow\Software\MyImageConverter_4z HKEY_CURRENT_USER\Software\MyImageConverter_4z HKEY_LOCAL_MACHINE\SOFTWARE\Classes\MyImageConverter_4z.DynamicBarButton HKEY_LOCAL_MACHINE\SOFTWARE\Classes\MyImageConverter_4z.DynamicBarButton.1 HKEY_LOCAL_MACHINE\SOFTWARE\Classes\MyImageConverter_4z.FeedManager HKEY_LOCAL_MACHINE\SOFTWARE\Classes\MyImageConverter_4z.HTMLPanel HKEY_LOCAL_MACHINE\SOFTWARE\Classes\MyImageConverter_4z.HTMLPanel.1 HKEY_LOCAL_MACHINE\SOFTWARE\Classes\MyImageConverter_4z.MultipleButton HKEY_LOCAL_MACHINE\SOFTWARE\Classes\MyImageConverter_4z.MultipleButton.1 HKEY_LOCAL_MACHINE\SOFTWARE\Classes\MyImageConverter_4z.PseudoTransparentPlugin HKEY_LOCAL_MACHINE\SOFTWARE\Classes\MyImageConverter_4z.PseudoTransparentPlugin.1 HKEY_LOCAL_MACHINE\SOFTWARE\Classes\MyImageConverter_4z.Radio HKEY_LOCAL_MACHINE\SOFTWARE\Classes\MyImageConverter_4z.ScriptButton HKEY_LOCAL_MACHINE\SOFTWARE\Classes\MyImageConverter_4z.ScriptButton.1 HKEY_LOCAL_MACHINE\SOFTWARE\Classes\MyImageConverter_4z.SettingsPlugin HKEY_LOCAL_MACHINE\SOFTWARE\Classes\MyImageConverter_4z.SettingsPlugin.1 HKEY_LOCAL_MACHINE\SOFTWARE\Classes\MyImageConverter_4z.SkinLauncher HKEY_LOCAL_MACHINE\SOFTWARE\Classes\MyImageConverter_4z.SkinLauncher.1 HKEY_LOCAL_MACHINE\SOFTWARE\Classes\MyImageConverter_4z.SkinLauncherSettings HKEY_LOCAL_MACHINE\SOFTWARE\Classes\MyImageConverter_4z.SkinLauncherSettings.1 HKEY_LOCAL_MACHINE\SOFTWARE\Classes\MyImageConverter_4z.ToolbarProtector HKEY_LOCAL_MACHINE\SOFTWARE\Classes\MyImageConverter_4z.ToolbarProtector.1 HKEY_LOCAL_MACHINE\SOFTWARE\Classes\MyImageConverter_4z.UrlAlertButton HKEY_LOCAL_MACHINE\SOFTWARE\Classes\MyImageConverter_4z.UrlAlertButton.1 HKEY_LOCAL_MACHINE\SOFTWARE\Classes\MyImageConverter_4z.XMLSessionPlugin HKEY_LOCAL_MACHINE\SOFTWARE\Classes\MyImageConverter_4z.XMLSessionPlugin.1 HKEY_CURRENT_USER\Software\Microsoft\Internet Explorer\Approved Extensions, value: 312F84FB-8970-4FD3-BDDB-7012EAC4AFC9 HKEY_CURRENT_USER\Software\Microsoft\Internet Explorer\Approved Extensions, value: 48586425-6BB7-4F51-8DC6-38C88E3EBB58 HKEY_LOCAL_MACHINE\SOFTWARE\Wow6432Node\Google\Chrome\Extensions\adldappccjhelkmbkpiibilgnnjakieg HKEY_LOCAL_MACHINE\SOFTWARE\Wow6432Node\Microsoft\Internet Explorer\Low Rights\ElevationPolicy\3d429207-4689-492d-a0e5-cdc5dfbb5005 HKEY_LOCAL_MACHINE\SOFTWARE\Wow6432Node\Microsoft\Internet Explorer\Low Rights\ElevationPolicy\66d59105-fe06-43a4-b292-eb0097e9eb74 HKEY_LOCAL_MACHINE\SOFTWARE\Wow6432Node\Microsoft\Internet Explorer\Low Rights\ElevationPolicy\9103c314-c4e2-4463-8934-b19bcb46236d HKEY_LOCAL_MACHINE\SOFTWARE\Wow6432Node\Microsoft\Internet Explorer\Low Rights\ElevationPolicy\97cef41c-5055-474a-855a-892d4fe3e596 HKEY_LOCAL_MACHINE\SOFTWARE\Wow6432Node\Microsoft\Internet Explorer\Low Rights\ElevationPolicy\d375ee64-f893-498a-a0e9-0e9829c88c3d HKEY_LOCAL_MACHINE\SOFTWARE\Wow6432Node\Microsoft\Tracing\MyImageConverterCrxSetup_RASAPI32 HKEY_LOCAL_MACHINE\SOFTWARE\Wow6432Node\Microsoft\Tracing\MyImageConverterCrxSetup_RASMANCS HKEY_LOCAL_MACHINE\SOFTWARE\Wow6432Node\Microsoft\Windows\CurrentVersion\Ext\PreApproved\1f6f39c1-00a8-4752-a94c-d0ea92d978b6 HKEY_LOCAL_MACHINE\SOFTWARE\Wow6432Node\Microsoft\Windows\CurrentVersion\Ext\PreApproved\38122a36-83b2-46b8-b39a-ec72a4614a07 HKEY_LOCAL_MACHINE\SOFTWARE\Wow6432Node\Microsoft\Windows\CurrentVersion\Ext\PreApproved\5354d921-3f52-47c5-938d-77a2fb6defe7 HKEY_LOCAL_MACHINE\SOFTWARE\Wow6432Node\Microsoft\Windows\CurrentVersion\Ext\PreApproved\71144427-1368-4D18-8DC9-2AE3CC4C4F83 HKEY_LOCAL_MACHINE\SOFTWARE\Wow6432Node\Microsoft\Windows\CurrentVersion\Ext\PreApproved\99e1f6fd-2e94-4cf6-8344-1ba63cd3bd9b HKEY_LOCAL_MACHINE\SOFTWARE\Wow6432Node\Microsoft\Windows\CurrentVersion\Ext\PreApproved\a86782d8-7b41-452f-a217-1854f72dba54 HKEY_LOCAL_MACHINE\SOFTWARE\Wow6432Node\Microsoft\Windows\CurrentVersion\Ext\PreApproved\ed345812-2722-4dca-9976-d01832db44ee HKEY_LOCAL_MACHINE\SOFTWARE\Wow6432Node\MozillaPlugins\@MyImageConverter_4z.com/Plugin HKEY_LOCAL_MACHINE\SOFTWARE\Microsoft\Internet Explorer\Low Rights\ElevationPolicy\9103c314-c4e2-4463-8934-b19bcb46236d HKEY_LOCAL_MACHINE\SOFTWARE\Microsoft\Internet Explorer\Low Rights\ElevationPolicy\97cef41c-5055-474a-855a-892d4fe3e596 HKEY_LOCAL_MACHINE\SOFTWARE\Microsoft\Internet Explorer\Low Rights\ElevationPolicy\d375ee64-f893-498a-a0e9-0e9829c88c3d HKEY_LOCAL_MACHINE\SOFTWARE\Microsoft\Tracing\MyImageConverterCrxSetup_RASAPI32 HKEY_LOCAL_MACHINE\SOFTWARE\Microsoft\Tracing\MyImageConverterCrxSetup_RASMANCS HKEY_LOCAL_MACHINE\SOFTWARE\Microsoft\Windows\CurrentVersion\explorer\Browser Helper Objects\312f84fb-8970-4fd3-bddb-7012eac4afc9 HKEY_LOCAL_MACHINE\SOFTWARE\Microsoft\Windows\CurrentVersion\explorer\Browser Helper Objects\c547c6c2-561b-4169-a2a5-20ba771ca93b HKEY_LOCAL_MACHINE\SOFTWARE\Microsoft\Windows\CurrentVersion\Ext\PreApproved\1f6f39c1-00a8-4752-a94c-d0ea92d978b6 HKEY_LOCAL_MACHINE\SOFTWARE\Microsoft\Windows\CurrentVersion\Ext\PreApproved\71144427-1368-4D18-8DC9-2AE3CC4C4F83 HKEY_LOCAL_MACHINE\SOFTWARE\Microsoft\Windows\CurrentVersion\Ext\PreApproved\99e1f6fd-2e94-4cf6-8344-1ba63cd3bd9b HKEY_LOCAL_MACHINE\SOFTWARE\Microsoft\Windows\CurrentVersion\Ext\PreApproved\a86782d8-7b41-452f-a217-1854f72dba54 HKEY_LOCAL_MACHINE\SOFTWARE\Microsoft\Windows\CurrentVersion\Ext\PreApproved\ed345812-2722-4dca-9976-d01832db44ee HKEY_LOCAL_MACHINE\SOFTWARE\MozillaPlugins\@MyImageConverter_4z.com/Plugin HKEY_LOCAL_MACHINE\SOFTWARE\Microsoft\Windows\CurrentVersion\Run, value: MyImageConverter Search Scope Monitor HKEY_LOCAL_MACHINE\SOFTWARE\Wow6432Node\Microsoft\Windows\CurrentVersion\Uninstall\VDC_is1 HKEY_LOCAL_MACHINE\SOFTWARE\Google\Chrome\Extensions\adldappccjhelkmbkpiibilgnnjakieg HKEY_LOCAL_MACHINE\SOFTWARE\MyImageConverter HKEY_LOCAL_MACHINE\SOFTWARE\Wow6432Node\MyImageConverter_4z HKEY_LOCAL_MACHINE\SOFTWARE\Classes\MyImageConverter.ScriptHelper HKEY_LOCAL_MACHINE\SOFTWARE\Classes\MyImageConverter.ScriptHelper.1 HKEY_LOCAL_MACHINE\SOFTWARE\Wow6432Node\Microsoft\Internet Explorer\SearchScopes\cf6e4b1c-dbde-457e-9cef-ab8ecac8a5e8 HKEY_LOCAL_MACHINE\SOFTWARE\Wow6432Node\Microsoft\Windows\CurrentVersion\Uninstall\MyImageConverter HKEY_LOCAL_MACHINE\SOFTWARE\MozillaPlugins\@MyImageConverter_ScriptHelper.com/Plugin HKEY_LOCAL_MACHINE\SOFTWARE\Microsoft\Windows\CurrentVersion\Run, value: MyImageConverter_4z Browser Plugin Loader HKEY_LOCAL_MACHINE\SOFTWARE\Wow6432Node\Microsoft\Windows\CurrentVersion\Run, value: MyImageConverter_4z Browser Plugin Loader HKEY_LOCAL_MACHINE\SOFTWARE\Microsoft\Internet Explorer\LowRegistry\DOMStorage\MyImageConverter.dl.tb.ask.com HKEY_CURRENT_USER\Software\Microsoft\Internet Explorer\DOMStorage\MyImageConverter.dl.myway.com HKEY_LOCAL_MACHINE\SOFTWARE\Microsoft\Internet Explorer\DOMStorage\MyImageConverter.com HKEY_LOCAL_MACHINE\SOFTWARE\Microsoft\Internet Explorer\LowRegistry\DOMStorage\www.MyImageConverter.com HKEY_CURRENT_USER\Software\Microsoft\Internet Explorer\DOMStorage\free.MyImageConverter.com HKEY_LOCAL_MACHINE\HKEY_CURRENT_USER\Software\[APPLICATION]\Microsoft\Windows\CurrentVersion\Uninstall..Uninstaller
Read More
The Extended Attributes Are Inconsistent Error
One of the most critical errors inside your Windows operating system is The Extended Attributes Are Inconsistent error. This error means that your operating system has been corrupted and it may produce many annoying issues like for example time lags, random crashes, and even freezing of the system when running multiple applications. There are a lot of reasons for this error, from the registry to faulty application installations to sometimes even hardware issues like bad RAM memory or bad hard drive. Mostly issue is due to corrupted files inside Windows and most often people only think that resetting the PC or complete reinstallation is the only way to fix this problem. Although reinstalling the system or resetting the PC will solve this error for sure there are other less time-consuming ways to fix this error. The Extended Attributes Are Inconsistent Error
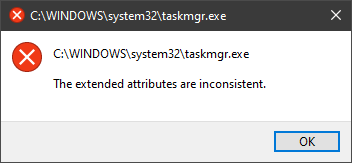
In this guide, we will show you common ways in fixing Extended Attributes are inconsistent errors inside your Windows that are easy to do and less time-consuming than complete reinstallation of the system.

Fixing Extended Attributes Are Inconsistent error

Run SFC scan

  1. Press ⊞ WINDOWS + X to open the hidden menu
  2. Click on command prompt (admin)
  3. In command prompt type in SFC /scannow and press ENTER
  4. Wait for the operation to complete
  5. Reboot your PC

Use System Image Repair Tool

  1. Press ⊞ WINDOWS + X to open the hidden menu
  2. Click on command prompt (admin)
  3. In command prompt type in Dism /Online /Cleanup-Image /RestoreHealth and press ENTER
  4. Wait for the operation to complete
  5. Reboot your PC

Change all user accounts to the administrator

  1. Press ⊞ WINDOWS + R to open the run dialog
  2. Type in netplwiz and press ENTER
  3. Select a first user account and click on Properties
  4. Click on the Group Membership tab
  5. Choose Others from the options
  6. Select administrator (if all accounts are already administrators change all to users)
  7. Repeat process for all other accounts
  8. Click OK to save settings

Change Windows Sound scheme to default

  1. Right-click on the sound icon in the taskbar
  2. Click on Sound options
  3. Go to the Sounds tab
  4. In Sound Scheme click and choose Windows Default
  5. Under Program Events choose Windows User Account Control
  6. Click on the drop-down menu and choose None
  7. Click on Apply
  8. Click on OK

Downgrade the Sound driver

  1. Press ⊞ WINDOWS + X to open the hidden menu
  2. Click on Device Manager
  3. Find your Audio driver and right-click on it
  4. Click on uninstall and then on OK
  5. Reboot your system

Do System Restore

If none of the provided solutions have worked, perform a system restore to the last point where everything was working fine.

Reset PC

If even system restore has not solved the issue or you do not have valid point in system restore time, perform Reset this PC and hopefully, the error will be finally fixed.

Conclusion

If all of the provided methods have not managed to repair this error that checks your hardware, your computer might have some faulty components if after complete PC reset error persists.
Read More
Fixing DRIVER_IRQL_NOT_LESS_OR_EQUAL Stop Error on Windows 10
If you’ve been using your Windows 10 PC for a long time now, you might have come across a couple of issues – from minimal ones to critical ones like the Blue Screen of Death or BSOD stop errors. One of these BSOD errors you can encounter is the DRIVER_IRQL_NOT_LESS_OR_EQUAL Blue Screen error. This particular BSOD error is caused by iaStorA.sys, iaisp64 sys, Netwtw04.sys, nvlddmkm.sys, ndis.sys, wrUrlFlt.sys, and other driver files on Windows 10. This error indicates that a kernel-mode driver tried to access pageable memory at a process IRQL that was too high. When you encounter this error, just like a typical BSOD error, your computer will abruptly stop and you will see a blue screen with an error message saying:
“Your PC ran into a problem and needs to restart. We’re just collecting some error info, and then we’ll restart for you. (100% complete) If you’d like to know more, you can search online later for this error: DRIVER_IRQL_NOT_LESS_OR_EQUAL (wrUrlFlt.sys)”
The iaStorA.sys file is a software component that’s related to the Intel Rapid Storage Technology by Intel. It is a software solution supported by Intel Smart Response Technology which allows the PC to communicate with the hardware as well as externally connected devices. The Intel Rapid Storage Technology enables the Peripheral Component Interconnect Express or PCIe storage support, serial ATA RAID or Redundant Array of Independent Disks 0, 1, 5, and 10 support, and the PUIS or power-up in standby is also supported. To resolve this kind of BSOD error, you have to update, roll back or fresh-install the problematic driver. Refer to the options laid out below for detailed instructions.

Option 1 – Try removing the Intel Rapid Storage Technology or IRST drivers

The first thing you can try is to fix the Wi-Fi driver or the Ethernet driver on your computer to resolve the BSOD error. Take note that this option works not only on Windows 10 but also other Windows versions.
  • Tap the Win + R keys on your keyboard to open the Run dialog box.
  • After that, type “devmgmt.msc” in the field and hit Enter or click OK to open the Device Manager.
  • After opening the Device Manager, click on the “IDE ATA/ATAPI Controller” entry and expand it.
  • Next, right-click on all the driver entries that are appropriately labeled, and then click on Uninstall device.
  • Now restart your PC and check if the problem’s fixed or not. If not, proceed to the next given option below.

Option 2 – Try updating the Intel Rapid Storage Technology or IRST drivers

If you’ve already tried uninstalling the IRST driver but you’re still getting the DRIVER IRQL NOT LESS OR EQUAL Blue Screen error when you use your Windows 10 PC, then this means that the drivers might be corrupted or not compatible with the operating system version that you are using right now. So to fix the problem, you have to update your drivers. To do that, follow the steps below.
  • The first thing you need to do is to go to your OEM’s website.
  • Once you’re already on the OEM’s website, go to the Drivers section and get the latest version for your device and then try to overwrite it.
Alternatively, you can also update the drivers via the Device Manager:
  • Tap the Win + R keys on your keyboard to open the Run dialog box.
  • After that, type “devmgmt.msc” in the field and hit Enter or click OK to open the Device Manager.
  • After opening the Device Manager, click on the “IDE ATA/ATAPI Controller” entry and expand it.
  • Next, right-click on all the driver entries that are appropriately labeled, and then click the Update driver option.
  • Now restart your PC and check if the BSOD error is fixed or not.

Option 3 – Try using the System File Checker via Command Prompt

System File Checker or SFC is a built-in command utility that helps in restoring corrupted files as well as missing files. It replaces bad and corrupted system files to good system files that might be causing the DRIVER IRQL NOT LESS OR EQUAL Blue Screen error. To run the SFC command, follow the steps given below.
  • Tap Win + R to launch Run.
  • Type in cmd in the field and tap Enter.
  • After opening Command Prompt, type in sfc /scannow
The command will start a system scan which will take a few whiles before it finishes. Once it’s done, you could get the following results:
  1. Windows Resource Protection did not find any integrity violations.
  2. Windows Resource Protection found corrupt files and successfully repaired them.
  3. Windows Resource Protection found corrupt files but was unable to fix some of them.
Read More
1 2 3 171
Logo
Copyright © 2023, ErrorTools. All Rights Reserved
Trademark: Microsoft Windows logos are registered trademarks of Microsoft. Disclaimer: ErrorTools.com is not affiliated with Microsoft, nor claims direct affiliation.
The information on this page is provided for information purposes only.
DMCA.com Protection Status