Error Code 0xC1900200, 0x20008 (Code 0xC1900202 – 0x20008) is an error that occurs when you attempt to upgrade to Microsoft Windows 10, but the minimum requirements have not been met by your computer. You will therefore be unable to upgrade to Microsoft Windows 10 until your computer is updated or upgraded to meet those requirements.
Common symptoms include:
When attempting to upgrade a dialog box with Code 0xC1900200 – 0x20008 (Code 0xC1900202 – 0x20008) is displayed.
Your computer is unable to begin the Microsoft Windows 10 upgrade process.
Solution
Error Causes
Error Code 0xC1900200 – 0x20008 (Code 0xC1900202 – 0x20008) occurs when you are unable to begin the Microsoft Windows 10 upgrade because your computer does not meet the minimum requirements to run Microsoft Windows 10.
You are unable to begin the upgrade because your computer does not meet the required system or hardware specifications.
You are not running the correct version of Microsoft Windows to be able to begin the upgrade.
You are not running the latest updated version of Microsoft Windows 7 SP1 or Microsoft Windows 8.1. Error Code 0xC1900200 – 0x20008 (Code 0xC1900202 – 0x20008) as stated, simply means your computer does not meet the requirements to update and does not indicate a permanent problem or inability to continue to use your computer. This error only means that you will not be able to upgrade to Microsoft Windows 10 until your computer is made to meet these requirements.
Further Information and Manual Repair
There are several solutions that the user can complete at home that should fix the problem resulting in a manifestation of Error Code 0xC1900200 – 0x20008 (Code 0xC1900202 – 0x20008). Below are several options that should resolve this error.
Method 1:
Verify what version of Microsoft Windows you are currently running, older, outdated, or no longer supported versions of Microsoft Windows are not able to upgrade to Microsoft Windows 10. If you are not running one of the following versions you will have to update before being able to upgrade.
The most current version of Microsoft Windows 7 SP1
The most current version of Microsoft Windows 8.1
Method 2:
Your computer's system specifications do not meet the requirements to be able to upgrade to and run Microsoft Windows 10. To check your system specifications do the following.
Click on the start button in the bottom left corner, then locate the control panel on the menu, click on it to open.
Once it opens, locate system and security on the menu and click to open, click on system and this will show you your amount of RAM and processor speed.
Find device manager on the left-hand side click this then select display adapter, and it will show you your current video card.
Click on the start button again, then click on the computer in the menu, this will show you your hard drive size, and available space.
If you have the option available you can simply run the get Microsoft Windows 10 app to check compatibility. Once you have your system specs make sure they meet or exceed the following.
1 GHz or higher processor or SoC
1 gig of RAM for 32 bit and 2 gigs of RAM for 64 bit
16 GB available hard drive space for 32 bit, 20 GB for 64 bit
Minimum of DirectX9 that has 1.0 WDDM
At least an 800x600 display
If your computer does not meet these minimum requirements, upgrade the components necessary to meet them. If you do not possess the technical expertise required to accomplish this yourself or do not feel comfortable doing so, download and install a powerful automated tool to get the job done.
Method 3:
Your computer might not meet the aforementioned requirements to make an upgrade because of insufficient hard drive space or resources. Learn how to create space on your computer.
Method 4:
Many people hold on to and use the same computer for a very long time. It is possible that your computer cannot be upgraded to meet the requirements, or that the cost to do so would be so high that a new computer would be cheaper. If that is the case, your only option may be to replace your computer.
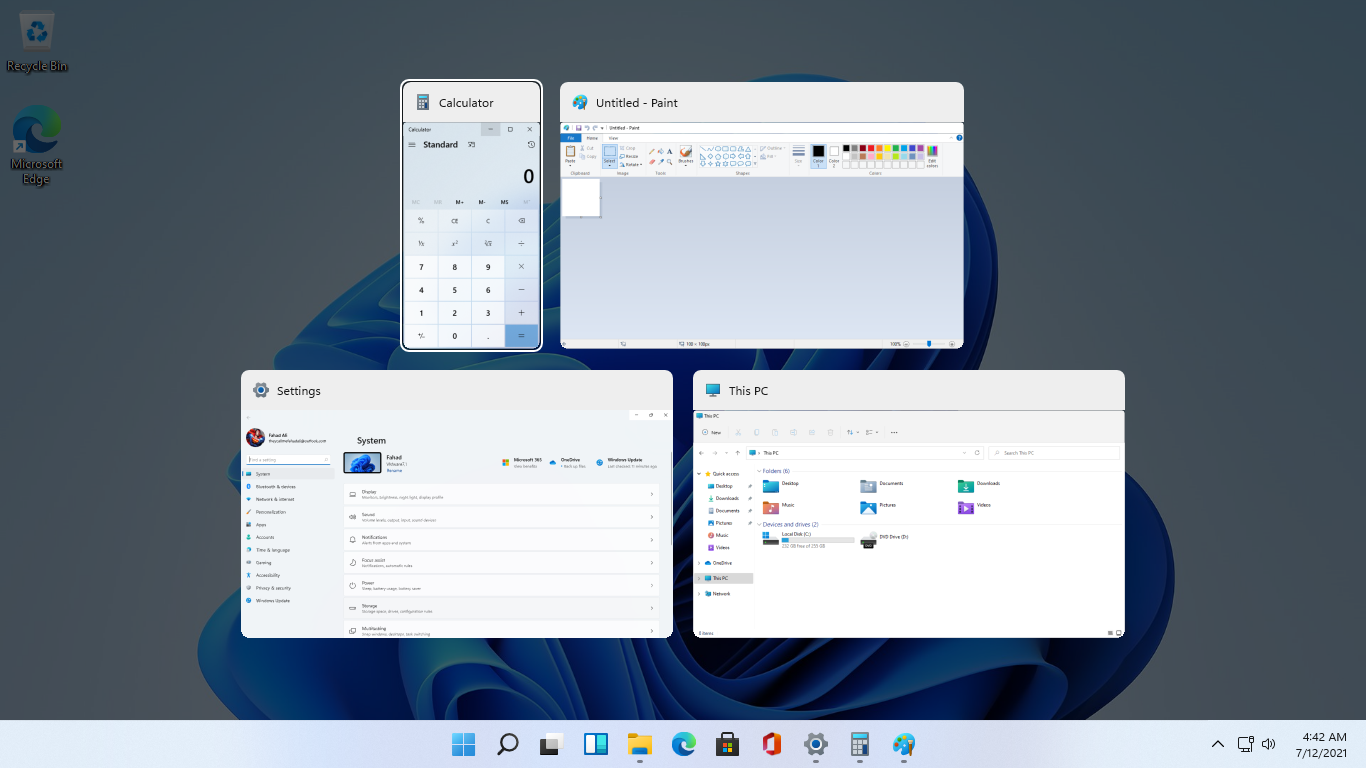
As in previous Windows 10, inside Windows 11 also when you press the ALT + TAB key combination you will get a preview of all running applications along with all Browser tabs so you can go through them and pick the one you want to switch to.
Alto, I personally am a big fan of alt-tabbing, I must admit that I am not a big fan of having multiple browsers tabs on screen when I do press key combo. Luckily there is a very easy way to turn this feature off.
Turning browsers tabs thumbnails off
Press ⊞ WINDOWS + I to open settings
Click on System in the sidebar
Scroll down and select Multitasking
Find Alt + Tab section and click on the drop-down menu
Pick Open Windows Only
Close settings
Now when you press the ALT + TAB key combination you will still see your browser but only an active tab in it instead of all tabs as different preview thumbnails.
This error 80070490 code may occur when you try to update your PC either through the Microsoft Update website or with a Windows update. The error message is displayed in the following format:
Error 80070490 (Element not found)
Solution
Error Causes
Error Code 80070490 is triggered because of a couple of reasons. It indicates the file CBS Manifest that is needed to install Windows update is corrupt or damaged.
CBS (Component Based Servicing) Manifest is the file that is used to help your computer recognize various components inside your PC.
Another reason for error occurrence is registry corruption.
If the registry that stores all the information and activities performed is not cleaned frequently, the obsolete files saved in the registry like the junk files, bad entries and cookies eventually accumulate and corrupt it thereby generating such error codes.
Further Information and Manual Repair
Here are some effective and proven methods that you can try by yourself to resolve error code 80070490 on your PC.
Method 1 - Use the System Update Readiness Tool
Download the System Update Readiness Tool from the Windows website and run it on your PC.
This tool is designed to detect and scan for abnormalities and inconsistencies that could be preventing and causing problems during the system update.
Once you have downloaded and scanned your PC, try to install the updates again. If the error still persists, try other methods illustrated below.
Method 2 - Repair Windows
Here are the steps that you need to follow to repair Windows:
First, close all programs and then reboot your PC. Insert the Windows DVD into the computer’s disk drive and wait for the setup to begin.
If for any reason, the setup doesn’t start automatically, then don’t worry simply click start, then type Drive: setup.exe in the search box. Please note, in the drive insert the letter of your computer’s DVD drive for example D:setup.exe.
Now in the programs list, click setup.exe And then click install now.
After that click ‘go online to obtain the latest updates for installation’, if you are asked for the Windows Product Key, then simply type it to proceed.
In the ‘Which kind of Installation do you want?’ option, click Upgrade.
When the Windows installation is complete, restart your PC and then run Windows update.
Method 3 - Clean the Registry
If the cause of error code 80070490 on your PC is related to registry corruption, then it is advisable to download Restoro. This is an advanced and easy-to-use PC Repair Tool embedded with a registry cleaner.
The registry cleaner scans your entire PC, removes all obsolete and unnecessary files corrupting the registry, and cleans it right away.
Click here to download Restoro to repair error code 80070490
Microsoft has been bringing new lock-screen features with every iterative feature release of Windows 10 in order to improve user experience. However, Windows 10 users have different opinions regarding it. Some users are pleased with it while some users simply do not like it. So if you are one of the users who seem to not approve of this feature, read on as this post will be about enabling or disabling the Console Mode sign-in feature in Windows 10.
Before you proceed, take note that you will not be able to use your mouse pointer in this Consol Mode login screen and you can only use your keyboard to navigate around various options. You might also want to create a System Restore point just in case.
To enable or disable the Console Mode sign-in in your Windows 10 computer, refer to the given steps below.
Step 1: Tap the Win + R keys to open the Run dialog box.
Step 2: Then type in “Regedit” in the field and tap Enter to open the Registry Editor.
Step 3: Next, navigate to the following registry path:
Step 4: From there, look for a DWORD named “ConsoleMode”. If you don’t see this DWORD, you can just create a new DWORD and name it as “ConsoleMode” and make sure that its base is set to Hexadecimal.
Step 5: After that, double click on ConsoleMode and change its value to “0” to disable it and “1” to enable it.
Step 6: Now restart your computer to apply the changes made.
Like pointed out, you can only use your keyboard when you’re in the Console Mode login window or screen. You can just use the ESC button to go back to the menu while you can utilize the arrow keys so you can go through the options that are mostly vertically arranged and the Enter key to select an option. In the Console Mode, sign-in using the Passwords and PINs worked efficiently.
Experiencing issues while using Remote Desktop connections is not uncommon. One of the issues that users encountered recently while trying to connect to their Remote Desktop network is the error saying, “Your credentials did not work, The login attempt failed”. If you are one of these users, then you’ve come to the right place as this post will walk you through fixing the problem.
When facing this kind of problem, the first thing you can try before you do some troubleshooting steps is to verify the credentials. But if you are certain that you’ve entered the correct credentials just like what other users reported, then it’s completely a different matter. Based on the reports, this error is common on newly installed versions of Windows 10 or after reinstalling the operating system which could mean that the problem might be due to the Windows security policies or the username might have been recently modified. The latter case is a possibility especially if you’ve reinstalled Windows 10 and had entered a new username. In such a case, you will really have a difficult time connecting to your Remote Desktop connection since its credentials do not really automatically change.
If you’ve verified that your credentials are correct, then now’s the time you troubleshoot the problem with the help of the potential fixes provided below. Just make sure that you follow each one of them in sequence.
Option 1 –Try to run the Network Adapter troubleshooter
To run the Network Troubleshooter, refer to these steps:
Open the Search bar on your computer and type in “troubleshoot” to open the Troubleshoot settings.
Next, scroll down and select the “Network Adapter” option from the right pane.
Then click on the Run Troubleshooter” button.
After that, your computer will check for any possible errors and will pinpoint the root cause of the problem if possible.
Restart your computer.
Option 2 – Try to change the network profile from public to private
According to some reports, this error occurs on systems where the network profile was set to public. Thus, you need to change the network profile to private to resolve the problem. How? Refer to these steps:
Go to Start and from there click on Settings > Network & Internet > Status.
Next, click on the “Change connection properties” option.
After that, set the radio button of Network Profile from Public to Private.
Wait for a couple of seconds until the system is done applying the changes you’ve made and then see if you can now connect to the Remote Desktop connection.
Option 3 – Try changing the account username
As mentioned, one of the possible causes for this error is the reinstallation of the operating system. You might have changed the username for the system but it does not really change the username of the Remote Desktop connection as well. Thus, you have to change the username back to what it was before you’ve reinstalled Windows 10.
Option 4 – Try modifying the Windows Security Policy
You can also try to edit the Windows Security Policy as it could help in resolving the error. This Windows Security Policy, when enabled, will not allow non-admin users to log on to the Remote Desktop connection. So if you want to allow non-admin users to use the Remote Desktop connection, then you need to modify this policy. Note that you can only do that if you are the admin of the system yourself.
Tap the Win + R keys to open the Run utility.
Then type “secpol.msc” in the field and tap Enter or click OK to open the Local Security Policy.
After opening the Local Security Policy window, select Local Policies > User Rights Agreement located on the left pane.
Next, double click on “Allow log on through Remote Desktop Services” located in the right pane.
And in the next window that appears, select Add user or group.
After that, type in the username of the intended non-admin user under the “Enter the object names to select” column.
Once done, click on the Check Names button to fix the username and then click OK to save the changes made.
Restart your computer.
Option 5 – Use the Group Policy Editor
Tap the Win + R keys to open the Run dialog box and then type “gpedit.msc” in the field and tap Enter to open the Group Policy Editor.
Next, navigate to this path: Computer Configuration > Administrative Templates > System > Credentials Delegation.
Double click on the “Allow delegating default credentials with NTLM-only server authentication” policy setting located on the right pane to edit it.
After that, shift its radio button to Enabled and click on Show.
Then type “TERMSRV/*” in the Value box and click OK.
Now repeat the same for the following policy settings:
“Allow delegating default credentials”
“Allow delegating saved credentials”
“Allow delegating saved credentials with NTLM-only server authentication”
Once you’re done, restart your computer and see if the problem is fixed.
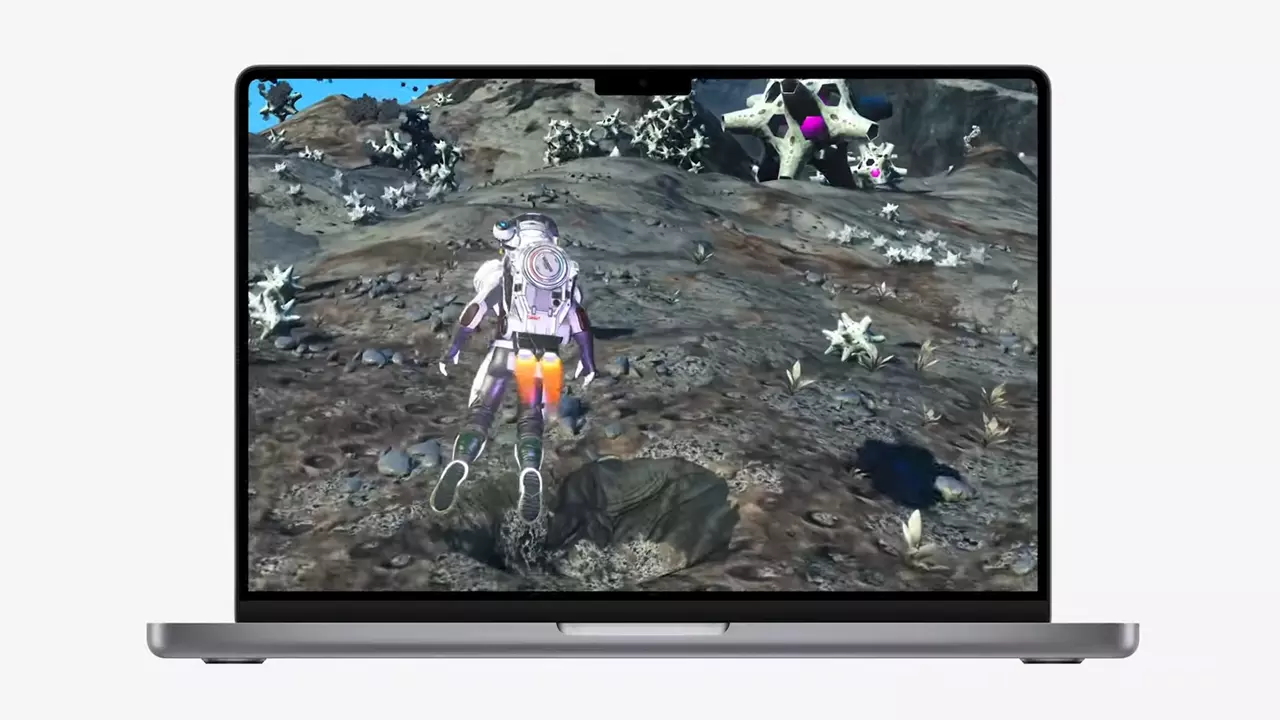
New Apple's upscaling technology called MetalFX will place iOS and macOS devices back into the gaming world. Apple had great games back in the old days and some all-time hits like the prince of Persia have been made first for apple but along the way, it just lost it.
Same as NVIDIA's DLSS and Intel's XeSS systems, Apple MetalFX also uses AI algorithms to upscale the resolution of output game frames. So, for example, the GPU inside your MAC might render the game at 1080p, but through MetalFX and AI upscaling it will look like a 4K image but have a good frame rate since it is rendered in base resolution.
The ability to make AI strike a good balance between performance and image quality is a key to technology in today's modern gaming and having this technology will help developers a ton to be able to achieve great results on Apple hardware.
The First MetalFX Games
So far three official games that will use this technology and be released natively for Appl hardware are Resident Evil 8 Village, GRID legends, and No Man's Sky. All three games have been confirmed and Resident Evil 8 Village is already sent for review people are impressed since the game can run smoothly on all Apple devices, even ones with an M1 CPU.
Apple is back into gaming
When you say Apple gaming is probably the last thing that comes to your mind but truth be told Apple makes more money from games than Microsoft, Nintendo and Sony combined. Also, Apple itself was a big player once regarding computer games as well, Myst and Prince of Persia are games that were made and have been released for Apple first. Bungie was also founded by Apple developers and Halo was originally announced as a Mac game.
Apple has been trying and pushing gaming on its platform since it kind of died down. Today all Sony, Nintendo, and Microsoft controllers work without any issues with all Apple products. Apple also has its own gaming subscription service, Apple Arcade, and its Apple TV is packed with GPU that can rival Xbox ones.
MetalFX API ties and brings it all together, it is designed to get the most performance from the hardware by minimizing overhead.
Now, computers and laptops do not hold any large numbers if we look at the user base, and that could deter developers but if we look at iPad and iPhone things are different there, much different. How same CPU power these devices and how MetalFX is available across all products it is clear that there is a market for games there. No Man's Sky is coming to iPad using these technologies and bringing full computer experience to tablets.
One of the most popular and most used web browsers commonly used by Windows users is Google Chrome. This well-known web browser has been introducing various features recently in order to stay at the top. However, it makes the web browser a lot more complex and thus prone to errors. Although this may not be a big deal, it can be quite annoying as it can interrupt your web browsing.
There are various errors that can come up with this level of complexity of the web browser. One of these errors is the “This site can’t be loaded from the cache, ERR_CACHE_MISS” error message that can suddenly appear while you browse the web using your Google Chrome browser on your Windows 10 PC.
Take note that when you encounter this particular error, there really is no direct fault in the Chrome browser as there are also issues with caching the website data locally in the computer. Moreover, this error can also occur when a website is coded in an incorrect manner or if there are some browser extensions or toolbars that are in conflict with the proper functioning of the website.
To fix the ERR_CACHE_MISS error in Google Chrome, refer to the possible solutions laid out below.
Option 1 – Try clearing browser data
There are times when some data in the browser is conflicting with the loading of the website and triggers errors like ERR_CACHE_MISS. And so you can try to clear your browser’s data. This might be a very basic solution but oftentimes it works in fixing this kind of error in Google Chrome. Follow the steps below to clear the data in your browser.
Open your Google Chrome browser.
After that, tap the Ctrl + H keys. Doing so will open a new panel that allows you to delete the browsing history and other data in your browser.
Now select every checkbox that you see and click on the Clear browsing data button.
Then restart your Chrome browser and check if you can now open any website or not.
Option 2 – Try using the Developer Tools
You can also try using the Developer tools in Google Chrome to help you fix the ERR_CACHE_MISS error. Refer to the steps below to do so.
Open Google Chrome.
Tap the Ctrl + Shift + I keys on your keyboard and then tap the F1 key to open the Settings tab inside the Chrome Developer Tools.
Next, select the Disable cache option while DevTools is open and apply those settings.
After that, refresh your browser and check if the entries you’ve seen previously in the Network tab are gone.
Now try to load the same webpage again and see if the problem is resolved.
Option 3 – Reset Winsock, TCP/IP & Flush DNS
Resetting Winsock, TCP/IP, and flushing DNS might help you resolve the ERR_CACHE_MISS error. To do so, follow these steps:
Right-click on the Start button and click on Command Prompt (administrator) so you can pull up an elevated Command Prompt.
After that, execute each one of the commands listed below. And after you typed in one after the other, you have to hit Enter.
netsh winsock reset – type in this command to reset Winsock
netsh int ip reset resettcpip.txt – type in this command to reset TCP/IP
ipconfig /flushdns – type in this command to flush the DNS cache
Next, restart your PC and check if the problem’s fixed.
Option 4 – Get rid of any conflicting browser extensions
Open Chrome and press Alt + F keys.
Go to More tools and click Extensions to look for any suspicious browser extensions or toolbars.
Click the Recycle bin and select Remove.
Restart Chrome and press Alt + F keys again.
Proceed to On Startup and mark Open a specific page or set of pages.
To check if the browser hijacker is still active, click Set pages, if it is active, overwrite the URL.
Note: If removing the browser extensions or toolbars didn’t work, you can also try to reset your Google Chrome browser.
Open Google Chrome, then tap the Alt + F keys.
After that, click on Settings.
Next, scroll down until you see the Advanced option, once you see it, click on it.
After clicking the Advanced option, go to the “Restore and clean up option and click on the “Restore settings to their original defaults” option to reset Google Chrome.
Error 1512 is a type of runtime error code. This error may hamper your ability to run and load your desired programs on Windows PC. There are increased chances of runtime error 1512 occurring when system files go missing or get corrupt.
Symptoms of this error code include:
Slow PC speed
Window System freeze
Solution
Error Causes
There are several for the occurrence of runtime error 1512. These include:
Faulty or outdated drivers
Poor Program installation
Damaged Windows Registry
Viruses tampering the system settings/memory
Broken or incorrect Registry entries
Damaged Windows registry
Further Information and Manual Repair
To resolve this issue you don’t have to hire a professional and spend hundreds of dollars to get it fixed. Here are some of the best and easy do-it-yourself methods to repair error 1512 on your system in a few minutes.
These methods are very easy to work around and do not require any kind of technical expertise.
Method 1 - Uninstall and then reinstall the Same Program
Sometimes this runtime error may pop up due to poor program installation. In such an event, it is advisable to uninstall the program and then reinstall it again properly. To do so, go to the start menu, and click on control panel.
Now select the program & features option. Here you will find the option Add/Remove Program. Remove the program causing error 1512. Once the program is removed, reinstall it again.
Method 2 - Run an Antivirus Program
Computer viruses are capable of tampering with system settings. Due to this reason you might experience runtime errors like 1512 on your PC. These malicious programs usually enter the system through phishing emails or website downloads.
To resolve the issue, you need to run a powerful antivirus program. An antivirus removes all sorts of malicious programs hiding in your PC like malware, spyware, and malware that are responsible for generating runtime errors.
Method 3 - Update the Outdated Drivers on your PC
If the error still persists, then it is suggested to update outdated drivers. Faulty and outdated drivers can also trigger runtime error 1512. To do this, go to the Device Manager. Here use the Driver update wizard to make updates.
Method 4 - Remove the Invalid Registry Entries and Repair the Damaged Registry
The best way to perform both tasks is to download Restoro. It is embedded with a registry cleaner that is quite easy to use.
The registry cleaner removes all invalid entries in seconds, cleans the cluttered registry by wiping out all the redundant and unnecessary files. The damaged registry is then repaired and resumes its normal function.
Click here to download Restoro and resolve runtime error 1512.
Error code 0x8024402f is a Windows Update error indicating some sort of connectivity issue. Windows may show you theError 0x8024402f in Windows 10 whenever you try to download and install new updates. This error is caused by small interruptions in communications between the computer to be updated and the update to be downloaded. These issues usually resolve themselves. Windows Firewall settings may also be blamed for this problem.
Common symptoms
Error code 0x8024402f prevents you from installing the latest version of Windows 10
This Error prevents you from downloading new and latest updates from Microsoft
Solution
Error Causes
This error is caused by a problem with the Microsoft .NET Framework 4 Client Profile.
This error can occur even if no changes are made to network settings.
Your Firewall settings may cause this problem.
A high number of update requests on the Windows Update server may cause this problem.
More Information and Manual Repair
Method 1:
Exit Windows Update. Wait for 10 to 15 minutes, and then restart Windows Update to check for updates. OR
Turn on Windows Automatic Update so that updates are installed automatically every 24 hours.
Method 2:
Uninstall the Microsoft .NET Framework 4 Client Profile:
Click Start>Control Panel>Programs and Features
Locate the Microsoft .NET Framework 4 Client Profile
Right-click and then select Uninstall/Change
Confirm that you want this component to be uninstalled. This may take a few minutes.
Reboot your computer
When the system has restarted, re-run Windows Update as you normally would.
Method 3:
Check your internet connection:
As mentioned earlier the error code 0x8024402f is related to connection problems with Windows Update. It means that your computer isn’t able to connect with the Microsoft Update server; therefore you’re unable to receive any new updates. So, you either have a problem with the internet connection or the Microsoft Update server is corrupted. If the problem is caused by the Microsoft Update server, you just need to wait a while because Microsoft staff will most probably solve the problem quickly.
Method 4:
But, if the issue isn’t related to your internet connection, you should perform the following method:
Got to Search and enter Identify and Repair
Open Identify and repair network problems
Click on the Search Result.
It should automatically Start the identifying process
If your network has any issue then it will show you and ask you to fix it.
Now, establish your internet connection. The problem 0x8024402 should be solved by now and you’ll be able to update your Windows 10 Technical Preview to the latest 10049 builds.
Method 5:
Turn on Windows Firewall:
If you have some anti-malware or antivirus on your Windows 10 PC, then it might turn off Windows Firewall on its own or create its own Firewall as default. If this is the case, you will need to turn on Windows Firewall.
Search for "Firewall" OR
Click on Windows Firewall from Control Panel.
On the left pane, Click on Turn Windows Firewall ON or OFF.
Click on Turn on Windows Firewall then Click Ok.
That is it. Now, try again and see if you are still getting Windows Update Error 0x8024402f in your Windows 10.
Method 6:
This is an advanced method:
If the above steps fail, then you might surely want to try this advanced method, which is Enabling ActiveX in your Router Firewall settings.
If you had turned off ActiveX in your Router Firewall settings then this must be the culprit and so Error 0x8024402f is shown whenever you try to get Windows Update.
All you need to do is Enable ActiveX by going to your Router Firewall settings and that should do it. The Error should be gone for good now and you will be easily able to install the Updates in your Windows 10.
If you do not possess the technical expertise required to accomplish this yourself or do not feel comfortable doing so, download and install a powerful automated tool to get the job done.
If you encounter error 0x8024500C after a Windows Update or when you were trying to update Windows Store apps, read on as this post will guide you in fixing the problem. This kind of Windows Update error indicates that the Windows Update service has been blocked.
Here are some suggestions you could check out to resolve the Windows Update error 0x8024500C on your Windows 10 computer.
Option 1 – Try checking the status of all the Windows Update Services
You need to check if all the Windows Update Services are up and running or not. To do so, follow the steps below.
Tap the Win + R keys to open the Run dialog box.
Next, type “services.msc” in the field and hit Enter to open Windows Services.
From the list of Services, look for the following services that support Windows Update:
Background Intelligent Transfer Service (BITS)
Delivery Optimization
Windows Update
Windows Update Medic Service
Once you’ve found them, check if they are running just fine or not. if not, you can right-click on each entry and click on Start.
Option 2 – Run the Windows Update Troubleshooter
You might also want to run the Windows Update Troubleshooter as it could also help in fixing Windows Update Error 0x8024500C. To run it, go to Settings and then select Troubleshoot from the options. From there, click on Windows Update and then click the “Run the troubleshooter” button. After that, follow the next on-screen instructions and you should be good to go.
Option 3 – Try downloading and installing the Windows Updates manually
Error 0x8024500C might be due to a Windows Update that has failed. So if it is not a feature update and only a cumulative update, you can download the Windows Update and install it manually. But first, you need to find out which update has failed, and to do so, refer to the following steps:
Go to Settings and from there go to Update and Security > View Update History.
Next, check which particular update has failed. Note that Updates that have failed to install will be displayed under the Status column which has a label of “Failed”.
After that, go to the Microsoft Download Center and look for that update using its KB number and once you find it, download and then install it manually.
Note: You can also use the Microsoft Update Catalog, a service from Microsoft that provides a list of software updates that can be distributed over a corporate network. With the help of this service, it can be easier for you to find Microsoft software updates, drivers as well as fixes.
Option 4 – Try checking the Registry settings
Tap the Win + R keys to open the Run dialog box.
Then type “Regedit” in the field and hit Enter to open the Registry Editor.
After that, navigate to this registry path: HKEY_LOCAL_MACHINESoftwarePoliciesMicrosoftWindowsWindowsUpdate
Then double click on “DisableWindowsUpdateAccess” located at the right side of the panel and make sure that its value is set to “0”. If not, you have to change it to “0”.
Now restart your computer and check if error 0x8024500C is now fixed or not
Option 5 – Disable the Proxy server
Tap the Win + R keys to open the Run dialog box.
Then type “inetcpl.cpl” in the field and hit Enter to pull up the Internet Properties.
After that, go to the Connections tab and select the LAN settings.
From there. Uncheck the “Use a Proxy Server” option for your LAN and then make sure that the “Automatically detect settings” option is checked.
Now click the OK and the Apply buttons.
Restart your PC.
Note: If you are using a third-party proxy service, you have to disable it.
Option 6 – Try to reset the Microsoft Store cache
Just like browsers, Microsoft Store also caches as you view apps and games so it is most likely that the cache is no longer valid and must be removed. To do so, follow the steps below.
Right-click on the start button and click on Command Prompt (administrator).
Next, type in the command, “exe” and tap Enter. Once you do, the command will clear the cache for the Windows Store app.
Now restart your PC and afterward, try opening Microsoft Store again.
Option 7 – Perform a System Restore
Performing System Restore might help you in fixing the Windows Update error 0x8024500C. You can do this option either by booting into Safe Mode or in System Restore. If you are already in the Advanced Startup Options, just directly select System Restore and proceed with the next steps. And if you have just booted your PC into Safe Mode, refer to the steps below.
Tap the Win + R keys to open the Run dialog box.
After that, type in “sysdm.cpl” in the field and tap Enter.
Next, go to the System Protection tab then click the System Restore button. This will open a new window where you have to select your preferred System Restore point.
After that, follow the on-screen instructions to finish the process and then restart your computer and check if the problem is fixed or not.
The Recycle Bin is undeniably an important place to make files ready for deletion. To put it simply, it assumes some importance but there are times when it displays an unpredictable behavior. For instance, it just suddenly goes missing and even Cortana is unable to find it. A lot of users have experienced the missing Recycle Bin issue in their Windows 10 computers. If you are one of these users, you might have wondered where the Recycle Bin icon has gone and how you can get it back. Worry not, as this post will provide you a couple of options you can try to bring back Recycle Bin in your Windows 10 computer.
Follow the given options below to get started.
Option 1 – Try to restore Recycle Bin
It could be that you have disabled the Recycle Bin by accident which is why Windows was not able to show it on your desktop. To restore Recycle Bin, follow these steps:
First, click on the Start button and select Settings.
Next, select the Personalization setting and then select Themes from the left pane.
After that, click on the “Desktop icon settings” link under the “Related Settings” heading. This will display a list of icons in the Desktop Icons window.
From there, make sure that you check the checkbox for “Recycle Bin” to make it appear on your Desktop screen once again.
Option 2 – Try to recreate the Recycle Bin
If the first option didn’t work, then it could be that Recycle Bin might have been deleted which is why you fail to restore it. And to resolve this problem, you need to recreate Recycle Bin. Refer to the following steps to do so:
You need to launch the Windows File Explorer first and go to the View tab.
From this tab, select Options and click on the drop-down arrow and then select the “Change folder and search option”.
Afterward, switch to the View tab when the Folder Options window appears on your screen and select the “Show hidden files, folders, and drives” option.
And then unmark the checkbox next to the “Hide protected operating system files (Recommended)” option and click on both the Apply and OK buttons, respectively.
Next, go back to the File Explorer and click on “This PC” located on the left bar and go to the C: drive.
From there, you will find a file named “$Recycle.Bin” located at the top.
Open this folder to access its contents and you should see the Recycle Bin icon located at the top.
After that, right-click on the Recycle Bin icon and click on the “Send To” option and then click on “Desktop (create shortcut)”.
It will then confirm and recreate the Recycle Bin icon on your Desktop screen.
Note: Even though this icon is quite similar to the original one, it actually differs from it. The difference is that you won’t see if fill up when you delete files and you can’t simply empty it by right-clicking on the shortcut. On the other hand, you can still drag items into it just like with the original one. So when you want to empty the content of the newly restored Recycle Bin, you just have to double-click on the shortcut and right-click on the recycle bin in the window that appears, and select the “Empty Recycle Bin” option. In addition, now that you’ve set up the Recycle Bin shortcut, you have to re-activate the “Hide protected operating system files” to keep the important files and folders in your computer hidden.
Option 3 – Try to repair the Recycle Bin
If both the first two options failed to restore the missing Recycle Bin, then you can try repairing it instead. There are times when the Recycle Bin is removed from the Desktop screen due to some corrupted Windows system files. To fix these corrupted system files, you can run the DISM tool. This tool is known to repair potentially corrupted files in your system as having them could also system issues like the missing Recycle Bin. To repair these corrupted system files, you can run the DISM commands:
Tap the Win + X keys and click on the “Command Prompt (Admin)” option.
After that, input each one of the commands listed below sequentially to execute them:
Dism /Online /Cleanup-Image /CheckHealth
Dism /Online /Cleanup-Image /ScanHealth
Dism /Online /Cleanup-Image /RestoreHealth
Once you’ve executed the commands given above, restart your computer and check if the problem is now fixed.
Option 4 – Make sure that you are not in Tablet Mode
Since Windows 10 is designed to work on both desktop and mobile devices, it could be that your computer has slipped into Tablet Mode which explains why you’re not seeing the Recycle Bin. To check if your computer is really in Tablet Mode, follow these steps:
Go to the Start menu and select Settings.
Next, select the System setting and from the left pane select the Tablet Mode.
From there, make sure that the buttons next to the options given below are set to the off position:


 As in previous Windows 10, inside Windows 11 also when you press the ALT + TAB key combination you will get a preview of all running applications along with all Browser tabs so you can go through them and pick the one you want to switch to.
Alto, I personally am a big fan of alt-tabbing, I must admit that I am not a big fan of having multiple browsers tabs on screen when I do press key combo. Luckily there is a very easy way to turn this feature off.
Turning browsers tabs thumbnails off
As in previous Windows 10, inside Windows 11 also when you press the ALT + TAB key combination you will get a preview of all running applications along with all Browser tabs so you can go through them and pick the one you want to switch to.
Alto, I personally am a big fan of alt-tabbing, I must admit that I am not a big fan of having multiple browsers tabs on screen when I do press key combo. Luckily there is a very easy way to turn this feature off.
Turning browsers tabs thumbnails off