If you got an error code of 0x80072EE2 while trying to download a Windows 10 update then it could be that something is blocking the Windows Update service on your Windows 10 PC and is preventing it from connecting to the Microsoft server. In addition, the error code 0x80072EE2 also indicates “ERROR_INTERNET_TIMEOUT” and together with this message, you might also see a message as Windows Update encountered an unknown error or you might also find it hard to search for new updates. So in this post, you will be guided on how you can fix the Windows Update error code 0x80072EE2. Make sure to follow the steps below carefully.
Option 1 – Restart your computer and try installing the Updates again
You can restart your computer and then try installing the updates once again. There are instances when a simple restart resolves Windows Update errors. Aside from that, it would also be better if you make sure that your internet connection is working and that it’s stable. And so after you restart your computer, check for updates once again and see if you’re still getting the error or not.
Option 2 – Run the Windows Update Troubleshooter
Running the built-in Windows Update troubleshooter is one of the things you can first check out as it is known to automatically resolve any Windows Update errors like error code 0x80072EE2. To run it, go to Settings and then select Troubleshoot from the options. From there, click on Windows Update and then click the “Run the troubleshooter” button. After that, follow the next on-screen instructions and you should be good to go.
Option 3 – Try to disable your antivirus program
Disabling the antivirus program or any security software installed in your computer is always a good idea you can try when the Windows Update process does not go smoothly. So before you try updating your computer again, make sure to disable the antivirus or security program and once the Windows Update is done, don’t forget to enable the antivirus program back again.
Option 4 – Try to restart the Background Intelligent Transfer Service
The Background Intelligent Transfer Service or BITS is a part of the Windows Update service and is the one that manages the background download of Windows Update, as well as scans for new updates and so on. And if Windows Update is experiencing some problems, you can try restarting BITS but make sure that you have admin privileges to do so.
Tap the Win + R keys to open the Run dialog box.
Next, type “services.msc” in the field and hit Enter to open Windows Services.
From the list of Services, look for the Background Intelligent Transfer Service and double-click on it to open Properties.
After that, you need to set the Startup type to “Automatic (Delayed Start) and click on Apply.
Now click the Stop button to stop BITS and then click the Start button to restart the service.
Click OK to save the changes made and then restart your PC.
Option 5 – Try installing the updates in a Clean Boot State
It could be that some third-party application is the one that’s causing the problem so it’s best if you put your computer in a Clean Boot state. During this state, you can start the system with a minimum number of drivers and startup programs that will surely help you in isolating the root cause of the issue.
Log onto your PC as an administrator.
Type in MSConfig in the Start Search to open the System Configuration utility.
From there, go to the General tab and click “Selective startup”.
Clear the “Load Startup items” check box and make sure that the “Load System Services” and “Use Original boot configuration” options are checked.
Next, click the Services tab and select the “Hide All Microsoft Services” check box.
Click Disable all.
Click on Apply/OK and restart your PC. (This will put your PC into a Clean Boot State. And configure Windows to use the usual startup, just simply undo the changes.)
After that, try to install the Windows app again.
Note: If you are able to install the app without any trouble at all then it means that the error is caused by some third-party application on your computer. You need to look for the culprit and uninstall it once you found it.
Option 6 – Run Microsoft’s online troubleshooter
Running Microsoft’s online troubleshooter might also help you fix the Windows update error code 0x80072EE2. This online troubleshooter is known to help in fixing Windows Update errors, it scans your computer for issues that might be causing the problem and then fixes them automatically.
Anytime when a new folder is created in Windows name "New Folder" is offered and set as the default name. If by any chance you would like to change this and set your own default name instead of the standard one, follow this guide.
Please be aware that this guide will require you to change the registry of Windows, it is common practice to make a backup of your registry each time you want to manually change any values in it, just in case something goes wrong.
In order to change the default new folder name first press ⊞ WINDOWS + R to open the run dialog, type in it RegEdit, and press ENTER
Select the NamingTemplates key. If it is not present, you’ll need to create one.
Right-click the NamingTemplates key to add a String Value.
Assign it the following name: RenameNameTemplate.
Double-click on the RenameNameTemplate data value to open the Edit String dialog box.
In the Value Data field enter the new text you want to appear when you create a new folder. You have to make sure you are not using any of the following characters: \ / ? : * " > < |
Close the Registry Editor and Exit.
Now, when you create a new folder, it will be named Whatever you chose instead of the New folder.
And that is all to it, you now have your own personal new folder naming template.
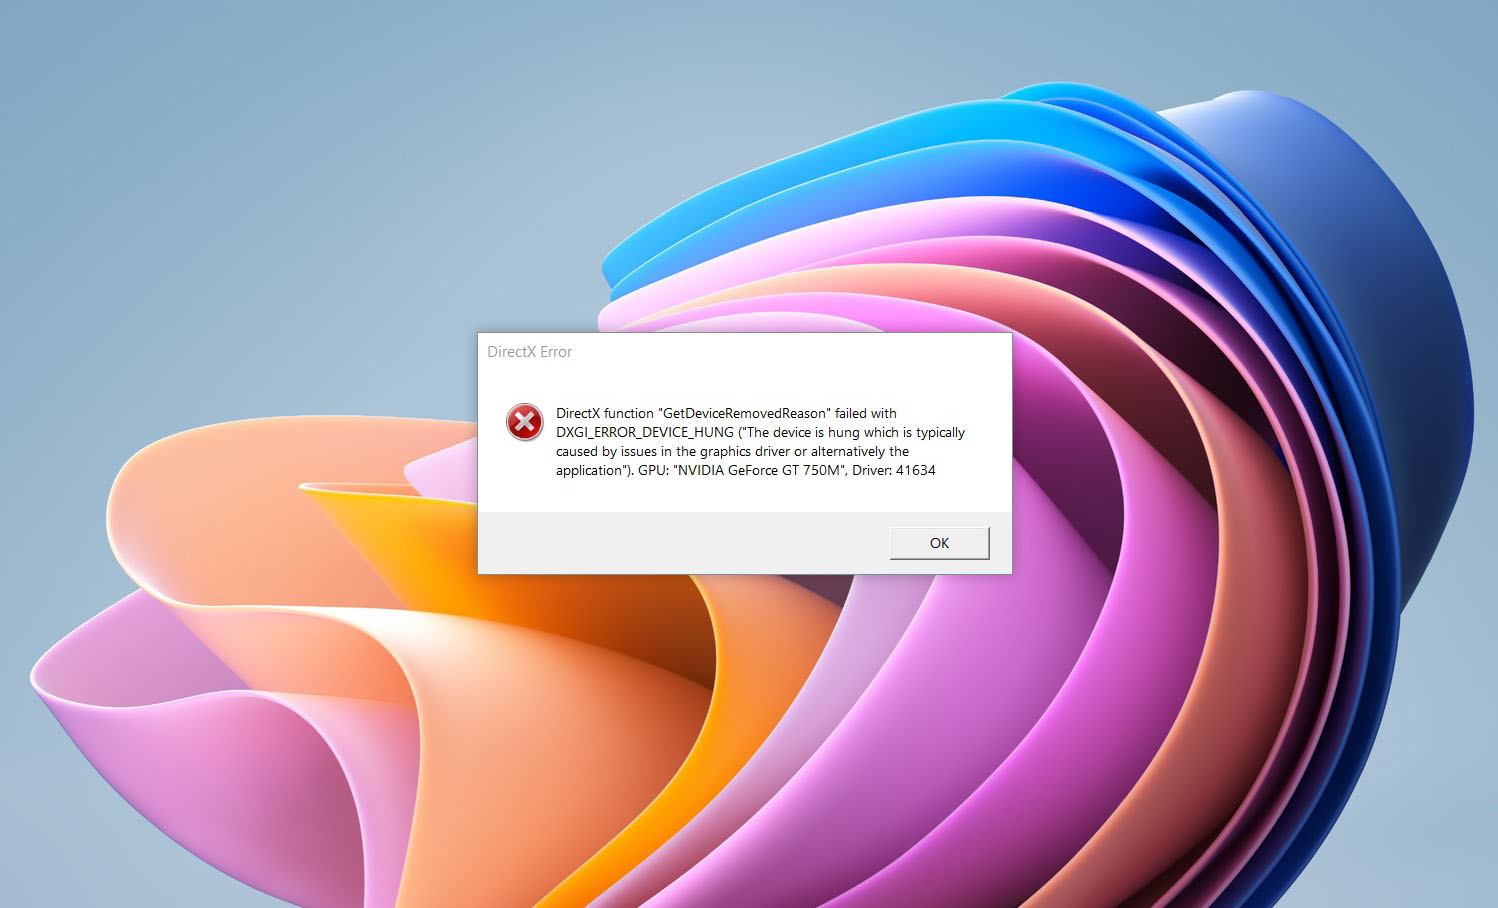
DirectX function GetDeviceRemovedReason error is a DirectX error that comes up during playing games on Windows 11 operating system. Usually, the error occurs in gaming systems powered by AMD and very rarely if any times at all on Nvidia or intel platforms.
If you are one of the gamers affected by this error, fear not because we have a solution for you. Follow provided fix guide in order to correct this error and get back to gaming asap.
1. Update drivers
The first thing of course is to update your graphic card driver, you can do this with your graphic cards panel software or directly in Windows itself but the best practice and one that I would recommend is to go to your graphic card manufacturer’s website and download the latest driver there, and then install it inside Windows 11.
2. Change power mode
Changing power mode inside Windows 11 can solve this issue since sometimes Windows power manager if it is set to anything except best performance can interfere with the proper functioning of the graphic adapter, and because of this error. To change the power setting do the following:
Press ⊞ WINDOWS + I to open settings
Click on the System tab
Select power & battery on the right part
Click on the menu beside power mode
Select the best performance
3. Run SFC scan
Corrupted system files can also cause this error and if previous steps have not resolved it we will use Windows built-in tool SFC scan to find and repair all bad files in windows.
Press ⊞ WINDOWS + S to open the search menu
Type in Windows terminal and run it as administrator
If prompted click on YES on UAC
Press CTRL + SHIFT + 2 to run command prompt
Type in sfc /scannow and press ENTER
Wait for the whole process to finish and then reboot your system
4. Reinstall the problematic game
Sometimes game files can get corrupt and maybe even overwritten, try with game reinstallation if the problem still persists.
If your Windows 10 computer is having problems connecting to a wireless network and it takes too long to respond and only keeps on displaying the “Checking network requirements”, then you’ve come to the right place as this place will walk you through fixing the problem.
There are two things that can happen when your computer connects to a wireless network. Windows can either connect to the wireless network successfully or return an error message that says, “Cannot connect to the network. However, if none of these things happened, and it only remains at the “Checking network requirements” message, then it could be due to obsolete or incompatible drivers in your computer, particularly the network adapter drivers. To fix this problem, you can try to update or reinstall these drivers, reset the TCP/IP, or run the Network Adapter troubleshooter, as well as reset the Network. For more information, refer to the given options below.
Option 1 – Update the Network Adapter drivers
The first thing you can do to resolve the problem is to update the Network Adapter drivers by following these steps:
Tap the Win + R keys to launch the Run window and then type in the “devmgmt.msc” command and hit Enter to open the Device Manager window.
Under the Device Manager, you will see a list of drivers. From there, look for the Network Adapters and expand them.
Look for the Broadcom Network Adapter and right-click on it, as well as other network adapters that have an exclamation icon, and update them all.
Restart your PC and see if it helped in fixing the problem.
Note: If updating the network drivers didn’t help in fixing the problem, you can also try to uninstall the very same drivers and restart your Windows 10 PC. After that, the system itself will reinstall the drivers you just uninstalled. Alternatively, you can also download and install the drivers from the manufacturer’s website directly.
To reinstall the network adapter drivers, refer to these steps:
Open the Devices Manager from the Win X Menu.
Then locate the device drivers and right-click on them to open the Properties.
After that, switch to the Driver tab and click on the Uninstall Device button.
Follow the screen option to completely uninstall it.
Finally, restart your computer. It will just reinstall the device drivers automatically.
Option 2 – Try to reset the TCP/IP
As you know, the TCP/IP or the Internet Protocol is the most important thing if you want to use the internet on your computer. That’s why if it ends up getting corrupted, you need to reset the TCP/IP to fix the problem. To reset TCP/IP, refer to these steps:
In the Windows start the search, type “command prompt” and right-click on Command Prompt from the search results.
Then select the “Run as administrator” option to open Command Prompt with admin privileges.
After that, execute this command: netsh int ip reset resettcpip.txt
Once it’s done, exit Command Prompt and restart your computer and then check if the error is now fixed.
Option 3 – Run the Network Adapter troubleshooter
To run the Network Troubleshooter, refer to these steps:
Open the Search bar on your computer and type in “troubleshoot” to open the Troubleshoot settings.
Next, scroll down and select the “Network Adapter” option from the right pane.
Then click on the Run Troubleshooter” button.
After that, your computer will check for any possible errors and will pinpoint the root cause of the problem if possible.
Restart your computer.
Option 4 – Try to perform Network Reset
You can also try to perform a Network Reset to resolve the problem. This will reset the entire network configuration including your IP address. To perform Network Reset, follow these steps:
Tap the Win + I keys to open Settings.
From there, go to the Network and Internet section.
Next, scroll down and look for “Network Reset” under the status pane.
After that, click on Network Reset and then on Reset now to start resetting the network configuration. Once done, check if it is able to fix the error or not.
Kernel Mode Heap Corruption is the error message that the Windows operating system throws when it encounters a blue screen of death or BSOD error during PC startup or launching specific programs such as video games. It is mainly caused due to software conflicts, driver issues (especially graphics card driver), and computer hardware malfunctioning.
The good news is that this error is easily fixable.
Follow the next steps in order to fix the error:
Rollback graphic card driver
Press ⊞ WINDOWS + X to open Windows secret menu and click on device manager
Expand Display adapters section
Right-click on your GPU and choose properties
In properties window go to the driver tab and click on Roll back driver
Select the reason for operation and click on YESReboot your PC
Update corrupted and outdated drivers
How is this error mostly driver issue, updating and fixing bad drivers can fix it very easily. As in the previous step, you will need to open the device manager and go through all drivers and manually check for updates for each one, update as necessary or reinstall ones you might think have gone rogue. If you are not experienced enough with this kind of task install some automatic solution for this task like DriverFix
Check for software issues
If this error started happening after the installation of new software it is very likely that the application is causing problems. Try uninstalling or disabling the application to see if it will fix the issue. You can also boot Windows in safe mode to see if the error will happen there, if Windows is working fine in safe mode, it is likely that issue is on the software side.
Run SFC scan
Press ⊞ WINDOWS + X and choose Command prompt (admin)
In command prompt type in sfc /scannow and press ENTERWait for the process to be finished and Reboot the system
This post will help you fix the request that failed due to a fatal device hardware error on your Windows 10 PC. You can encounter this error when that hard drive/SSD on your computer is damaged physically and the system is either unable to access or perform read/write operations in it. Aside from hard drive/SSD, this error can also happen to removable drives.
This kind of error is not uncommon and in most cases, the hardware is physically damaged due to which you are not able to perform operations. However, there are a couple of fixes that you can try to resolve the problem before you go ahead and back up your data and move them to a different drive. What exactly causes this error? It’s actually self-explanatory and it gives you an idea that the drive is either corrupted or in a bad state. To resolve the error, follow the given options below carefully and see which one worked best for you.
Option 1 – Verify the hard drive using SMART attributes
In case you don’t know, Windows has a built-in feature of SMART analysis which analyzes the hard drive/SSD and checks all the parameters by performing some minor operations. To use it, follow these steps:
Tap the Win + S keys and type “command prompt” in the field then right-click on the related search result and select the “Run as administrator” option.
After opening Command Prompt as admin, type the “wmic diskdrive get status” command and hit Enter.
You should get a result after that, and if you see that it’s “normal”, proceed to the next option below.
Option 2 – Use the CHKDSK utility
When it comes to some issues concerning the hard drive or removable devices, there is a utility in Windows that might help which is called “chkdsk”. This error check utility can help with several issues in the system.
Tap the Win + S keys to open the Search box.
Then type “command prompt” in the field and from the search results that appear, right-click on Command Prompt and select “Run as administrator”.
After opening an elevated command prompt, copy and paste the following command and hit Enter:
Note: In the command given above, “[/F]” will try to fix the system errors while “[/R]” will be the one to fix the bad sectors.
Now if you are prompted to run CHKDSK after your reboot your PC, just tap Y and reboot your PC.
If CHKDSK is not able to find any errors, tap the Win + E keys and navigate the access window. From there, right-click on the concerned drive and click on Properties.
After opening Properties, click on the tab Tools and then click on the “Check” button under the Error-checking section.
Wait until the process is completed and then restart your computer.
Option 3 – Format your drive
You can try formatting your drive since this problem also occurs on removable hard drives. In addition, if your drive is not properly initialized, this error will really pop up. Thus, you need to make sure that the hard drive is initialized and that the correct partition style is selected.
To get started formatting your drive, tap the Win + E keys and then go to the access page of the drive.
Next, right-click on the drive and select Format.
After that, uncheck the “Quick Format” option and then format your drive properly.
Now once the formatting process is finished, unplug the drive and plug it back in afterward.
Check if the error is already fixed. If the drive is not initialized, tap the Win + R keys and hit Enter.
After opening the Run dialog box, type “diskmgmt.msc” and hit Enter to open Disk Management.
From there, right-click on the drive volume and select Initialize Disk.
Next, select the correct partition type and proceed.
That should fix the problem, if not, follow the next advanced option below.
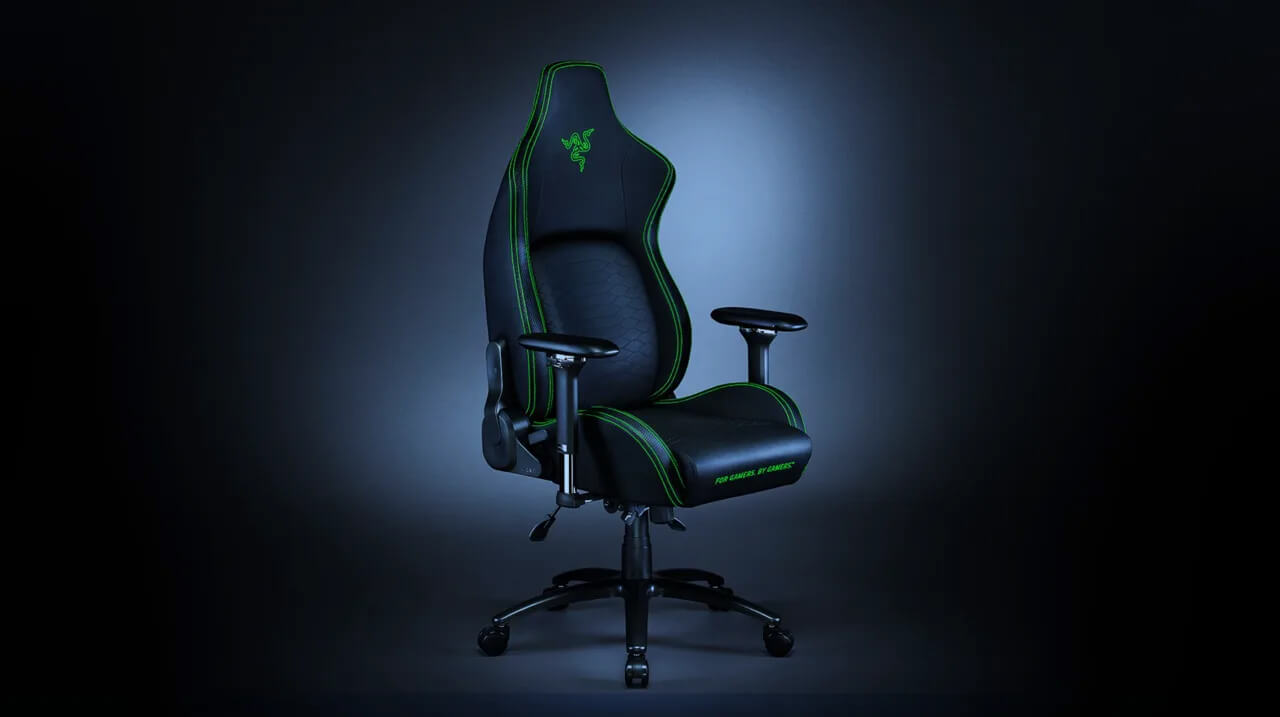
It seems that last few days we were riding some Razer bandwagon but rest assured that we are not sponsored by them in any way, truth is that simply they come up with some interesting accessories which I believe are worth covering.
Gaming Chair itself comes in two colors, fully black and green black combination and it is not really an entry-level chair if we are talking about price. The chair itself is around 600USD depending on the distributor and considering that price range it is placed in more top cream of gaming chairs but it is worth every dime.
Iskur Specifications
Iskur is made of a steel frame with a reinforced plywood lumbar support frame for added weight tolerance. Frame and lumbar support are surrounded with memory foam and all of that is wrapped in cotton and polyester layer which is again wrapped in multi-layer synthetic leather making the chair very durable for long hours of daily use.
The chair also comes with a memory foam head cushion which is detachable and removable if you do not wish to use it. On the Razer website among specifications, it stands that the chair is best suited for persons from 5’6” – 6’2” (170 – 190cm) height and up to 299lbs (136kg).
Features
The chair has, of course, height adjustment as any gaming chair and surprisingly it has great control for the armrest. The armrest can be adjusted in 4 different ways: up & down, left & right, forward & backward, and inward & outward. The backrest can be also tilted up to 26 degrees angle.
All of these features are great and good but there is one more feature that really makes this chair stand out from rest and it is Lumbar support. Iskur has an adjustable lumbar support system on the lower part of the backrest. With your lumbar support secured, you can then make the necessary tweaks to optimize the rest of your posture using the Razer Iskur’s adjustable height, backrest, and armrests.
Conclusion
Razer Iskur is neither cheapest nor perhaps the best gaming chair you can buy, but it is a really good one. It is well manufactured and made to feel and look like a premium product that actually it is.
Regular and gaming headphones have many differences between them and not knowing what they are can lead you to get yourself the wrong one. In this article, our goal is to analyze the differences between them so you can choose the right one for you.
Price
One thing that goes in both worlds is that the cheapest models on both sides are not really worth the purchase since both the quality and longevity will be very low. If we compare high-end models, regular headphones are far far more expensive than gaming ones. Hi-end gaming models can go as far as 400$, perhaps a little more but hi-end audio regular headphones are going even for over 2000$.
If we compare same-price headphones generally regular ones will offer you a little better sound quality but gaming headphones will offer some features such as positional audio that regular ones do not have.
Surround sound and positional audio
One of the main advantages of gaming headsets is positional audio and true surround sound. this technology is built-in so you can hear more clearly where your enemy is coming from that is a big help in competitive games. This is achieved by positioning multiple speakers in various positions and angles inside them. Each speaker has a different sound channel that is mixed with another speaker in order to provide you with a full surround experience.
Regular headphones have typically one or two speakers on both sides aimed at the same angle and can not offer precise surround or positional audio.
Noise cancellation
Both gaming and hi-fi headphones offer some sort of noise cancelation to minimize outside noise but if you really want to focus and have good noise cancelation you will have to look out for headphones with active noise cancelation or ANC.
Microphone quality
Let us say this right at the start, most middle and quality regular audio headphones do not have a microphone at all, and ones that might pack one usually have it at a lower quality than gaming ones. This of course makes perfect sense since regular headphones will focus on audio, and gaming ones will focus on playing games where having a good microphone is essential in order to game properly.
Speaker and sound quality
Speaker quality will reflect directly on the sound quality and fidelity. This is where audio regular headphones have an advantage over gaming ones. Since they do not have many small speakers positioned at various angled and instead have just a few, usually 2 or 1 large one, that one is of much better quality and range for audio than a pack of small ones. If you are searching for clarity and quality of the audio itself, especially if you are listening to some FLAC uncompressed music, then regular HiFi ones are a much better choice.
Longevity and durability
Another area where regular ones have an advantage but that is no surprise since their price goes far up compared to gaming ones. Most of the time everything in hi-end audio headphones is made from quality materials and designed to last a long time and therefore advantage. Most of the time gaming headphones will come in plastic versions whereas higher quality audio ones pack a lot of durable metal in frames and in buds making them much more durable. Of course, we are talking here about proper headphone use, not extreme cases of throwing, etc.
Error 0x80010108 is a Windows Live Photo Gallery error. This error prevents the Windows PC user from viewing photos. The error code is often displayed in the following format:
‘An error is preventing the photo or video from being displayed’ Error code 0x80010108
Solution
Error Causes
The error 0x80010108 occurs due to multiple reasons including:
To view the photos on your Windows PC, it is advisable to fix the problem right away.
Furthermore, you should also not delay in fixing this problem especially if the underlying causes are related to the registry or viral infection. These can pose serious system and security threats including system failure, crash and data breaches.
Further Information and Manual Repair
To resolve this error on your system, you don’t always have to hire a technical expert or be a technical whiz yourself. Here are some easy and effective methods to resolve error 0x80010108 on your PC immediately:
Method #1
To repair Windows Live Essential Software Settings, go to the start menu and then click the control panel.
Now in the control panel go the option Programs. In the programs click the tab programs and features and then select Windows Live Essentials and click repair tab. Once the settings are repaired, restart your PC to activate changes.
Method #2
Go to the start menu and type regedit.exe and then press enter. Type the following key: HKEY_CLASSES_ROOT WindowsLive.PhotoGallery.bmp.15.4 shell open DropTarget then right-click DropTarget and then Rename. Prefix a hyphen so that it becomes “-DropTarget”.
Now type the following for each GIF/ICO/JPG/PNG/TIF file types:
HKEY_CLASSES_ROOTWindowsLive.PhotoGallery.gif.15.4 shellopen DropTarget
HKEY_CLASSES_ROOT WindowsLive.PhotoGallery.ico.15.4 shell open DropTarget
HKEY_CLASSES_ROOT WindowsLive.PhotoGallery.jpg.15.4 shell open DropTarget
HKEY_CLASSES_ROOT WindowsLive.PhotoGallery.png.15.4 shell open DropTarget
HKEY_CLASSES_ROOT WindowsLive.PhotoGallery.tif.15.4 shell open DropTarget
Method #3
Download Restoro on your PC to scan for both registry issues and malware. Restoro is a multi-functional PC Fixer embedded with utilities like a powerful registry cleaner, an antivirus, and a system optimizer to name a few.
The registry cleaner scans and detects all registry-related issues. It removes all unnecessary files damaging the registry and corrupting the registry settings. Simultaneously, the antivirus removes all kinds of malicious software affecting your PC including spyware, viruses, and Trojans.
The system optimizer feature ensures that your PC works at the optimal level and does not slow down during and after the cleaning process.
Restoro is efficient and safe.
It has a user-friendly interface and simple navigations which makes it quite easy to operate. It can be downloaded on all Windows versions including.
Click here to download Restoro to resolve error 0x80010108.
Runtime Error 5 is one of those errors that Windows users encounter at least once in their life.
Generally, when Runtime Error 5 occurs, the message that appears says ‘Invalid Procedure Call or Argument’. Runtime Error 5 occurs because the Quality Analyst function that resides within the Operating System behaves in an abnormal manner and the user receives a warning.
Solution
Error Causes
As explained above, Runtime Error 5 is caused because of the unexplained behavior of the Quality Analyst function.
The problem occurs when the function is lost and is not mapped to any drive. As a result, Windows is unable to find and load it and displays the error message. Runtime Error 5 is also caused by other reasons listed below as follows.
When files of programs like Visual Basic use bad entries in the registry.
When a user attempts to load Internet Explorer and a global cash of browser occurs, this also causes Runtime Error 5.
Since these types of errors can easily be fixed, it is strongly advised that a user takes the necessary actions to keep them from occurring in the future.
Further Information and Manual Repair
Some instructions for users to fix Runtime Error 5 as soon as it appears are listed below as follows.
Users are recommended to restart their computers. However, prior to doing so, it is advised that any programs that are opened are closed and work is saved to prevent data loss. Once the computer restarts, users should load the program that triggered Runtime Error 5 once again to determine whether or not the error recurs.
If the problem persists, the best approach is to uninstall the program causing the error. This can be accomplished by going to the ‘Control Panel’ and selecting the ‘Add/Remove programs’ option if one is using Windows XP or Windows 95. However, if a user is running Windows 7, the same task can be accomplished in the ‘Program and Features’ option. If there’s an option that allows you to clear personal settings and preferences, the box should be checked.
Now reinstall the program using the latest version of the installer to stop encountering this error. Use any patch for the program if available. Run installer while following the instructions on the screen. Check the default settings as well. It is suggested to instantly install any patches if available.
Another piece of advice is to simultaneously press ‘Ctrl, Shift, and Esc’. Windows task manager will appear. Go to the “processes” tab and select a process that doesn’t look familiar to you. Note the filename and click on the ‘End Process’ button. Load the program again and find out if the error occurs. Once the program causing the error is identified, the user can perform the steps listed above to resolve the problem.
Recently, a lot of users reported having an issue with Windows Update. According to these users, they got an error message saying, “Windows Update components must be repaired” after they run the Windows Update troubleshooter. So if you are also facing this issue then you’ve come to the right place as this post will guide you in fixing this problem.
There are various suggestions you can check out to fix this problem – you can try running the Windows Update troubleshooter again but this time, in a Clean Boot State or you could also run System File Checker or the DISM tool to repair corrupted Windows Update files or reset the Windows Update components. For more information, refer to the given options below.
Option 1 – Run the Windows Update troubleshooter in a Clean Boot State
Repairing the “Windows Update components must be repaired” error is not that complicated. One of the things you can try is to run the Windows Update troubleshooter again but this time, in a Clean Boot State. Refer to the steps below to get started.
Log onto your PC as an administrator.
Type in MSConfig in the Start Search to open the System Configuration utility.
From there, go to the General tab and click “Selective startup”.
Clear the “Load Startup items” check box and make sure that the “Load System Services” and “Use Original boot configuration” options are checked.
Next, click the Services tab and select the “Hide All Microsoft Services” check box.
Click Disable all.
Click on Apply/OK and restart your PC. (This will put your PC into a Clean Boot State. And configure Windows to use the usual startup, just simply undo the changes.)
Now try to run the Windows Update troubleshooter again and see if the error is fixed or not.
Option 2 – Try to run System File Checker
If the Windows Update troubleshooter still failed to fix the problem, you can run System File Checker instead. It is a built-in command utility that helps in restoring corrupted files as well as missing files. It replaces bad and corrupted system files with good system files. To run the SFC command, follow the steps given below.
Tap Win + R to launch Run.
Type in cmd in the field and tap Enter.
After opening Command Prompt, type in sfc /scannow
The command will start a system scan which will take a few whiles before it finishes. Once it’s done, you could get the following results:
Windows Resource Protection did not find any integrity violations.
Windows Resource Protection found corrupt files and successfully repaired them.
Windows Resource Protection found corrupt files but was unable to fix some of them.
Option 3 – Run the DISM tool
Running the DISM Tool helps in repairing the Windows System Image as well as the Windows Component Store in Windows 10. Using this built-in tool, you have various options such as the “/ScanHealth”, “/CheckHealth”, and “/RestoreHealth”.
Open the Command Prompt with admin privileges.
Then type in the following commands and make sure to hit Enter right after you type each one of them:
Dism /Online /Cleanup-Image /CheckHealth
Dism /Online /Cleanup-Image /ScanHealth
exe /Online /Cleanup-image /Restorehealth
Do not close the window if the process takes a while as it will probably take a few minutes to finish.
Note: If it happens that the Windows Update client is broken, you need to run the following command to repair it then restart your PC and click on Update once again.
Option 4 – Delete the contents in the Software Distribution folder and Catroot2 folder
You can also delete the contents in both the Software Distribution and Catroot2 folders as it could potentially fix the “Windows Update components must be repaired” error.
Open the WinX Menu.
From there, open Command Prompt as admin.
Then type in the following command – don’t forget to hit Enter right after typing each one of them.
net stop wuauservnet start cryptSvcnet start bitsnet start msiserver
After entering these commands, it will stop the Windows Update Service, Background Intelligent Transfer Service (BITS), Cryptographic, and the MSI Installer
Next, go to the C:/Windows/SoftwareDistribution folder and get rid of all the folders and files thereby tapping the Ctrl + A keys to select them all and then click on Delete. Note that if the files are in use, you won’t be able to delete them.
After resetting the SoftwareDistribution folder, you need to reset the Catroot2 folder to restart the services you just stopped. To do that, follow these steps:
Type each one of the following commands.
net start wuauservnet start cryptSvcnet start bitsnet start msiserver
After that, exit Command Prompt and restart your computer, and then try to run Windows Update once more.


 If you are one of the gamers affected by this error, fear not because we have a solution for you. Follow provided fix guide in order to correct this error and get back to gaming asap.
 It seems that last few days we were riding some Razer bandwagon but rest assured that we are not sponsored by them in any way, truth is that simply they come up with some interesting accessories which I believe are worth covering.
Gaming Chair itself comes in two colors, fully black and green black combination and it is not really an entry-level chair if we are talking about price. The chair itself is around 600USD depending on the distributor and considering that price range it is placed in more top cream of gaming chairs but it is worth every dime.
It seems that last few days we were riding some Razer bandwagon but rest assured that we are not sponsored by them in any way, truth is that simply they come up with some interesting accessories which I believe are worth covering.
Gaming Chair itself comes in two colors, fully black and green black combination and it is not really an entry-level chair if we are talking about price. The chair itself is around 600USD depending on the distributor and considering that price range it is placed in more top cream of gaming chairs but it is worth every dime.

