What is Windows ImageAcquisition High CPU & Disk usage? The Windows Image Acquisition is the driver model in charge of the communication between the graphics hardware and the operating system. There are times when it causes high disk and CPU usage in Windows 10 systems which results in slow performance of the computer. To fix this issue, read on as this post will help you in addressing the problem.
The cause of this problem might have something to do with the hardware or the drivers. And so if your computer becomes slow because of the Windows Image Acquisition process, here are some suggestions that might be of help. You can try to restart the Windows Image Acquisition service, run a System File Checker Scan, disconnect & reconnect imaging hardware as well as update and reinstall the drivers and updating the graphics drivers.
For a complete set of instructions, follow the given options below.
Option 1 – Try restarting the Windows Image Acquisition Service
Tap the Win + R keys to open the Run dialog box.
Then type “services.msc” in the field and hit Enter to open the Windows Services Manager.
From there, look for the Windows Image Acquisition Service and check on its service Status.
If the Service Status is blank, right-click on it and select Start. And if the service Status is Running right-click on it and select Restart. After that, check if your computer’s performance is now back to normal.
Option 2 – Try running a System File Checker scan
As you know, running a System File Checker scan can help in replacing missing files as well as repair the corrupted ones which might be the reason behind the problem.
Tap Win + R to launch Run.
Type in cmd in the field and tap Enter.
After opening Command Prompt, type in sfc /scannow
The command will start a system scan which will take a few whiles before it finishes. Once it’s done, you could get the following results:
Windows Resource Protection did not find any integrity violations.
Windows Resource Protection found corrupt files and successfully repaired them.
Windows Resource Protection found corrupt files but was unable to fix some of them.
Restart your computer after the scan is completed.
Option 3 – Try disconnecting and reconnecting the imaging hardware and then update and reinstall its drivers
It could be that the hardware that calls for the Windows Image Acquisition service has some issues which are why disconnecting and reconnecting the imaging hardware like scanners, printers, cameras can help in fixing the problem. In addition, you can also boot your computer in a Clean Boot State so that you can find the problematic hardware by hit and trial method. Refer to the steps below to do so:
Log onto your PC as an administrator.
Type in MSConfig in the Start Search to open the System Configuration utility.
From there, go to the General tab and click “Selective startup”.
Clear the “Load Startup items” check box and make sure that the “Load System Services” and “Use Original boot configuration” options are checked.
Next, click the Services tab and select the “Hide All Microsoft Services” check box.
Click Disable all.
Click on Apply/OK and restart your PC. (This will put your PC into a Clean Boot State. And configure Windows to use the usual startup, just simply undo the changes.)
Option 4 – Try updating the Graphics drivers
First, boot your computer into Safe Mode.
After that, tap the Win + R keys to launch Run.
Type in devmgmt.msc into the box and tap Enter or click OK to open the Device Manager.
After that, a list of device drivers will be displayed. From there, look for the Display Adapters and click on them.
After that, right-click on each entry under the Display Adapters and select the “Uninstall Device” option from the menu.
Now restart your computer.
After restarting your computer, go to the Settings app and Check for Updates in the Windows Update section.
Note: You also have the option to go directly to the website of your graphics card manufacturers like NVIDIA, Intel, or AMD and go to the section called Drivers then check if there’s a new available update – if there is, download and install it.
The Windows Subsystem for Linus, also known as WSL, is a useful and excellent tool for developers. However, it isn’t without flaws as users can still encounter some errors when using it. One of these errors is the error code WslRegisterDistribution, 0x8007019e,0x8000000d. Although it seems like the error is have something to do with the installation of WSL, it could be a false positive since some users who’ve installed WSL still encountered the same problem. Here’s the context of the error:
“Installing, this may take a few minutes…WslRegisterDistribution failed with error: 0x8007019e/0x8000000dError: 0x8007019e/0x8000000d The parameter is incorrect.Press any key to continue.”
Error code 0x8007019e or 0x8000000d could be due to the absence of supporting Windows 10 features since the error does not even let one use the WSL-based command line. If you are one of the users facing this problem, then you’ve come to the right place as this post will provide you with a couple of suggestions to fix it.
There are two options you can check out to fix the problem, but before you do that, you need to make sure that the Windows Subsystem for Linux feature is enabled. The two options include enabling WSL using the “Turn Windows features on or off” option and using the Windows PowerShell.
Option 1 – Try to enable the WSL using the “Turn Windows features on or off” option
To get started, search for “Turn Windows Features on or off” in the Start Search and click on the appropriate result to open a dialog box.
After that, you will see a populated list in the dialog box and from there, look for the “Windows Subsystem for Linux” option.
Once you find it, select OK. This will search and install the system files needed and ask you to restart your computer.
Restart your computer. The Linux distro should now work without any trouble.
Option 2 – Try to use Windows PowerShell
The next thing you can do to fix the error code 0x8007019e or 0x8000000d is to use Windows PowerShell.
Tap the Win + X keys and click on the “Windows PowerShell (Admin)” option to open Windows PowerShell as admin.
After that, execute this command to enable the Windows Subsystem for Linux feature: Enable-WindowsOptionalFeature -Online -FeatureName Microsoft-Windows-Subsystem-Linux
The command you entered will start to search for the required system files and install them.
If prompted, type “Y” to restart your computer. This should fix the problem.
It seems that last few days we were riding some Razer bandwagon but rest assured that we are not sponsored by them in any way, truth is that simply they come up with some interesting accessories which I believe are worth covering.
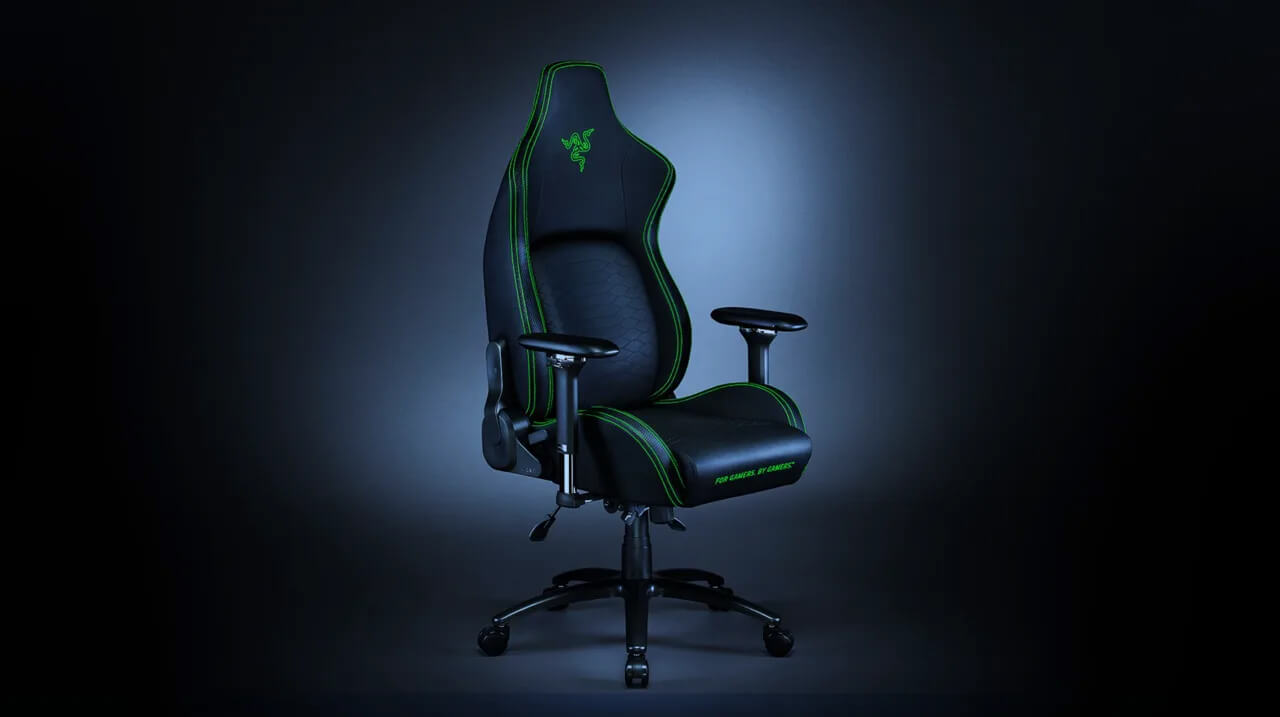
Gaming Chair itself comes in two colors, fully black and green black combination and it is not really an entry-level chair if we are talking about price. The chair itself is around 600USD depending on the distributor and considering that price range it is placed in more top cream of gaming chairs but it is worth every dime.
Iskur Specifications
Iskur is made of a steel frame with a reinforced plywood lumbar support frame for added weight tolerance. Frame and lumbar support are surrounded with memory foam and all of that is wrapped in cotton and polyester layer which is again wrapped in multi-layer synthetic leather making the chair very durable for long hours of daily use.
The chair also comes with a memory foam head cushion which is detachable and removable if you do not wish to use it. On the Razer website among specifications, it stands that the chair is best suited for persons from 5’6” – 6’2” (170 – 190cm) height and up to 299lbs (136kg).
Features
The chair has, of course, height adjustment as any gaming chair and surprisingly it has great control for the armrest. The armrest can be adjusted in 4 different ways: up & down, left & right, forward & backward, and inward & outward. The backrest can be also tilted up to 26 degrees angle.
All of these features are great and good but there is one more feature that really makes this chair stand out from rest and it is Lumbar support. Iskur has an adjustable lumbar support system on the lower part of the backrest. With your lumbar support secured, you can then make the necessary tweaks to optimize the rest of your posture using the Razer Iskur’s adjustable height, backrest, and armrests.
Conclusion
Razer Iskur is neither cheapest nor perhaps the best gaming chair you can buy, but it is a really good one. It is well manufactured and made to feel and look like a premium product that actually it is.
Microsoft has presented its next version of their flagship product, Windows 11, and feelings are divided among users.
Some users like it very much and eager to upgrade, some do not like the graphic overhaul it went through, but overall I think Microsoft has done a good job with it.
Here in this article, we will discuss some of the new features which Windows brings to the table, well at least ones that were showed, I am sure there are plenty more which we will see once OS has been released.
New Start menu
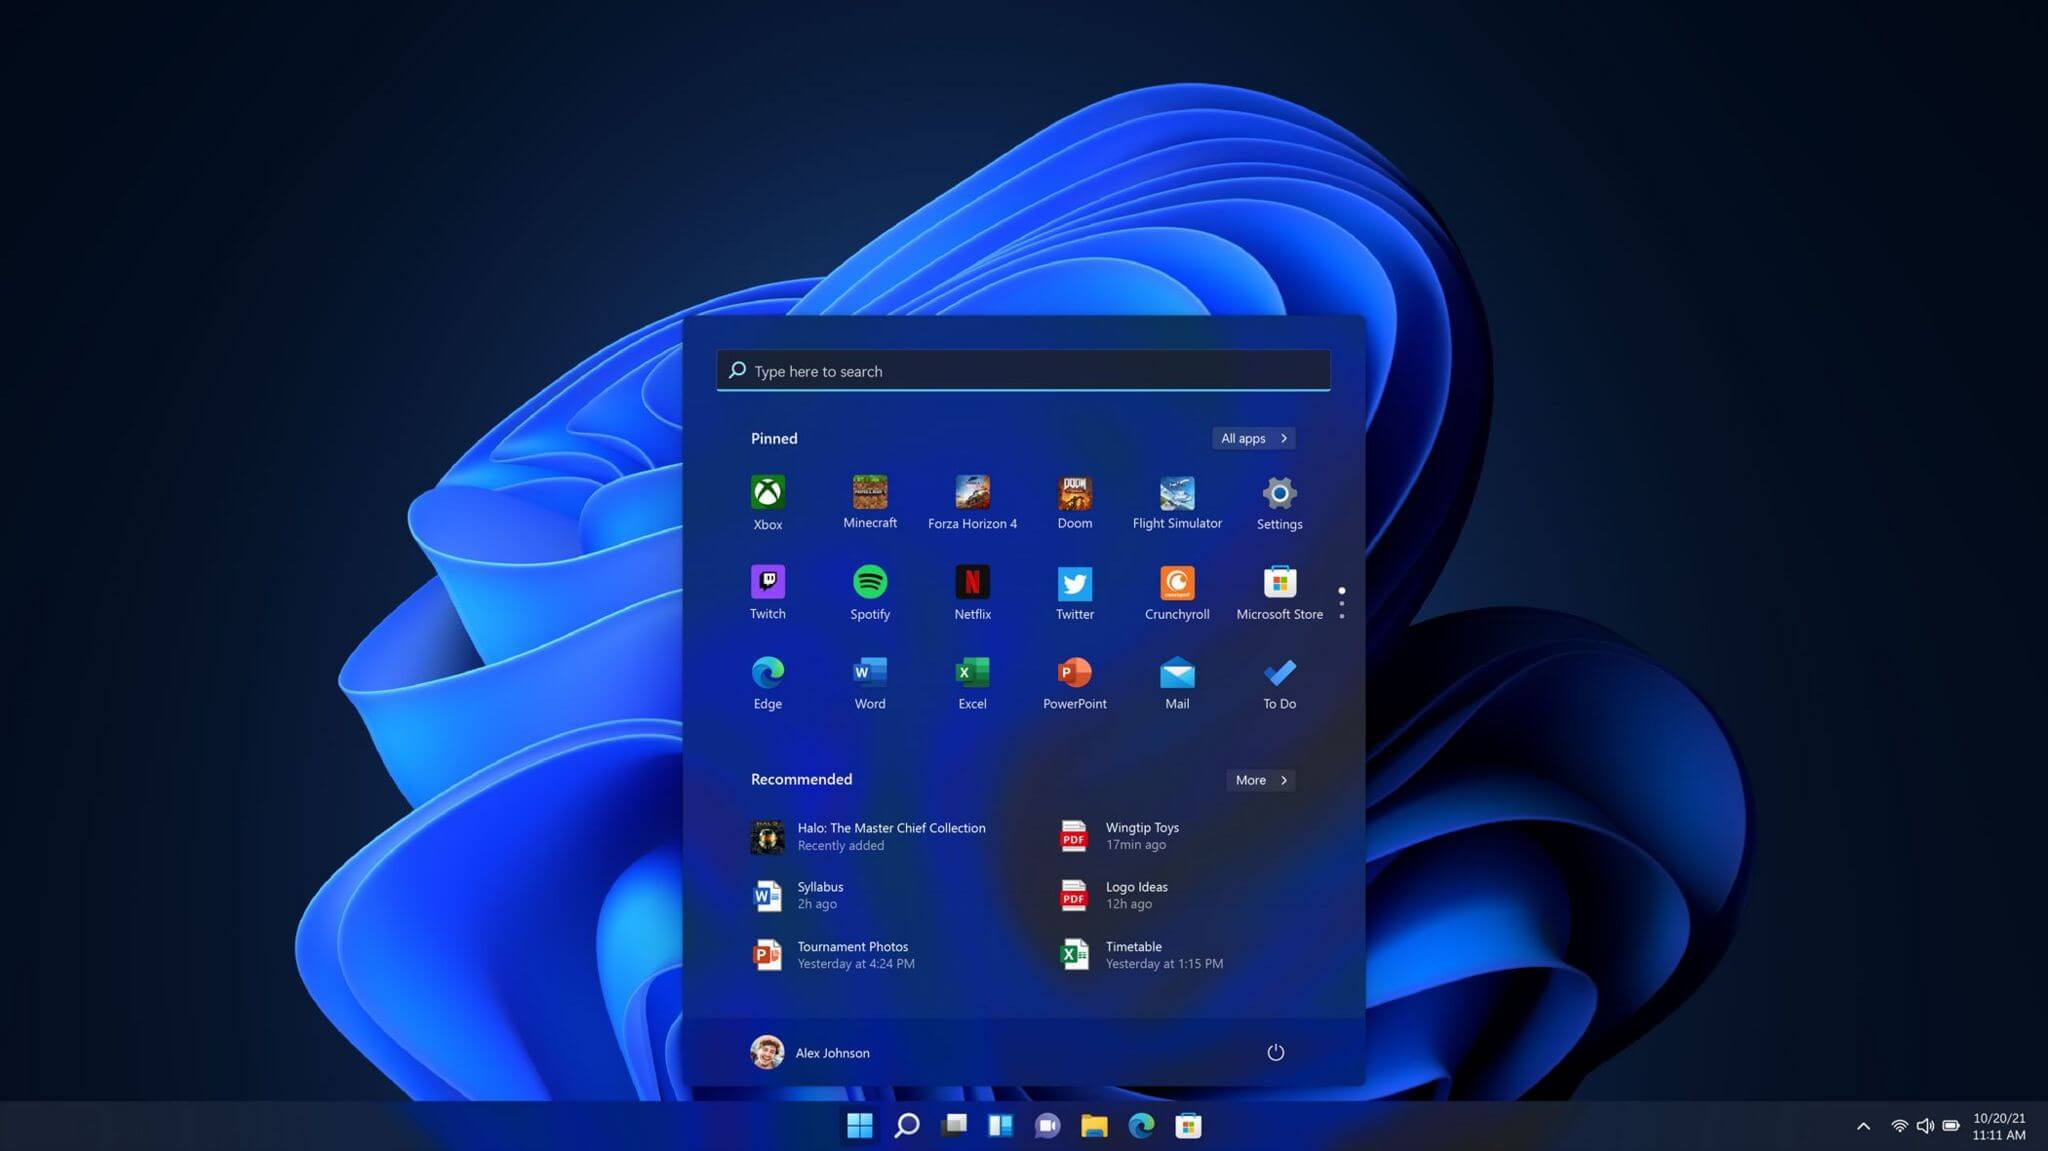
One of the first things that everyone saw when Microsoft has unveiled Windows 11 is its Start menu. Funny enough this is what has caused most of the divide among users, some find it interesting, and some do not like it. Truth is, it is different, and it is centered in the middle instead of the lower left part of the screen.
It has been confirmed however that the Start menu can be moved to any part of the screen so if you want, you could place it on the lower left as it has always been.
Live tiles do not longer exist in the Start menu, instead, we have styled simple icons.
Windows 11 Snap controls are great
If you have used the cascade option in previous Windows versions then it is most likely that you will like the new Snap controls.
You can quickly snap windows side by side, or arrange them in sections on your desktop just by hovering over maximize button on the title bar.
Windows 11 File Explorer
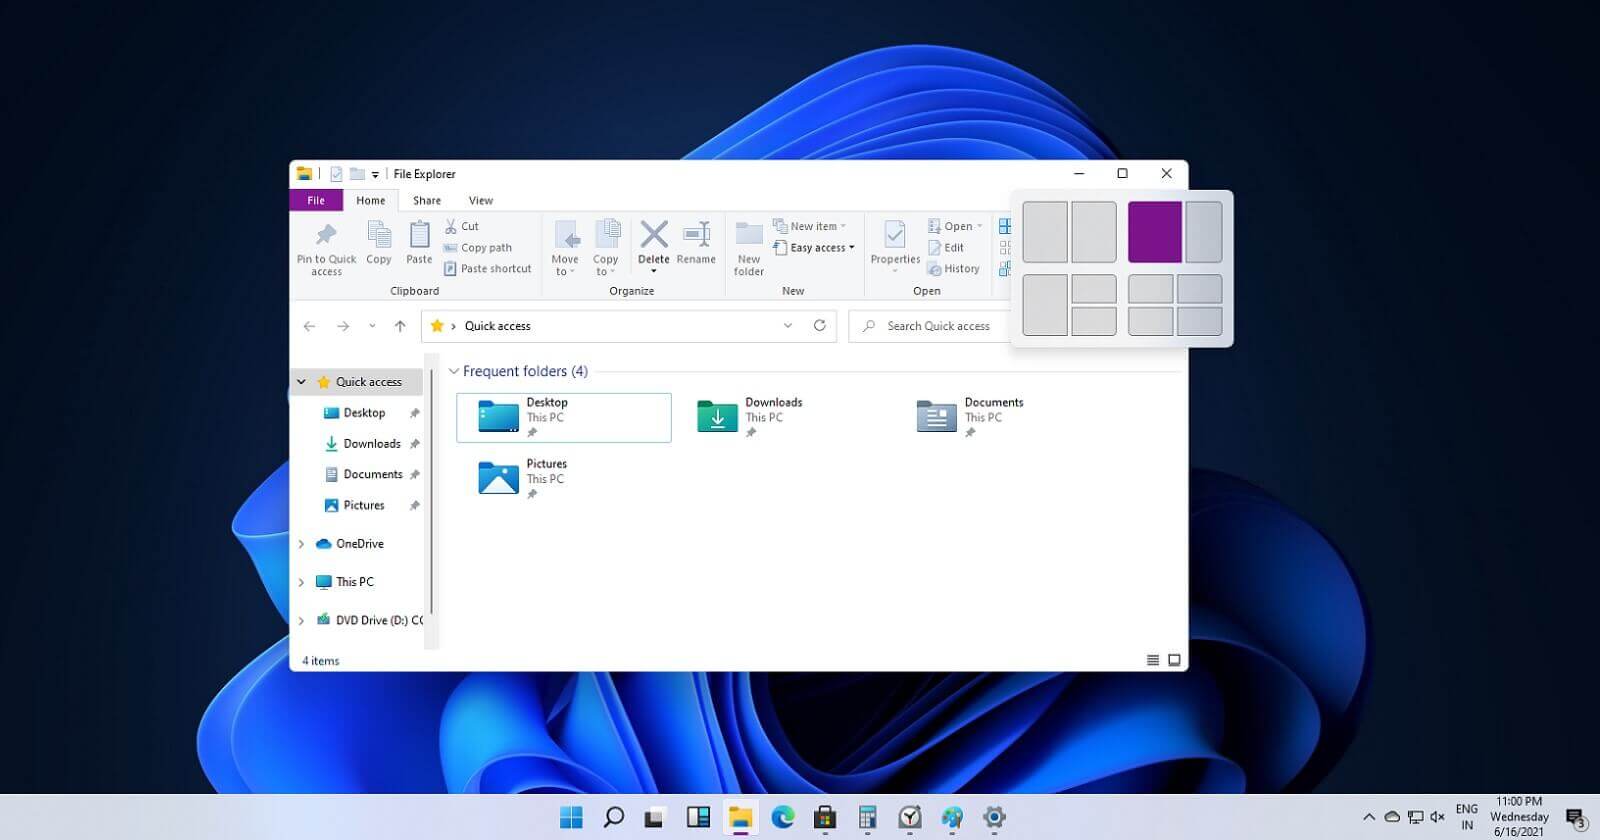
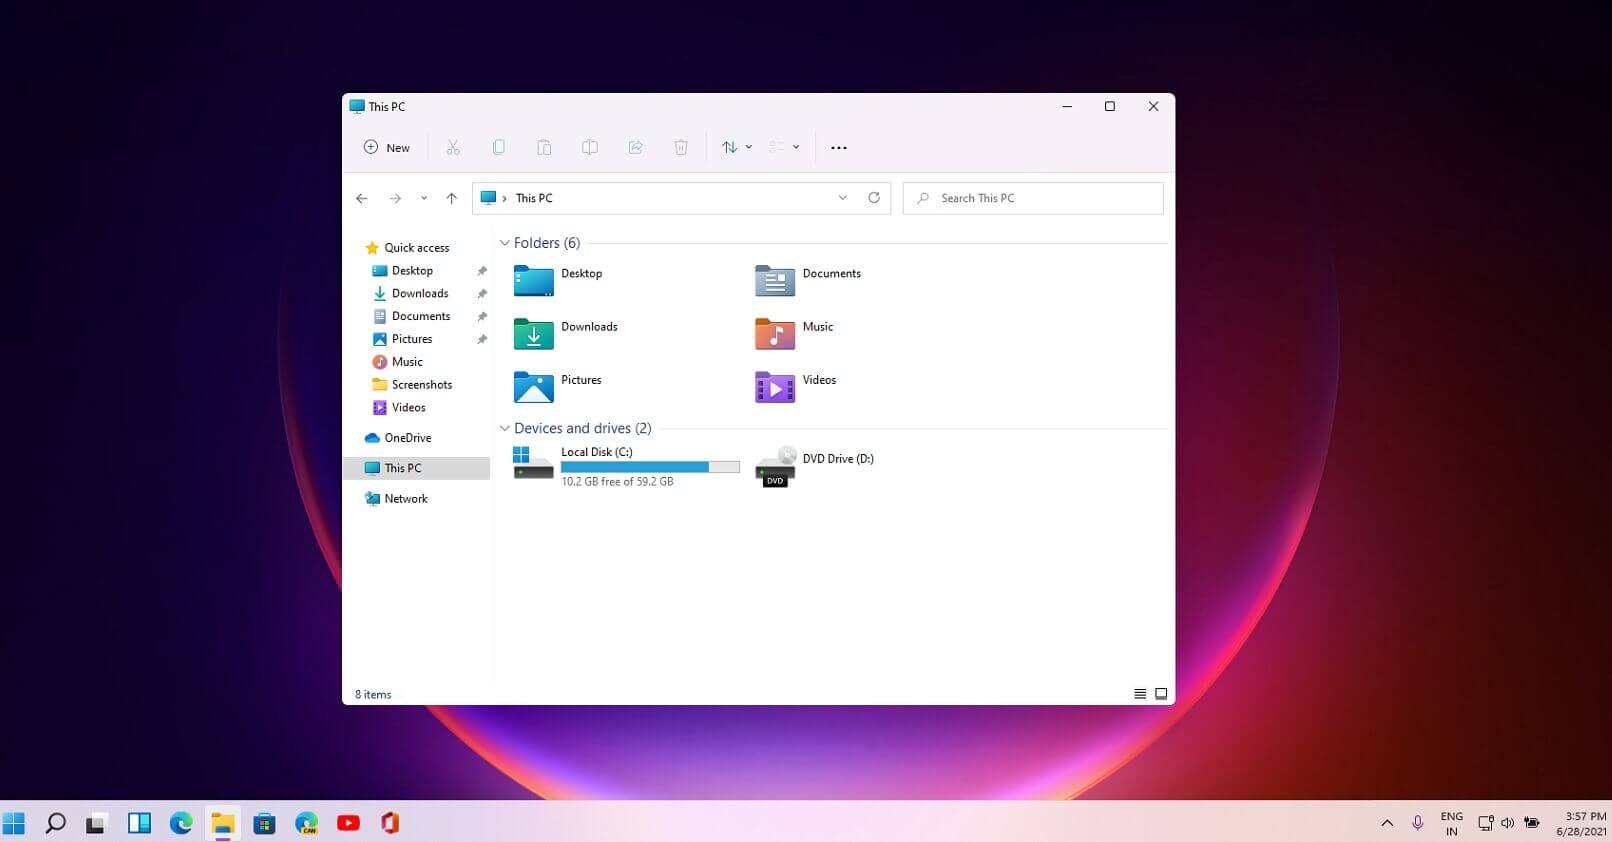
File explorer has gone through some visual and design changes, the ribbon on top has been completely removed and replaced with a header-like feature with a slick and clean design.
The header contains a nice organized and designed single row of icons like cut, paste, copy, rename, delete, and new folder icons.
Settings app ovberhaul
The settings app also has gone through visual and design changes. It has a new design that is very visually appealing and navigation has been simplified and more organized. Finding the right and desired setting is much faster and clearer now.
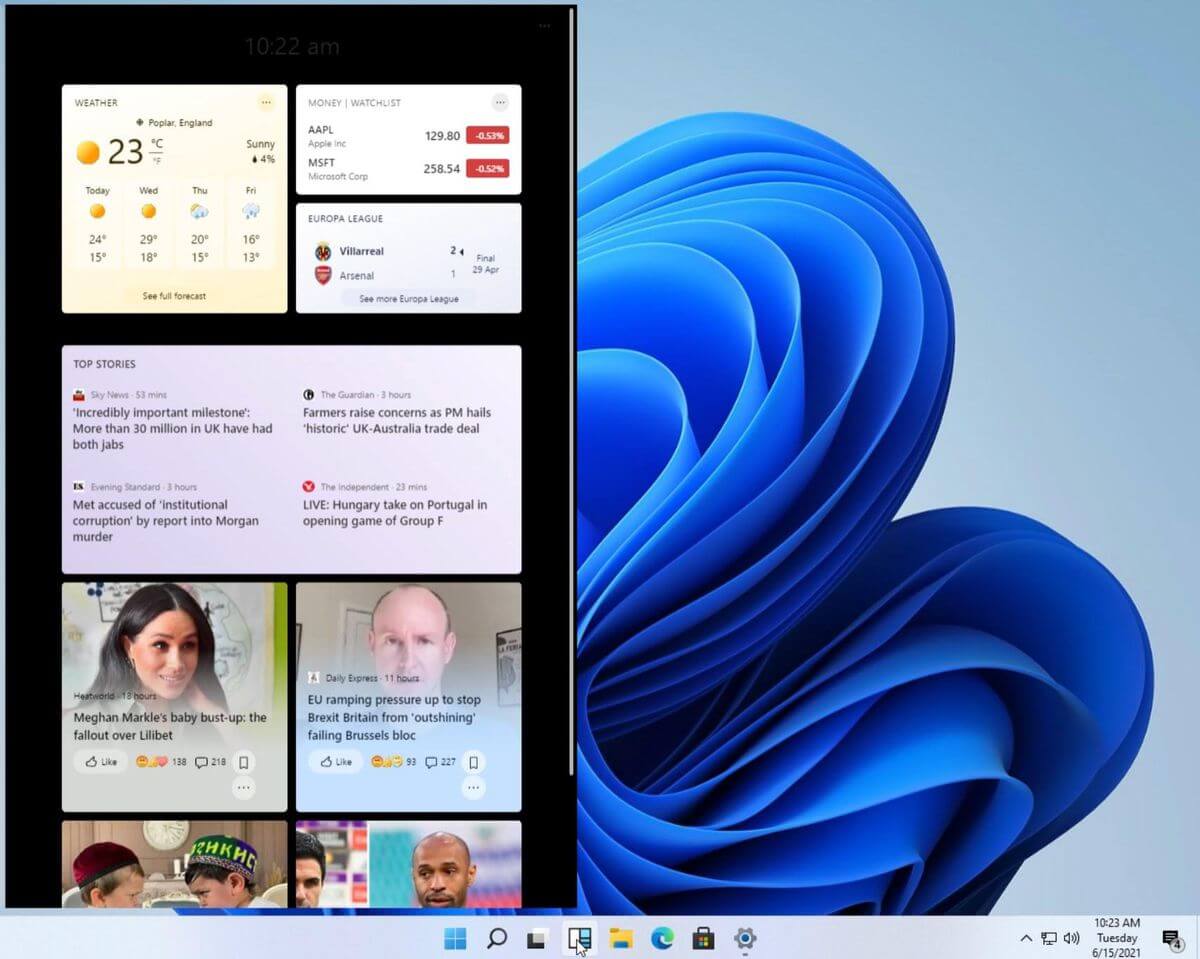
Widget tab makes comeback in Windows 11
Yes, widgets are back but not like you remember them.
Instead of being all-time present at your desktop like once they used to be, now there is a button on the taskbar which brings the widget bar up that contains desired widgets. This way they are easily accessible and do not clutter desktops.
So far we have weather, news, calendar, and stocks widget but we will see how development on these goes. I expect to have community-made widgets like in old days for all of our needs.
XBOX app
The new Xbox app is now integrated into Windows 11, offering quick access to Xbox Game Pass games, the social parts of the Xbox network, and the Xbox store.
Security and TPM 2.0 in Windows 11
As widely known by now Windows 11 will require you to have a TPM 2.0 module capable CPU in order to install it.
This system requirement has caused a lot of controversies but essentially it seems that MS's goal is to protect your personal data by using this module.
The upside of course is that your data will be protected much more than in previous Windows versions, the downside, of course, will be that you will need newer hardware to run OS on it.
and that is essentially it, keep on tuned on more Windows 11 information and overall articles tied to PC and technology here at errortools.com
If you suddenly encounter an error message saying, “ File Record Segment is Unreadable ” on a blue screen while booting your PC, it means that your hard drive is in an error state. This particular blue screen of death error might have a lot of bad sectors or might have reached its end.
The workarounds you can try to resolve the issue is by locating the bad sectors or checking your hard drive for any discrepancies in the mapping and fix them. Follow the detailed instructions laid out below for these workarounds.
Option 1 – Try to check for any bad sectors and wrong configurations in your hard drive
The first thing you have to check is the boot files on your PC. As you know, your PC boots from these files and if there is anything wrong with any one of them or if one of them ends up getting corrupted, you will most likely see the blue screen of death error or a prompt with an error message saying, “File record segment is unreadable”. According to some users who reported this issue, new hard drives aren’t exempted from this error. That’s why it is recommended that you carry out this solution no matter what kind of scenario you are in. You will have to launch the Command Prompt in recovery mode and see if you can fix the problem by executing the check disk commands.
Upon booting, restart your PC and tap F11 to go to the recovery environment then select Troubleshoot.
Next, click Advanced from the given options and select Command Prompt.
After opening Command Prompt, execute the commands listed below, and don’t forget to hit Enter right after you type in each one of them and if you have installed Windows to some different directory, you must replace “C” with the name of the drive you’ve installed Windows with.
chkdsk C: /r /x
chkdsk C: /f
Note: The Chkdsk function might take a while before it finishes its operations so you need to be patient and wait until the entire process is completed. And depending on the situation, it might even take a day at most so patience is really the key here.
Option 2 – Try connecting the hard drive to a different computer
If option 1 didn’t work for you and you’re still seeing the error, you can try connecting the hard drive to a different computer and then copy the data first. Make it a priority to salvage the data just in case the hard drive won’t make it in the future.
After replicating your hard drive, you can then try running the chkdsk commands that are listed in option 1 above in the new computer you’re connecting your hard drive to and make sure that you key in the correct drive letter that’s assigned to the hard drive you’re using. After executing the chkdsk commands, plug your hard drive back into the previous computer and then check if you can now boot it without any issues.
Option 4 – Replace the faulty hard drive
If none of the options provided above really worked out then maybe it’s time to consider getting a replacement for your hard drive. In about 50% of the cases about this error, some unfortunate users were left with no choice but to replace the hard drive since the problem is with the hard drive itself. Hard drives have a complex running mechanism which includes a head and the disk that rotates accordingly so you can check if the cables connected to the hard drive are connected properly and if it is in a correct position or not. In addition, you also have to make sure that the SATA adapters where the hard drive is connected are working properly.
If the drive is showing problems in the I/O operation, there is little chance for you to use it as a normal hard drive. If the hard drive is in warranty, get it checked and replace it. If not, you might consider taking it to the service center for the specialists to take a look into it.
One of the most useful built-in tools in Windows 10 is the Check Disk or CHKDSK utility. It is the one that maintains the integrity of the disk that’s connected to a computer which can be launched using the GUI or graphical user interface and using the command line.
There are a lot of things that warrant the running of this built-in utility and one of these things is the readability of the disk. Recently, a number of users reported that they encountered an error when they tried to run the CHKDSK utility – the error states, “Cannot open volume for direct access”. This kind of error in CHKDSK appears each time the command line is launched according to the affected users.
As per the users who encountered this issue, they receive the following error messages when they tried running a ChkDsk command:
“C:WINDOWSsystem32>chkdsk /f g:
Cannot open volume for direct access.C:WINDOWSsystem32>chkdsk /f f:
The type of the file system is NTFS. Volume label is 0529357401.”
To fix the “Cannot open volume for direct user access” error, here are some suggestions that might help. Follow them carefully.
Option 1 – Try running the CHKDSK utility on Boot
On the other hand, you can also try to run the CHKDSK utility on Boot so you can fix the error and recover any damaged segments of the drive.
Open an elevated Command Prompt and enter this command: chkdsk /x /f /r
After that, you will a message that says, “Chkdsk cannot run because the volume is in use by another process. Would you like to schedule this volume to be checked the next time the system restarts? (Y/N)”
Type Y and tap Enter to schedule a CHKDSK scan once your computer reboots next time.
Option 2 – Try to run the Primary Hard Disk Self Test
The next thing you can do to fix the problem is to run the Primary Hard Disk Self Test by following the steps below.
You need to boot your computer into the BIOS first.
After that, go to the Diagnostics tab and select the “Primary Hard Disk Self Test” option. Note that it may be different depending on the motherboard with different manufacturers but they should imply the same thing.
Now, wait until the test is completed, and then boot your computer normally.
Option 3 – Try to check the hard drive’s health
The next thing you can do to resolve the issue is to check the health of your hard drive using the WMIC utility in the Windows Command Prompt. This utility will check if your hard drive has any problems which resulted in the “Cannot open volume for direct user access” error.
Option 4 – Try to disable various restrictions on your hard drive
You might also want to disable the various restrictions on your hard drive since it is possible that it is encrypted or restricted which explains why you are unable to perform any operations in it and throws the “Cannot open volume for direct user access” error instead. For instance, if you have BitLocker, you can try to disable it and see if it fixes the error or not.
Option 5 – Try to uninstall or disable the Drive Locking feature on your hard drive
You could also look for any Drive Locking feature on your hard drive that tricks disk changes as it might be the root cause of the problem. Thus, if you find one, you need to either uninstall or disable it and then execute a check disk command to resolve the problem.
Option 6 – Try to disable the application service
Disabling the application service can also help you fix the problem. How? Refer to these steps:
Tap the Win + R keys to launch the Run utility and type “services.msc” in the field and then hit Enter to open the Services Manager.
Next, scroll down among the list of services and look for the service related to the security software or disk checker software.
Once you find it, right-click on that service and select Properties.
After that, change its Startup type to Disabled and click on the OK and Apply buttons to save the changes made.
Now restart your computer and don’t forget to enable the service back once the disk check is completed.
Option 7 – Try to use Repair Volume via Windows PowerShell
You could also try to use the Repair Volume using Windows PowerShell. All you have to do is open PowerShell as admin and type the “repair-volume -drive letter <DRIVE LETTER>” command and then tap Enter to run Repair Volume. This should resolve the error.
IRQL_NOT_LESS_OR_EQUAL error is a type of blue screen of death (BSoD) error. It is a typical Windows PC error that occurs even in the latest Windows versions.
The IRQL_NOT_LESS_OR_EQUAL error occurs on the computer screen when a memory address triggers unauthorized access. This leads to the suspension of your login session. The computer screen turns blue.
Solution
Error Causes
IRQL_NOT_LESS_OR_EQUAL error occurs due to several reasons. However, the most common causes for this error code include:
Incompatible device drivers
The poor device driver installation
Faulty hardware
Disk fragmentation
Registry issues
Viruses and malware attack
Blue screen of death error codes like IRQL_NOT_LESS_OR_EQUAL is critical. If not resolved timely, this error code can pose serious threats to your PC.
It can lead to system crash and failure, due to which you can also lose your valuable data stored in your system.
How to Fix IRQL_NOT_LESS_OR_EQUAL Error Code?
Further Information and Manual Repair
Here are some of the best and easy DIY methods to resolve this error code on your PC:
1. Roll Back Drivers
If the underlying cause of IRQL_NOT_LESS_OR_EQUAL error is poor driver installation, then try this method to resolve the issue. This can be done by simply clicking the start menu.
Once you click on it, go to the control panel, then double click the system icon and locate the System Properties window. After that, click the hardware tab and then the device manager button. Now locate the device you recently installed.
Double click on the recently installed device driver, click the driver tab, and then the rollback driver button. This will take a while, so wait for the process to finish. After that, reboot the system.
2. Run Hardware Diagnostic
The IRQL error may also be triggered by faulty hardware. To identify which hardware is causing the error to pop up, you will have to run a hardware diagnostic.
For this, go to the start menu, type Memory Diagnostic in the search bar.
Now access this tool and click on Diagnose your memory problems. As you click it, it will ask you to perform the check by either restarting the PC immediately or on the next restart.
Select the immediate one to get going. The system will carry a scan on the memory and show you the list of problematic errors detected during the scan. To resolve this error then all you have to do is replace the piece of faulty hardware.
Nonetheless, if no faulty hardware is detected, this means the error is related to memory. If so, try method 3 to resolve.
3. Disable Memory Caching
To fix the IRQL_NOT_LESS_OR_EQUAL error, try disabling the memory caching option. This is called BIOS memory caching.
This can be done by restarting your PC and pressing the BIOS setup keys to enter the settings screen. Mostly it is an F2 key, however, it may be different in some computers as the motherboards of different makes have their own respective keys.
Once you enter the BIOS settings look for options stating memory settings. Access these options and disable the memory caching feature.
4. Scan your PC for Malware
As mentioned above this error message can also result due to the intrusion of malicious software like malware, viruses, and spyware.
To detect and remove them from your PC, download an antivirus and perform a system scan. Remove the detected viruses and malware to resolve. Please note, antivirus installation may lower the speed of your PC.
5. Repair Registry and Fragmented Disk
Due to poor PC maintenance, you may experience registry issues. The registry stores all the activities performed on the PC including the unnecessary pieces of information like junk files, internet history, temporary files, cookies, and other flies.
Such files take up a lot of disk space. When there is not much space on the storage device, the new data is saved in fragments. This is called disk fragmentation. When this file becomes fragmented it takes time to rearrange the data and reunite it to run the fragmented file on your PC.
If not resolved, this leads to registry issues and thereby generating various PC error codes including IRQL_NOT_LESS_OR_EQUAL errors.
The best way to clean the registry and repair the fragmented disk is to download Restoro.
This is an advanced and multi-functional PC Fixer. It is embedded with multiple system repair utilities including a powerful registry cleaner that detects all registry issues in seconds, removes and wipes out unnecessary files cluttering the registry, cleans and repairs the registry and the damaged files.
Other utilities include an antivirus that detects privacy errors and all types of malicious software infecting your system. It also functions as a system optimizer which means by running this software on your PC you won’t be compromising on your system’s performance. The system optimizer utility boosts the speed of your PC.
This tool is safe and efficient. It has a user-friendly interface and is compatible with all Windows versions.
Click here to download Restoro and resolve the IRQL_NOT_LESS_OR_EQUAL error code right away.
If you’ve been using your Windows 10 PC for a long time now, you might have come across a couple of issues – from minimal ones to critical ones like the Blue Screen of Death or BSOD stop errors. One of these BSOD errors you can encounter is the DRIVER_IRQL_NOT_LESS_OR_EQUAL Blue Screen error. This particular BSOD error is caused by iaStorA.sys, iaisp64 sys, Netwtw04.sys, nvlddmkm.sys, ndis.sys, wrUrlFlt.sys, and other driver files on Windows 10. This error indicates that a kernel-mode driver tried to access pageable memory at a process IRQL that was too high. When you encounter this error, just like a typical BSOD error, your computer will abruptly stop and you will see a blue screen with an error message saying:
“Your PC ran into a problem and needs to restart. We’re just collecting some error info, and then we’ll restart for you. (100% complete)If you’d like to know more, you can search online later for this error:DRIVER_IRQL_NOT_LESS_OR_EQUAL (wrUrlFlt.sys)”
The iaStorA.sys file is a software component that’s related to the Intel Rapid Storage Technology by Intel. It is a software solution supported by Intel Smart Response Technology which allows the PC to communicate with the hardware as well as externally connected devices. The Intel Rapid Storage Technology enables the Peripheral Component Interconnect Express or PCIe storage support, serial ATA RAID or Redundant Array of Independent Disks 0, 1, 5, and 10 support, and the PUIS or power-up in standby is also supported.
To resolve this kind of BSOD error, you have to update, roll back or fresh-install the problematic driver. Refer to the options laid out below for detailed instructions.
Option 1 – Try removing the Intel Rapid Storage Technology or IRST drivers
The first thing you can try is to fix the Wi-Fi driver or the Ethernet driver on your computer to resolve the BSOD error. Take note that this option works not only on Windows 10 but also other Windows versions.
Tap the Win + R keys on your keyboard to open the Run dialog box.
After that, type “devmgmt.msc” in the field and hit Enter or click OK to open the Device Manager.
After opening the Device Manager, click on the “IDE ATA/ATAPI Controller” entry and expand it.
Next, right-click on all the driver entries that are appropriately labeled, and then click on Uninstall device.
Now restart your PC and check if the problem’s fixed or not. If not, proceed to the next given option below.
Option 2 – Try updating the Intel Rapid Storage Technology or IRST drivers
If you’ve already tried uninstalling the IRST driver but you’re still getting the DRIVER IRQL NOT LESS OR EQUAL Blue Screen error when you use your Windows 10 PC, then this means that the drivers might be corrupted or not compatible with the operating system version that you are using right now. So to fix the problem, you have to update your drivers. To do that, follow the steps below.
The first thing you need to do is to go to your OEM’s website.
Once you’re already on the OEM’s website, go to the Drivers section and get the latest version for your device and then try to overwrite it.
Alternatively, you can also update the drivers via the Device Manager:
Tap the Win + R keys on your keyboard to open the Run dialog box.
After that, type “devmgmt.msc” in the field and hit Enter or click OK to open the Device Manager.
After opening the Device Manager, click on the “IDE ATA/ATAPI Controller” entry and expand it.
Next, right-click on all the driver entries that are appropriately labeled, and then click the Update driver option.
Now restart your PC and check if the BSOD error is fixed or not.
Option 3 – Try using the System File Checker via Command Prompt
System File Checker or SFC is a built-in command utility that helps in restoring corrupted files as well as missing files. It replaces bad and corrupted system files to good system files that might be causing the DRIVER IRQL NOT LESS OR EQUAL Blue Screen error. To run the SFC command, follow the steps given below.
Tap Win + R to launch Run.
Type in cmd in the field and tap Enter.
After opening Command Prompt, type in sfc /scannow
The command will start a system scan which will take a few whiles before it finishes. Once it’s done, you could get the following results:
Windows Resource Protection did not find any integrity violations.
Windows Resource Protection found corrupt files and successfully repaired them.
Windows Resource Protection found corrupt files but was unable to fix some of them.
Sometimes you may experience QTCF.dll error on your computer either during installation or while upgrading applications like iTunes and QuickTime. This error indicates that the installation or the upgrading of the desired application was unsuccessful.
The QTCF.dll error is recognized by the Apple Support Community and they have provided a solution to fix this error easily.
Solution
Error Causes
QTCF.dll error occurs because the computer overloads with too much data which corrupts and damages registry files. And therefore the desired program fails to download and start on your PC.
When this happens you see a pop up on your screen and the QTCF.dll error message that is usually displayed as:
QTCF.dll not found
QTCF.dll file is missing
Such message display hinders your ability to use iTunes or QuickTime applications on your PC. Furthermore, it also slows the performance of your system and you may encounter startup and shutdown problems.
Therefore, it is advisable to repair the problem and fix the QTCF.dll error right away.
Further Information and Manual Repair
The good news is that you don’t need to go to a professional or be an IT expert in order to fix the QTCF.dll error. Since this error means that the installation or the attempt to upgrade the system was unsuccessful therefore you need to reinstall the fresh copy of the application.
Here’s how you can easily fix the problem by yourself and install a fresh copy of the application:
Step 1: First close all the applications running on your computer.
Step 2: Now uninstall the application that you were trying to install such as iTunes or QuickTime. To do this, go to the start menu, click on settings, control panel, and programs. Now click on the application you want to remove.
Step 3: Once the application is uninstalled and removed from your computer, then restart it again.
Step 4: Now download a fresh version of the application (iTunes or QuickTime) from Apple’s official website
http://www.apple.com/quicktime/download/.Step 5: Run the installer.
If reinstalling doesn’t work, then it is advisable to download the QTCF.dll repair tool. This repair tool will scan your PC for errors in seconds. Once the scanning is complete, click on the ‘fix all’ button to repair your computer.
Once the error is fixed, restart your computer and then try reinstalling the desired application one more time.
A Word of Advice
For regular PC users, it is advisable to install an anti-virus and malware scanner and run it every time you use your computer. This helps you keep informed about the viruses or errors that your computer might be exposed to.
And you can take timely actions before you experience file corruption and damage.
Stable Diffusion is a machine learning model developed by Stability AI to generate digital images from natural language descriptions. The model can be used for different tasks like generating image-to-image translations guided by text prompts and upscaling images.
Unlike competing models like DALL-E, Stable Diffusion is open source and does not artificially limit the images it produces. Stable diffusion was trained on a subset of the LAION-Aesthetics V2 data set. It can run on most consumer hardware equipped with a modest GPU and was hailed by PC World as "the next killer app for your PC".
Since Stable Diffusion is run locally and not in the cloud, as mentioned there is no limit to the number of images that you can produce but in order to use it you will have to get down a little dirty with setting your PC environment for it since it is not really an application, it is a command line text based descriptor that will use python to generate your images, so there is no install nor GUI.
In this guide, we will show you how to both install and run Stable Diffusion on your local PC so you can start producing some cool images all by yourself.
Hardware and software requirements
Make no mistake, Stable Diffusion will not run on a potato PC, in order to harvest the power of AI-generated imagery this is what you will need:
A GPU with at least 4GB of VRAM
10GB of hard disk space
Python and libraries (Miniconda3 installer will install everything you need)
The Stable Diffusion files
Git
Any OS (Windows, Linux, macOS)
Installing components
For this tutorial, we are covering the installation and running of Stable Diffusion on Windows PC. The steps presented here are presented in a way that installation can be performed on any operating system but precise instructions will be for Windows OS.
GIT
The first thing to do is to install GIT. It is a tool that will let you easily maintain and install repos from the internet. to install it go to: https://git-scm.com/ and click on download. Follow the instructions for your version of the operating system. If you are a developer you are familiar with GIT and if you already have it installed you can skip this step.
One thing that is important when installing GIT locally is to select to use it via the command line (the second option that says "Git from the command line and also from 3rd-party software").
Miniconda3
Now when we have GIT installed, next thing is to use Miniconda3 to install python and all required libraries that are needed. Get the installer at: https://docs.conda.io/en/latest/miniconda.html
Miniconda3 is basically an easy installer so you do not have to install tons of stuff manually from different websites and sources, it is nicely packaged in the installer that will take care of everything.
Stable Diffusion
After the previous two steps, we are ready now to actually install Stable Diffusion. Go to https://huggingface.co/CompVis/stable-diffusion#model-access and install the latest library (as of the writing of this article currently it is stable-diffusion-v1-4-original, the last one on the right), the library is almost 5GB in size so be prepared for big download.
Once downloaded click on the Windows start button and type in Miniconda3 and click on open. Create a folder and name it how you want on a drive of your choice. For this example, we will install it all in disk C under folder AI_art, follow the instructions below but use your own names and destination instead. Do not close Minicoda3 after typing commands!!!
cd c:/
mkdir AI_art
cd AI_art
Extract GitHub files that you have downloaded into your new folder and get back to Minicoda3 and type the next commands:
Let the whole process finish, some files are large and it might take a while. After the whole process is finished and completed, copy the checkpoint file that you have downloaded into: C:\AI_art\stable-diffusion-main\models\ldm\stable-diffusion-v1
After the file is copied rename it to model.ckpt and you are finished.
Running Stable Diffusion
The created environment is needed in order to actually use Stable Diffusion to create images. Each time you want to use it you will have to run it, so go into Miniconda3, and inside it type:
conda activate ldm
cd C:\AI_art\stable-diffusion-main
after we are inside the folder call the script with the parameters:
python scripts/txt2img.py --prompt "TXT DESCRIPTION OF IMAGE THAT YOU WANT TO CREATE" --plms --n_iter 5 --n_samples 1
and that's it, your image is created and it is located in C:\AI_art\stable-diffusion-main\outputs\txt2img-samples\samples
Things have stirred lately with Chinas ban on crypto mining and many used GPUs will flow the market probably. But should you buy a used GPU?
Short answer: NO, long answer: keep on reading to find out why.
GPU shortage and its cause
As you all know by now, we live sadly in a world struck by a global Pandemic. Due to this awful disease and measures taken against it, many people are either working from home or are at home making the manufacturing of new chips problematic while demand on the market has raised.
Throw into that mix crypto mining which has raised in popularity and you have, well today's market where we have GPU shortage.
Now with the latest news that China has banned the mining of cryptocurrency, there is to be expected that at some point in time mining cards used there will fit the market in the whole world.
Sadly even with a large quantity of GPUs that will become available, the overall price of cards will not be much lowered I am afraid since demand is still very high and many people would not want to purchase used mining cards and neither should you.
Be prepared for the worst scenario
Although this sounds very pessimistic and in most cases, it will not turn out to be true, you should always prepare yourself mentally that you might be in that lower percentage that will end up with a really bad GPU.
What has come up to be absolutely true when considering GPU that were mining is that if anything at all can be done to GPU in order to increase performance, it has been done. Miners want to optimize and almost every GPU if could be overclocked, it was overclocked.
Extensive mining also means that thermal paste has been dried and it is pretty useless at this point and there is a very high chance that fans and heat sinks will need much cleaning or even replacement raising the price of the card itself for mentioned paste, fans, and heat sinks.
There's no way to tell what the previous owner might have done with a graphics card when you're shopping online, so our advice is to assume the worst. Don't trust the seller to give truthful information. Any listing that says it was "never used for mining" at this point is probably a lie.
Age of the GPU matters
Date when GPU itself has manufactured really matters. Newer cards even if used extensively have been used for a much shorter period of time and are not so damaged were ones produced a few years ago have seen a lot of action.
Let’s say that you get RTX 3060, In the worst-case scenario it has been mining since late February of 2021 and basically, it is still under warranty so it should behave OK and put some good work in gaming even in that state.
On another hand, if we take for example GTX 1080Ti which is 4 years old GPU things start to change drastically. 4 years GPU could be worn out even if it was used just for extensive gaming sessions let alone for mining.
No return policy and seller rating
Most of the time you will run into a product that cannot be returned or no refunds policy. This should bring a red flag right away and deter you from purchase.
Sellers with the highest ratings are more trustworthy since many of them will not want to destroy their reputation but these will probably not even have these kinds of merchandise in their store.
Buying with a poor rating seller and no return policy on a product is just asking for trouble. And although some stores do have arbitration and will stand on the customer side there is no guarantee for that and it will take too much time to process.
If you really must buy a second-hand GPU
Of course in these troubled times sometimes due to malfunction or any other reason, there would not be another choice than to buy a second-hand GPU.
In this case, if there is no other option consider sellers with many positive ratings. If you can buy locally that would even be better or the best-case scenario would be if you could visually see and inspect GPU itself in order to see in what state it is.
Look for warranty stickers to see if they are thorn and the card has been tampered with. Also take a good look at screws, if they have scratches card has been opened, probably to replace fan or heating sinks which means that it has worked a lot.
Conclusion
It is very difficult to give the best possible advice on this situation since of GPU shortage, but I would much prefer a new GPU with lower performance than a hi-performance one which was mining.

 It seems that last few days we were riding some Razer bandwagon but rest assured that we are not sponsored by them in any way, truth is that simply they come up with some interesting accessories which I believe are worth covering.
Gaming Chair itself comes in two colors, fully black and green black combination and it is not really an entry-level chair if we are talking about price. The chair itself is around 600USD depending on the distributor and considering that price range it is placed in more top cream of gaming chairs but it is worth every dime.
It seems that last few days we were riding some Razer bandwagon but rest assured that we are not sponsored by them in any way, truth is that simply they come up with some interesting accessories which I believe are worth covering.
Gaming Chair itself comes in two colors, fully black and green black combination and it is not really an entry-level chair if we are talking about price. The chair itself is around 600USD depending on the distributor and considering that price range it is placed in more top cream of gaming chairs but it is worth every dime.
 One of the first things that everyone saw when Microsoft has unveiled Windows 11 is its Start menu. Funny enough this is what has caused most of the divide among users, some find it interesting, and some do not like it. Truth is, it is different, and it is centered in the middle instead of the lower left part of the screen.
It has been confirmed however that the Start menu can be moved to any part of the screen so if you want, you could place it on the lower left as it has always been.
Live tiles do not longer exist in the Start menu, instead, we have styled simple icons.
One of the first things that everyone saw when Microsoft has unveiled Windows 11 is its Start menu. Funny enough this is what has caused most of the divide among users, some find it interesting, and some do not like it. Truth is, it is different, and it is centered in the middle instead of the lower left part of the screen.
It has been confirmed however that the Start menu can be moved to any part of the screen so if you want, you could place it on the lower left as it has always been.
Live tiles do not longer exist in the Start menu, instead, we have styled simple icons.
 If you have used the cascade option in previous Windows versions then it is most likely that you will like the new Snap controls.
You can quickly snap windows side by side, or arrange them in sections on your desktop just by hovering over maximize button on the title bar.
If you have used the cascade option in previous Windows versions then it is most likely that you will like the new Snap controls.
You can quickly snap windows side by side, or arrange them in sections on your desktop just by hovering over maximize button on the title bar.
 File explorer has gone through some visual and design changes, the ribbon on top has been completely removed and replaced with a header-like feature with a slick and clean design.
The header contains a nice organized and designed single row of icons like cut, paste, copy, rename, delete, and new folder icons.
File explorer has gone through some visual and design changes, the ribbon on top has been completely removed and replaced with a header-like feature with a slick and clean design.
The header contains a nice organized and designed single row of icons like cut, paste, copy, rename, delete, and new folder icons.
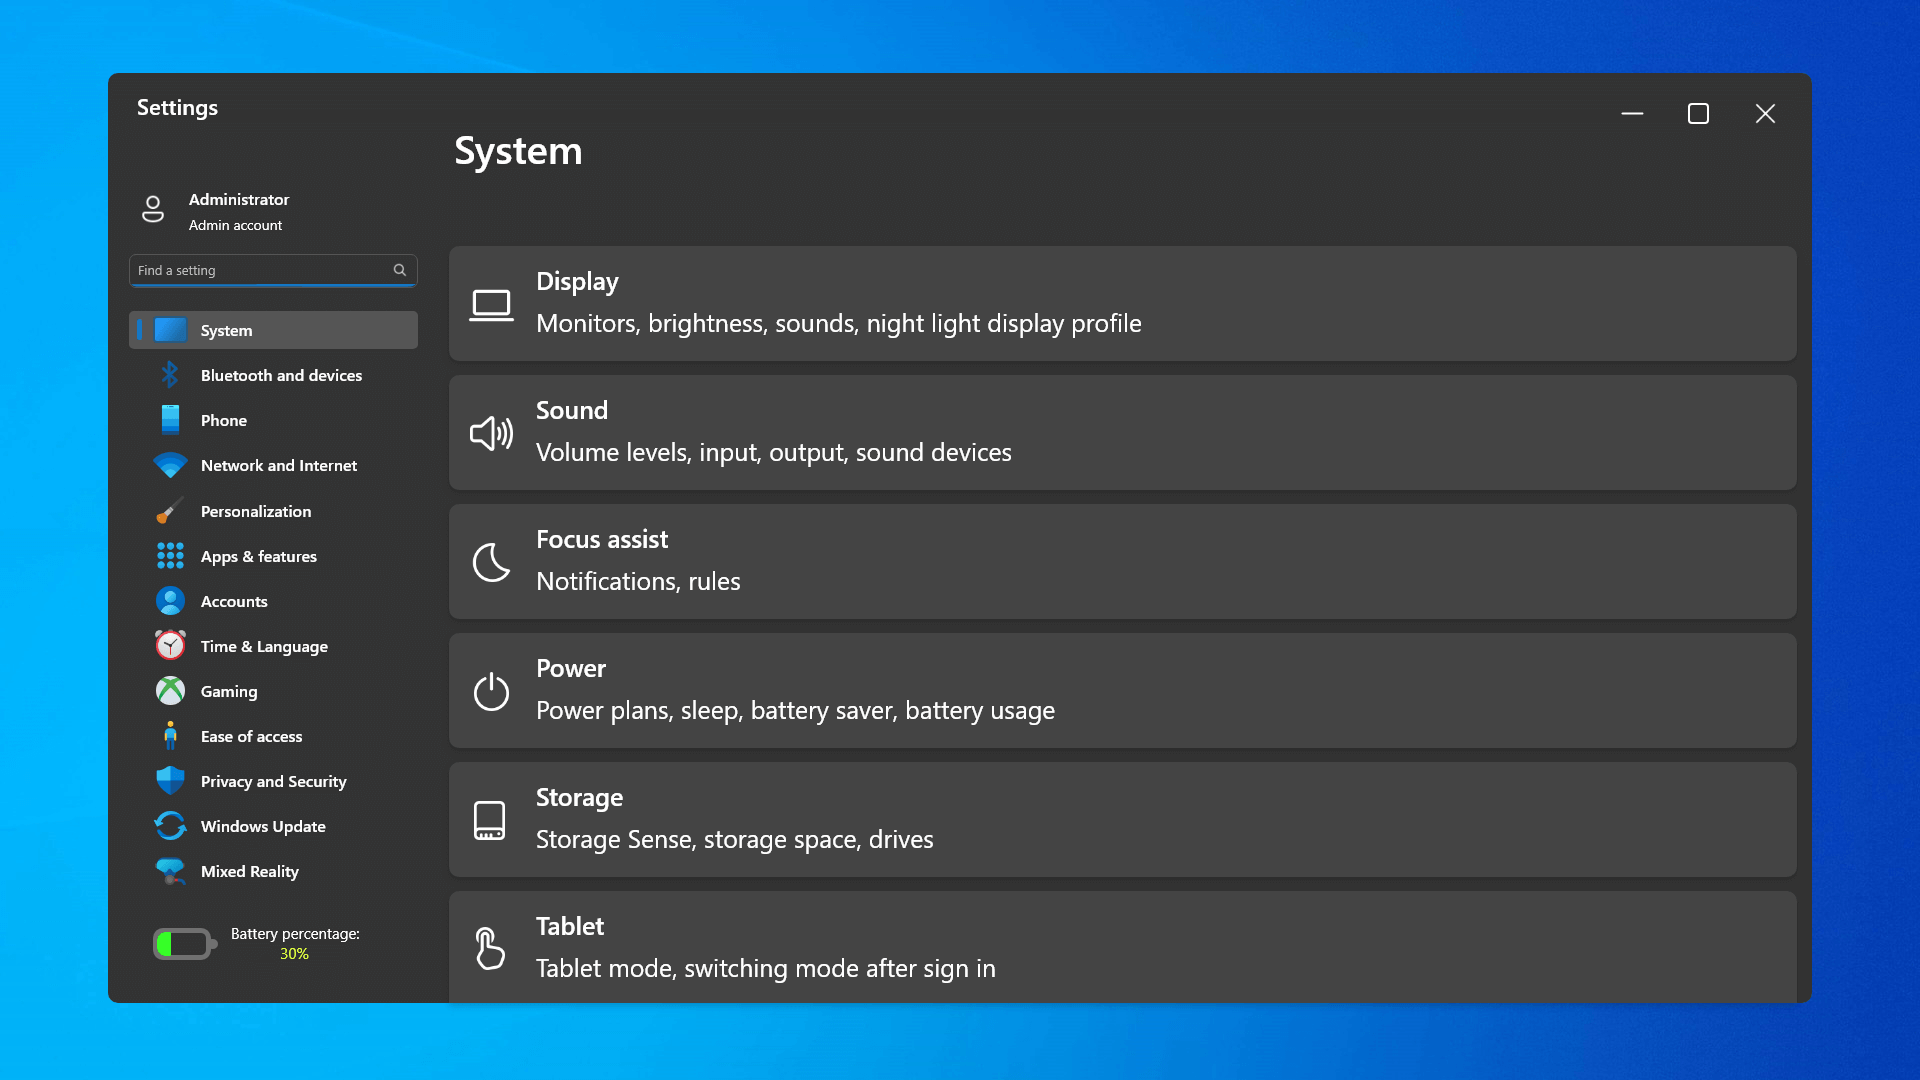 The settings app also has gone through visual and design changes. It has a new design that is very visually appealing and navigation has been simplified and more organized. Finding the right and desired setting is much faster and clearer now.
 Yes, widgets are back but not like you remember them.
Instead of being all-time present at your desktop like once they used to be, now there is a button on the taskbar which brings the widget bar up that contains desired widgets. This way they are easily accessible and do not clutter desktops.
So far we have weather, news, calendar, and stocks widget but we will see how development on these goes. I expect to have community-made widgets like in old days for all of our needs.
Yes, widgets are back but not like you remember them.
Instead of being all-time present at your desktop like once they used to be, now there is a button on the taskbar which brings the widget bar up that contains desired widgets. This way they are easily accessible and do not clutter desktops.
So far we have weather, news, calendar, and stocks widget but we will see how development on these goes. I expect to have community-made widgets like in old days for all of our needs.
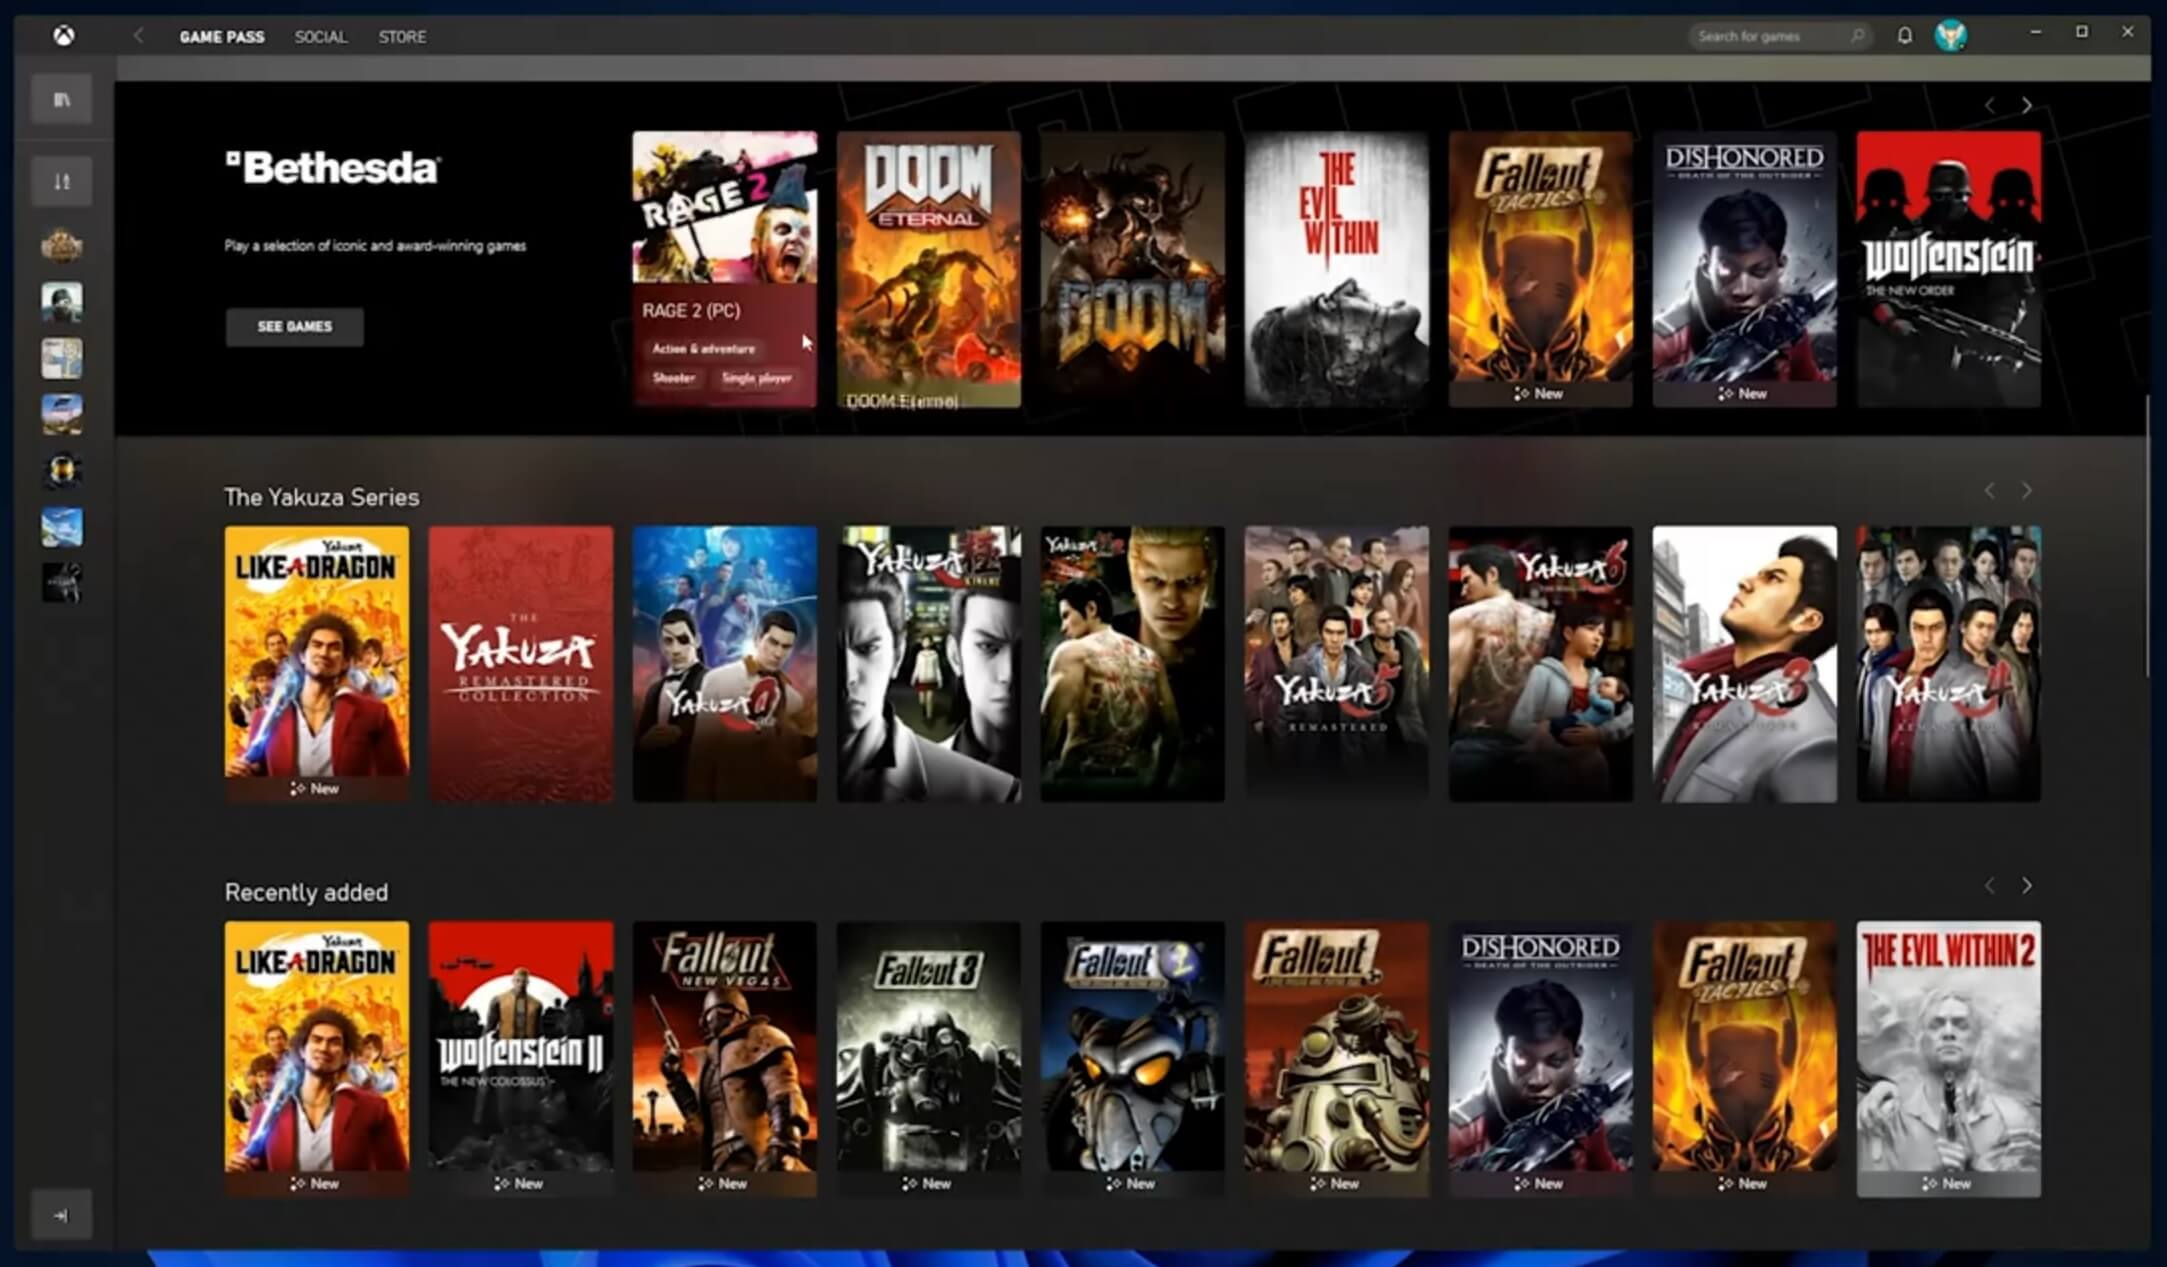 The new Xbox app is now integrated into Windows 11, offering quick access to Xbox Game Pass games, the social parts of the Xbox network, and the Xbox store.
 As widely known by now Windows 11 will require you to have a TPM 2.0 module capable CPU in order to install it.
This system requirement has caused a lot of controversies but essentially it seems that MS's goal is to protect your personal data by using this module.
The upside of course is that your data will be protected much more than in previous Windows versions, the downside, of course, will be that you will need newer hardware to run OS on it.
and that is essentially it, keep on tuned on more Windows 11 information and overall articles tied to PC and technology here at errortools.com
As widely known by now Windows 11 will require you to have a TPM 2.0 module capable CPU in order to install it.
This system requirement has caused a lot of controversies but essentially it seems that MS's goal is to protect your personal data by using this module.
The upside of course is that your data will be protected much more than in previous Windows versions, the downside, of course, will be that you will need newer hardware to run OS on it.
and that is essentially it, keep on tuned on more Windows 11 information and overall articles tied to PC and technology here at errortools.com 

 GPU shortage and its cause