A lot of users complain about low storage space each time a Windows Feature update is released as well as to complain about not being able to download the updates, slow update experience, and many other complaints. The main issue is that many users do not have enough storage space available on their PCs. And now to make sure that none of the updates gets stuck because of low storage space, Microsoft presented the Reserved Storage feature which comes preinstalled with v1903 or those where v1903 was clean installed. This guide will be showing you how you can enable or disable the Reserved Storage in your Windows 10 computer.
As you know, the Windows Update process should have enough space so that it can download, extract and apply the update on the computer. Usually, the size of the Reserved Storage is around 7GB which gives enough space for the update, temporary files, system caches, apps, and many more. And according to Microsoft, the size of the Reserved Storage space will vary from time to time and will depend on how you use your computer.
Explanation
The Reserved Storage space feature is enabled by default on devices that come preinstalled with the May 2019 update or after performing a clean installation of the Windows 10 OS. To check if your computer has this feature, you need to go to Settings > System > Storage and from there click on the “Show more categories” link and then click on the “System & reserved” option. However, if you can’t find the Reserved Storage from the list, then it’s probably because your computer has limited space on the hard disk or it is not a fresh or new install. On the other hand, if you have this feature but have no use for it and want to disable it instead, then read on as this post will also show you how it’s done.
Solution
Keep in mind that when you disable the Reserved Storage feature, chances are, you might be unable to enable it back so you need to make sure that it’s really what you want to do before you disable it permanently. So if you really want to disable Reserved Storage, you can do so using the Registry Editor. Before you proceed, you have to create a System Restore point first and then carry out the following steps.
- Tap the Win + R keys to launch the Run utility and type “Regedit” in the field and then tap Enter to open the Registry Editor.
- Next, navigate to this registry path: ComputerHKEY_LOCAL_MACHINESOFTWAREMicrosoftWindowsCurrentVersionReserveManager
- From there, double click on the DWORD named “ShippedWithReserves” and set its value to “1”.
- Once you’re done, restart your computer and see if the Reserved Storage feature is now gone.
On the other hand, if you want to reduce the Reserved Storage space, there are two ways you can do that. First, you can go to Settings > Apps > Apps & features > Manage optional features and from there, uninstall the optional features that you do not use. The second one is you have to go to Settings > Time & Language > Language and then uninstall the languages and their add-on which you don’t use.
Note: The Reserved Storage feature is also used by system processes and apps to create temporary files and once the Reserved Storage space fills up, Windows 10 will delete them automatically. It is undeniable a useful feature so disabling it is not recommended but if you are running on low storage space and don’t have much choice, then you may disable it at your own risk.


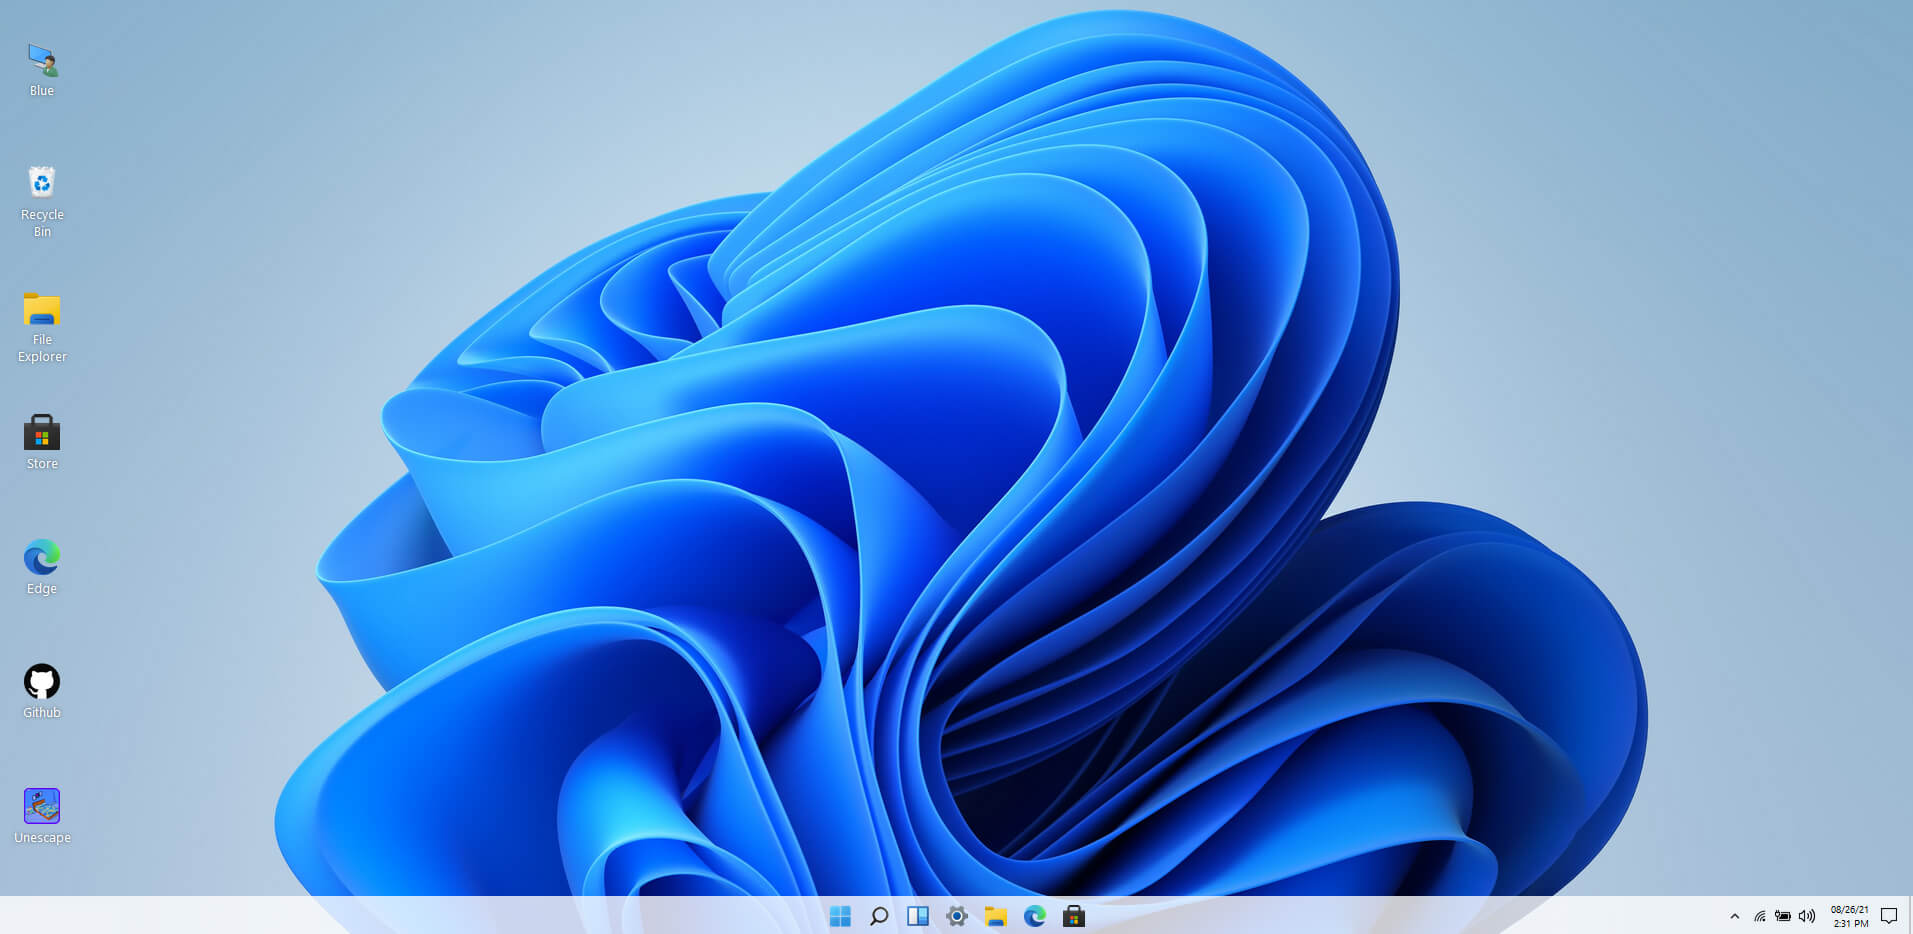 Windows 11 release date is closing in, some people have tried it via insider build, some have decided not to. It has come to our attention that there is a little website made by BlueEdge that offers a virtual Windows 11 desktop.
Opening the Website will put you right inside Windows 11 desktop, now take note that this is not Windows 11, it is a simulation of Microsoft’s newest OS and therefore many things will not work like File Explorer, etc.
One thing you can make sure it is working is UI itself, you can see how you do like the new Taskbar, start menu, widgets, and some other things. You can just pop up on the site and check how you do like the overall new look and feel of Windows 11 UI before installing it or trying it.
We are sure that many more options will come in time but even now you can get a feel of the newest OS.
Windows 11 BlueEdge site:
Windows 11 release date is closing in, some people have tried it via insider build, some have decided not to. It has come to our attention that there is a little website made by BlueEdge that offers a virtual Windows 11 desktop.
Opening the Website will put you right inside Windows 11 desktop, now take note that this is not Windows 11, it is a simulation of Microsoft’s newest OS and therefore many things will not work like File Explorer, etc.
One thing you can make sure it is working is UI itself, you can see how you do like the new Taskbar, start menu, widgets, and some other things. You can just pop up on the site and check how you do like the overall new look and feel of Windows 11 UI before installing it or trying it.
We are sure that many more options will come in time but even now you can get a feel of the newest OS.
Windows 11 BlueEdge site:  Inside personalization, click on the Lock Screen tab.
 On the right screen, under the picture, you will find Windows spotlight, click on it to bring a drop-down menu up.
 Your choice is presented as a single picture for background or slideshow, a series of pictures that are going to be looped in a given time interval.
If you would like just a single picture for your background, choose that and click on it.
Your choice is presented as a single picture for background or slideshow, a series of pictures that are going to be looped in a given time interval.
If you would like just a single picture for your background, choose that and click on it.
 Once you are in choose picture dialog, click on the browse button and navigate to the picture on your storage which you would like to have as a background.
If however, you fancy slideshow as your lock screen background, click on the background drop-down menu and choose the slideshow. Next, click on add a folder and navigate to a folder where you have pictures that you would like to have as a slideshow for your Windows lock screen.
Once you are in choose picture dialog, click on the browse button and navigate to the picture on your storage which you would like to have as a background.
If however, you fancy slideshow as your lock screen background, click on the background drop-down menu and choose the slideshow. Next, click on add a folder and navigate to a folder where you have pictures that you would like to have as a slideshow for your Windows lock screen.

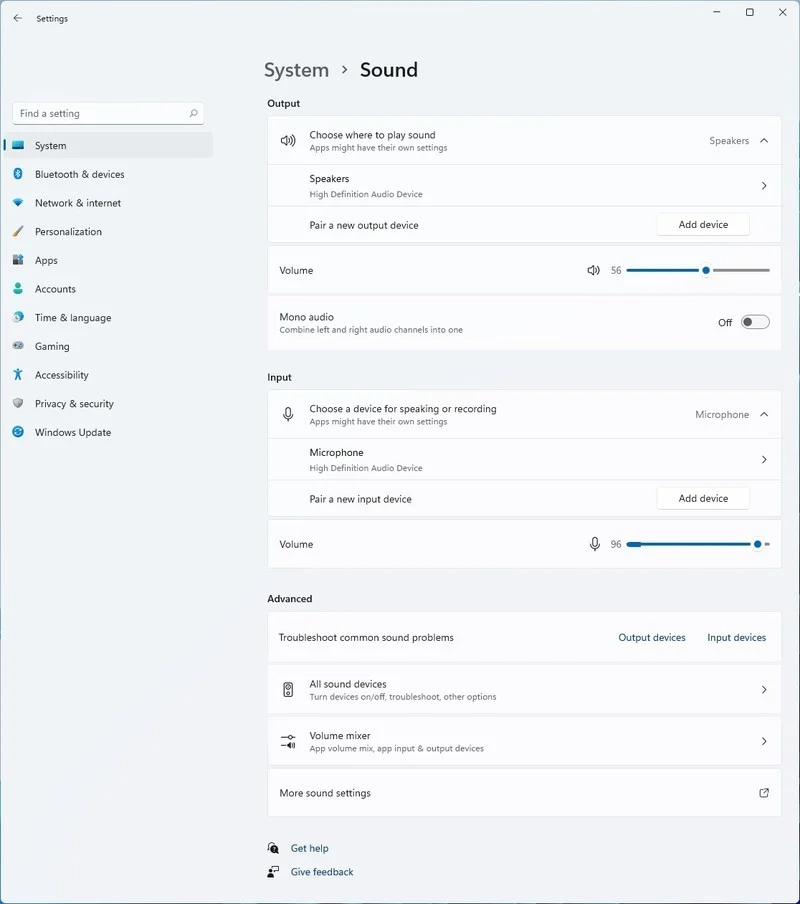 Windows 11 has brought some new features and changed some of the existing ones. One of these changes includes quick switching of audio devices which will play audio.
Audio switching can still be done under the taskbar, it is just a little different and one could say even hidden. Follow this quick guide and you will be switching from your headphones to speakers as an example in a matter of seconds.
Windows 11 has brought some new features and changed some of the existing ones. One of these changes includes quick switching of audio devices which will play audio.
Audio switching can still be done under the taskbar, it is just a little different and one could say even hidden. Follow this quick guide and you will be switching from your headphones to speakers as an example in a matter of seconds.
 The console itself is coming in cylindrical shape powered by Intel CPU and ASUS GPU of the unknown chipset. It has Seagate Baraccuda 1TB SSD and it is VR-ready. The console will have raytracing and will be 4K ready.
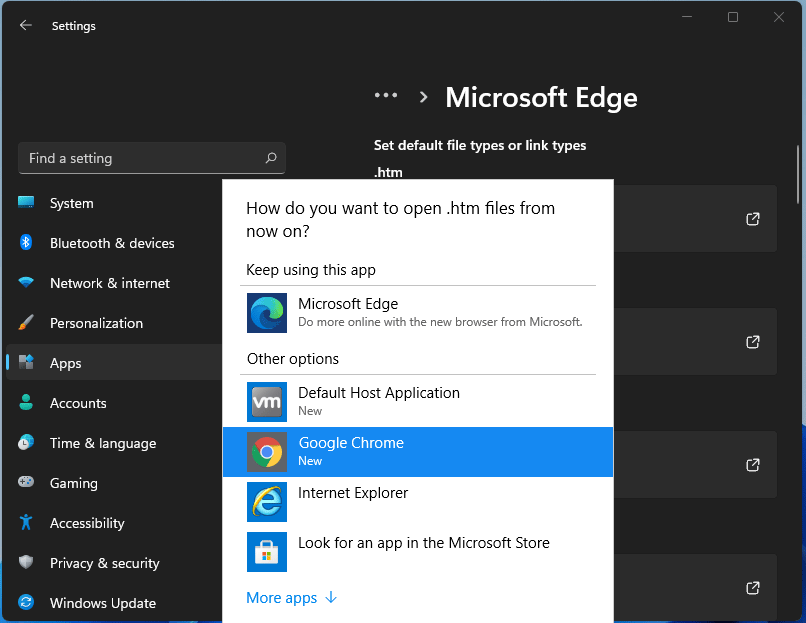 For anyone who is not aware, when Windows 11 was released if you wanted to switch to another browser you had to go into the settings app and choose the default browser for different types of file extensions like HTML, HTM, PDF for opening on the web, etc. Of course, this was completely unnecessary and it was not well received by users. So after some time, Microsoft backpedaled to standard one click, choose your default browser solution that existed in the previous version of Windows OS.
Altho sometimes Microsoft knows how to irritate its users base, it is good to know that they can also listen and fix things that are required.
For anyone who is not aware, when Windows 11 was released if you wanted to switch to another browser you had to go into the settings app and choose the default browser for different types of file extensions like HTML, HTM, PDF for opening on the web, etc. Of course, this was completely unnecessary and it was not well received by users. So after some time, Microsoft backpedaled to standard one click, choose your default browser solution that existed in the previous version of Windows OS.
Altho sometimes Microsoft knows how to irritate its users base, it is good to know that they can also listen and fix things that are required.